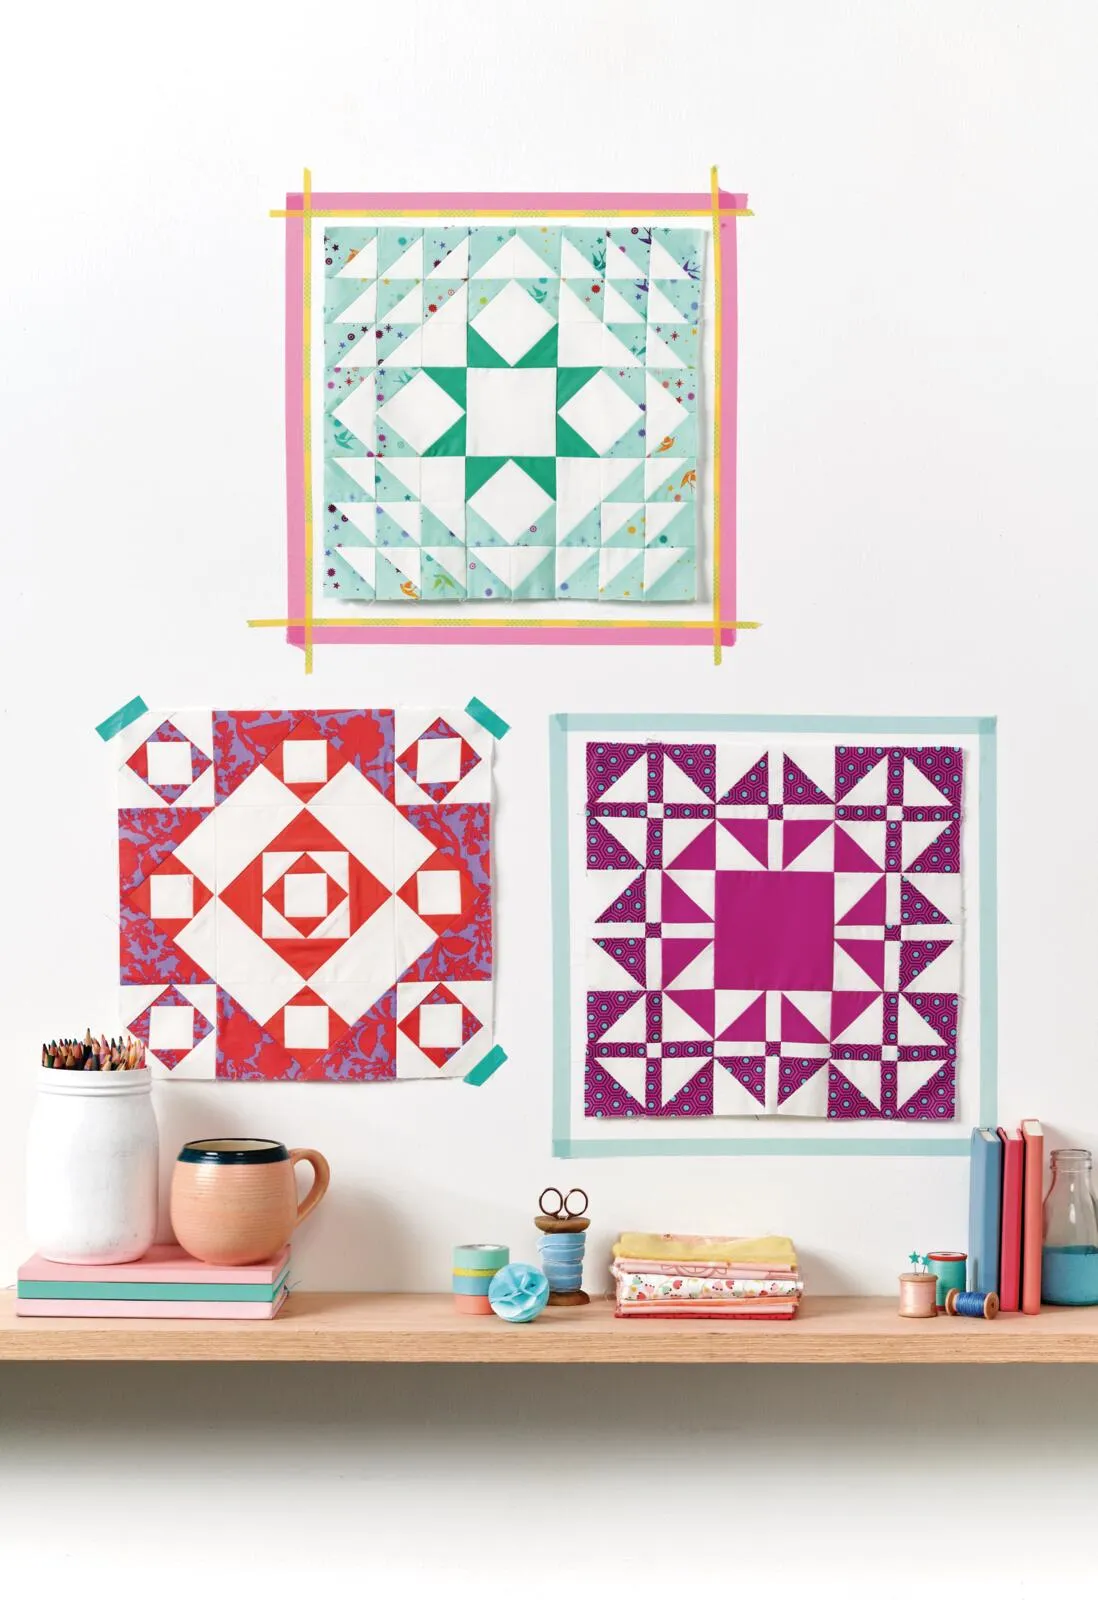
Step 1
From the print fabric cut:
–Two (2) 8in x 10in.
–Four (4) 2½in squares, cut each into two (2) Half Square Triangle (HST) by cutting along one diagonal (for Economy Block template Section 2 and Section 4).
Step 2
From the solid fabric cut:
–Four (4) 2½in squares, cut each into two (2) HSTs by cutting along one diagonal (for Economy Block template Sections 3 and 5).
Step 3
From the white fabric cut:
–Two (2) 8in x 10in.
–Four (4) 2in squares (for Unit A).
–Four (4) 2½in squares (for Economy Block template Section 1).
–One (1) 3½in square (for Unit C).
Step 4
To Foundation Paper Piece the Economy Block templates, first place a 2½in square of white fabric on the reverse side of one of the templates with the wrong side facing the back of the paper. Ensure that the fabric square covers the whole of Section 1 plus at least ¼in around all sides.
Step 5
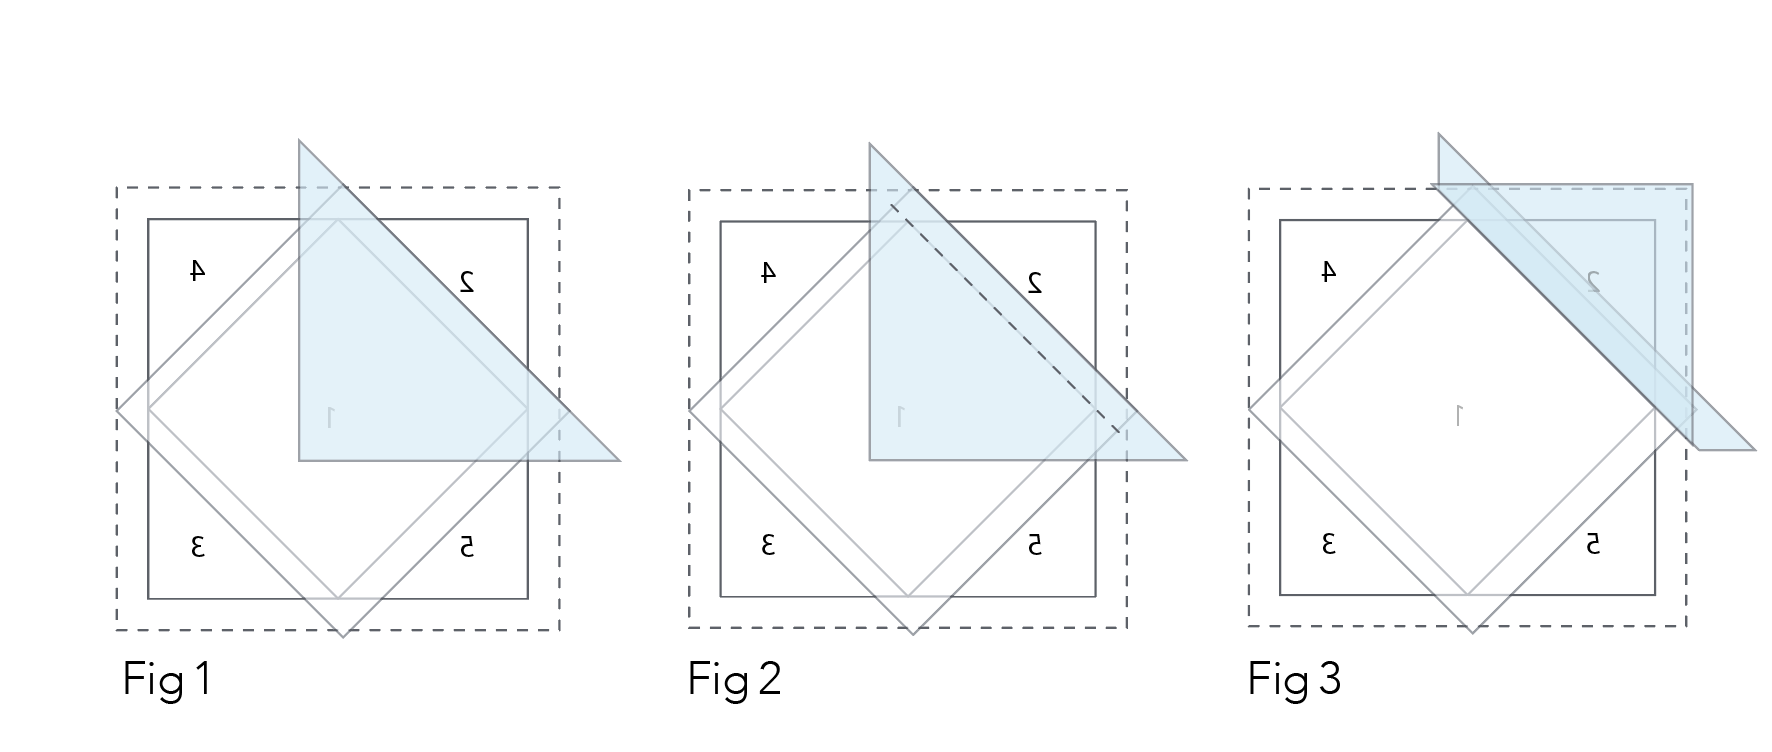
Pin one of the print fabric 2½in HSTs RST with the white 2in square (Fig 1) so that, when flipped over at the seam line, the HST will cover Section 2 plus at least ¼in all round.
Step 6
Flip the template so that the paper is uppermost and sew along the seam line between Sections 1 and 2, extending the seam line approximately ¼in beyond each end. Fig 2 shows the seam as it appears from the back of the template.
Step 7
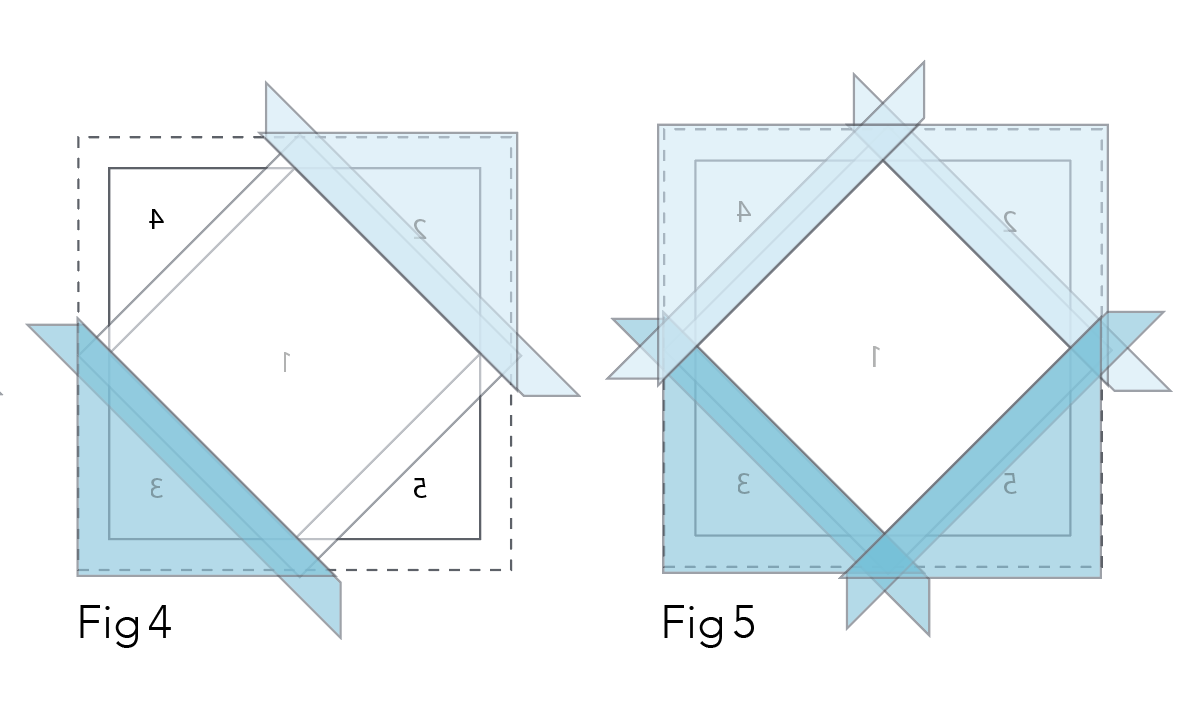
Fold then press the triangle of print fabric over so that it covers Section 2 (Fig 3). Repeat to add a solid HST for Section 3 (Fig 4), a print HST for Section 4 and
a solid HST for Section 5 (Fig 5).
Step 8
Trim excess fabric along the dashed line on the templates as shown. Then you will need to patiently repeat to piece all four templates.
Step 9
To piece the HSTs, place one print 8in x 10in rectangle and one white 8in x 10in rectangle RST and pin to the back of the HST template, making sure that the white fabric rectangle is next to the paper and that the fabrics completely cover the printed area of the template.
Step 10
Sew along the red lines then cut through all the black lines to give yourself twenty four triangles. Carefully trim off the corners of each unit along the green lines. Press the HST units open. Now repeat with the second copy of the template to make the remaining HST units. You will need forty HST units – so you can discard eight.
Step 11
Remove papers from economy blocks and HSTs by tearing along the seam lines. Assemble the economy blocks and Half-square Triangles into units.
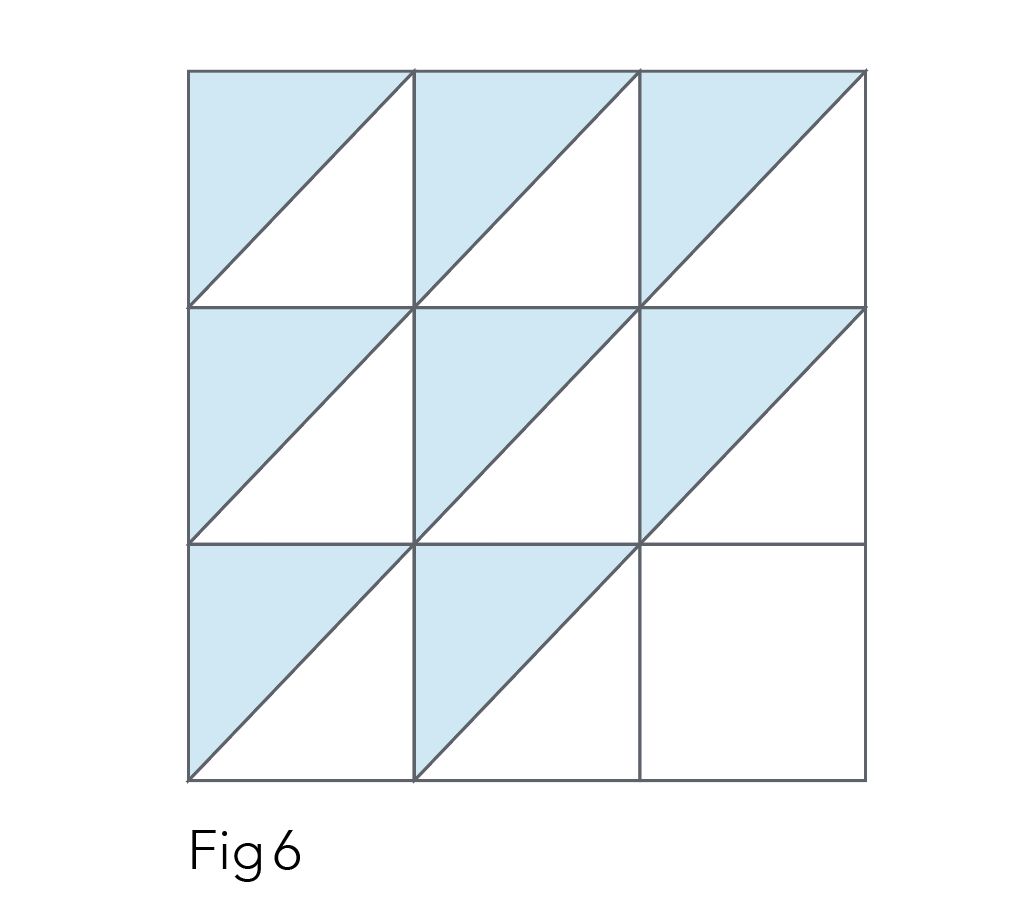
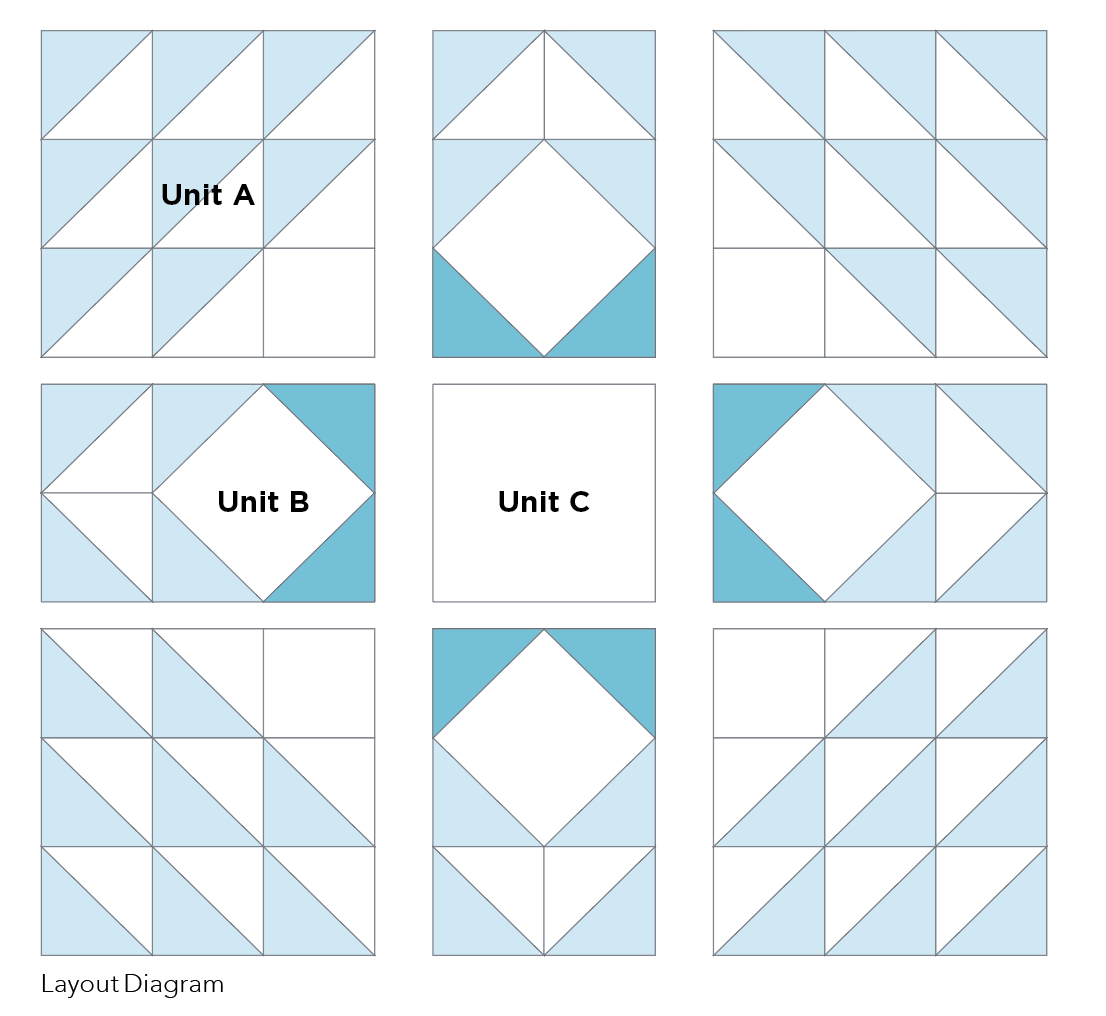
-Unit A is pieced by joining two rows of three HSTs and one row of two HSTs and one 2in square (Fig 6). Make four.
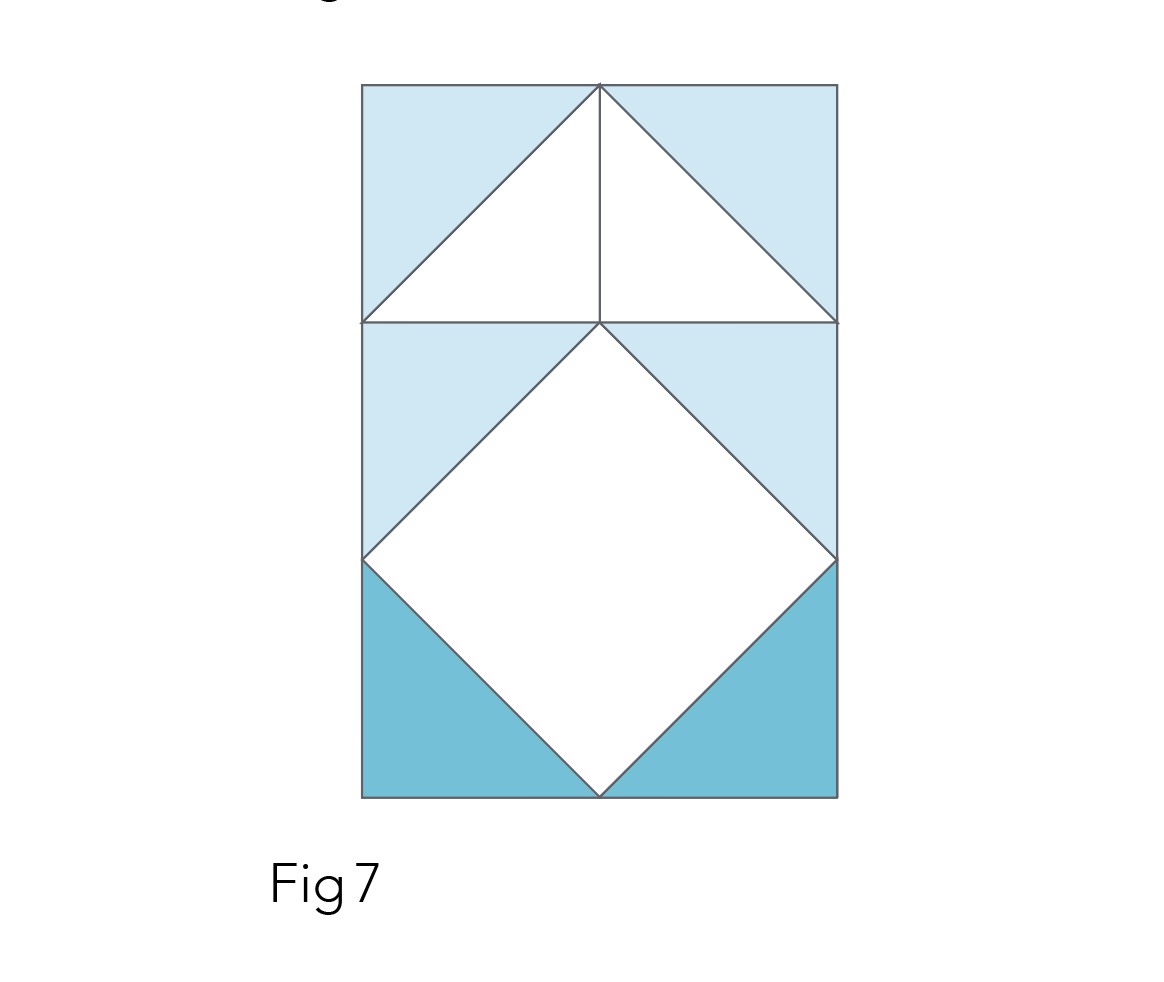
-Unit B is pieced by first piecing together two HSTs then sewing those to one of the economy blocks (Fig 7). Make a total of four Unit B.
Step 12
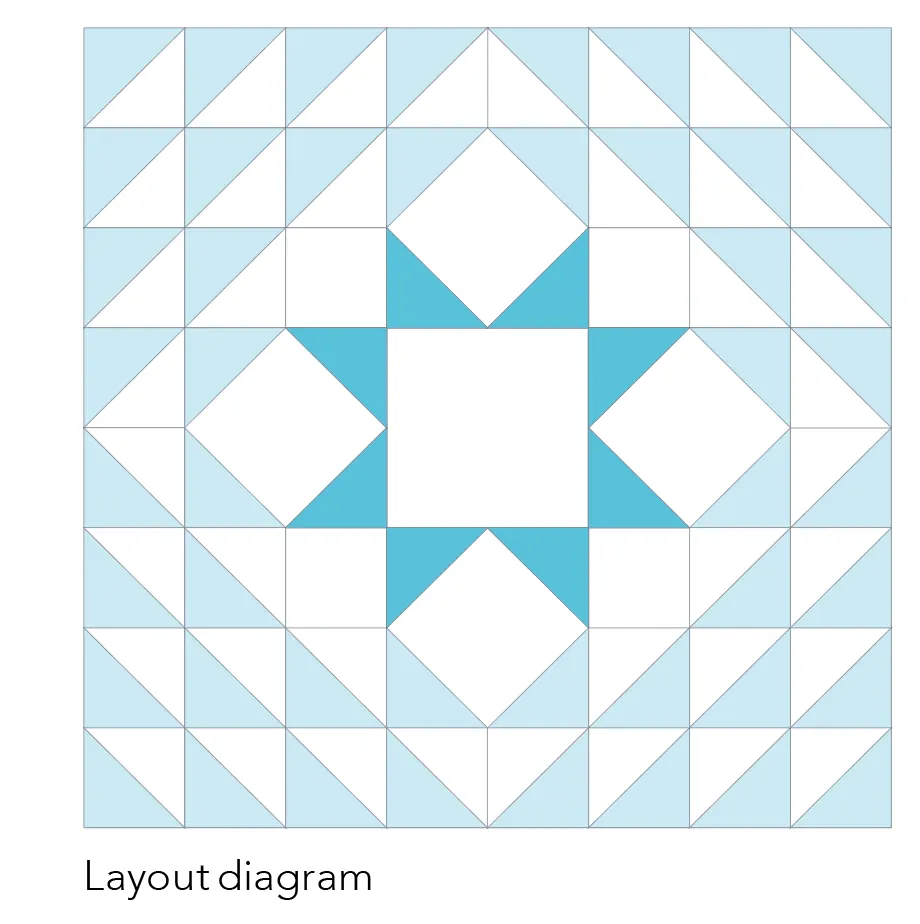
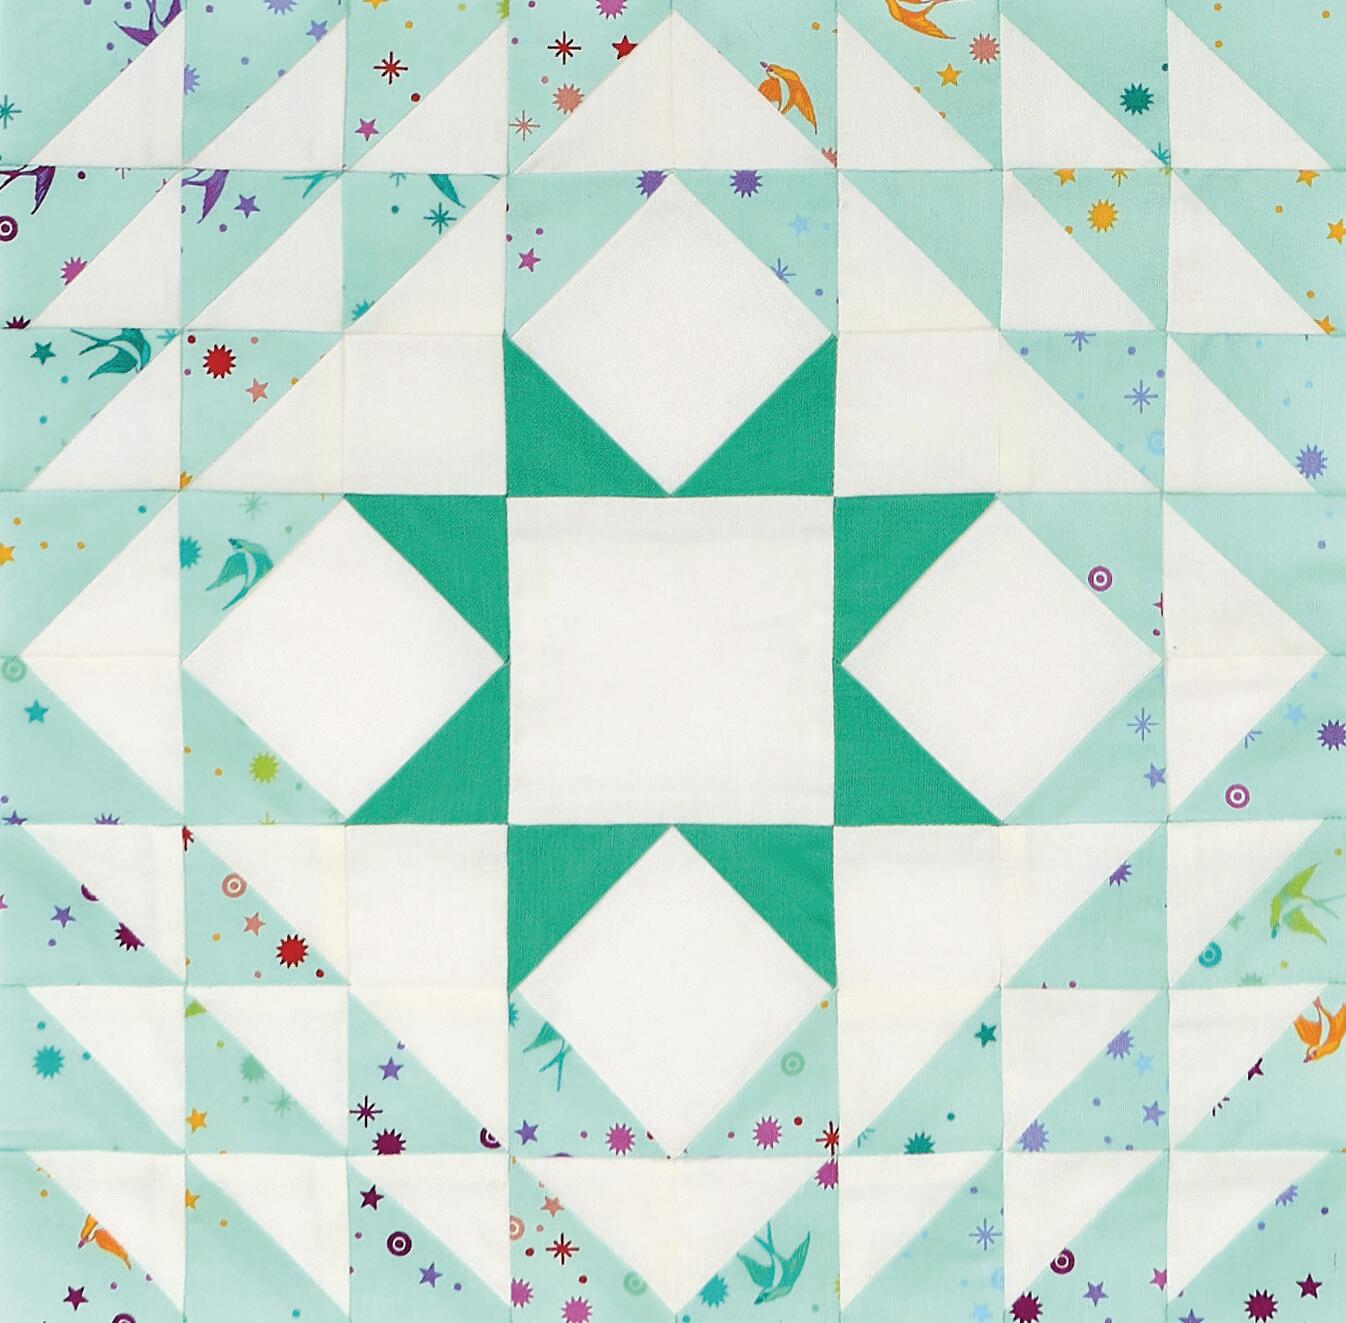
Arrange Units A and B as shown in the Layout Diagram. Unit C is the remaining white 3½in square. Sew the units together into three rows of three units.
Step 13
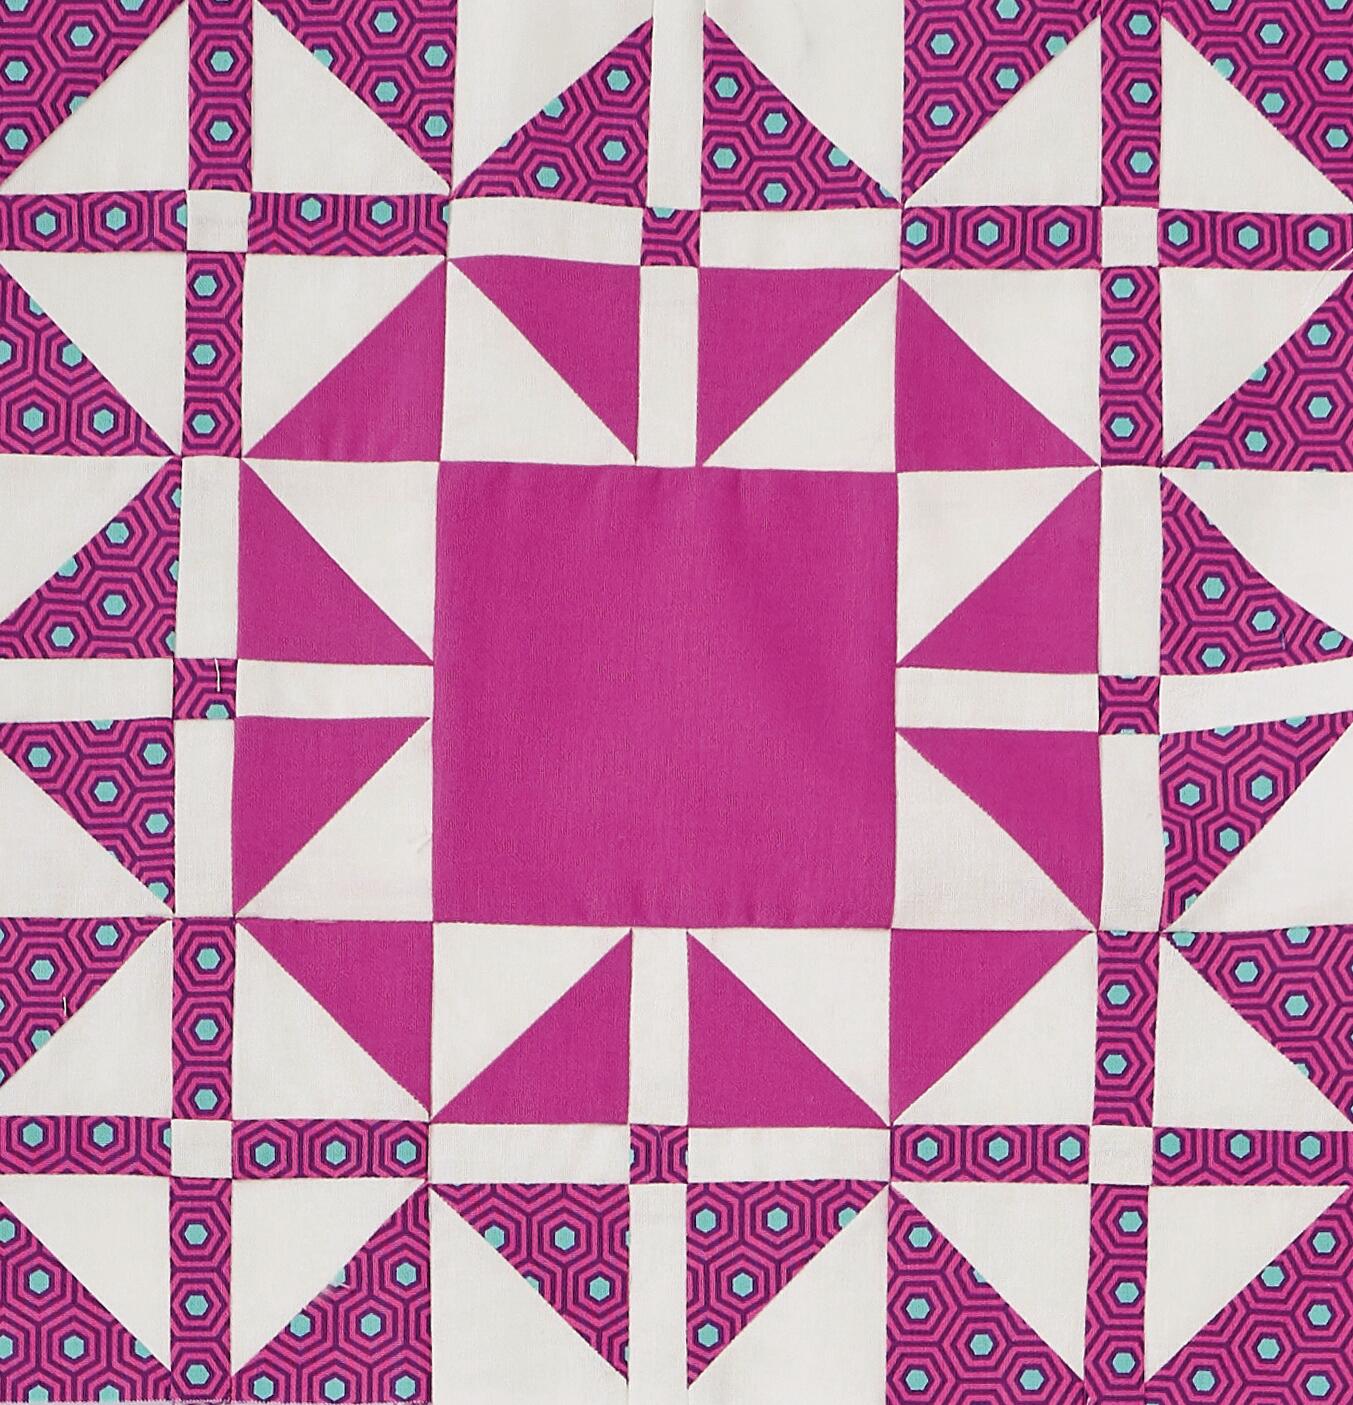
Now sew the three rows together to make the finished block, taking care to align seams neatly. Press the block and check it is 12½in square.
Tula Pink Block Party FPP Pattern - Block two

Step 14
From the print fabric cut:
-Two (2) 5¾in x 8¼in.
-Sixteen (16) 1in x 2¼in.
-Four (4) 1in squares.
Step 15
From the solid fabric cut:
-One (1) 5¾in x 8¼in.
-One (1) 4½in square.
Step 16
Cut the white fabric as follows:
-Three (3) 5¾in x 8¼in.
-Sixteen (16) 1in x 2¼in.
-Four (4) 1in squares.
Step 17
Pin one white 5¾4in x 8¼in and one print 5¾in x 8¼in to the back of one of the paper templates with the fabrics RST and the white fabric next to the paper.
Step 18
Shorten your machine stitch to 1.5 and sew along all of the red lines. Cut the template and fabric along all the black lines using a rotary cutter. Trim off the corners on each triangle along the green lines. Press each HST unit open.
Step 19
Remove papers from each unit. Repeat with one white and one print rectangle and with one white and one solid rectangle. You will need twelve solid/white HSTs and twenty white/print HSTs in total, so you can discard four white/print HSTs as they won't be needed.
Step 20
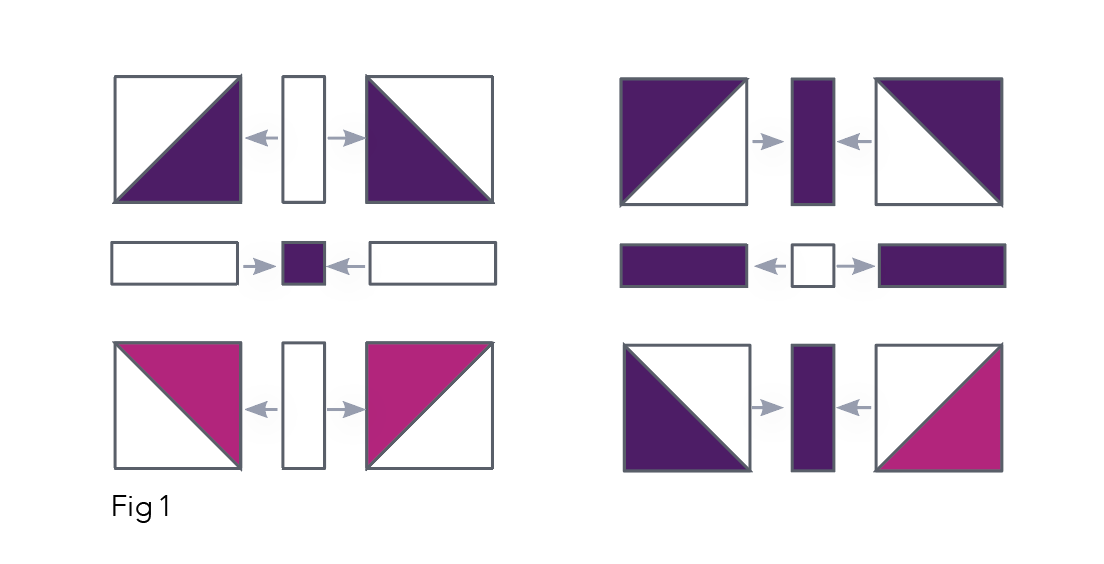
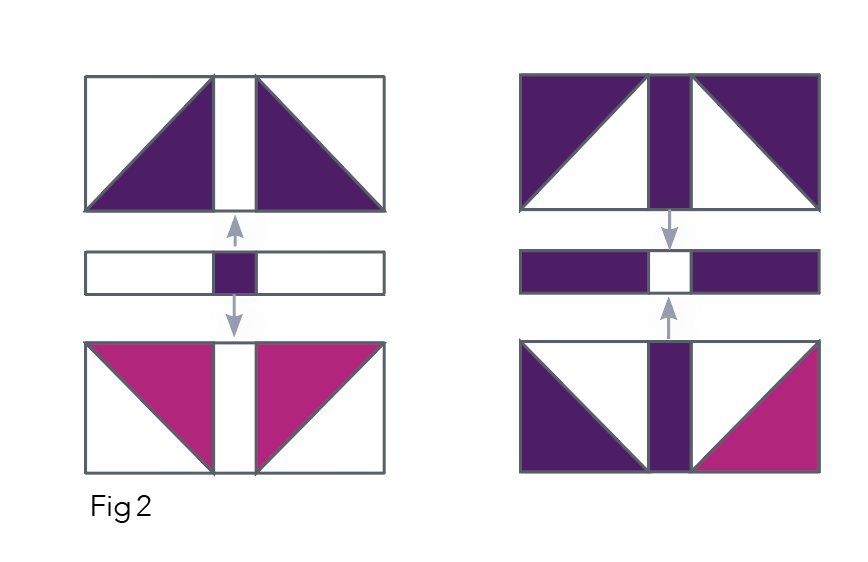
You will need to make four small blocks with a white background and four small blocks with a print/solid background. First sew the HST units, the 1in x 2¼in strips and the 1in squares into three rows of three pieces, pressing the seams in the direction of the arrows (Fig 1). Sew the three rows of each small block together, pressing seams in the direction of the arrows (Fig 2).
Step 21
Sew the eight small blocks and the centre square into three rows, as shown in the Layout Diagram. Press the seams away from the centre block in the top and bottom rows and towards the centre in the middle row, so that they nest together when sewn into a block (Fig 3).
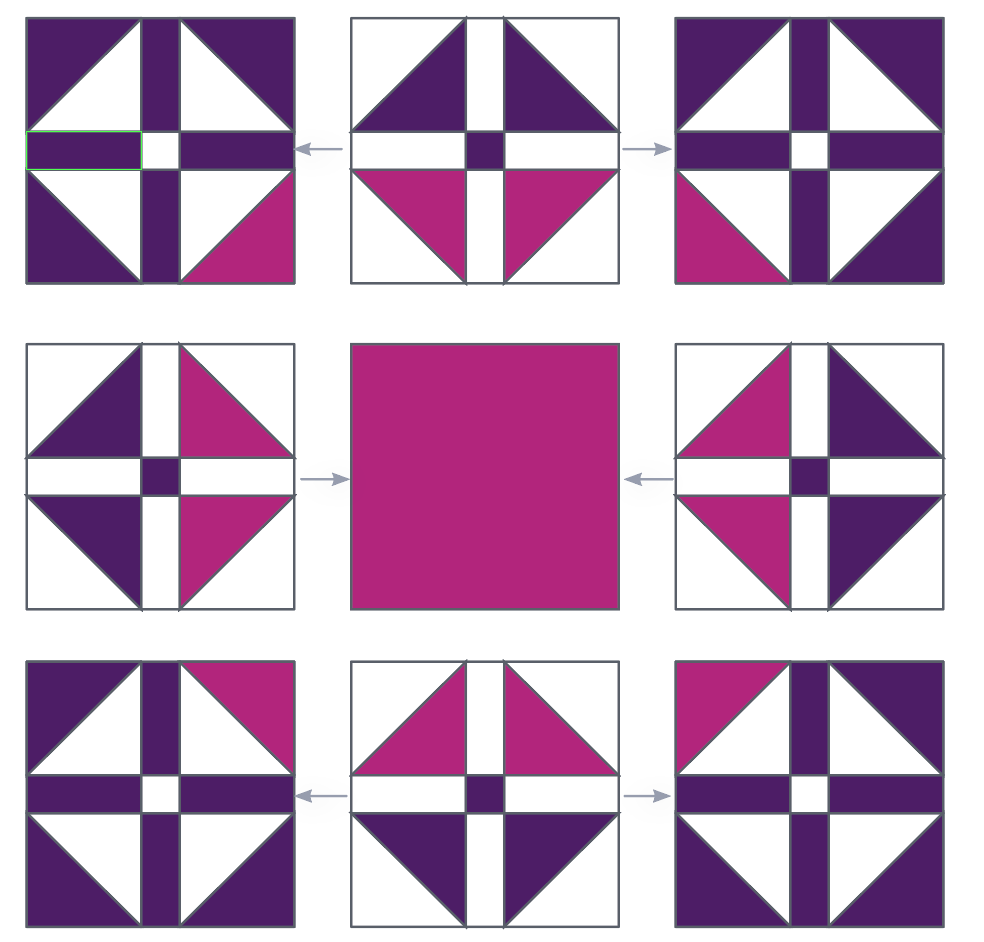
Step 22
Sew the three rows together to finish the block, carefully matching seams. Press the block and check that it is 12½in square to finish.
