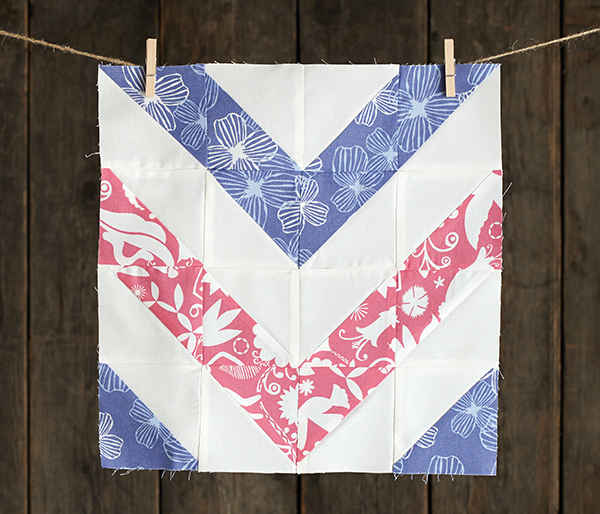
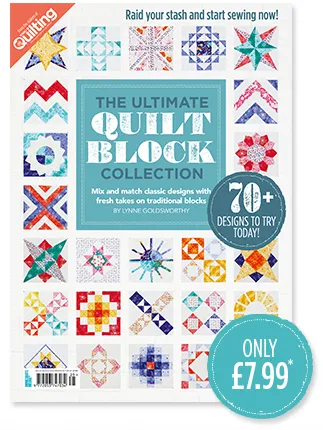
In this free tutorial, we'll talk you through how to make Lynne Goldsworthy’s Ric Rac chevron quilt block pattern. This eye-catching block design is just one of over 70 blocks featured in The Ultimate Quilt Block Collection. This free taster quilt block pattern is great for beginners as half-square triangles are one of the easiest block units to cut and sew.
We'll show you how to make a chevron quilt block with half square triangle units below, and as a bonus treat we've included two ways to mix up your block for different effects… read on to find out how! If you're new to making your own quilts, you might also like our complete guide to quilting for beginners.
This project was designed by Lynne Goldsworthy for Love Patchwork & Quilting magazine.
How to sew a chevron quilt block
You will need
- Fabric A: one x 8½in square
- Fabric B: one x 8½in square
- Fabric C: two x 8½in squares
- Sewing machine
- Basic sewing kit
- Download our How-to-make-a-ric-rac-block-template and print out 2 copies
- NB: we've used Daydream fabric by Kate Spain for Moda
Finished size
12½in square (12in square once pieced into your quilt top)
Notes
- Seam allowances are ½in, unless otherwise noted.
- Press seams open, unless otherwise instructed.
- Wash and press all fabrics well before cutting.
- Shorten your stitch length to 1.5 for paper piecing.
- HST = half-square triangle.
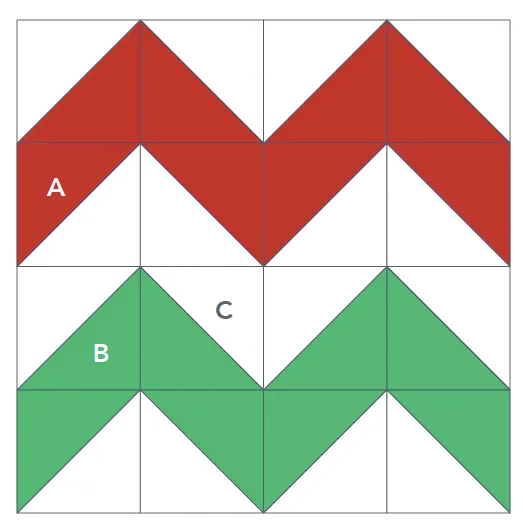
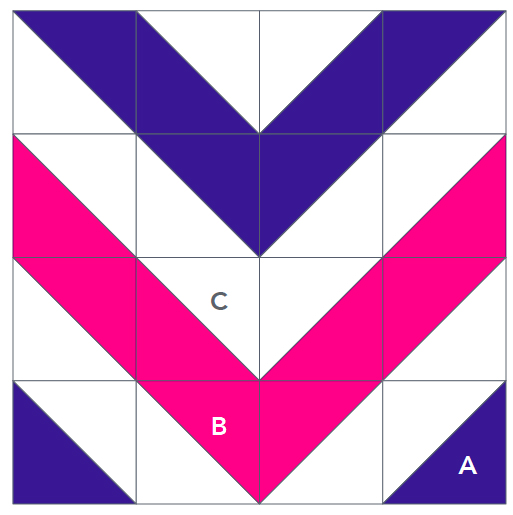
Above: layout diagram: Chevron block
How to piece the 'Ric Rac' chevron block
Step one: Put the Fabric A square right sides together with a Fabric C square and pin to the back of the template, making sure that the cream fabric (Fabric C) is next to the paper and that the squares completely cover the printed area of the template.
Step two: Sew along the red lines. Remember to shorten your stitch length – this means the paper will be easier to tear away at the end.
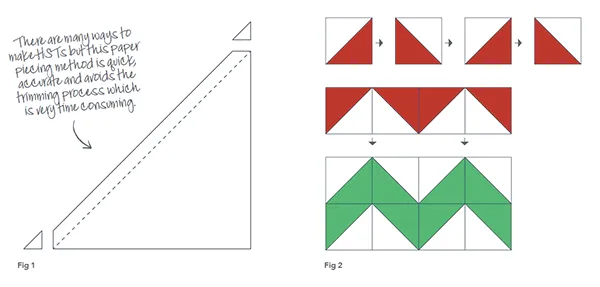
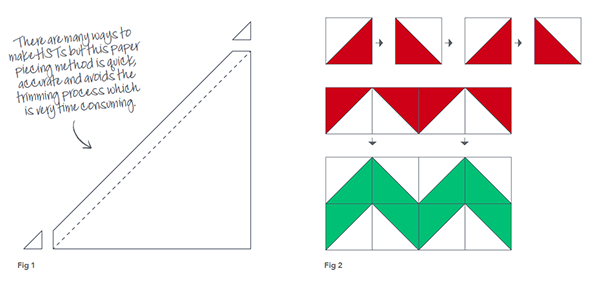
Step three: Cut through all the black lines on the template to give eight triangles. Trim off the corners of each triangle (Fig 1).
Step four: Press your HST units with the seam toward the darker fabric, leaving the paper in place to help stabilise the seam. Once pressed, remove the papers by gently tearing away.
Step five: Repeat steps 1–5, pairing the Fabric B square and the remaining Fabric C square. Once complete, you will have sixteen (16) 3½in HSTs in total.
Step six: Using the layout diagram (above) as a reference, arrange the HSTs. Sew the units into rows (Fig 2). Press the seams in alternate directions in each row so that they will nest neatly when the rows are sewn together.
Step seven: Sew the rows together to make the finished block. Press seams open or to one side as desired.
