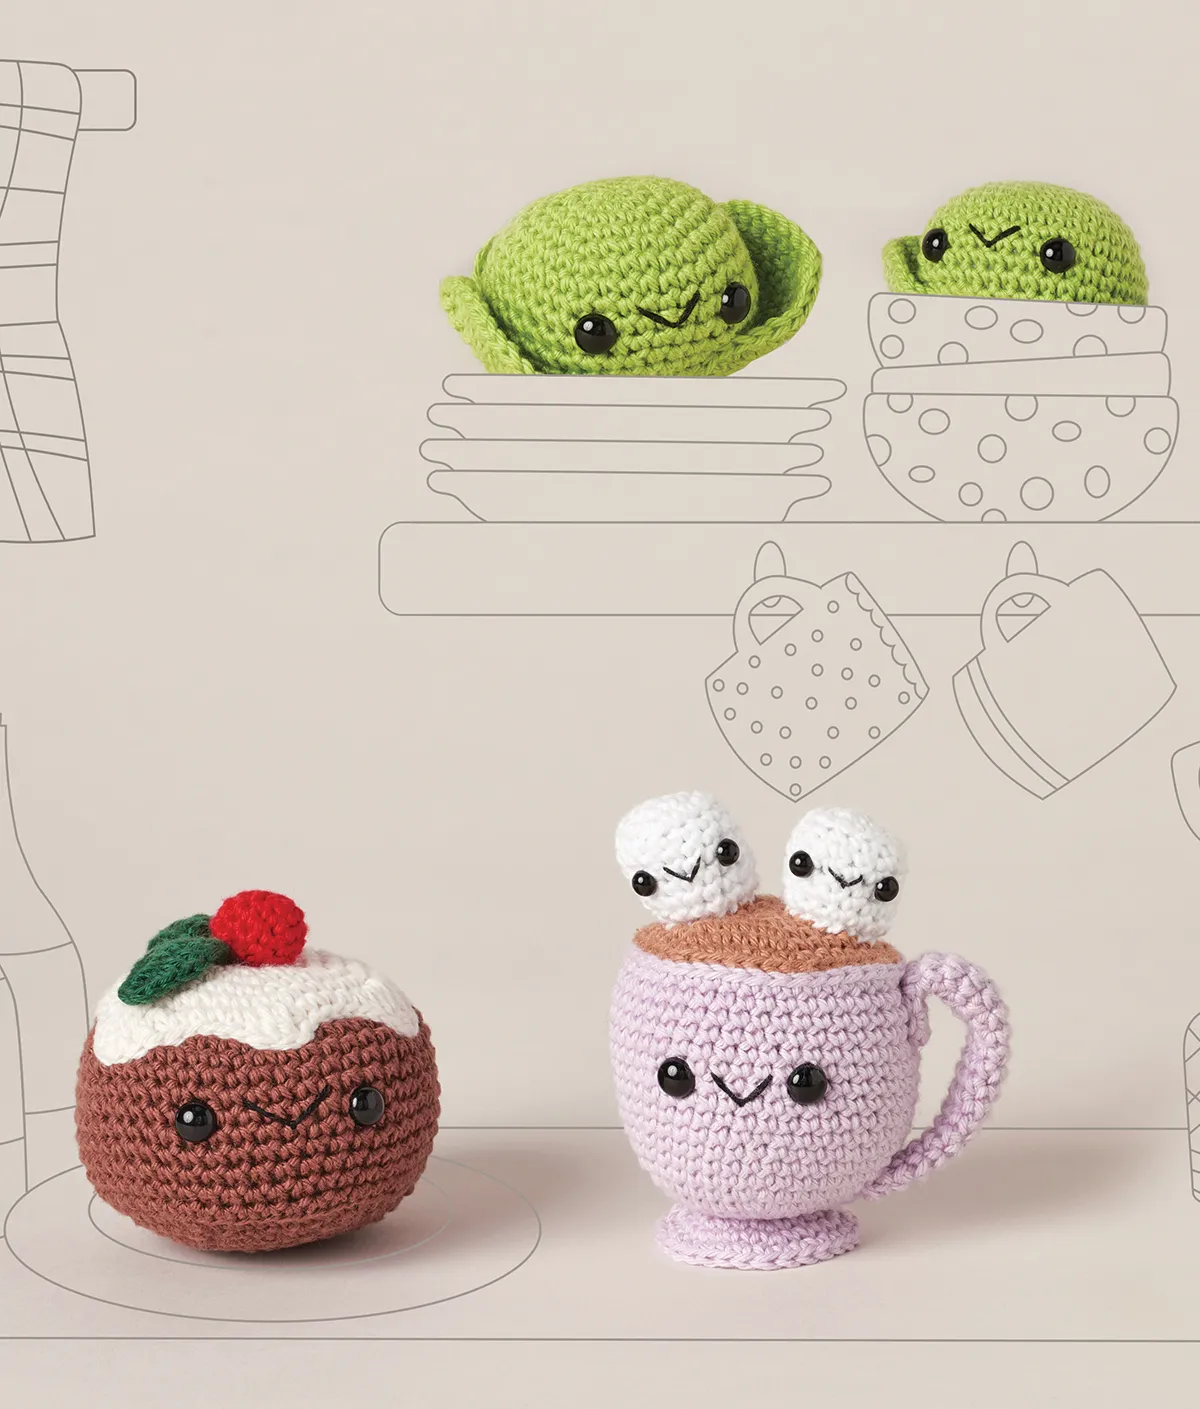
Amigurumi Christmas pudding pattern
Step 1
Pudding
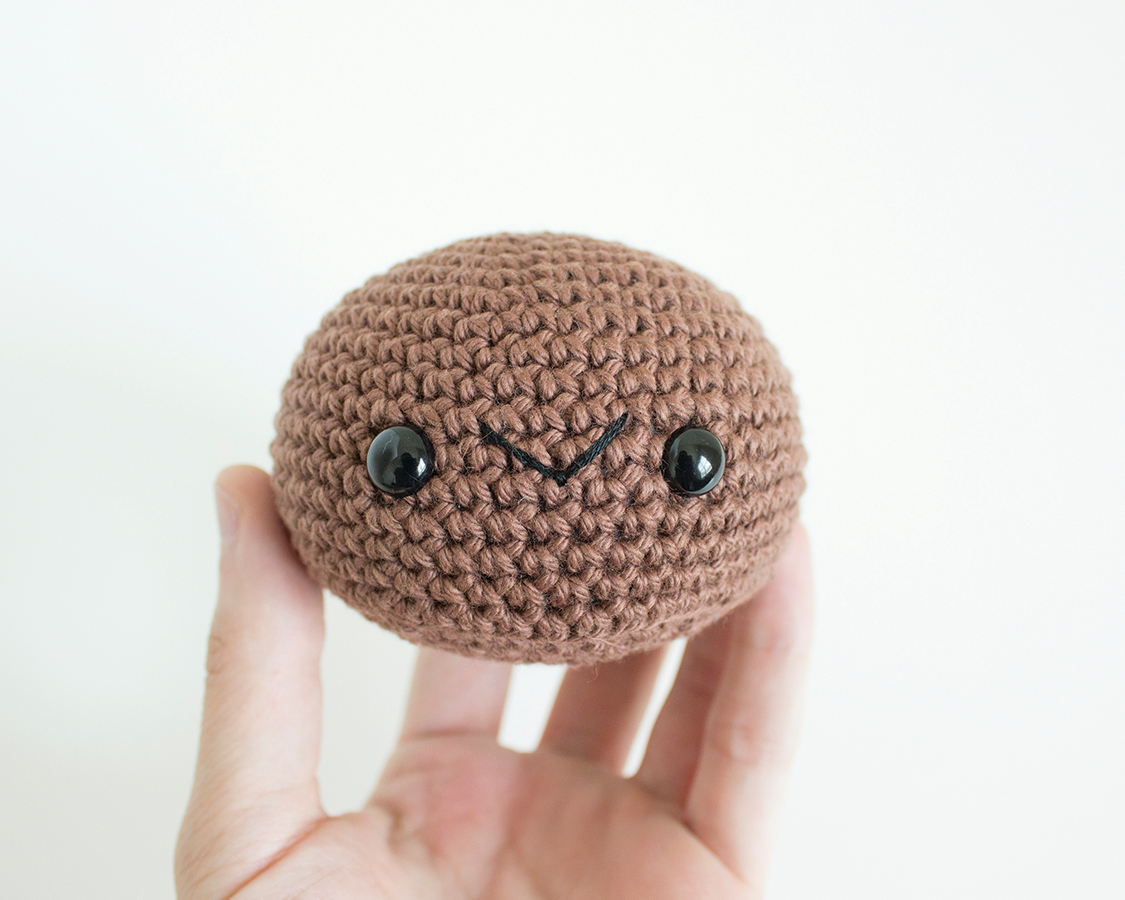
Worked from top to base
Round 1 using Yarn A, work 6dc into a magic ring and pull yarn tight [6 sts]
Round 2 1inc in each st around [12 sts]
Round 3 (1dc, 1inc) 6 times [18 sts]
Round 4 (2dc, 1inc) 6 times [24 sts]
Round 5 (3dc, 1inc) 6 times [30 sts]
Round 6 (4dc, 1inc) 6 times [36 sts]
Round 7 (5dc, 1inc) 6 times [42 sts]
Round 8 (6dc, 1inc) 6 times [48 sts]
Rounds 9-18 1dc in each st around
Add 9mm safety eyes, placing them between Rounds 13 and 14, 6 sts apart For the mouth, use six strands of black embroidery thread and stitch a small V in between the eyes
Round 19 work this round only in BLO, (6dc, 1invdec) 6 times [42 sts]
Round 20 (5dc, 1invdec) 6 times [36 sts]
Round 21 (4dc, 1invdec) 6 times [30 sts]
Round 22 (3dc, 1invdec) 6 times [24 sts]
Begin stuffing and continue until the end
Round 23 (2dc, 1invdec) 6 times [18 sts]
Round 24 (1dc, 1invdec) 6 times [12 sts]
Round 25 6invdec [6 sts]
Fasten off and use yarn tail to close, weave in ends
Icing
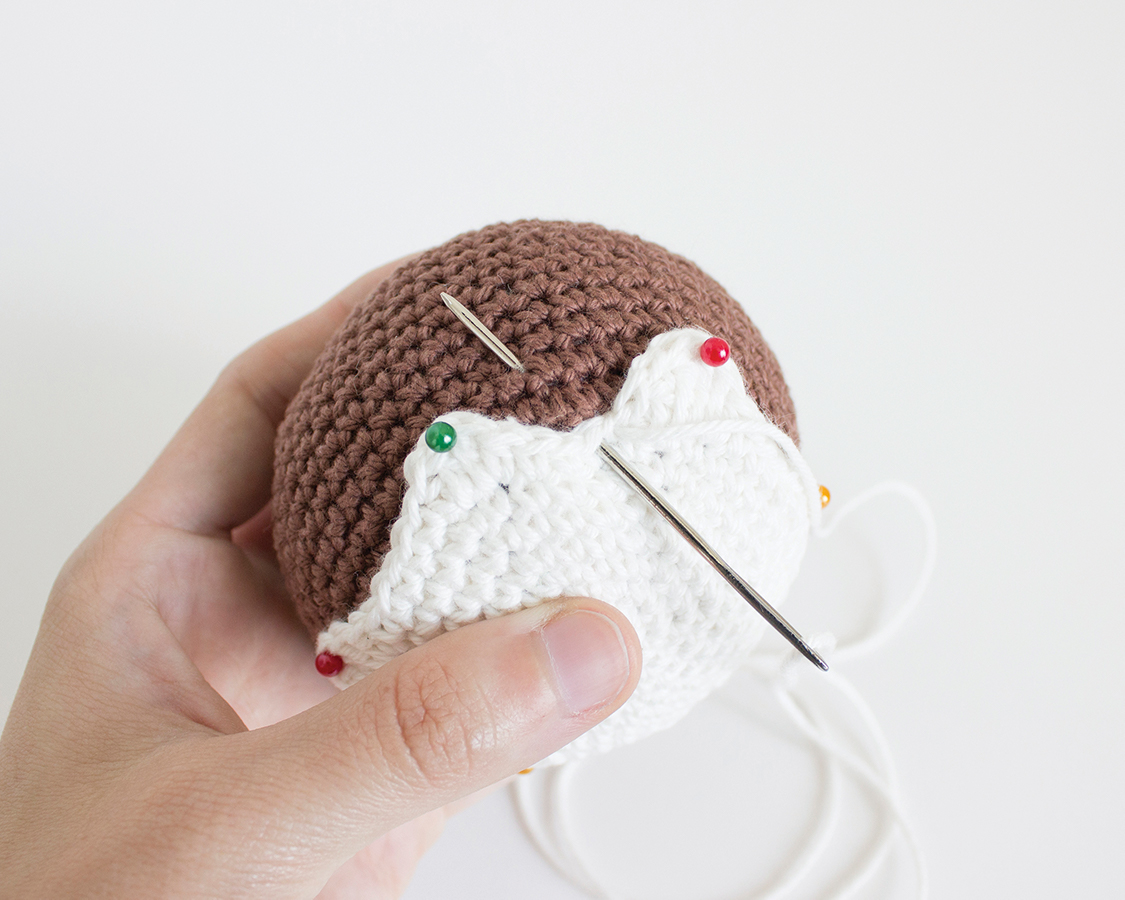
Using Yarn B, work Rounds 1-7 of Pudding Round 8 *4dc, (1htr, 1tr) in next st, (1tr, 1htr) in next st, 5dc, (1htr, 1tr) in next st, 2dtr in next st, (1tr, 1htr) in next st; rep from * twice more [57 sts]
Fasten off, leaving a long tail for attaching to pudding
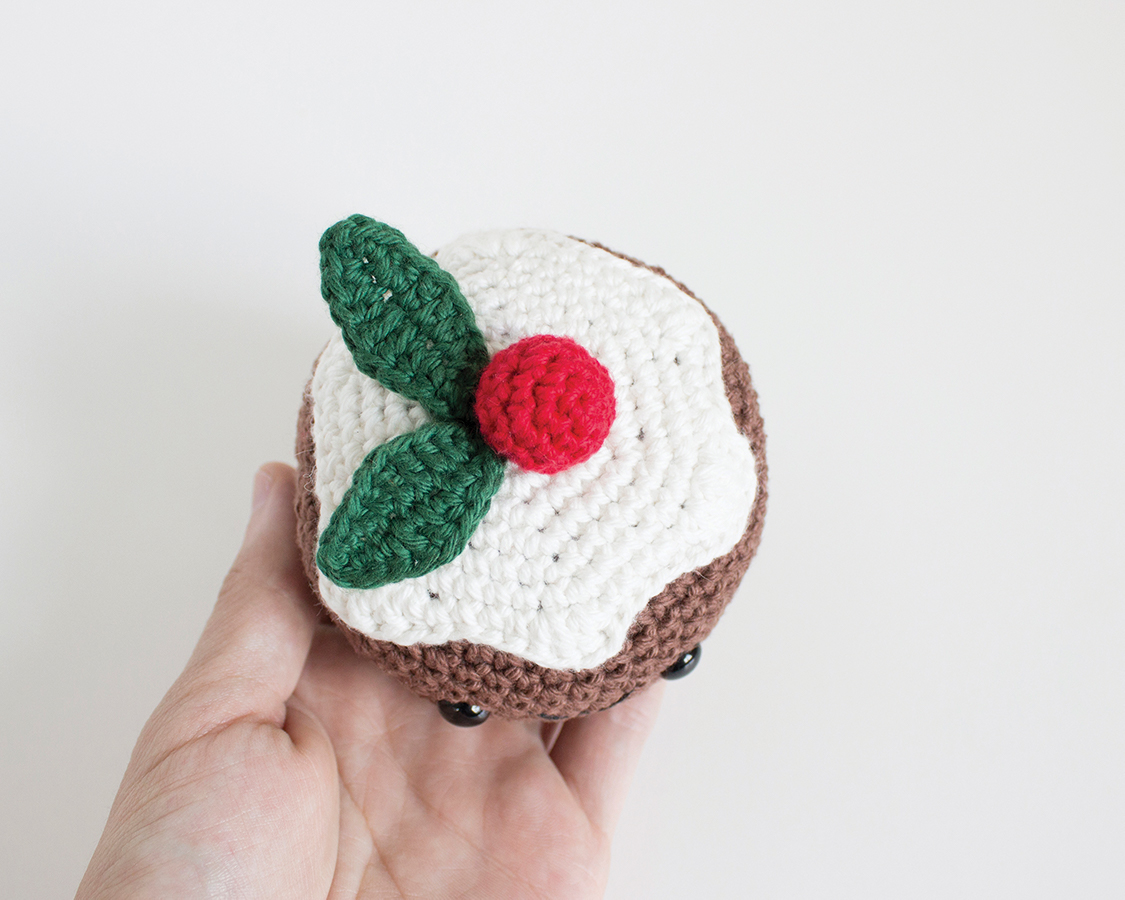
Pin the icing on top of the pudding. Using the yarn tail, sew to the top of the pudding with a running stitch along the entire edge of the icing.
Holly leaf (make two)
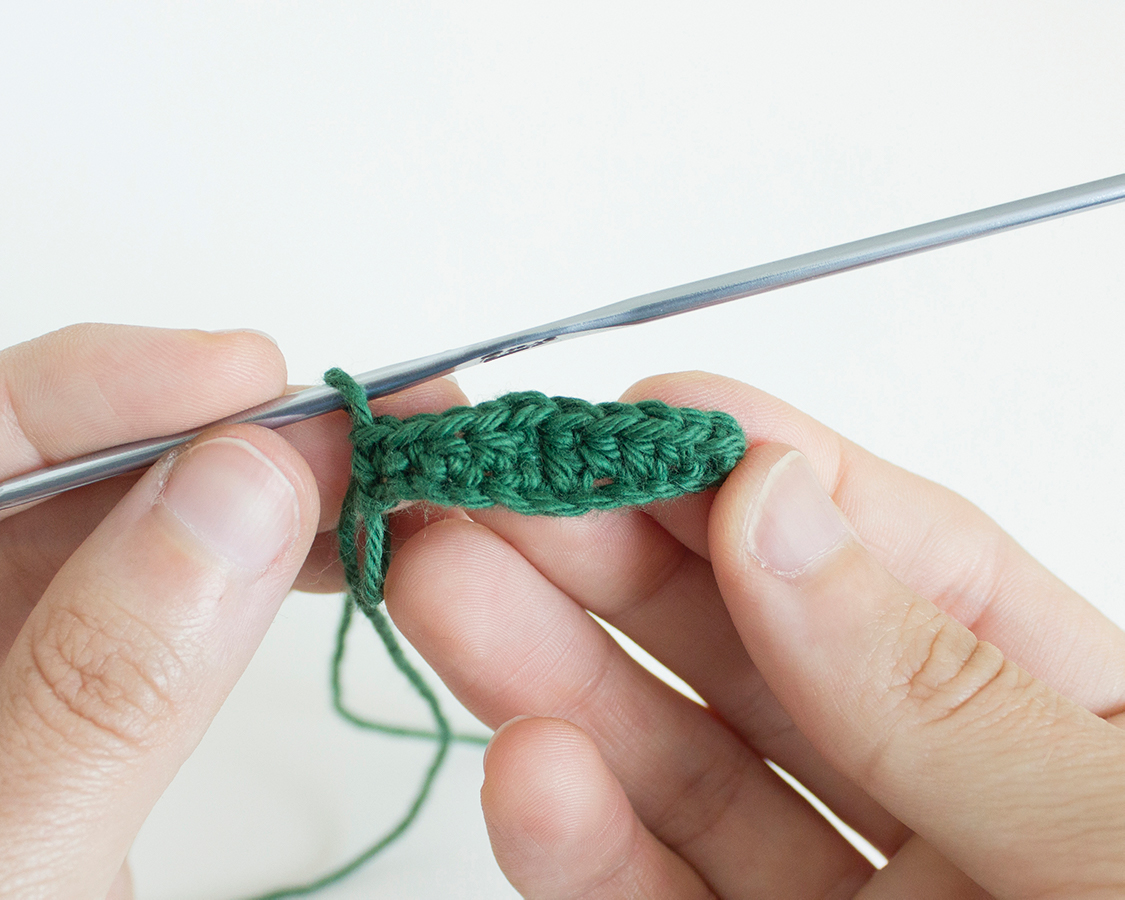
Foundation using Yarn C, ch11 Row 1 1dc in 2nd ch from hook, then work along the ch as follows: 1dc, 2htr, 2tr, 2htr, 2dc, turn to work along the underside of the ch, ch1, 2dc, 2htr, 2tr, 2htr, 2dc
Fasten off, leaving a long tail for attaching to icing Sew the two holly leaves near the centre top of the icing
Berry
Round 1 using Yarn D, work 4dc into a magic ring and pull yarn tight [4 sts]
Round 2 1inc in each st around [8 sts]
Round 3 (1dc, 1inc) 4 times [12 sts]
Rounds 4-5 1dc in each st around
Begin stuffing and continue until the end
Round 6 (1dc, 1invdec) 4 times [8 sts]
Round 7 4invdec [4 sts]
Fasten off and use yarn tail to close. Leave a tail for attaching to the icing. Sew the red berry to the centre of the icing, positioned slightly on top of the holly leaves.

Amigurumi sprout pattern
Step 1
Sprout centre
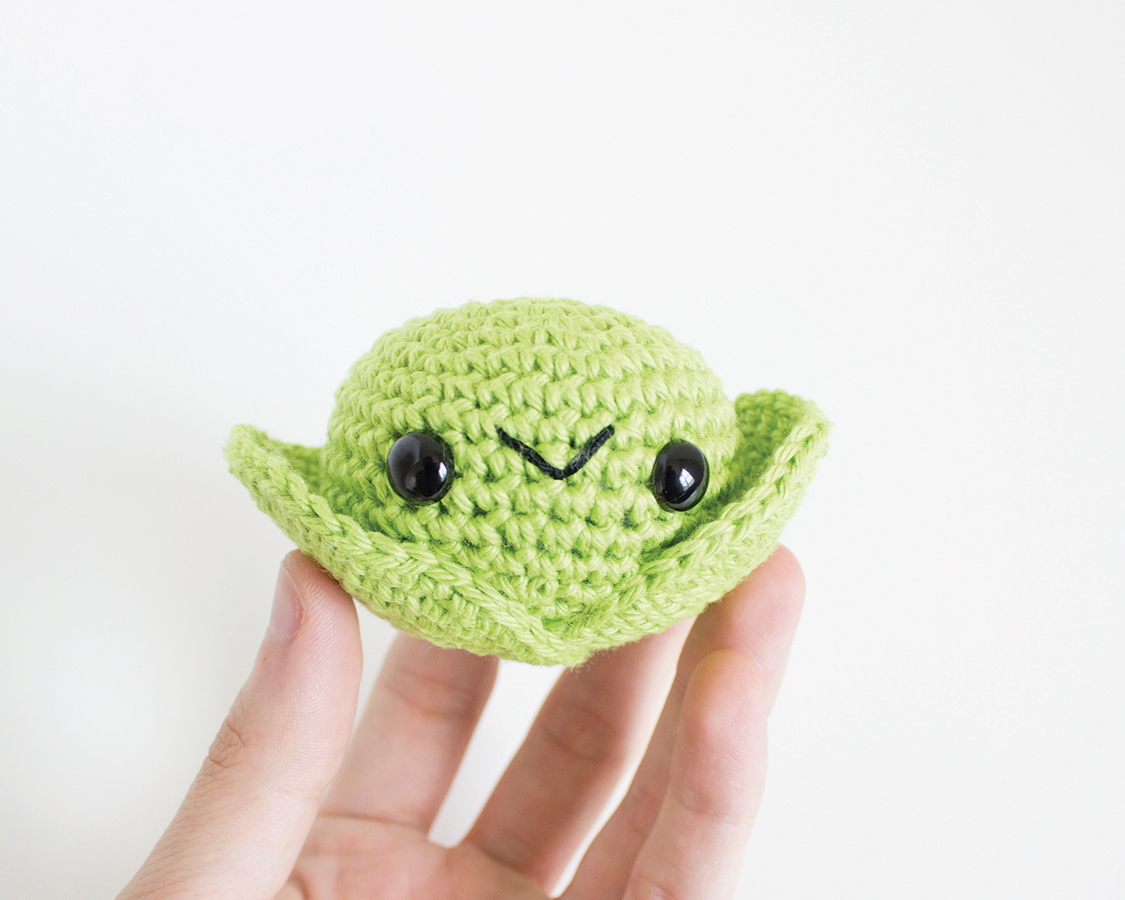
Using Yarn E, work Rounds 1-6 of Pudding
Rounds 7-12 1dc in each st around
Add 9mm safety eyes, placing them between Rounds 9 and 10, 6 sts apart
For the mouth, use six strands of embroidery thread and stitch a small V in between the eyes.
Round 13 (4dc, 1invdec) 6 times [30 sts]
Round 14 (3dc, 1invdec) 6 times [24 sts]
Begin stuffing sprout and continue until the end
Round 15 (2dc, 1invdec) 6 times [18 sts]
Round 16 (1dc, 1invdec) 6 times [12 sts]
Round 17 6invdec [6 sts]
Fasten off and use yarn tail to close. Weave in ends.
Leaves (make three)
Using Yarn E, work Rounds 1-6 of Pudding
Round 7 1dc in each st around
Fasten off, leaving a long tail for attaching to sprout
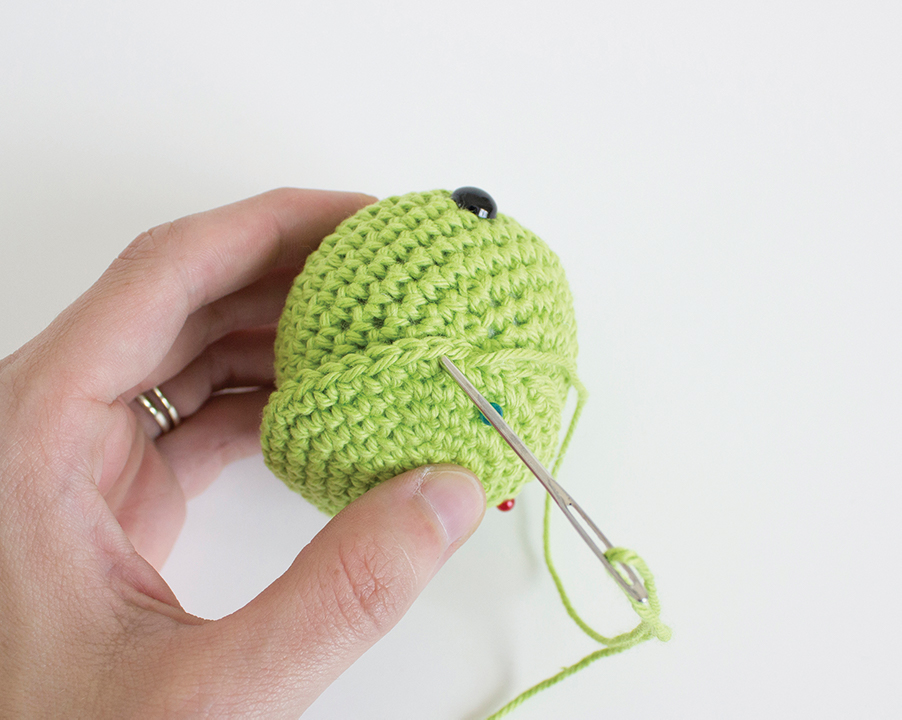
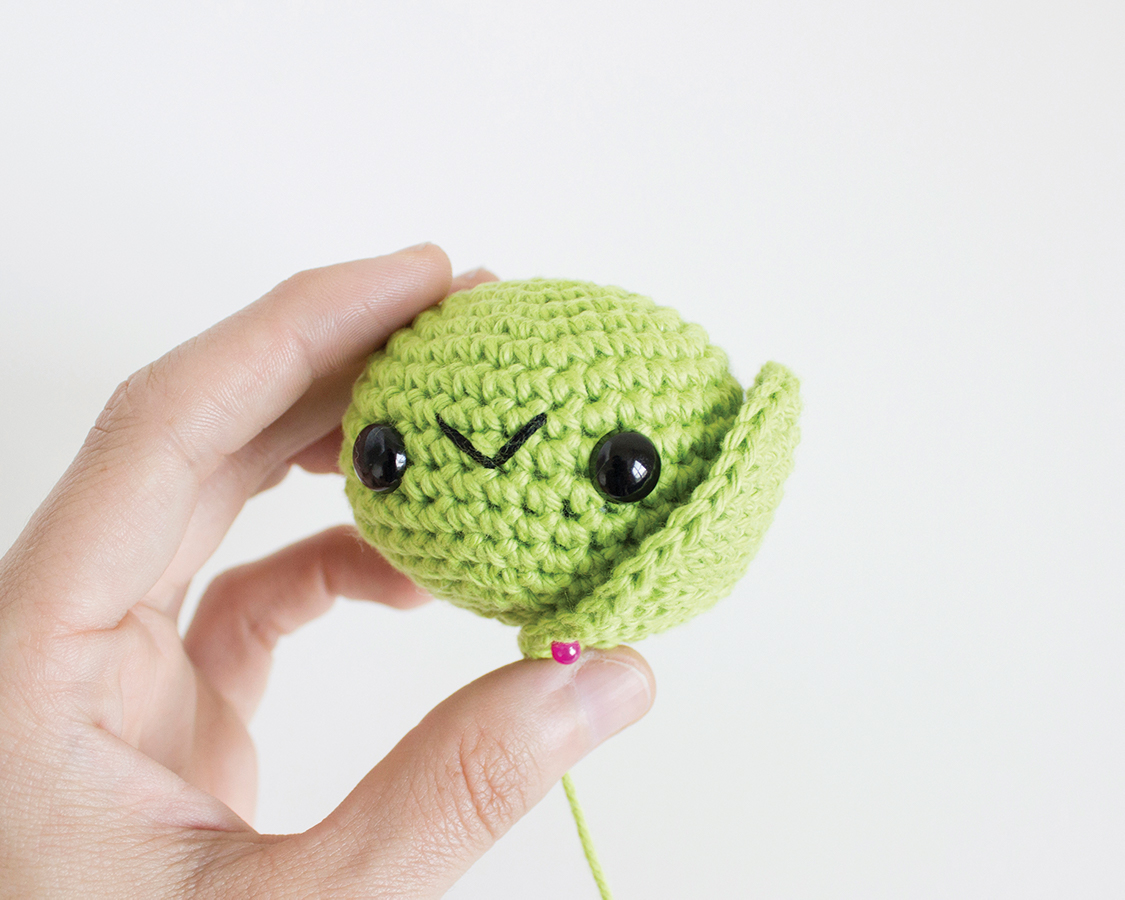
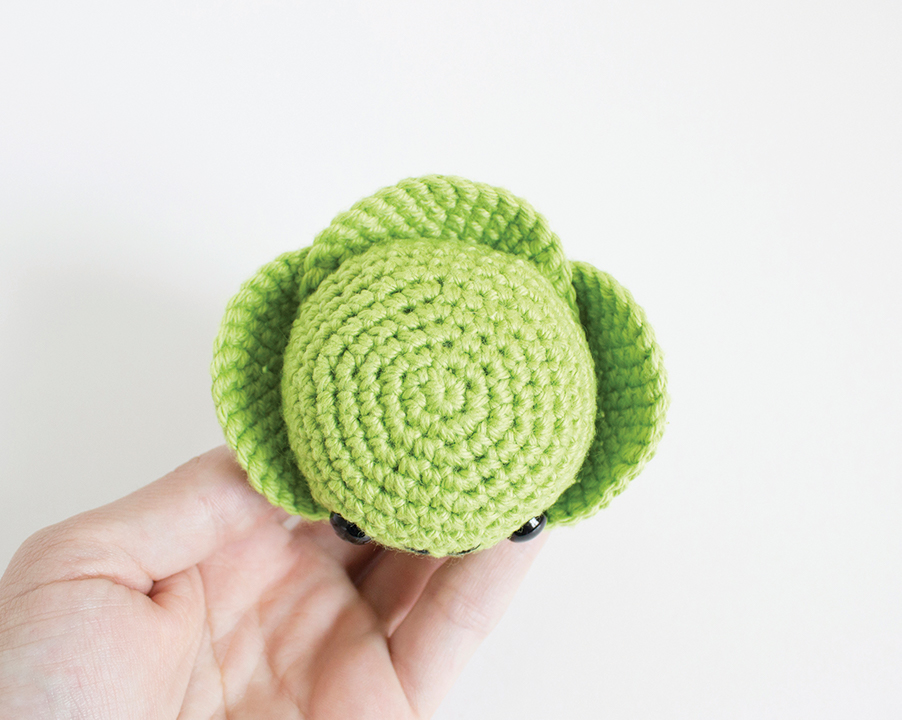
Position one of the leaves on the back of the sprout with the right side facing out. Using the yarn tail, sew the leaf to the sprout with running stitch, making sure to only sew about halfway up the leaf.
Position the second leaf on the side, then repeat the same running stitch halfway up. Place the third leaf on top of the other two and sew with running stitch. The leaves act as a cup for the sprout to sit in.
We hope you’ve enjoyed crocheting these adorable amigurumi Christmas ornaments! For more festive makes check out our natural Christmas decorations and our free Christmas printables.
Amigurumi hot chocolate pattern
Step 1
Mug
Worked from base upwards Using Yarn F, work Rounds 1-7 of Pudding
Rounds 8-20 1dc in each st around
Fasten off and weave in ends
Add 9mm safety eyes, placing them between Rounds 14 and 15, 5 sts apart
For the mouth, use six strands of black embroidery thread and stitch a small V in between the eyes
Top
Using Yarn G, work Rounds 1-7 of Pudding
Fasten off, leaving a long tail for attaching to mug
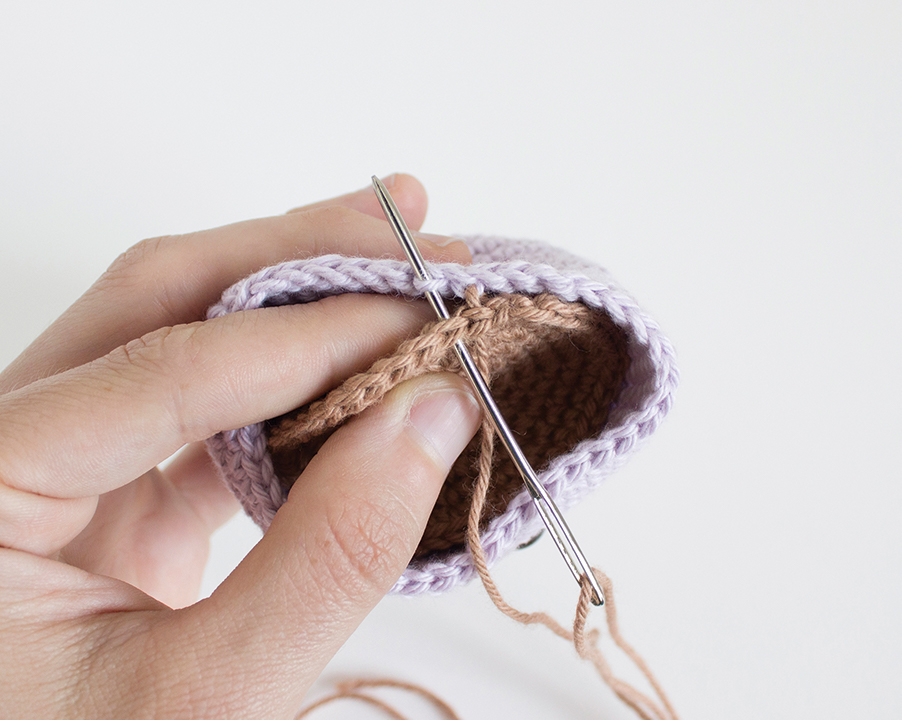
Using the yarn tail, sew the hot chocolate top to the mug.
Weave the needle through the horizontal row of stitches behind the dc from Round 20 of the mug and the top 2 loops of dc from Round 7 of the hot chocolate.
Stuff the mug before sewing the piece closed.
Handle
Round 1 using Yarn F, work 7dc into a magic ring and pull yarn tight [7 sts]
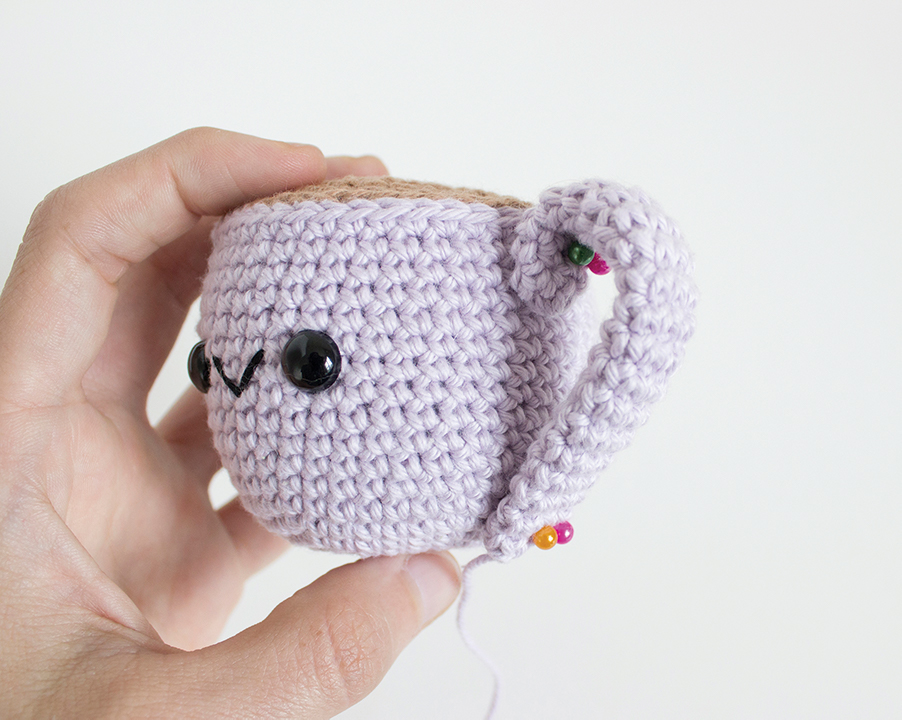
Rounds 2-20 1dc in each st around Fasten off, leaving a long tail for attaching to mug. Do not stuff. Position the handle on the side of mug, and pin at the top and bottom to hold in place. Using the yarn tail, sew the bottom part of the handle to the mug. Weave the needle and yarn tail up to the top and finish sewing the handle to the mug.
Base
Using Yarn F, work Rounds 1-5 of Pudding
Round 6 1dc in each st around
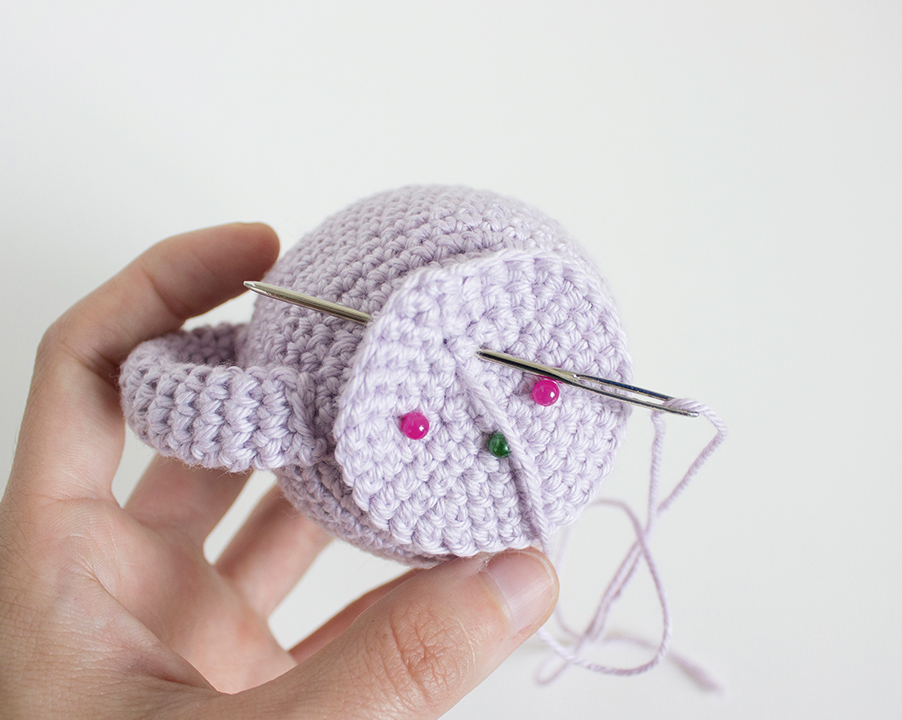
Fasten off, leaving a long tail for attaching to mug Using the yarn tail and the needle, weave through the sts on the underside until you reach Rounds 2 and 3. Pin these into place. Use running stitch to sew the saucer base to the bottom of the mug.
Marshmallow (make two)
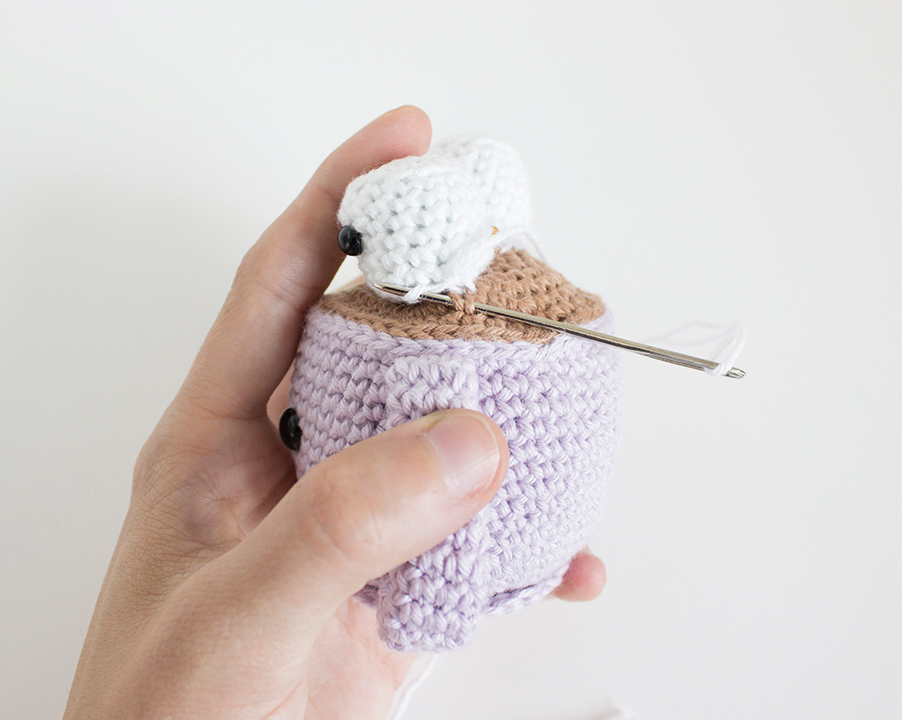
Round 1 using Yarn H, work 5dc into a magic ring and pull yarn tight [5 sts]
Round 2 1inc in each st around [10 sts]
Round 3 (1dc, 1inc) 5 times [15 sts]
Round 4 work this round only in BLO, 1dc in each st around
Rounds 5-9 1dc in each st around
Add 6mm safety eyes, placing them between Rounds 3 and 4, 3 sts apart
For the mouth, use three strands of embroidery thread and stitch a small V in between the eyes
Begin stuffing and continue until the end
Round 10 work this round only in BLO, (1dc, 1invdec) 5 times [10 sts]
Round 11 5invdec [5 sts]
Fasten off and use yarn tail to close. Leave a tail for attaching. Using the yarn tail, sew the marshmallows to the hot chocolate.
