Making the fabric tubes
Step 1
Fold Fabric A in half lengthways with right sides (RS) together and pin together down the length.
Step 2
Sew together down the long edges then trim the seam allowance to 5mm (1⁄4in).
Step 3
Turn RS and press out with the seam in the centre of one side to make a tube for the outer row.
Step 4
Repeat this with Fabric B for the middle row and Fabric C for the inner row.
Creating the beads
Step 1
Take the outer row tube and choose some contrasting stranded cotton, which will show up beside the fabric. You need to use all six strands of this threaded in your needle.
Step 2
Tie it around the tube 2cm (3⁄4in) from one end.
Step 3
Stuff the tube with polyester fibrefill. Use a pencil or knitting needle to poke the stuffing carefully down the tube so it is firmly and evenly filled.
Step 4
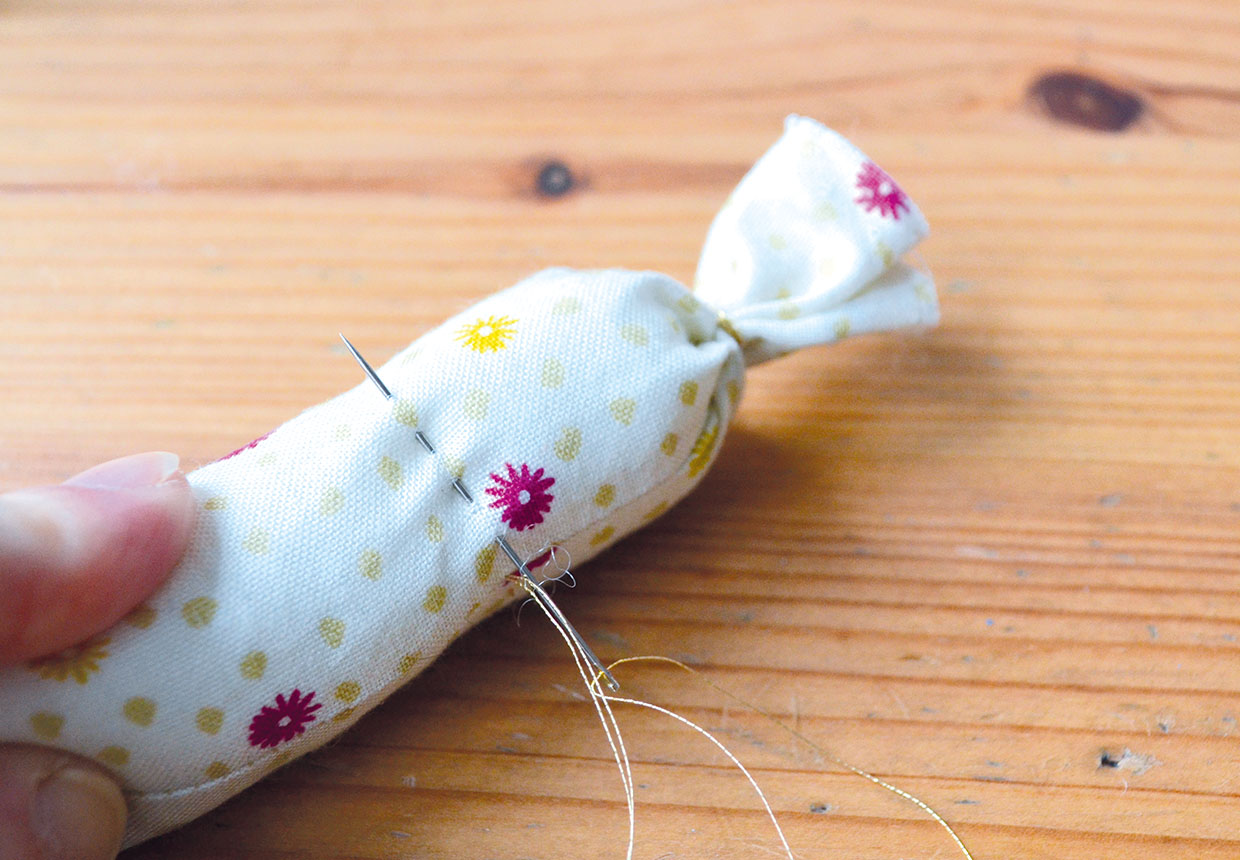
Sew a running stitch around the tube about 2.5cm (1in) from the end you tied, using your contrasting stranded cotton. Make sure the starting end is secure.
Step 5
Pull the thread tightly to bunch up the fabric and create a ‘bead’ shape. Once pulled tight, wrap the thread around where you stitched several times to create a binding.
Step 6
Add a few stitches at the back of the tube to secure and keep the thread in place.
Step 7
Repeat this at 2.5cm (1in) intervals along the tube. Leave at least 2cm (3⁄4in) of fabric after your last bead.
Step 8
Repeat this same process with the inner row tube.
Step 9
Make the middle row tube in the same way but when you are forming the 'bead' shapes, wrap the thread at 3cm (11⁄4in) intervals instead to create wider 'beads'.
Joining the rows
Step 1
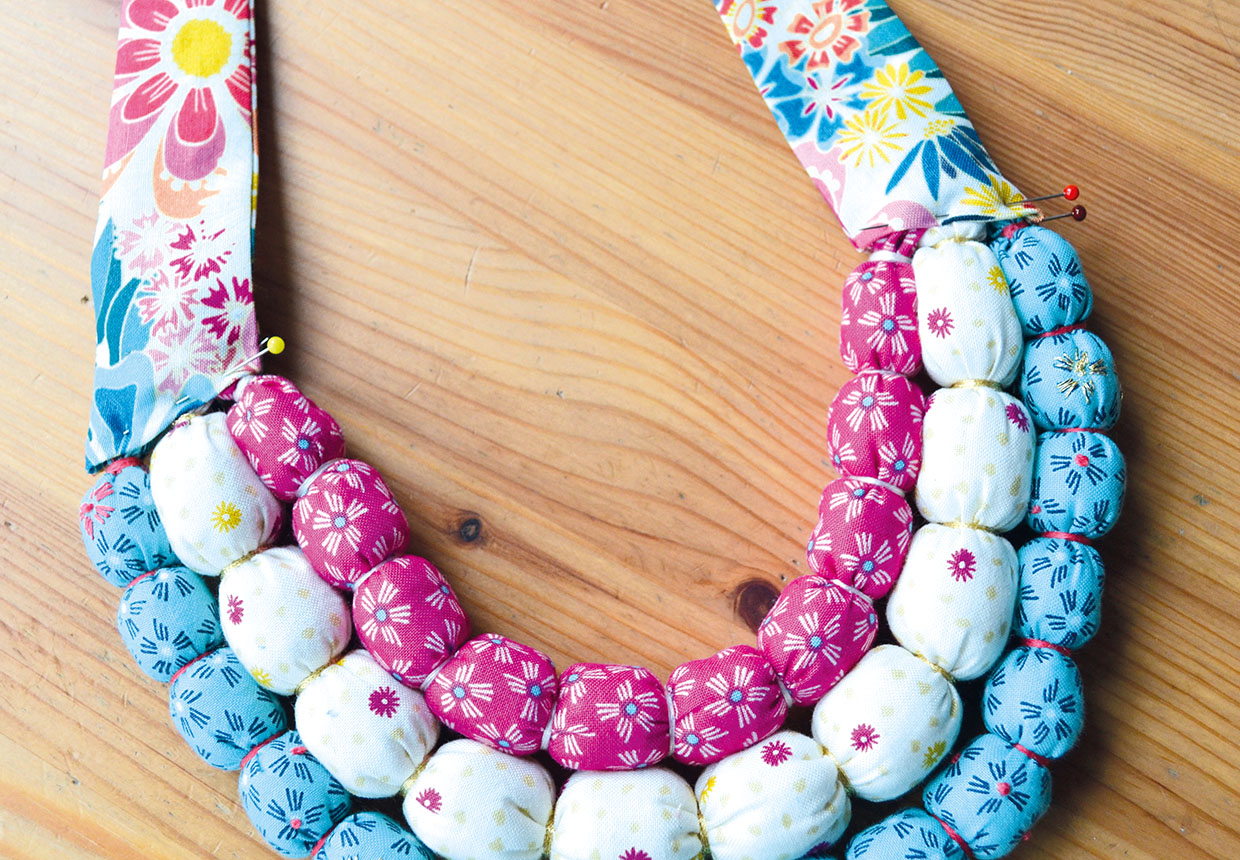
Pin the three rows of ‘beads’ together in a curve, making sure the end beads line up at both ends.
Step 2
To keep the curved shape, sew a few stitches on an outer ‘bead’ to secure your thread then pass it through all three rows and out the other side.
Step 3
Pass the thread back through and secure with a few stitches.
Step 4
Repeat this at roughly 7cm (23⁄4in) intervals while holding the ‘beads’ in a curved shape to keep them together.
Making the strap
Step 1
Download and print the strap template then cut it out.
Step 2
Fold Fabric D for the strap in half widthways with RS together.
Step 3
Place the template in the centre of one half of the folded fabric and draw around it, leaving enough room to draw a second one beside it.
Step 4
Flip the template over and draw around it again, leaving at least 2cm (3⁄4in) between the two outlines.
Step 5
Pin the fabric together in the centre of each drawn strap shape to keep the fabric layers held together.
Step 6
Cut 1cm (3⁄8in) outside the drawn outlines for the seam allowance.
Step 7
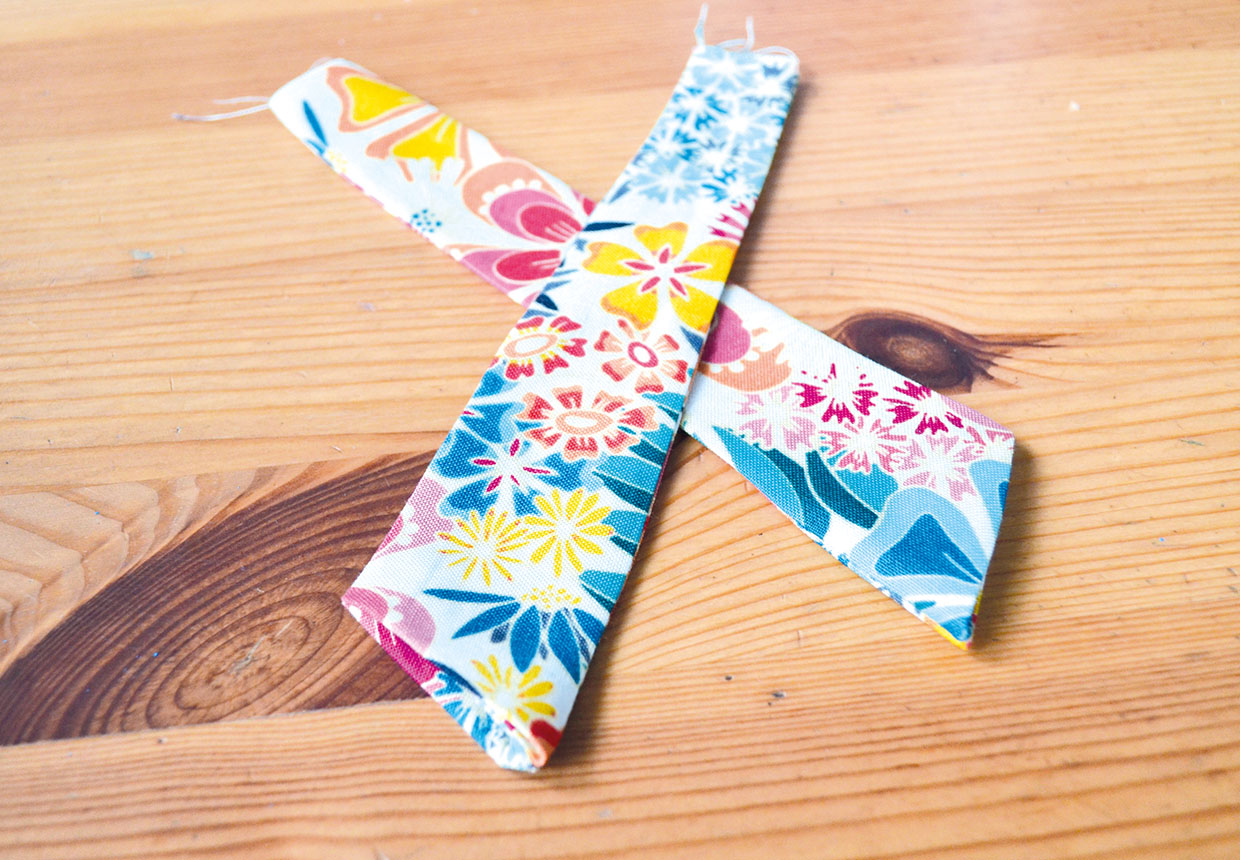
Sew each strap piece along the long drawn edges then turn RS out and press.
Step 8
Fold the wider open edge of each piece under by 1cm (3⁄8in) to the inside and then press to hold.
Assembling the necklace
Step 1
Lay the strap pieces down so their top tips point inwards then tuck the loose ends of each of the ‘bead’ strands into the folded-under edge of the straps and pin to hold. Do this on both sides of your necklace.
Step 2
Hand-sew the strap sections to the ‘bead’ sections.
Step 3
Decorate the join with a zigzag stitch in gold thread at the bottom of the straps.
Step 4
Decorate the ‘bead’ rows with more hand-embroidery using stranded cotton and gold thread. We’ve sewn over the existing fabric patterns to embellish them, using French knots and simple stitching.
Attaching the clasp
Step 1
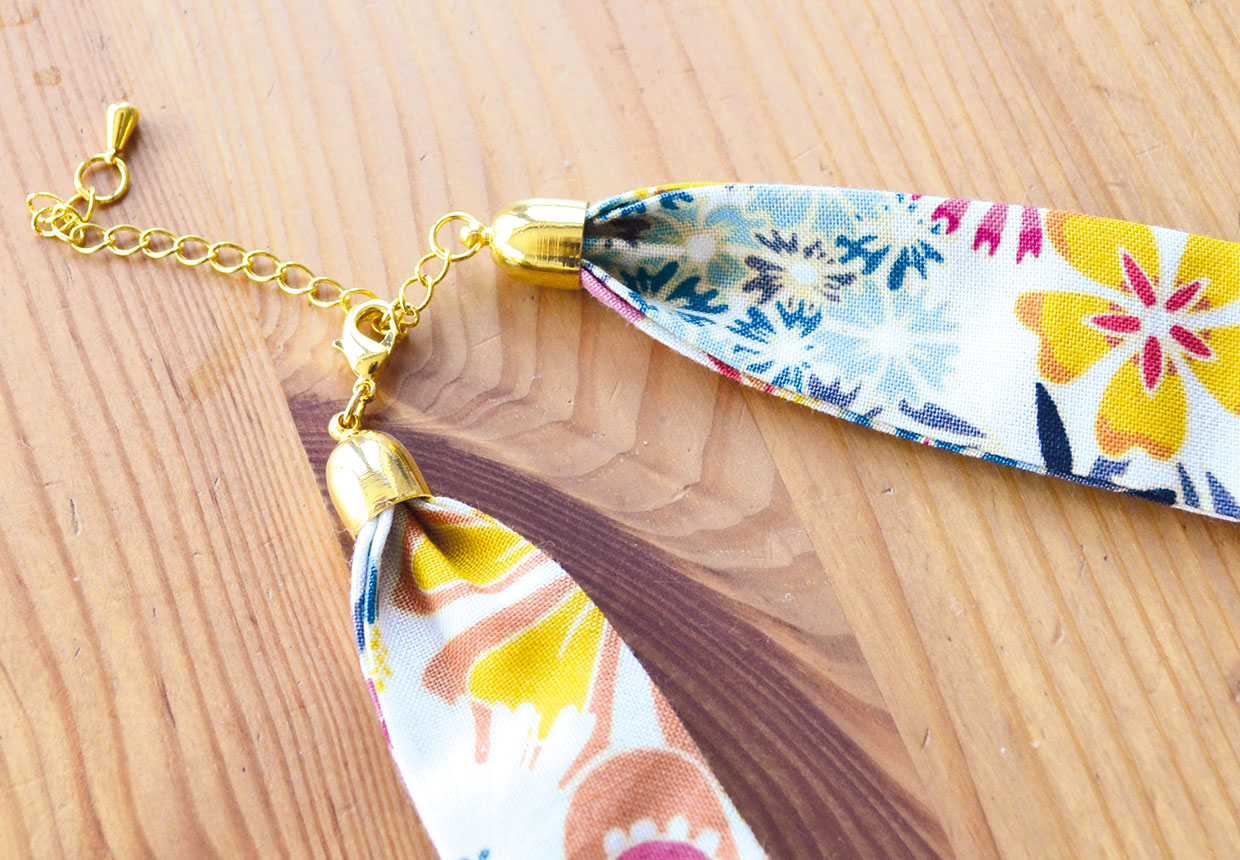
Glue the bell closer ends in place by putting a little craft glue inside each one.
Step 2
Neatly gather the top ends of the strap pieces and poke them into the glue-filled caps. Leave to dry thoroughly to finish.
