1. How to make a cushion cover without a zip – slipstitch method
Step 1
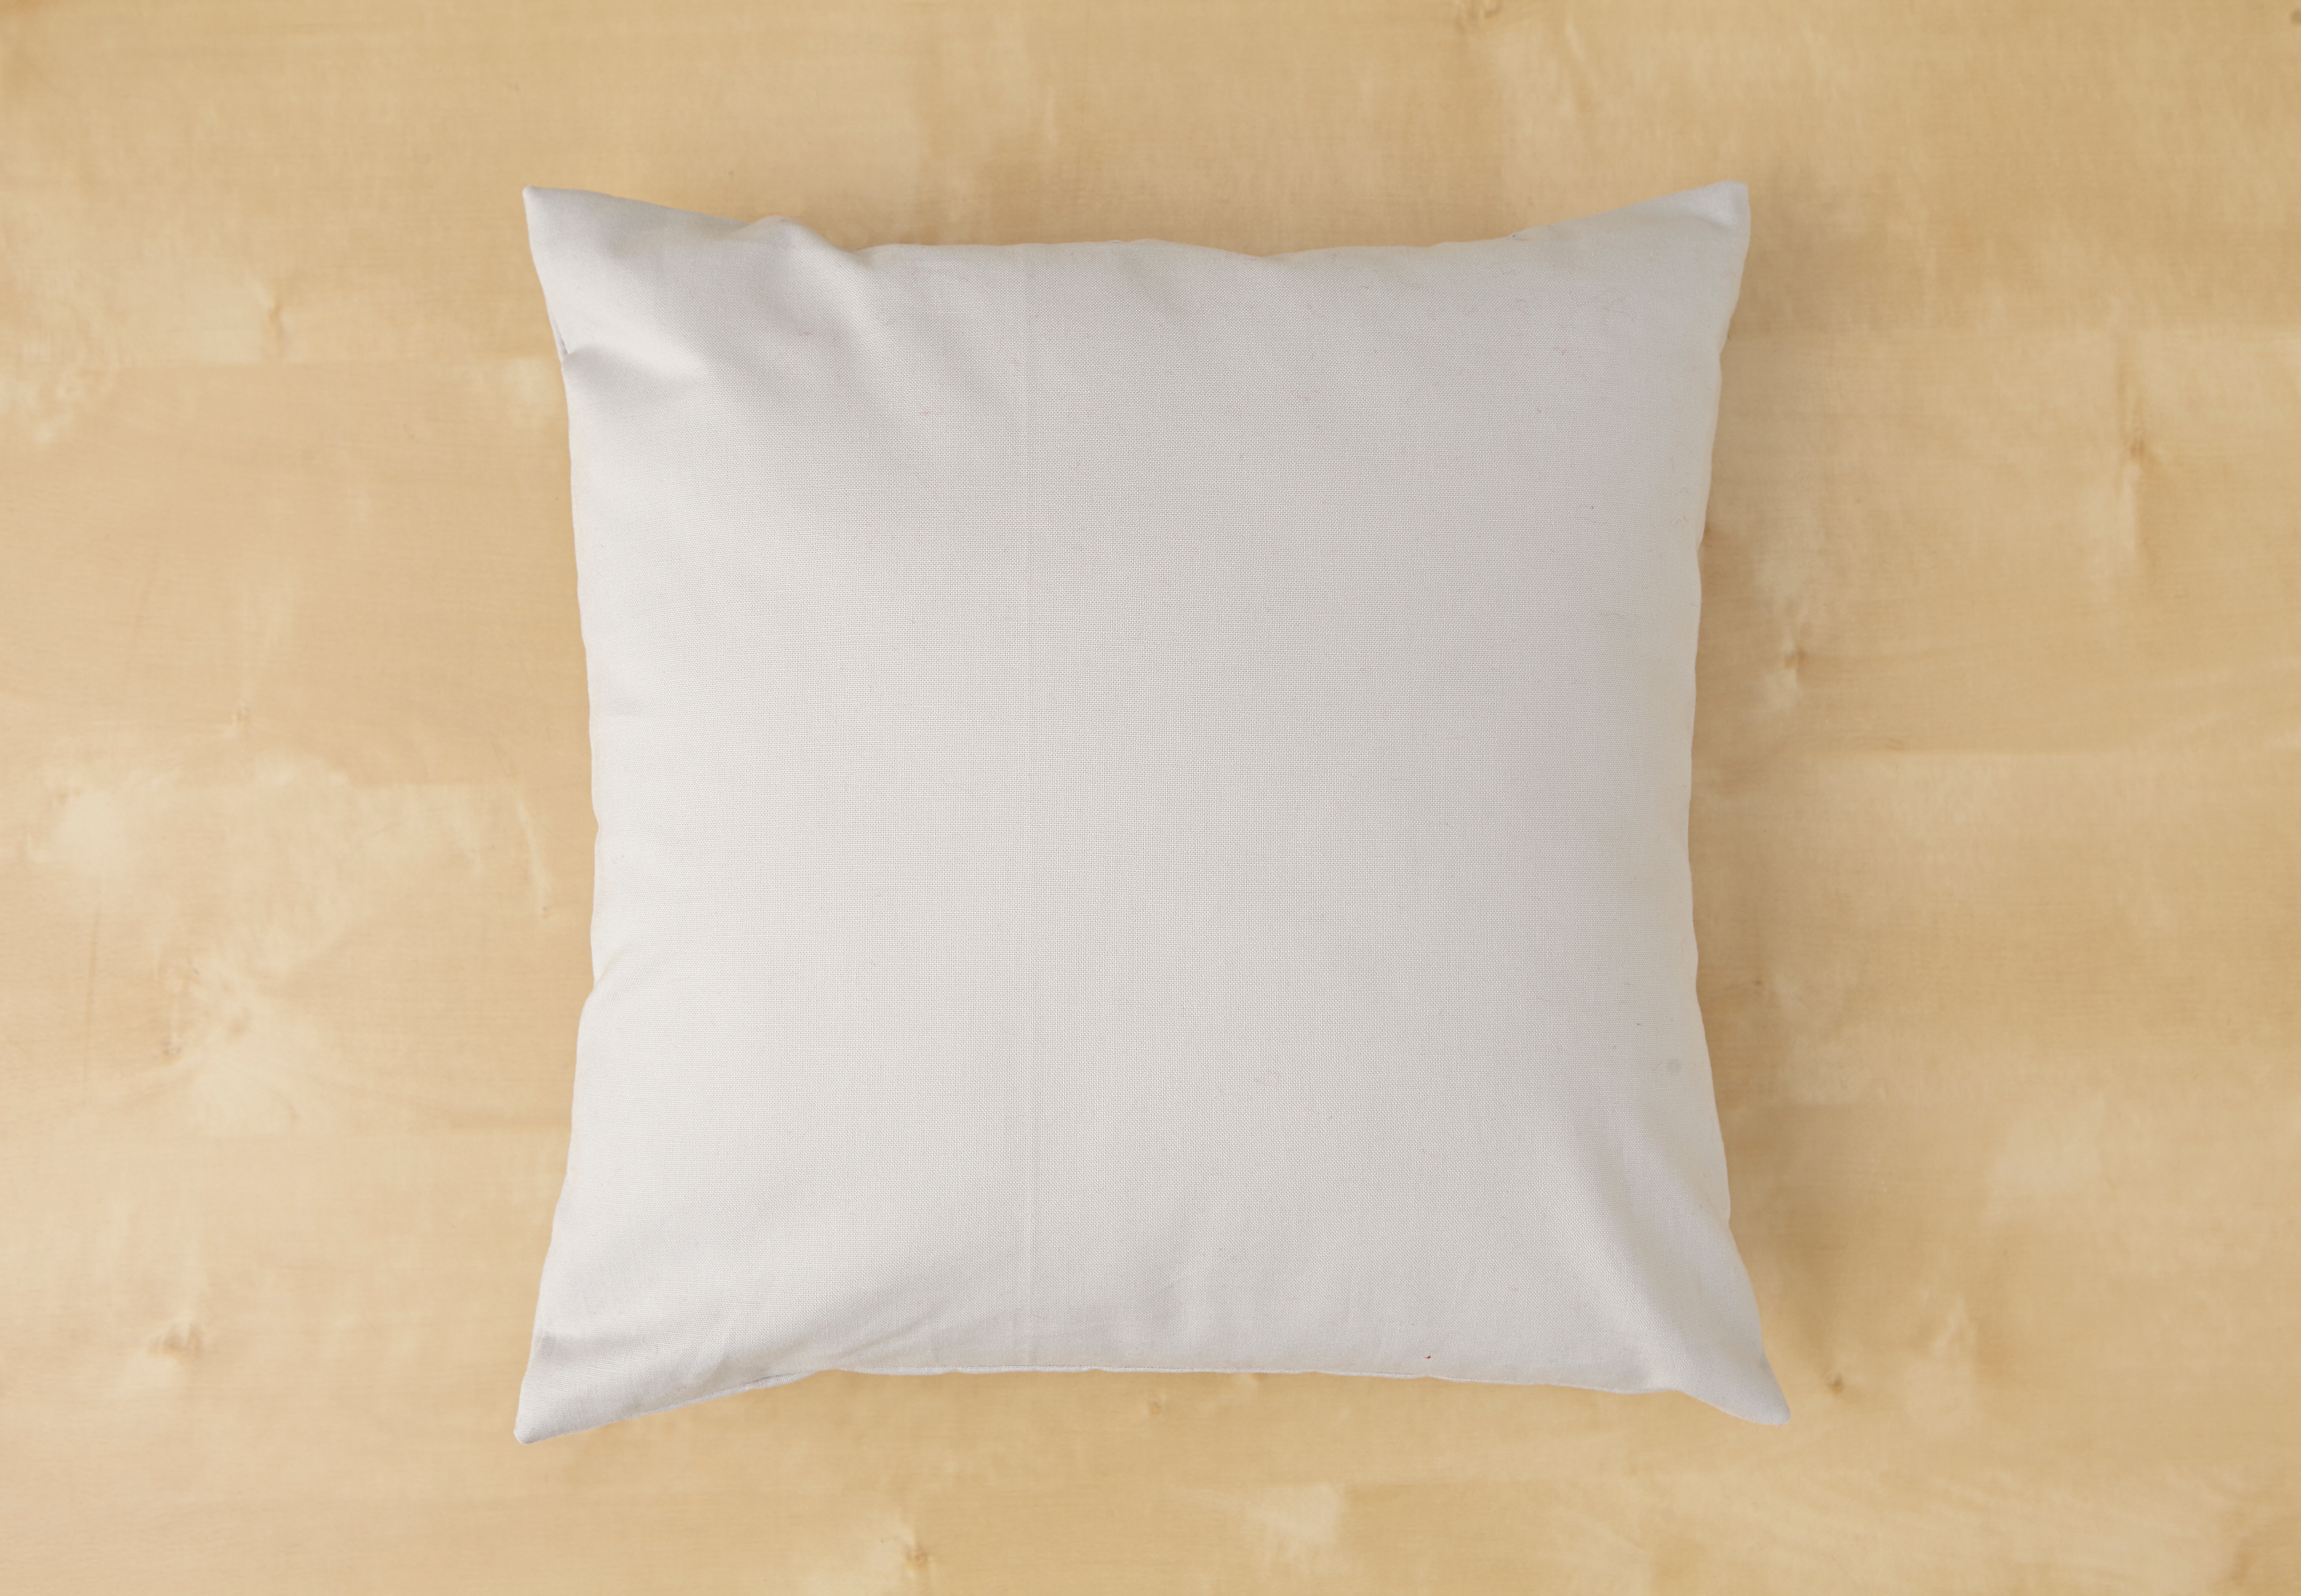
The slipstitch cushion method will work for any fabric, from lightweight cottons to strokeable velvet and corduroy – you could even use an old pair of jeans. Whatever fabric you’re using, make sure you have the right needle in your machine so it can sew it up cleanly. Once your slipstitch cushion is finished, the only way to remove the cushion pad is to undo your stitching, so this method is best for cushions that won’t need regular washing.
You will need
Step 2
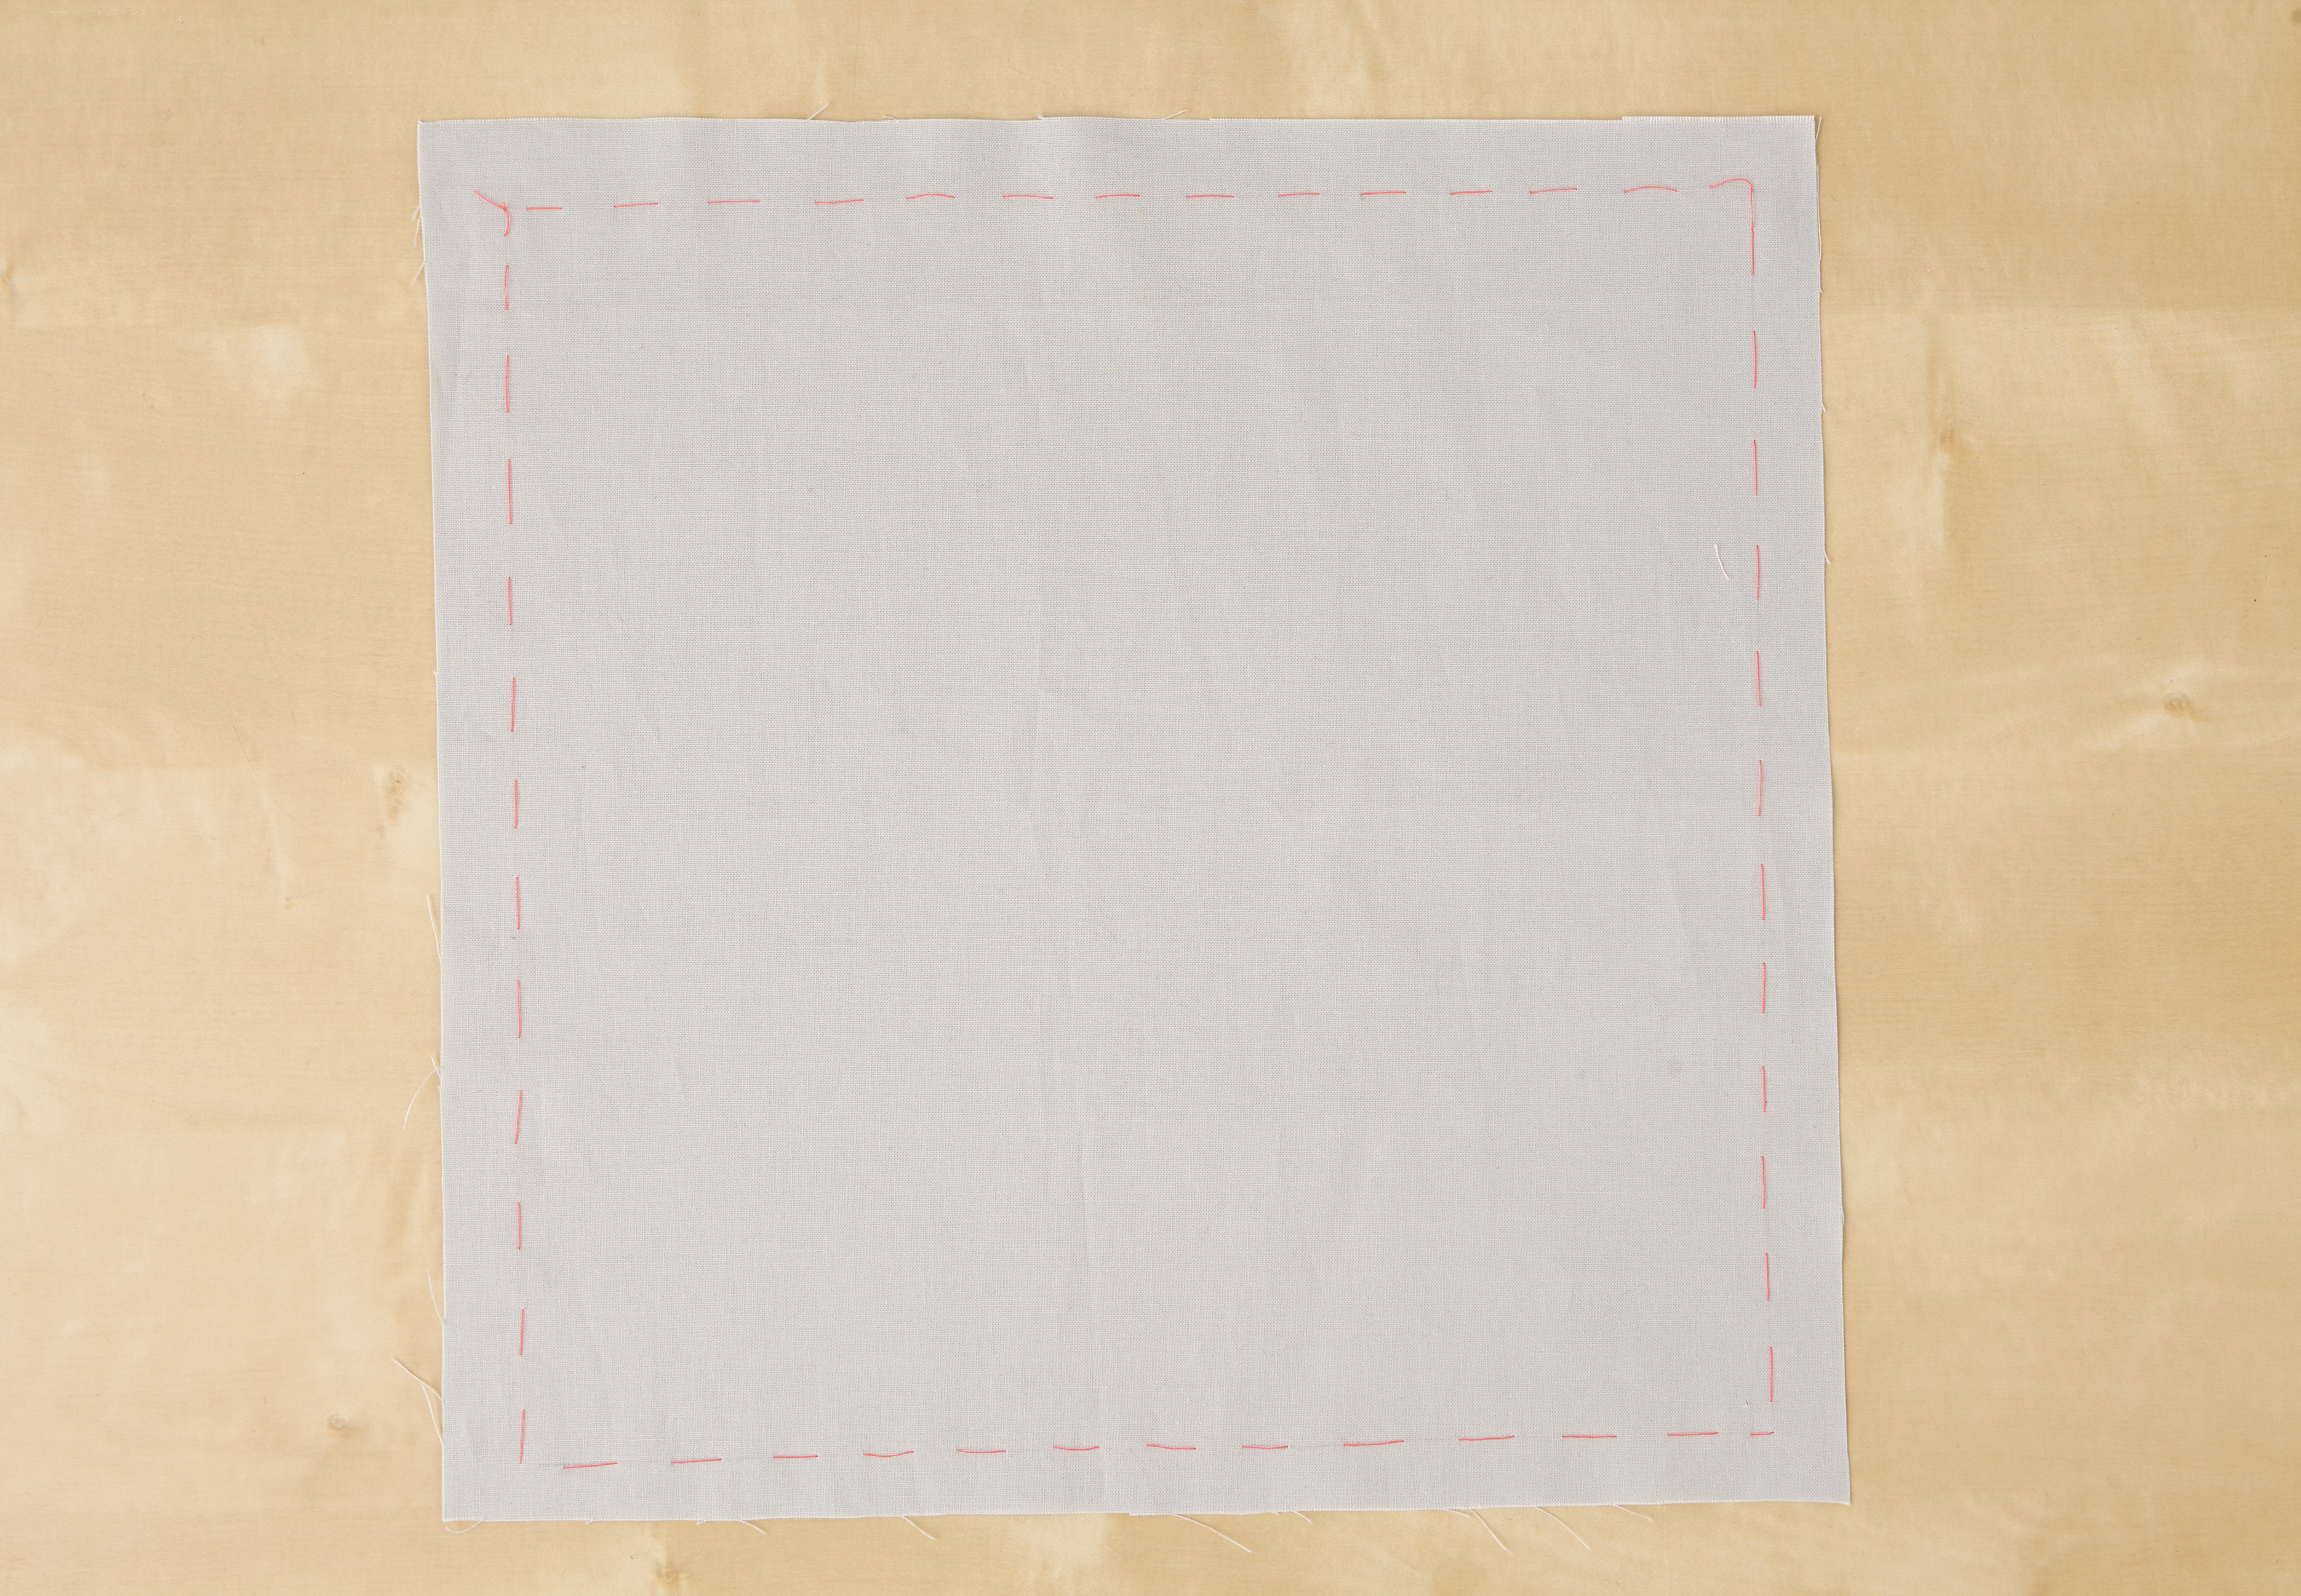
Cut two pieces of cotton fabric to 32x32cm. One sneaky trick is to measure and mark out the first square and use this as a template to cut out the second. These measurements include a 2cm seam allowance on each side so the cover can accommodate a 30x30cm (12x12in) cushion pad. Mark the stitching line on the reverse of the front piece, 2cm in from each edge. Use a washable marker or stitch a line of tacking.
Step 3
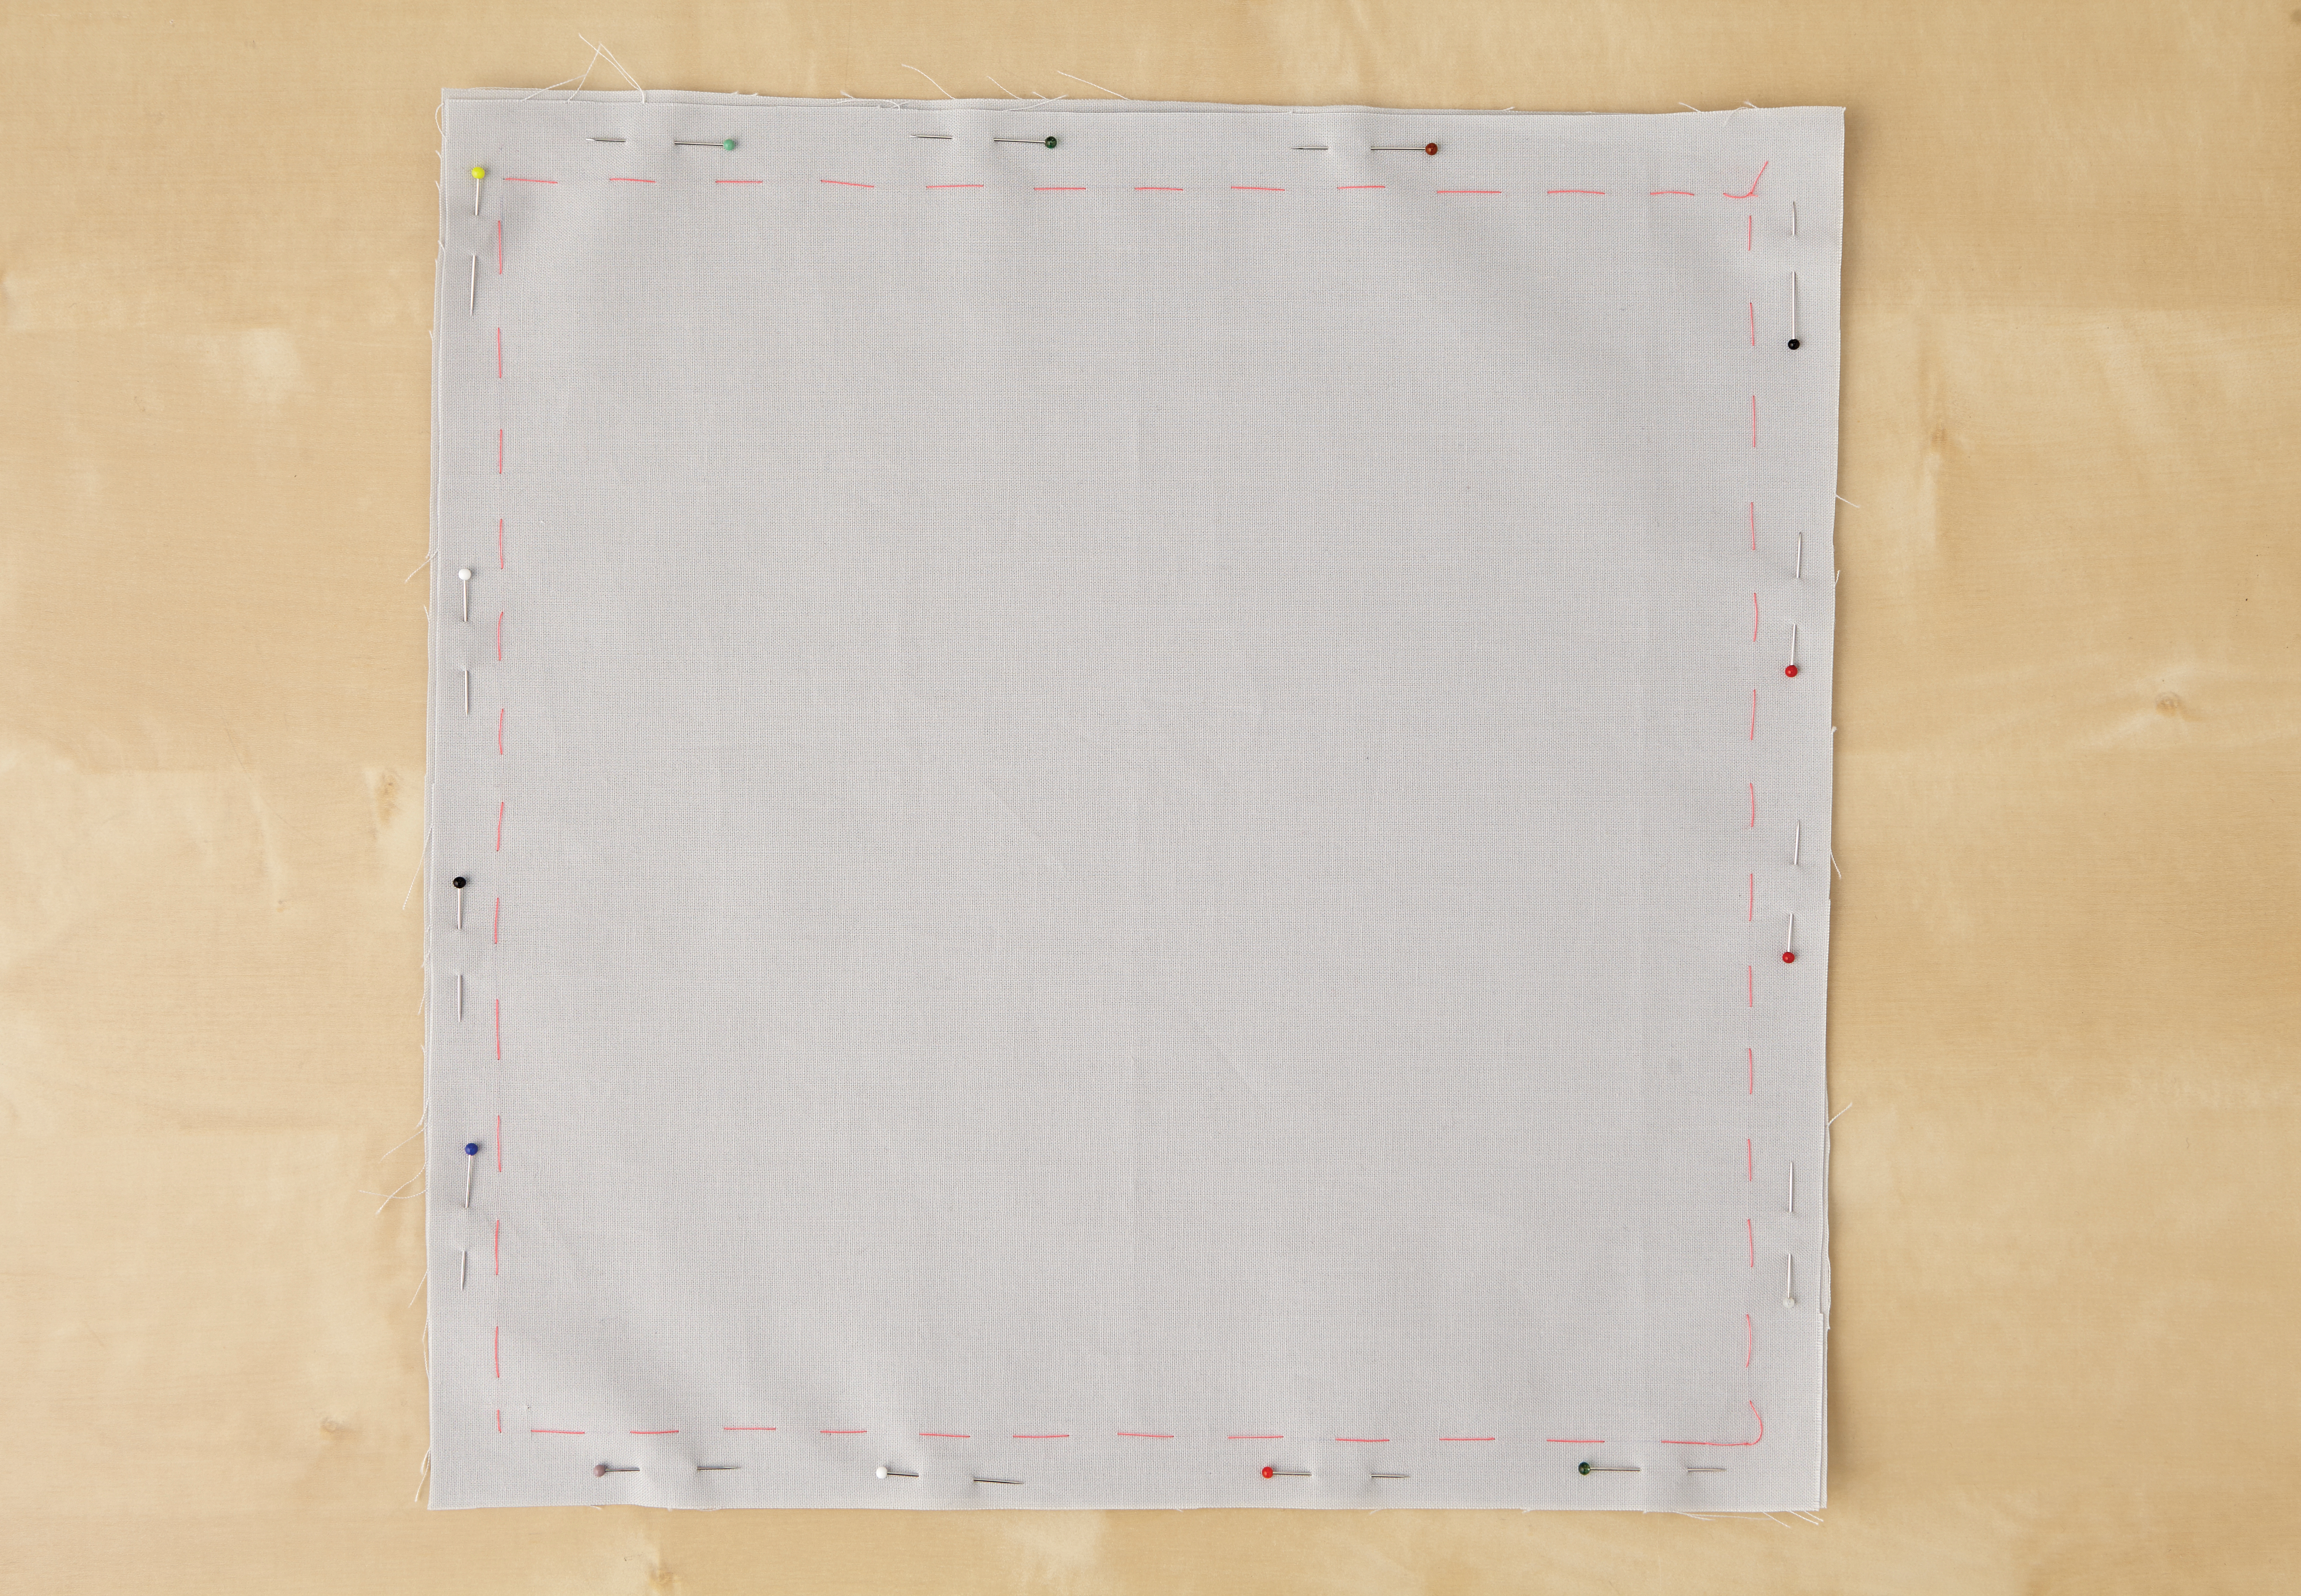
Place your cushion back piece on your worktop, with right side (RS) facing up. Now place your cushion front piece on top with RS facing down – you should have the stitch line markings facing you. Pin around all four edges, between the stitch line mark and the raw edge of the fabric. Don’t use too many pins – around four pins on each side should be enough. Pinning will prevent the two fabric layers from moving when machine stitching.
Step 4
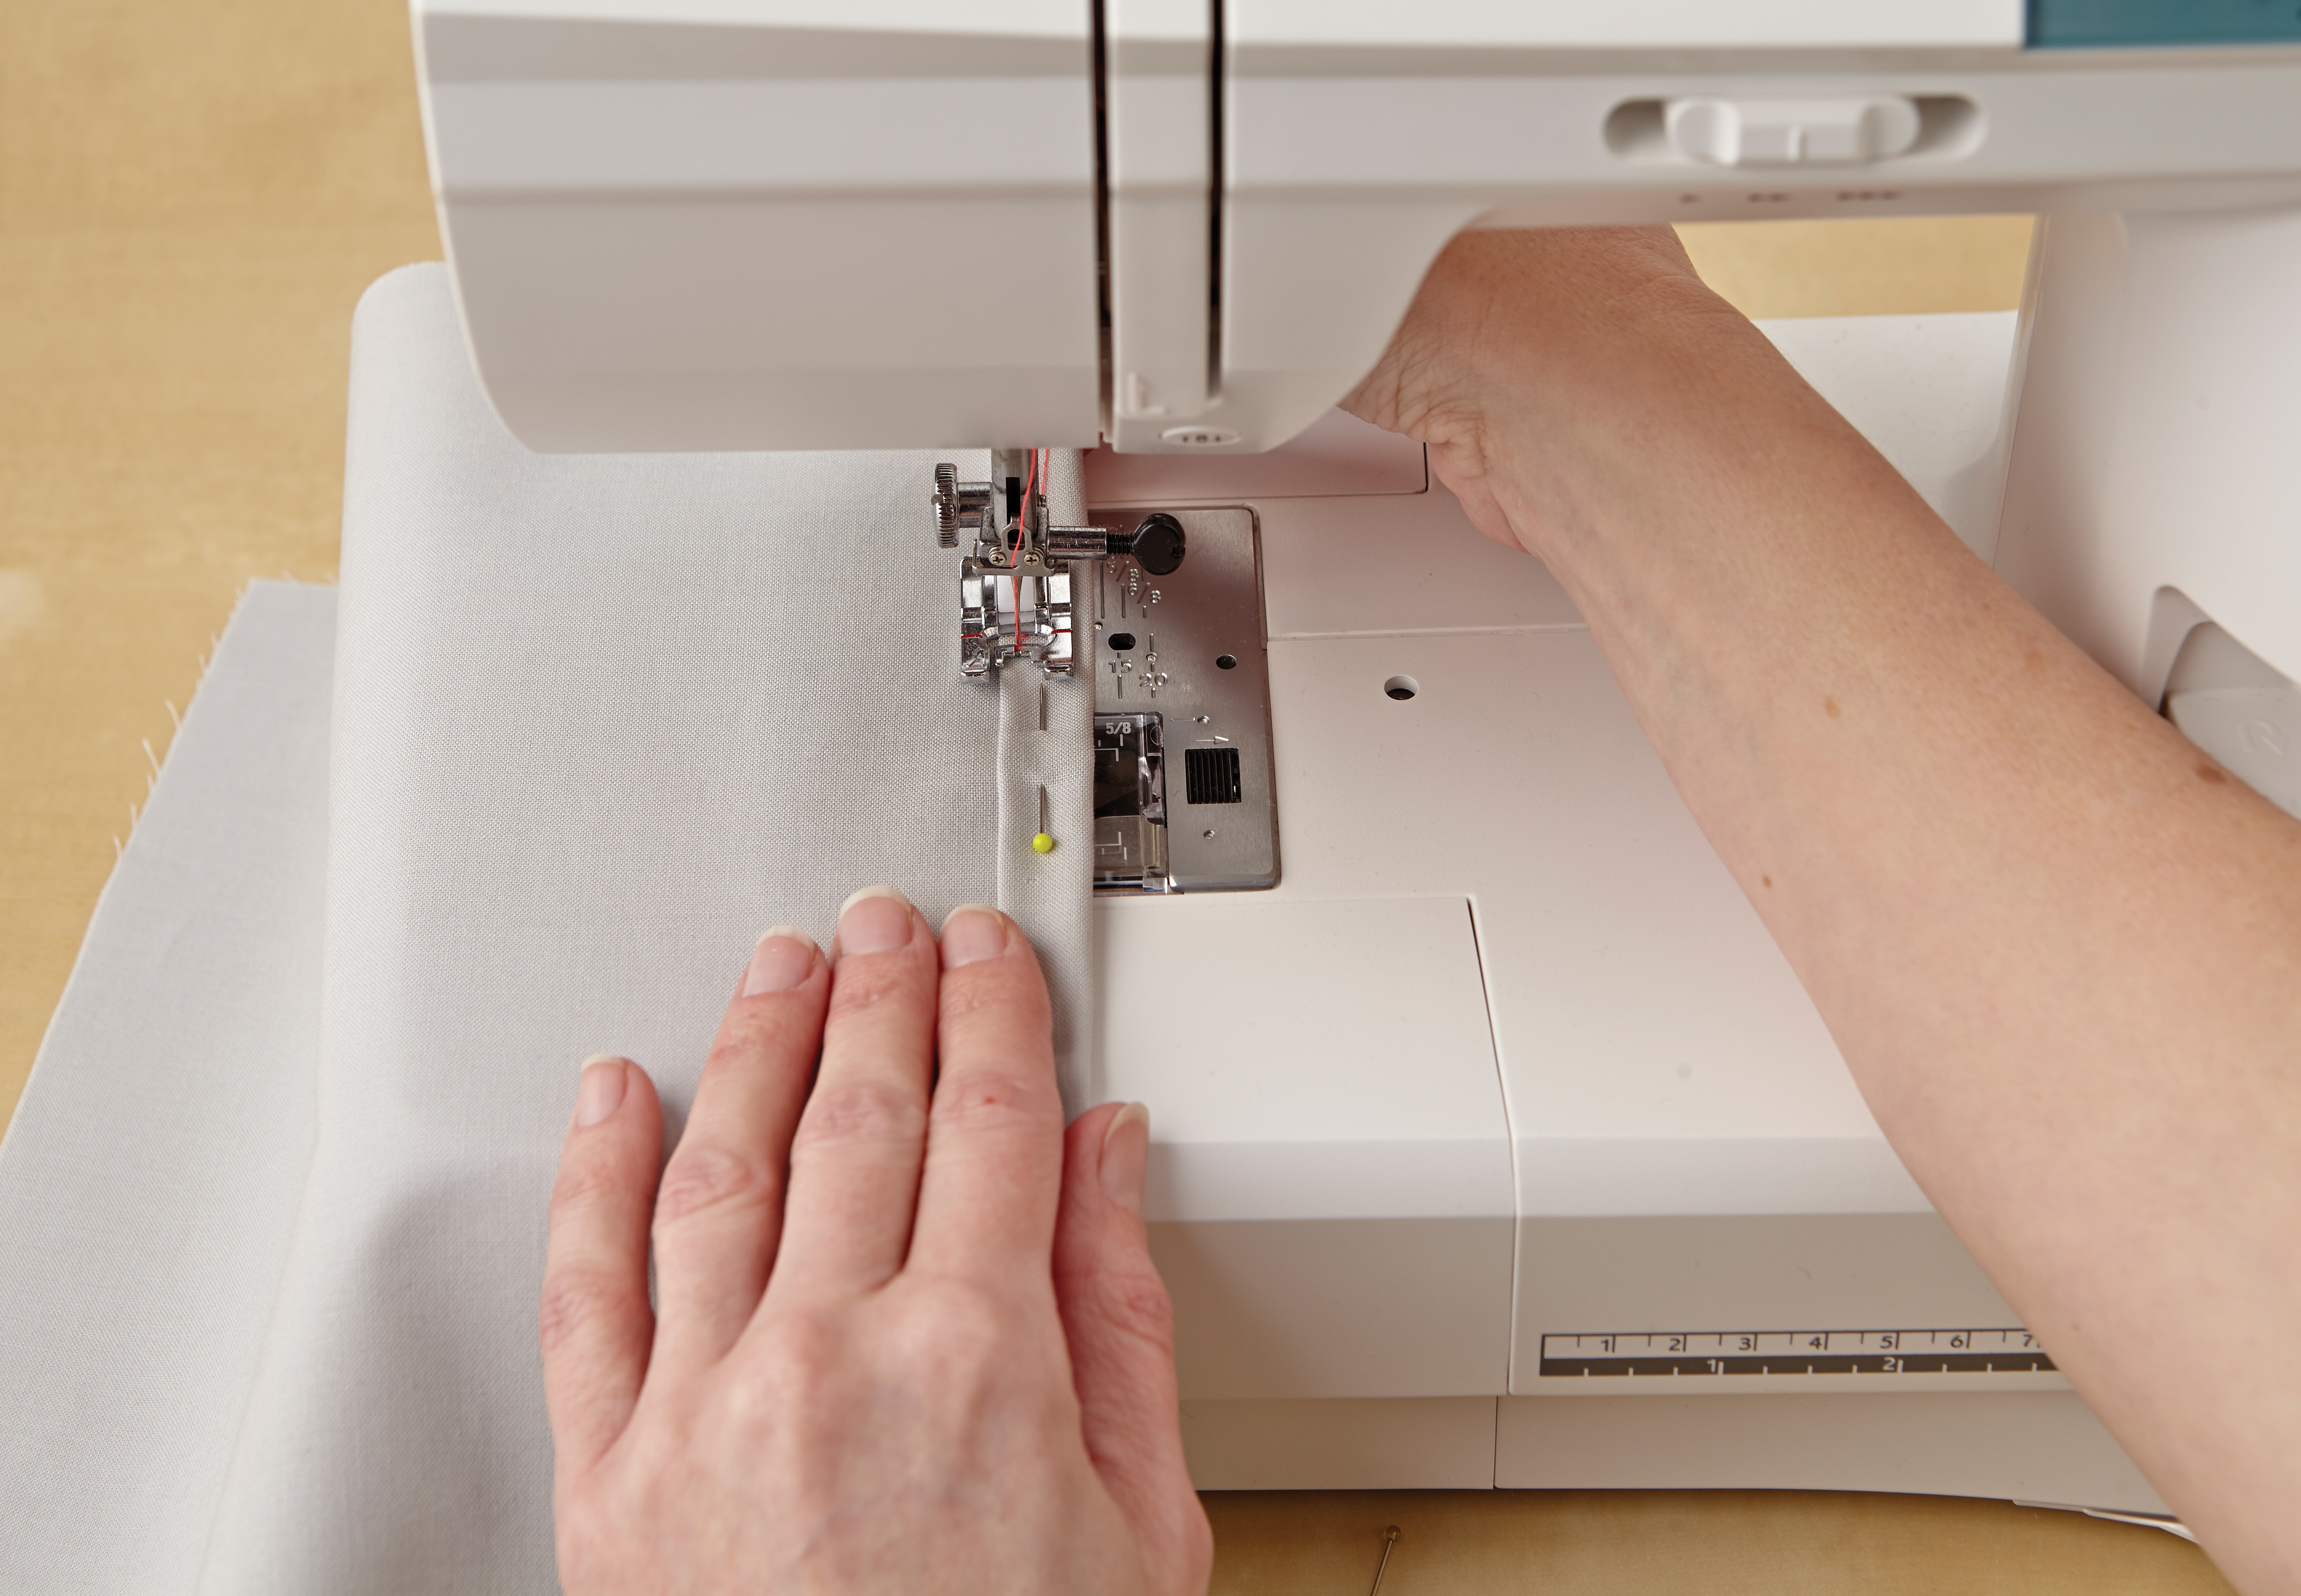
Now sew the two layers together – use a small stitch length and follow the marked stitch lines. Start stitching about two-thirds of the way along one side, make a few stitches and then use the reverse stitch on your machine to sew back over these stitches and secure them. Now continue sewing along the marked lines. When you reach the corner, keep your needle in the fabric, lift the presser foot, rotate your fabric, lower the foot and continue sewing.
Step 5
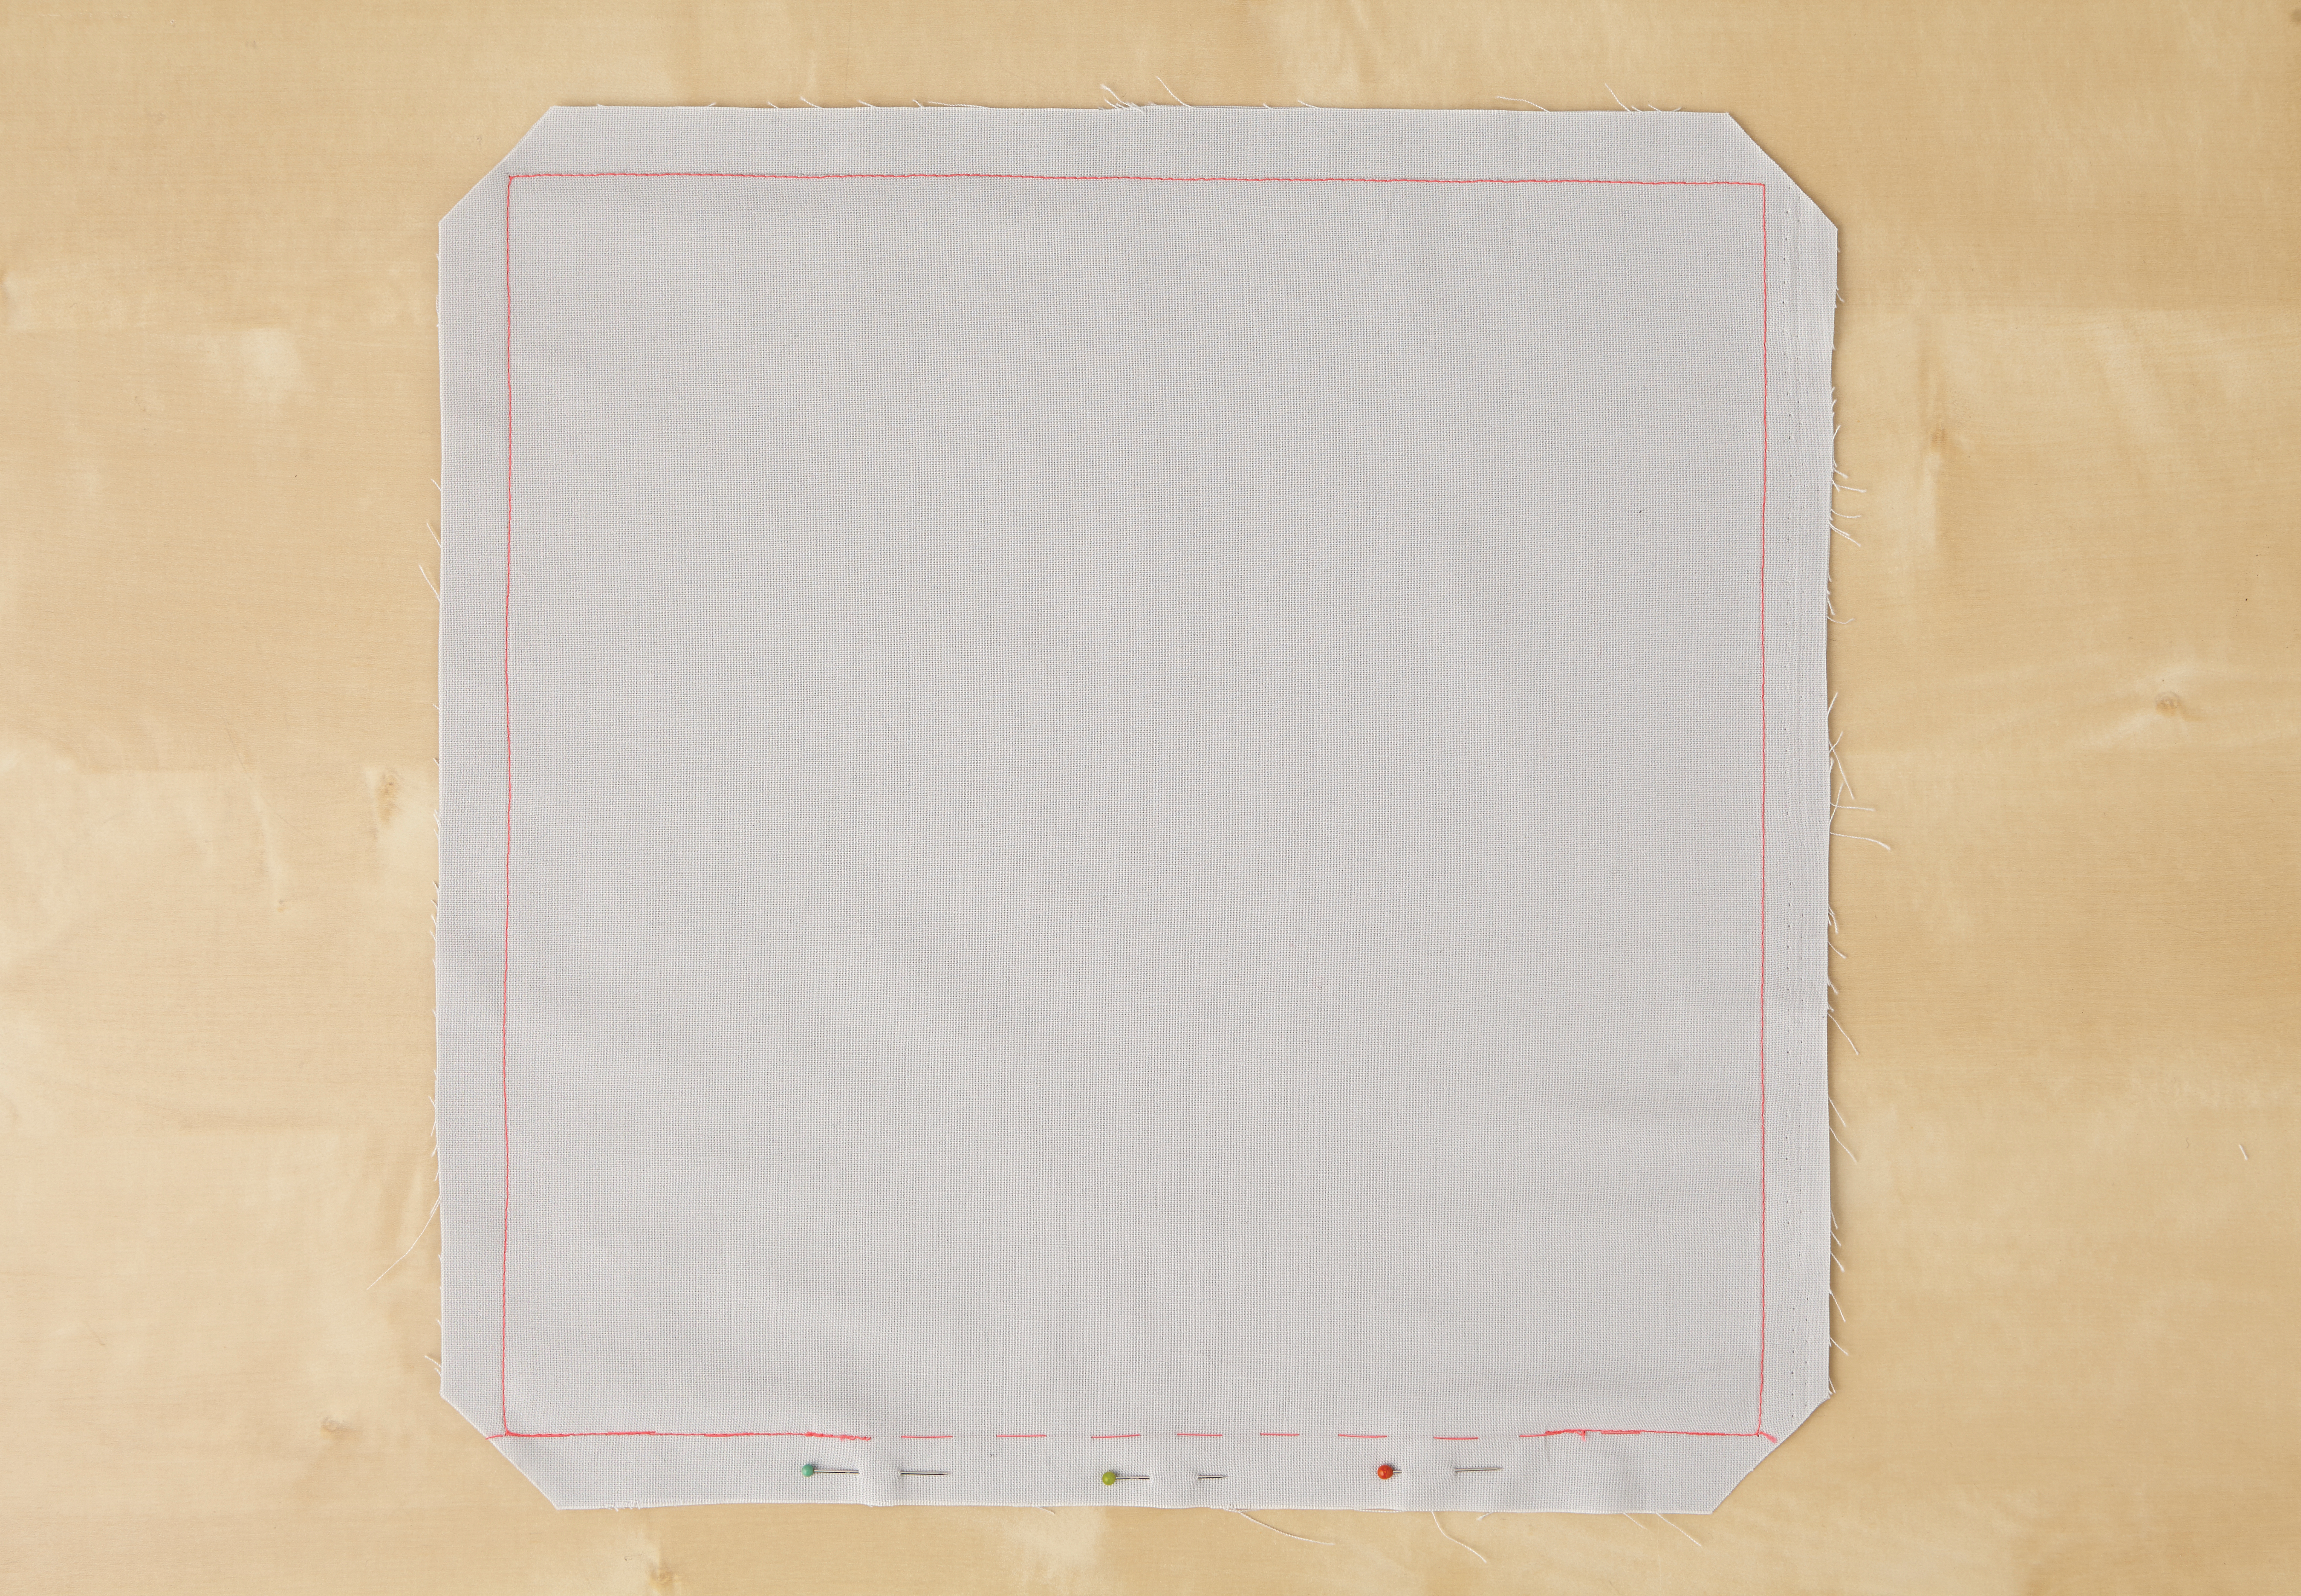
Work your way around all four sides, but stop stitching 10cm before you reach the start of your stitching line – use the reverse stitch on your machine to sew back over your last few stitches to secure them. Stopping here will give you an opening through which you can turn the cushion cover. Trim the seam allowance of the fabric to 1cm, and carefully snip off the corners of the seam allowances (not too close to the stitching line) to reduce bulk.
Step 6
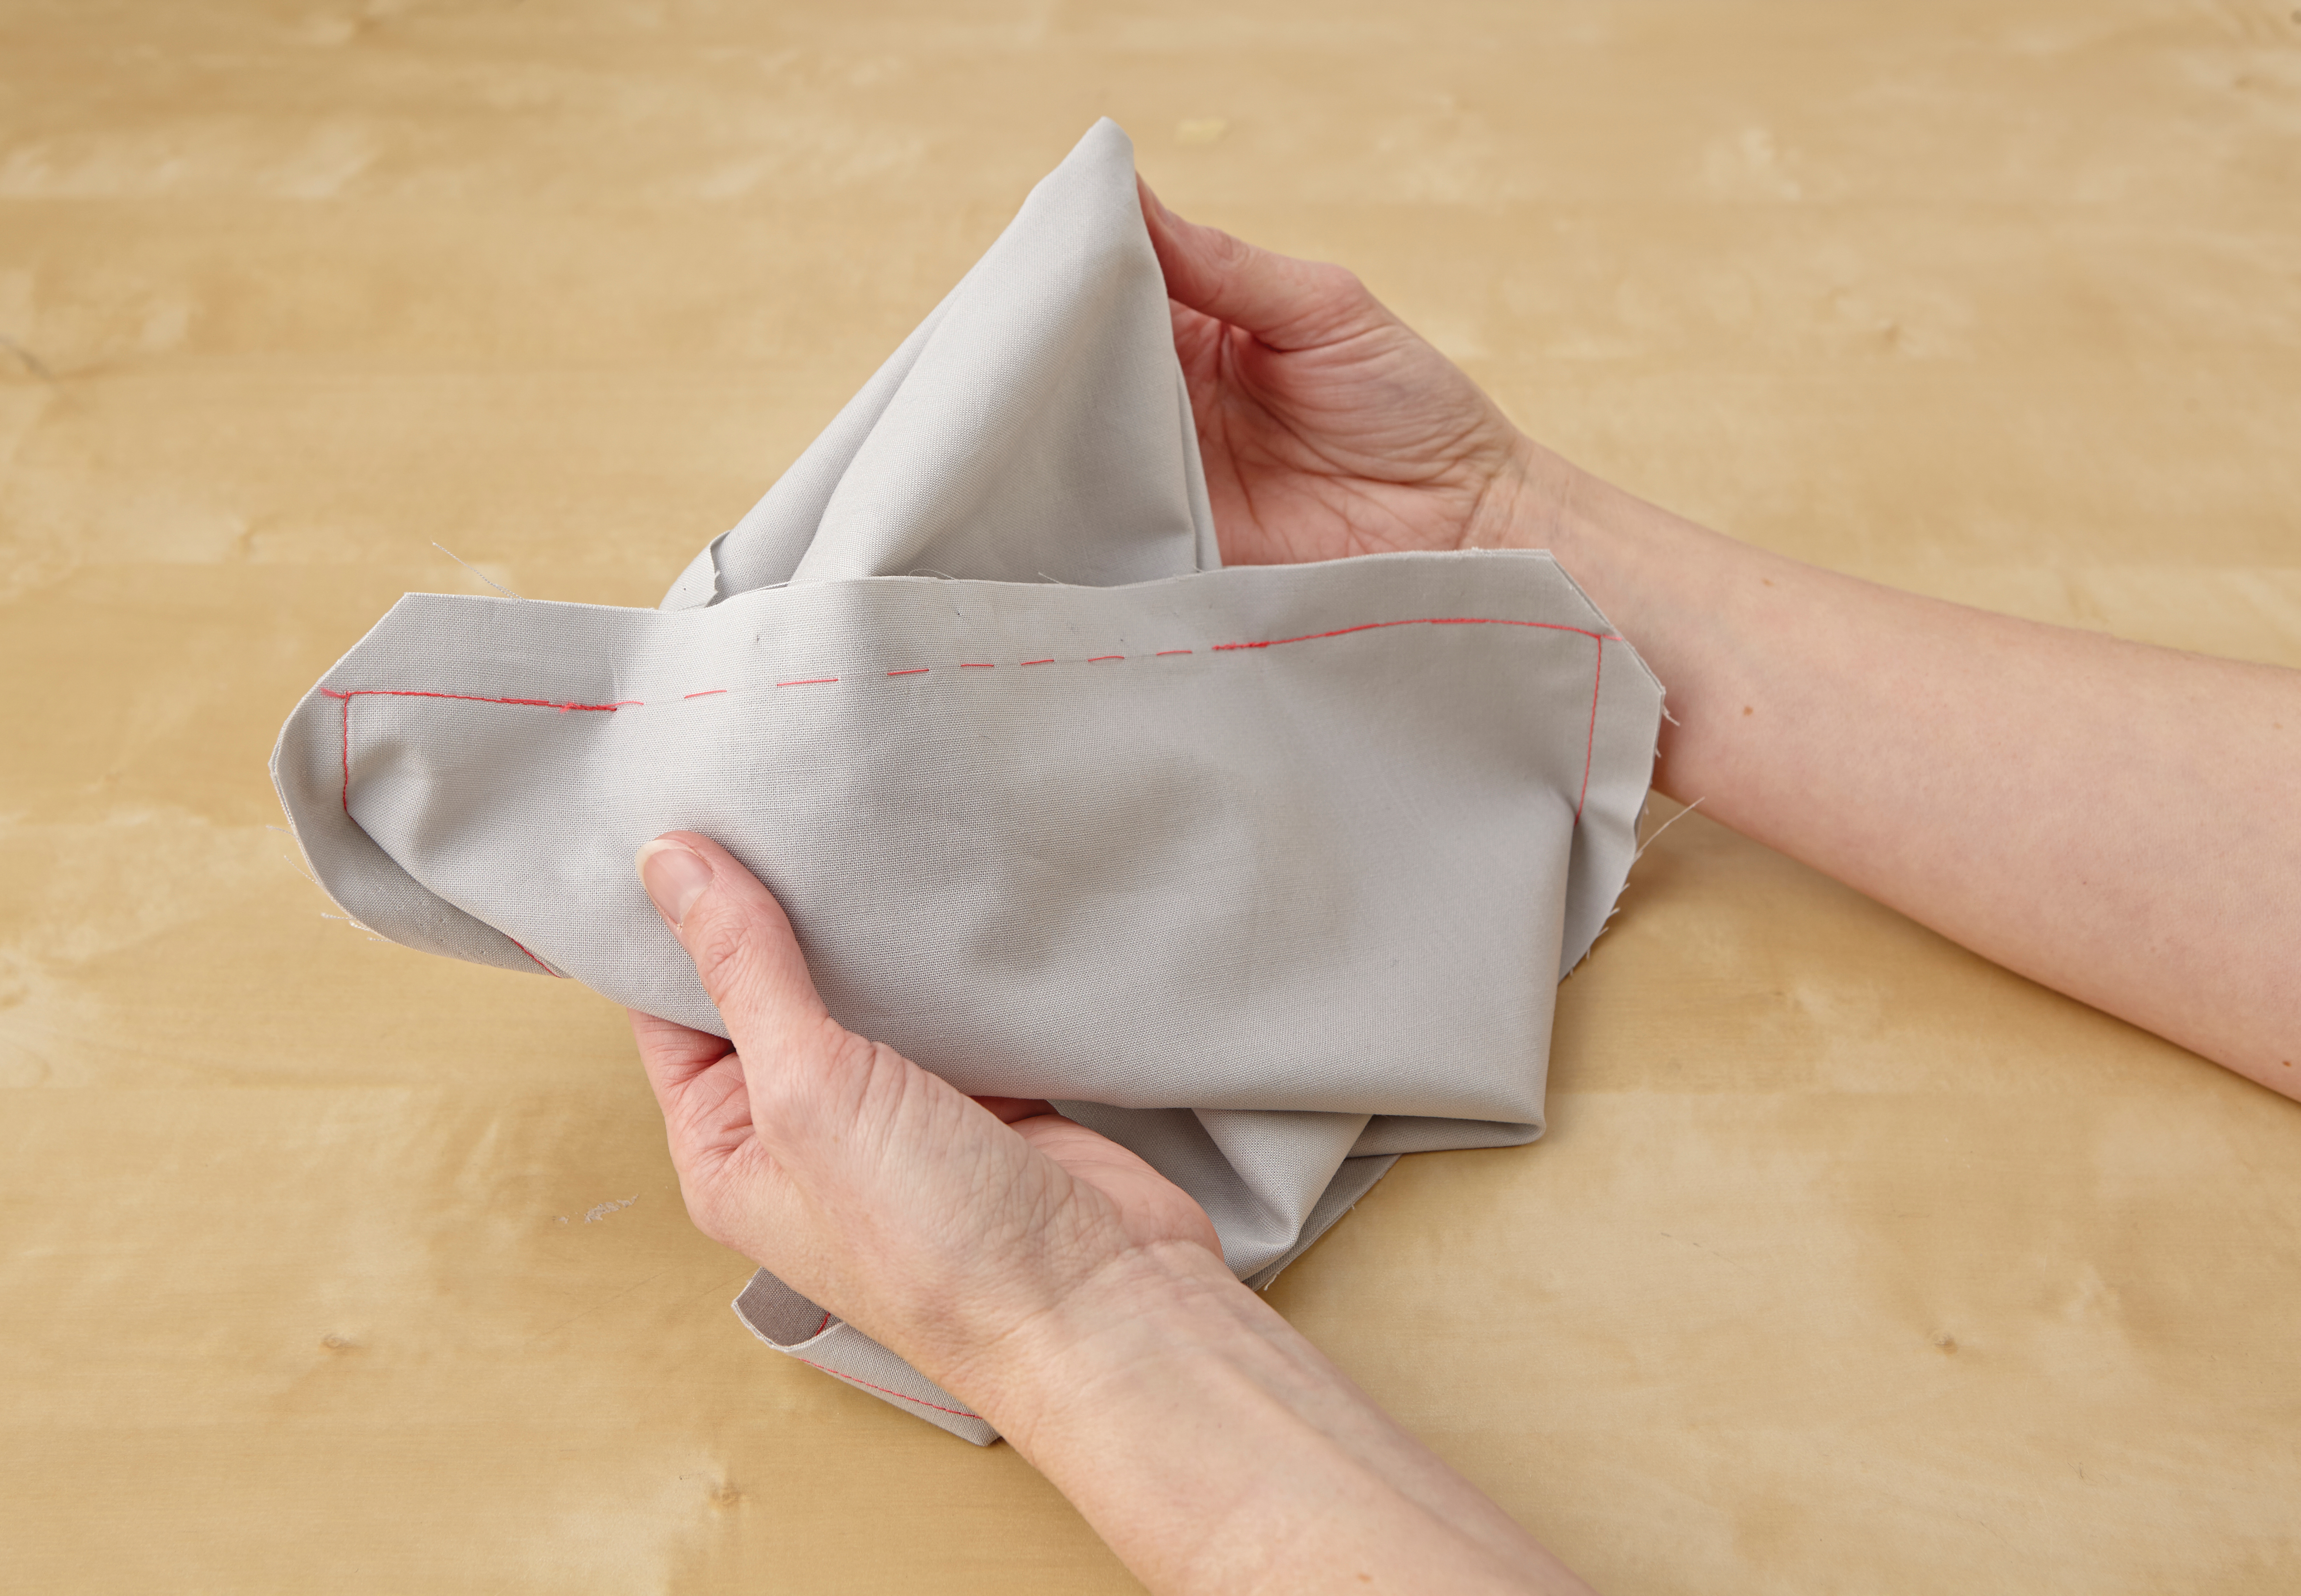
Remove the pins and the stitch line markings from the two layers, either by carefully pulling out the tacking stitches or by using a damp sponge to remove the marker lines. Push both layers of fabric through the opening to turn the cover RS out. Tease out the corners of the cushion cover, using a tapestry needle to help you. Give the cover a quick press with an iron, tucking in the raw edges of the opening. Insert your cushion pad.
Step 7
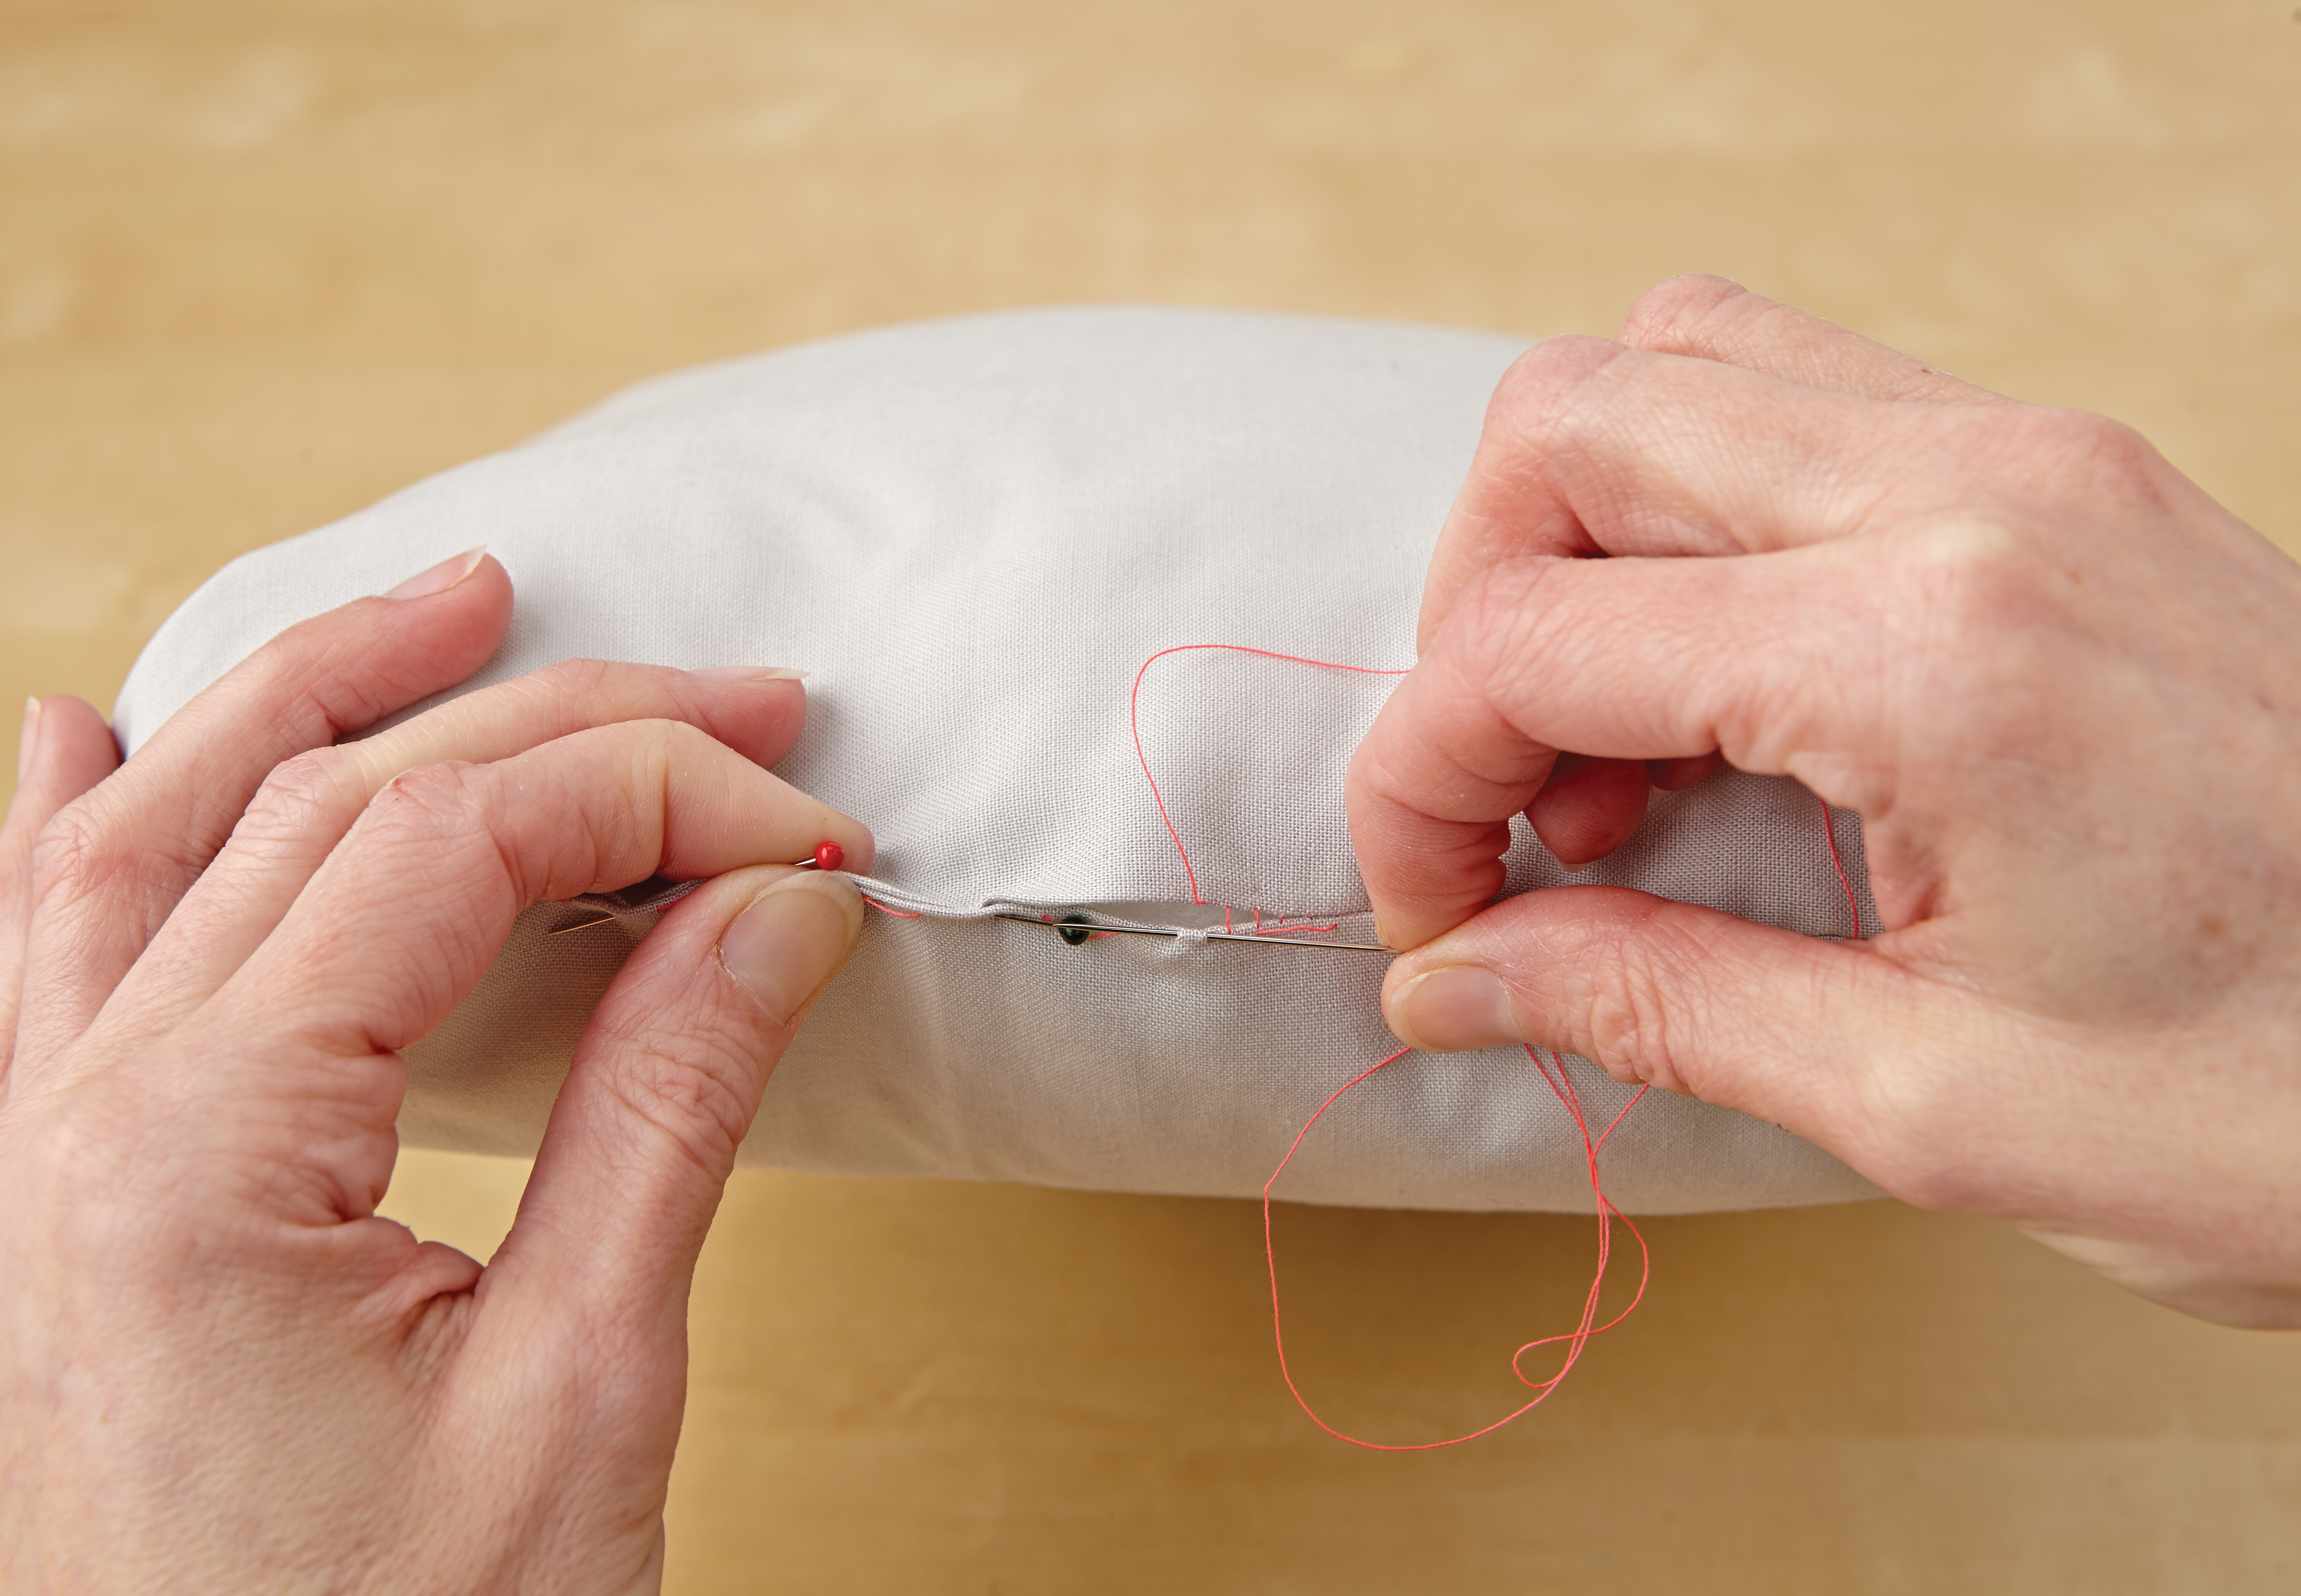
Now you need to slipstitch together the opening. To do this, make sure the opening is neat, with raw edges tucked inside and the fold of the seam matching up with the rest of the cushion. Pin in place. Thread a sewing needle and sew the seam together: working from right to left, make a small stitch (about 3mm long) into one side of the seam and then into the other. Keep the start of each stitch directly in line with the end of the previous stitch.
2. How to make an envelope cushion cover
Step 1
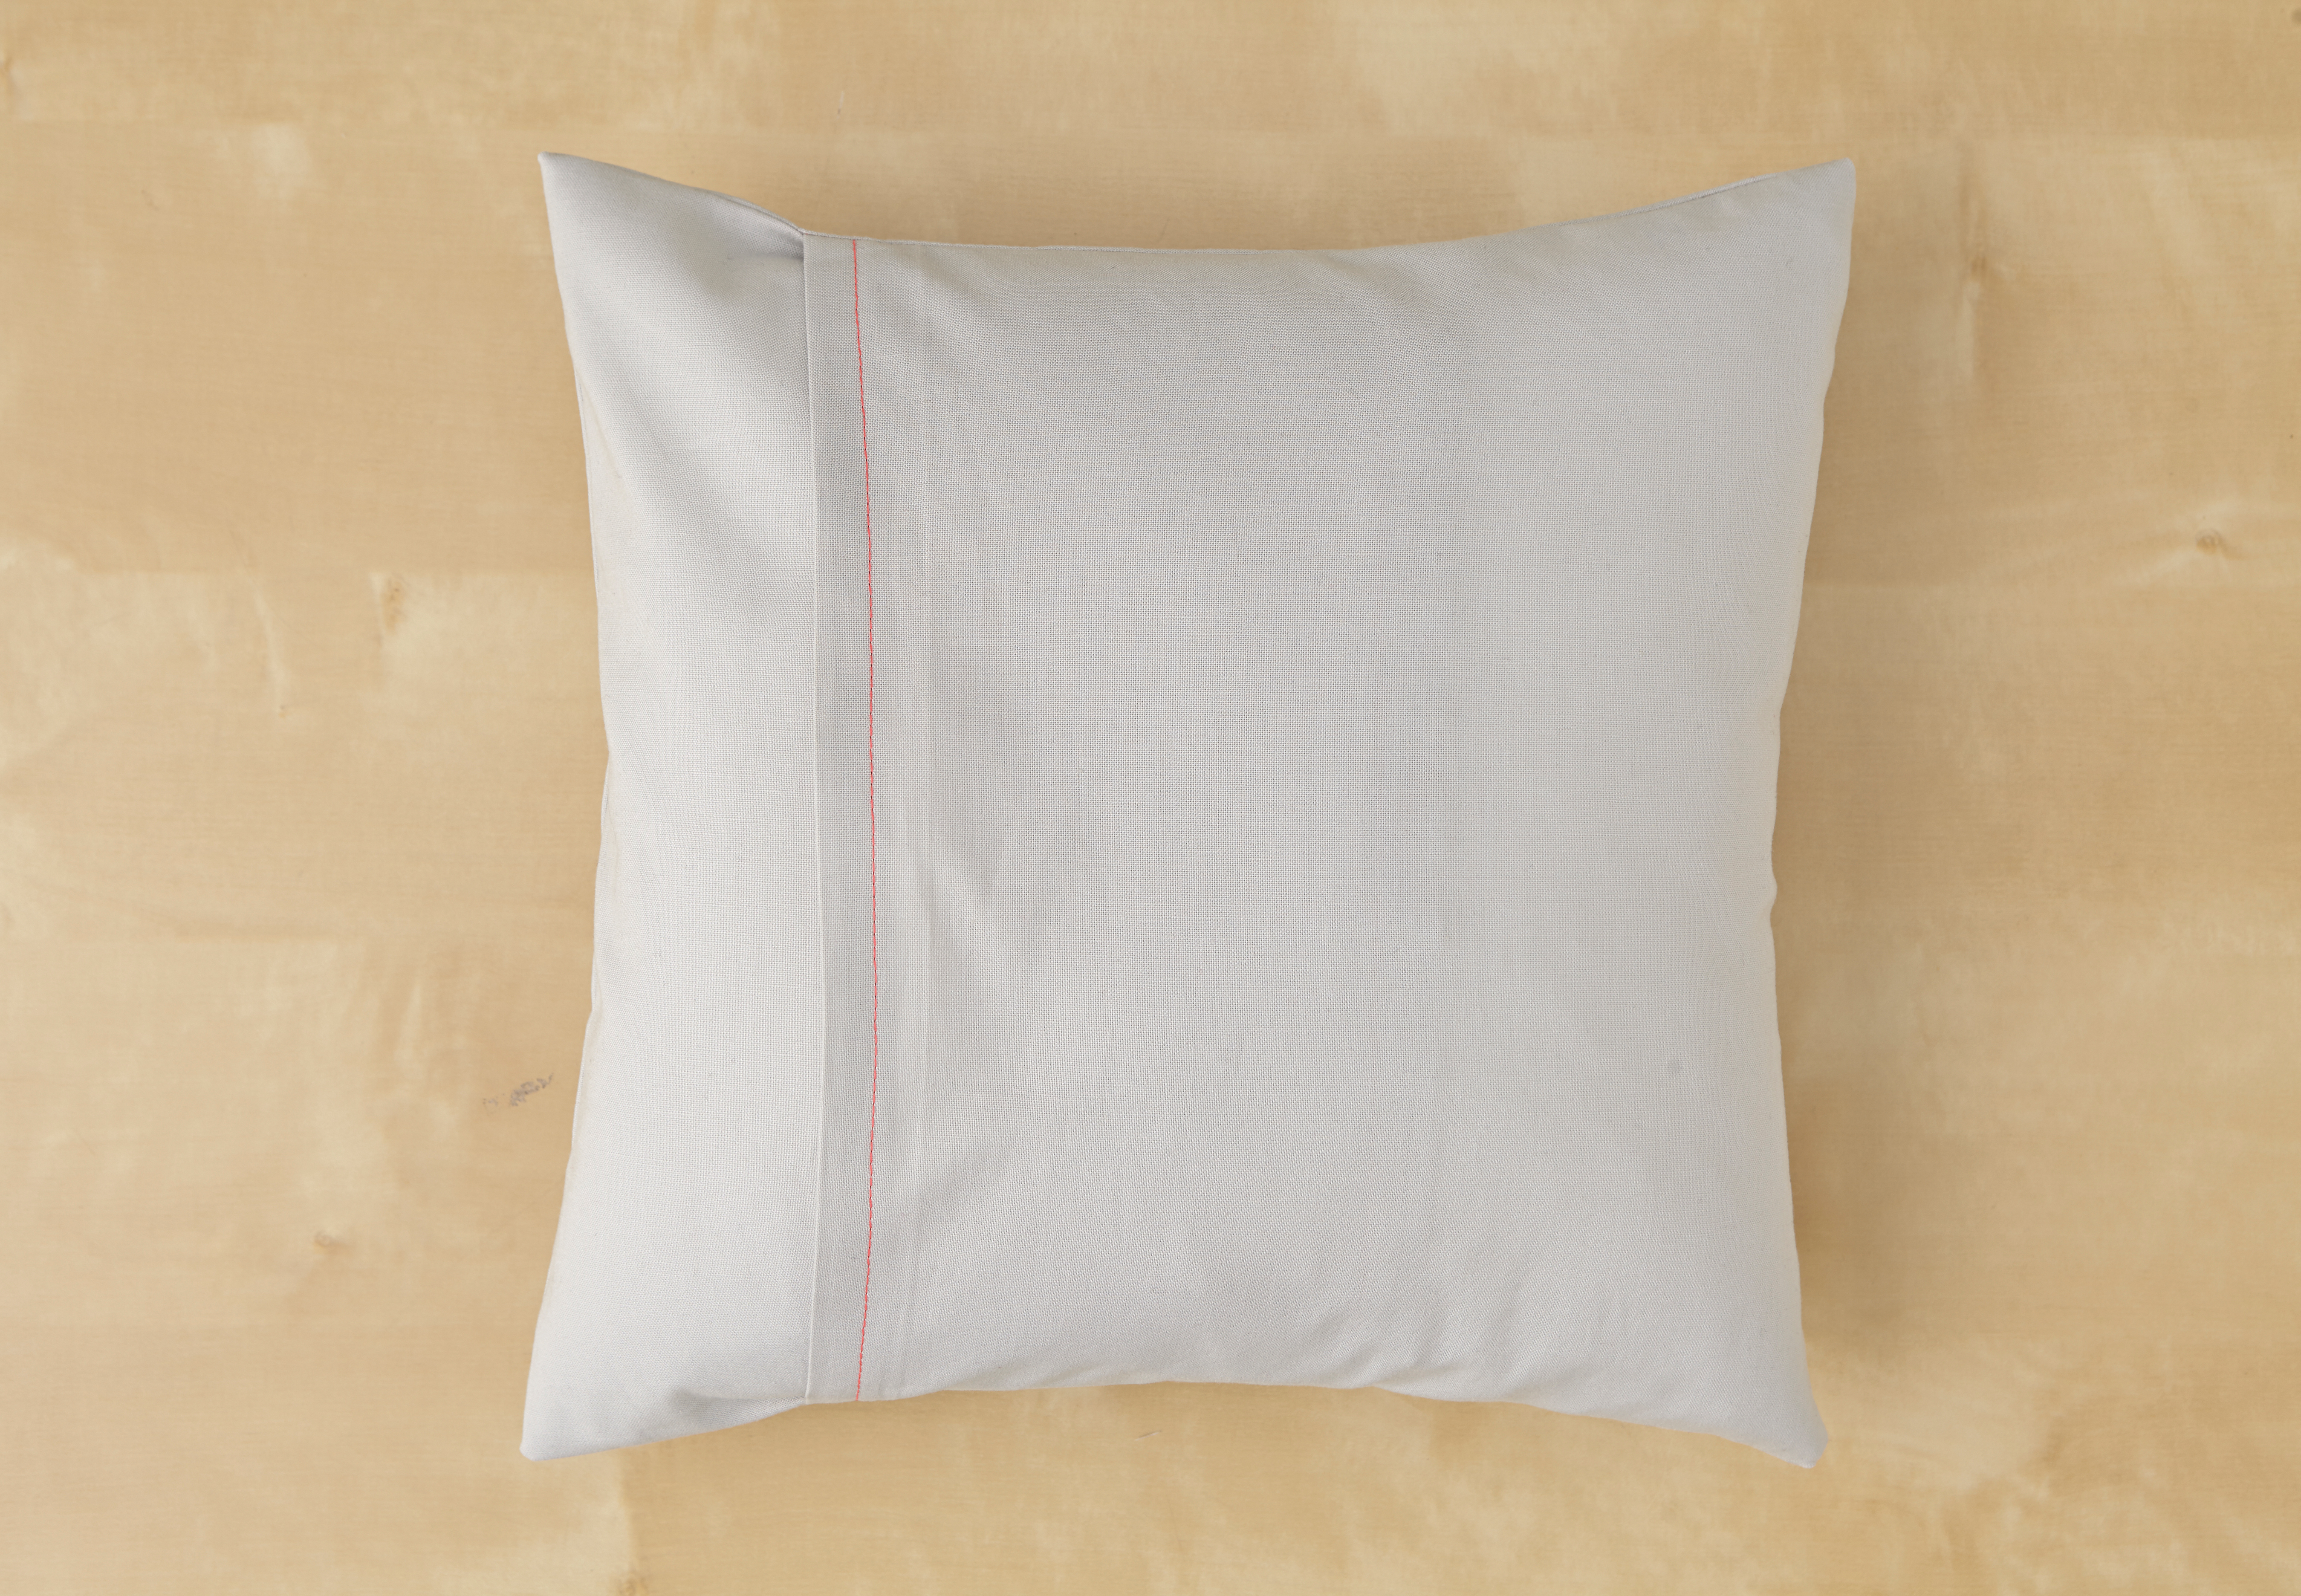
The ease of an envelope cushion means you can run up a new one (or two) in almost no time at all! The back of the cushion is made up of two pieces of fabric that overlap to make an envelope shape, so there are no tricky zips, buttons or any other fastenings to worry about.
When shopping for fabric for your envelope cushion, try to avoid any fabric that’s too heavy or stiff – it’s best to use a fabric that has a little bit of natural stretch so that you can easily insert and remove the cushion pad from the envelope opening at the back.
You will need
- One piece cotton fabric: 32x32cm for cushion front
- Two pieces of cotton fabric: 32x25cm for cushion back
- Cushion pad: 30x30cm
Step 2
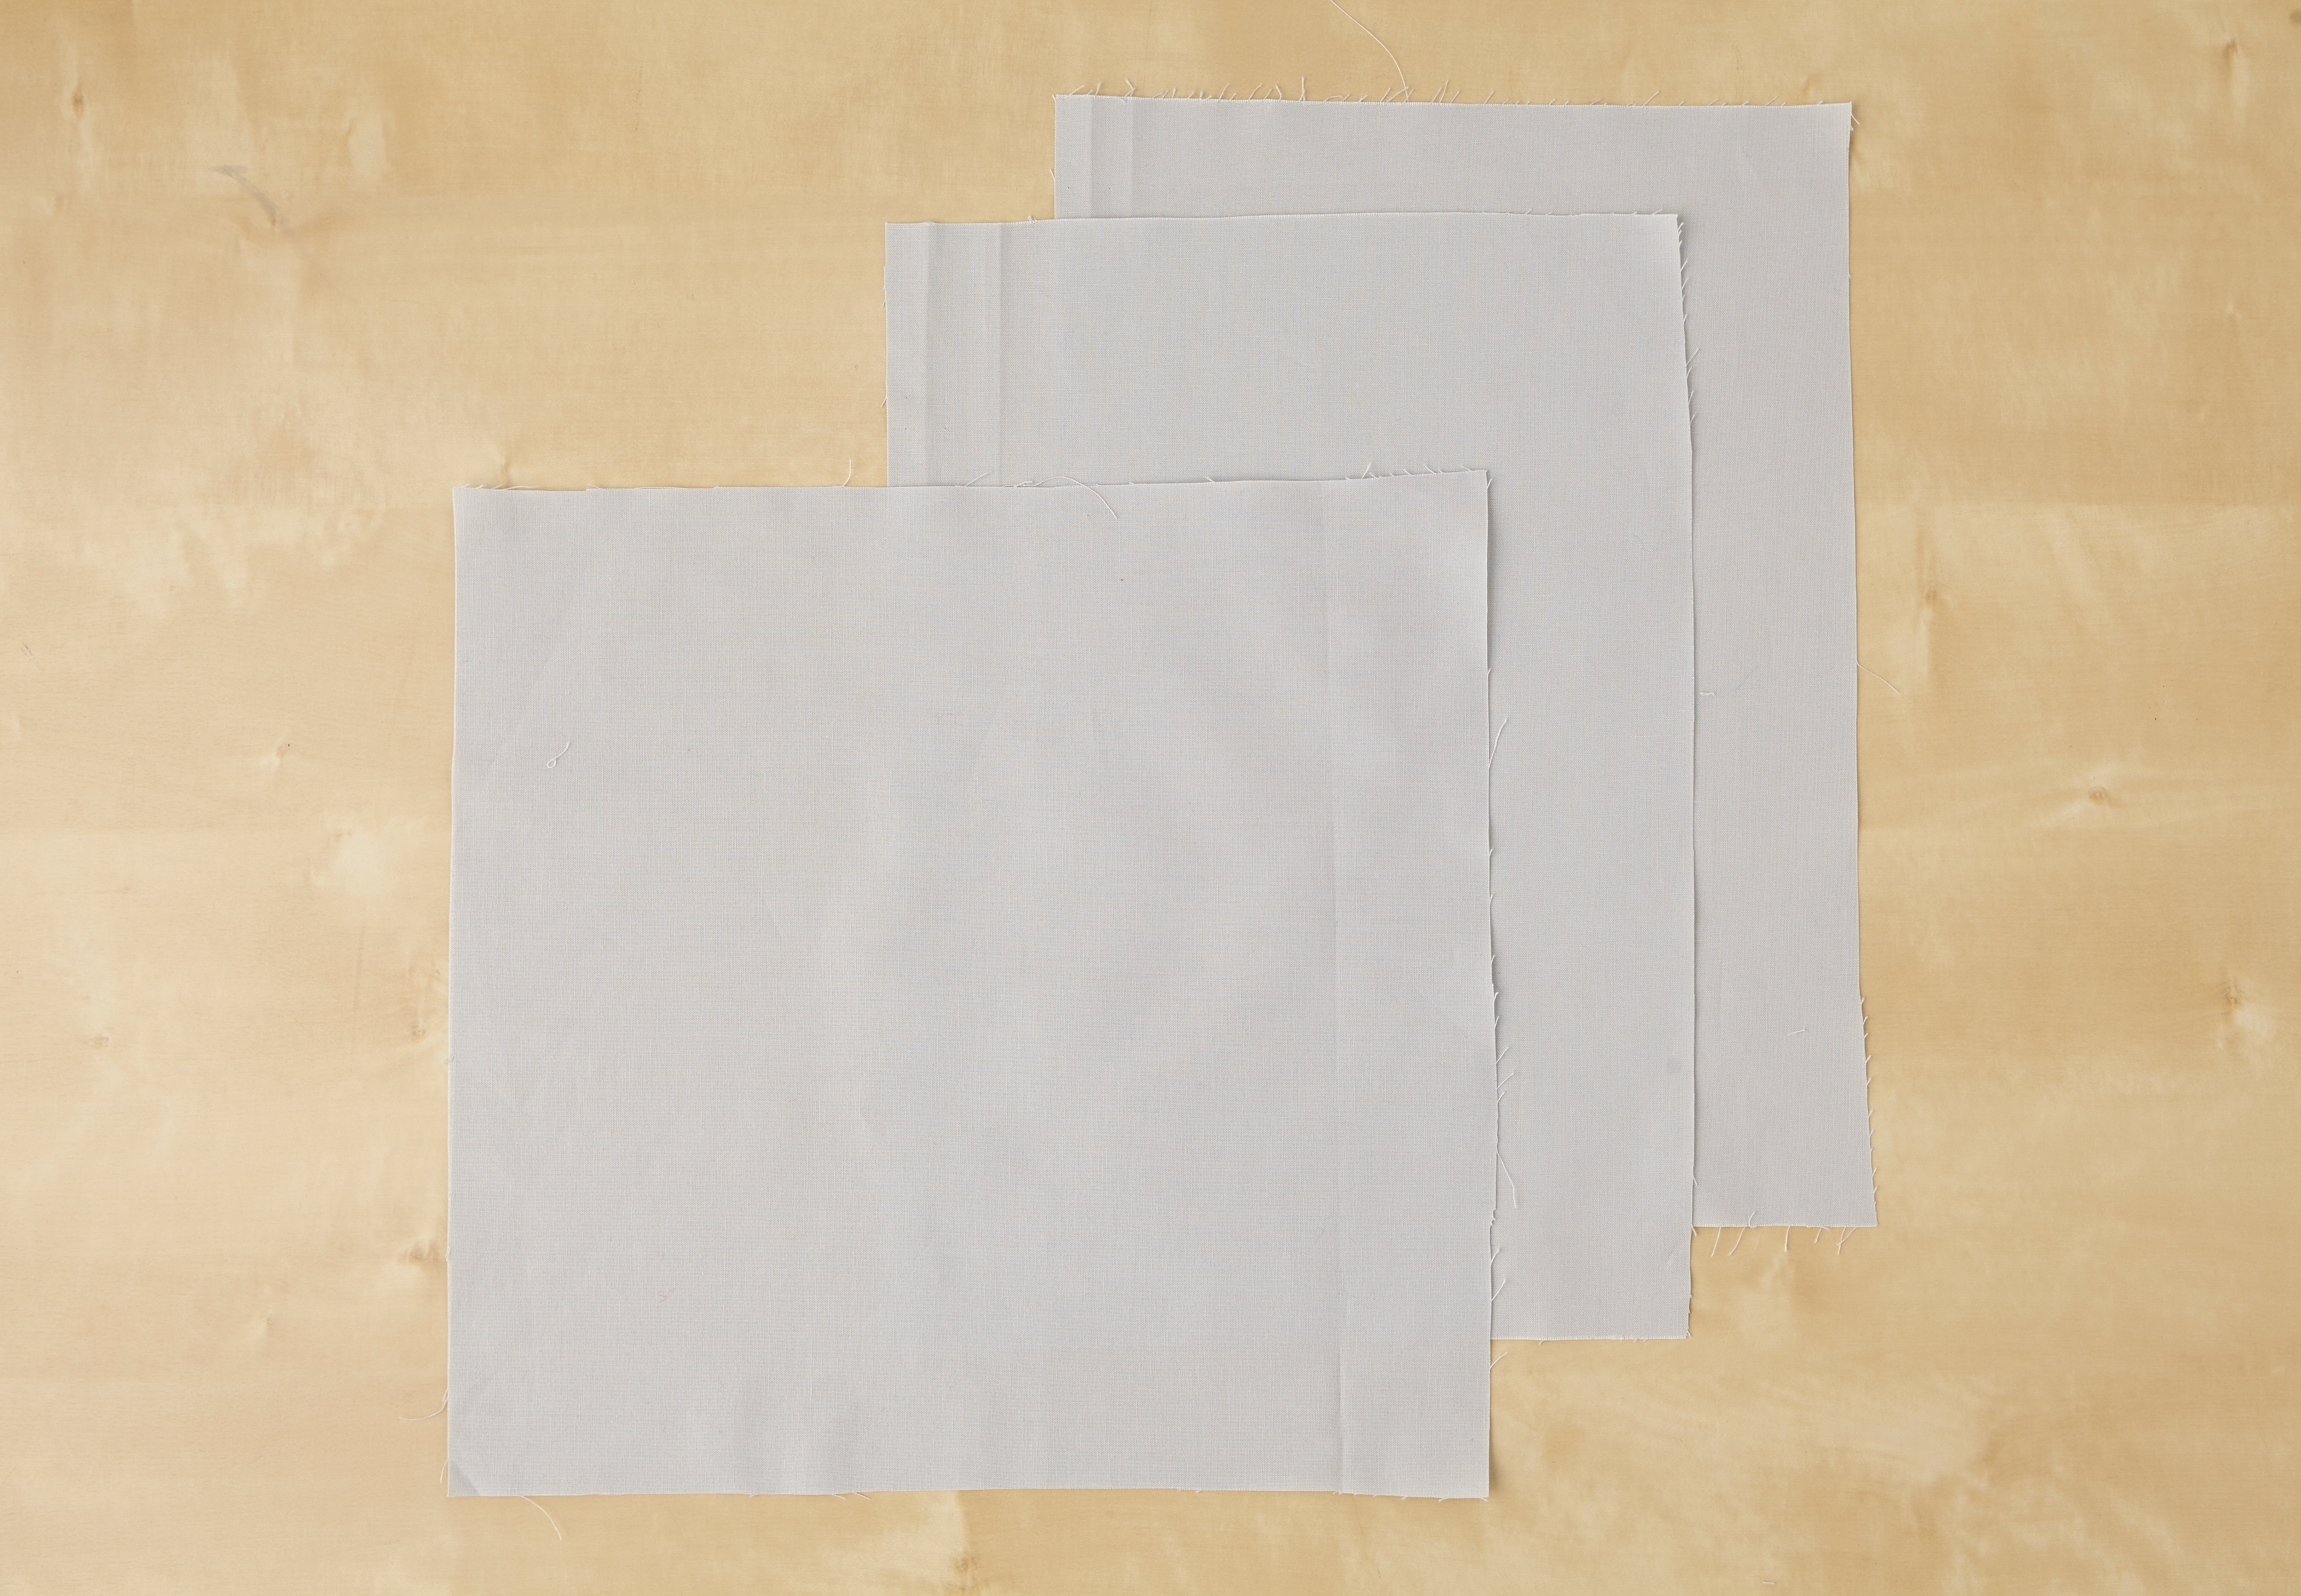
Cut your front piece of fabric to measure 32x32cm. This measurement includes a 2cm seam allowance on each side so the cover can accommodate a 30x30cm (12x12in) cushion pad. The back of the cushion will be made up of two fabric pieces, so cut two pieces out of your back fabric, each measuring 32x25cm. These measurements also include a 2cm seam allowance on each side. You could use a different fabric design for the front and back.
Step 3
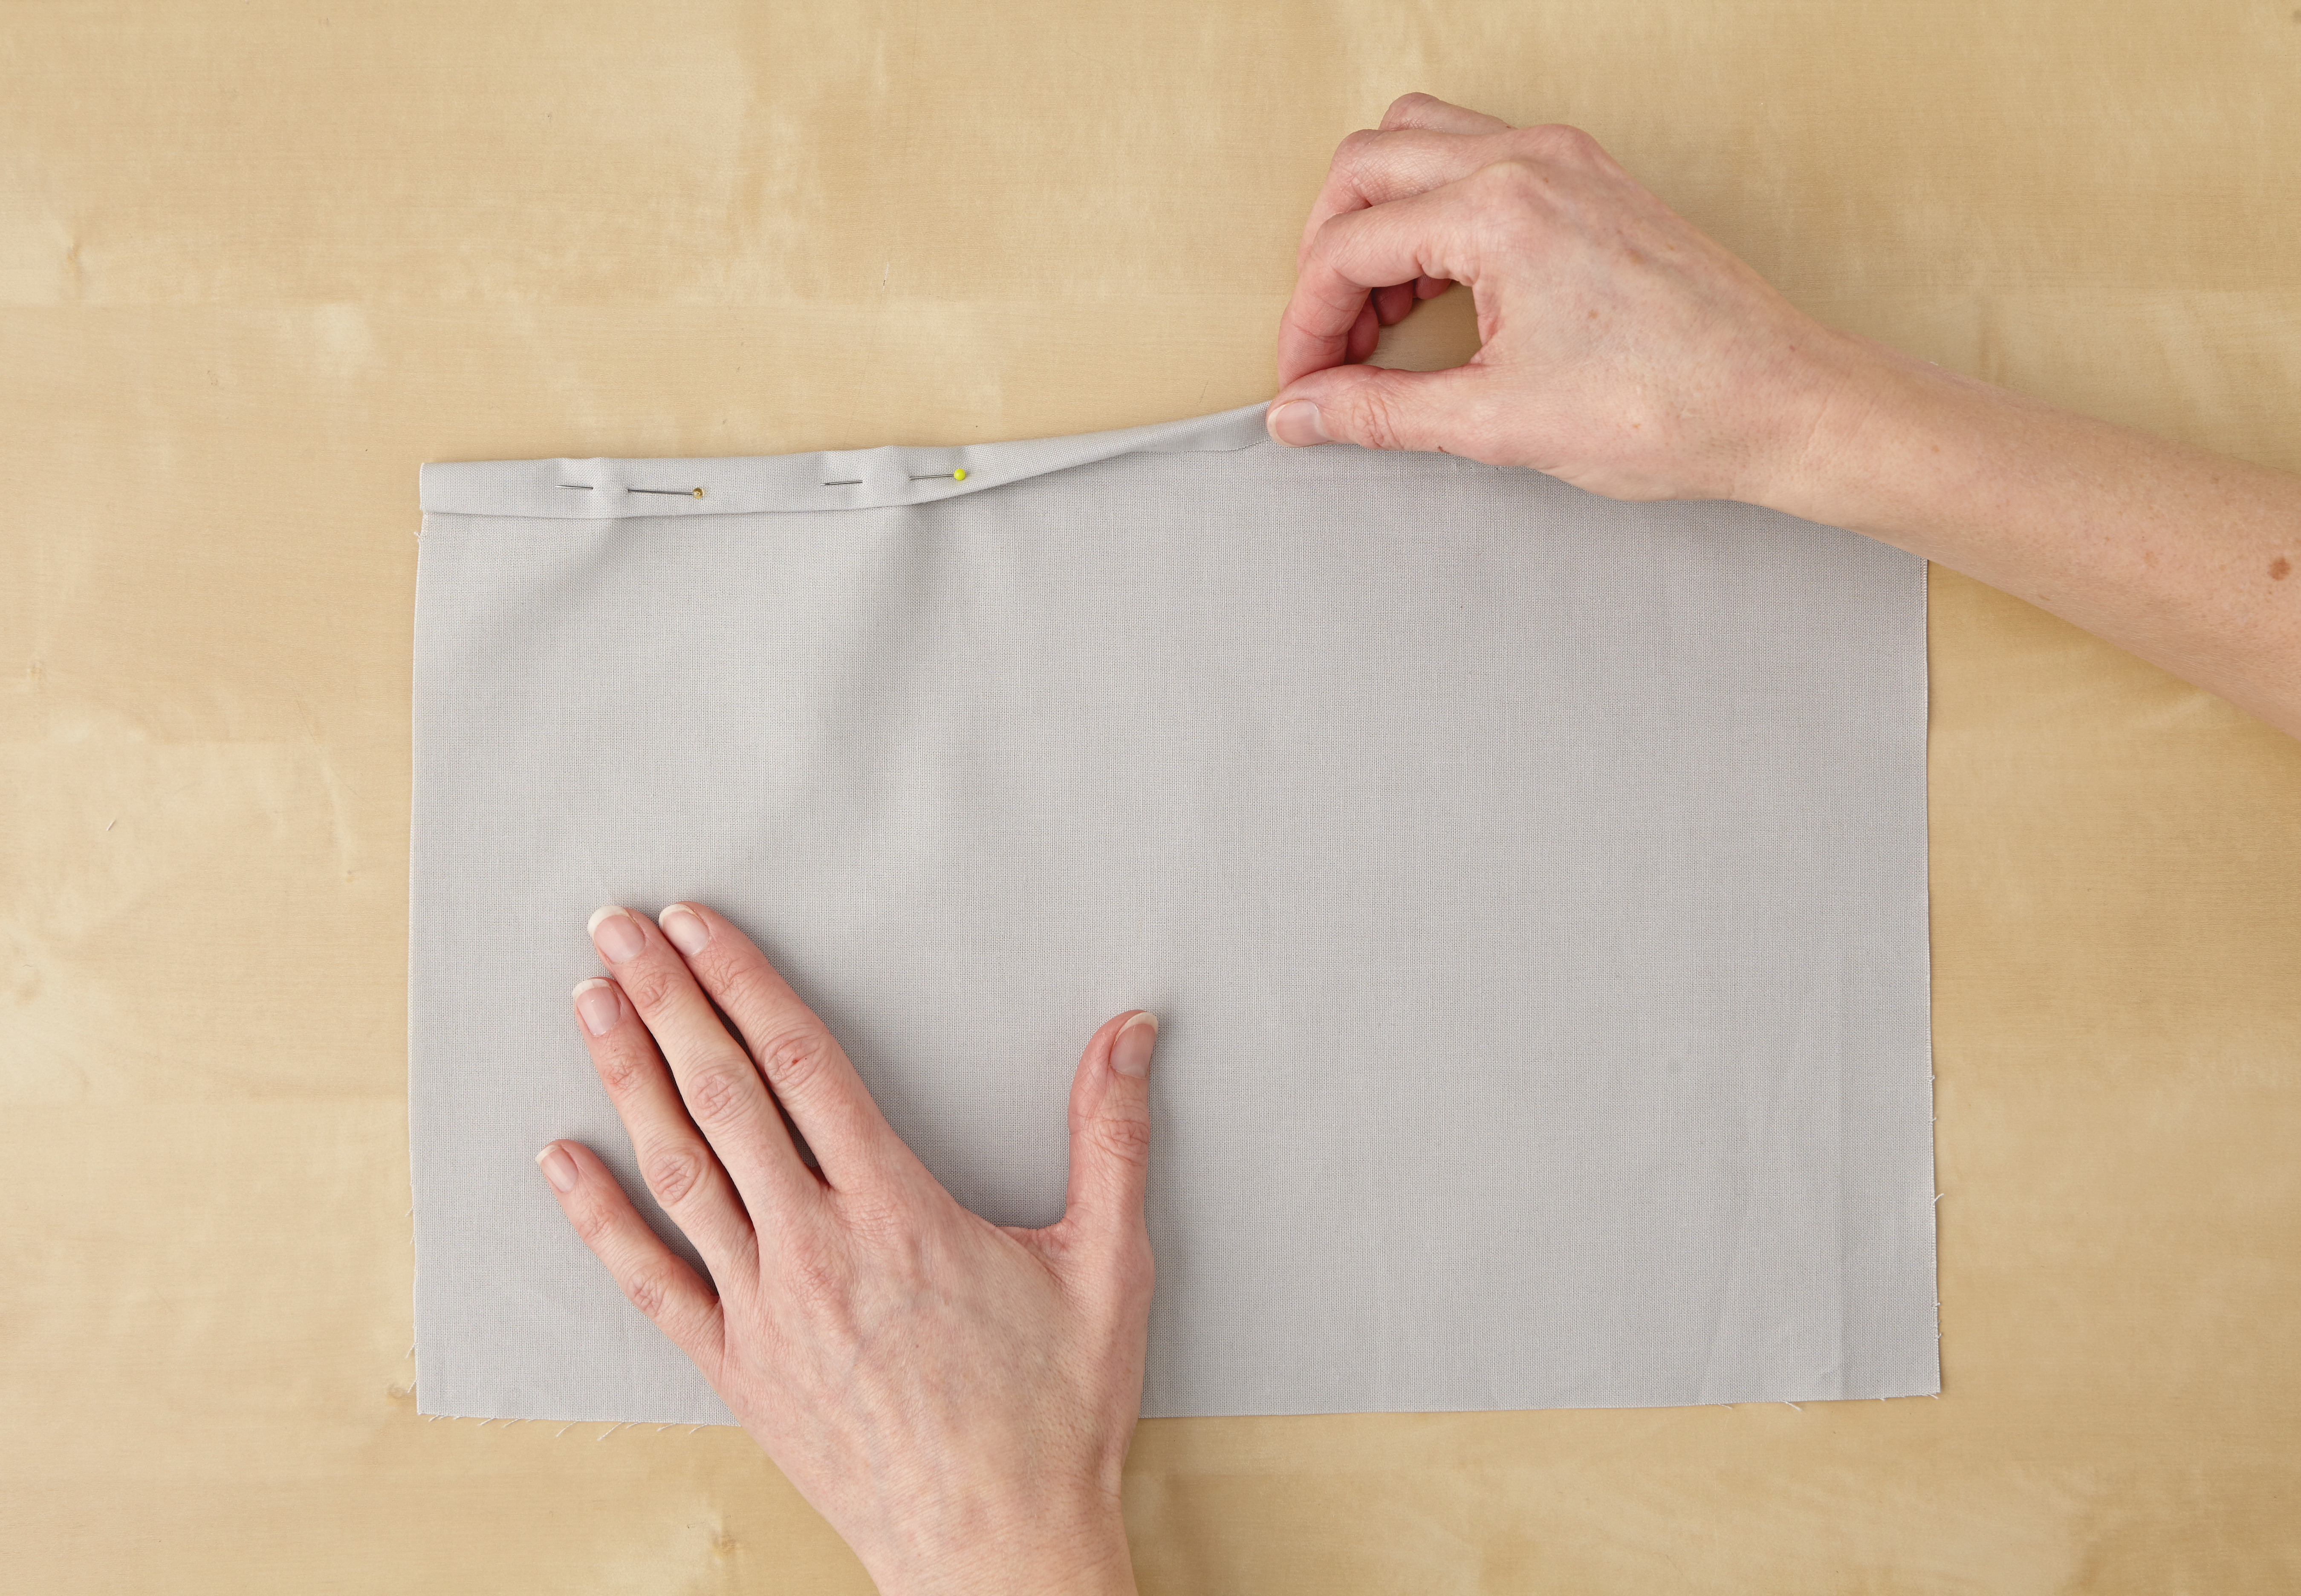
Take one of the back pieces and hem one of the long sides of the fabric. To do this, fold the fabric towards the wrong side by 1cm. Then fold the fabric towards the wrong side (WS) by 1cm again and pin in place. This is called a double fold hem. Give this a quick press with an iron to help to keep the folds in place. Repeat this on the other back piece.
Step 4
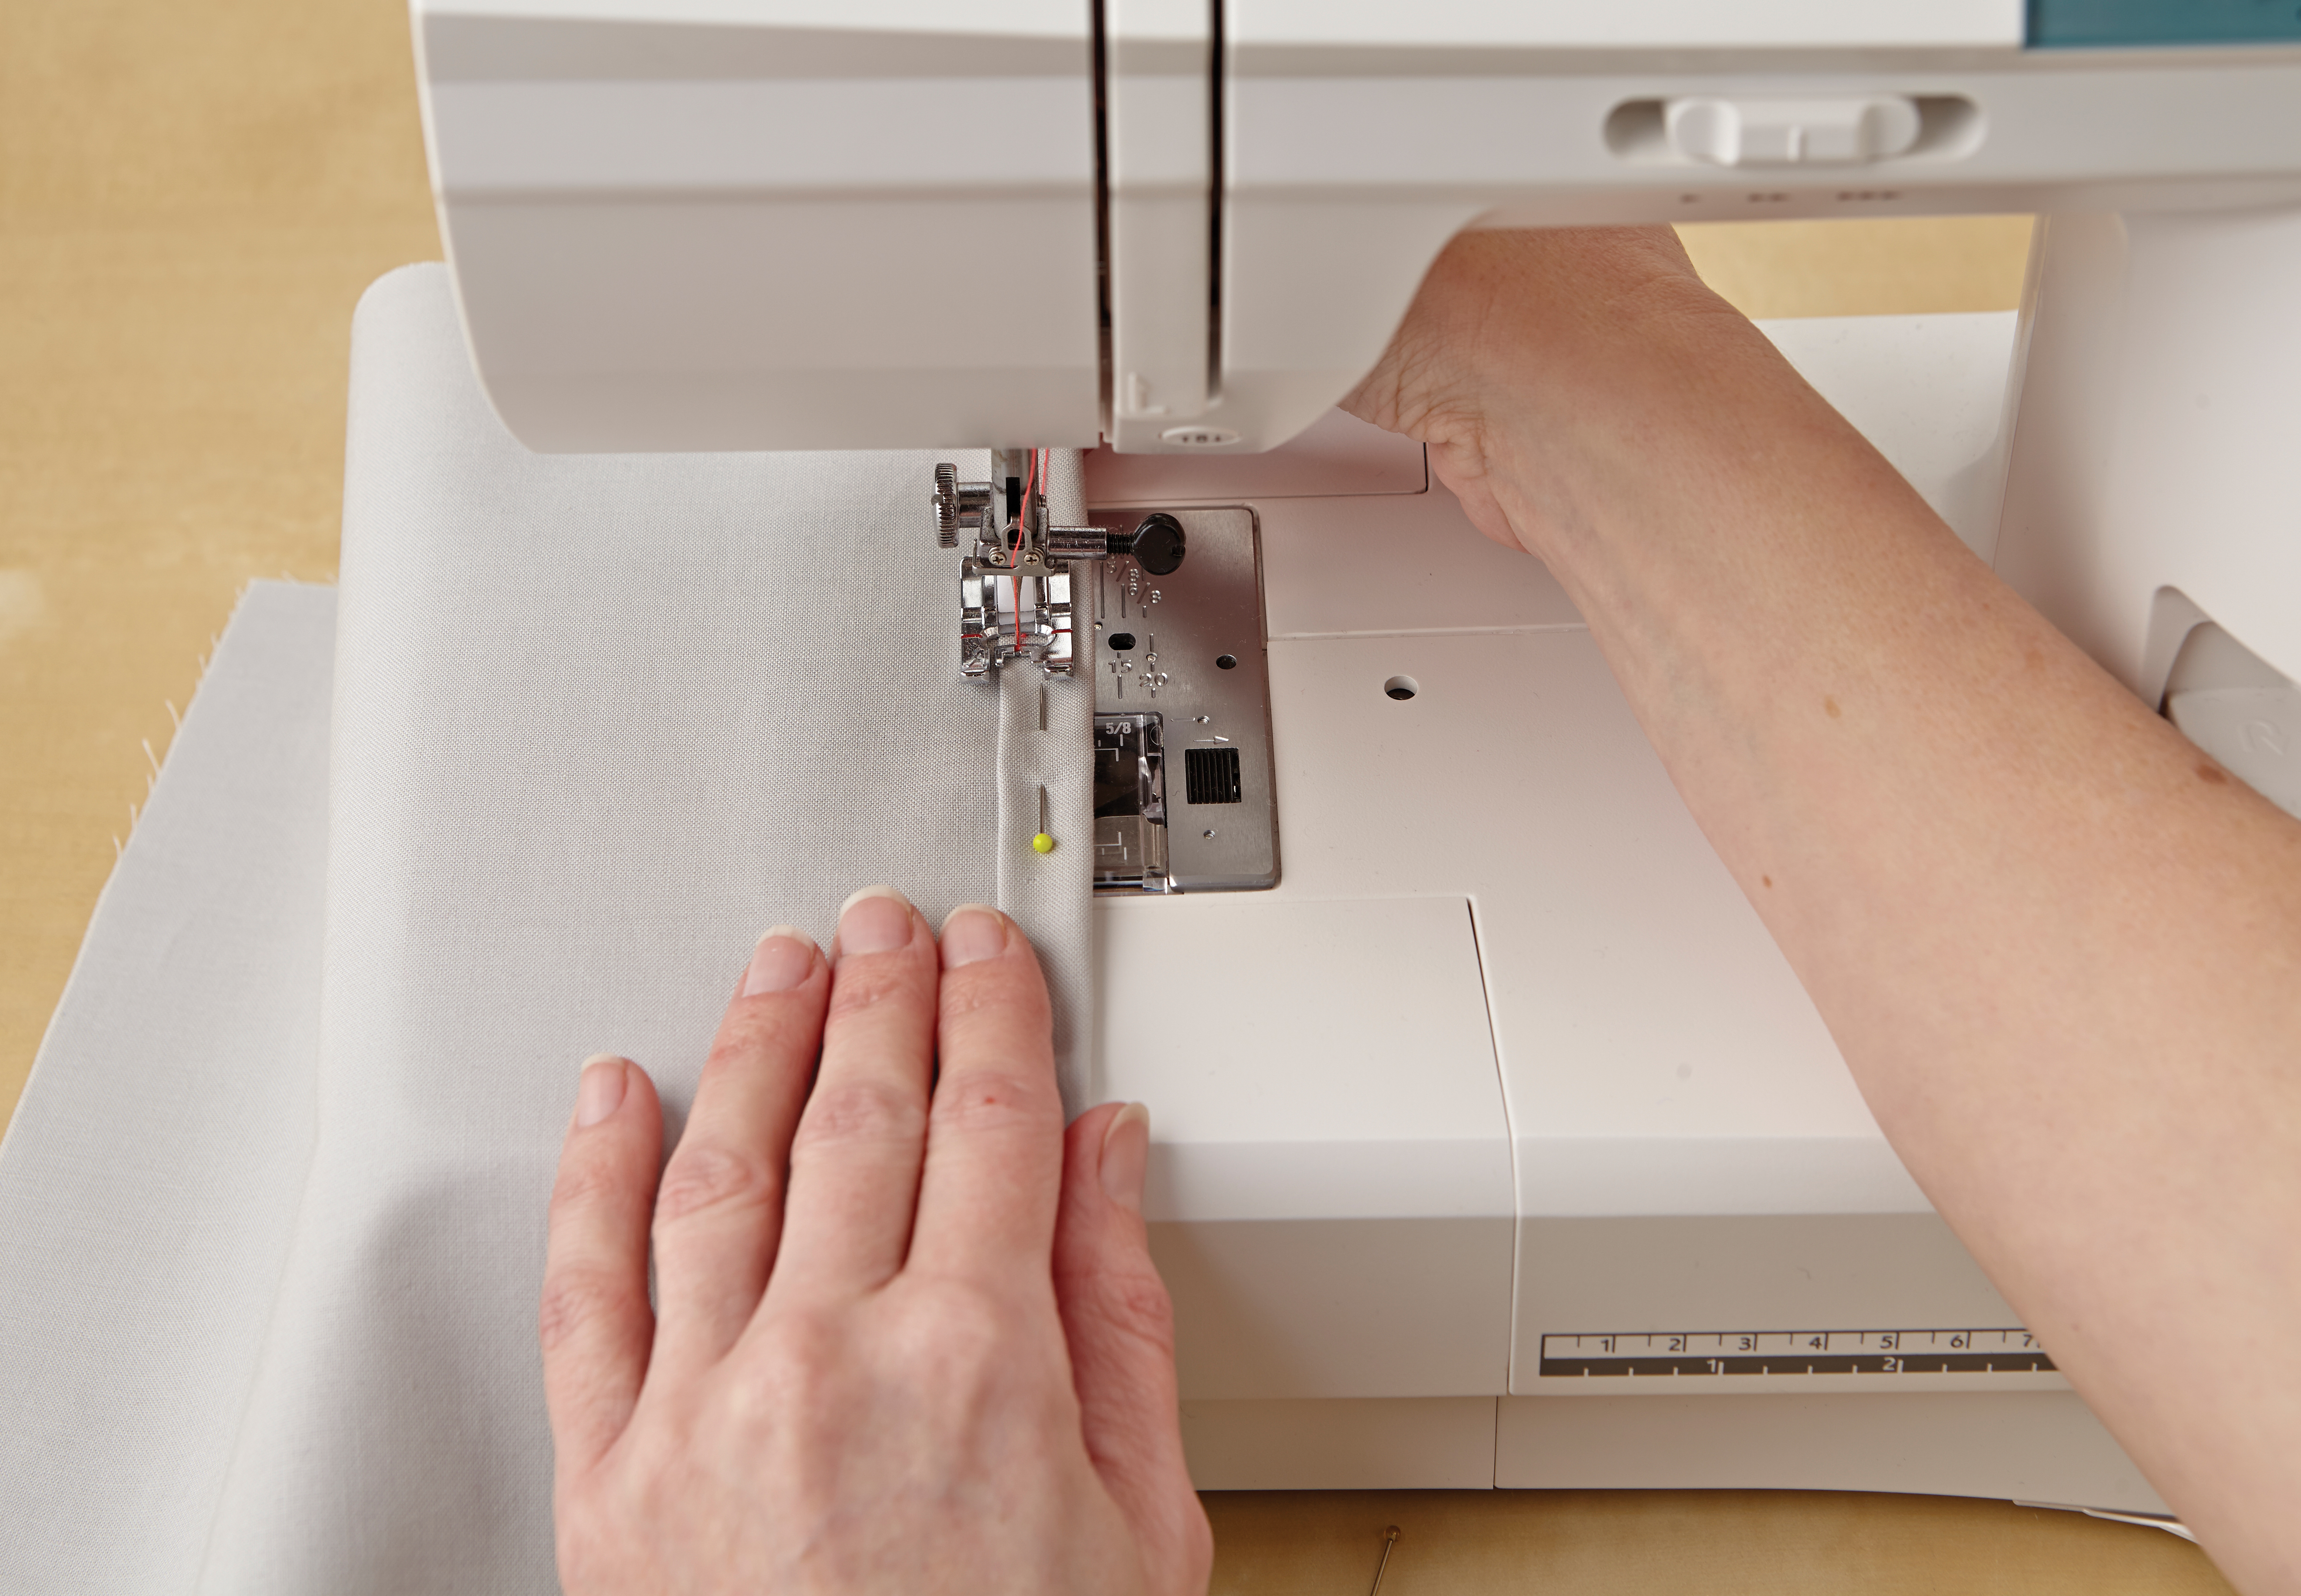
Now machine stitch this hem in place. To do this, set your sewing machine to a small stitch length and thread with a co-ordinating thread – we’ve used a contrasting thread so you can see the lines more easily. Stitch along the length, close to the first fold of the double fold. Make a few stitches, then use the reverse stitch on your machine to sew back over these stitches and secure them. Repeat this process on your second back piece. Remove pins.
Step 5
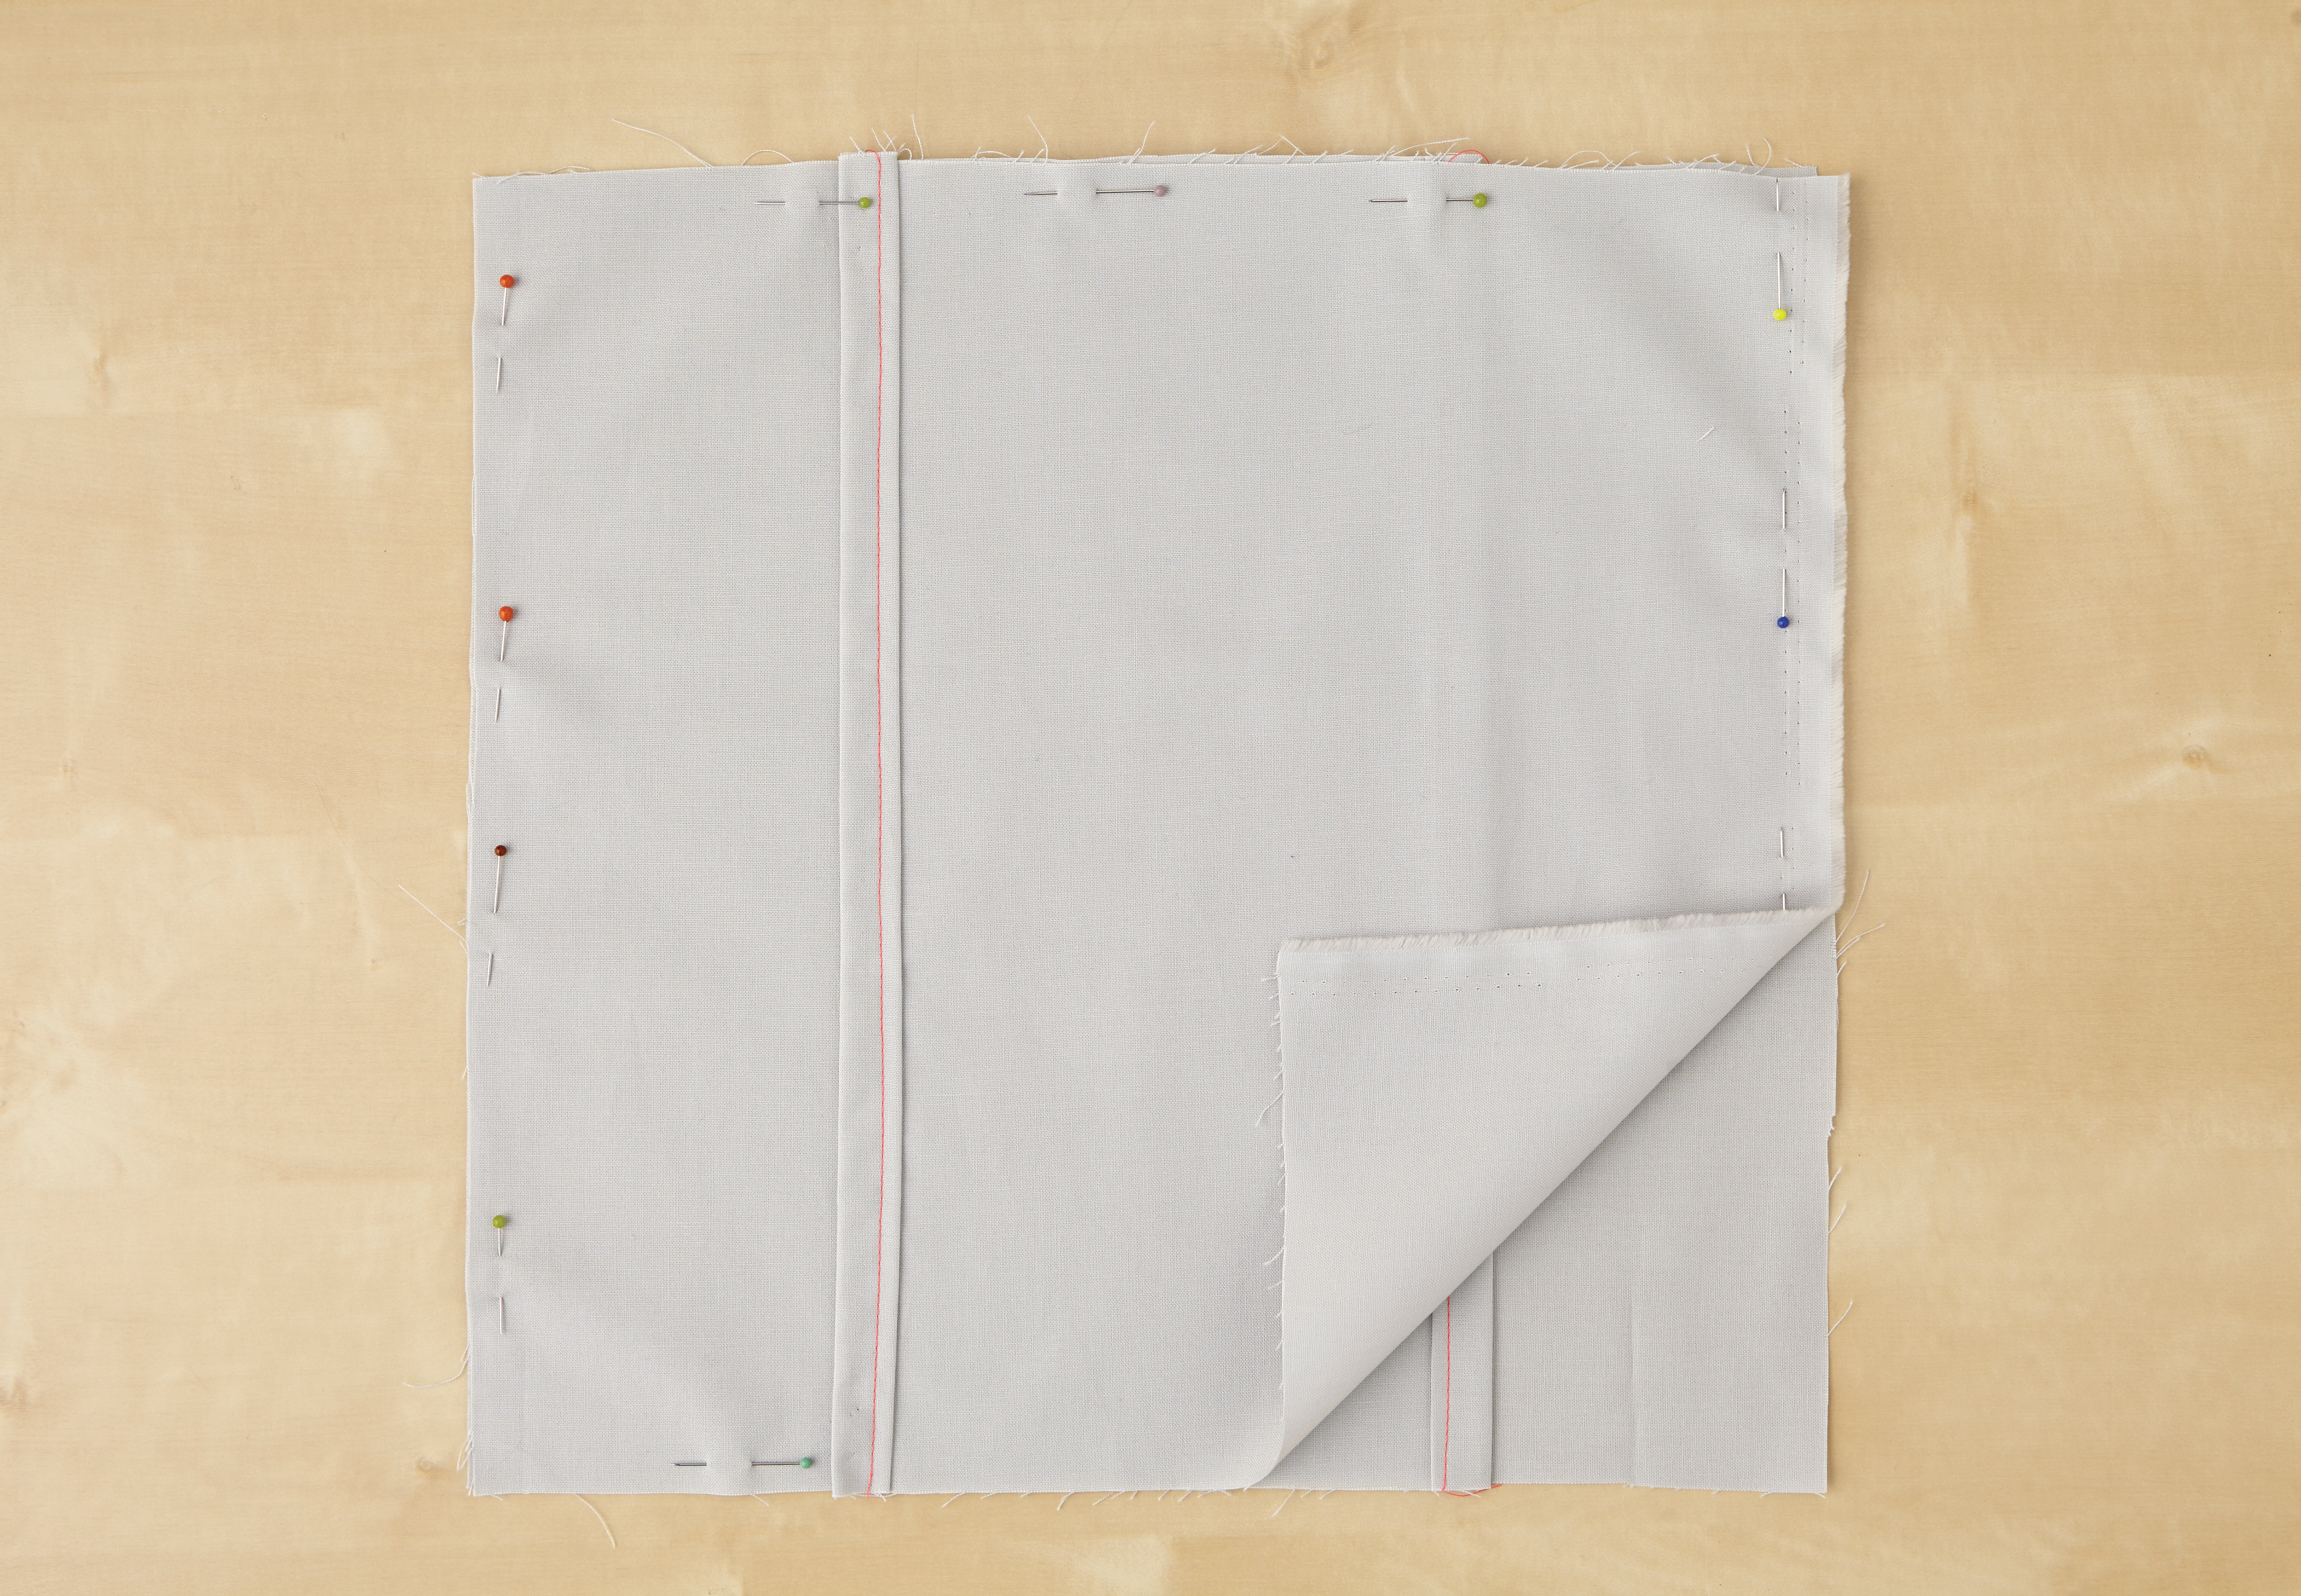
Place your front piece on your work surface, with RS facing up. Now place one of your back pieces on top with RS facing down – you should have the stitched fold facing you. Position the hemmed side in the centre and the raw edges on the outside. Place the other back piece on top with RS down, and again, the hemmed side in the centre and the raw edges on the outside. Make sure all raw edges are even and pin around all four edges.
Step 6
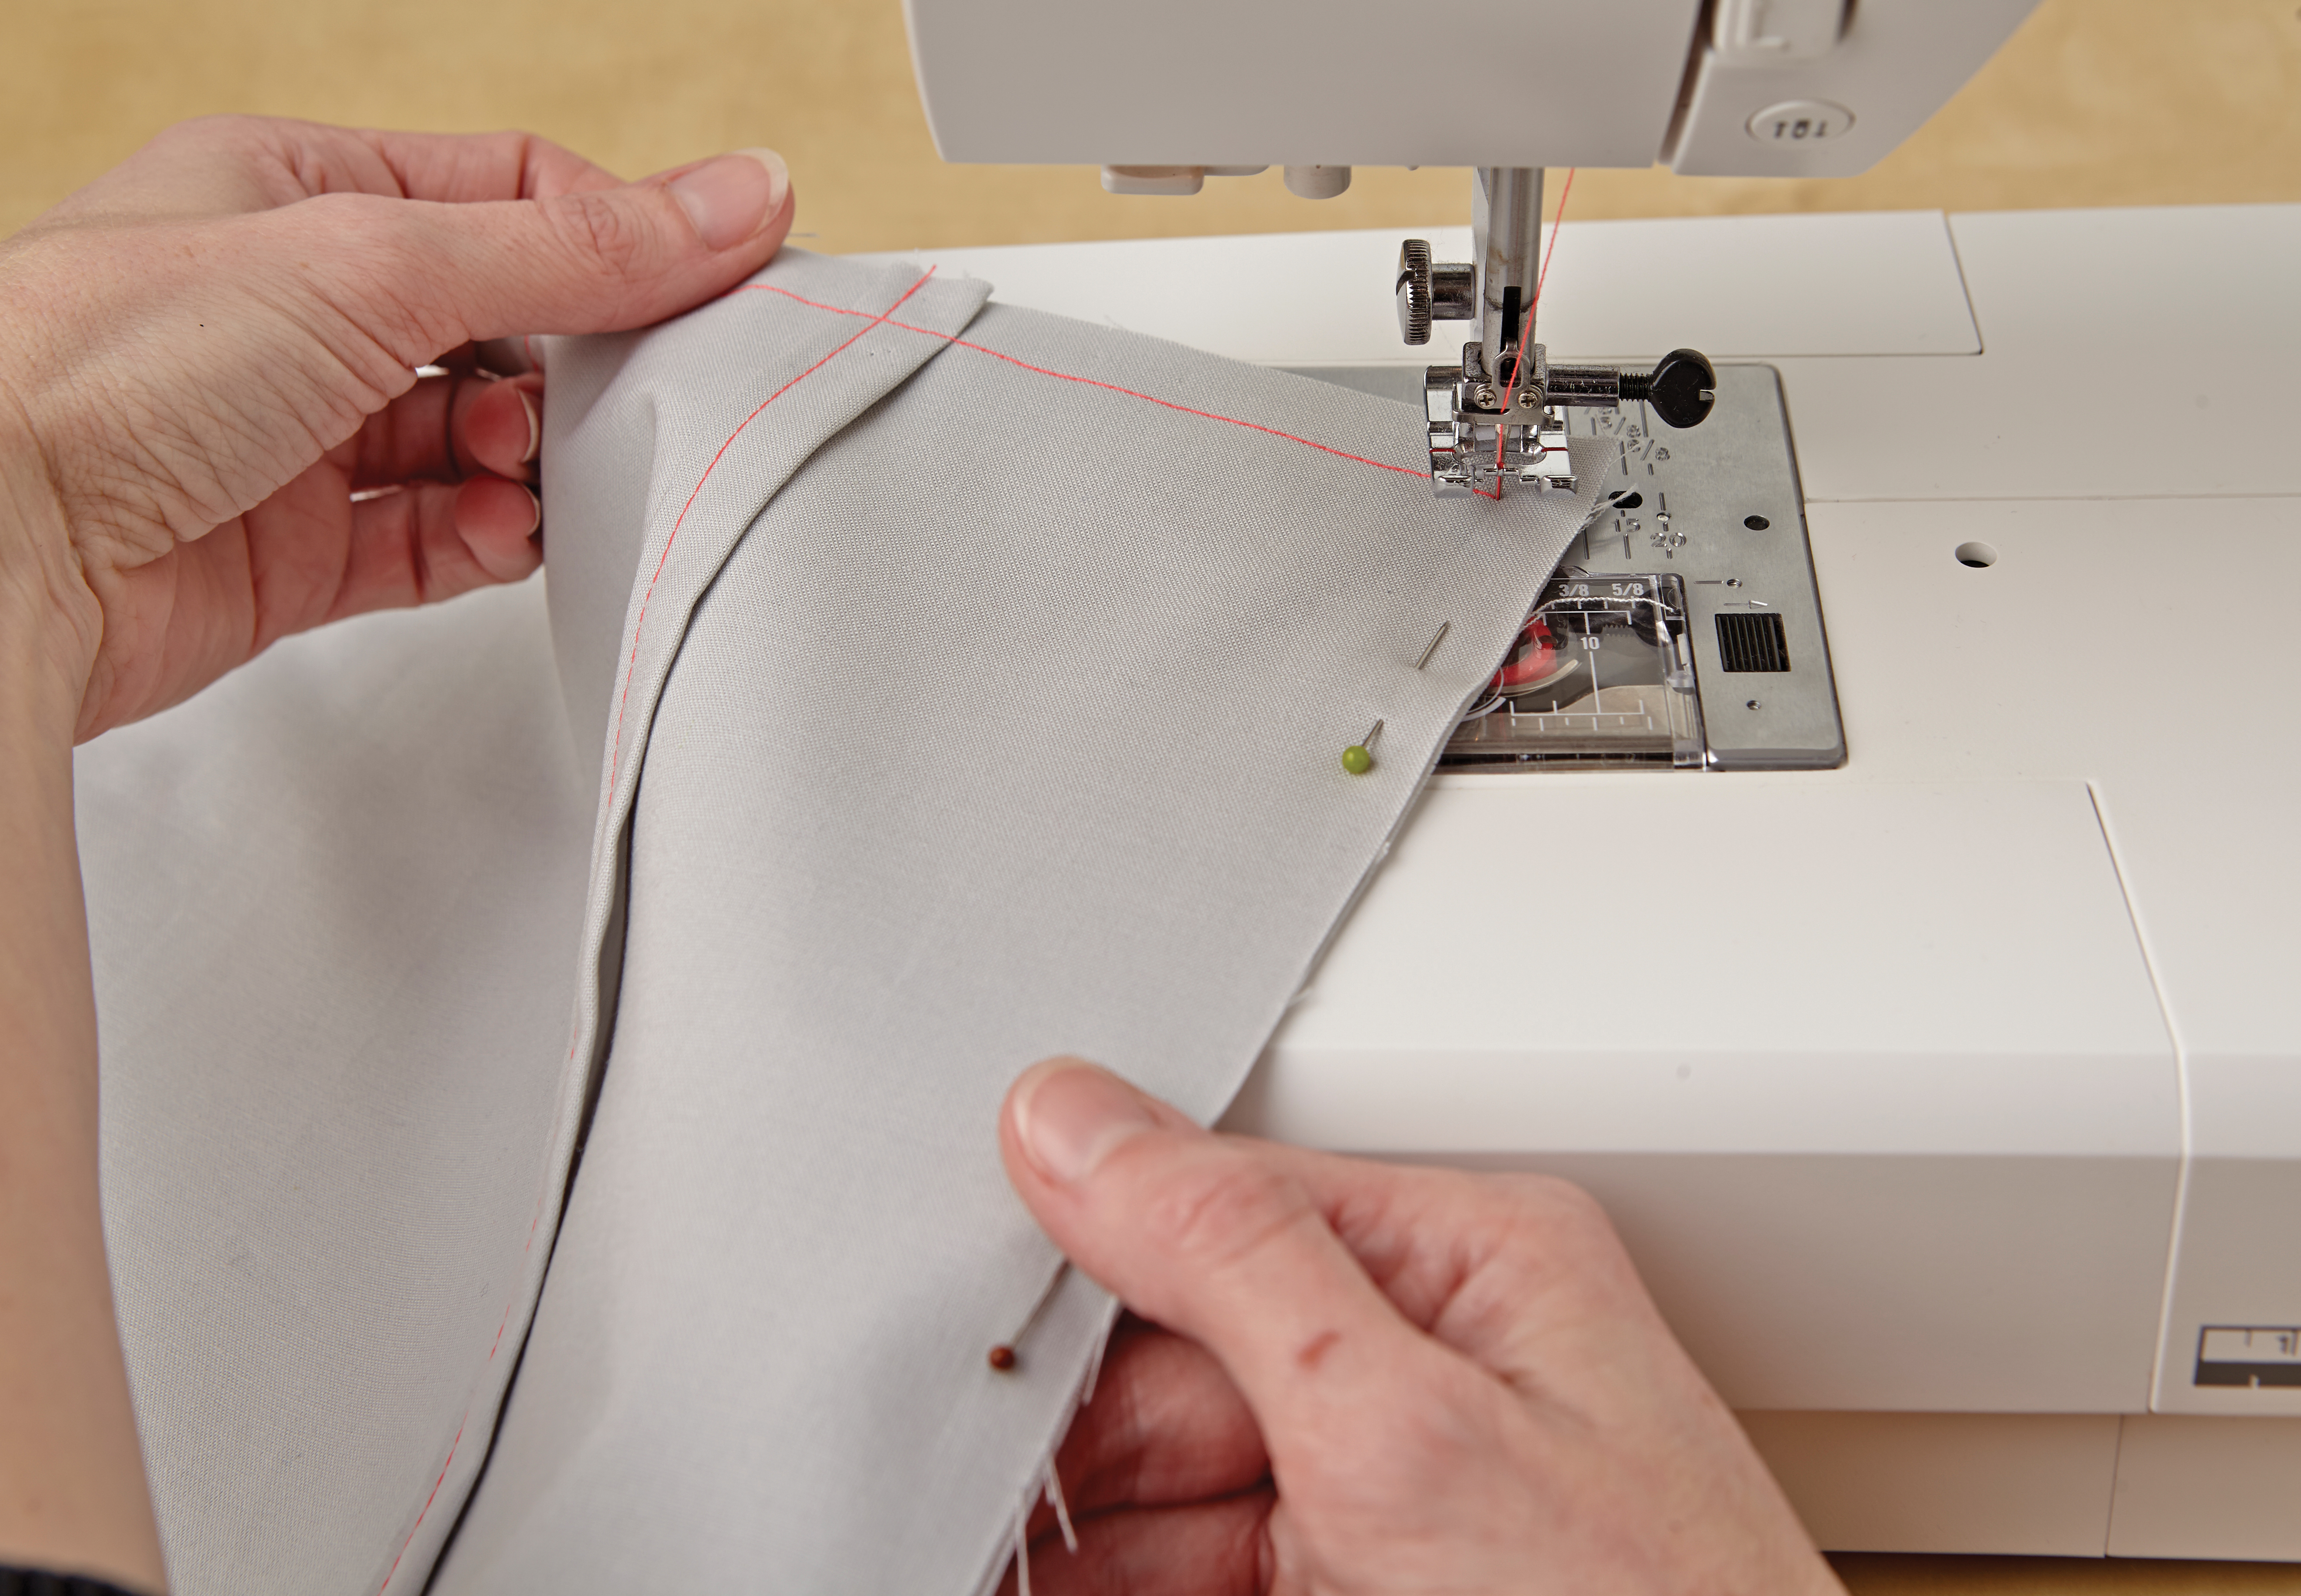
Now to machine stitch the layers together. Start stitching at one corner, 2cm from the raw edge of the fabric. When you reach the next corner, lower your needle into the fabric and lift the presser foot, then rotate your fabric. Lower the foot and continue sewing in the new direction. This time, you will be turning the cover through to the RS by using the envelope opening, so you can stitch all the way around all four edges.
Step 7
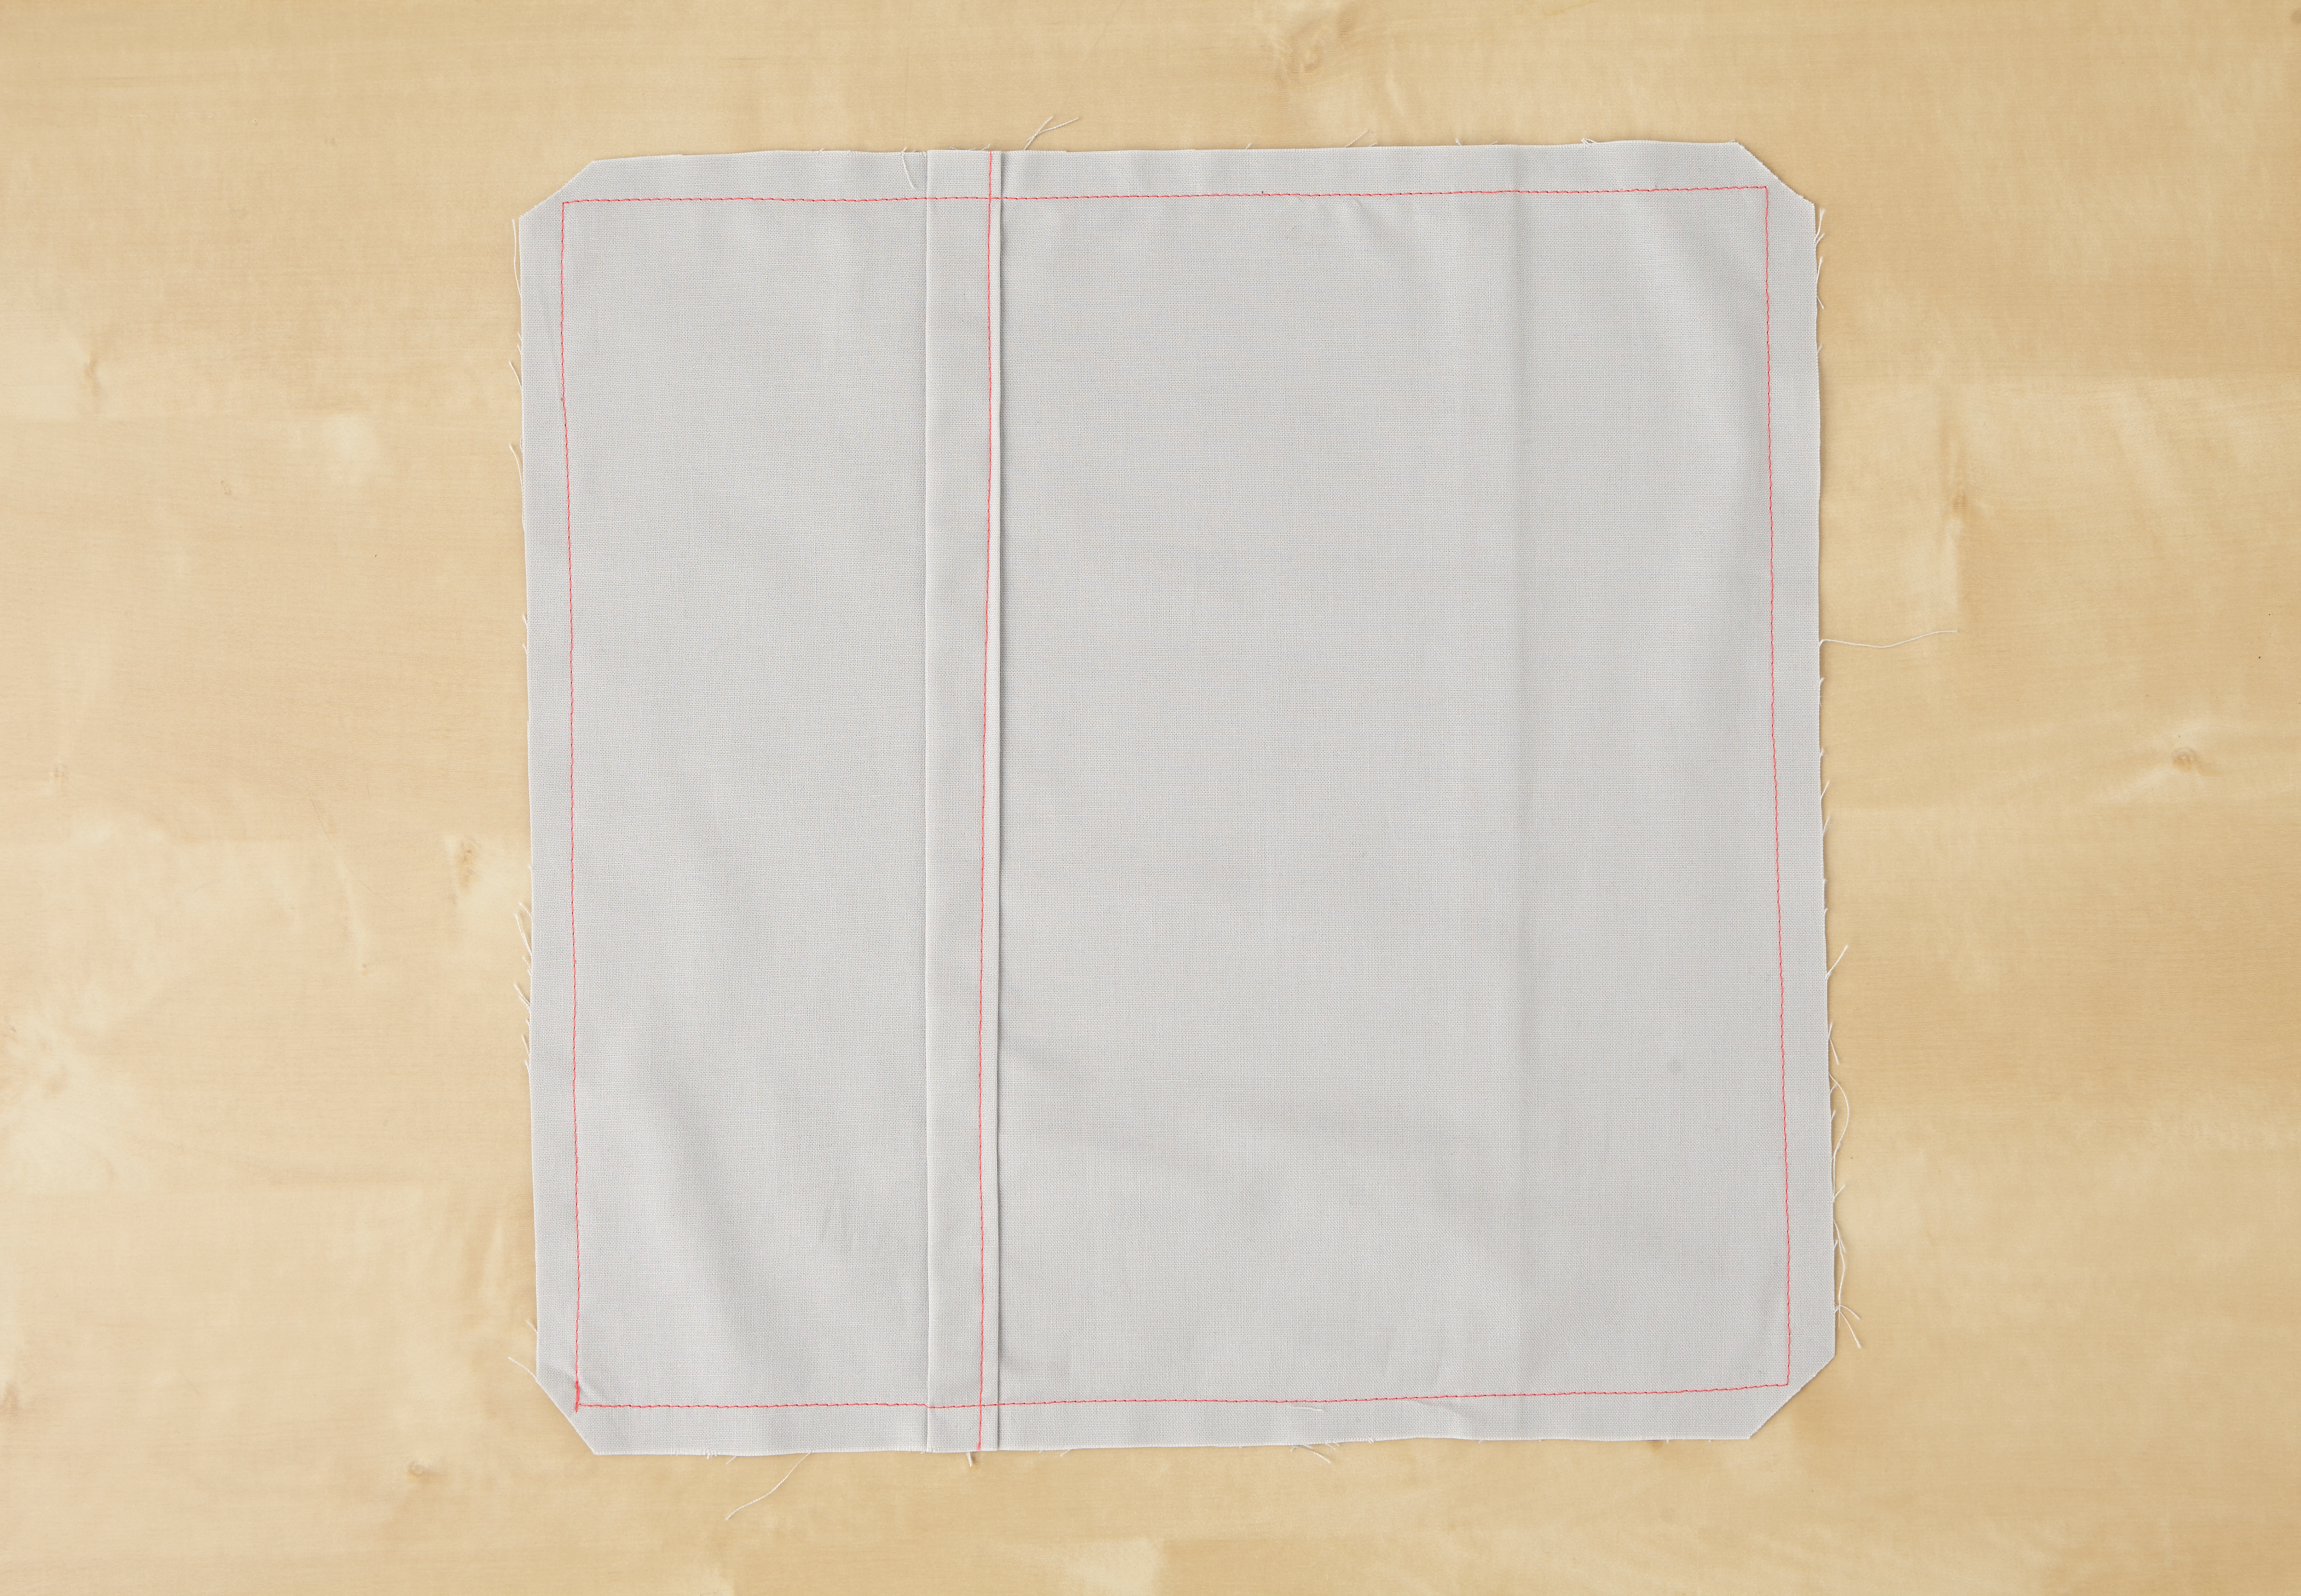
Once you reach the start of your stitch line, sew over the first few stitches to secure. Remove the pins and trim the seam allowance to 1cm along all four sides. Snip off the corners of the seam allowances to help reduce bulk. Turn the cushion cover RS out through the envelope back. Carefully tease out the corners and then iron the seams flat. Now insert your cushion pad to finish!
3. How to make a cushion cover with a button closure
Step 1
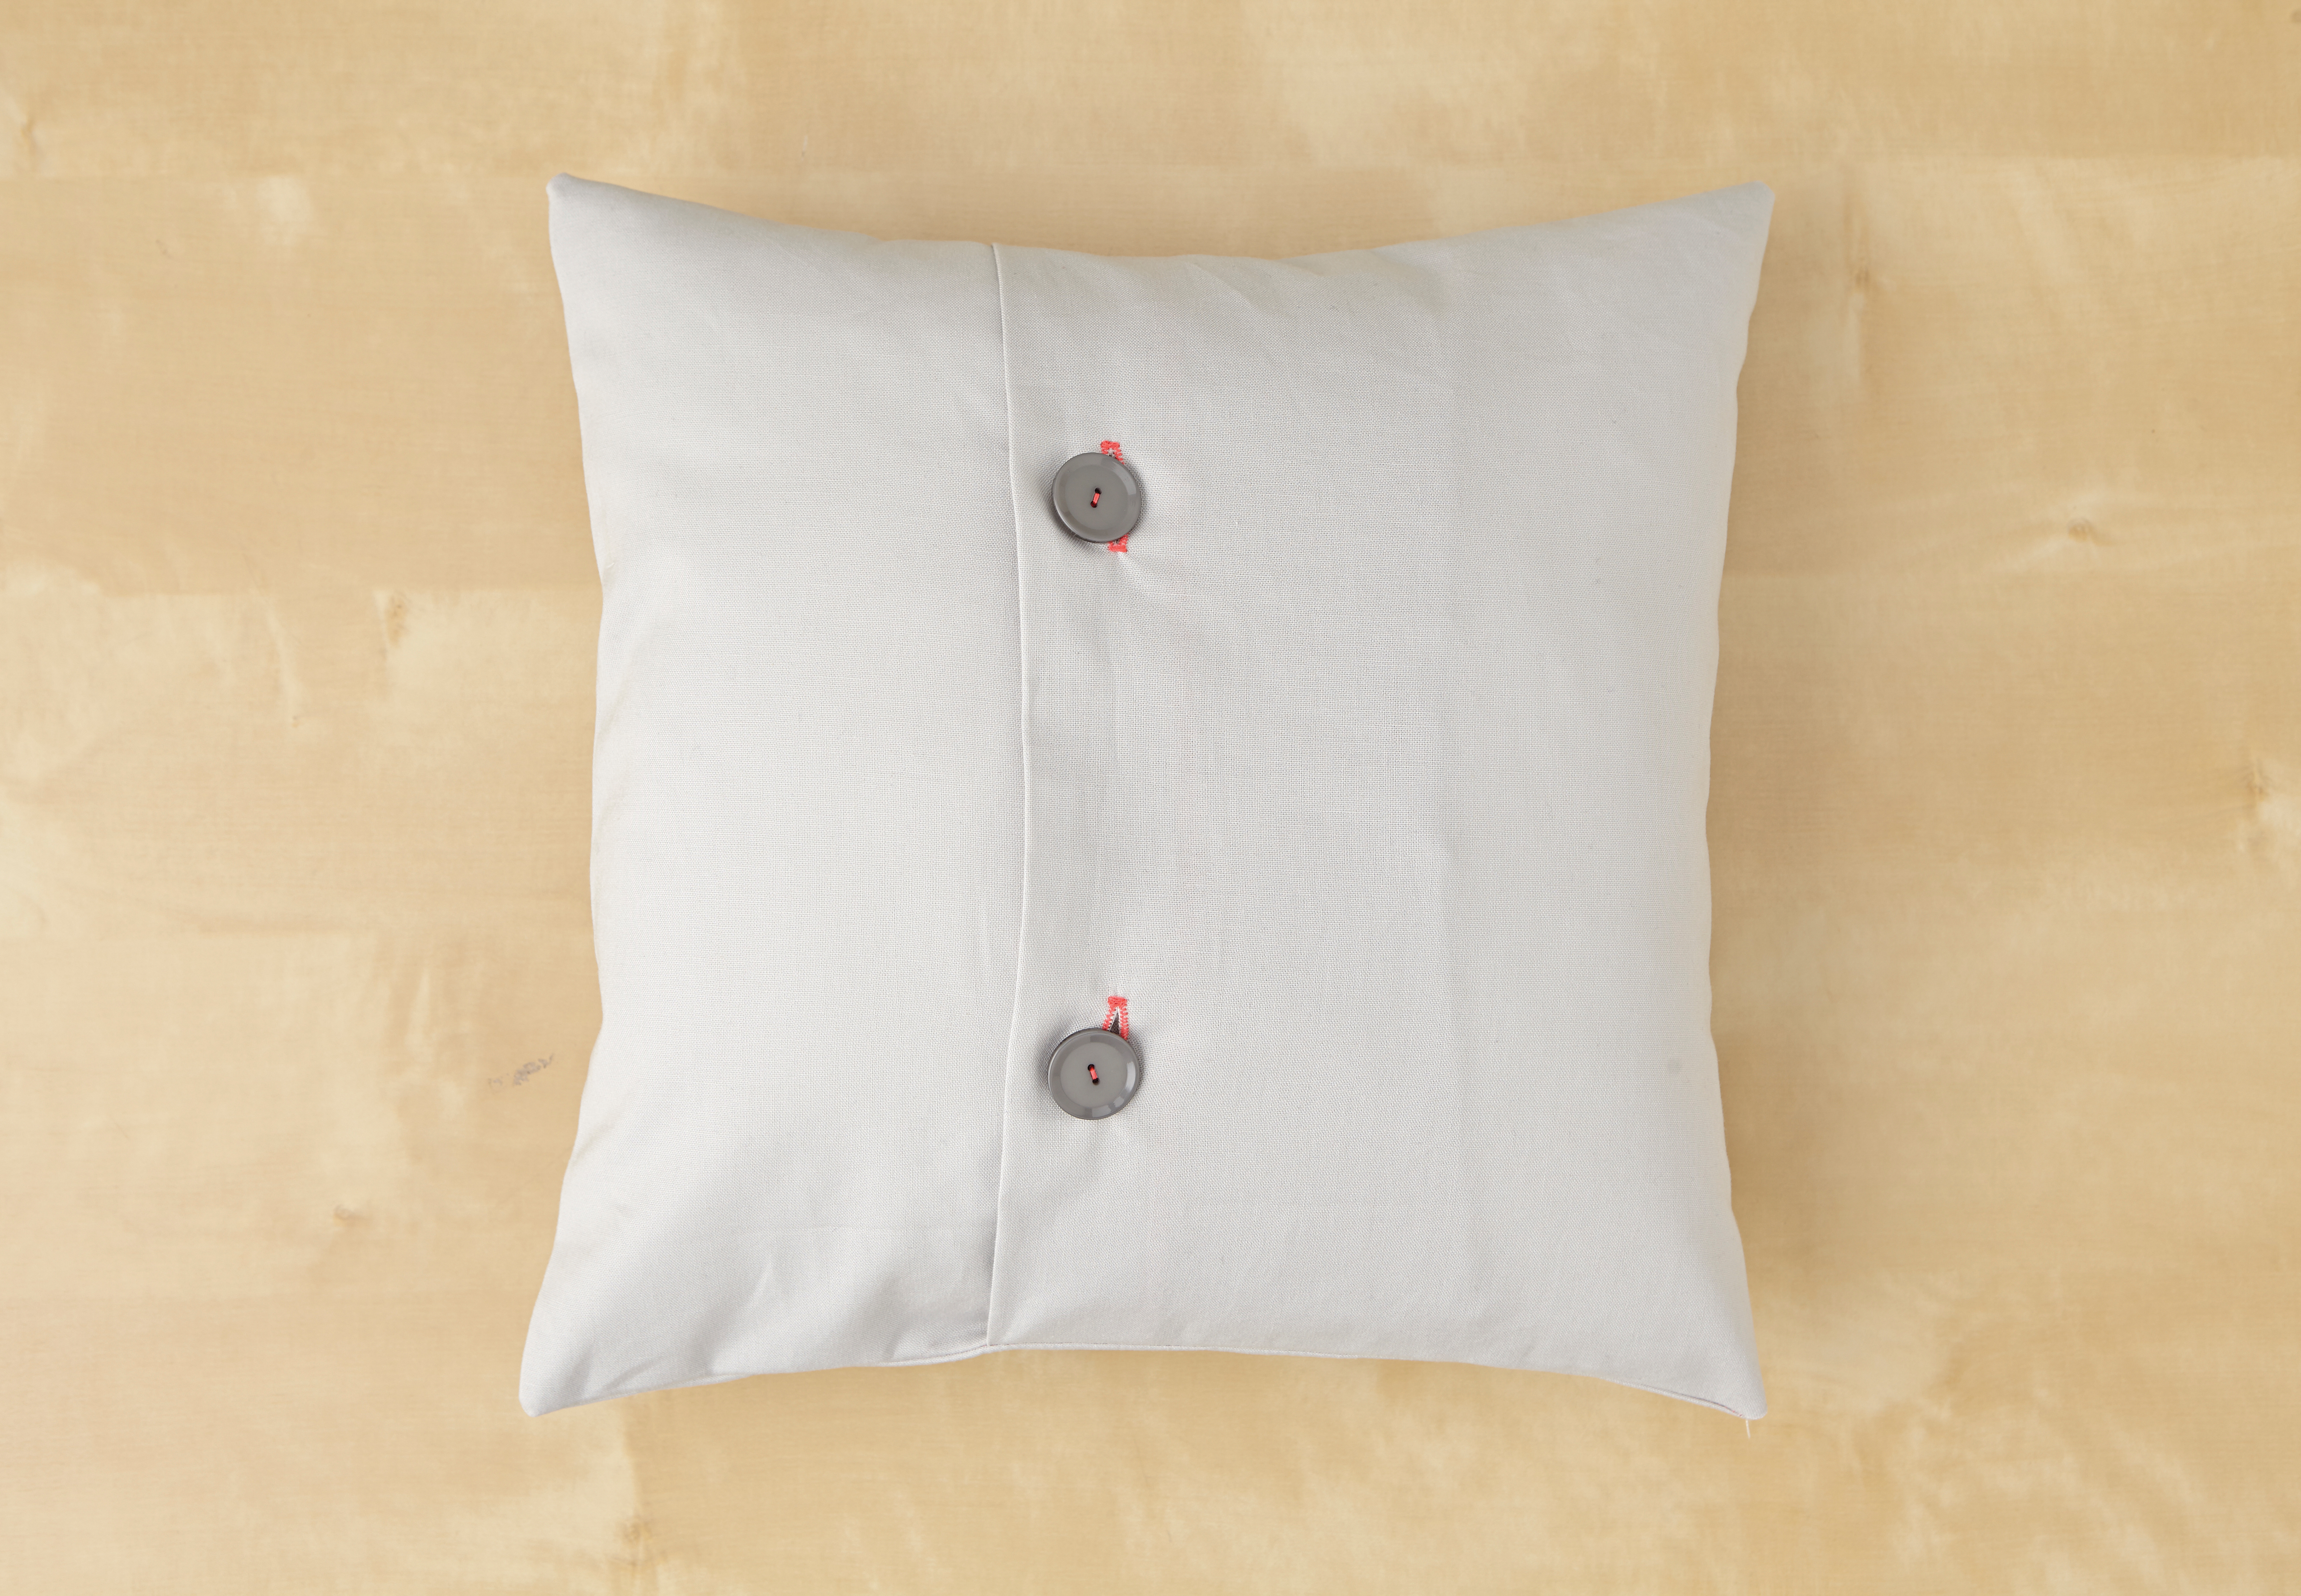
The best thing about this style of cushion is that you can remove the cushion pad and wash the cover as often as you like. If you’ve never made buttonholes before, it isn't difficult – you just need a buttonhole foot (which comes for free with most sewing machines), and then read your instruction manual carefully to find out how to make buttonholes that are the right size for your buttons.
You will need
- One piece cotton fabric: 32x32cm for cushion front
- Two pieces cotton fabric: 32x25cm for cushion back pieces
- Cushion pad: 30x30cm
- Buttons: x2
- Machine feet
Step 2
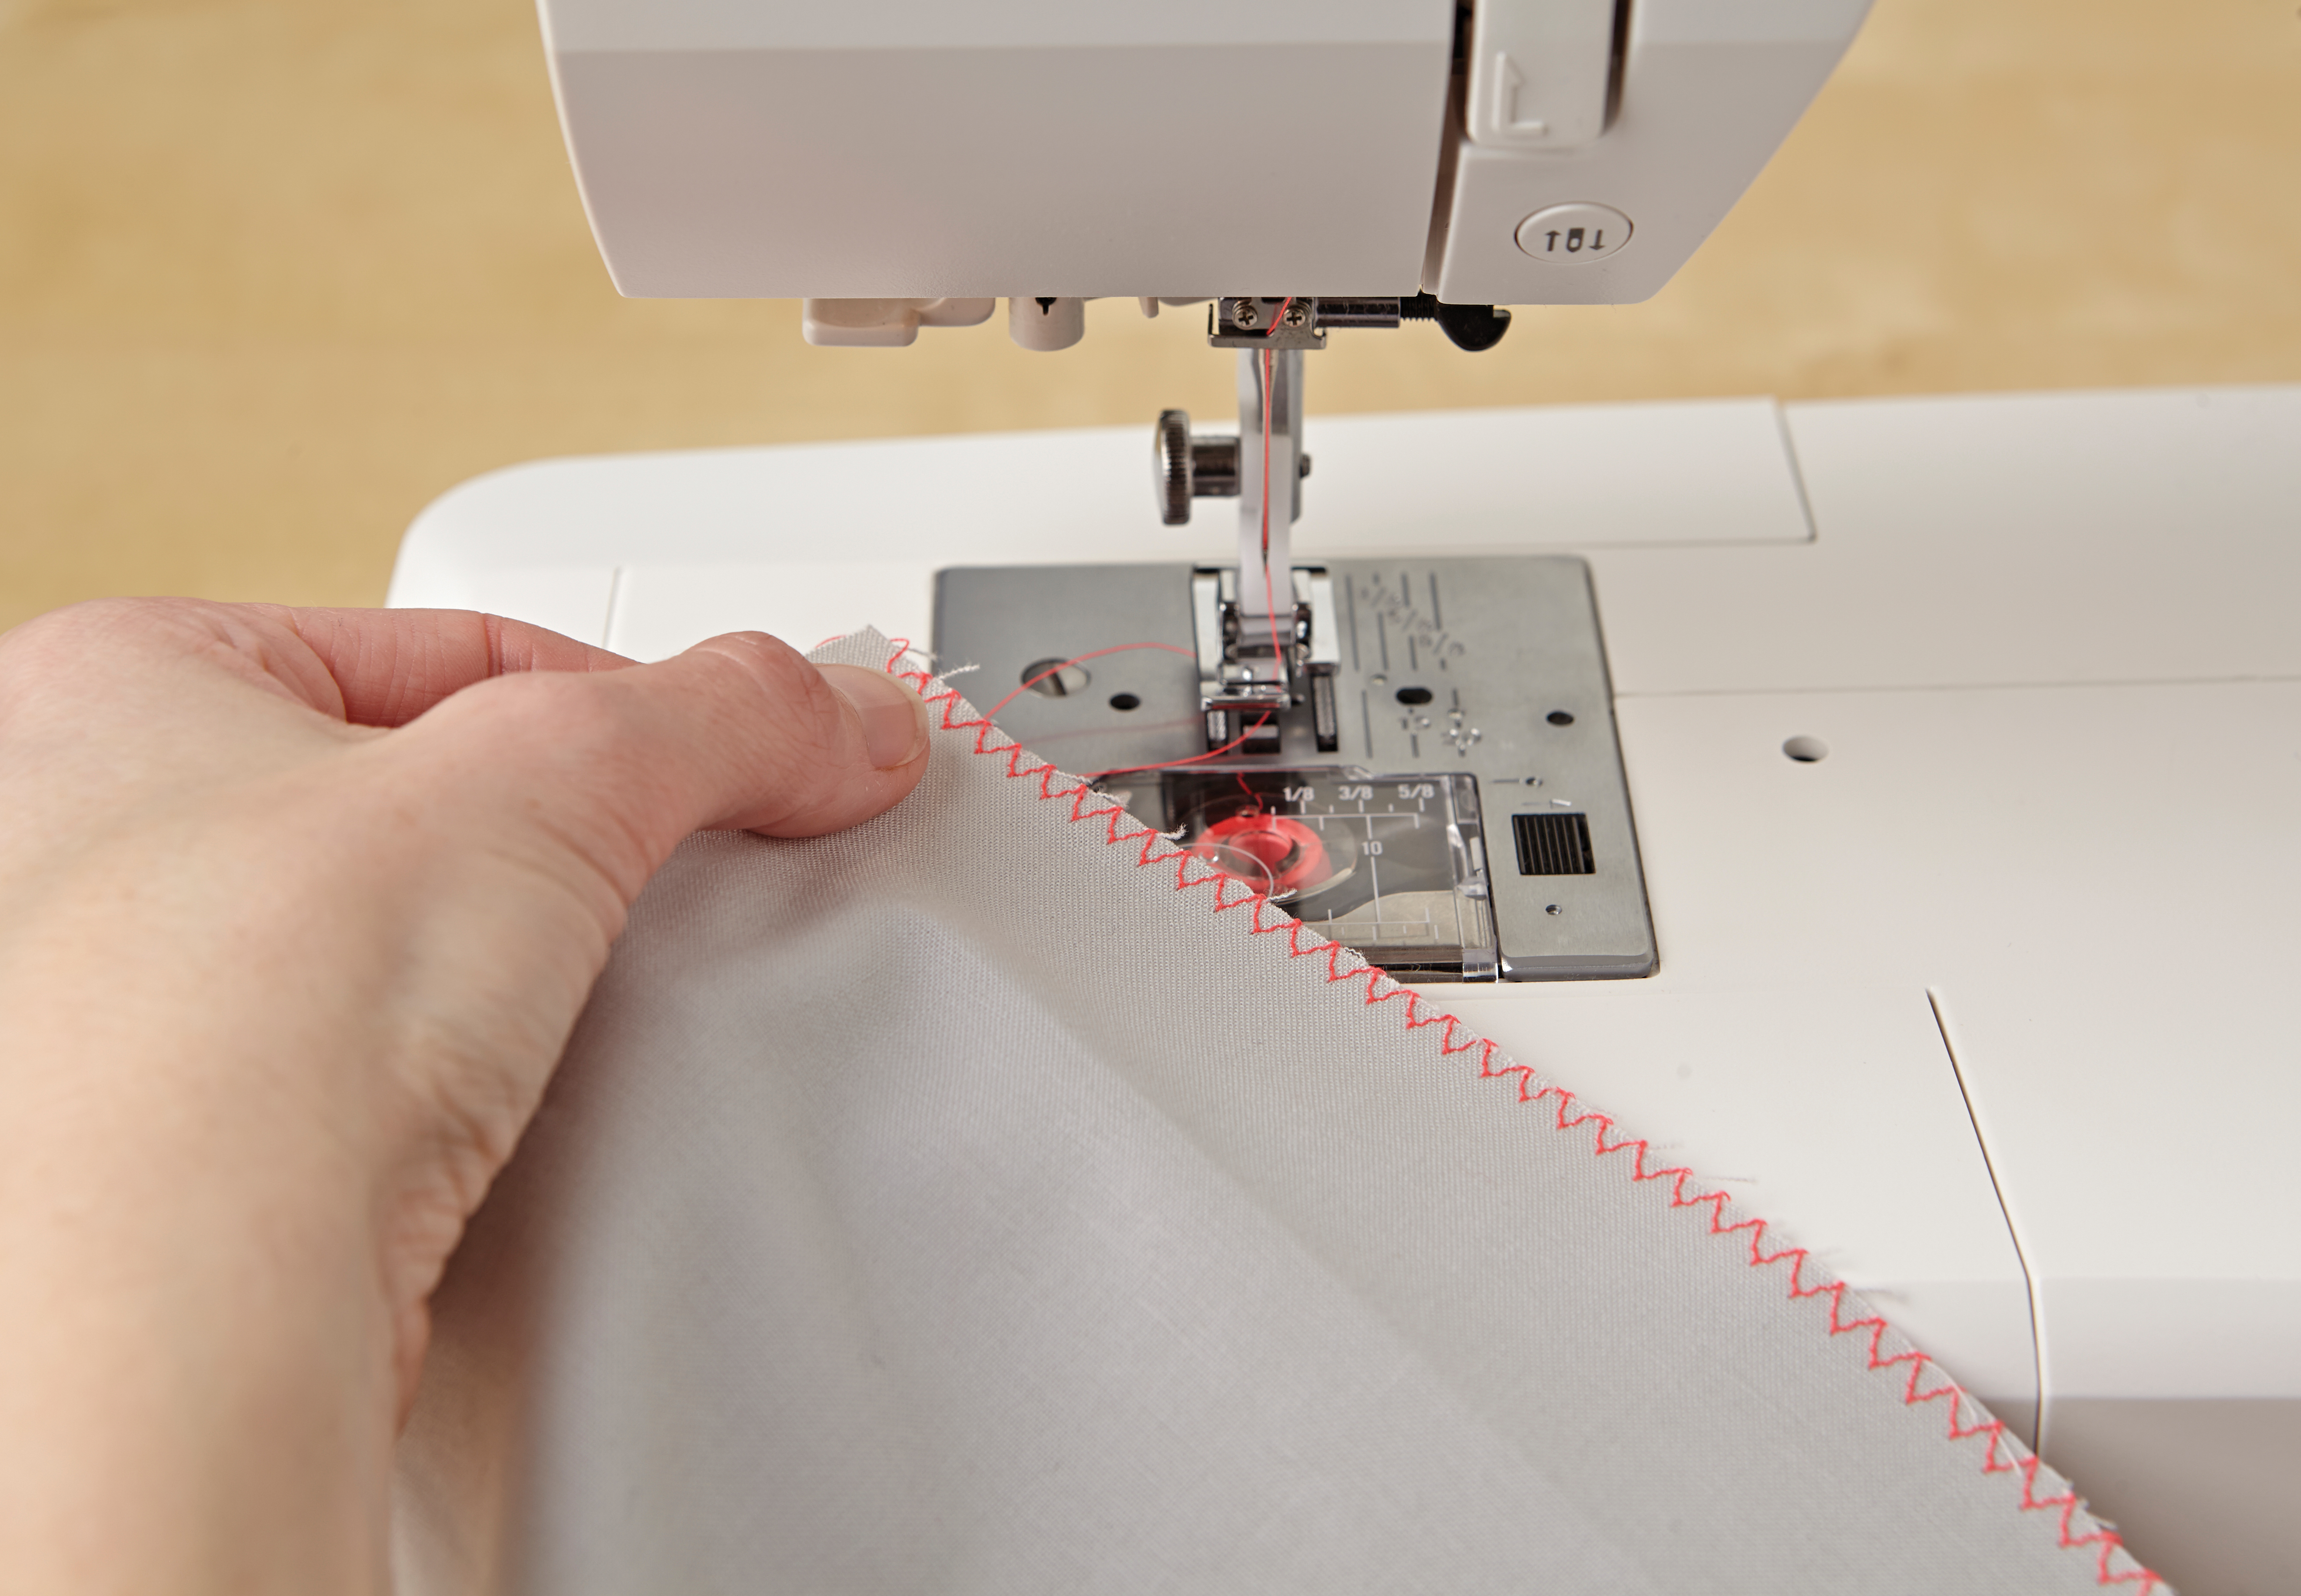
Cut your front piece of fabric to 32x32cm and two back pieces of fabric to 32x25cm – these measurements include a 2cm seam allowance on each side so that the cover can accommodate a 30x30cm (12x12in) cushion pad. Using your sewing machine and an edging foot, overcast one of the long sides of one of your back pieces of fabric by working a zigzag stitch along the raw edge. Repeat with the second back piece of fabric.
Step 3
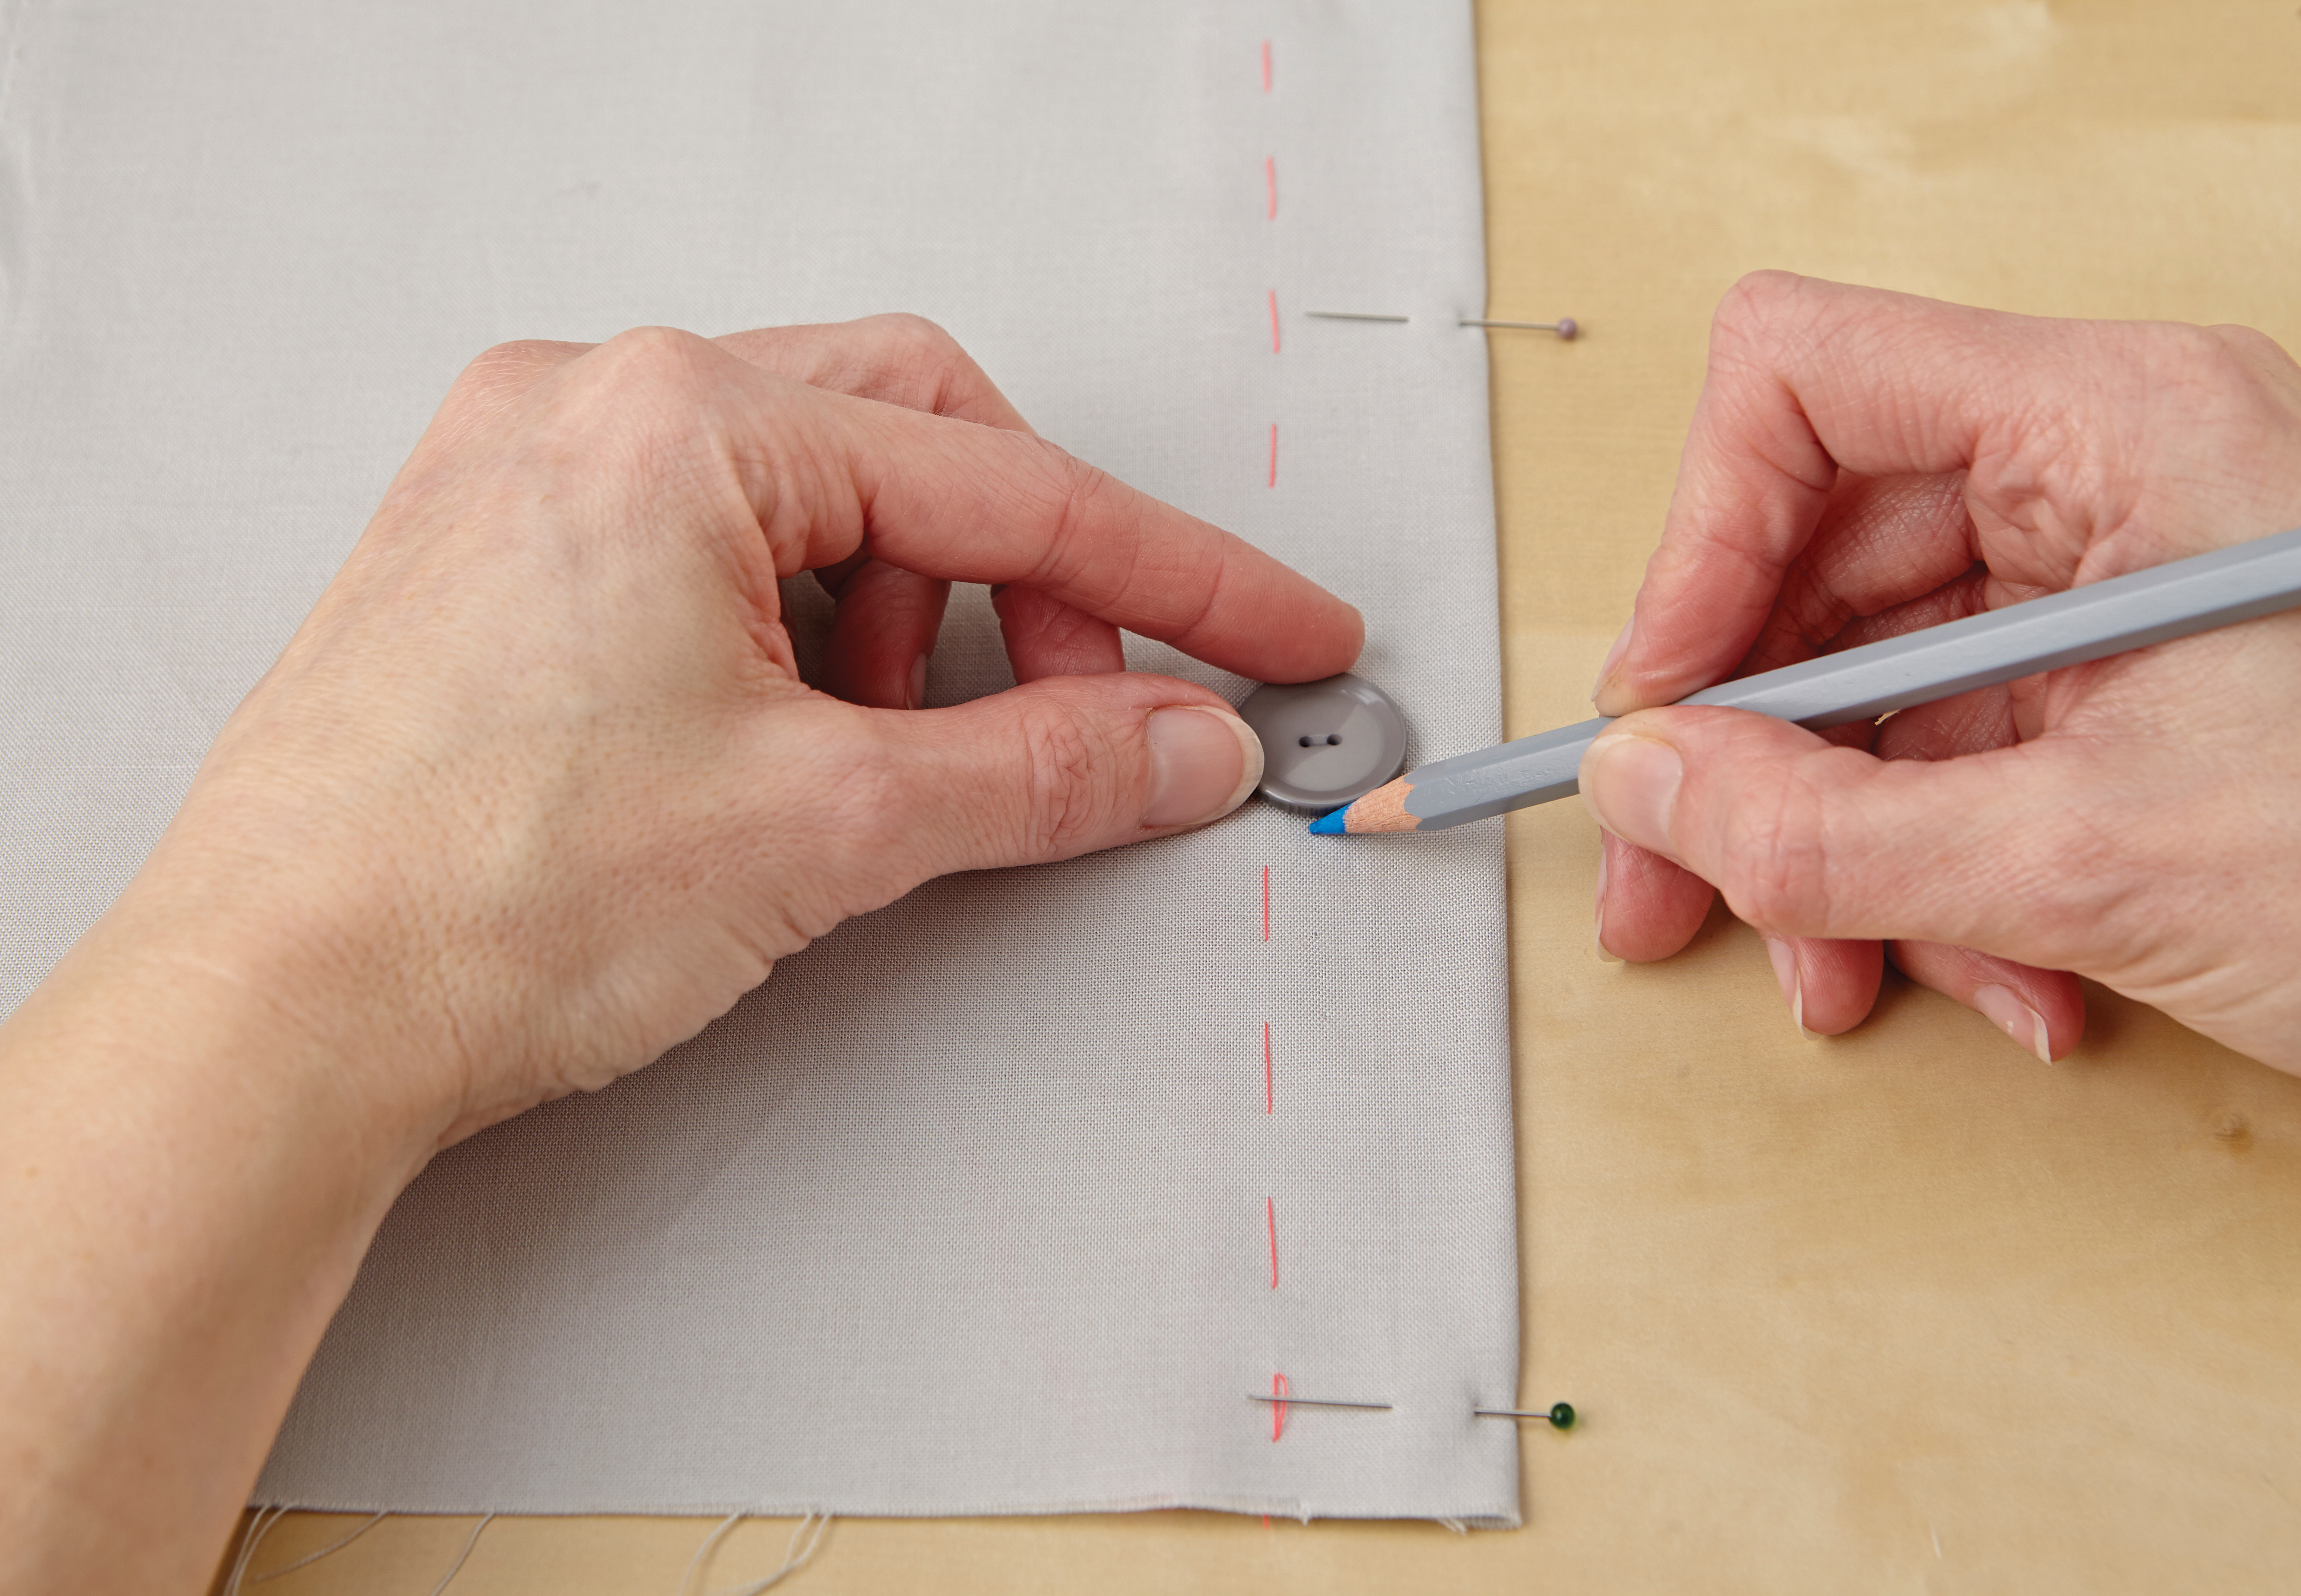
On one of the back pieces, fold the overcast edge to the reverse of the fabric by 2.5cm and pin in place (a single fold will be less bulky than a double fold, which will help when making the buttonholes). Divide the folded edge into 8cm quarters and mark with pins. Place buttons at the 8cm and 24cm marks and use a pencil to mark each button’s position. This will be your stitching guide when working the buttonhole on the machine.
Step 4
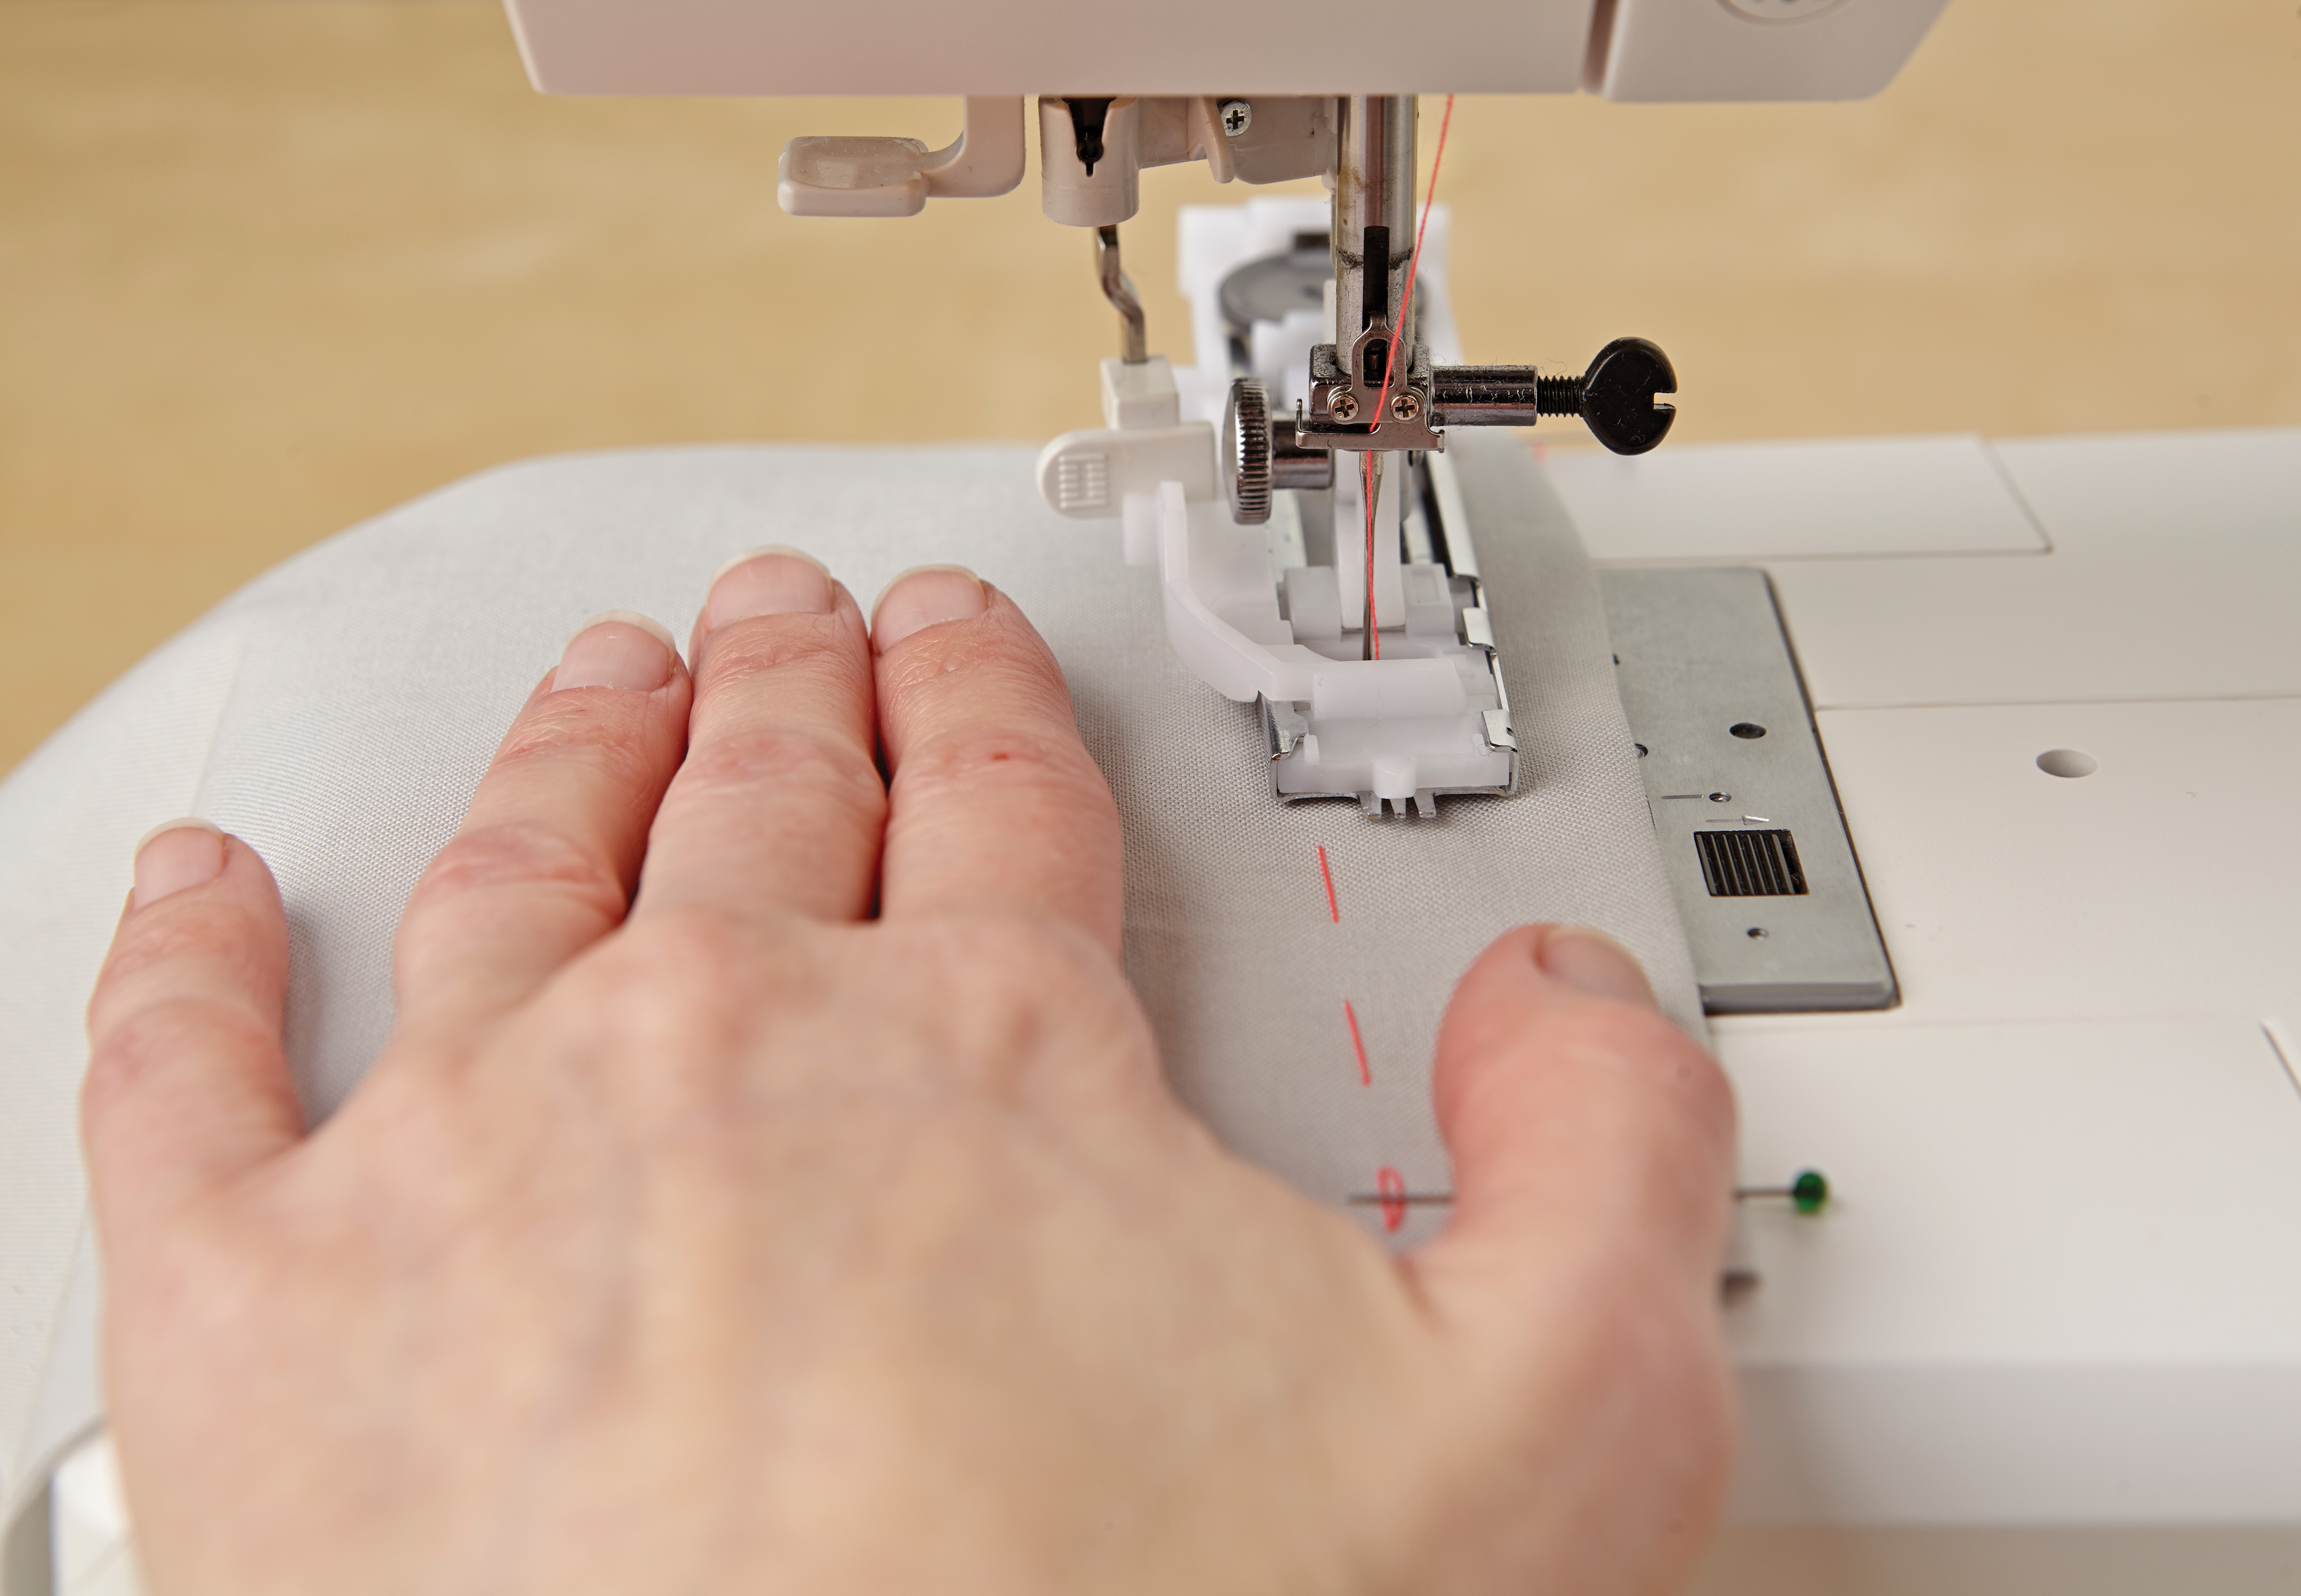
Fit the automatic buttonhole foot on your machine and set the machine ready to stitch – check your machine’s instruction book if this is your first time making buttonholes. If you feel a bit unsure about what to do, have a practice on some spare fabric first. Place your back piece of fabric right side up into the machine, lining up your pencil mark with your needle. Start to machine stitch the buttonhole. Repeat to make the second buttonhole.
Step 5
Once your two buttonholes have been stitched, use a seam ripper to open up the hole. To do this, place a pin at the end of the stitched buttonhole, which will act as a barrier to prevent the seam ripper from ripping too much of the fabric and slicing through the stitches! Insert the seam ripper into the fabric gap at the centre of the buttonhole and use it to carefully rip the fabric and open up the buttonhole. Repeat with the second buttonhole.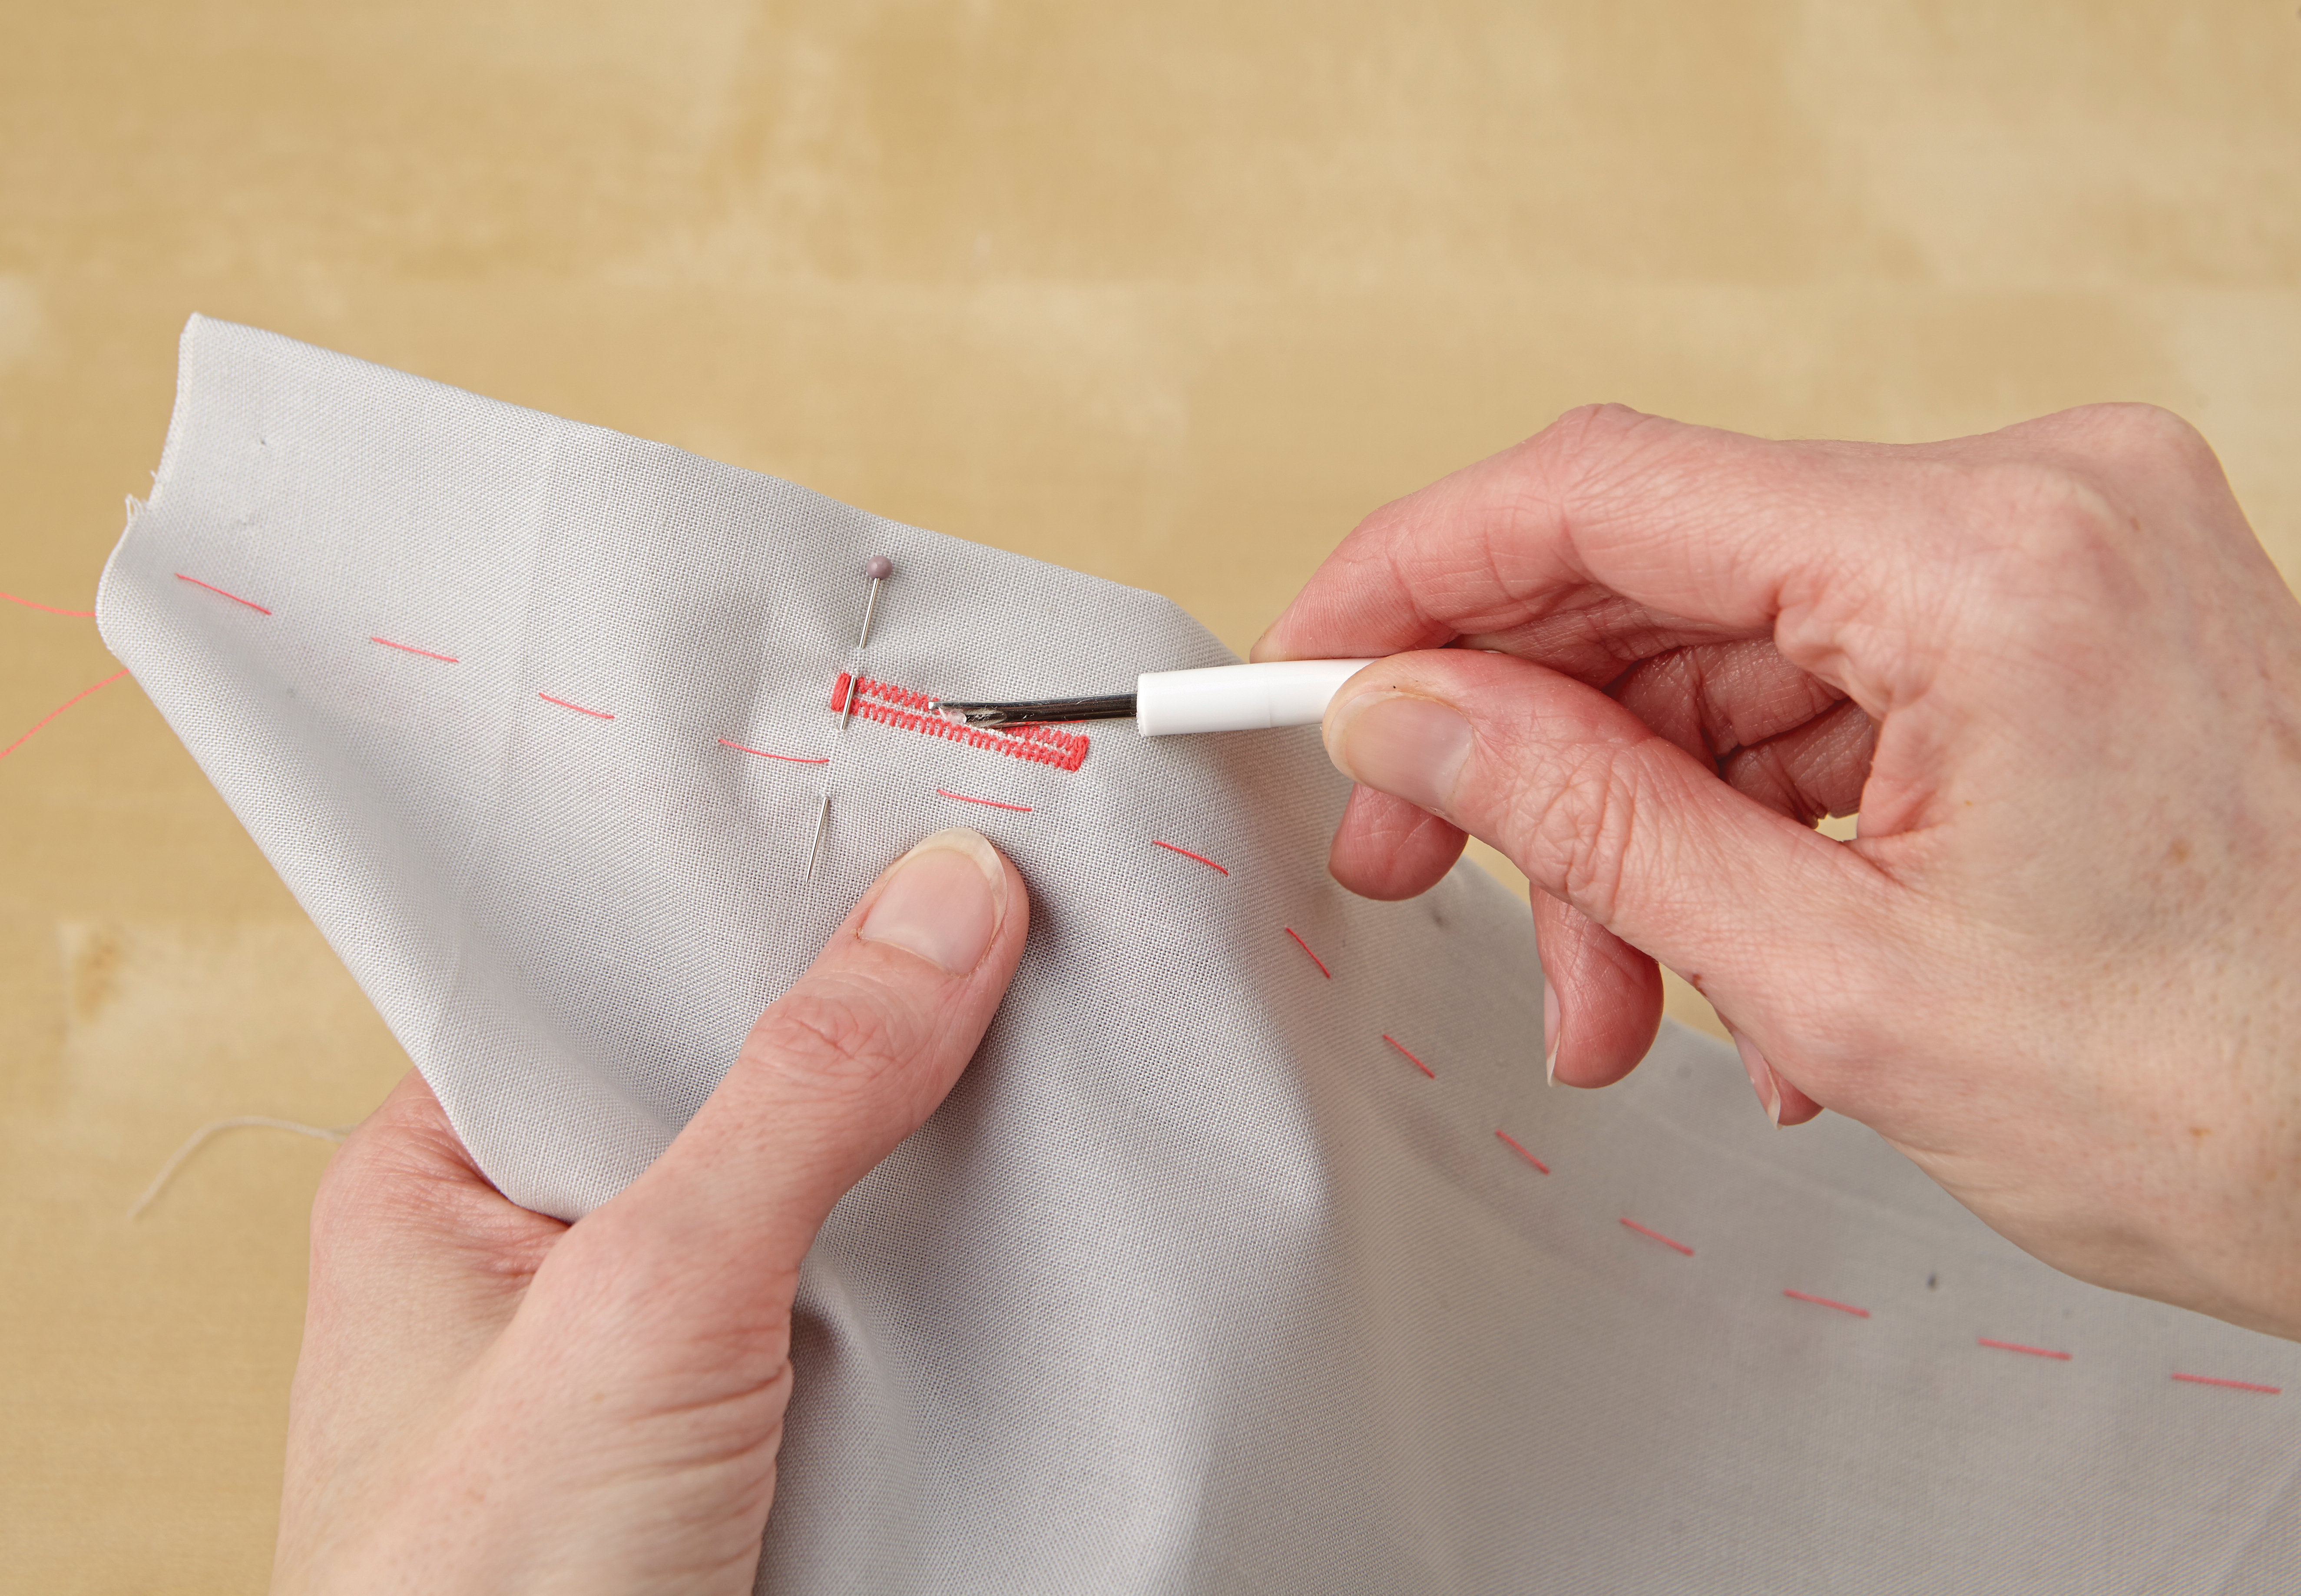
Step 6
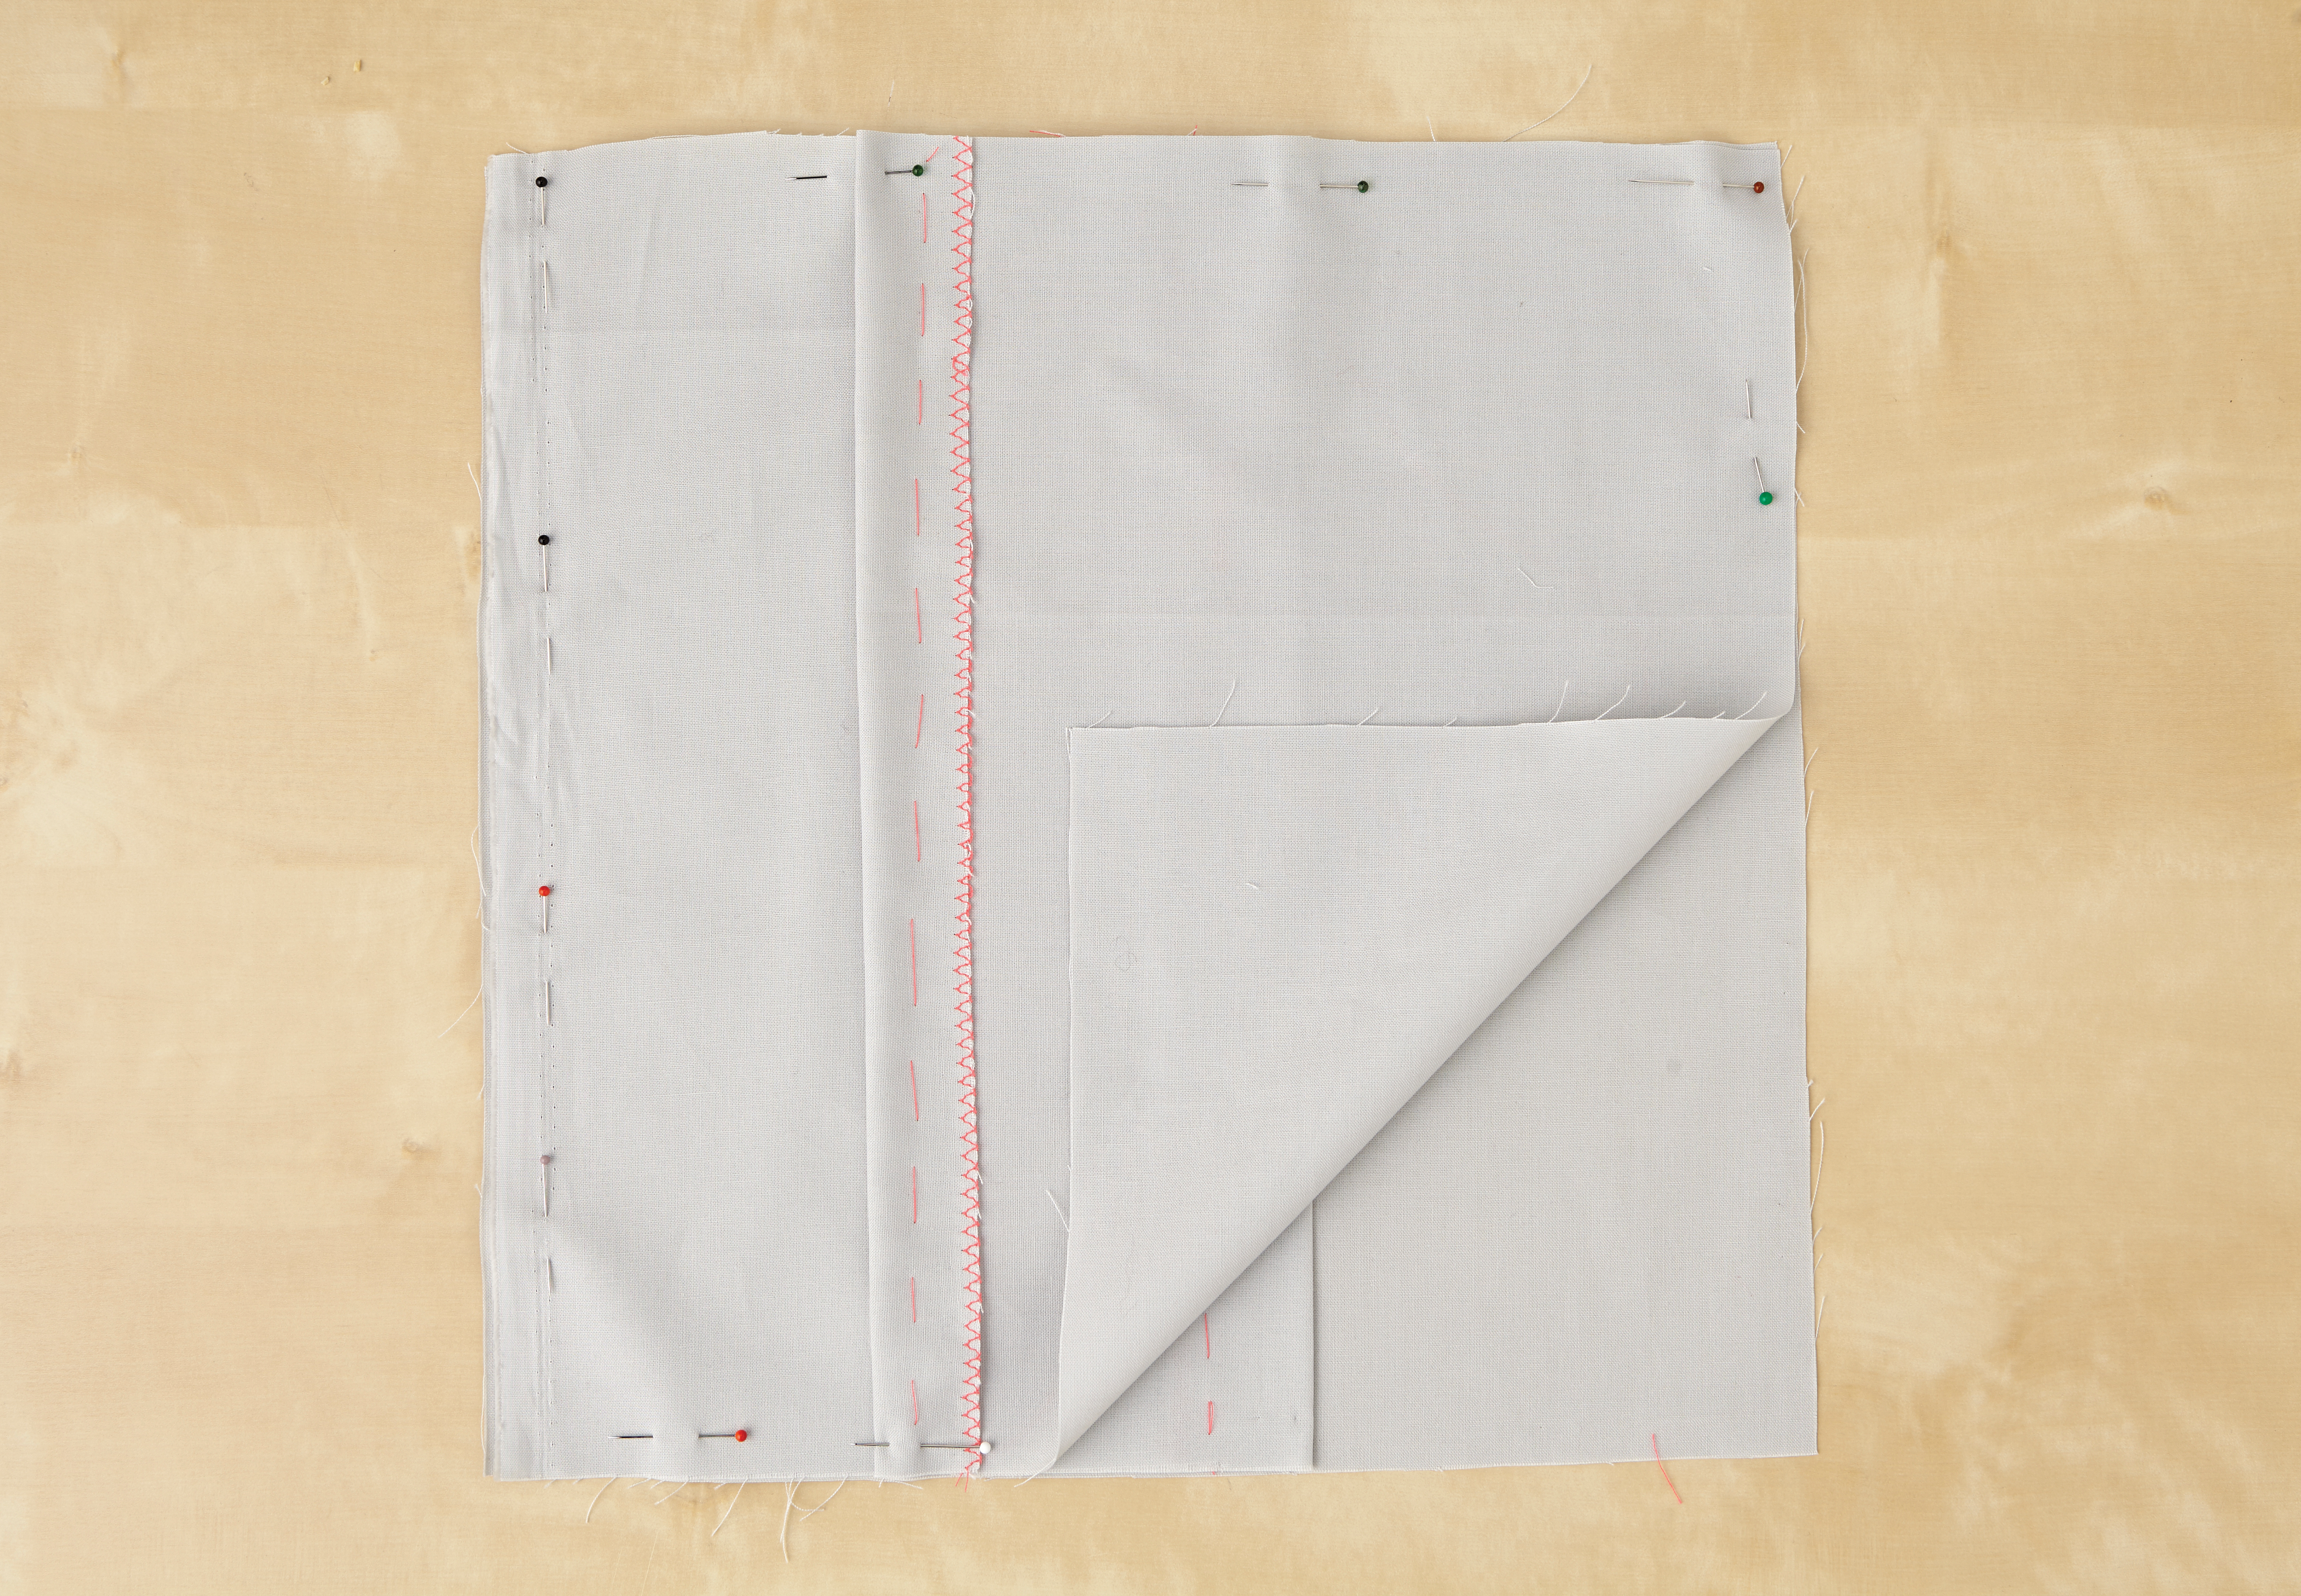
Now assemble the cushion. Place the cushion front on a flat surface with right side up. Place the buttonholed back piece on top, with right side down. Finally, place the second back piece on top, with right side down. Match up all the raw edges and pin securely in place. Make sure the two zigzag edges of the back pieces are at the centre of the cushion. Machine stitch the layers together around all four sides, 2cm from the edge.
Step 7
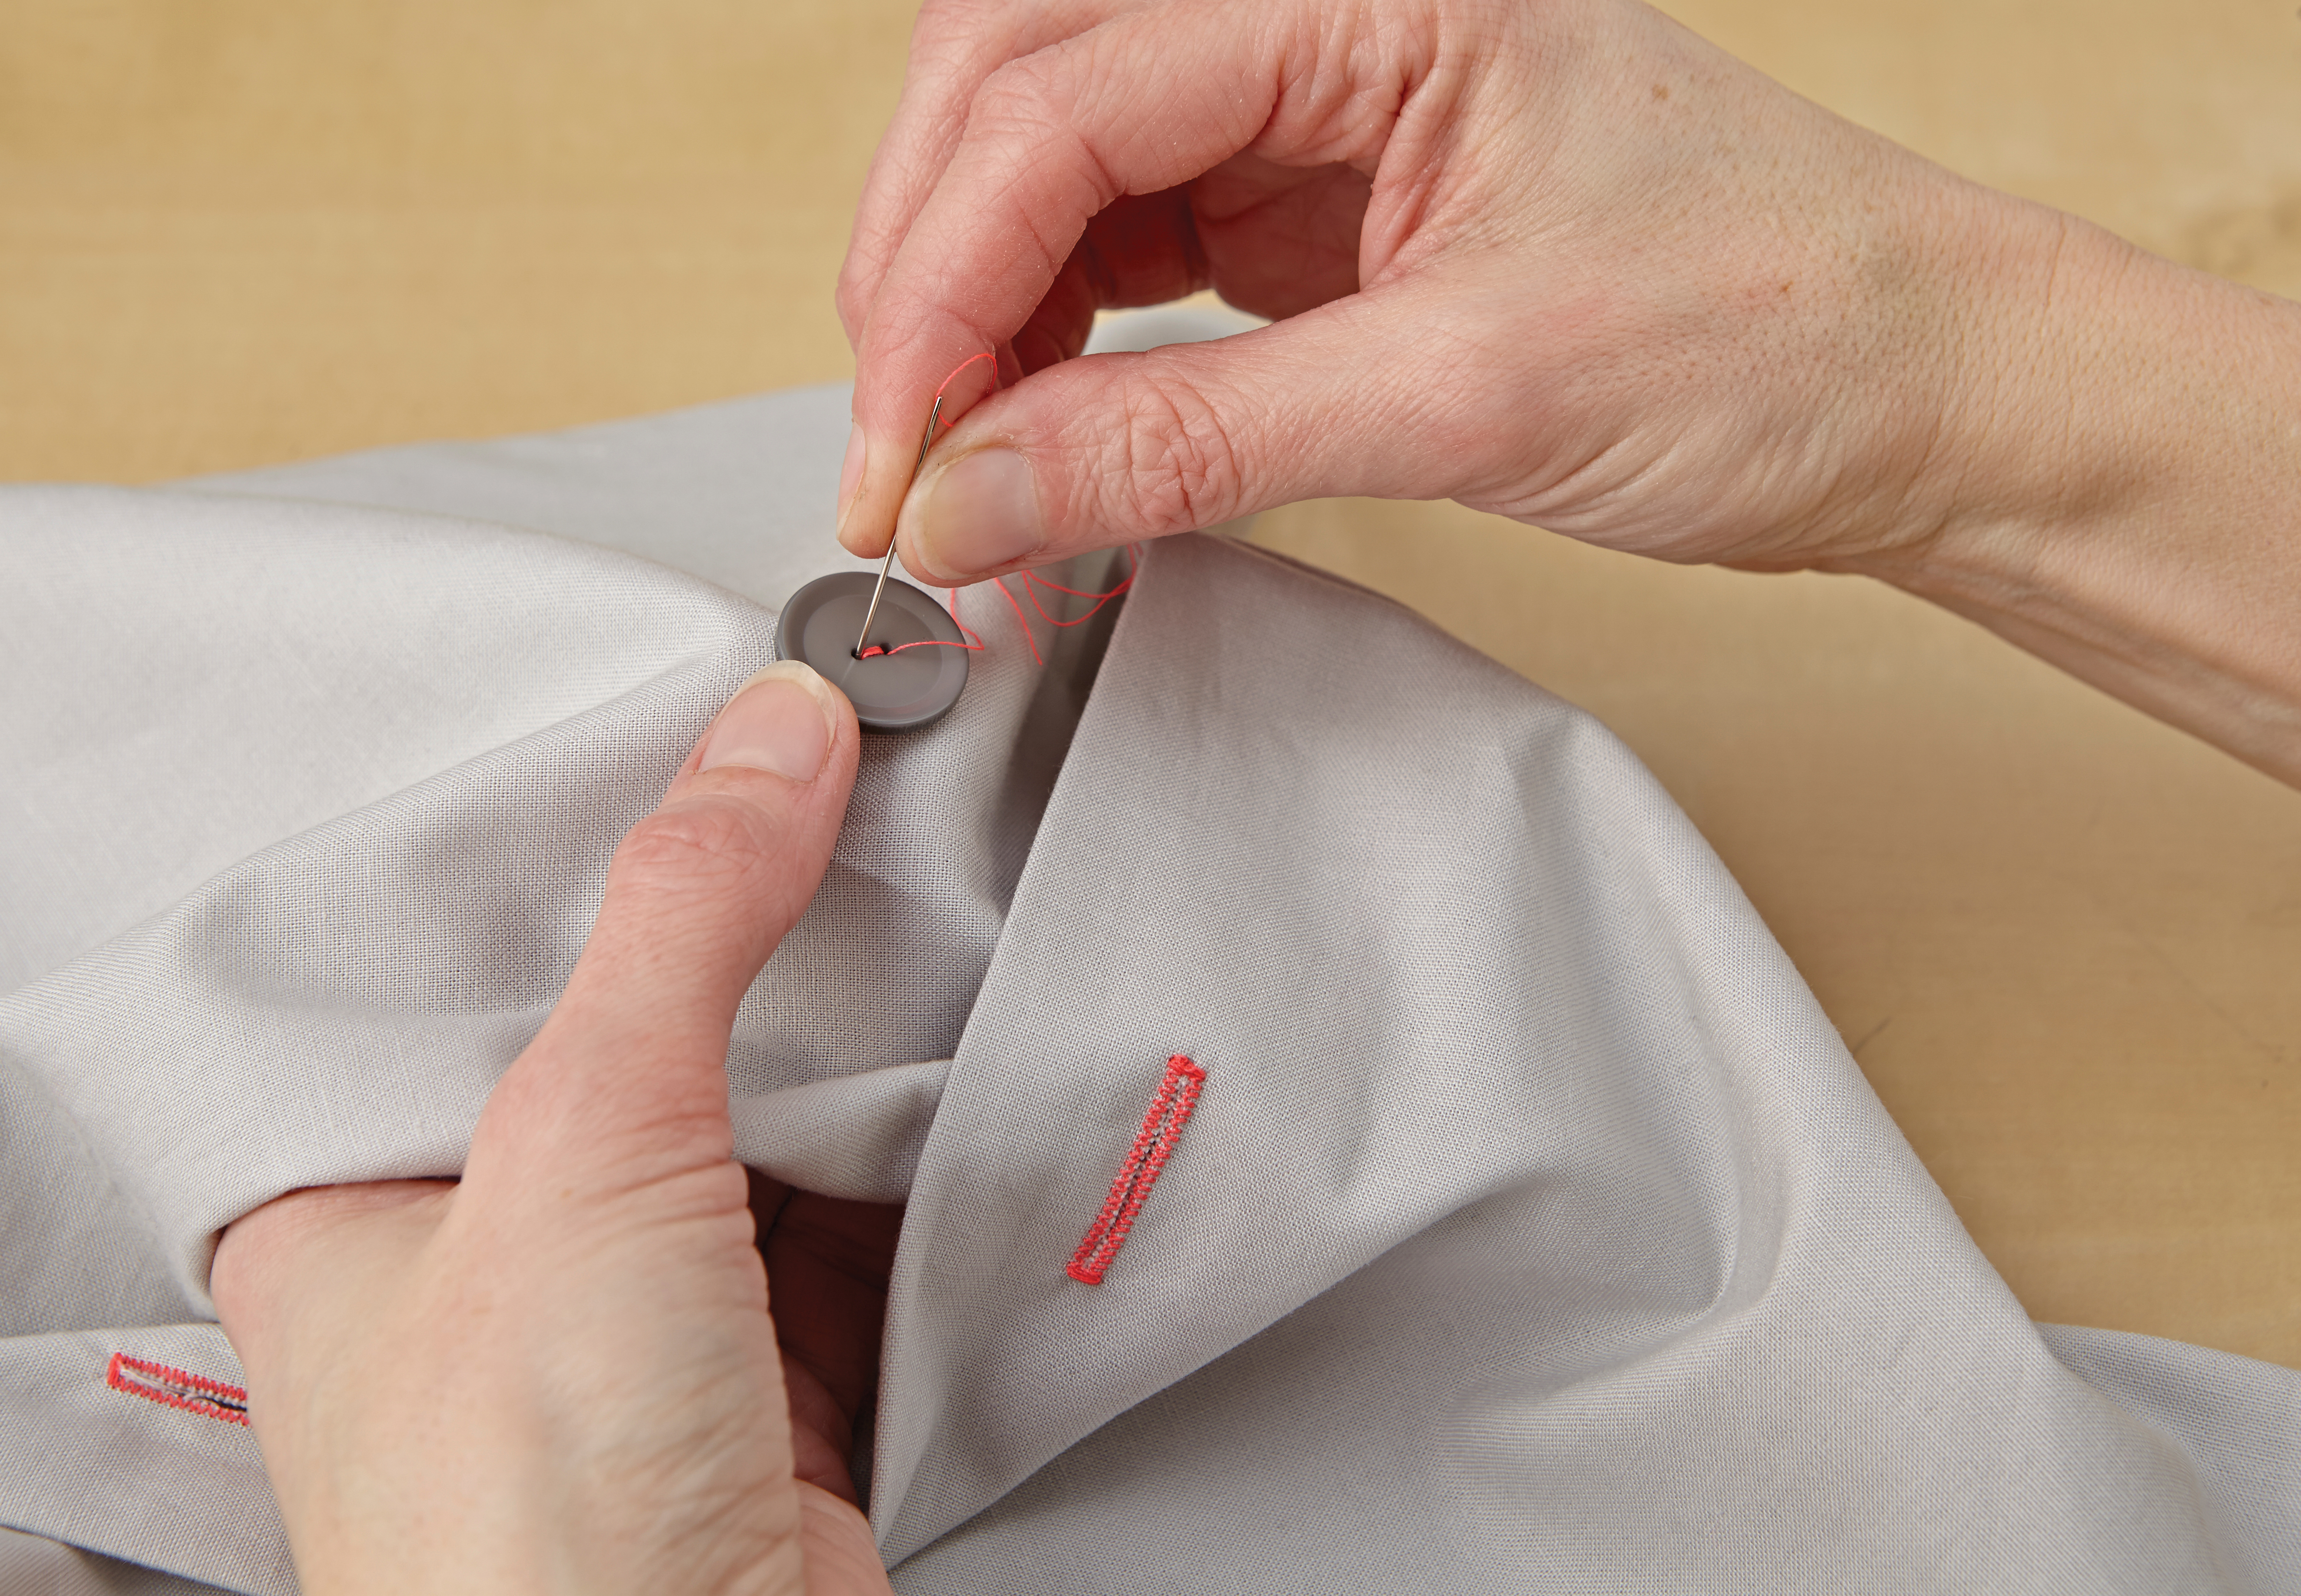
Trim the seam allowances to 1cm along all four sides. Snip off the corners of the seam allowances to help reduce bulk. Iron open the seams to keep them crisp and then turn the cover right side out through the gap in the back. The final step is to stitch the two buttons into place, lining them up carefully with the buttonholes first. Once this is done, simply insert the cushion pad and then do up the buttons to finish!
4. How to make a cushion cover with a zip
Step 1
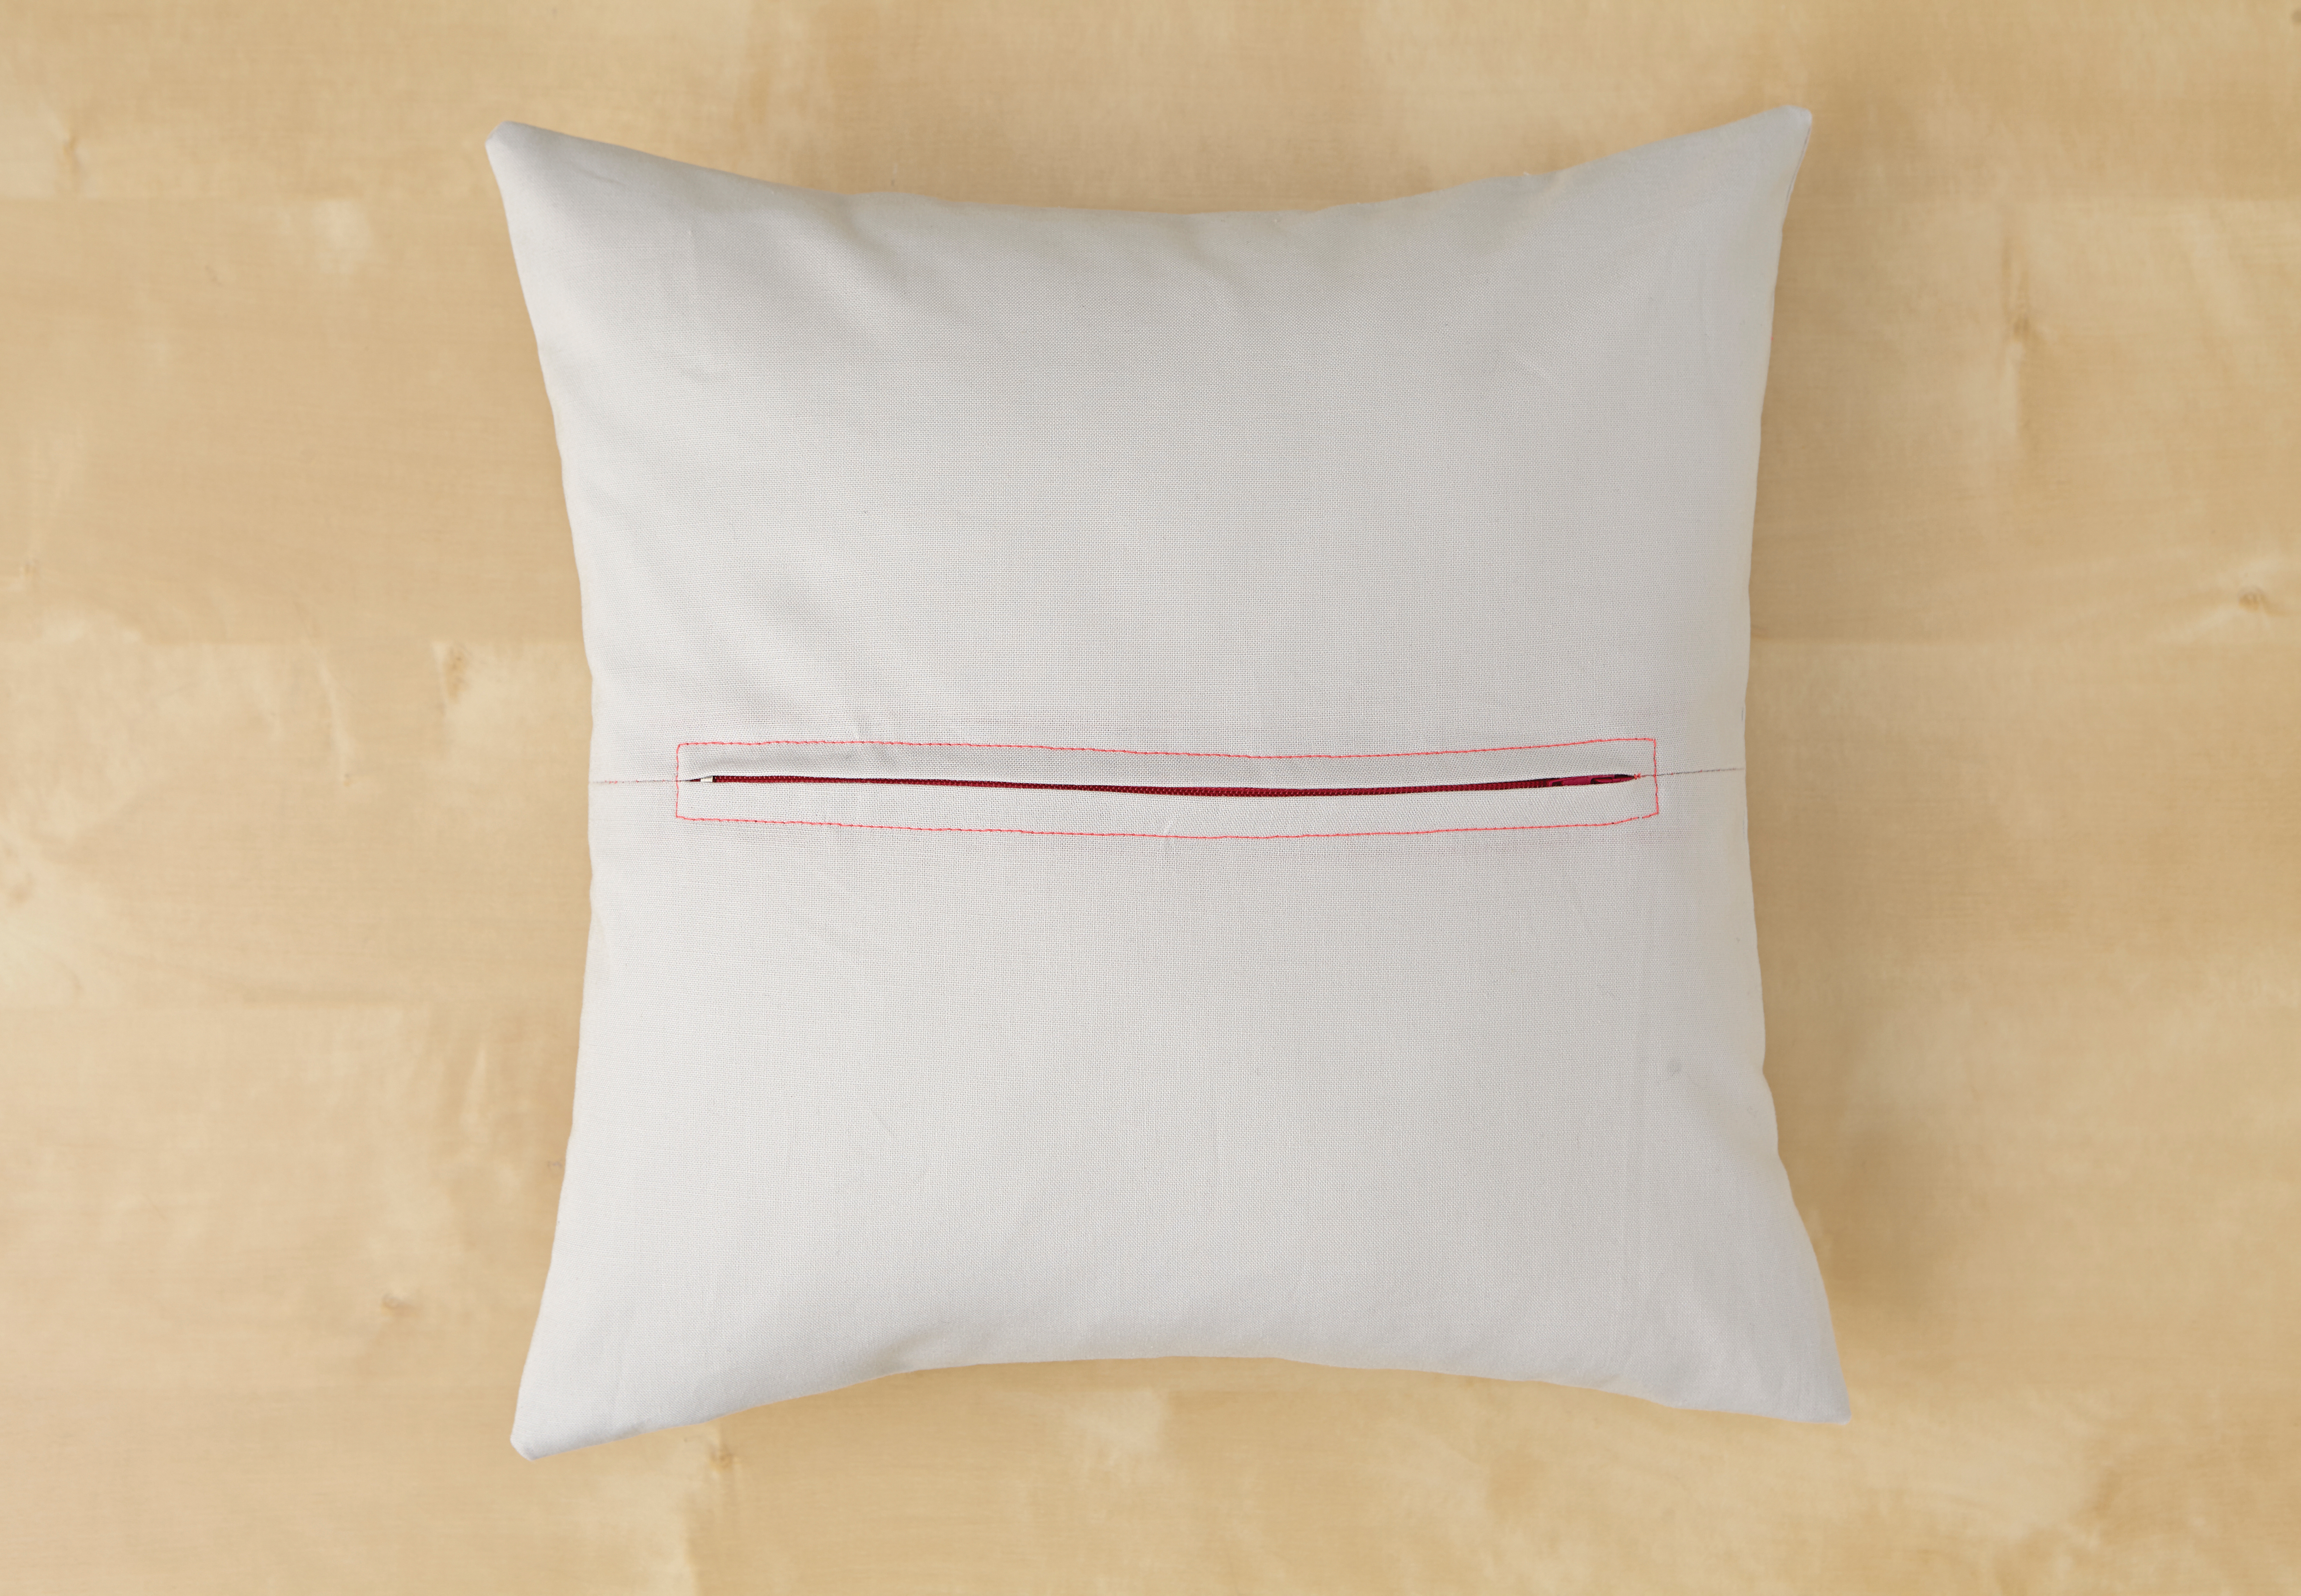
The zip opening means you can use any fabric you like to make this style of cushion, from cotton to denim. When choosing a zip, opt for one that’s about 5-10cm shorter than the width of your cushion. Once you’re happy with the method below and feel confident about inserting zips, you could try placing the zip along one side of the cushion instead of at the centre. Your cushions will look very professional!
You will need
Step 2
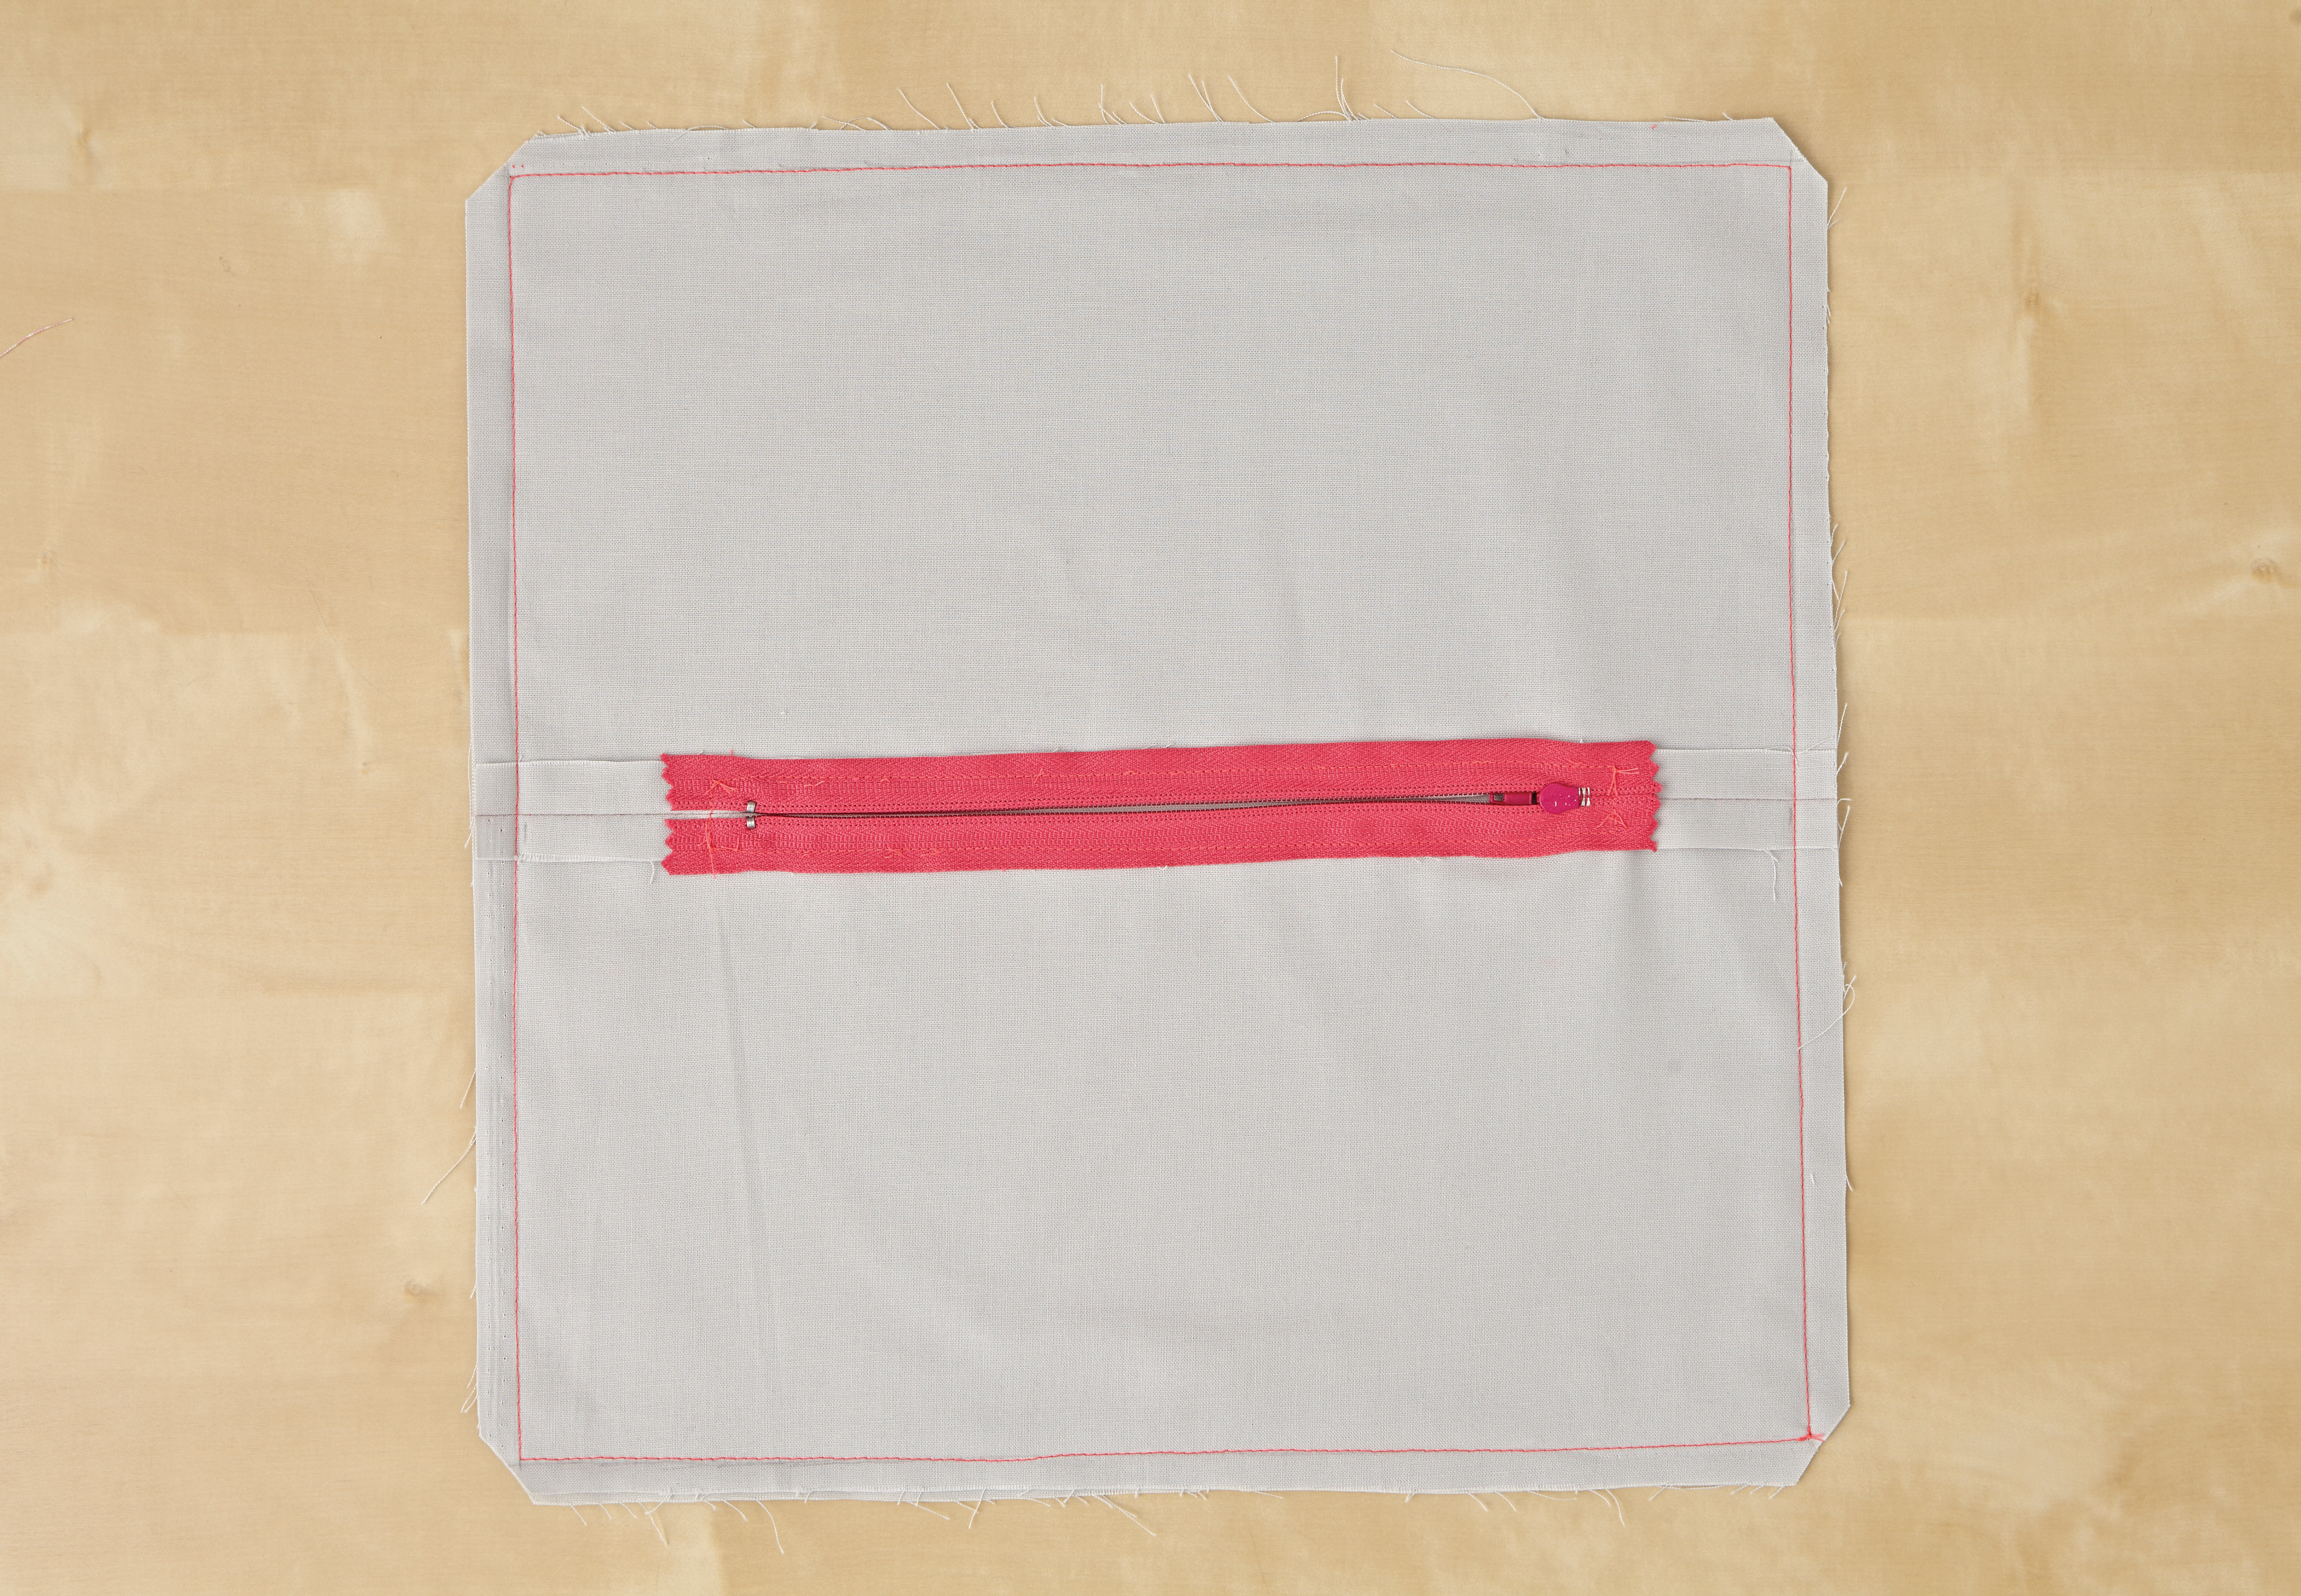
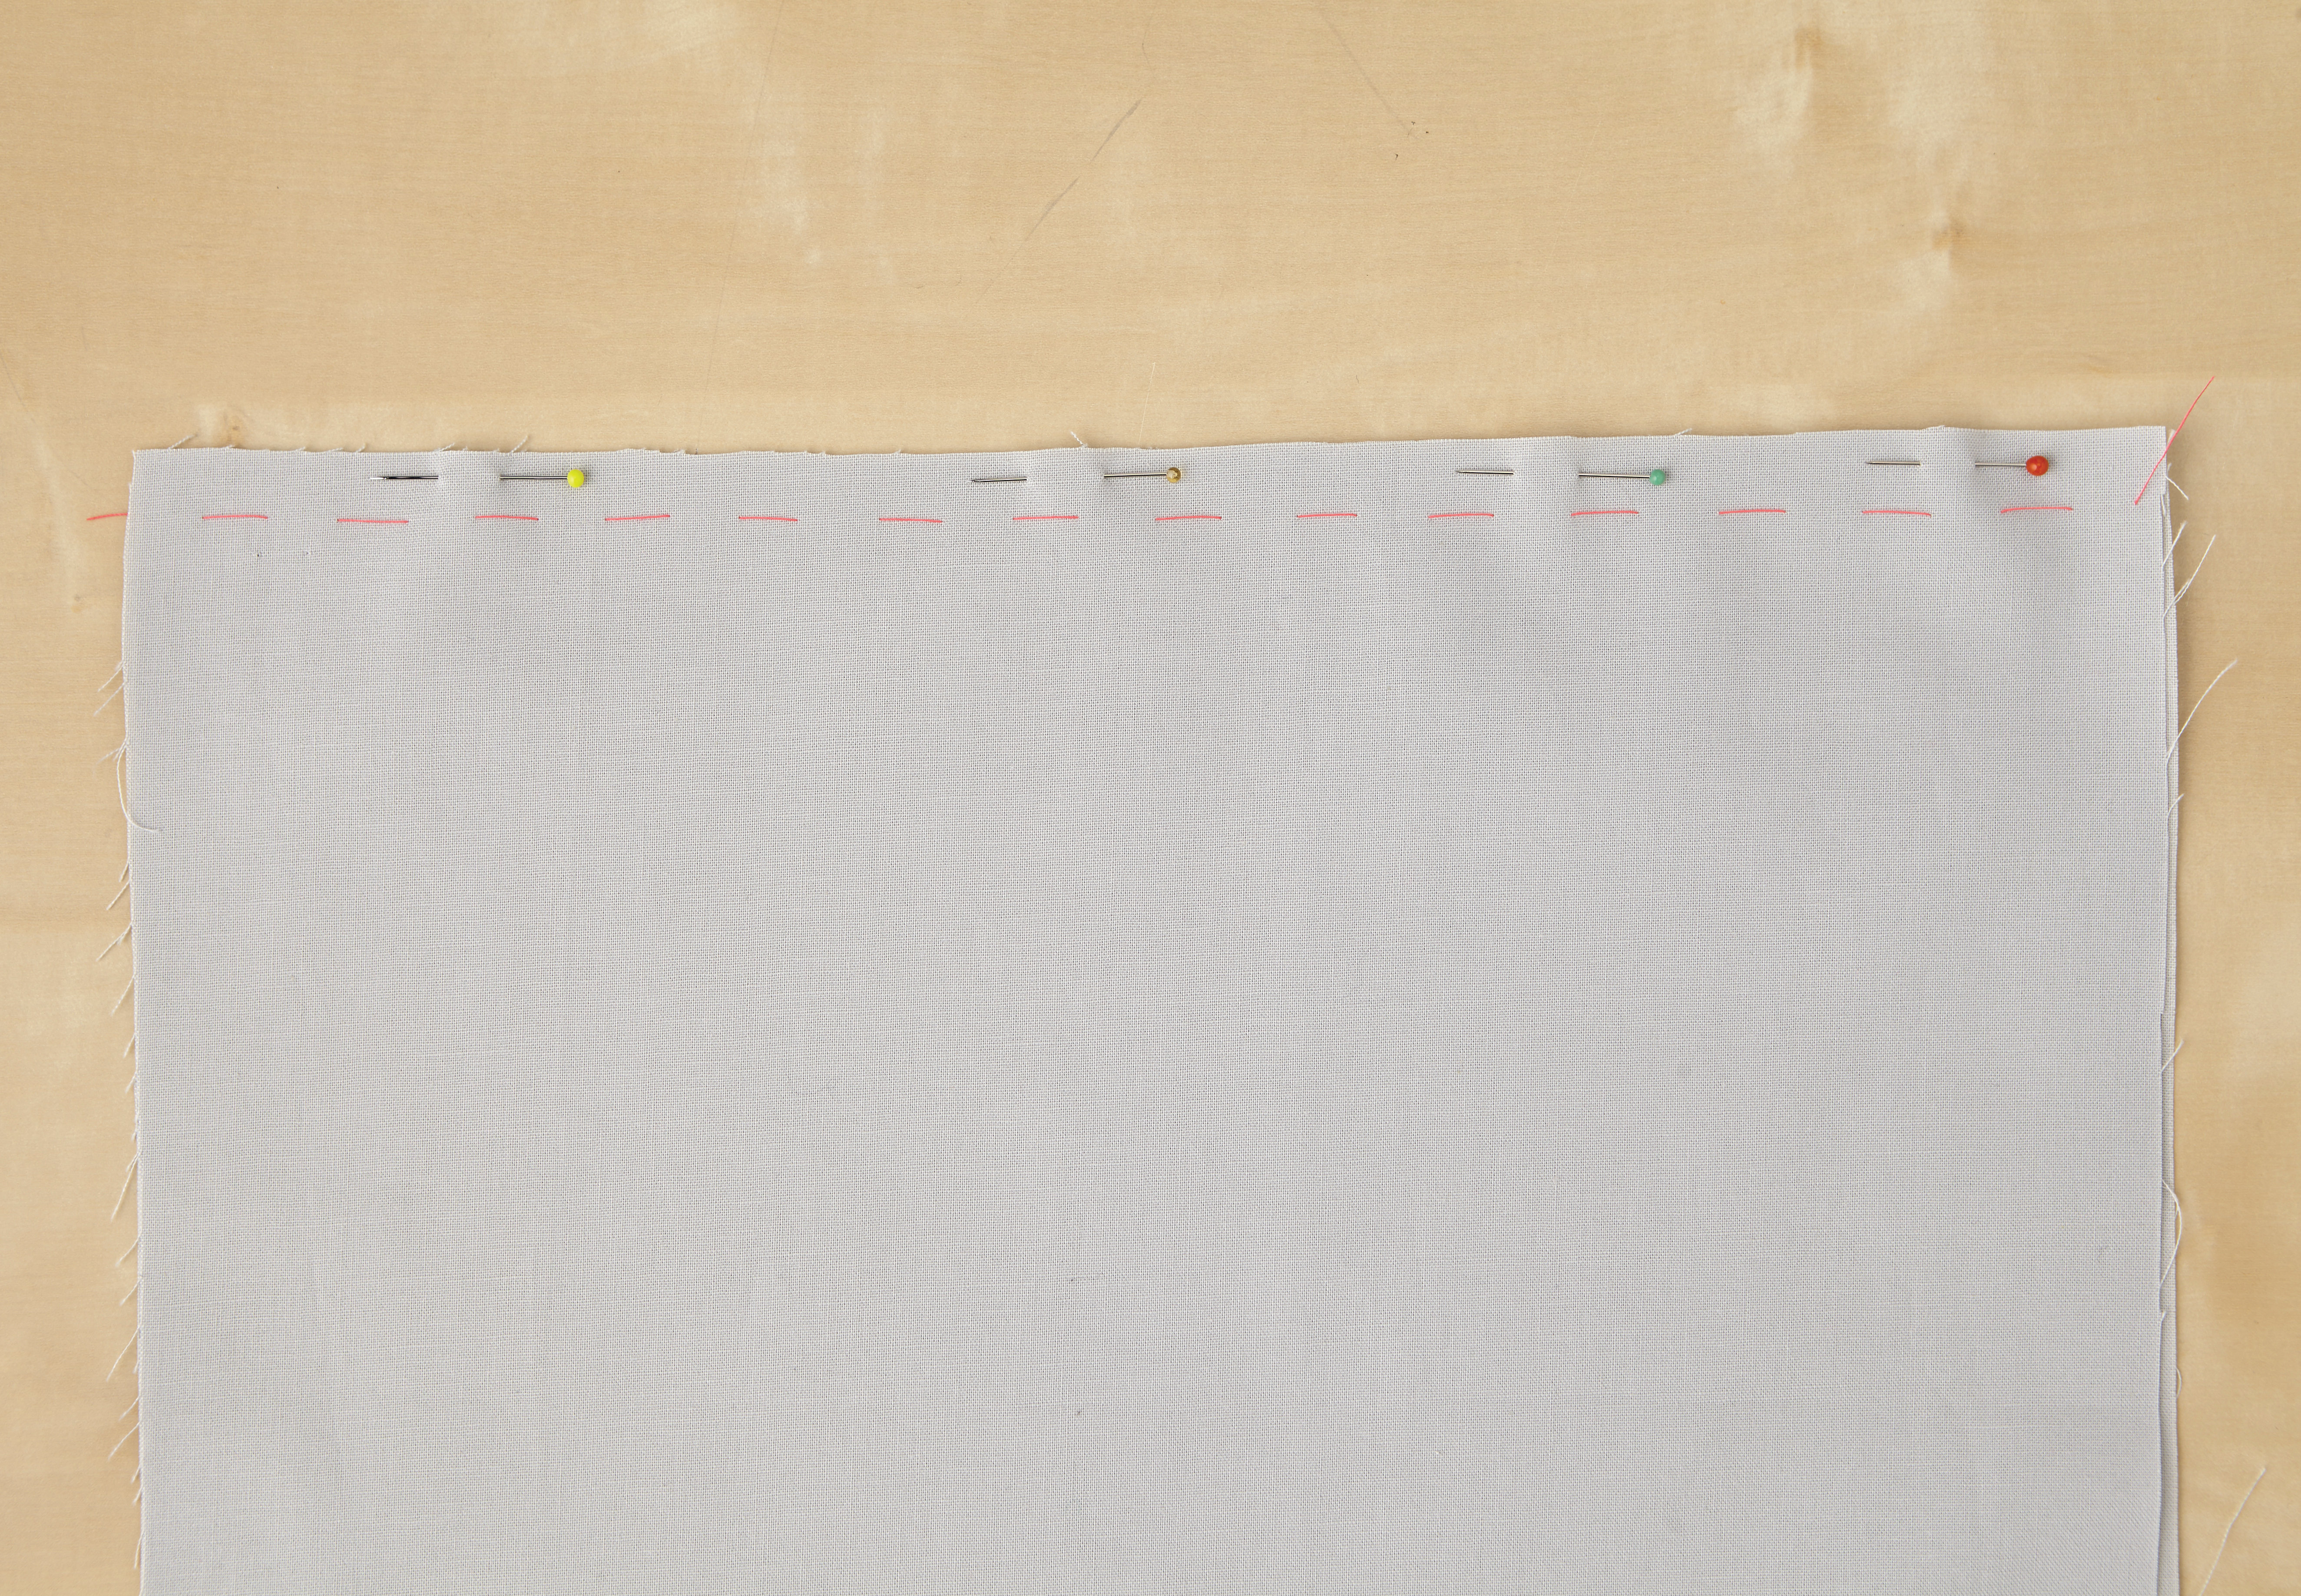
Make sure your front piece of fabric measures 32x32cm and your two back pieces are 18x32cm – these measurements include a 2cm seam allowance on each side so that the cover can accommodate a 30x30cm (12x12in) cushion pad. Place the two back pieces together, with right sides facing, and pin in place along one of long edges. Tack together about 1.5cm from the raw edge, using a long running stitch.
Step 3
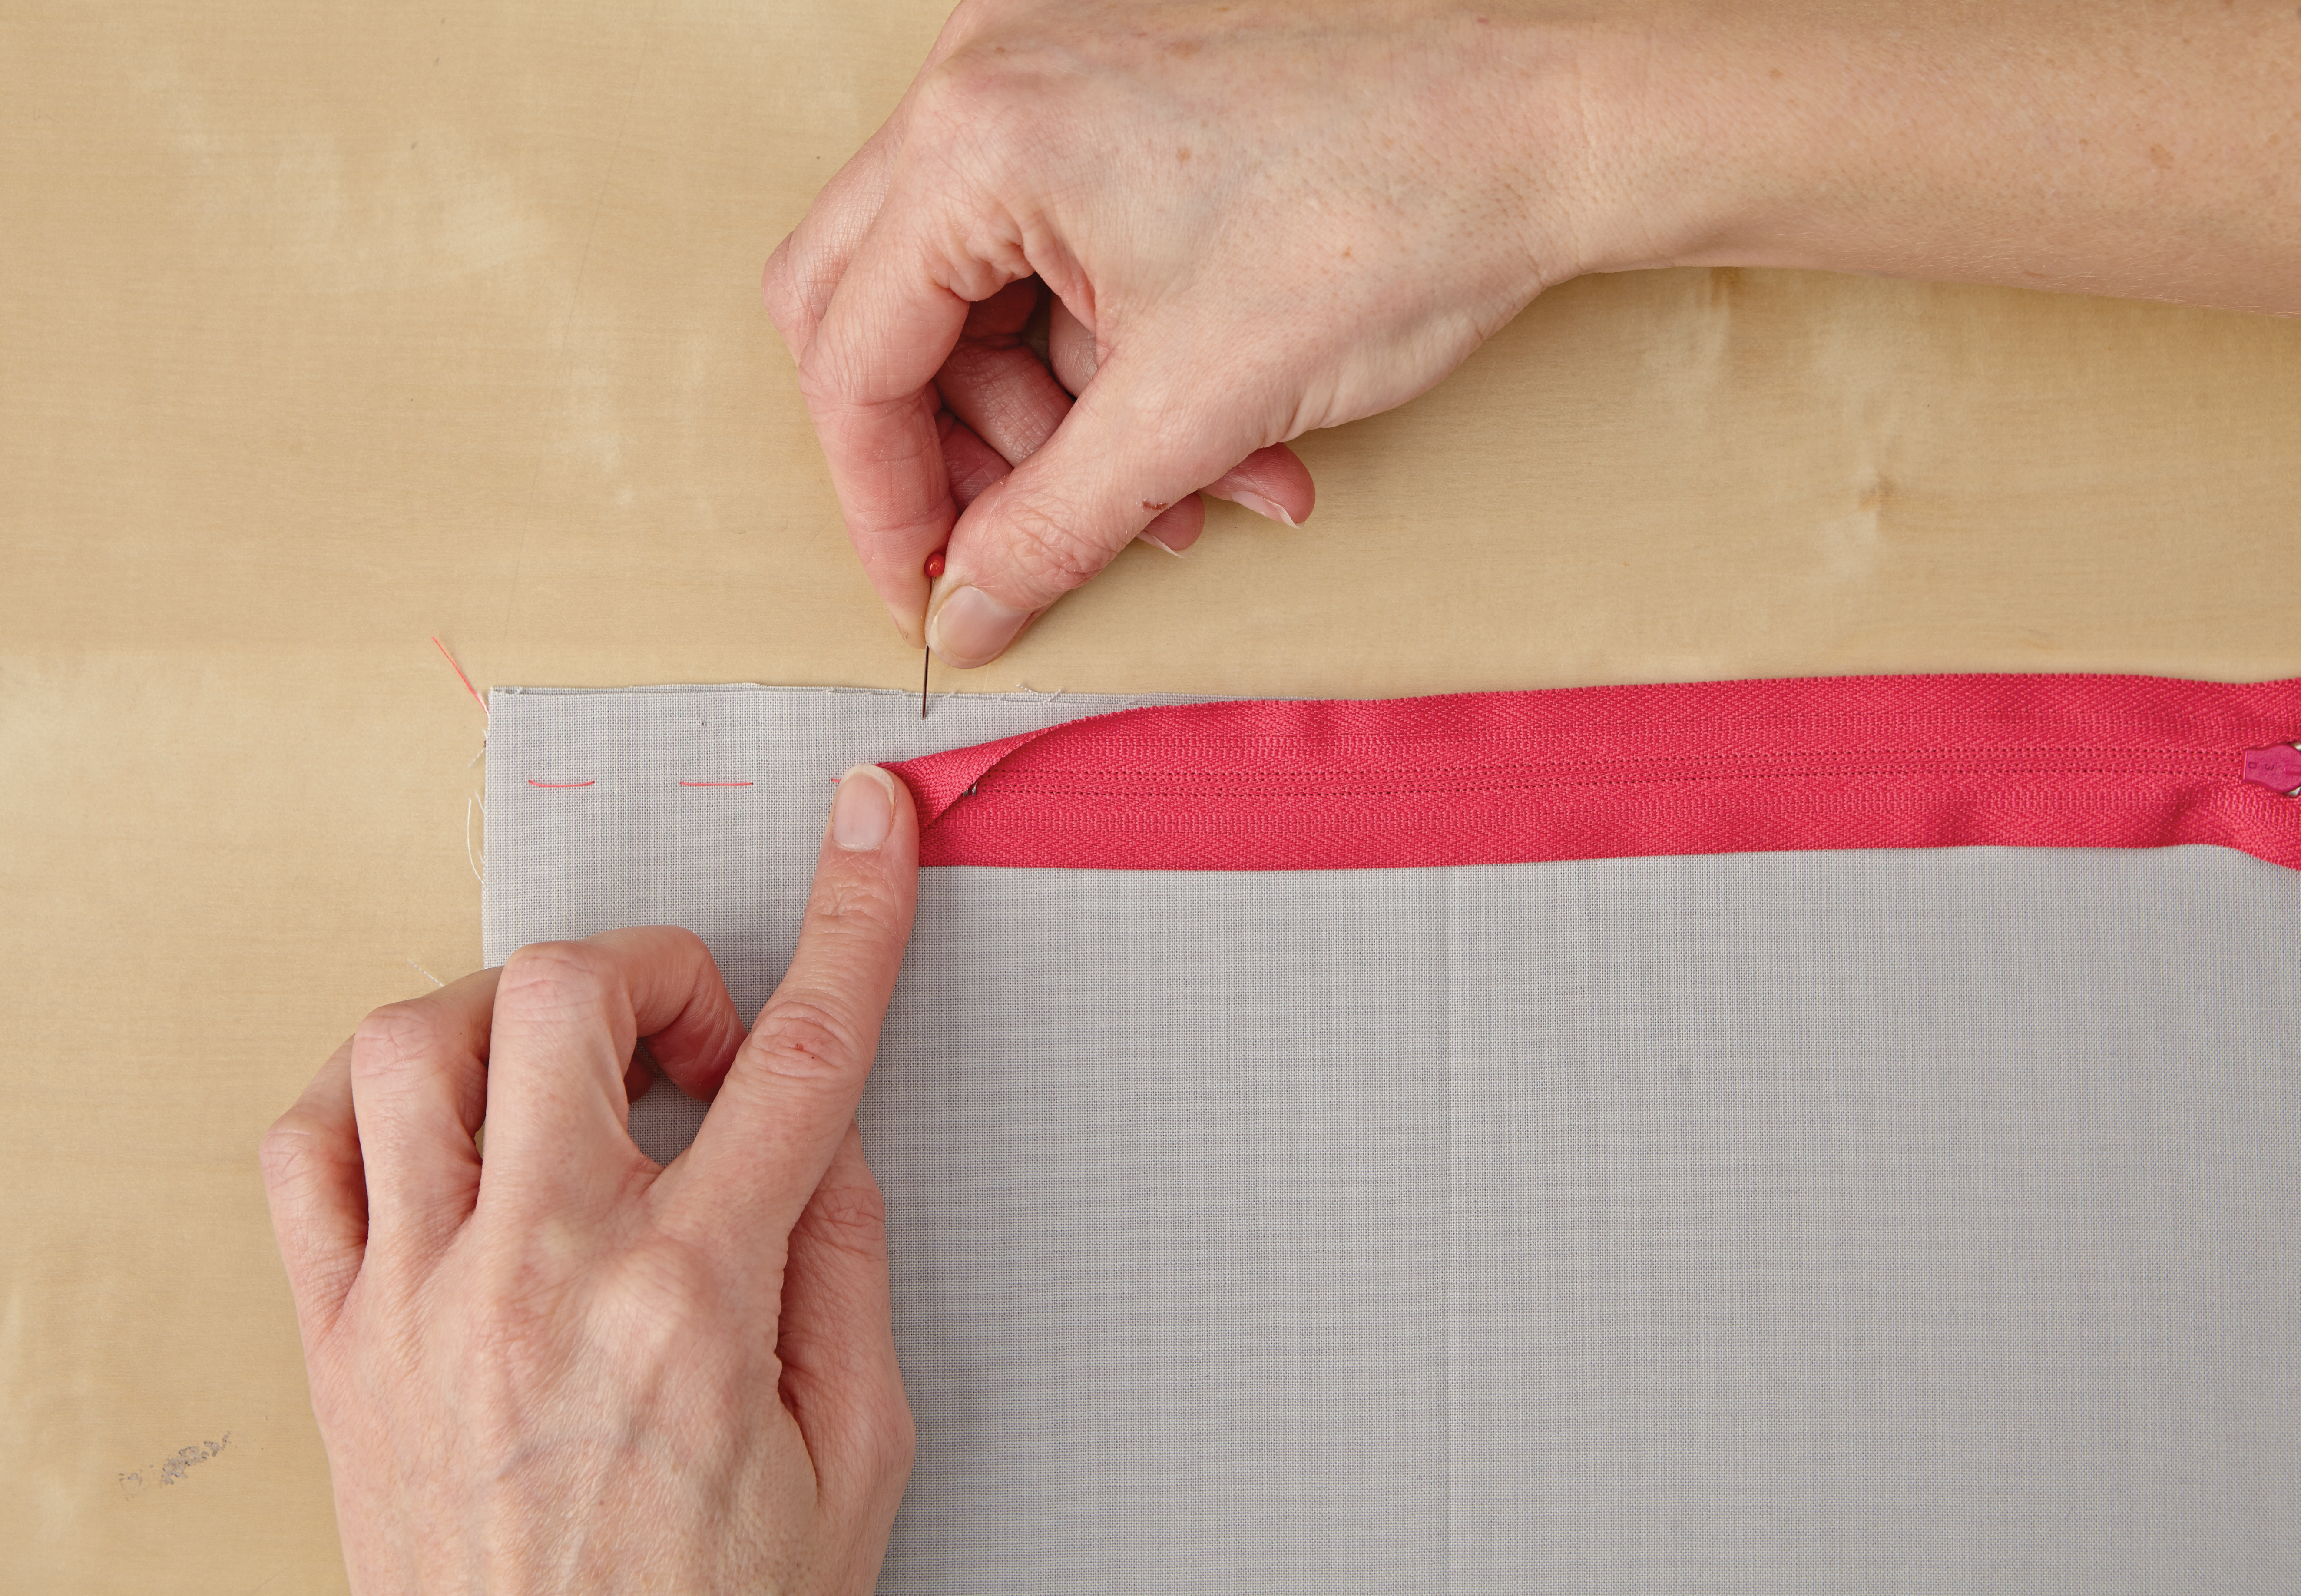
Lay the zip over your tacking stitches and adjust its position until the zip is lying centrally along the long edge of the pieces. Use a couple of pins to mark the position of the zip on the fabric – mark the position of the zip end first and then the position of the zip stopper.
Step 4
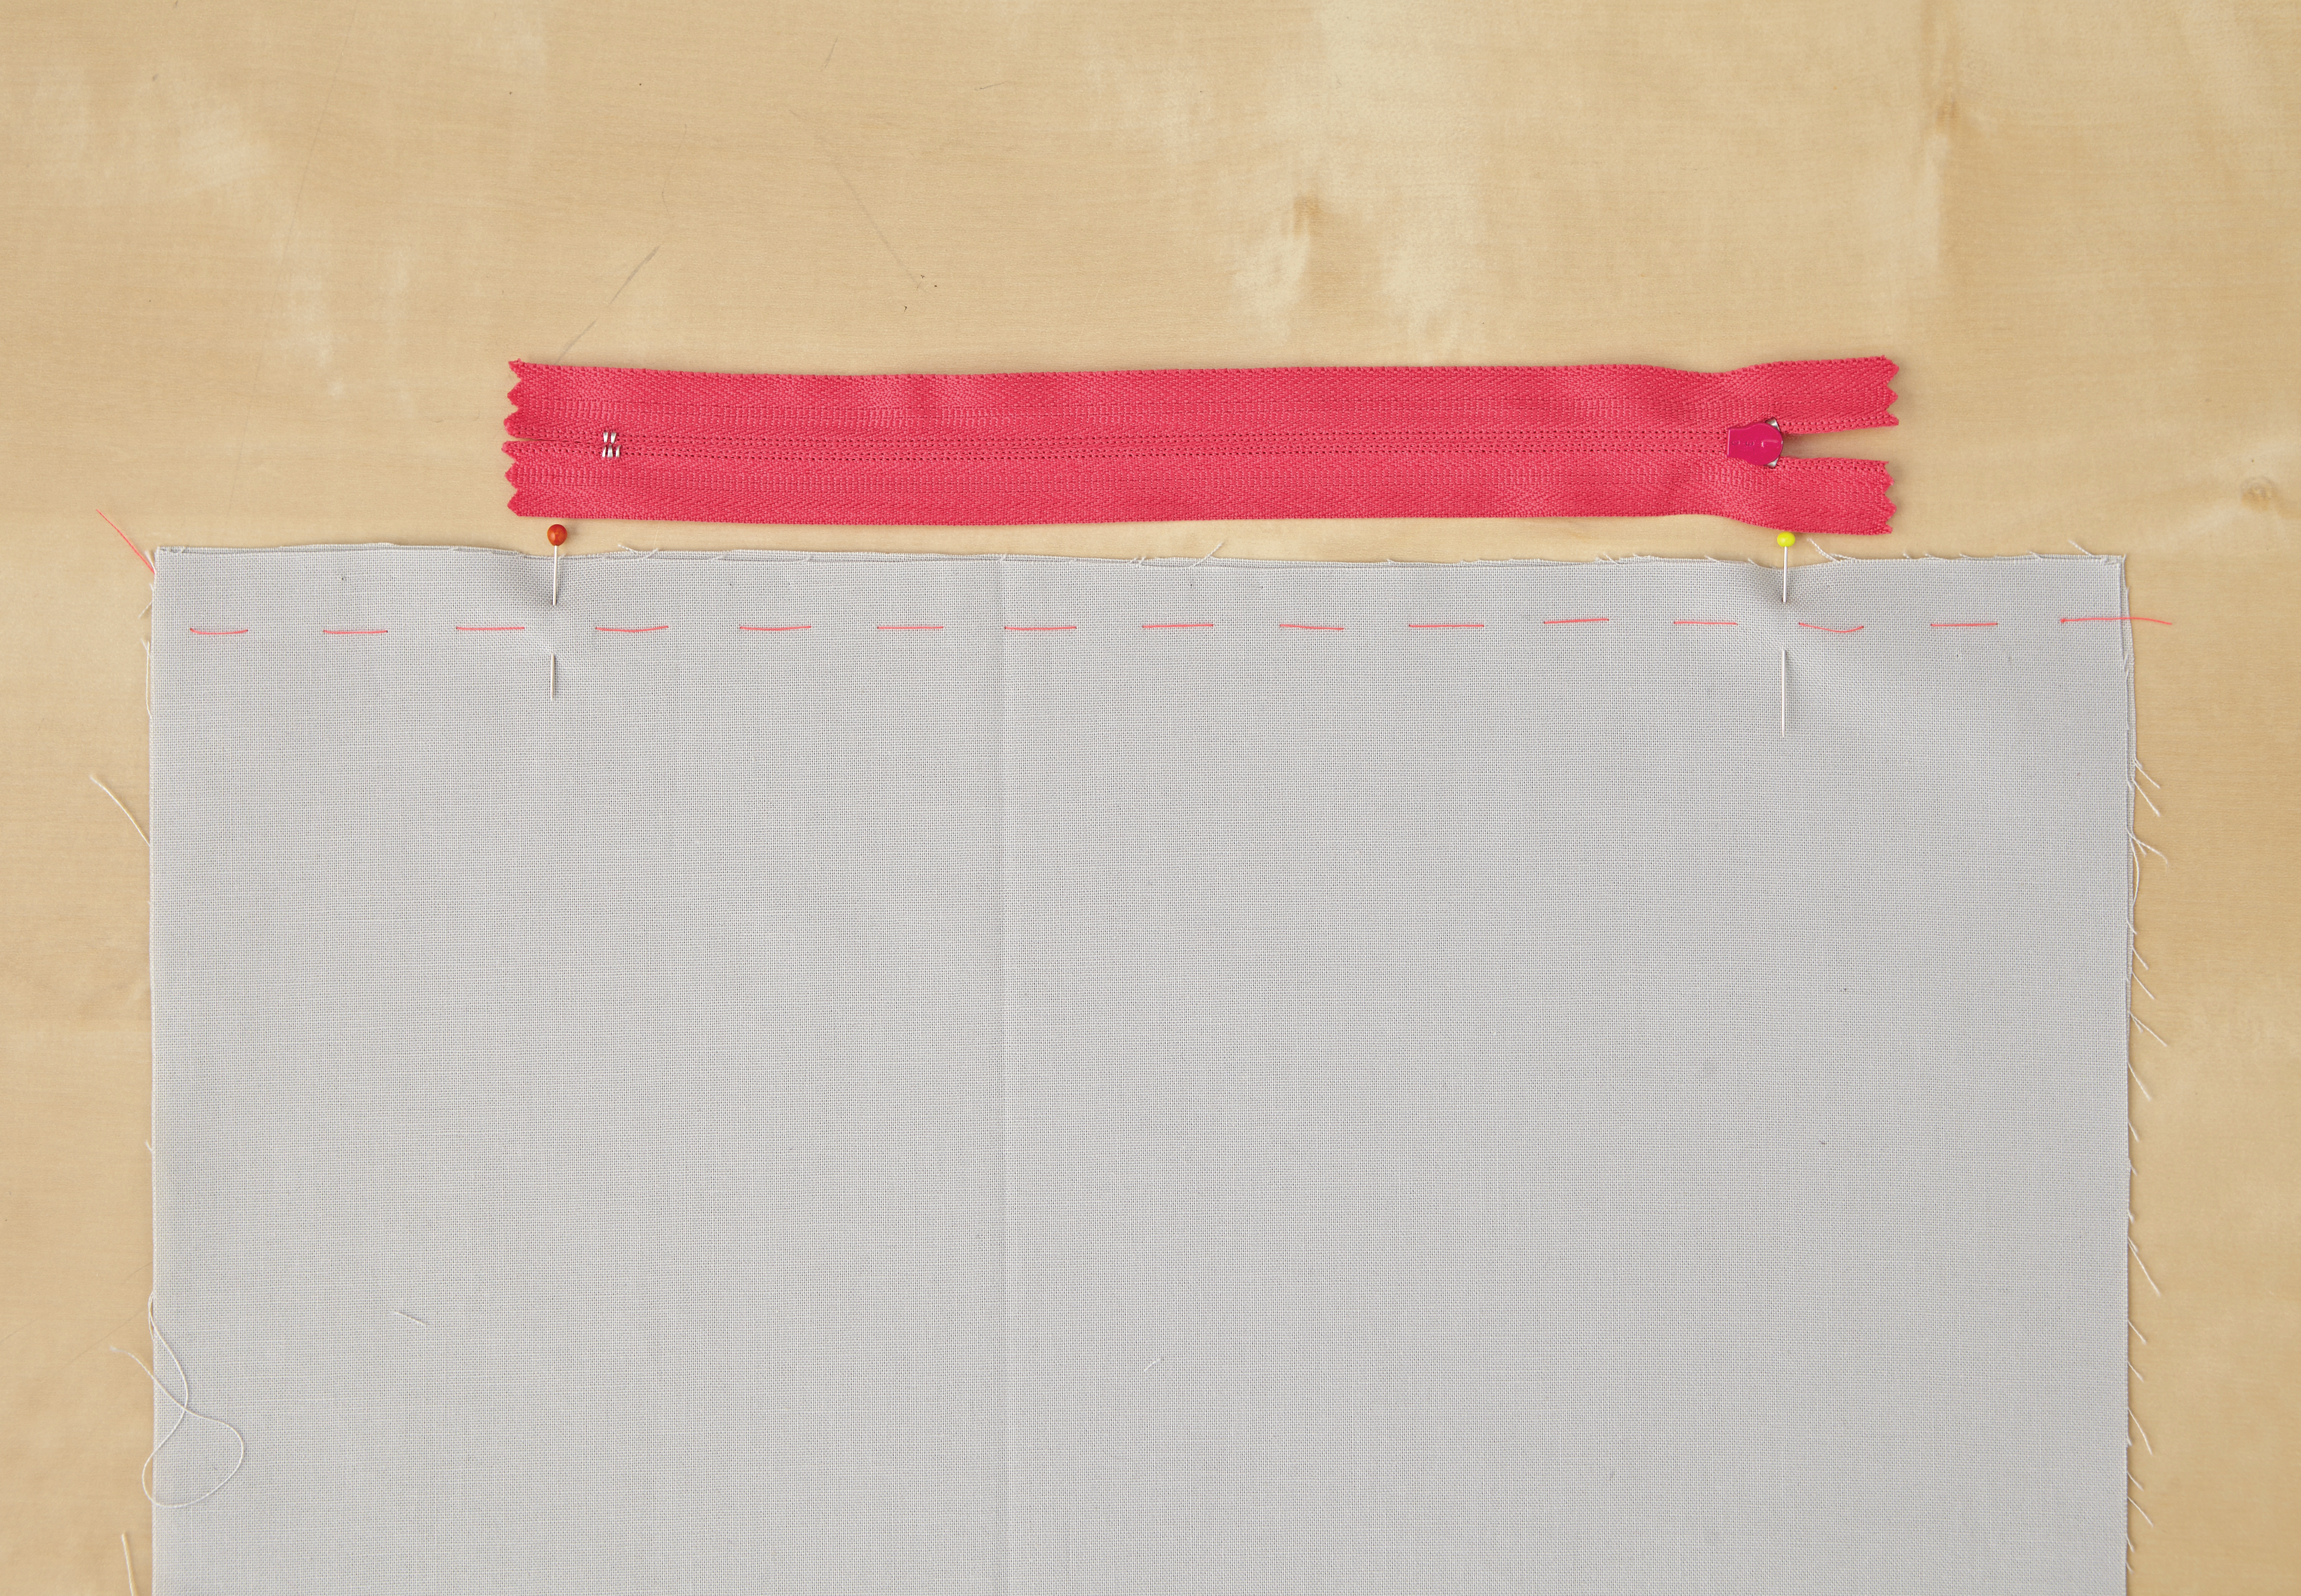
Move the zip up above the fabric, out of the way, and double check the position of your pins. When you’re happy, machine stitch the two back pieces together – start from the edge of the fabric, working towards your first pin marker, along the tacking stitches. Make sure you backstitch when you reach the pin. Repeat on the other fabric edge, working towards your second marker. Leave your tacking stitches in place and press open the seam.
Step 5
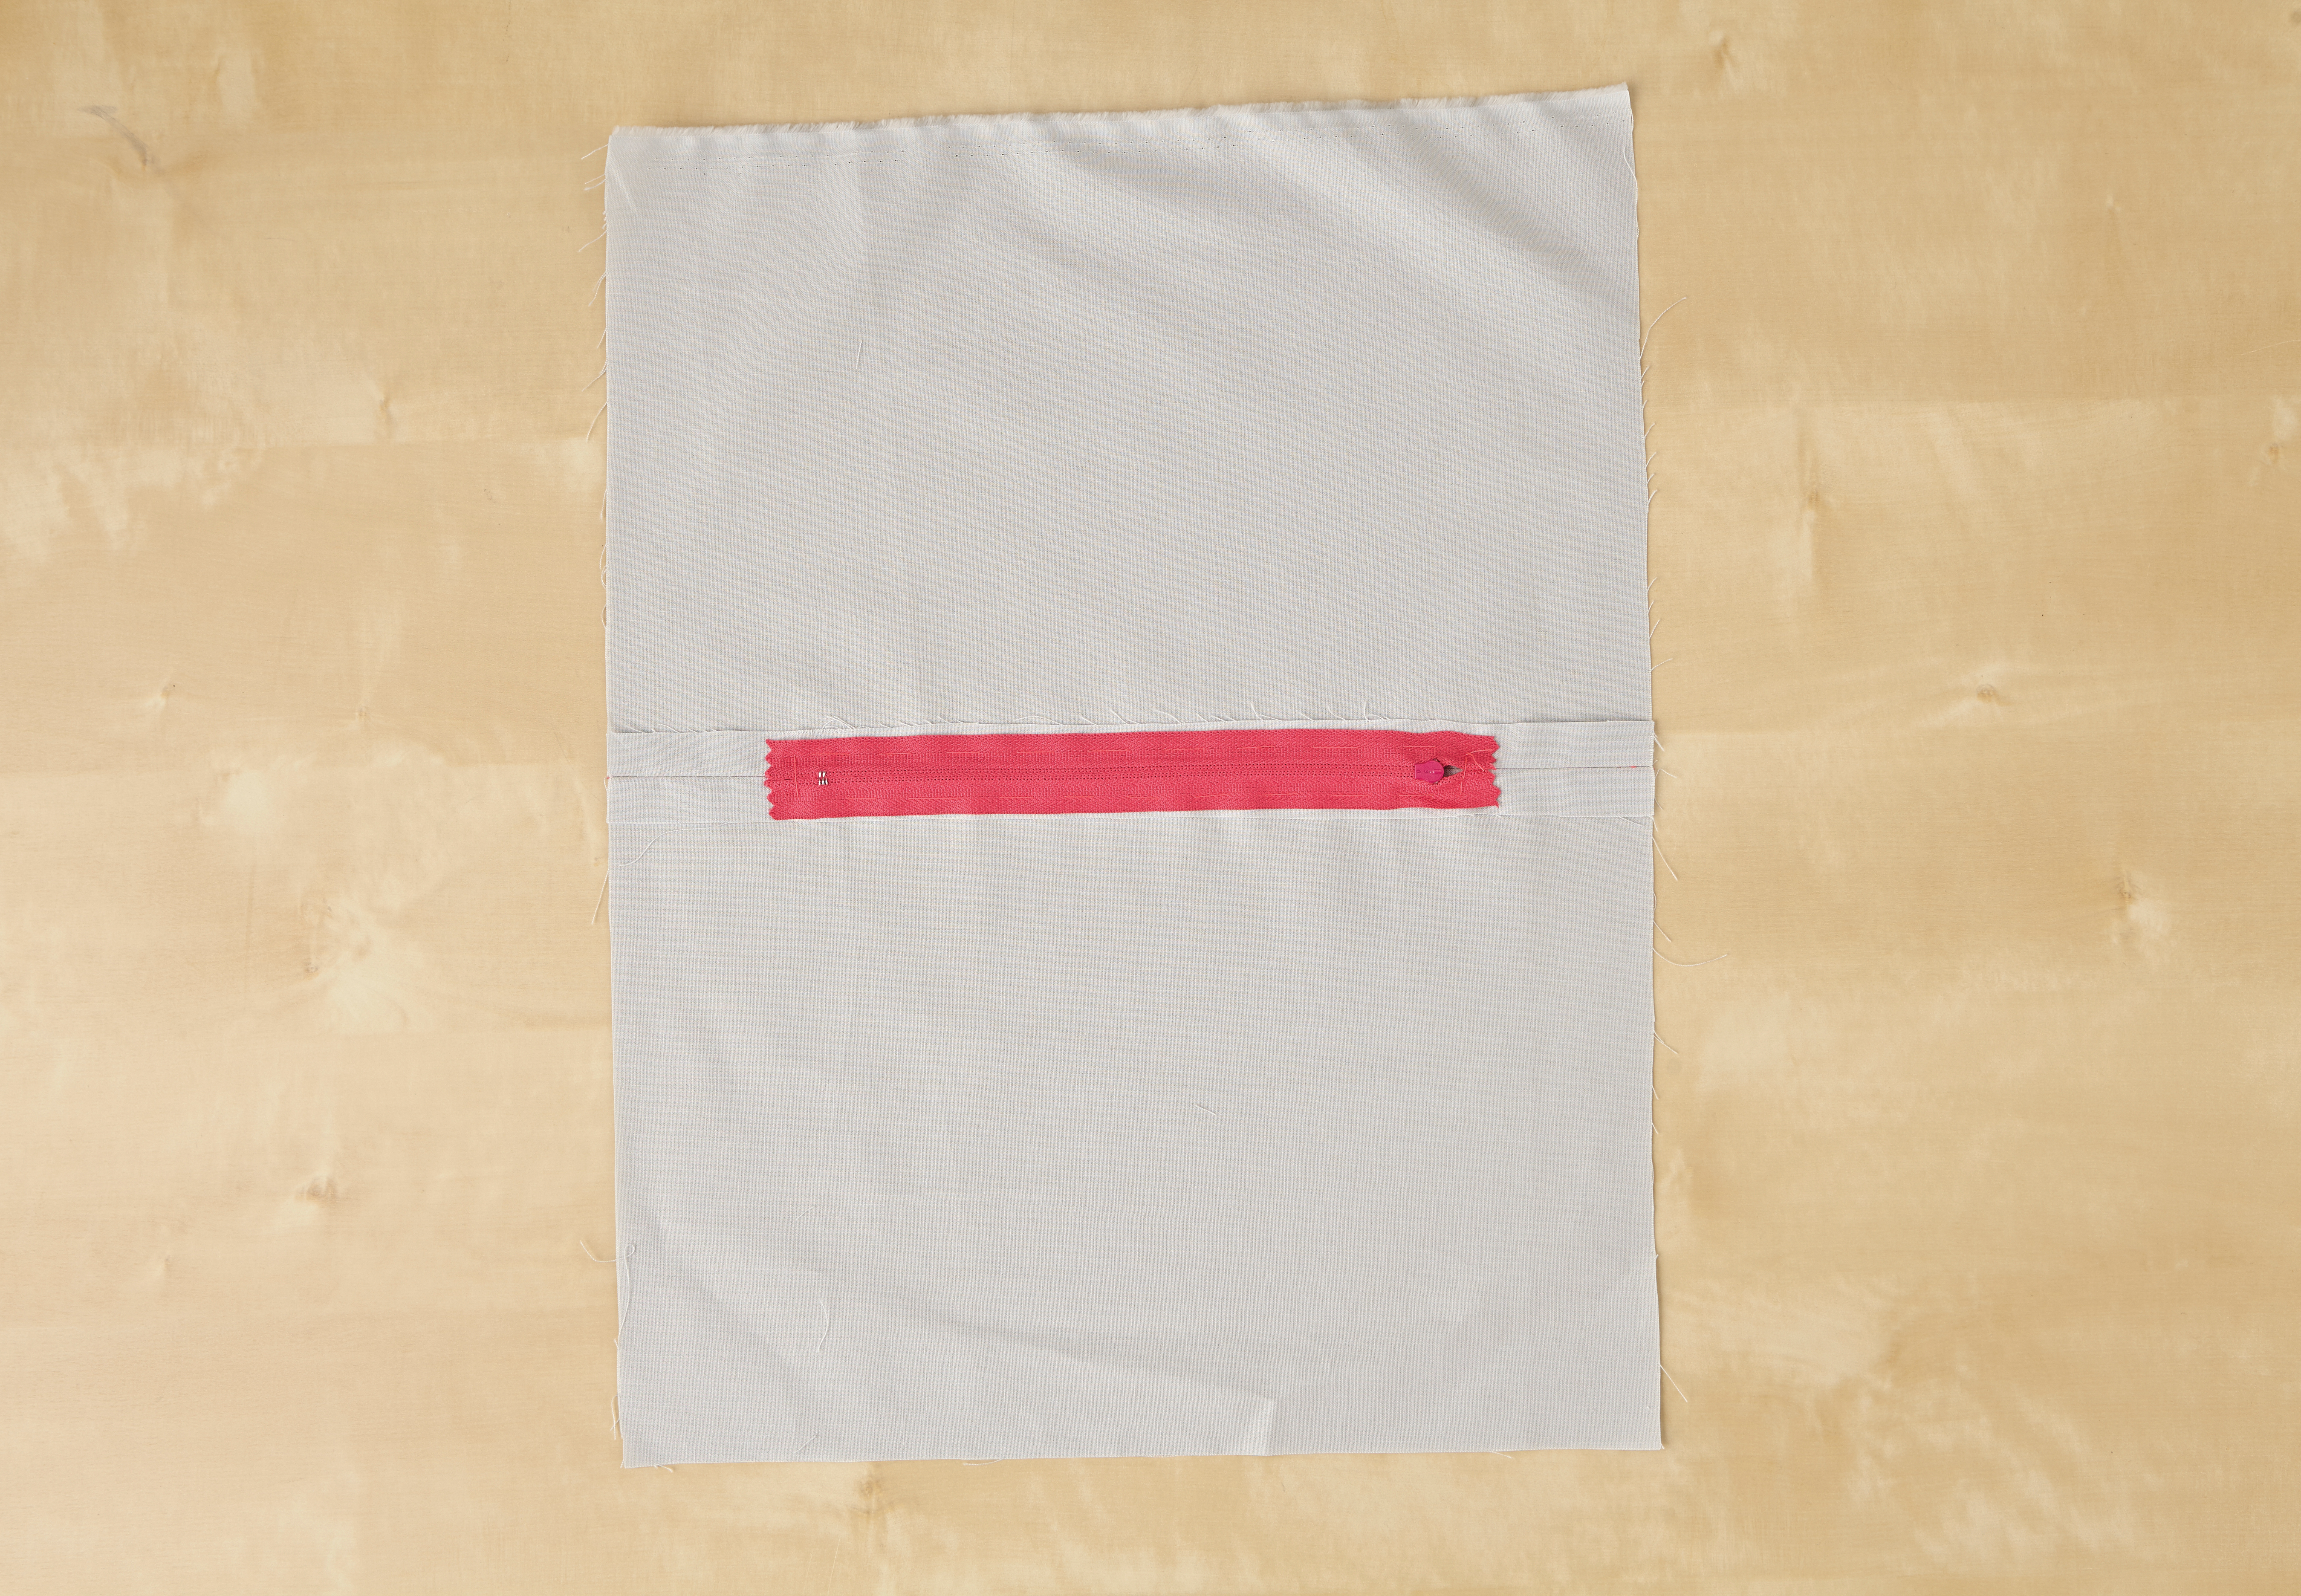
Open out the back pieces so the fabric lies flat. Place the zip face down over the tacked section of the seam. Make sure the teeth of the zip are exactly over the seam line because this will be where the zip will be visible. Pin the zip in place and then tack it down onto the fabric. Remove any staples there might be on the zip at this point as well.
Step 6
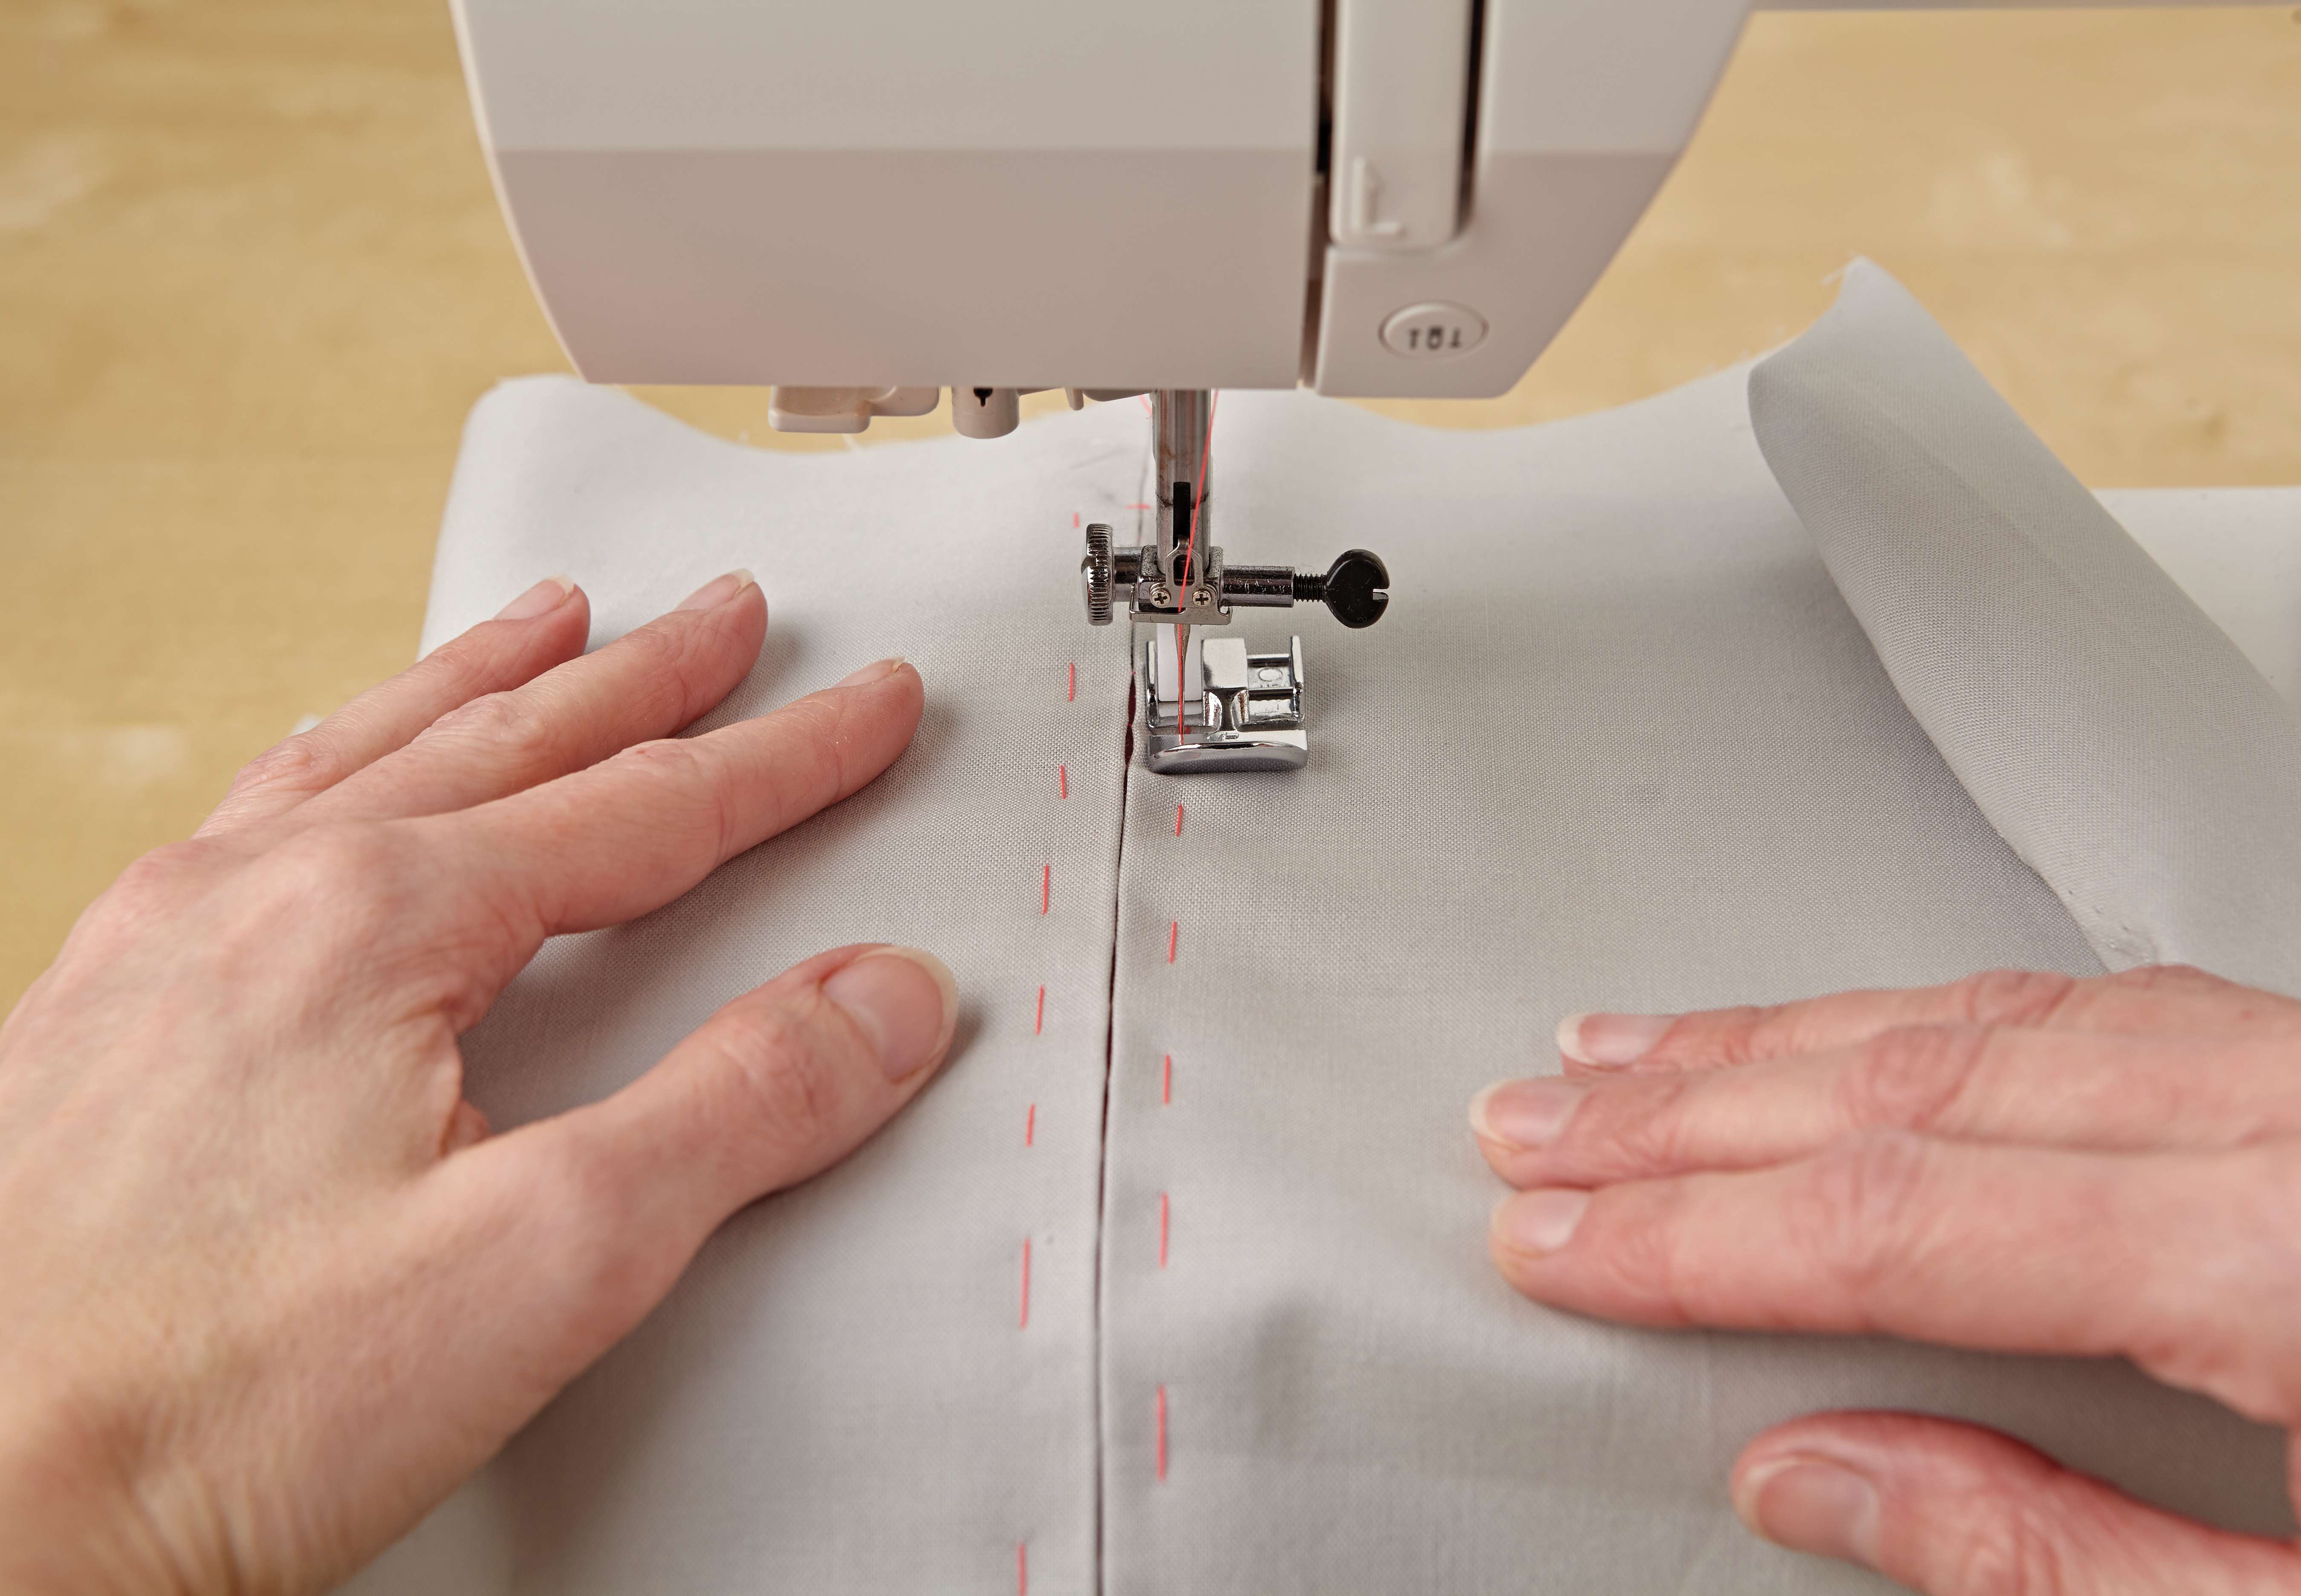
Working from the right side of the fabric, and using the zipper foot on the machine, start to stitch the zip in place. Stitch an even line about 0.75cm from the seam line, along each side of the zip, and across the top and bottom of the zip. Take care to avoid the zip stops at both ends, otherwise you may break the needle! Remove your tacking stitches and the zip should work freely. Leave the zip half open.
Step 7
To make up the cushion, place the front and back pieces right sides together, then machine stitch around all four sides, about 2cm from the fabric edge. Trim the seam allowances to 1cm and snip off the corners to help reduce bulk. Press the seams open with an iron and turn the cushion cover right side out, through the zip opening. Press the cover to smooth out any creases, then insert the cushion pad and zip up the opening to finish!
