Cutting out
Step 1
Download, print and cut out the templates.
From Fabric A cut:
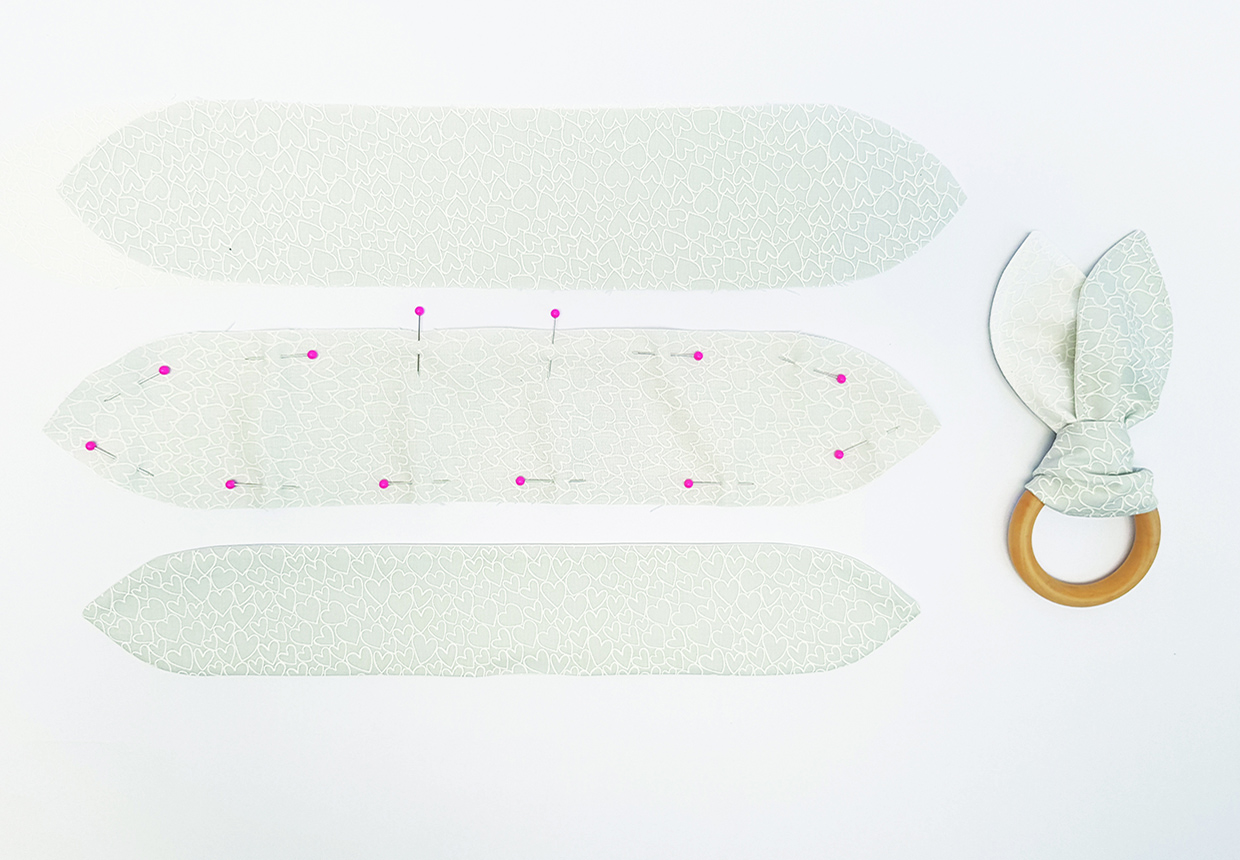
- Tie outer: one using teething ring template.
From Fabric B cut:
- Tie lining: one using teething ring template.
From Fabric C cut:
- Comforter back: 32x32cm (13x13in)
- Ear appliqué: one 10x10cm
- Ears: two using the template
- Bunny embroidery: one using the template
From Fabric D cut:
- Comforter front: 32x32cm (13x13in)
- Ears: two using the template
From the wadding cut:
- Comforter wadding: one 32x32cm (125⁄8x125⁄8in)
- Ears: two using the template
Making the teething ring tie
Step 1
Place the tie outer and tie lining pieces right side (RS) together and sew all the way around, leaving a turning gap. Clip the corners.
Step 2
Turn RS out and press, tucking the raw edges in. Topstitch all the way around.

Step 3
Fold the teething ring tie into a loop. Push the loop into the teether ring then thread the two fabric ends through the loop, pulling the loop tighter and adjusting the fabric as you wish.
Creating the ears
Step 1
Transfer the ear central appliqué details to the Bondaweb.
Step 2
Press the Bondaweb onto the wrong side (WS) of the ear appliqué piece and cut out the two ear appliqué details.
Step 3
Iron the two appliqué details onto the Fabric D ear pieces then topstitch around the appliqué. These are the ear fronts.
Step 4
Staystitch the wadding to the WS of the ear fronts.
Step 5
Place the Fabric C ear pieces RS facing the ear fronts and sew together around the curved edges, leaving the bottom unsewn. Clip the corners and trim off excess fabric. Turn RS out through the bottom.
Step 6
Mark the centre point along the bottom of the ear, then mark 1cm (3⁄8in) either side of this point. Fold over the ear from one side point to the other. Staystitch along the bottom edge to hold.
Step 7
Repeat these steps to make the second ear, this time folding over the ear crease to the other side – so you have a mirror pair.
Adding the embroidered face
Step 1
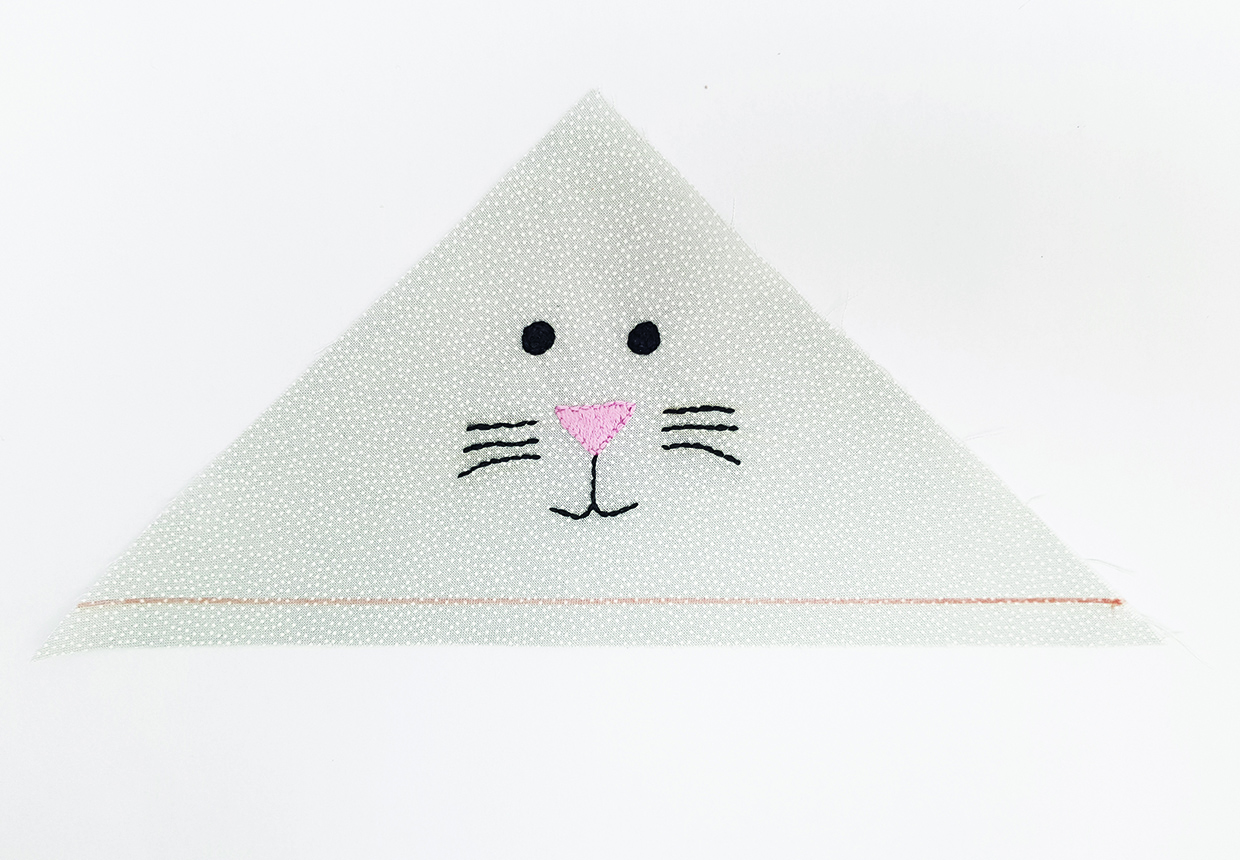
Transfer the embroidery onto the bunny embroidery triangle piece and embroider the face.
Step 2
Draw a line along the bottom of the triangle, 1cm (3⁄8in) up from the bottom edge.

Step 3
Fold the fabric to the WS along the marked line and press.
Assembling the comforter
Step 1
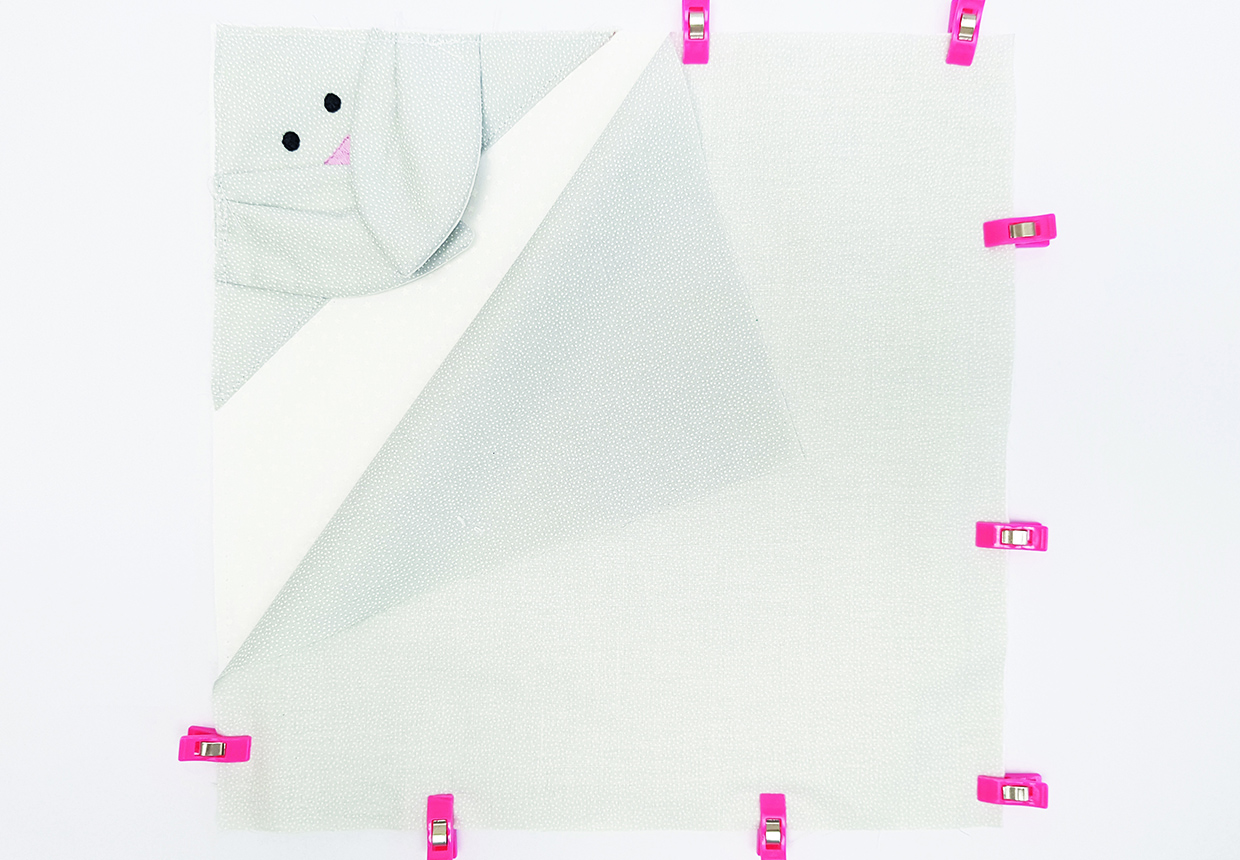
Place the embroidered triangle RS up on top of the comforter front fabric, in the top left corner. Staystitch around the two edges and topstitch along the diagonal folded edge.
Step 2
Staystitch this whole piece to the comforter wadding, WS facing.
Step 3
Place a bunny ear 6cm (23⁄8in) away from the top left corner, with the ear RS facing the embroidery and aligning raw edges. Staystitch to hold. Repeat for the second ear.
Step 4
Place the comforter back fabric square RS facing the bunny main. Pin or clip all around.

Step 5
Sew together all the way around, leaving a turning gap along one edge. Clip the corners and turn RS out through the turning gap. Push out all edges and the seam and press.
Step 6
Close the gap with a neat ladder stitch.


