How to do a Full Bust Adjustment: wrap dress tutorial

How to do a Full Bust Adjustment: wrap dress tutorial

If you have a larger bust and struggle to get the fit right on wrap bodices, you may need to do a full bust adjustment (FBA). Here is our step-by-step guide for altering a wrap dress sewing pattern so you can get the perfect custom fit.

Try 3 issues of Simply Sewing magazine for £10!

Published: January 24, 2020 at 8:59 am

You will need

  • Calico or other inexpensive fabric 1mx140cm (118ydx55in), see notes
  • Pattern paper
  • Pattern master or ruler
  • Paper scissors
  • Coloured fine liners
  • Scotch magic tape
  • Mechanical pencil

Get The Maria Wrap Dress sewing pattern

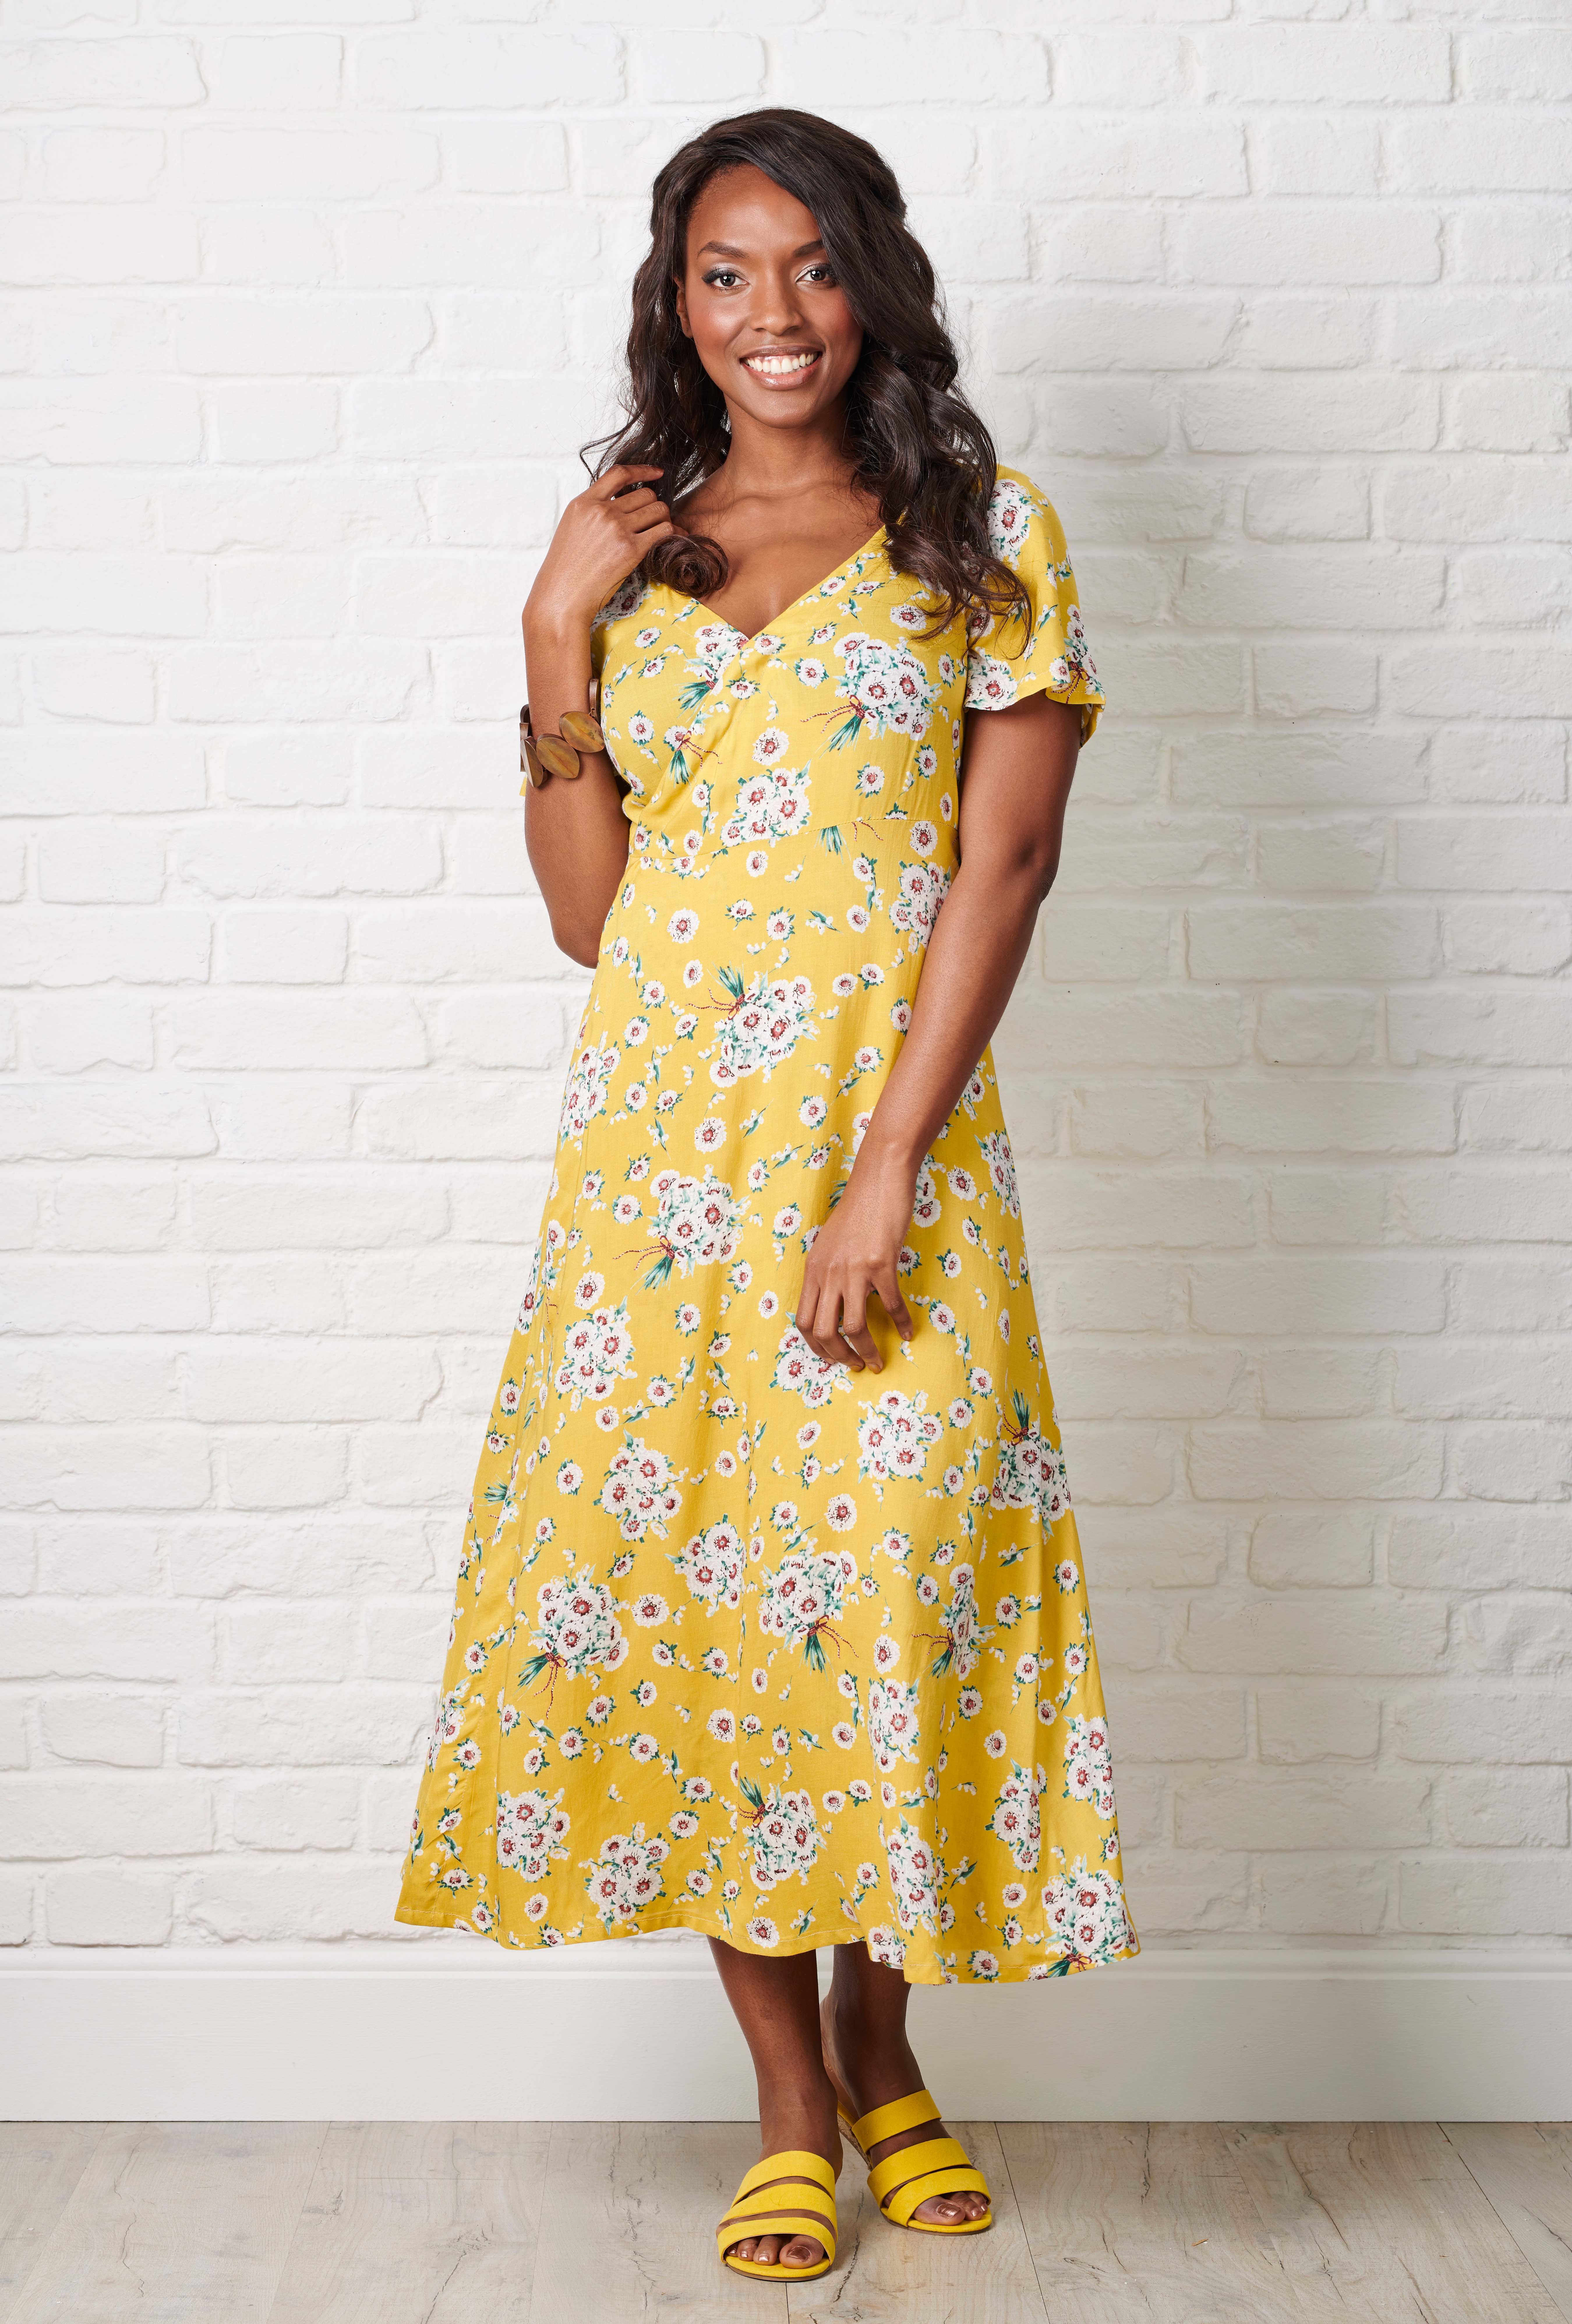
With a tie fastening, elegant flutter sleeves and midi and maxi lengths, The Maria Dress is the ultimate in summery chic. Get making this wrap dress sewing pattern today: it was first published with issue 58 of Simply Sewing magazie & the PDF pattern is available in our Etsy pattern shop.

Notes

  • These instructions are for the Maria dress (above) – the basic full bust adjustment principle applies to most bodice pattern pieces, however, due to the combination of an armhole dart and wrap bodice we recommend that these instructions are only applied to the Maria dress.
  • 1 meter (118yd) of fabric will be enough to create two samples of the bodice section. You will need more fabric if you wish to make more samples. Use a fabric that is a similar weight and drape to your fabric for the final garment to get an accurate idea of fit and hang.
  • We used coloured fineliners to indicate the various pattern markings and adjustments made. This is for ease of demonstration, but you may find that this helps you to clearly differentiate the lines as pattern alterations can get messy and confusing! If you don’t have fineliners, highlighters or felt tip pens can also be used to mark the pattern.
  • Scotch magic tape is a matte tape that you can draw on and can be removed easily without ripping the paper. Any tape will work but use clear tape sparingly so that lines can be marked.

Before you begin

Do I need to do a full bust adjustment?

Most patterns are drafted to a B cup. A full bust adjustment (FBA) will increase the size of the dart and add more room (width and length) into the pattern to accommodate a larger bust. Signs that you need to do an FBA include:

  • Your bust measurement is a larger size than the measurement for your waist and hip measurements on the envelope size chart.
  • The waist line is pulling so it sits higher on the front than it does on the back. You may need to look in a mirror to gauge this or ask a friend for assistance.
  • The wrap front doesn’t fit correctly over your bust, it is too small or too tight. There may also be visible pulling across the bodice when you fasten the ties.

How to calculate your adjustment amount

Wearing your usual bra style, measure your bust at the widest point, ensuring the tape measure is parallel to the floor. Make a note of this measurement. Compare this measurement to the bust measurements on the envelope size chart, if you are 5cm (2in) or more larger than the size that your other measurements fall into then you will need to do an FBA.

The bust measurement on the Maria dress envelope for a size 10 is 86cm (34in). We are going to demonstrate how you would alter the pattern if you fall into the size 10 measurements for your waist and hips but your bust measures 91cm (36in), 5cm (2in) larger than the size 10 bust measurement.

Making a toile

Make a quick sample of the bodice before beginning in the size indicated by your measurements on the envelope back. You will need to stitch the two front and one back bodice pieces together at the side and shoulder seams to get an idea of fit.

It isn't necessary to finish any of the seams or add the facings to your sample and you can use a longer stitch length to speed up the process. Once you have your sample you will see what adjustments need to be made.

Moving the dart

Step 1

Trace off the bodice including the grainline, centre front line, armhole notch and the dart.

Step 2

Measure the width of the dart and mark the centre point at the armhole edge (the widest part of the dart). Draw a line through the centre of the dart, connecting the centre point to the dart tip.
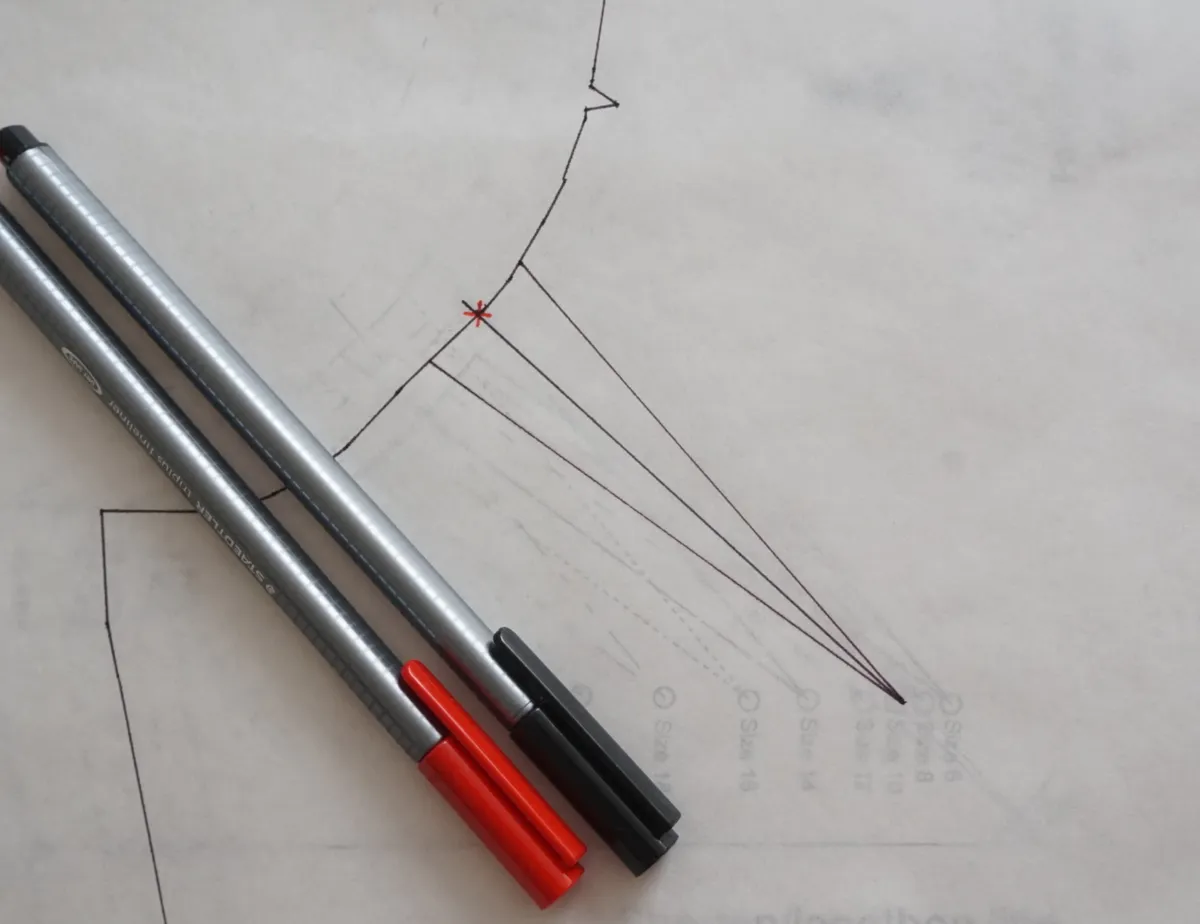
Full bust adjustment tutorial step 1
Moving the dart - Marking the centre of the dart

Step 3

Darts are positioned approx. 2.5cm (1in) from the actual bust apex (usually your nipple point) this is so that the bodice doesn’t form a point at the bust. The dart will lay flatter and have a better appearance if it is positioned slightly away from the bust. We are going to find the original bust apex point. Place your ruler along the centre line of the dart and measure 2.5cm (1in) from the tip of the dart in the same direction. Mark this point with a cross and join the cross to the dart tip.
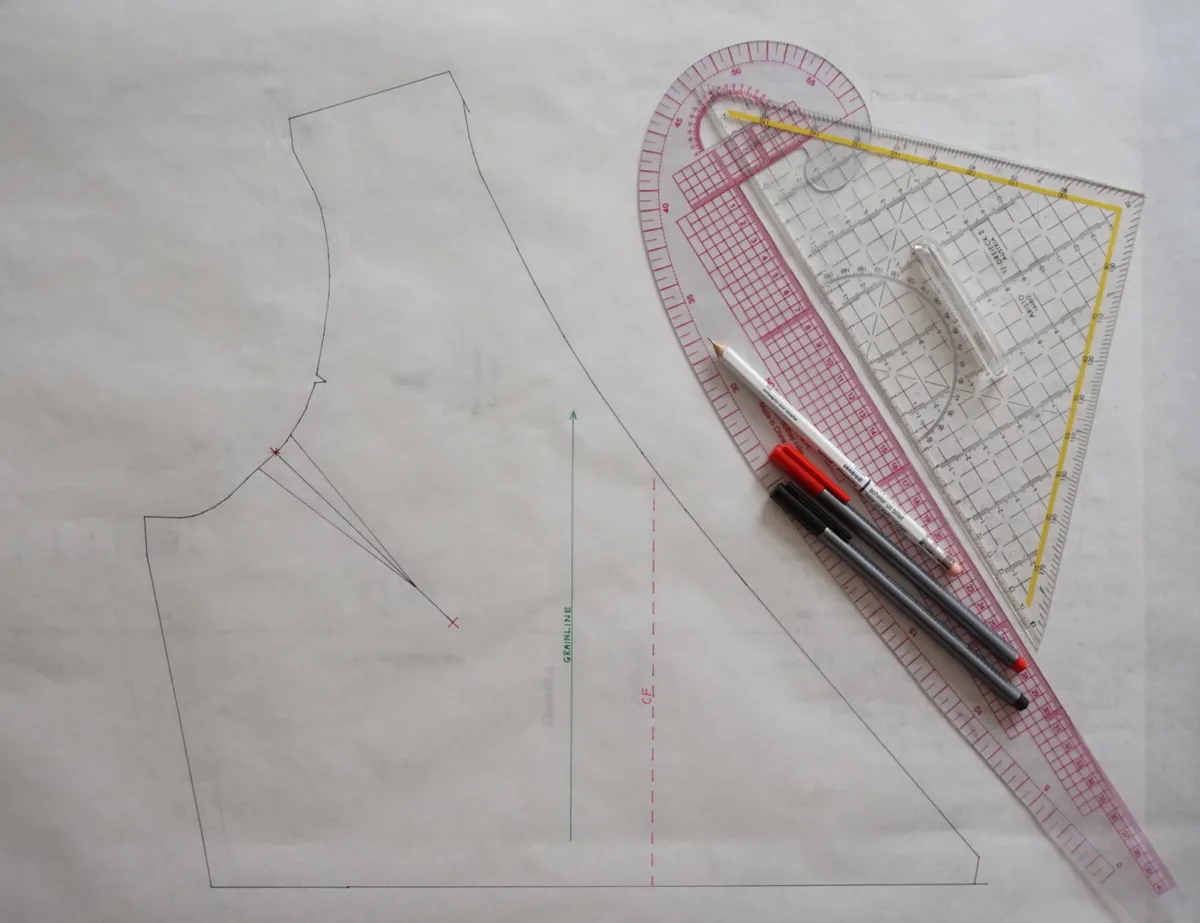
How to do a full bust adjustment step 3 finding the bust point
Finding the bust point

Step 4

Redraw the dart legs so that the tip extends to the marked cross. The widest point of the dart will still be in the same position. We have shown this in red.

Step 5

We will now reposition the dart into the side seam to make the full bust adjustment easier. Measure 8cm (318in) down from the top of the side seam and draw a line to the bust point cross.
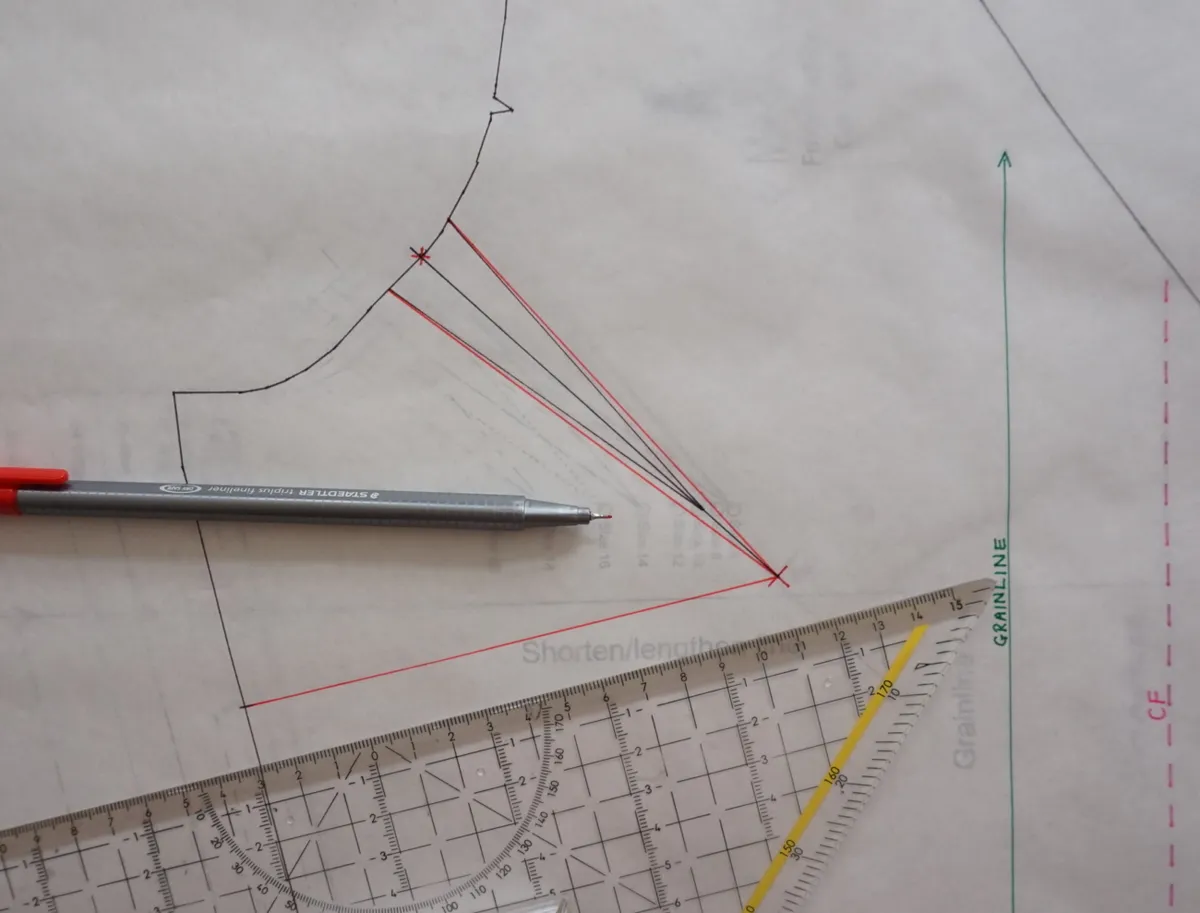
How to do a full bust adjustment step 6
Marking the side dart

Step 6

Cut out the pattern piece around the outer edge. Fold the dart along the centre line Then fold to bring the dart edges together and tape closed.
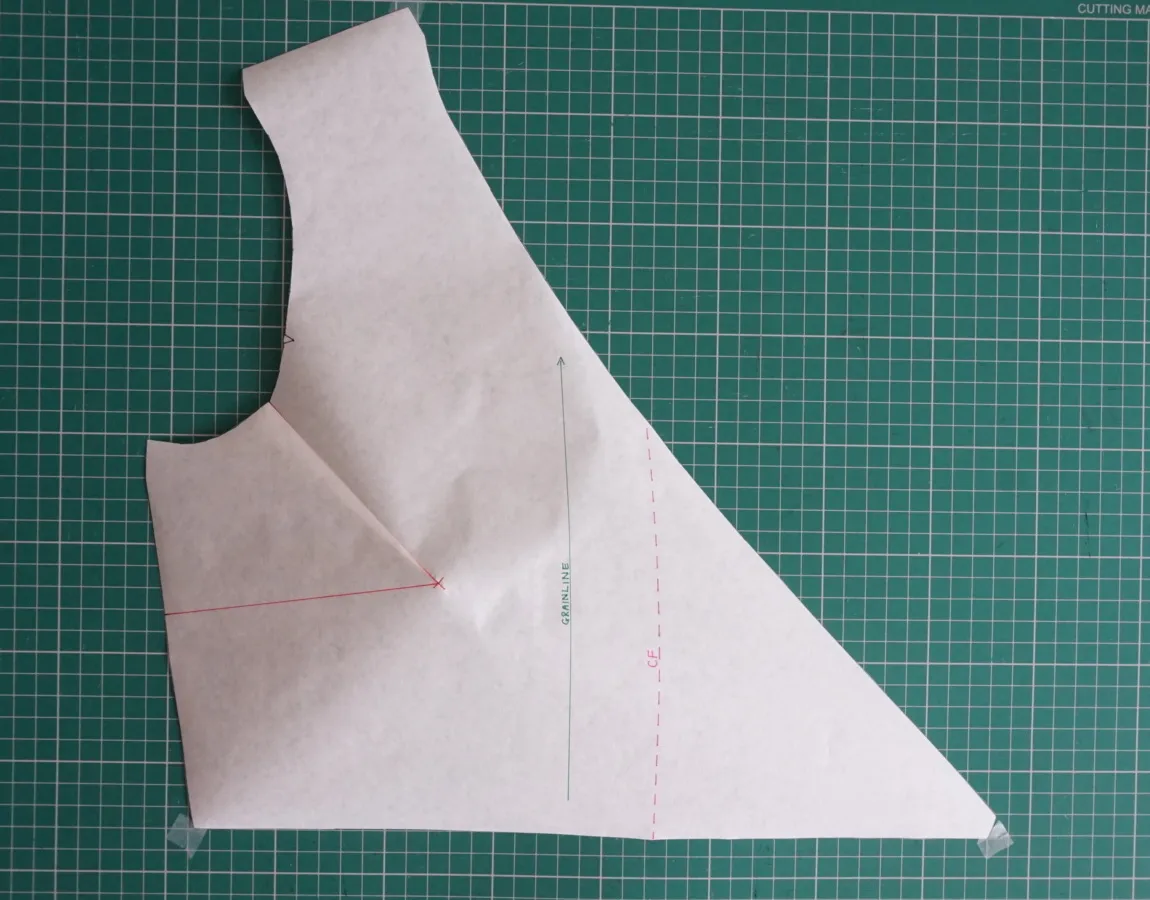
How to do a full bust adjustment step 6 B
Closing the armhole dart

Step 7

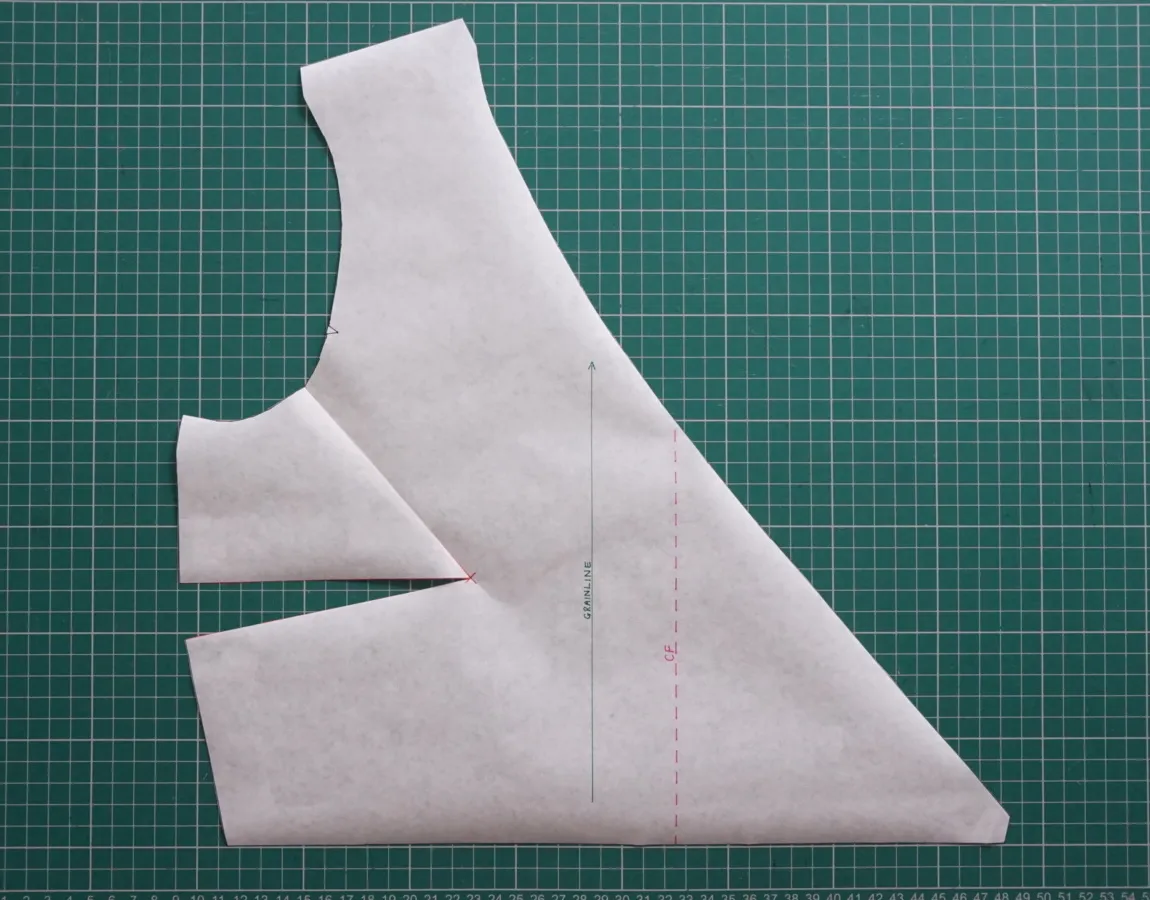
Cut along the newly marked side seam line stopping at the bust point cross. This will release the paper and move the dart to the side seam.
How to do a full bust adjustment step 7
Opening the side dart

Step 8

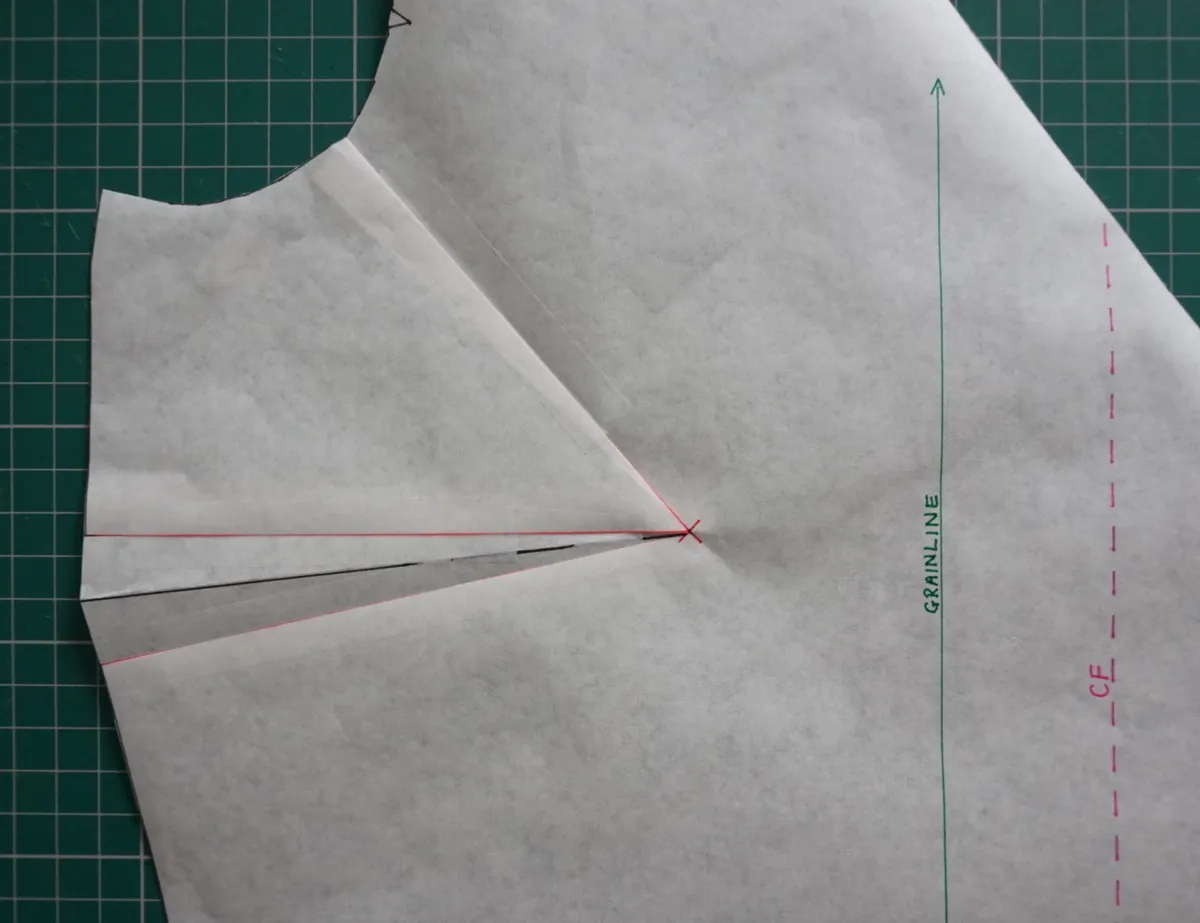
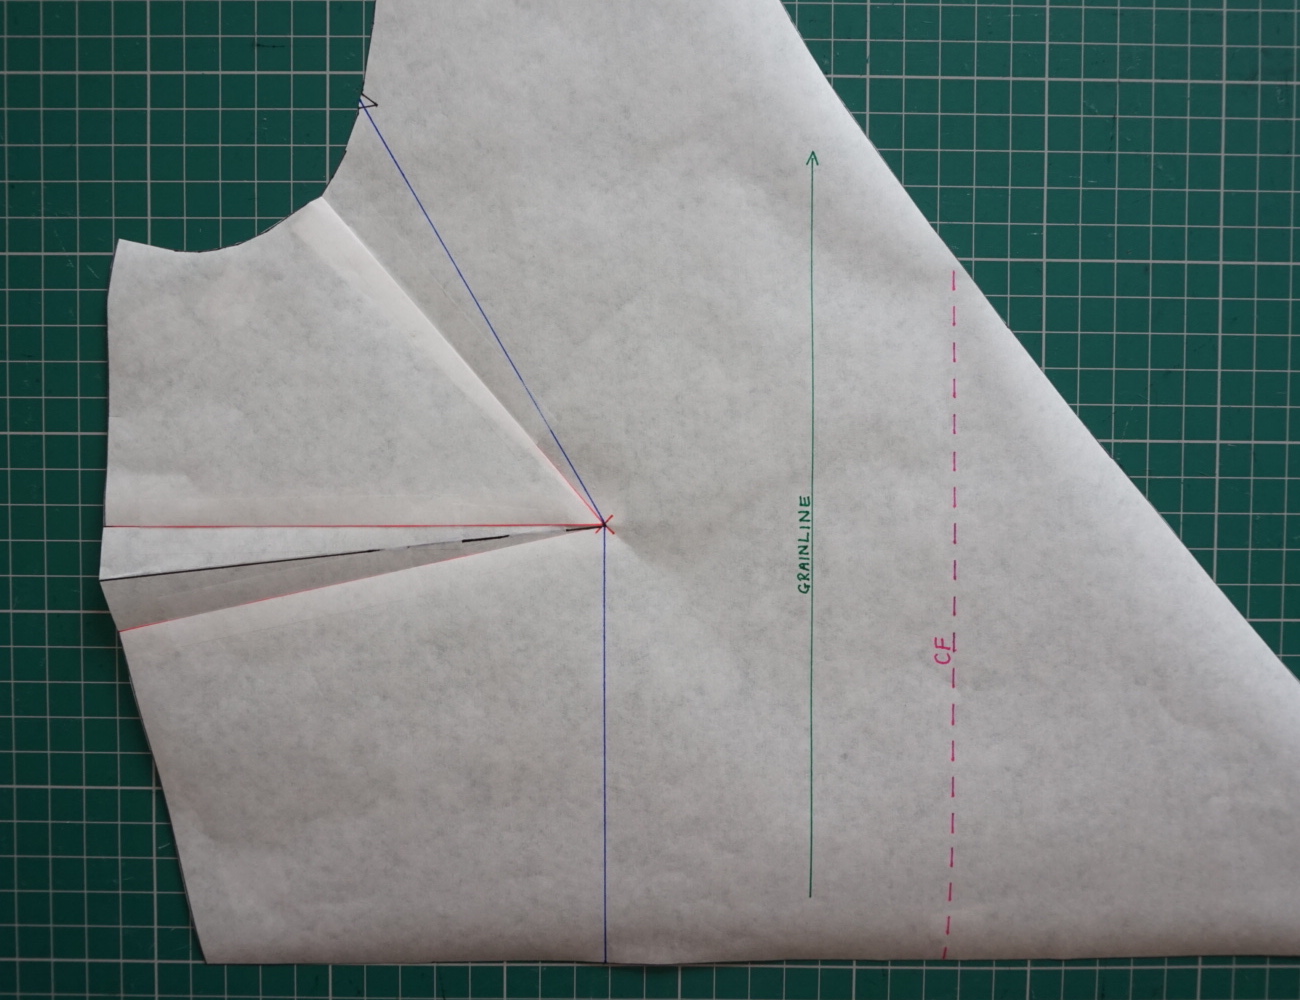
Tape paper behind the new dart opening and mark the centre of the dart as before. You may also like to fold along the dart centre line and true the dart edges by cutting through the folded excess paper at the side seam.
How to do a full bust adjustment step 8
Marking the centre of the side dart

Full bust adjustment: step-by-step

Step 1

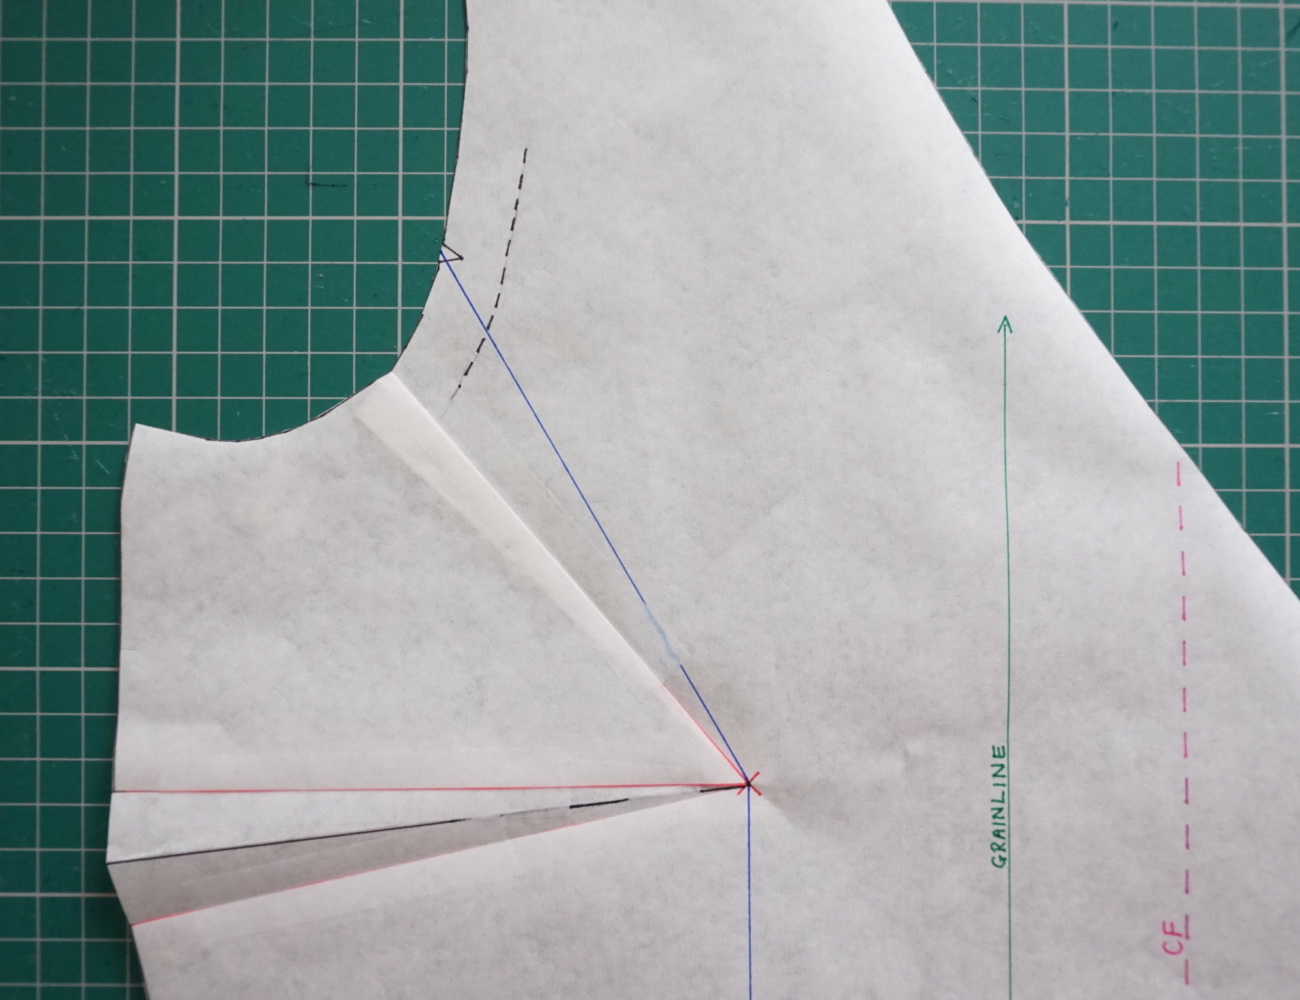
Draw a line from the bust apex cross to the bottom of the pattern piece, parallel to the grainline.

Step 2

Draw another line from the bust apex cross to the armhole notch. Shown in blue.

How to do a full bust adjustment FBA step 2 moving the dart
Marking the adjustment lines

Step 3

You will also need to mark the 1.5cm (⅝in) seam allowance around the armhole approx. 3cm (118in) either side of the notch.

How to do a full bust adjustment FBA step 3
Marking the seam allowance

Step 4

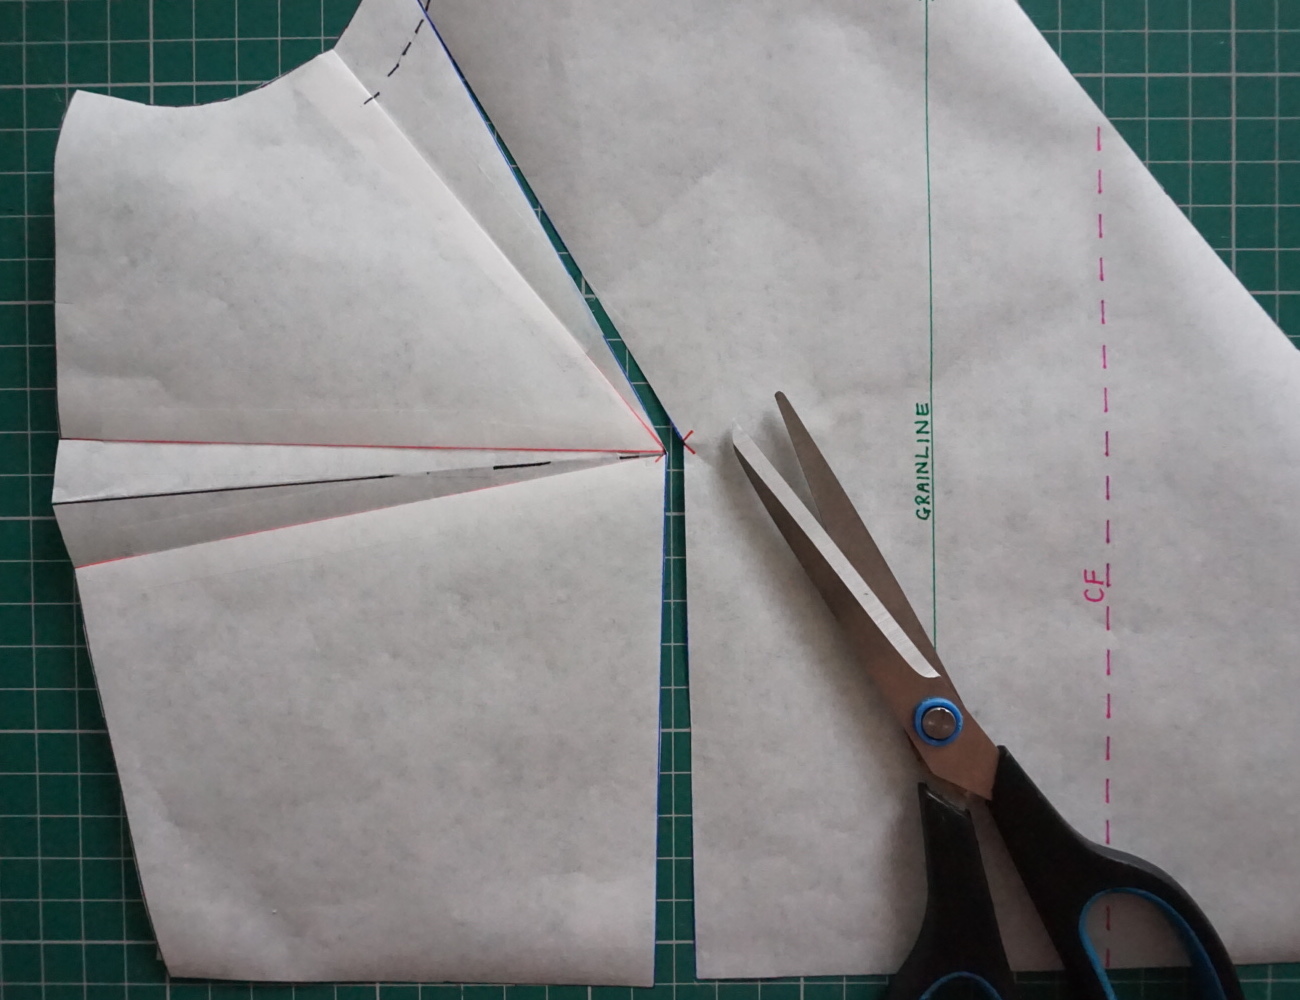
Cut through the lines you have just drawn starting at the base of the pattern and cutting up through the bust apex point and then up through the angled line towards the armhole. Don’t cut all the way to the edge, you will need to stop cutting 2-3 millimetres away from the seam allowance mark you made earlier.

How to do a full bust adjustment FBA step 4
Cutting along the adjustment lines, stop a few millimetres away from the marked seam allowance

Step 5

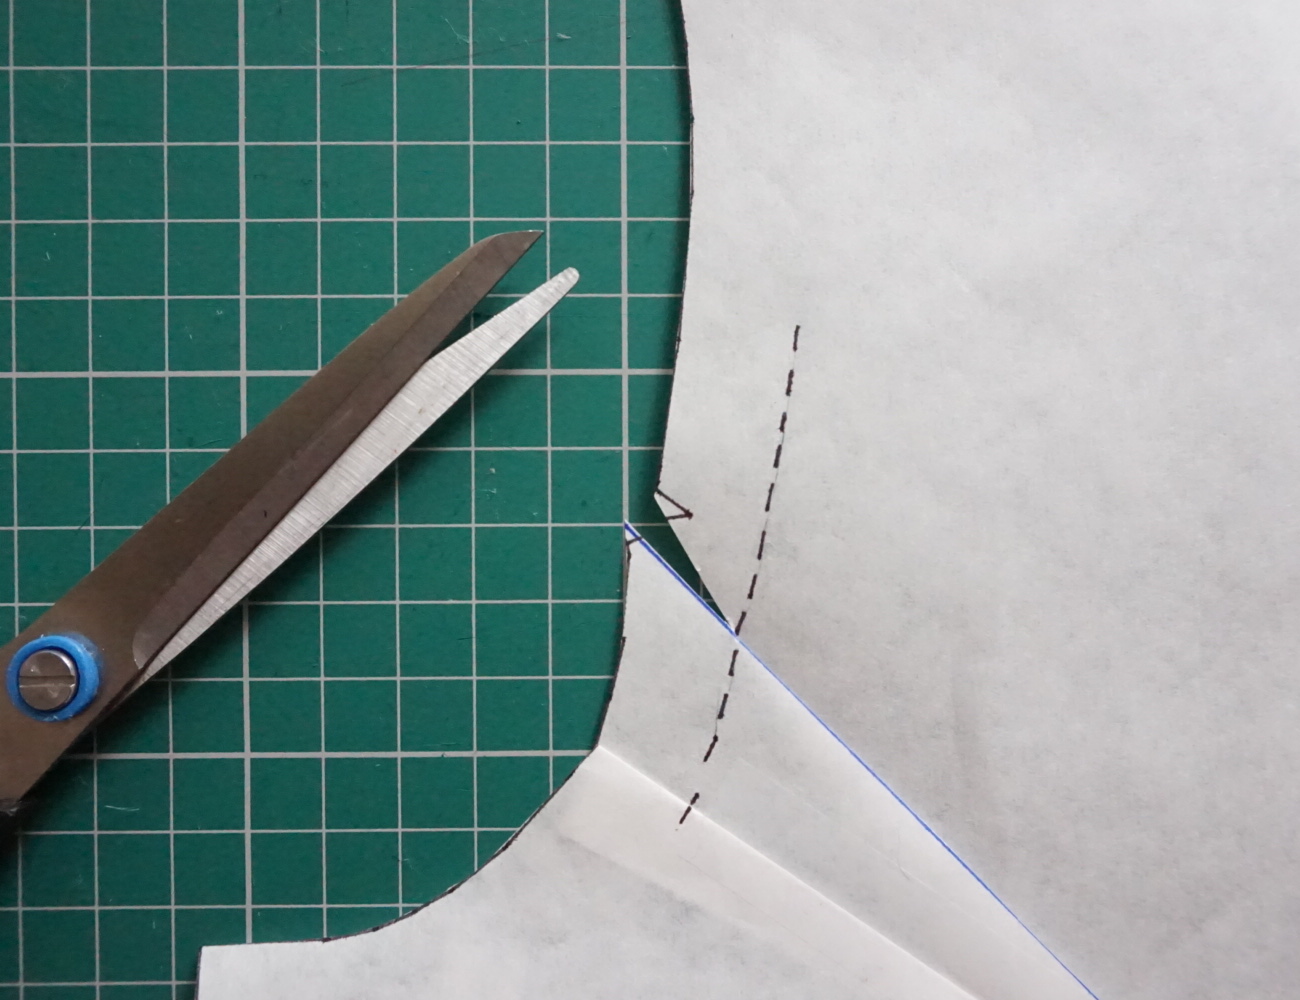
Then snip into the other side of the seam allowance mark from the edge of the paper towards the seam allowance marks, again stopping 2-3 millimetres from the line. This will create a ‘hinge’ so that you can manoeuvre the pattern.

How to do a full bust adjustment FBA step 5
Snipping into the seam allowance, creating a ‘hinge'

Step 6

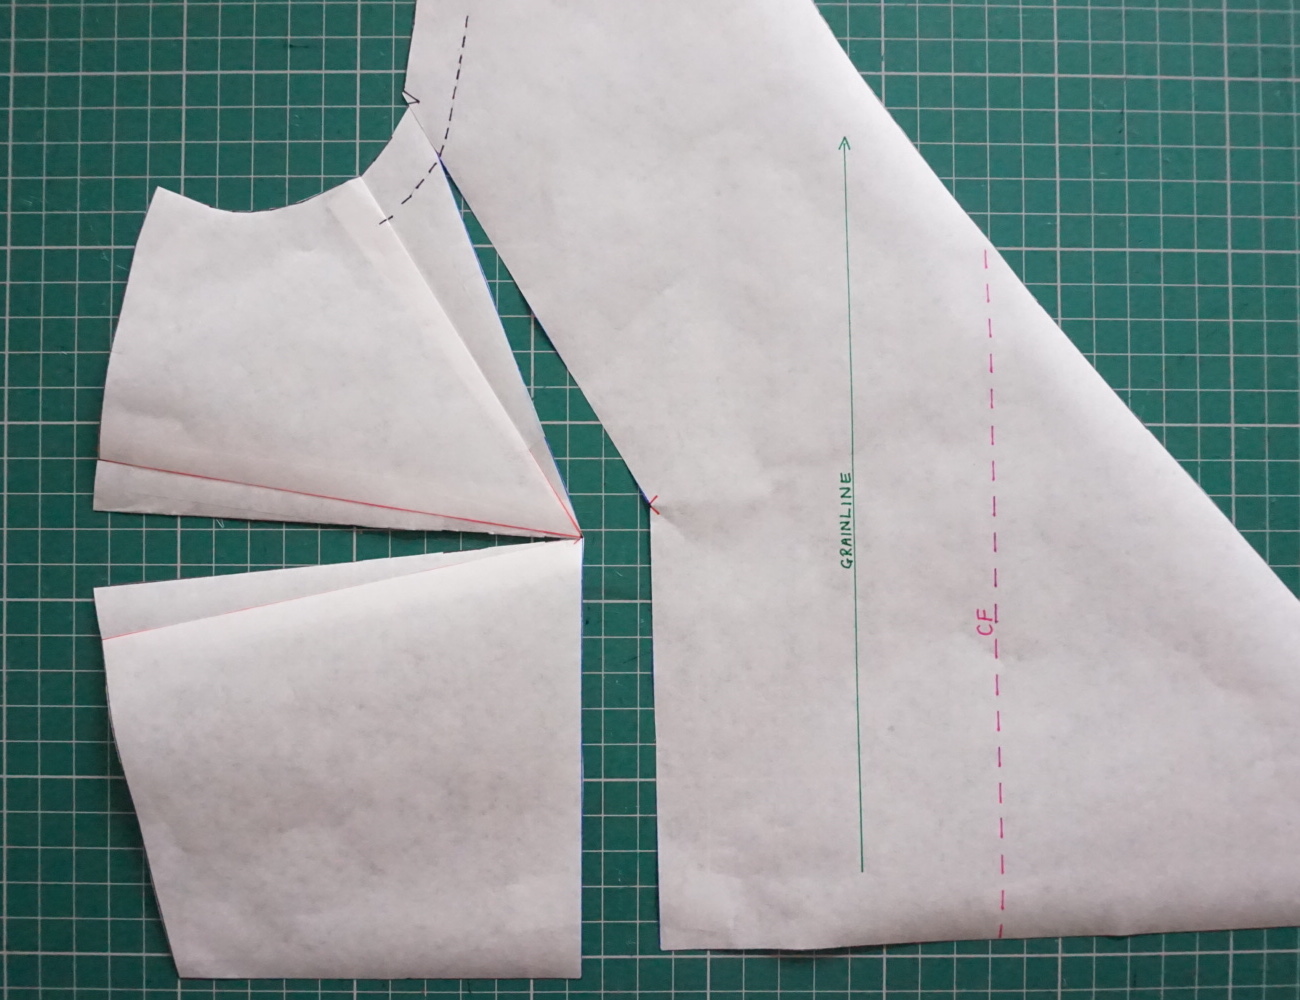
Cut through the centre line of the side seam dart, again leaving a 2-3 millimetres at the tip of the dart to act as a ‘hinge’.

How to do a full bust adjustment FBA step 6
Cutting the side seam dart

Step 7

Carefully lay your pattern over a larger piece of pattern paper.

Step 8

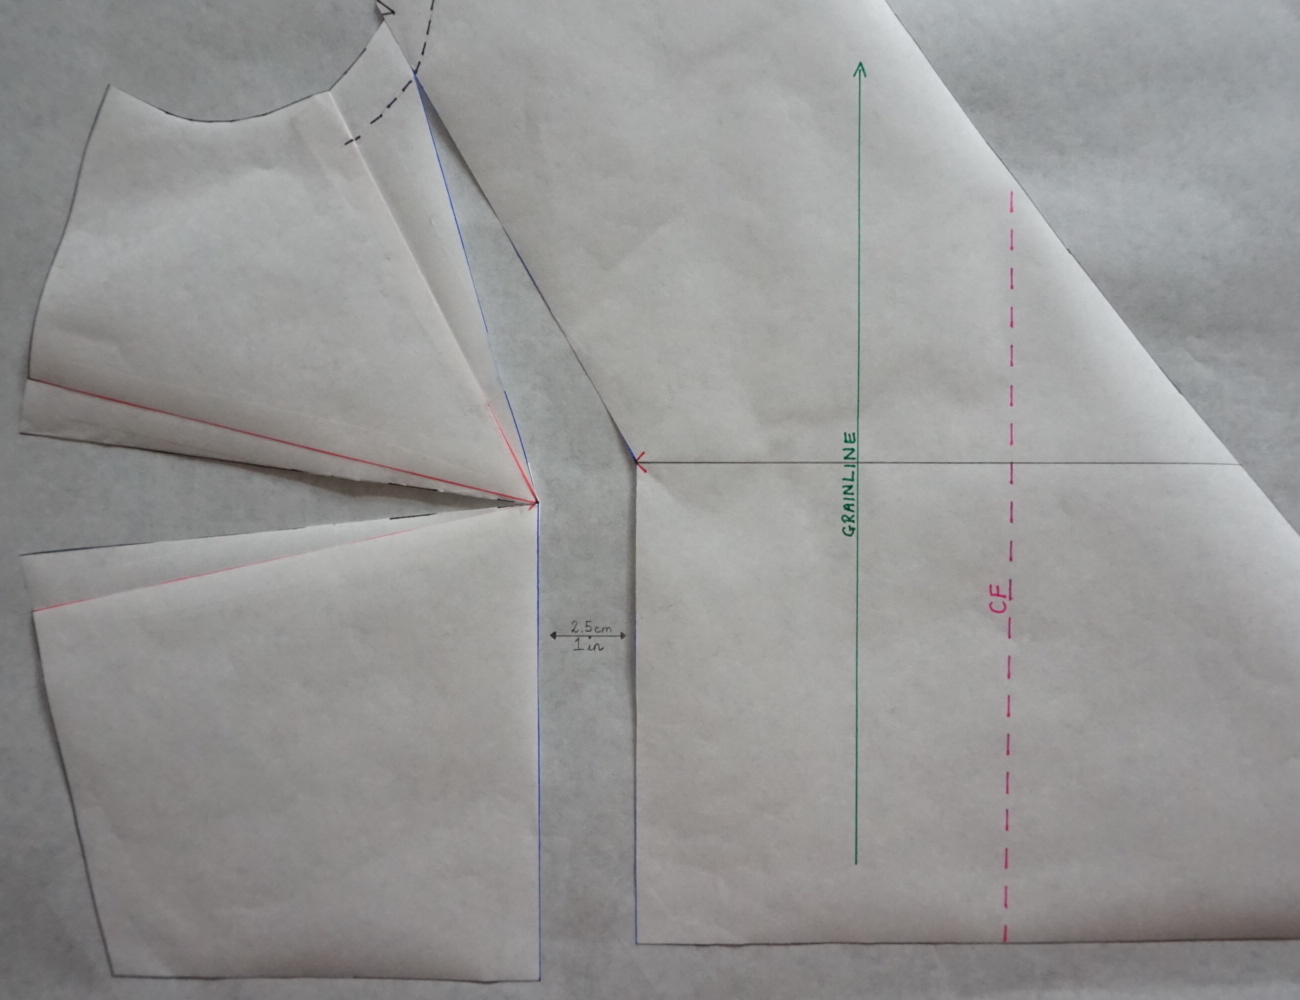
Open the vertical line from the bust apex to the base of the pattern by the amount of the bust adjustment you require. Remember that as this pattern piece is only half of the whole bodice front you will only need to add half of the overall adjustment amount. We opened our pattern by 2.5cm (1in) which is half of our total amount to adjust by is 5cm (2in).

Step 9

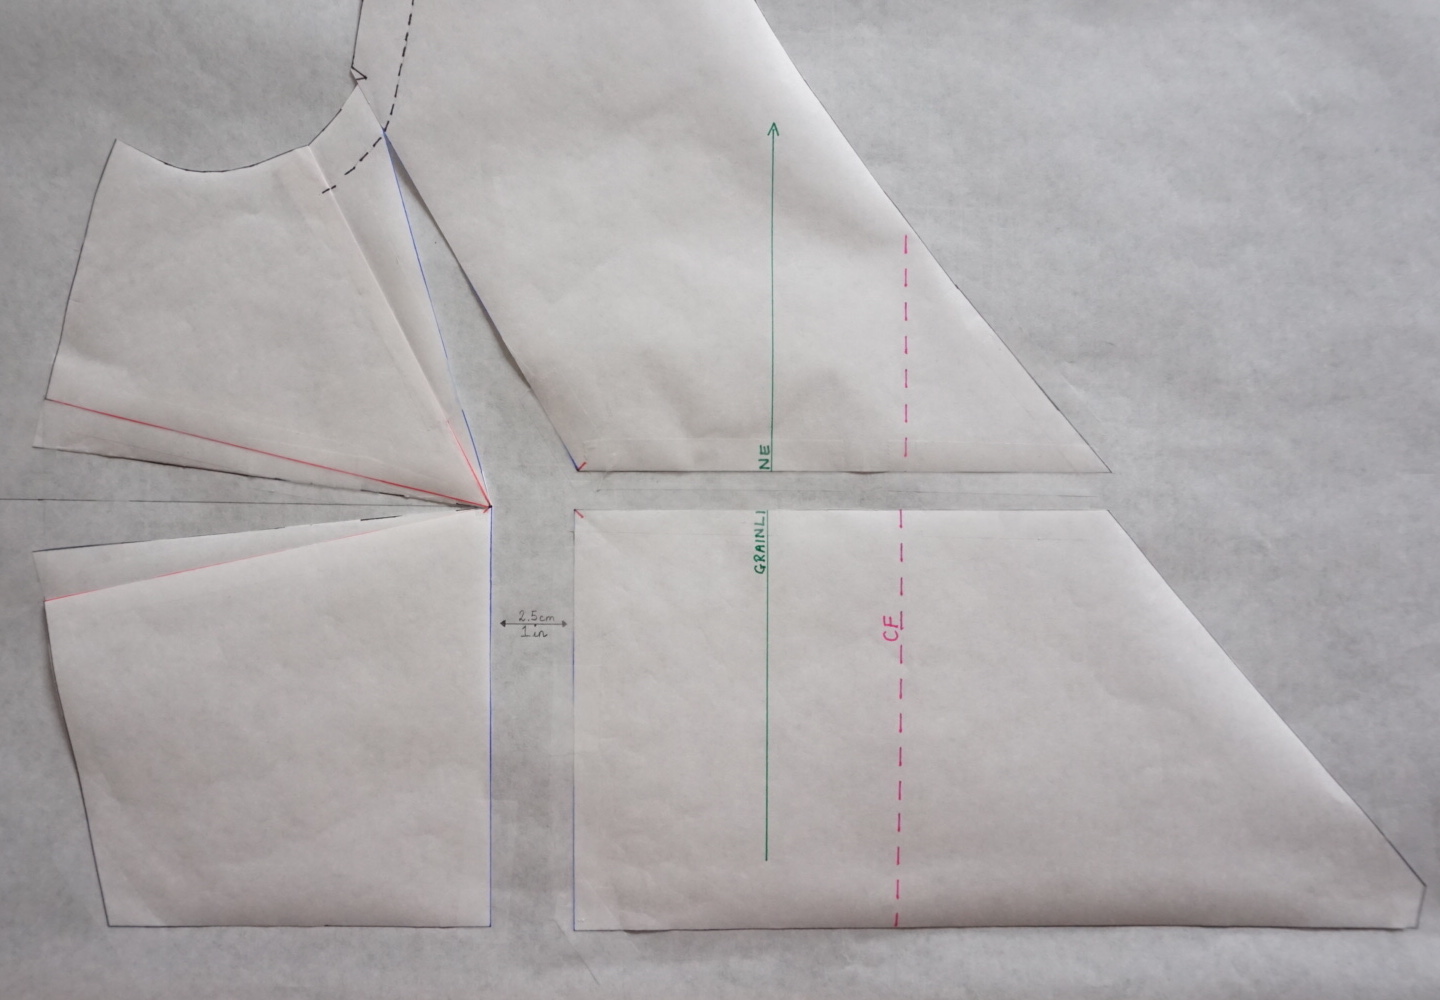
You will notice that the right-hand side of the bodice is slightly higher than the left-hand side which has been opened out. In order to fit this, we will bring the left-hand side of the pattern down. Measure across from the bust apex point cross towards the centre front of the bodice, mark the line ensuring that it is at a right angle to the grainline.

How to do a full bust adjustment FBA step 9
Mark a horizontal line to re-align the waist seam

Step 10

Cut along this line and move the cut away piece down until the base is in line with the left-hand side.

Move the lower piece down to align the waist seam, ensuring the grainline remains straight

Step 11

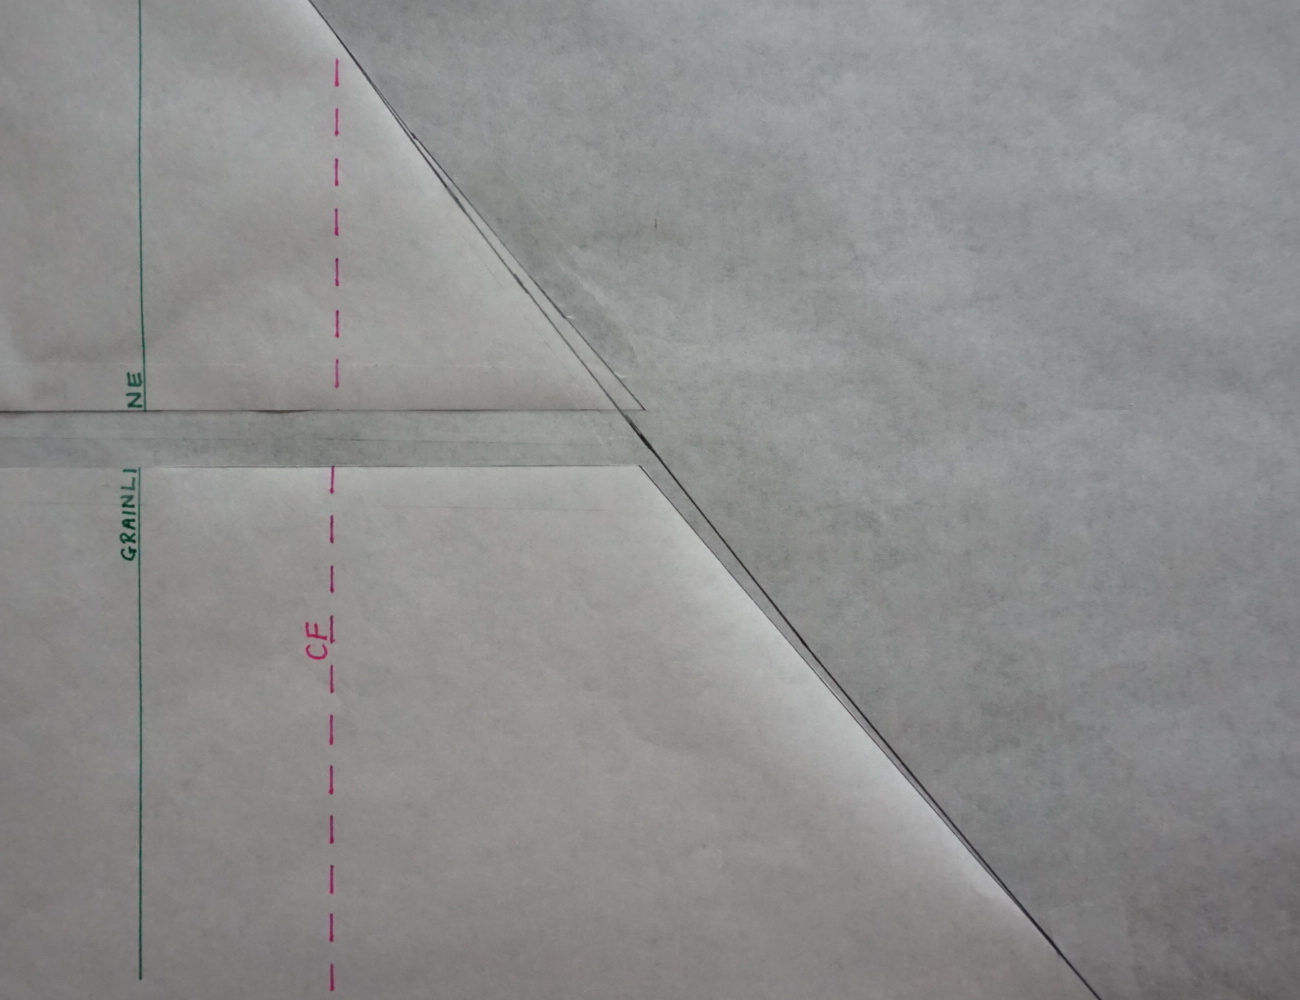
The armhole may need trueing to create a smooth curve around the original dart. You will also notice that the wrap front of the bodice no longer aligns. Fix this by trueing the wrap front line with a curved ruler.

How to do a full bust adjustment FBA step 11
Truing the wrap front

Step 12

You now have two choices, you can either leave the dart in the side seam or move it back to the armhole as in the original pattern.

Leave the dart in the side seam

Step 1

To leave the dart in the side seam you will need to remark the dart to bring the point away from the centre. Measure the width of the dart between the legs and draw the centre line of the dart from this point to the apex cross.

Step 2

Now measure 2.5cm (1in) from the apex cross along the centre line and make a mark.

Marking the new dart apex point

Step 3

Join the dart legs to this mark. This mark is the new bust apex which is sitting away from the actual bust apex so that it doesn’t give the bust a pointed shape. You can alter the amount that you move the apex if necessary, the general rule is that the larger the bust the further away from the apex the tip of the dart should be. The tip should stop just as the bust starts to curve, on a larger bust the curve is deeper so the tip needs to finish further away. Don’t reduce the length of the dart too much or it will affect the overall fit, but if you need to move it slightly further along the dart centre line you can do so. You can now trace off another copy of the pattern so that you have a nice clean copy to work with.


Move the dart back to the armhole

Step 1

To move the dart back to the armhole you will need to trace off the pattern at this point. This will avoid any confusion with the multiple lines we have drawn! Before tracing, you might like to mark around the whole pattern and dart with a bold pen to make tracing easier.

Step 2

Mark the original dart opening onto the paper. You might be able to feel the fold in the paper underneath or alternatively you can use the original pattern. If using the original you only need to mark the left most dart leg (don’t mark in the whole dart!).

Marking the armhole dart position

Step 3

Join this mark to the bust apex.

Connecting the armhole mark to the bust apex

Step 4

Close the side seam dart and secure with tape. This will create a tent shape in the paper.

Closing the side seam dart

Step 5

Cut along the newly drawn armhole to apex line to release the dart back into the armhole.

Step 6

Place a scrap of paper behind the open dart and tape in place. Then mark the centre line along the dart.

Open the armhole dart and mark the new centre

Step 7

Measure 2.5cm (1in) from the apex along the line and mark this point. This will be the new apex point. Redraw the dart legs starting at the original dart leg ends and meeting the new apex point.

Marking new new bust apex point and drawing the dart

Step 8

This is the final pattern. If you would like, you can trace off another copy of the pattern so that you have a nice clean copy to work with.

Making another toile

Make a second sample using your new pattern piece to check the fit again, you might find that you want to move the bust point closer to or further away from the apex. You may also like to make small adjustments to other seams.


Final steps

Step 1

As we have added in 5cm (2in) to the total front of the bodice we will also need to add 5cm (2in) to the dress skirt front. This amount will depend on how much you added into the bodice for your full bust adjustment.

As the skirt is a wrap it is cut as one pair, therefore only 2.5cm (1in) needs to be added to the pattern as for the bodice. The skirt front is assembled in four pieces (A, B, C and D) The easiest way to add the extra amount to the skirt is to join pieces A and B, then pieces C and D together. You will now have two long halves of the skirt.

Before joining the four pieces together, add a strip down the centre of the required amount (2.5cm in our case). This will mean that the waist of the bodice front and the skirt front will measure the same and match up when sewn.

Step 2

Adjust the front facing so that it is the same size as bodice front. Keep the width the same but you will need to adjust the length and the curve so that it matches the trued curve of your new front bodice piece.

Step 3

We did not add any length to the side seam or alter the shoulder seam, therefore the back bodice and back bodice facing do not require any adjustments. If you decided to make adjustments to your final toile remember to alter the back bodice and facing pieces in line with the alterations.

And that’s it! Bust adjustments can be daunting and beginner sewists in particular can be put off by the seemingly lengthy process, but we promise that once you get started it can be therapeutic to work though the stages. When you see the difference that correct fit can make to a garment you won’t look back to the days of ‘that’ll do!’

Maria wrap dress pattern