Cutting out
Step 1
Download and cut out the templates.
Step 2
Place the pattern pieces onto the reverse side of the fabrics and draw around them, turning the templates over to cut pairs. Cut out and transfer the markings indicated on the pattern pieces.
Step 3
From Fabric A, cut out as follows:
- Body: one pair using the template.
- Base: one using the template.
- Head gusset: one using the template.
- Arms: two pairs using the template.
- Legs: two pairs using the template.
Step 4
From Fabric B, cut:
- Belly: one using the template.
Step 5
From Fabric C, cut:
- Spines: one pair using the template.
Step 6
From Fabric D, cut:
- Large spots: six using the template.
- Small spots: eight using the template.
Step 7
From Fabric E, cut:
- Eye: two using the template.
- Fangs: two using the template.
Step 8
From Fabric F, cut:
- Pupil: two using the template.
Making the hands and legs
Step 1
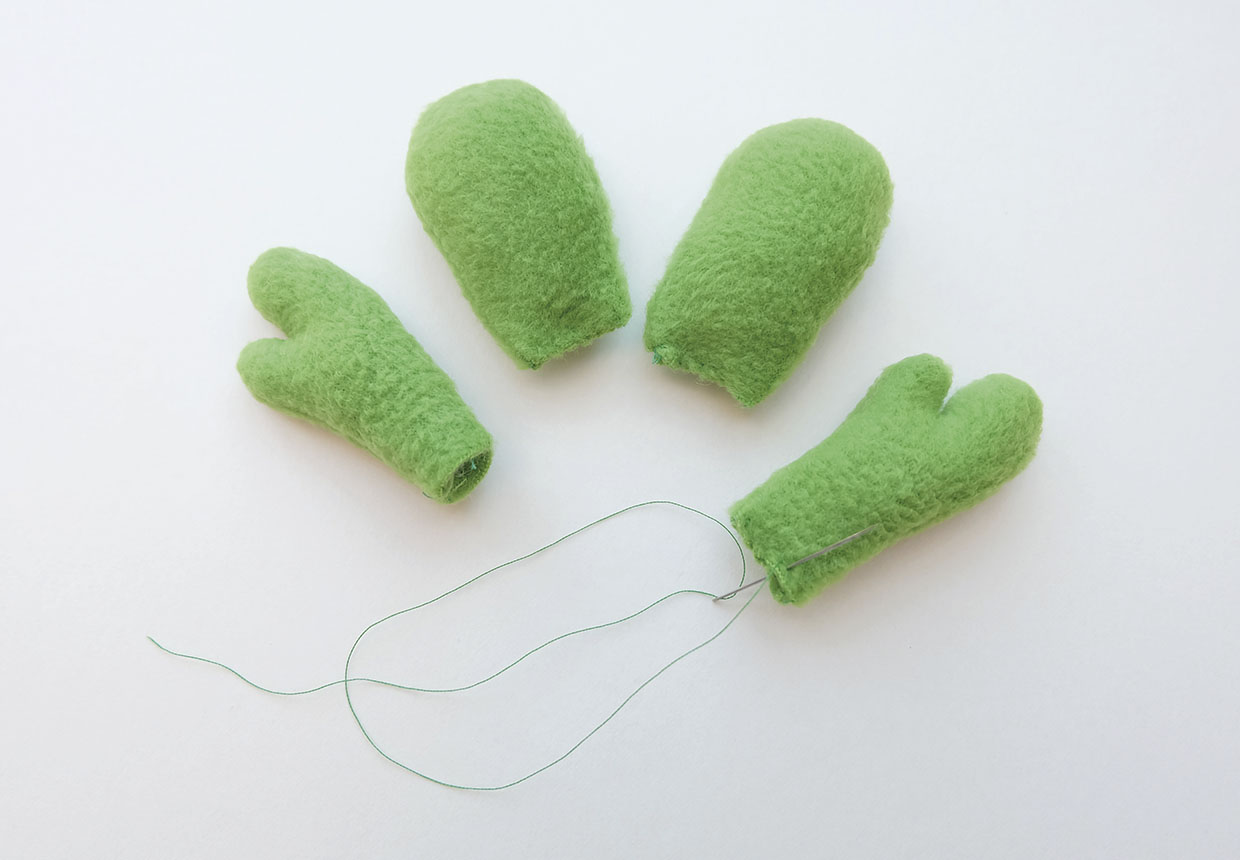
With right sides (RS) together, pin and sew the arms and legs, leaving the short ends open. Clip notches inside the deep V within each hand, then turn RS out. Stuff firmly, leaving a good 1cm (3⁄8in) unstuffed at the ends of each limb so they can later be sewn more easily into the seams of the body. Tack each one closed.
Inserting the head gusset
Step 1
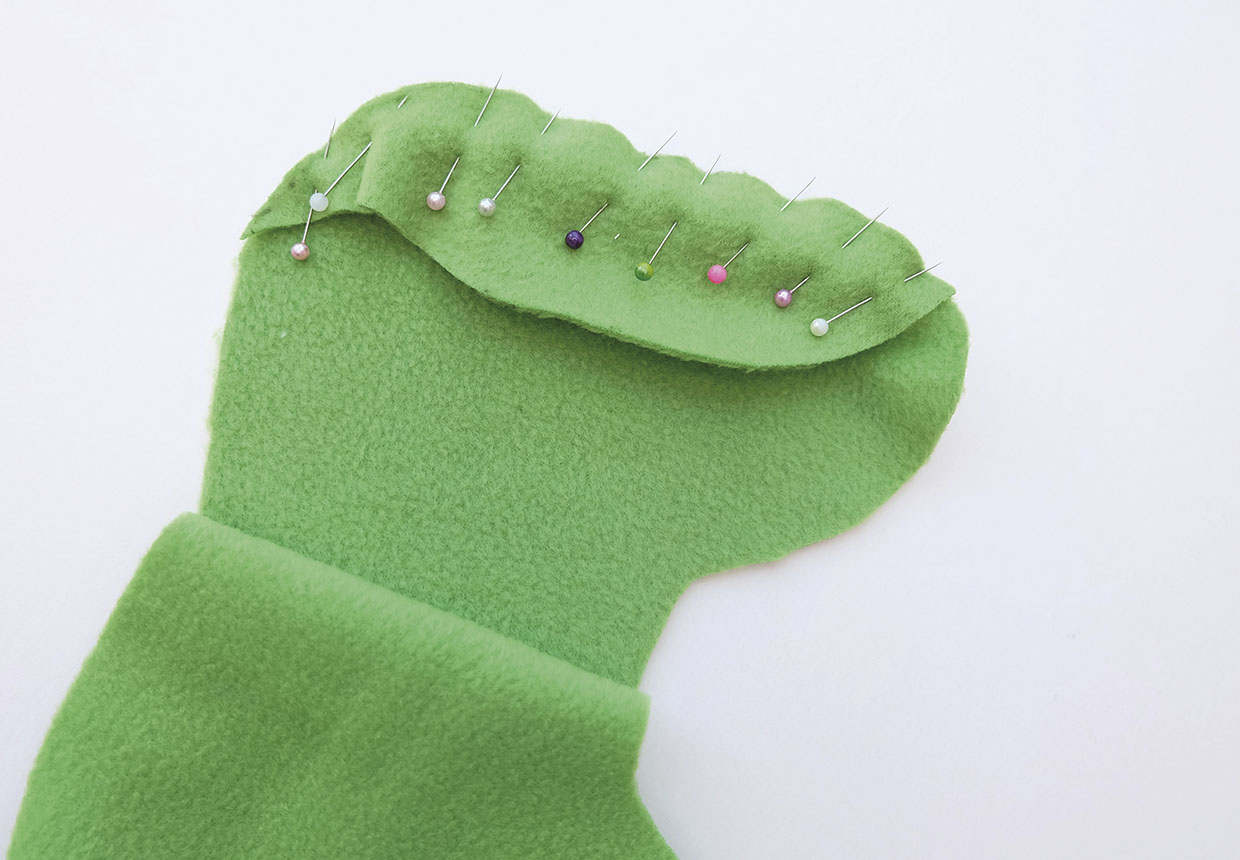
Placing the RS together, pin the head gusset onto the body piece, between points A and B along the top.
Step 2
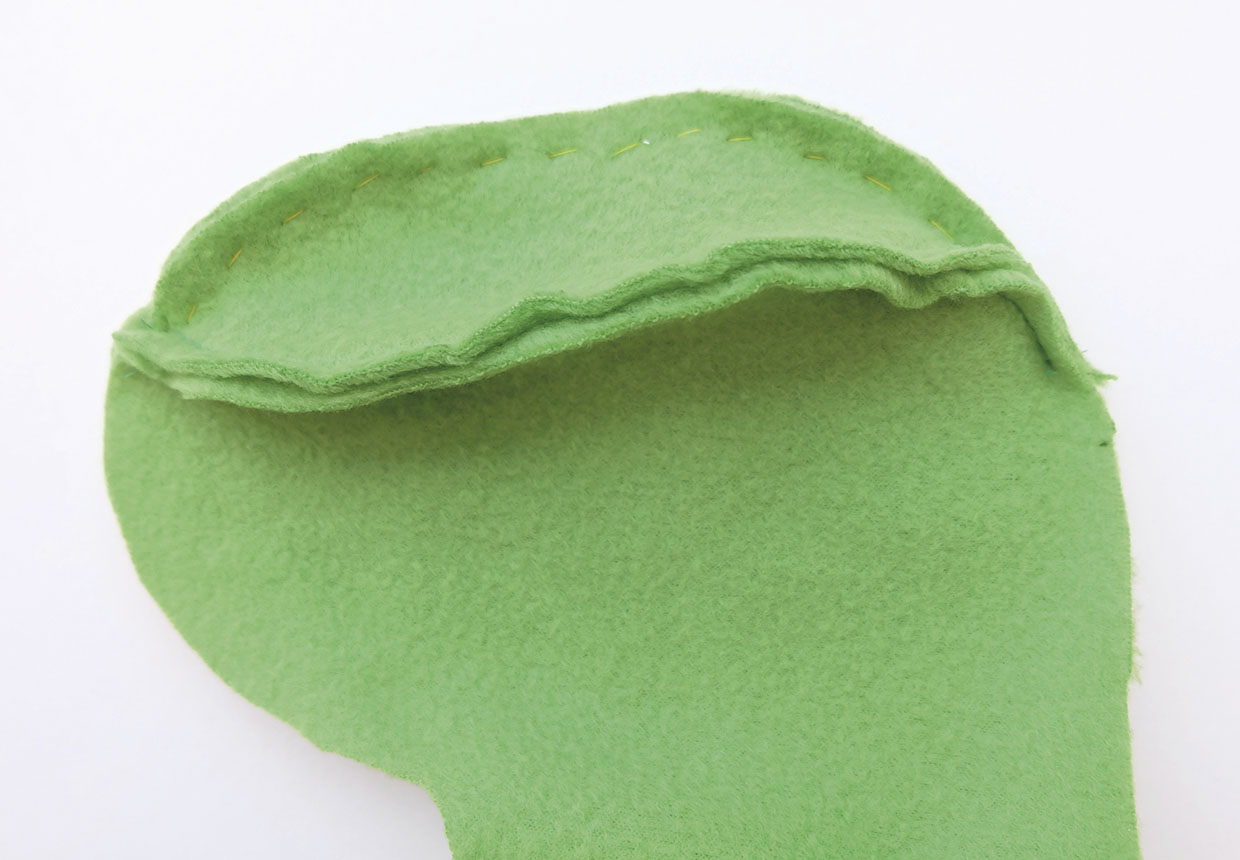
Tack and then sew in place. Repeat on the other side to form the three-dimensional head shape.
Making the spines
Step 1
Pin the spine pieces RS together and sew, leaving the long side open for turning. Clip notches at the bases of the triangles so the spines do not pucker when turned RS out. Turn RS out, pushing each of the spines out using a small stick.
Step 2
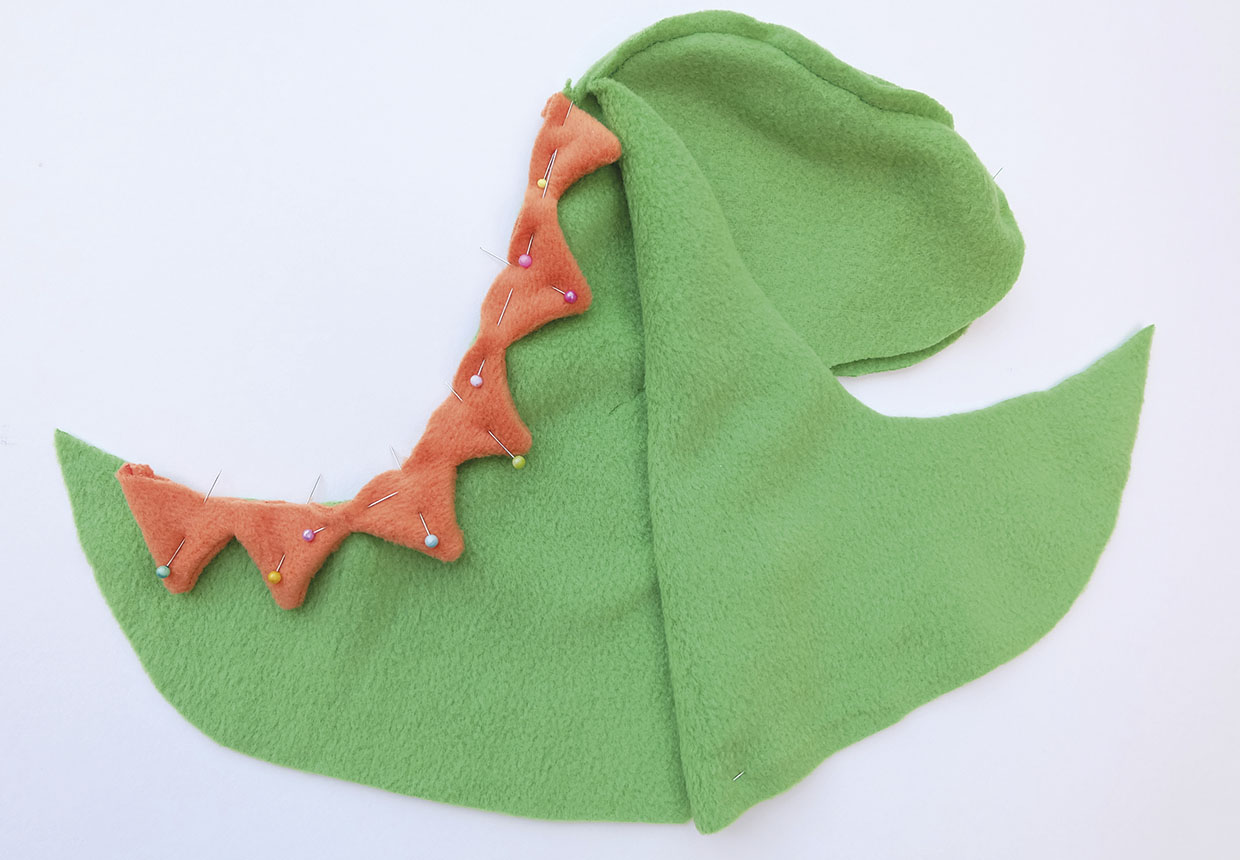
Place the spine lengthways onto one side of the dinosaur body, with the spines facing in. Pin into place between points B and F, matching up the edges of the fabrics. As the fabrics have slight opposing curves, start pinning the spines at each end first and bend and shape the fabric edges until they lie flat together. Roughly oversew all edges to keep it in place.
Making the belly
Step 1
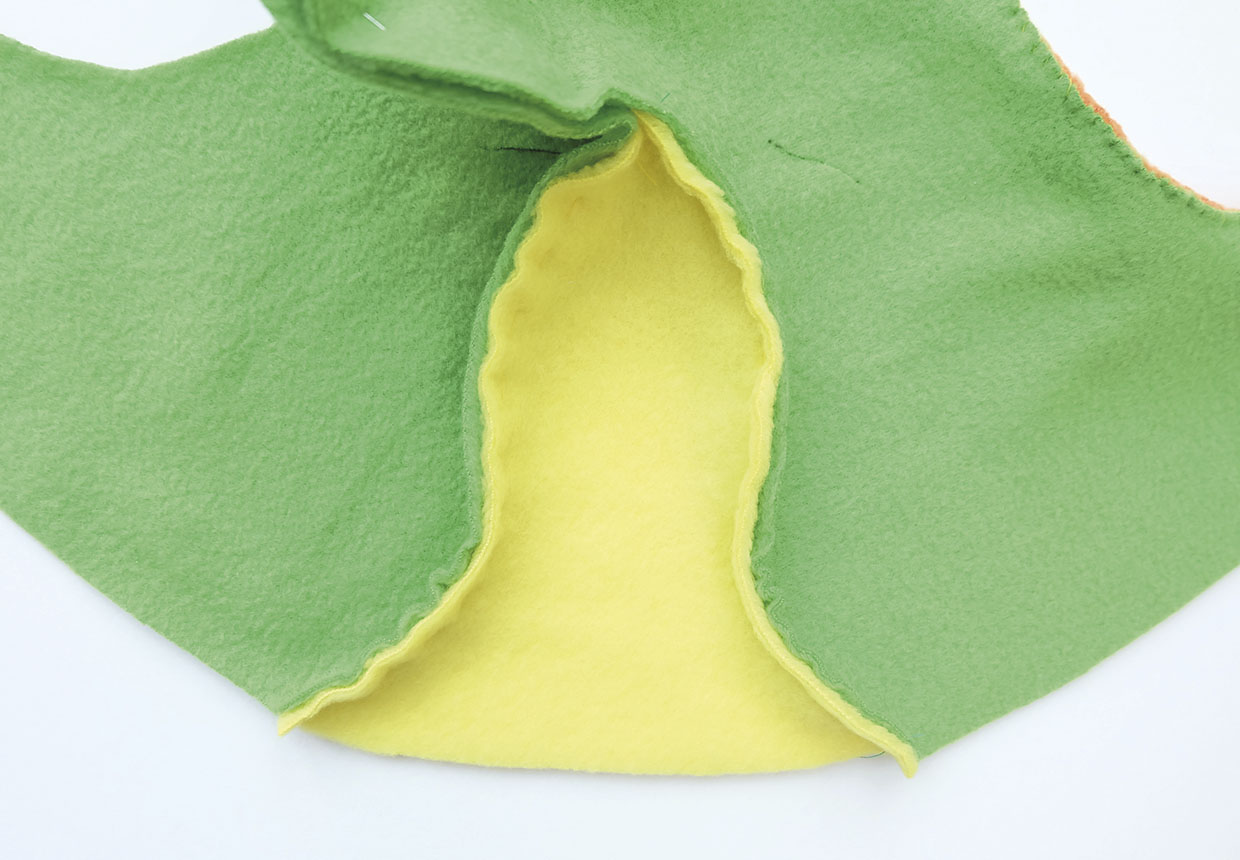
Pin the belly piece onto the front of a body piece, RS together, from point C to point D. Again, there are opposing curves here, so start with the belly piece pinned at each end, then bend and shape the fabric edges until they lie nice and flat together. Tack first, then sew. Repeat on the other side.
Step 2
With the dinosaur lying flat, sew up the short remaining seam between the top of the belly at point C and the front of the head gusset, at point A.
Inserting the hands
Step 1
Cut slits where marked in the body. 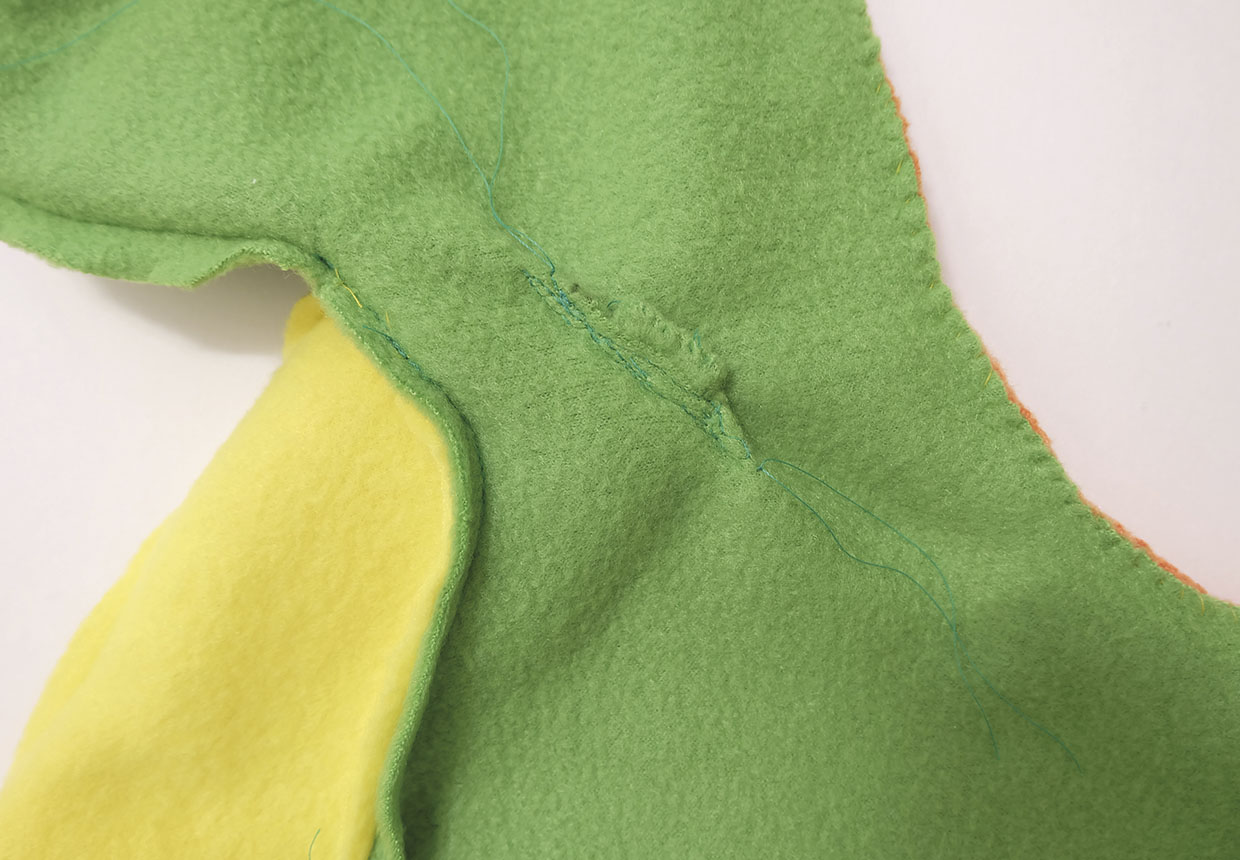
Step 2
Insert the hands from the wrong side (WS) through to the RS, with the thumb facing upwards. Pin and tack into place before sewing. Sew over two or three times to ensure your seam is strong and the hands securely fixed.
Making the base
Step 1
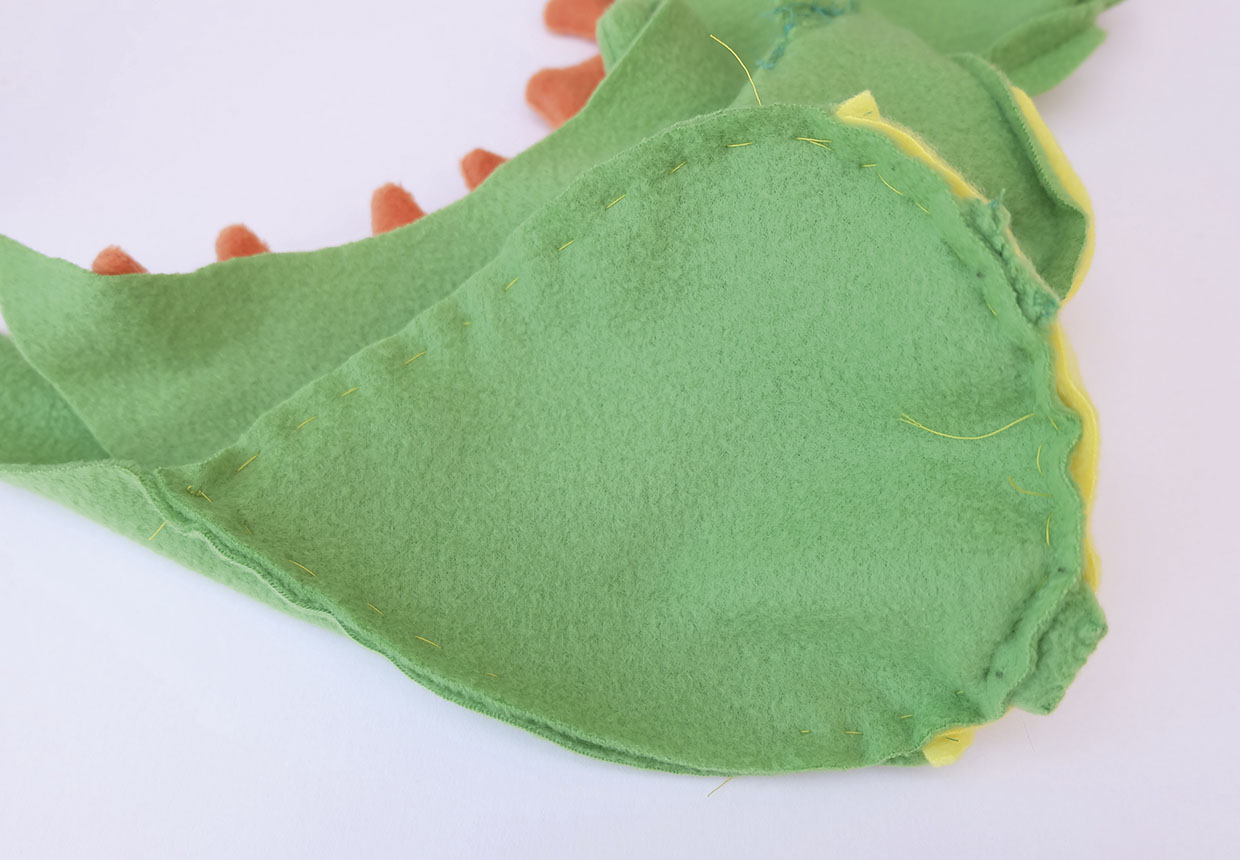
With RS together, pin the base piece to the main body, using the centre mark of the base to guide the position and with the point of the base ending at point E on the main body. Sandwich the legs into the base where marked on the template, facing inwards. Tack and turn RS out to check the positioning, especially of the legs. Turn back to the WS and sew. Remember to leave a turning gap.
Step 2
Sew over the leg seams two or three times to make sure they are extra strong.
Sewing up the body
Step 1
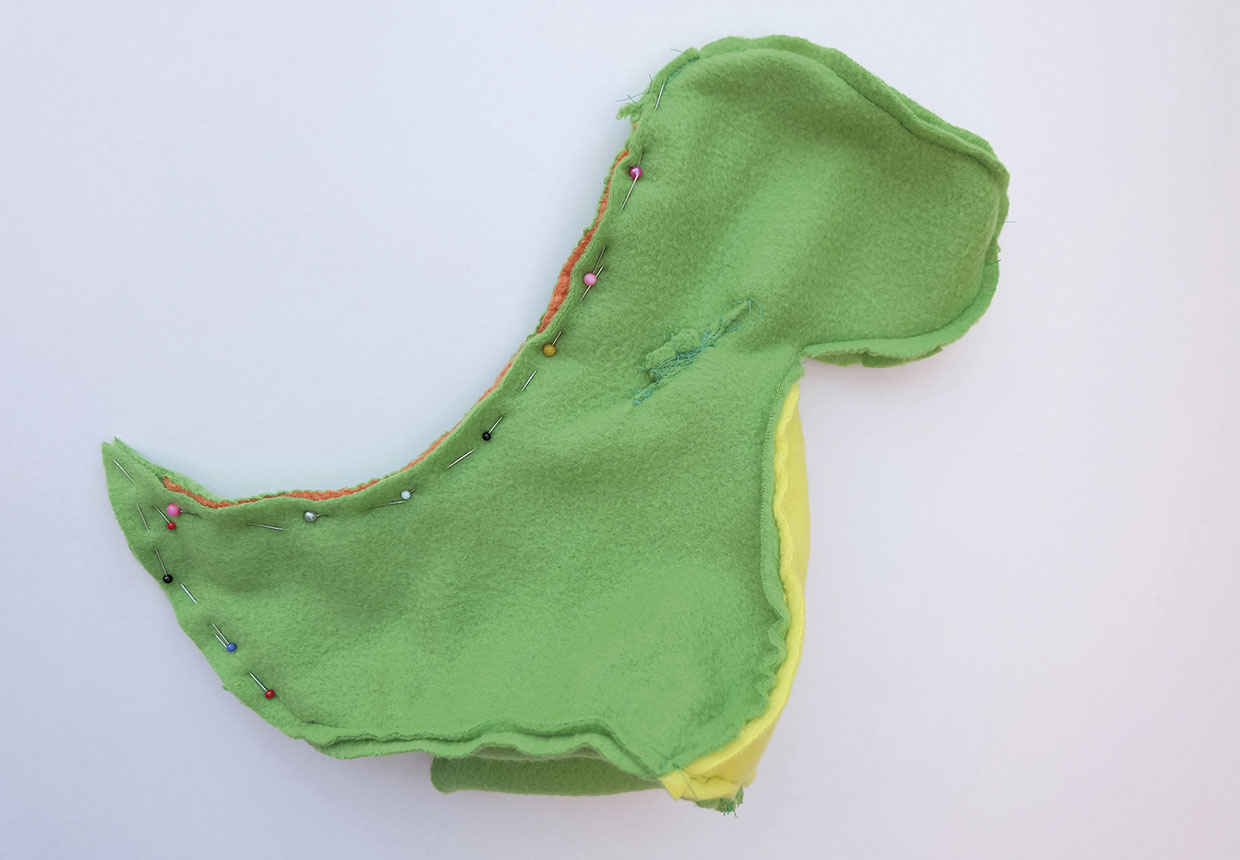
Sew from the top at point B, so the seam meets the back of the head gusset, down to point E, to meet the base seam.
Step 2
Trim all the seams and clip notches in any curves. Take care not to snip into the seams themselves. Turn the dinosaur RS out and stuff, using small amounts of stuffing at a time for a smooth and even shape. Keep stuffing until the dinosaur is really firm. Finally, ladder stitch the opening closed.
Forming the toes
Step 1
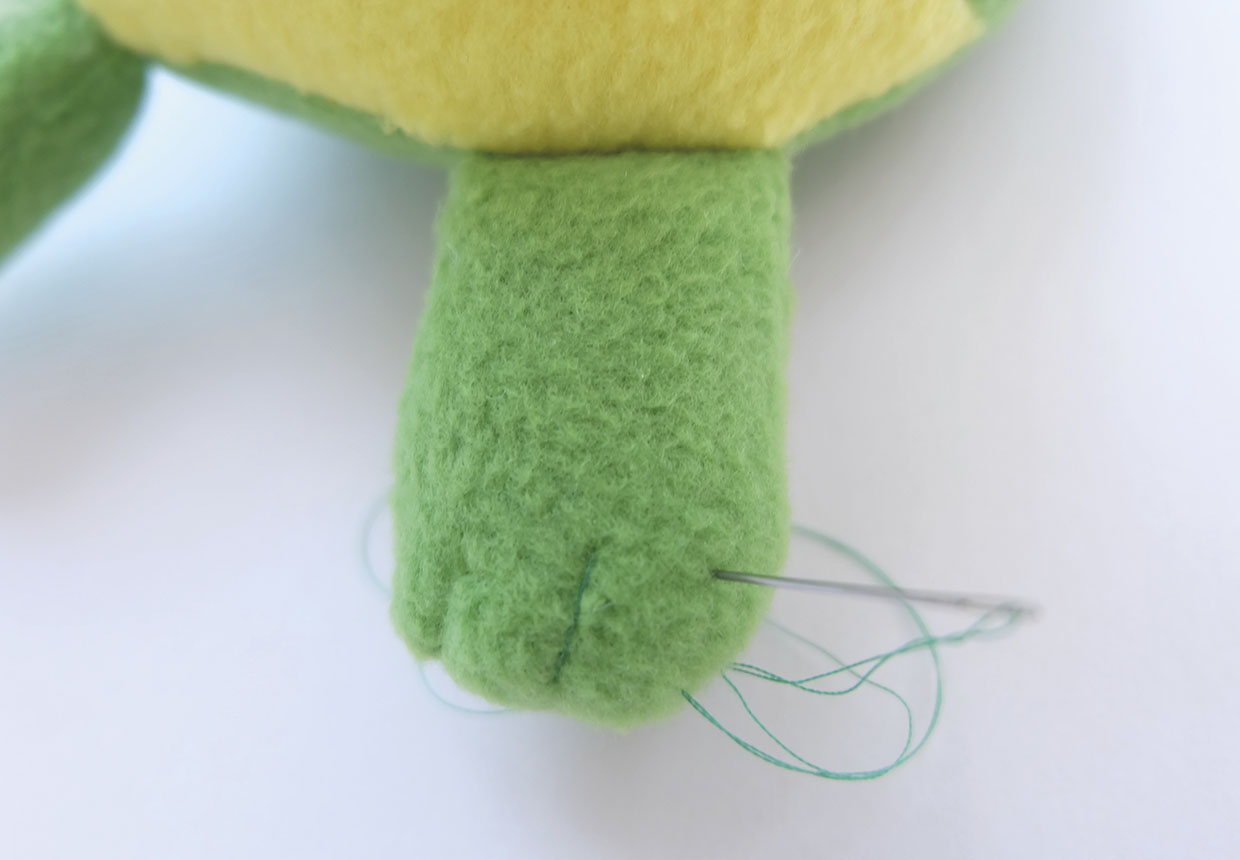
Using a matching thread, form toes using long straight stitches. Start in the seam of the foot and make stitches about 2cm (¾in) long onto the top. Then loop back under and through the seam before the next stitch is made. Use an extra strong thread that will stand up to being pulled hard, or use double thread.
Step 2
Fasten off with small back stitches, then push the needle and thread through to the other side of the leg before snipping. Repeat for the other leg.
Sewing the spots
Step 1
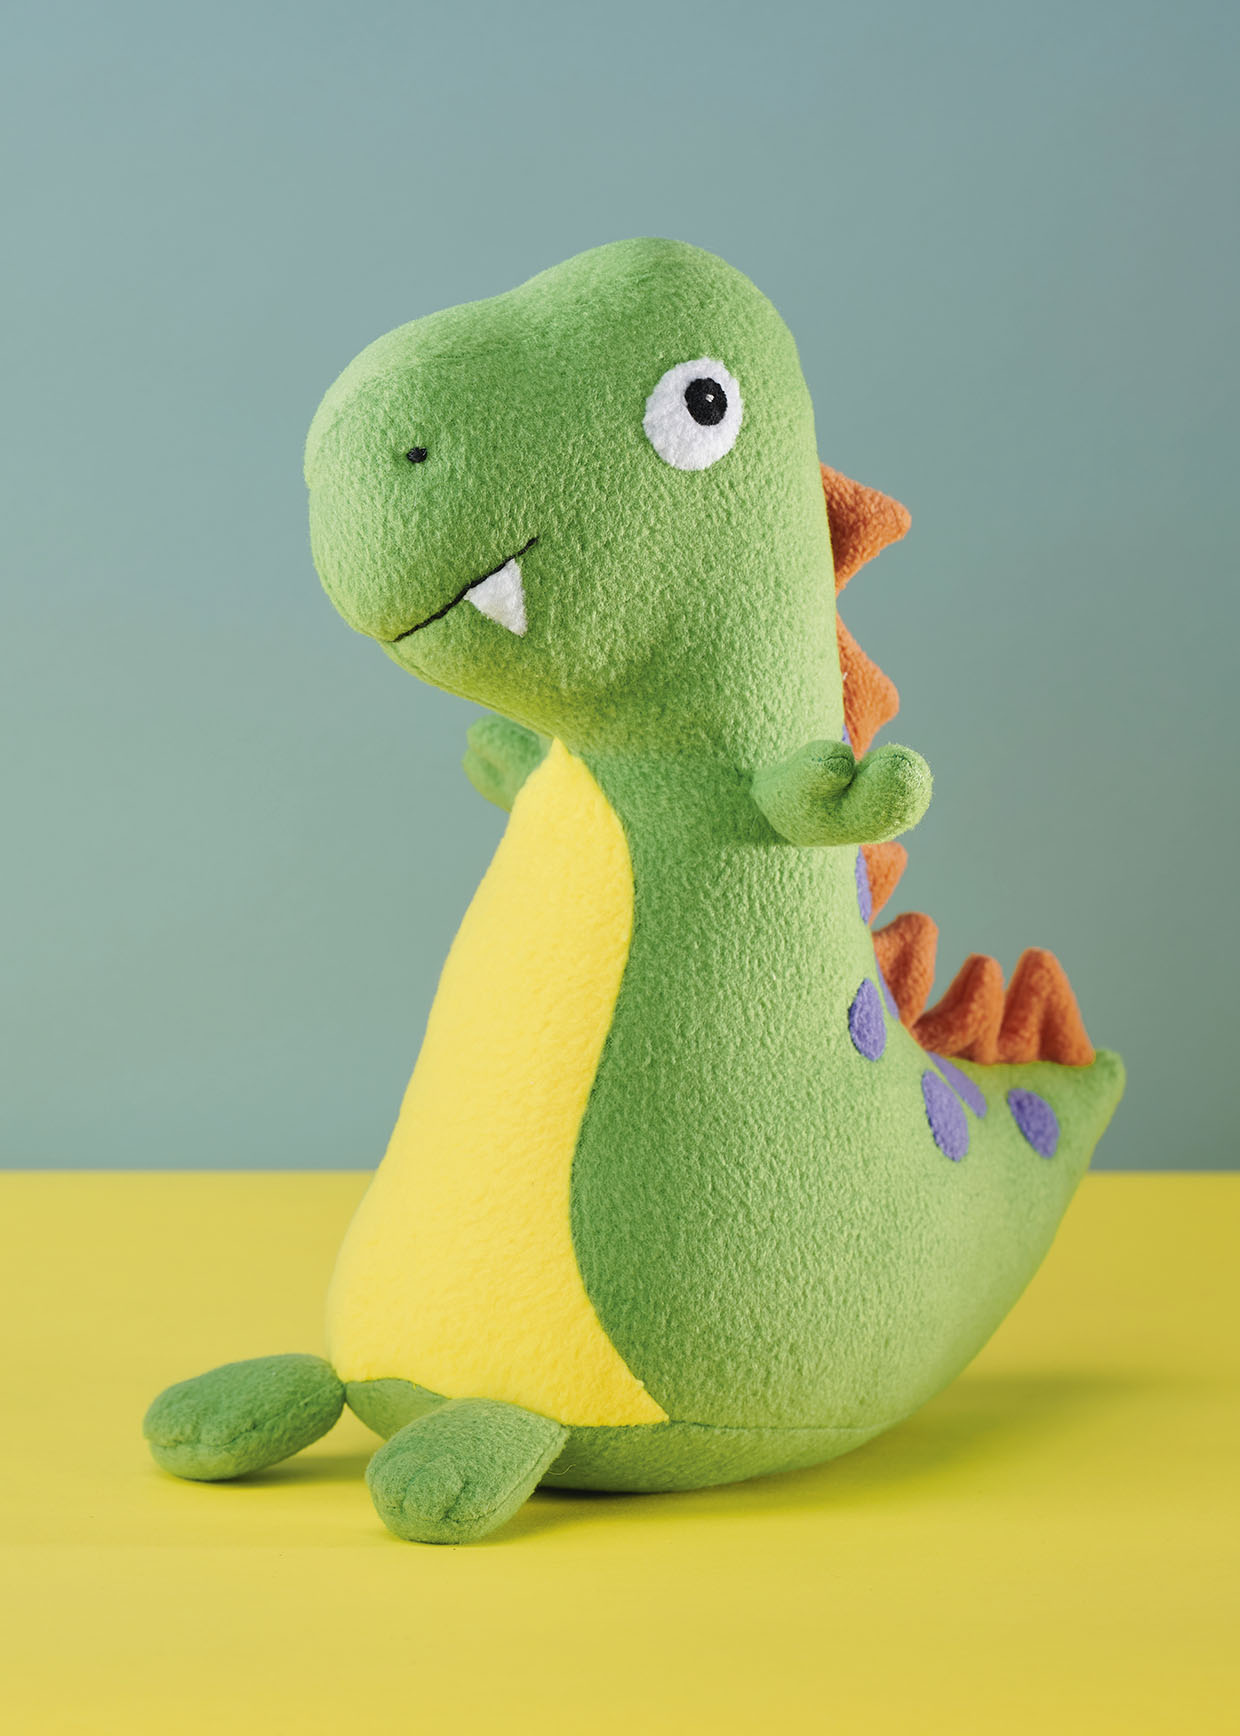
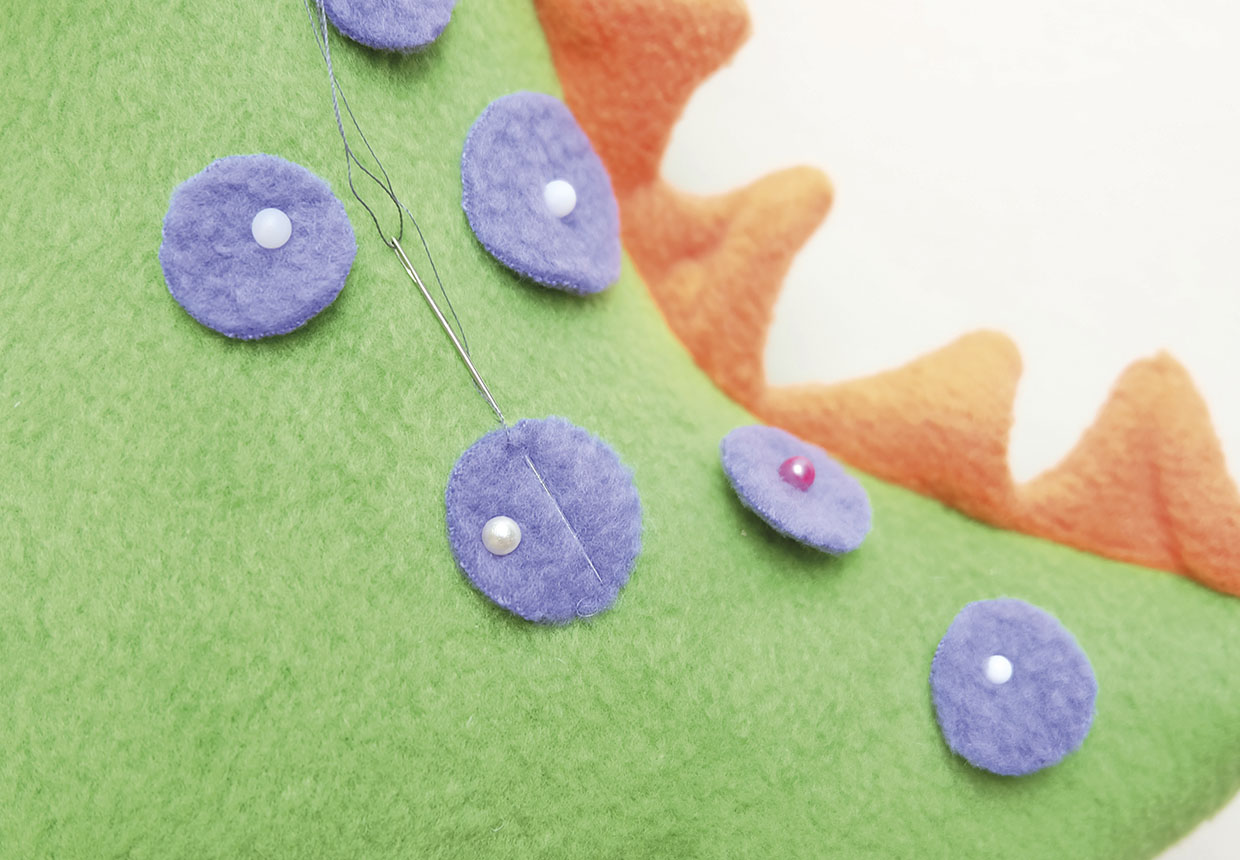
Pin each spot onto the back of the dinosaur. Position them along the dinosaur’s back using the photographs as a guide.
Step 2
Use a matching thread and appliqué them onto the body with small overstitches.
Making the eyes
Step 1
Use three strands of white stranded cotton thread to stitch little highlights onto the pupil of the eye. Use small satin stitches or French knots.
Step 2
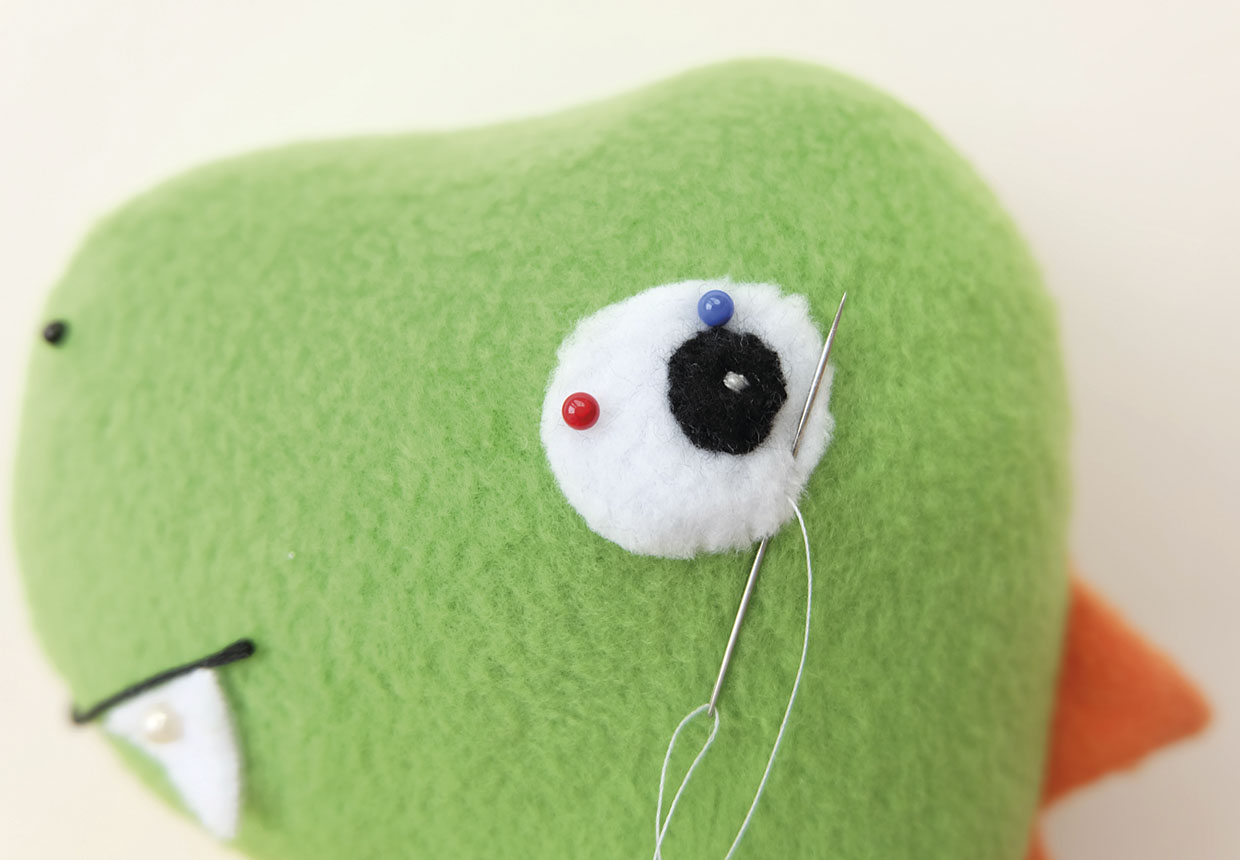
Pin the pupil onto the white eye, and hand-sew using tiny overstitches.
Step 3
Pin the eyes into position on each side of the toy’s head, using the images as a guide. Check that the eyes are properly lined up with one another, from both the front and top views, before sewing onto the body using small overstitches in white thread.
Making the mouth and nose
Step 1
Step one Draw the mouth shape onto the face using an erasable fabric marker. Pin the two fangs either side of the head, just below the mouth line. Sew the fangs in place using small, neat overstitches.
Step 2
Use the black stranded cotton to sew the mouth using back stitch. Fasten off with a few hidden stitches before taking the needle and thread away to the opposite side of the head and snipping off.
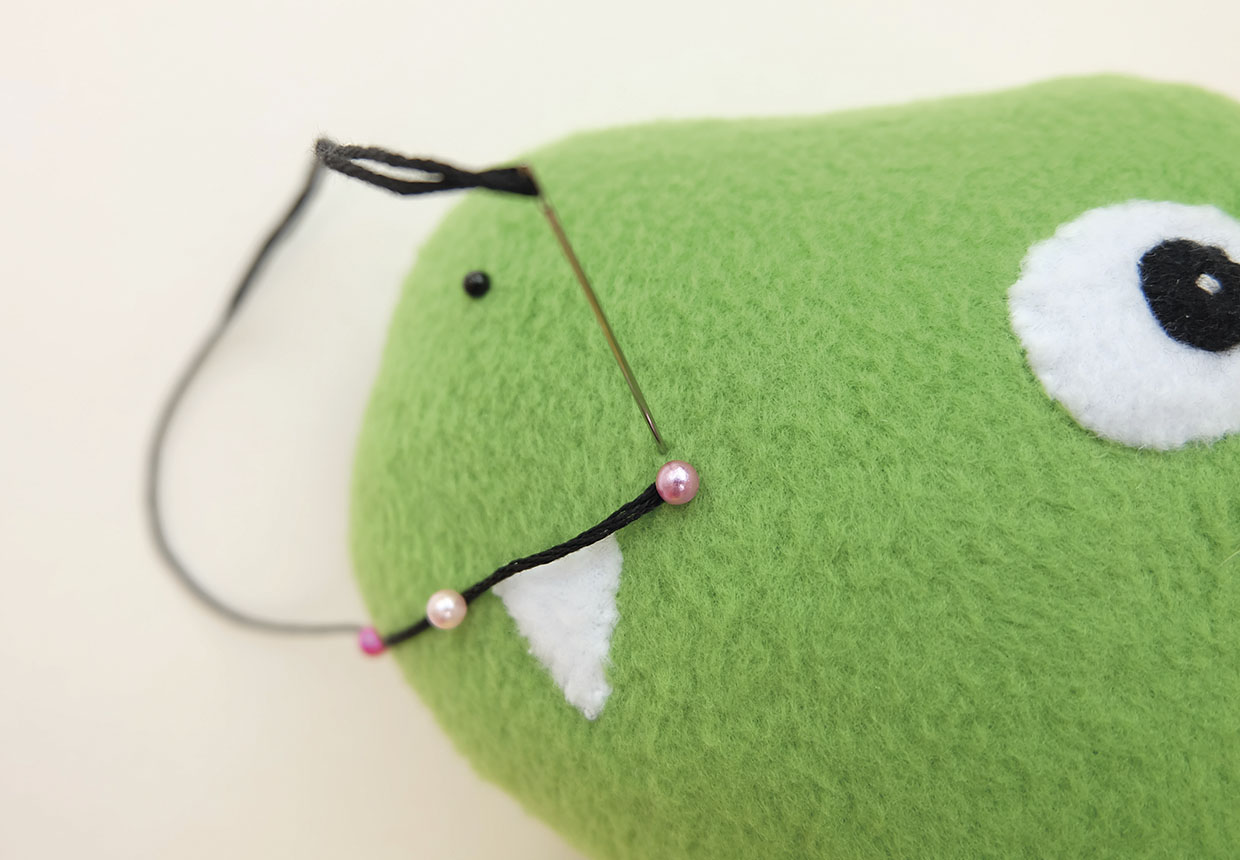
Step 3
Mark the position of the nose above the mouth with pins on each side of the head. Make sure the nose and mouth are level with each other.
Step 4
Sew them using small satin stitches or French knots in black stranded cotton.


