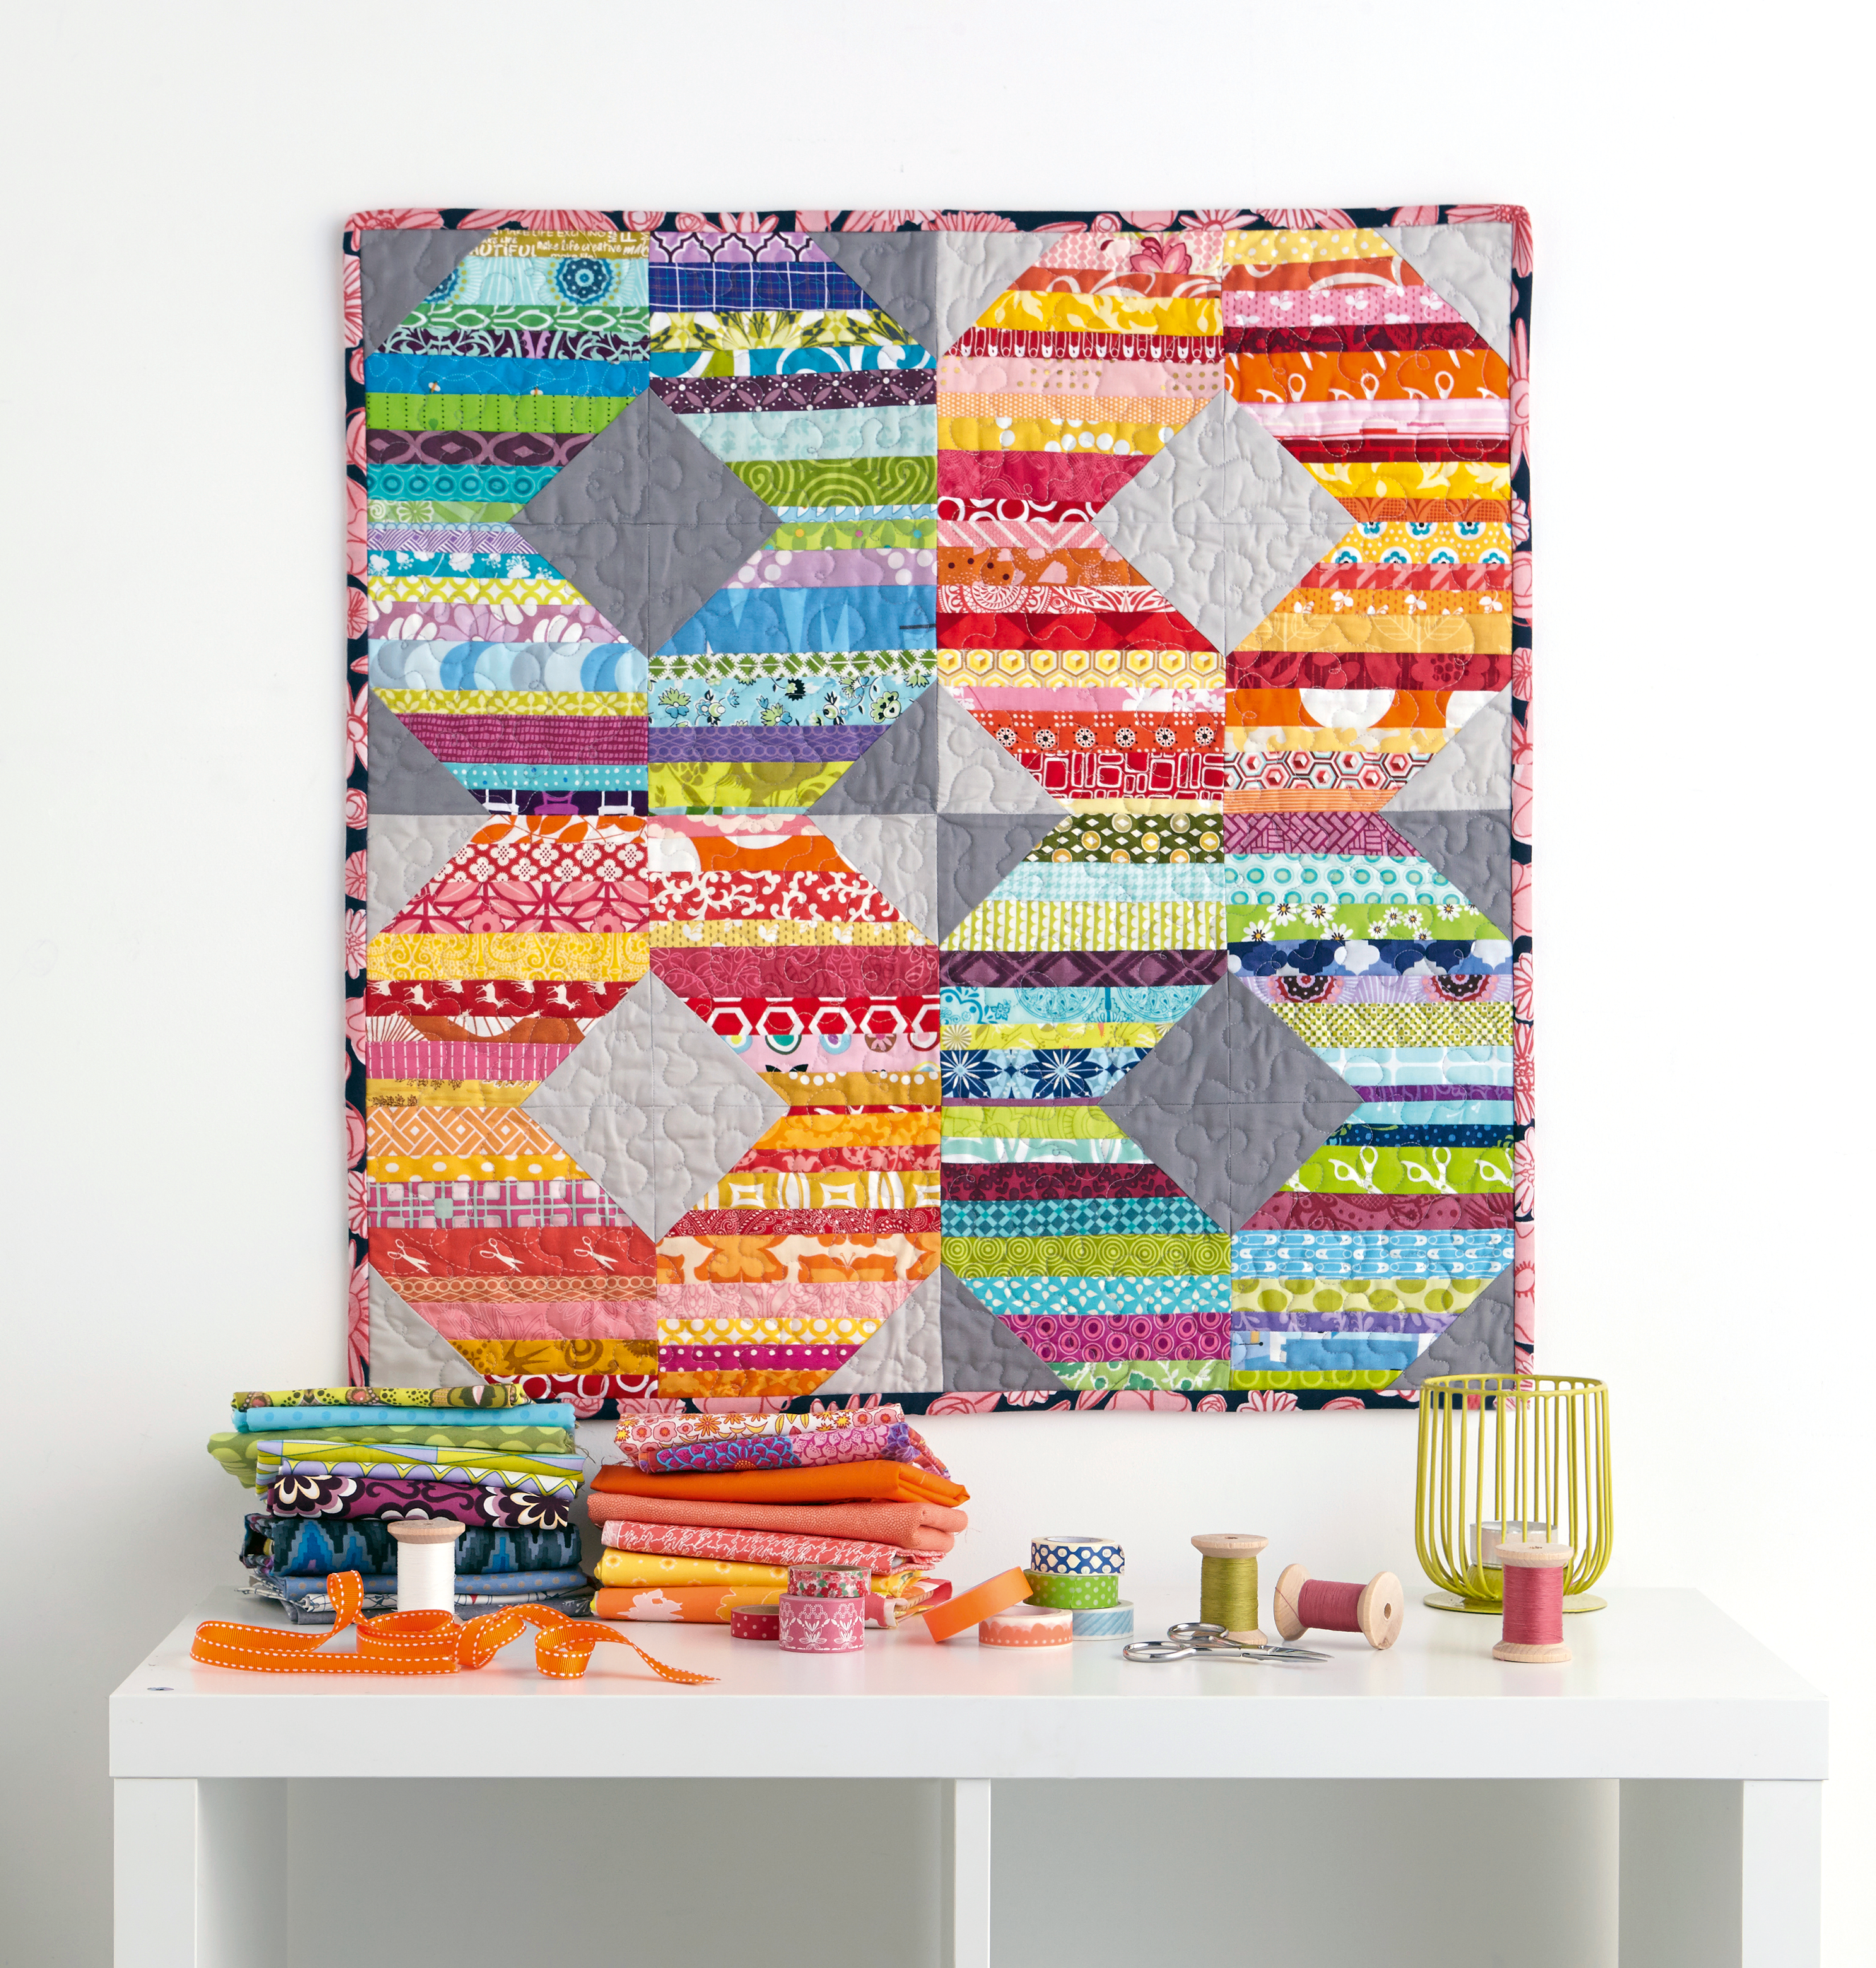
Cutting out the pattern
Step 1
Let’s start by getting our fabric pieces sorted. Grab your patchwork ruler and scissors (or rotary cutter) and let’s get prepping!
From light grey fabric cut eight (8) 4in squares. Subcut each square in half diagonally for a total of sixteen (16) HSTs (half square triangles).
Step 2
From medium grey fabric cut eight (8) 4in squares. Subcut each square in half diagonally for a total of sixteen (16) HSTs.
String piecing quilt tips
- Give your scraps some order by dividing into warm and cool colours for each block.
- A generous spritz of starch will stiffen your fabric scraps and make piecing those strings a breeze!
Step 3
From binding fabric cut:
■ Three (3) 2½in x WOF strips.
■ Two (2) 6in squares.
Piecing the blocks
Step 1
Now we’re getting to the fun part – starting the string piecing process!
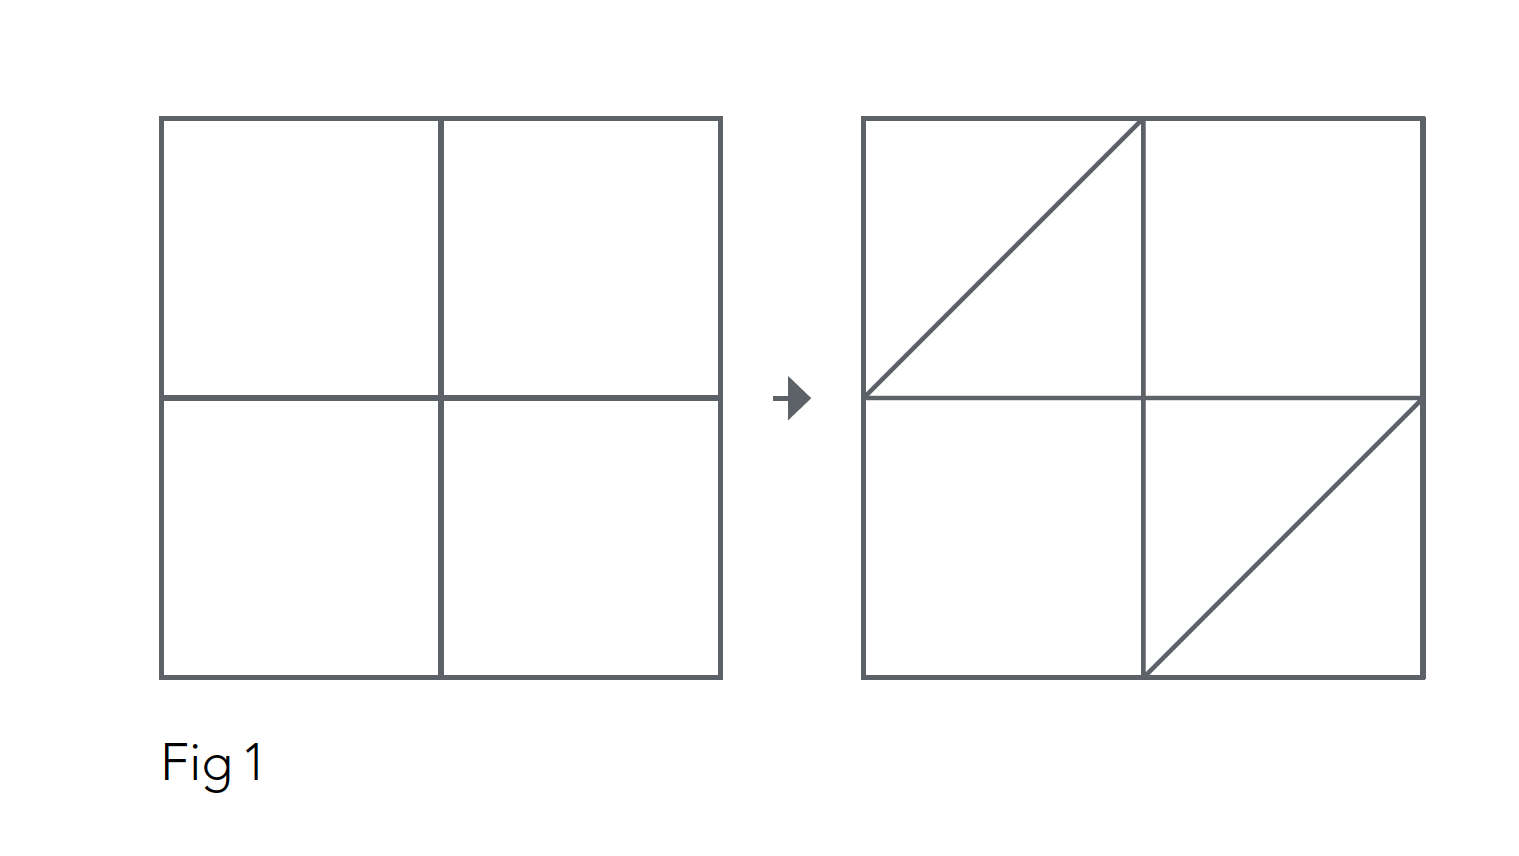
Begin by marking each of the sixteen (16) squares of paper with a pencil, as follows. First, divide your square into quarters with a horizontal and vertical line. Each line should be 3¼in from the edge, so they will meet in the centre of the square. Mark two diagonals in opposite corners as shown.
Step 2
Next, select a fabric string to start with. Use a dab of glue along the horizontal line on the centre of your first paper template and line up your fabric string along the line.
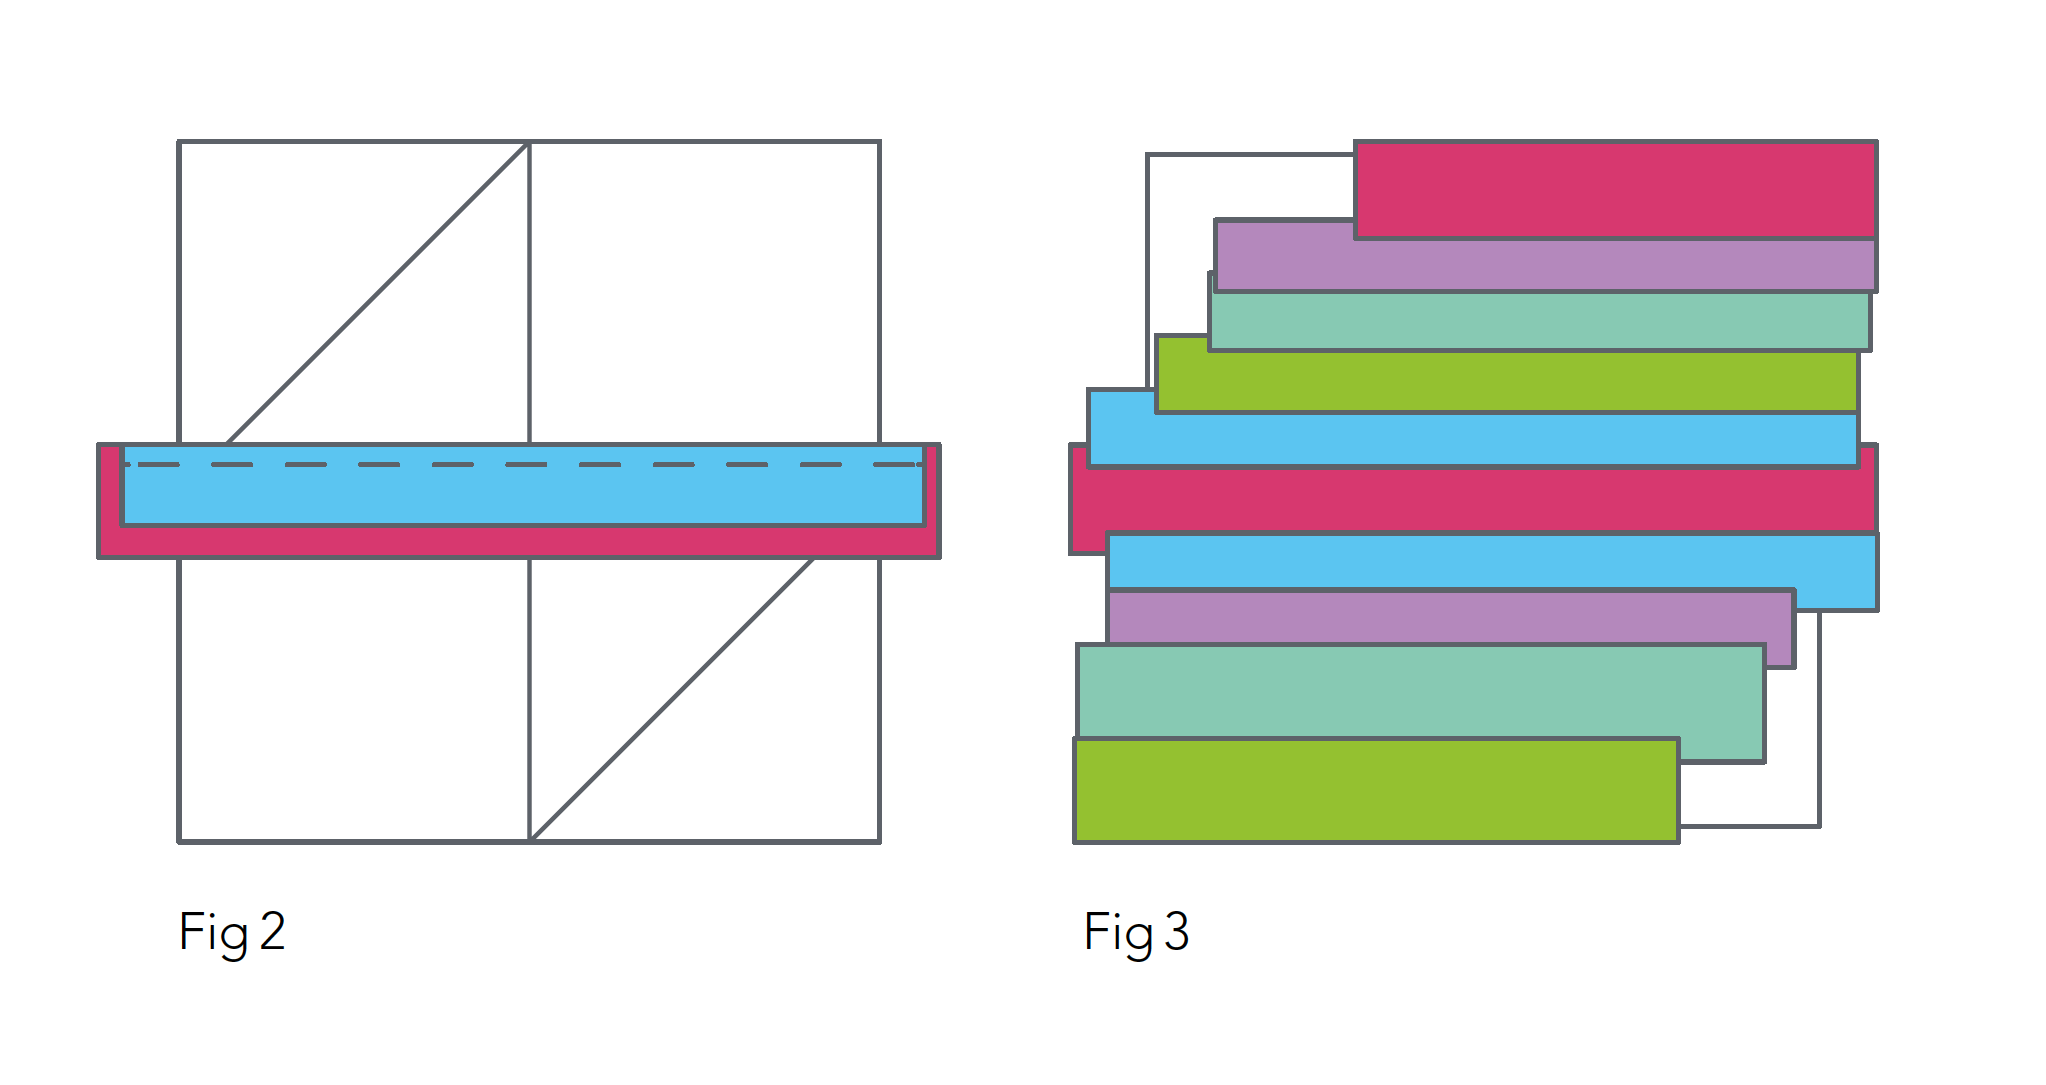
Place a second string RST (right sides together) with the first string, and sew in place, using a ¼in seam allowance (Fig 2). Press the strings open.
Repeat, adding more strings until you have filled the centre of the template paper (Fig 3). Make sure your fabrics hang at least ¼ in over the diagonal lines at the corners.
Step 3
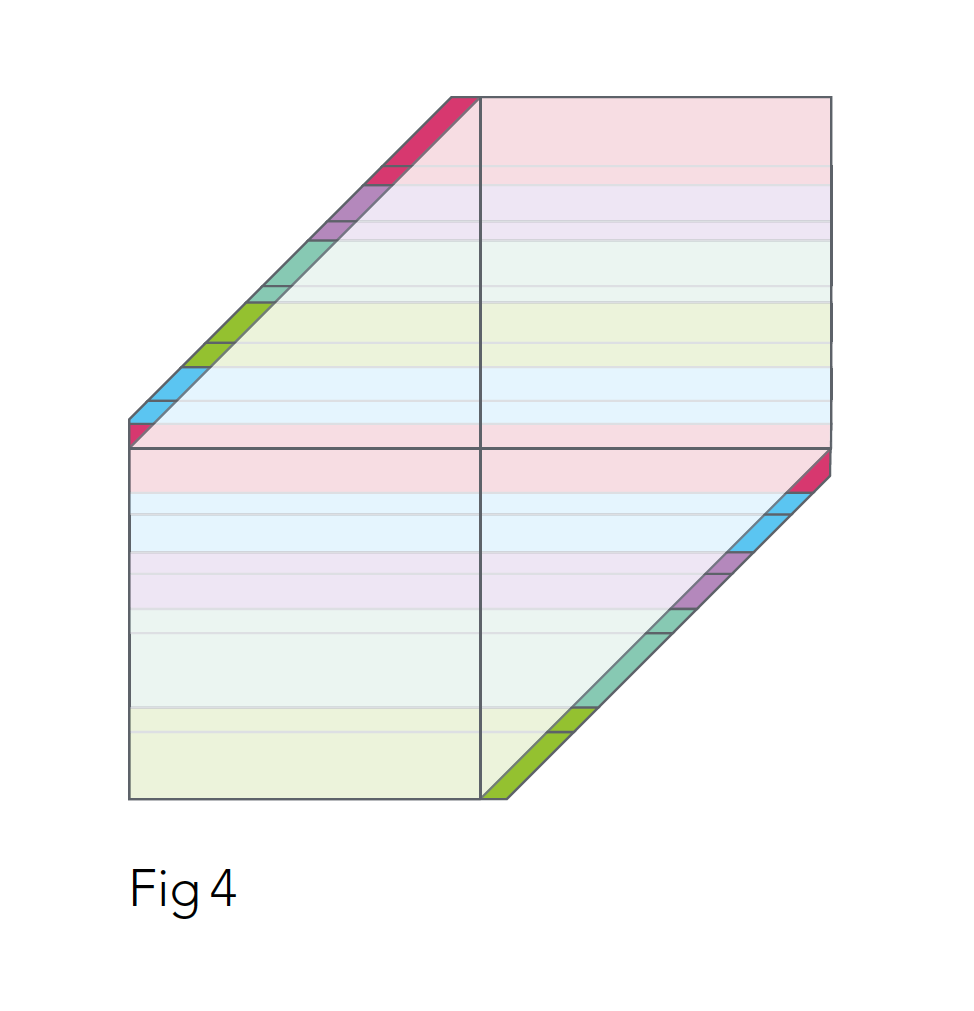
Flip your paper template over. Trim away any excess fabric along the edge of the block. Then fold back the paper along the two diagonal lines. Trim your fabric ¼ in away from the diagonal (Fig 4). Unfold the paper and give your block a quick press
Step 4
To create the corners of each template, choose a pair of light or medium grey triangles to work with. Take one of the triangles and align it right sides together with your strings. Sew in place, open out and press. Repeat with the remaining triangle.
Step 5
Repeat Steps 6–8 with the remaining paper squares, stitching half the blocks with the strings along the vertical line. This will allow you to match the string direction in the final blocks. Press each square again firmly, then remove the papers by tearing along the seam lines.
Assemble the quilt top
Step 1
Your squares are looking great so far, let’s put them together and make some magic happen!
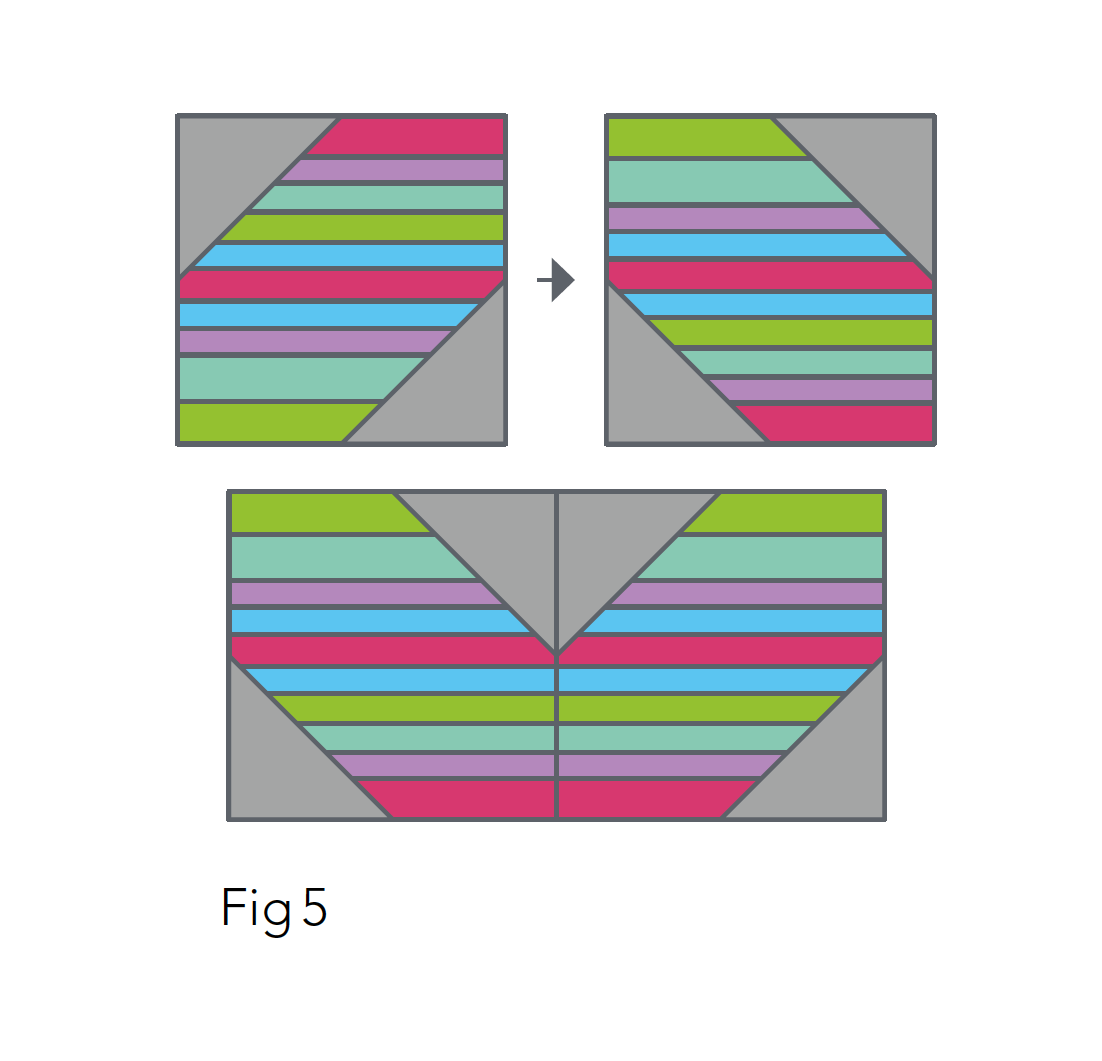
To create each of the four blocks, arrange four coordinating squares with one another as shown, using two horizontal and two vertical string blocks (Fig 5). Sew units together to create four blocks.
Quilting and finishing the quilt
Step 1
You’re onto the final stretch – just those finishing touches to go!
To finish the quilt top, sew two rows of two blocks, then sew the rows together, pinning as needed. Press seams open. You’ve finished the top, hooray!
Step 2
Layer your quilt top, batting, and backing together and baste as desired. Quilt to attach layers and prepare the binding by sewing strips together into one long length and pressing in half, wrong sides together.
Step 3
Before attaching the binding, press the two 6in binding squares in half, wrong sides together. This creates hanging corners for the mini quilt. Pin the hanging corners in the top right and left corners of the back side of the mini. Once the corners are pinned in place, machine the binding to the front side of the quilt, thus attaching the corners in place securely. Finally, hand stitch the binding to the back side of the quilt to finish.
Don't forget to label your mini quilt– you could use a fabric marker on the hanging corners to note the project name and finish date for future reference!
