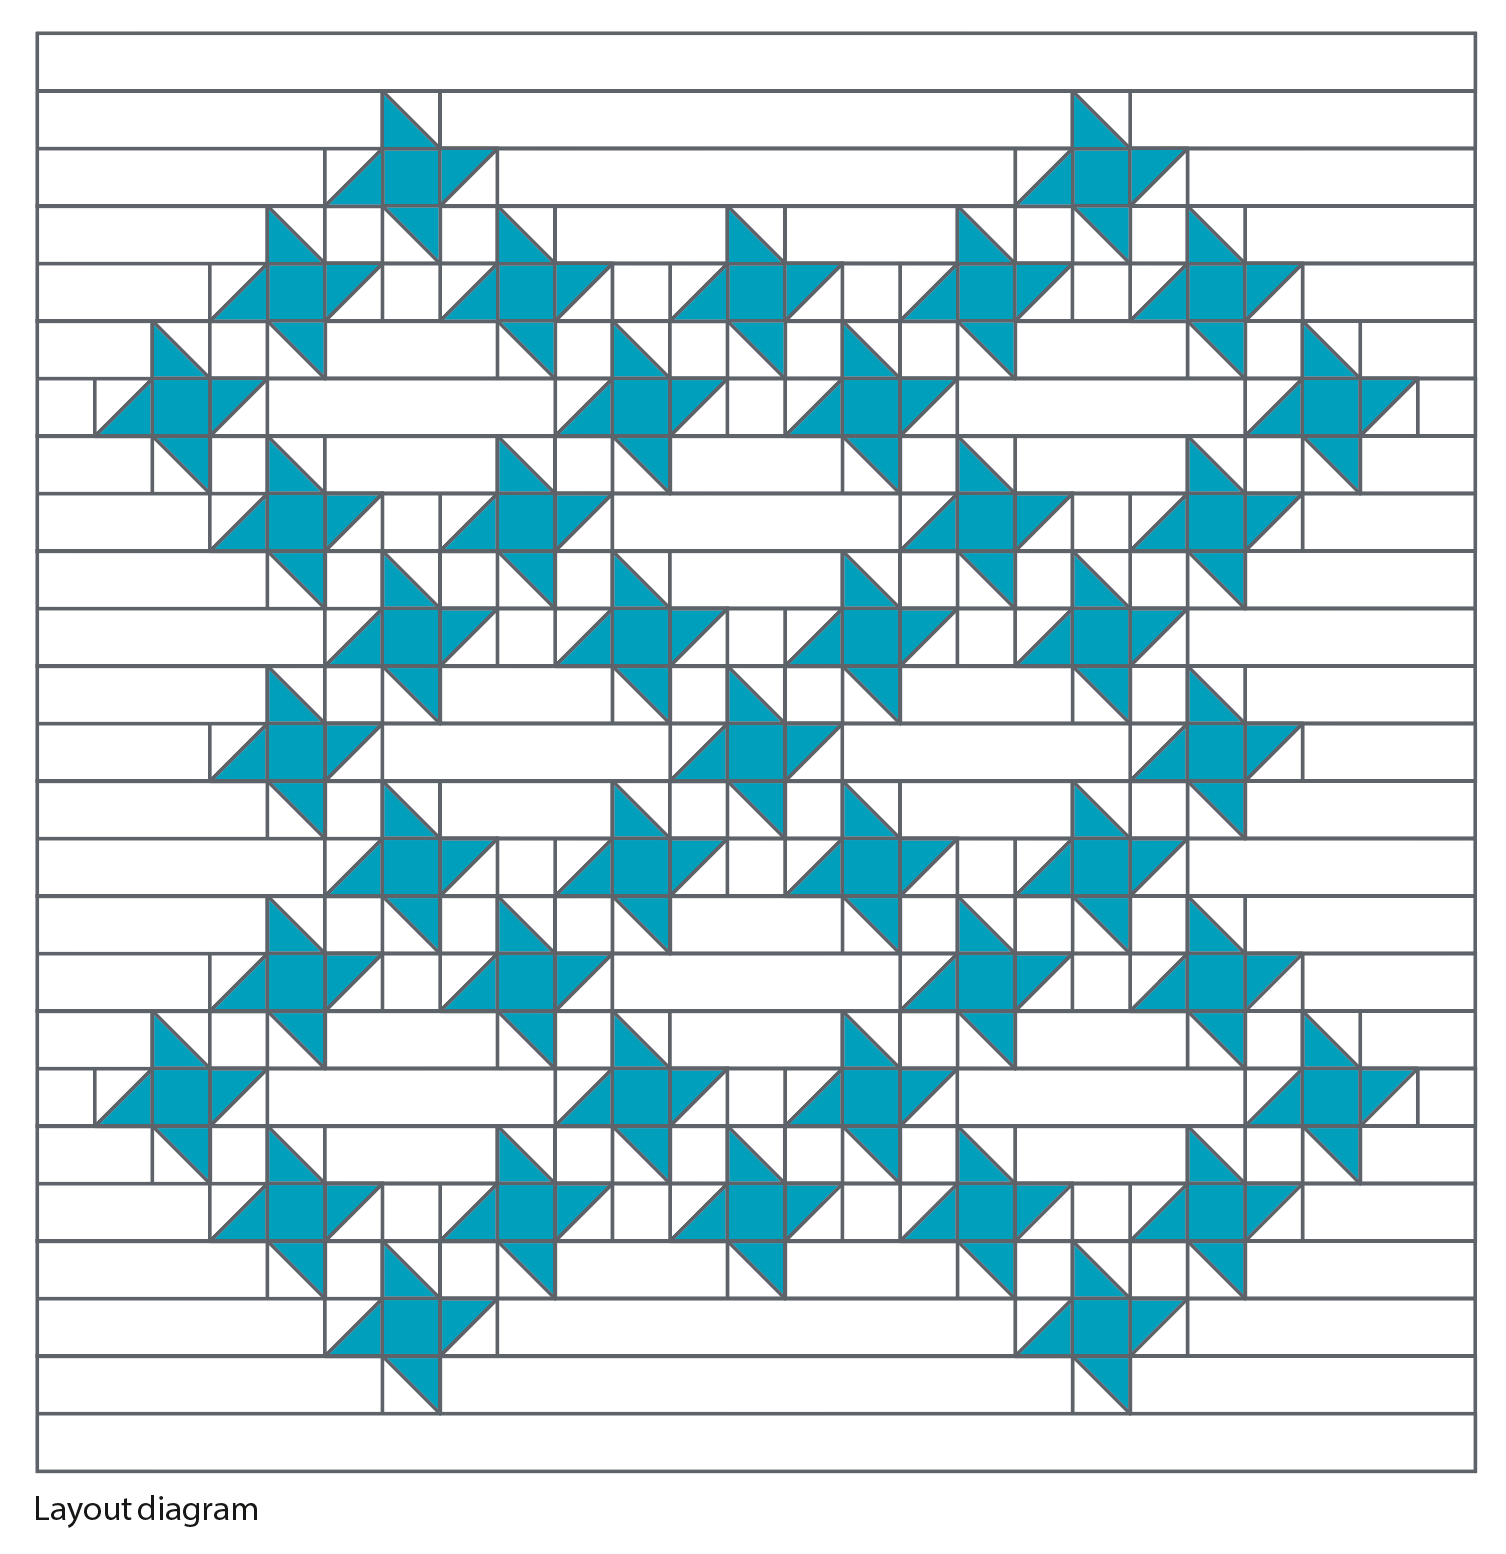
Ah pinwheel quilts – how we salute you! These beautiful and classic quilt patterns are simple to piece together from half square triangles of fabric, making them a great beginner patchwork quilt project, as well as a speedy sew for more experienced quilters. Mix up the colours to change the effect of your finished quilt – we've opted for low volume white background fabric here to really make our pinwheels pop, and laid out the pinwheels to form intersecting diamonds across the quilt top. In this free pinwheel quilt pattern we'll show you how to make your own, step by step, from cutting your fabrics to piecing the pinwheel quilting blocks and finishing your quilt.
This project was designed by Julie Rutter for Love Patchwork & Quilting magazine. If you love a contemporary quilt project, we've got more modern quilt patterns for you to try this year, and if you're new to quilting, you might find our guide to the best sewing machines for quilting comes in handy when you decide which machine to invest in.
How to make a pinwheels quilt: pattern and instructions
Fabric requirements
Background fabric: 6½yds
Six (6) low-volume print fabrics: ¼yd of each (pinwheel squares)
Eleven (11) print fabrics: ¼yd of each (pinwheel HSTs)
Binding fabric: ¾yd
Backing fabric: 5¼yds
Batting: 92in square
Finished size
87½in square approx
Notes
Seam allowances are ¼in, unless otherwise noted.
Press seams towards darker fabric, unless otherwise instructed.
Print fabrics are assorted prints from collections by Art Gallery Fabrics, mostly from Happy Home by Caroline Hulse.
You will need:
Fabric (See fabric requirements)
Batting (92in square)
Sewing machine
Thread
Basic quilting kit
Cutting out
Step 1
From the background fabric cut forty-one (41) 6½in squares for the pinwheel HSTs and four (4) 4in x WOF strips. Join the strips in pairs end-to-end with straight seams and trim to give two (2) 88in x 4in rectangles.
Step 2
From the background fabric also cut thirty-five (35) 4in x WOF strips. Subcut as follows:
Seven (7) strips into seventy-two (72) 4in squares total;
Two (2) strips into eight (8) 7½in x 4in rectangles total;
Eight (8) strips into thirty (30) 11in x 4in rectangles total;
Four (4) strips into twelve (12) 14½in x 4in rectangles total;
Eight (8) strips into sixteen (16) 18in x 4in rectangles total;
Two (2) strips into four (4) 21½in x 4in rectangles total;
Two (2) strips into two (2) 32in x 4in rectangles total;
Two (2) strips into two (2) 39in x 4in rectangles total.
Step 3
From the low-volume prints cut a total of thirty-six (36) 4in squares – around six (6) from each print, for the pinwheel squares.
Step 4
From the print fabrics cut forty-one (41) 6½in squares for the pinwheel HSTs and five (5) 4in squares for the pinwheel squares.
Step 5
From the binding fabric cut ten (10) 2½in x WOF strips.
Making the HSTs for the pinwheel quilting blocks
Step 1
Pair up the print fabric 6½in squares with the 6½in background squares. Place them RST and stitch around all four sides using a ¼in seam allowance.
Step 2
Press and then cut each square across both diagonals to create four (4) HSTs. Press each HST towards the darker fabric and trim to 4in square (Fig 1). You will have one hundred and sixty-four (164) print/background HSTs in total.
Piecing the quilt top
Step 1
Lay out the HSTs, 4in print squares, 4in background squares and the background fabric pieces as shown in the layout diagram. Experiment with your print fabric placement to find your favourite layout – Julie used the darker low volume squares to pick out the central diamond shape. Your pinwheels can have all the same print or all different prints – mix and match as desired.
Step 2
Join the patches into rows and then join the rows to complete the quilt top. Try to press the seams so that when joining the rows seams at the intersections are facing opposite directions as they will then nestle together neatly.
Quilting and finishing
Step 1
Cut the backing fabric in half across the width. Remove the selvedges and then re-join the pieces along the length. Make sure that the backing is least 2in bigger than the quilt top on all sides.
Step 2
Make a quilt sandwich (see our guide to quilting for beginners) by placing the backing fabric right side down, the batting on top, then the quilt top centrally and right side up. The backing and batting are slightly larger than the quilt top. Baste the layers together using your usual method.
Step 3
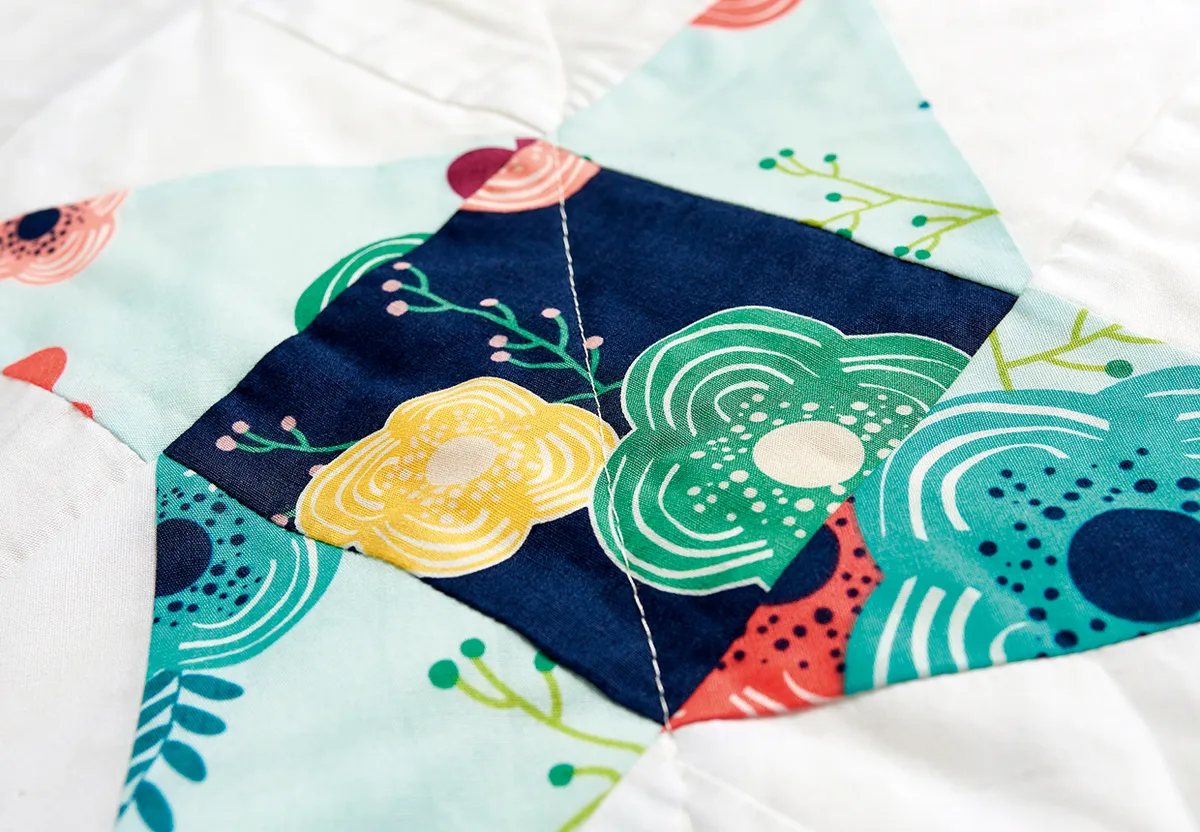
Quilt as desired. Julie quilted diagonal lines across the quilt, running through the centre square of each pinwheel.
Step 4
Trim away the excess batting and backing level with the quilt top edges.
Step 5
Sew the binding strips together end-to-end using diagonal seams. Press the seams open and trim away the dog ears. Fold in half lengthwise, WST, and press. (For more on binding, see our guide to how to bind a quilt).
Step 6
Sew the binding to the right side of the quilt. Before completing your stitching, neaten the short raw end of the starting piece and insert the ending piece into it.
Step 7
Fold the binding over to the back of the quilt and hand stitch in place to finish.
Self-taught quilter, Julie, loves to mix and match different fabric types and enjoys playing with colour. After several years of teaching sewing as well and designing and creating quilts for magazines, including Love Patchwork & Quilting, her love of knitting and wool began to take over and she founded Black Isle Yarns. Her All Around Arrows quilt was featured in the book ‘Love Flying Geese: 27 Modern Quilt Projects. See what she’s up to now, and viist her online shop at www.blackisleyarns.co.uk.
This website is owned and published by Our Media Ltd. www.ourmedia.co.uk