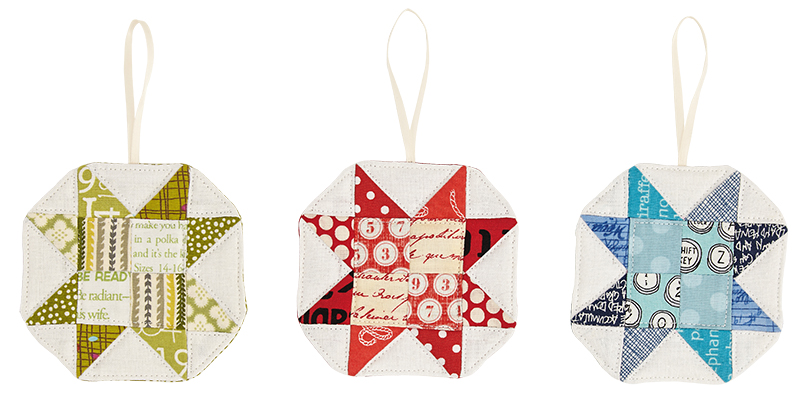
How to sew patchwork Christmas decorations

How to sew patchwork Christmas decorations

Transform the tiniest of fabric scraps of your prettiest prints into these beautiful patchwork star Christmas decorations.

Try Love Patchwork & Quilting magazine for and save over 45%!

Published: September 24, 2019 at 5:55 am

Loved Ali Burdon's scrappy star DIY stockings from Day 2 of our Quilty Advent calendar? Good news! Today we're bringing you a follow-up project.

This free pattern is a small taster of what you can find inside Love Patchwork & Quilting magazine. Subscribe to get a monthly dose of patchwork inspiration, straight to your door!

Easy-sew star decorations tutorial

You will need...

To make one (1) hanging dec

  • Fabric scraps in at least six red prints (or colour of your choice) each 4in square, for the star
  • White background fabric 9in x 4in
  • Co-ordinating fabric for the back of the decoration about 6in square
  • Medium-loft fusible fleece about 6in square
  • Iron-on lightweight interfacing about 6in square
  • Ribbon for the hanging loop 6in
  • Finished Size
  • 4in square approx

How to make patchwork Christmas decorations
Cutting out

Step 1

From your fabric scraps cut four (4) 112in squares for the centre of the star motif. Cut four (4) squares 2in and then cut them into half-square triangles.

Step 2

From the white background fabric cut four (4) rectangles 212in x 112in and four (4) 112in squares.

Assembling the star

Step 1

Piece the star block as for the Scrappy Stars Stockings, following steps 7–13 from our DIY star stockings tutorial.


Step 2

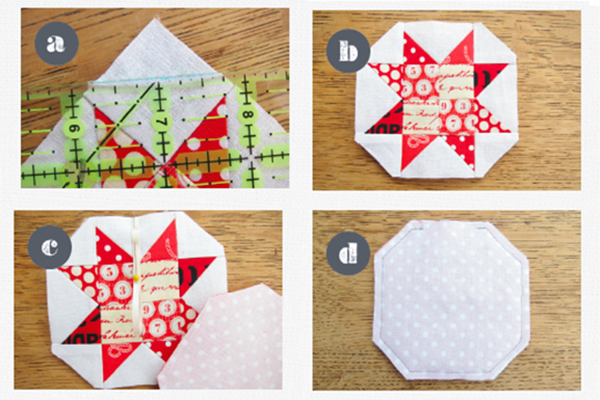
Apply fusible fleece to the back of the block. Line up your quilting ruler with the two of the star points at a corner and cut across the corners leaving a ¼in seam allowance (Fig a). Repeat for the other three corners (Fig b).

How-to-sew-patchwork-decorations-A-D-1

Step 3

Use the octagonal star block as a template to cut out a piece of backing fabric and a piece of lightweight interfacing. Apply the interfacing to the backing fabric.

Step 4

Fold the ribbon in half and pin to the middle of the top edge of the front of the block, aligning the raw edges with the raw edge of the block (Fig c). Put the back section right sides together with the front, sandwiching the ribbon between them.

Step 5

Stitch around the star, leaving a turning gap on one of the longer sides. Reverse stitch at either end of the stitching (Fig d). Turn the star right side out and push out the corners with a knitting needle or similar.

Step 6

Press, turning in the seam allowance on the turning hole as you do so. Finish the star by quilting – choose a design that will  secure the turning gap closed, too!

Easy sew Christmas decorations