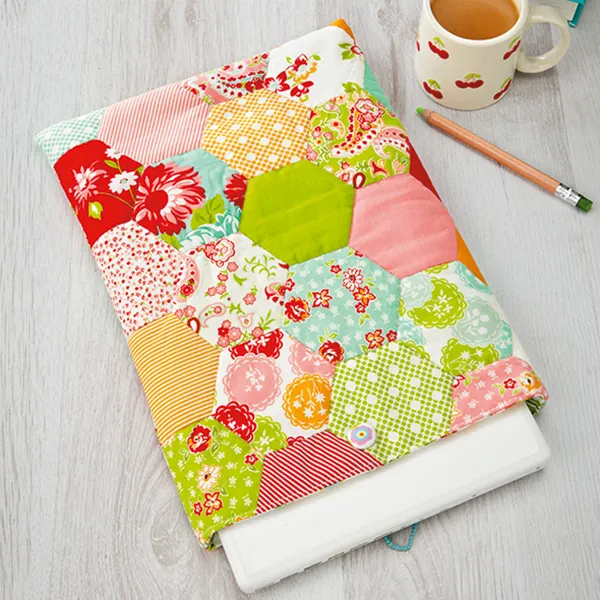
Step 1
Download and trace the hexagon shape from our Free hexagon template. Cut it out from thin card to make a template. Use the card template to cut out the correct number of paper hexagons. (It can be useful to sketch a layout diagram to work out how many whole, half and part hexagons you need to cover your laptop. Office paper or freezer paper works well.)
Step 2
Once you’ve cut out all your paper shapes, pin them onto your cotton fabrics (or iron on if you’re using freezer paper). If you’re using a charm pack, you can cut one whole hexagon from each square.
Step 3
Trim the fabric ¼in (6mm) outside the edge of each hexagon shape all the way around. Turn the edges of the fabric over to the back of the paper and tack into place, folding the corners neatly as you go. Arrange the hexagons on a flat surface until you’re happy with the placement and pattern.

Step 4
Take two hexagons and place them right sides together, then whip stitch along the two sides which will sit next to each other. Be careful not to sew through the backing paper and try to make the stitches small for a neat look. Continue joining the hexagon pieces together in this way, working on one seam at a time until all the hexagons are joined together.
Step 5
Once you’ve sewn all the hexagons together, undo the tacking stitches and remove the papers. Alternatively, by removing the papers as you go along, your work will become more flexible and easier to handle as you work – as well as saving you time at the end.
Step 6
In this stage, the three layers – the finished patchwork, wadding and backing fabric – are joined together with a running stitch, worked all around the edges of the hexagon pieces to create the raised quilted effect. Place the cotton backing fabric right side down with the wadding on top, then put the assembled patchwork right side up centrally on top. Now tack all three layers together, with the lines of tacking a few inches apart, to keep it secure. Neatly quilt around each hexagon shape with a matching quilting thread.
Step 7
Take the completed piece of patchworked and quilted fabric and trim the backing fabric and wadding so that the finished patchwork measures 11×28½in (28x72cm). To be extra sure, wrap around your laptop and check the size before you trim.
Step 8
Fold it in half right sides together widthways and sew together down both sides making sure you match the hexagon seams and use a ¼in (6mm) seam allowance. Repeat this step with the lining fabric but leave a gap in the centre of one side for turning later.
Step 9
Fold the button cord for the loop in half and place both ends at the centre of one side of the opening, tacking them into place. Turn the lining wrong sides out and place the patchwork outer inside, matching side seams and raw edges.
Step 10
Neatly stitch together all around the top using a ¼in (6mm) seam allowance. Turn the whole piece right sides out through the gap in the lining and press carefully with an iron. Push the lining inside the patchwork outer. Choose a good-sized button in a complementary colour to fit the loop. Fix the button to the front of the laptop case to line up with the cord loop on the other side. Slip your laptop inside and secure the loop to check it fits snugly.


