This technique works with other shapes too, and below you'll also find instructions for a mini quilt project that uses your new skills.
How to piece hexagons
In this step-by-step tutorial our technical expert Sarah Griffiths shows you how to tackle Y-seams on your sewing machine by piecing hexagons.
Published: February 23, 2020 at 12:09 pm
Piecing hexagons: planning your design
Step 1
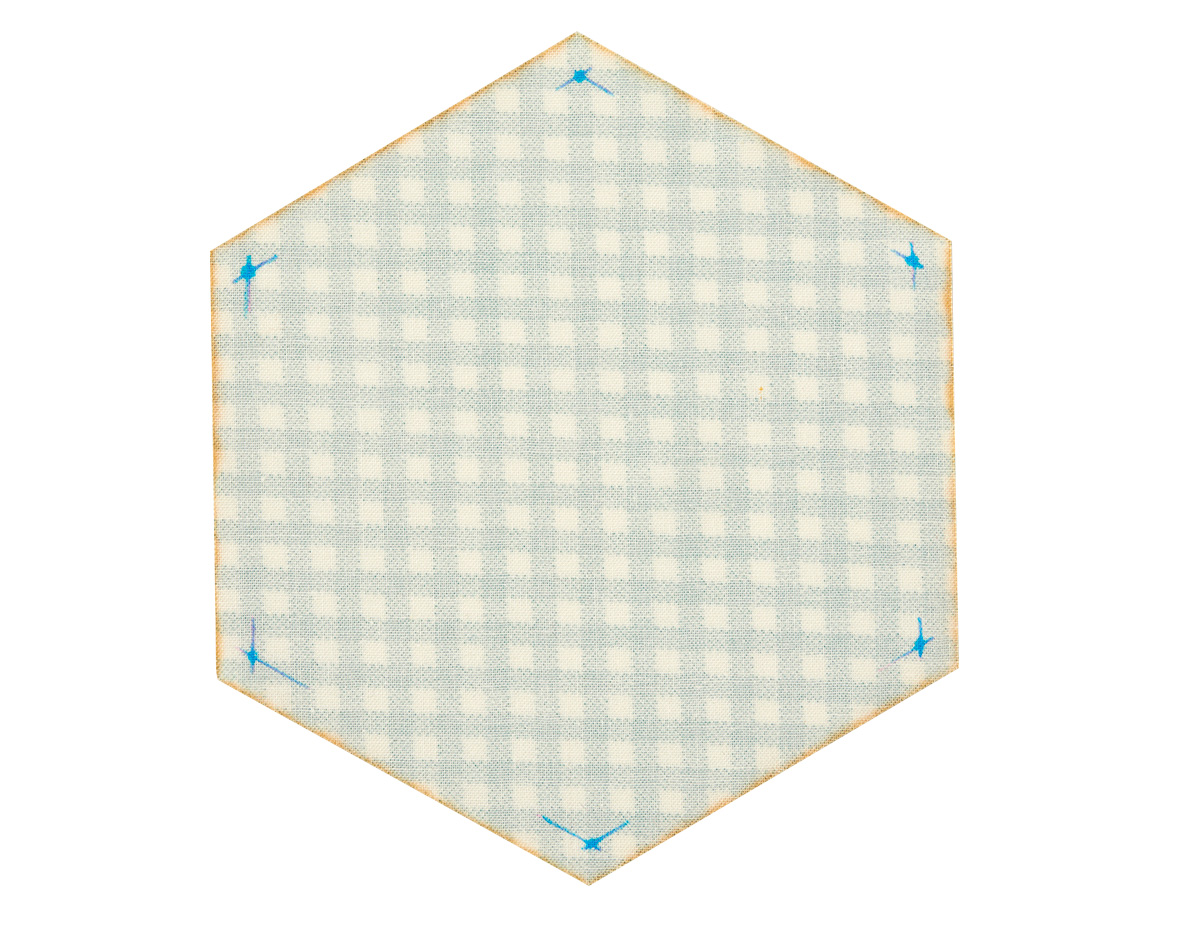
Make a 1⁄4in mark in each corner on the reverse of your hexagons. Do this by measuring 1⁄4in parallel to each edge at the corner. Mark a larger dot at the point where these lines intersect.
Step 2
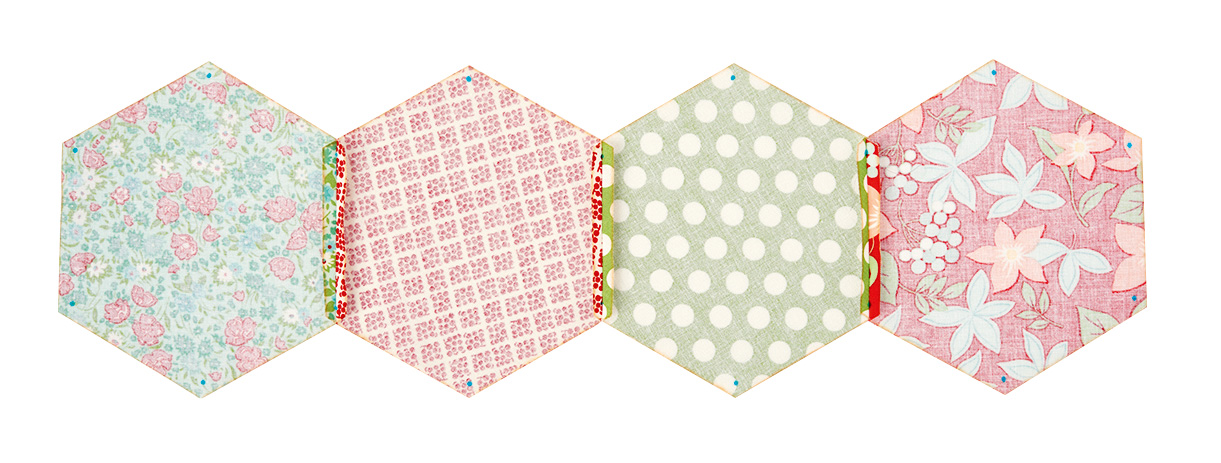
Arrange the hexagons in your desired pattern. Sew together in vertical rows, sewing only between the dots. Backstitch at the beginning and end of each seam. Press the seams open in each row. You will notice that between two hexagons, the dots are now at the seam join. Except for the hexagons at each end, there are only two dots visible on the outer corners.
Step 3
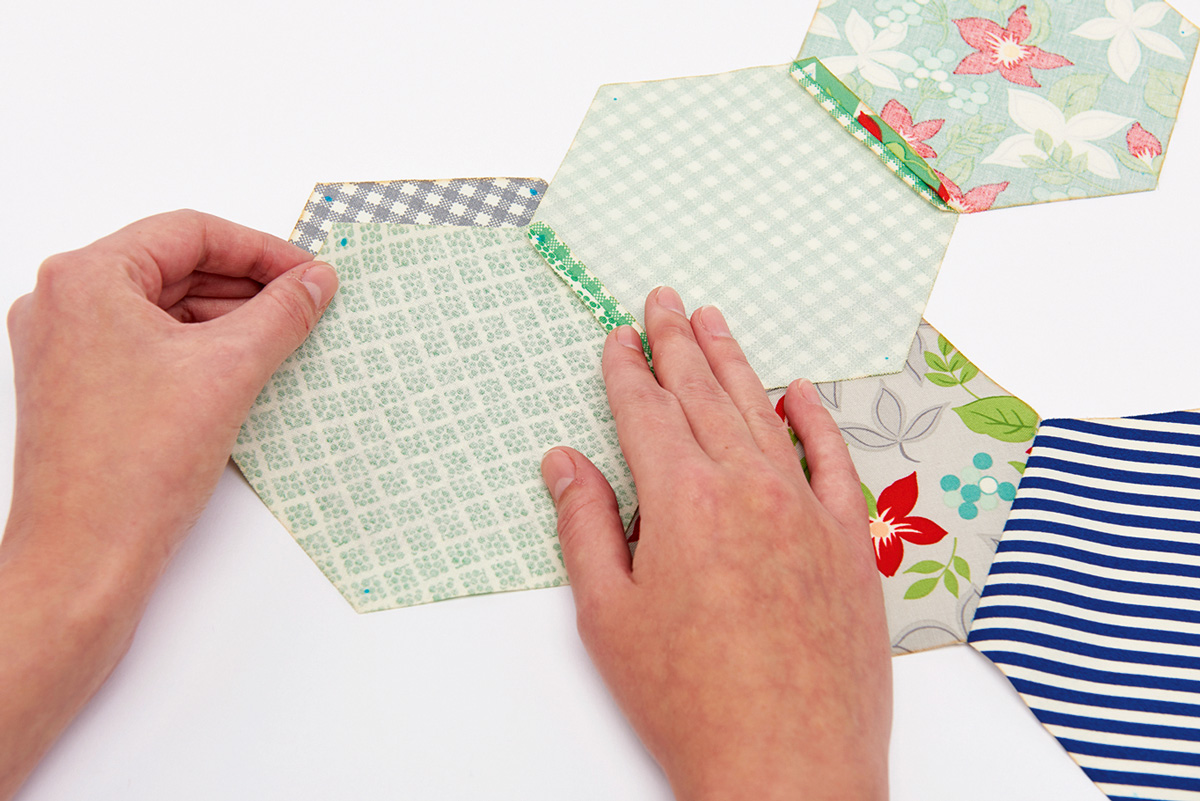
Sew as many rows of hexagons as required. To begin joining the rows, align the first two sides at the top of the strips. At the beginning of the seam, align the dots you marked earlier. At the end of the first edge, align the dot of the single hexagon with the dot at the seam of the two joined hexagons.
Step 4
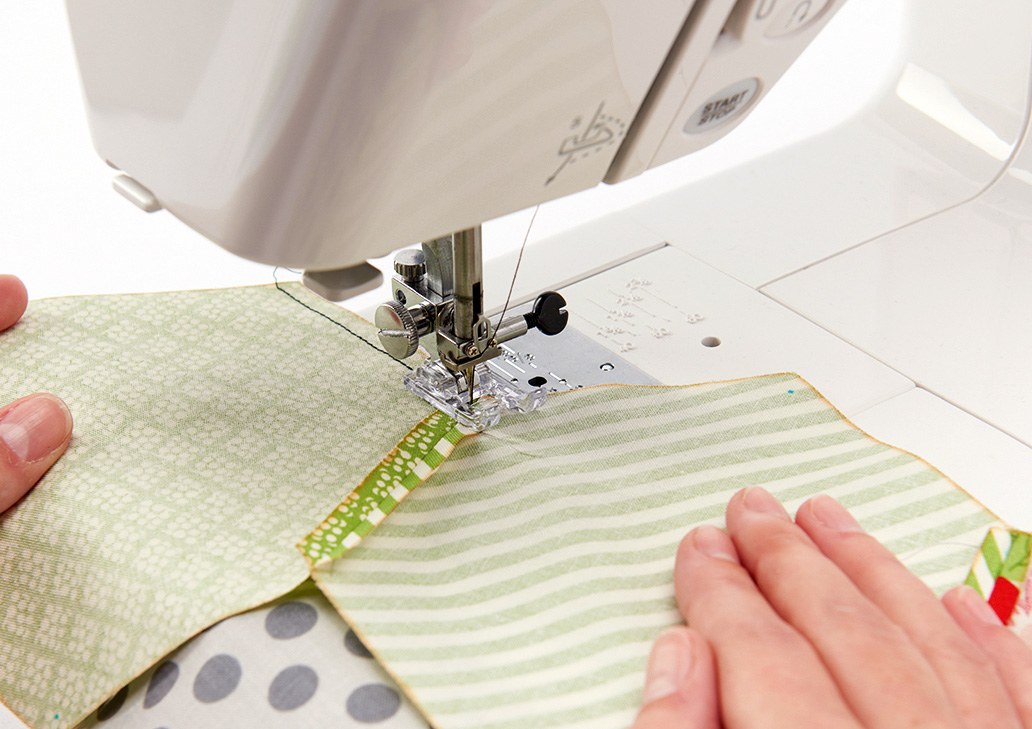
Sew the seam, stopping with the needle down, on top of the dot. Lift the presser foot and rotate the fabric pieces to align the next seam, matching dot to seam as before, at the end of the seam you are about to sew. Make sure you push any extra fabric out of the way, so it’s not twisted underneath the next seam. Then lower the presser foot and sew to the next dot.
Step 5
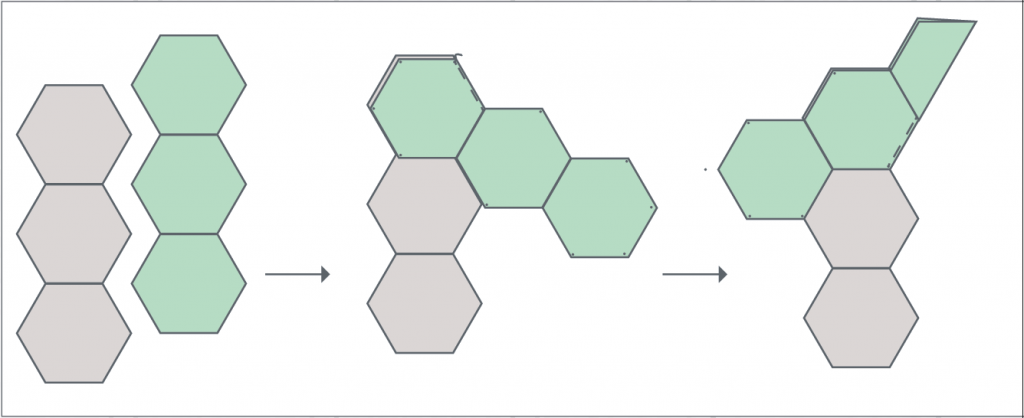
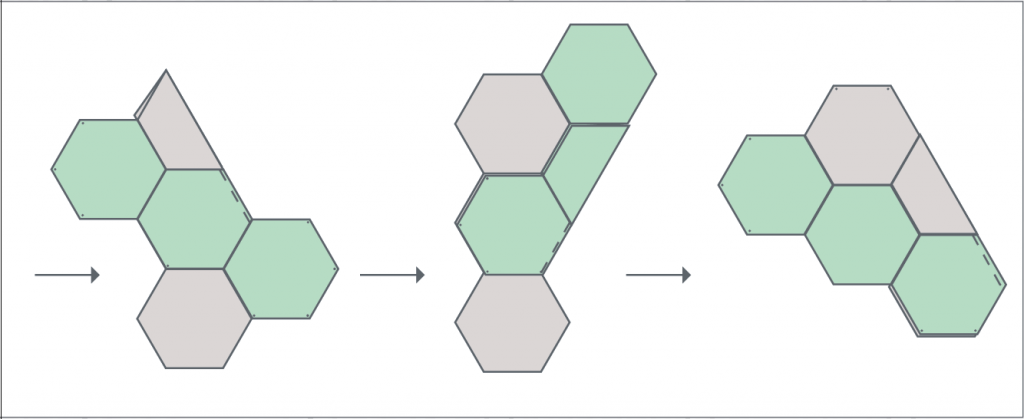
Keep working your way down the row, sewing one seam at a time. When you get to the last seam, you will again have two dots to align. Sew all the way to the end of the seam. Press the seams open down the entire row to finish. The images below show the progression of seams for joining two strips of three hexagons. It’s easier to join the rows in pairs, then sew pairs together until the whole top is joined.
Try it now: make a hexagon mini quilt
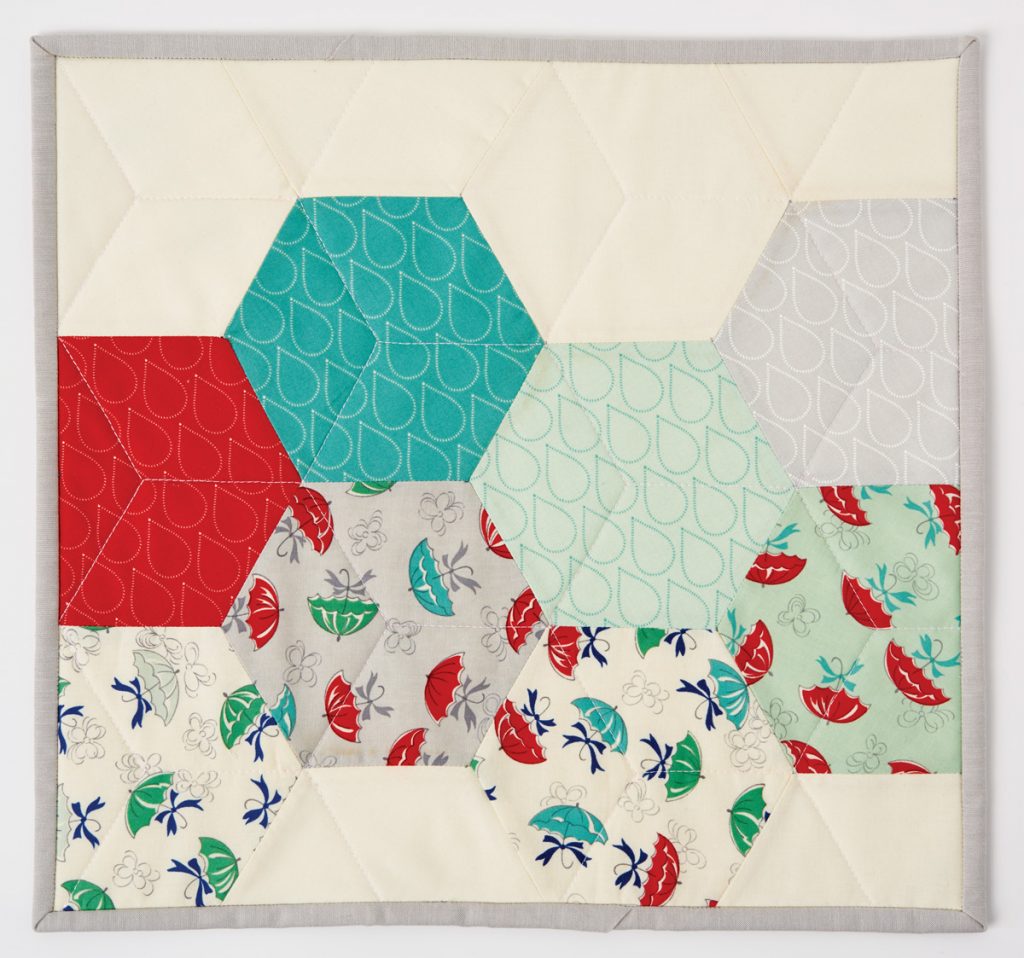
You will need
- Fourteen (14) hexagons with 3in sides
- Backing fabric 18in square
- Batting 18in square
- Binding fabric 1⁄4yd
Finished Size
14in x 15in approx.
Notes
- Seam allowances are 1⁄4in unless otherwise noted.
- WOF = width of fabric.
Fabrics Used
Hexagon fabrics are April Showers by Bonnie & Camille and Moda Bella Solids in Snow.
Step one: Following the instructions in steps one to five above, join the hexagons in two rows of three and two rows of four. Then piece the rows together as shown below.
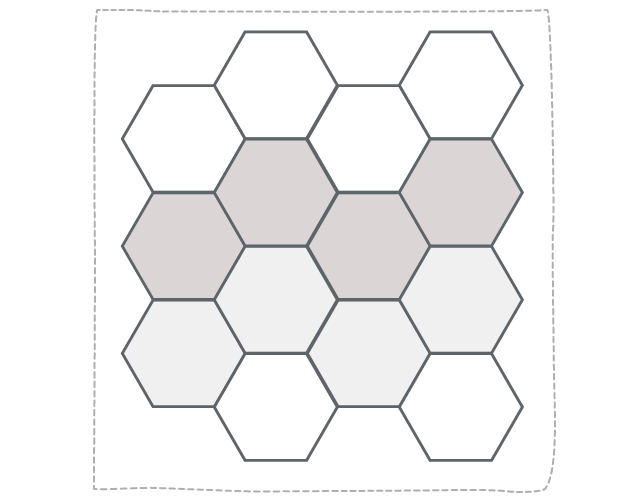
Step two: Trim the outer edges of your hexagon top, as shown below.
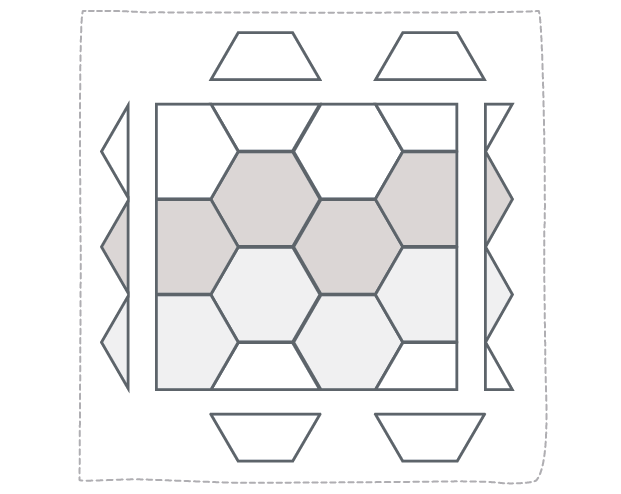
Step three: Make a quilt sandwich with your backing, batting and quilt top. Quilt as desired – we quilted an offset hexagon pattern. Trim away any excess batting and backing.
Step four: Cut three (3) 21⁄2in x WOF strips from your binding fabric and sew end to end. Press in half lengthwise, wrong sides together, and use to bind your mini quilt to finish.
