In these two handy step by step guides, our tech expert Sarah Griffiths will show you how to piece and sew simple circles, while Kate Webber's tutorial will show you how to piece Drunkard's Path blocks like a pro. You can also put these skills to use in the two on-trend tote bag projects, by sewing our pieced curves tote bag or our Drunkard's Path flower tote!
How to piece and sew curves
Circles are a daunting prospect for us quilters – usually we’re all about straight lines! But, actually, with a little know-how, it’s easy to translate techniques you already know into a skill that’ll have you sewing circles in no time.
Published: April 26, 2022 at 11:27 am
How to cut and use interfacing for simple circles
Step 1
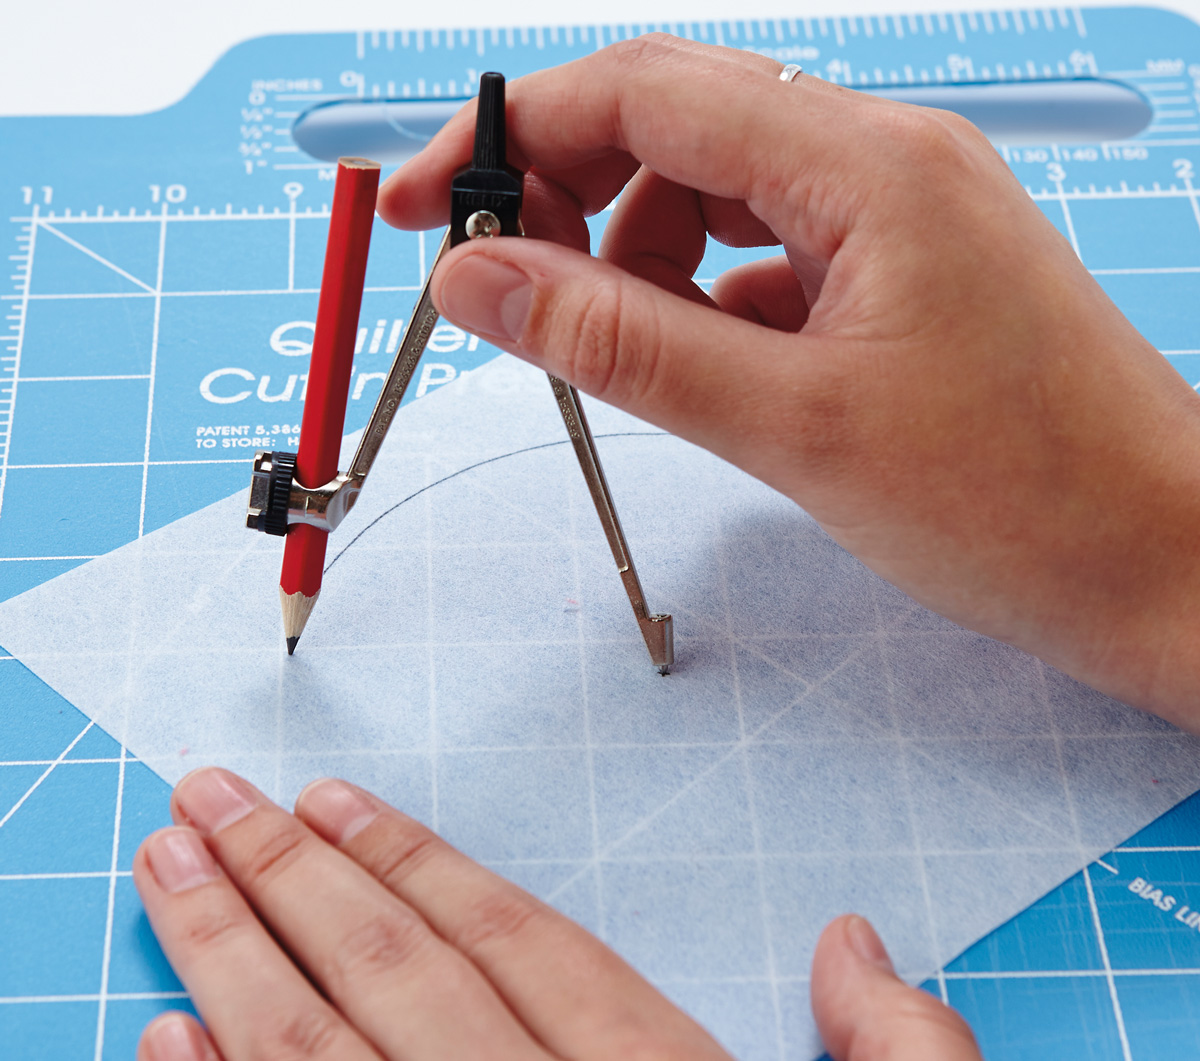
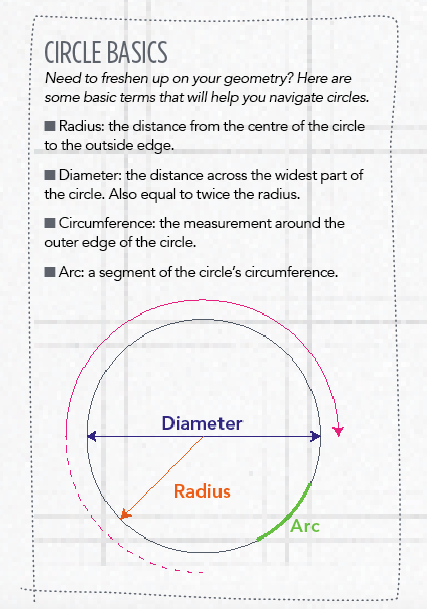
Draw a circle with a diameter ½in wider than your desired finished size on the non-sticky side of a piece of interfacing. A compass is the perfect tool for creating circles of any size. Simply open it out so the distance between the pencil and the sharp point is equal to the radius of the finished circle you want (see the Circle Basics, below, for a refresh on these geometry terms). You will probably also be able to find lots of circular things around your house to trace around too. You can use rolls of tape, vases, upturned bowls, plates, or anything else you can find.
Step 2
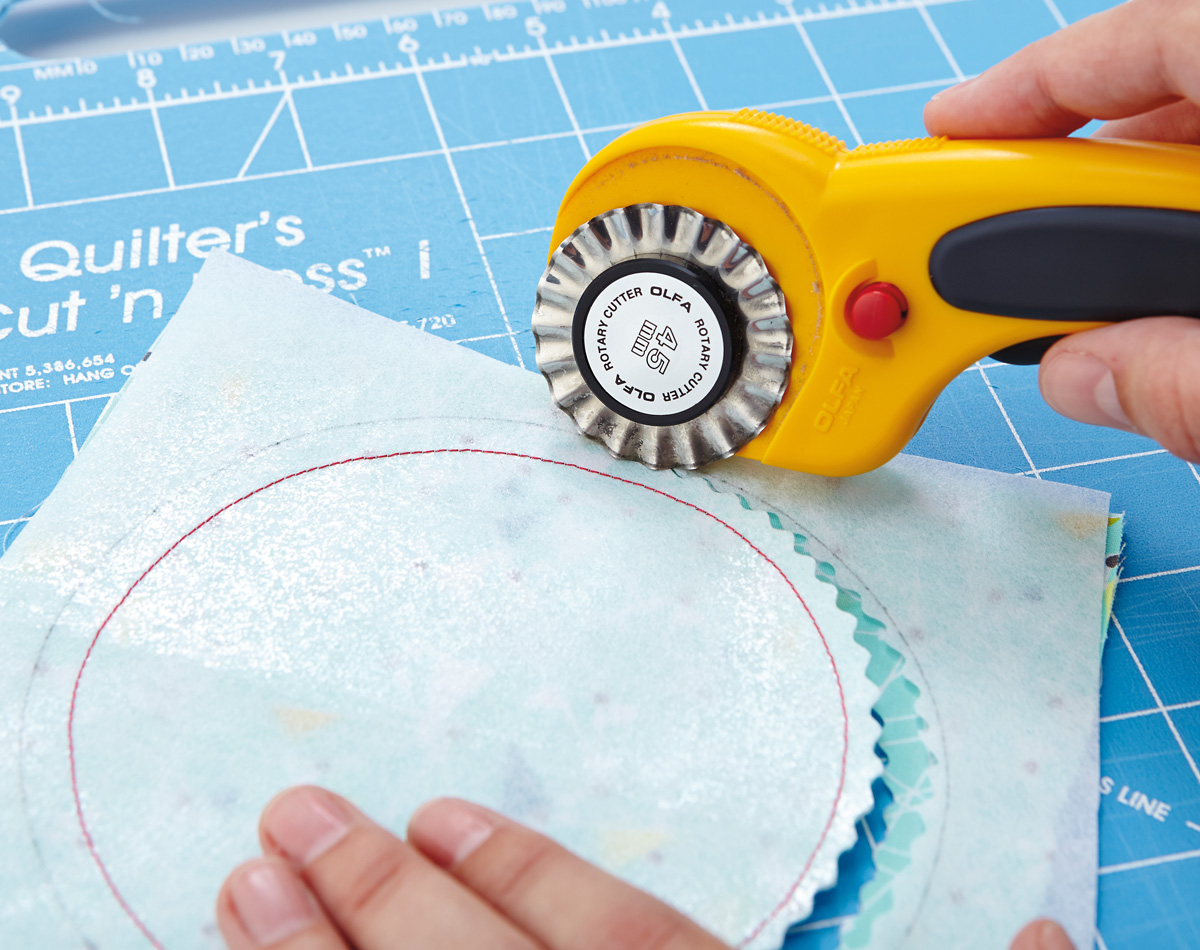
Pin the interfacing, sticky side up, to the right side of a piece of fabric. Do not iron yet. Sew the two layers together around the outer edge using a ¼in seam. Use a pinking blade to trim the seam. This will give you smooth edges when you turn the circle out later. If you don’t have a pinking blade, cut little notches all the way around the edge, being careful not to accidentally clip your seam line.
Step 3
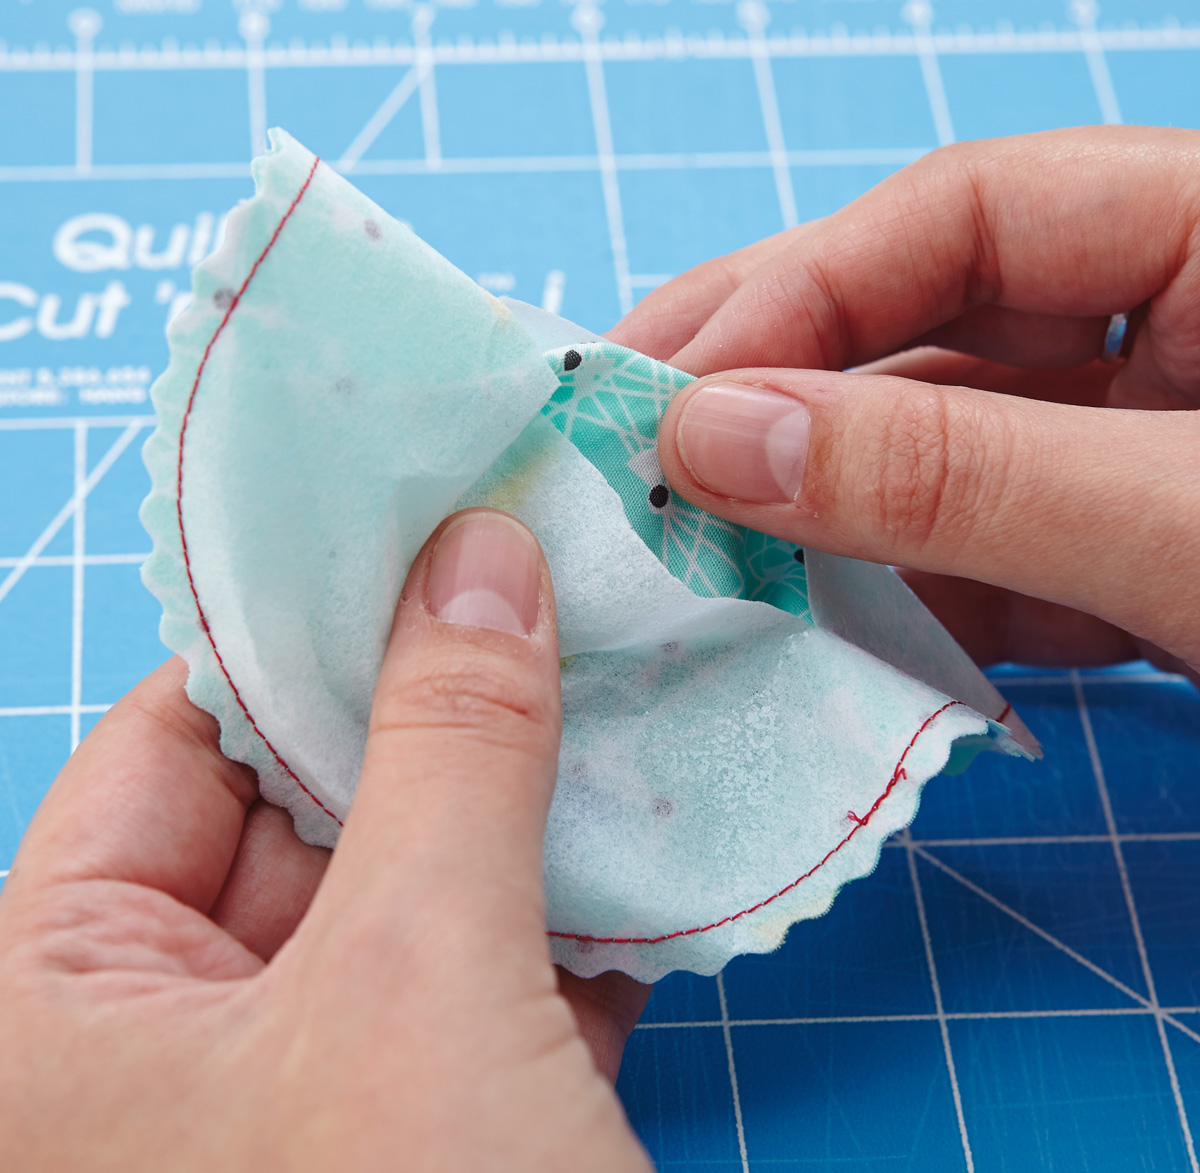
Carefully pull the interfacing away from your fabric and make a cut in the centre of the circle through the interfacing only. Turn your circle right sides out through this cut. Use a Hera marker or point turner to push out the edges all the way around your circle. Lay the circle flat on your ironing board, fabric side up, and finger press the seam, checking you are happy with the edge. Press with your iron to secure the fabric to the interfacing. You now have a circle ready for appliqué.
How to prepare and assemble pieced circles
Step 1
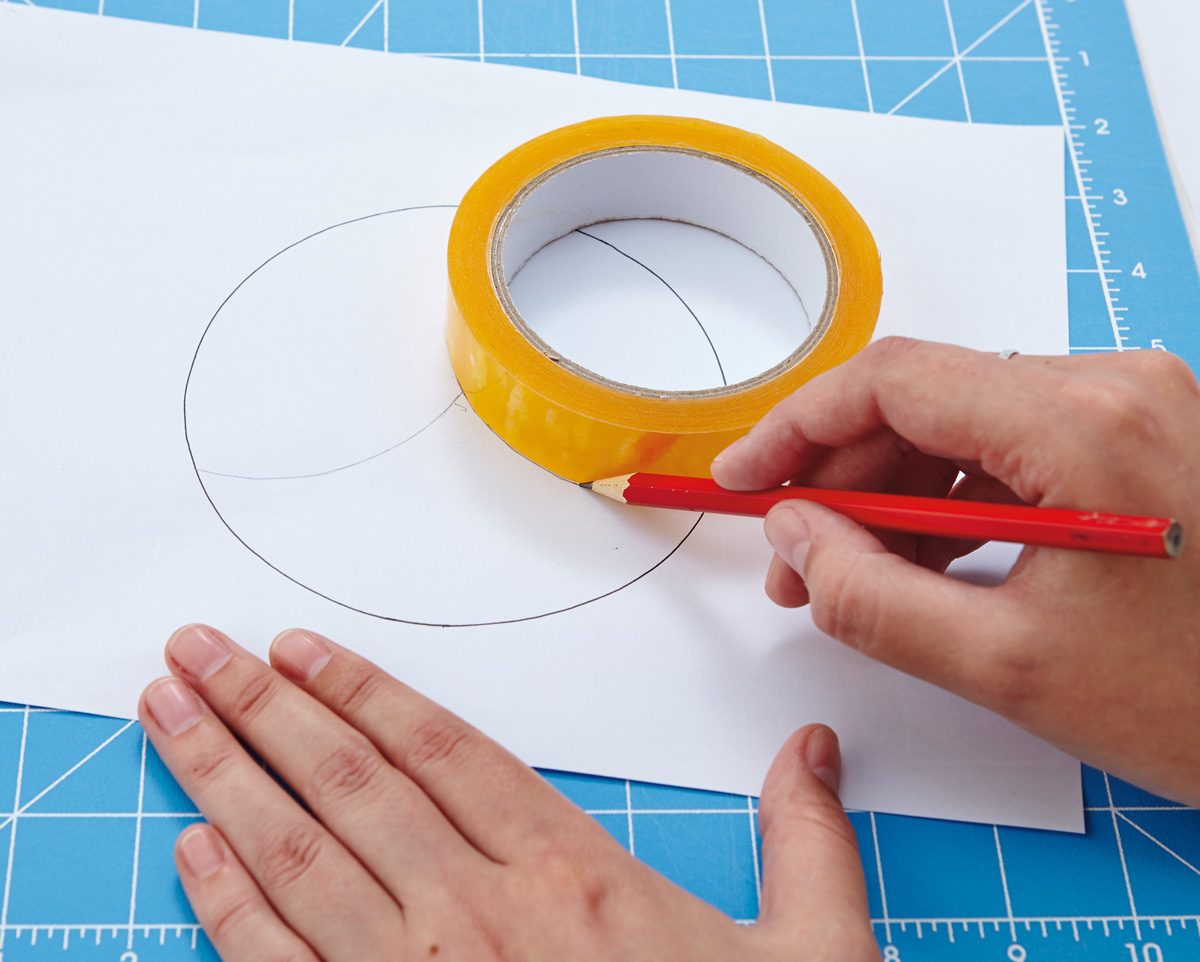
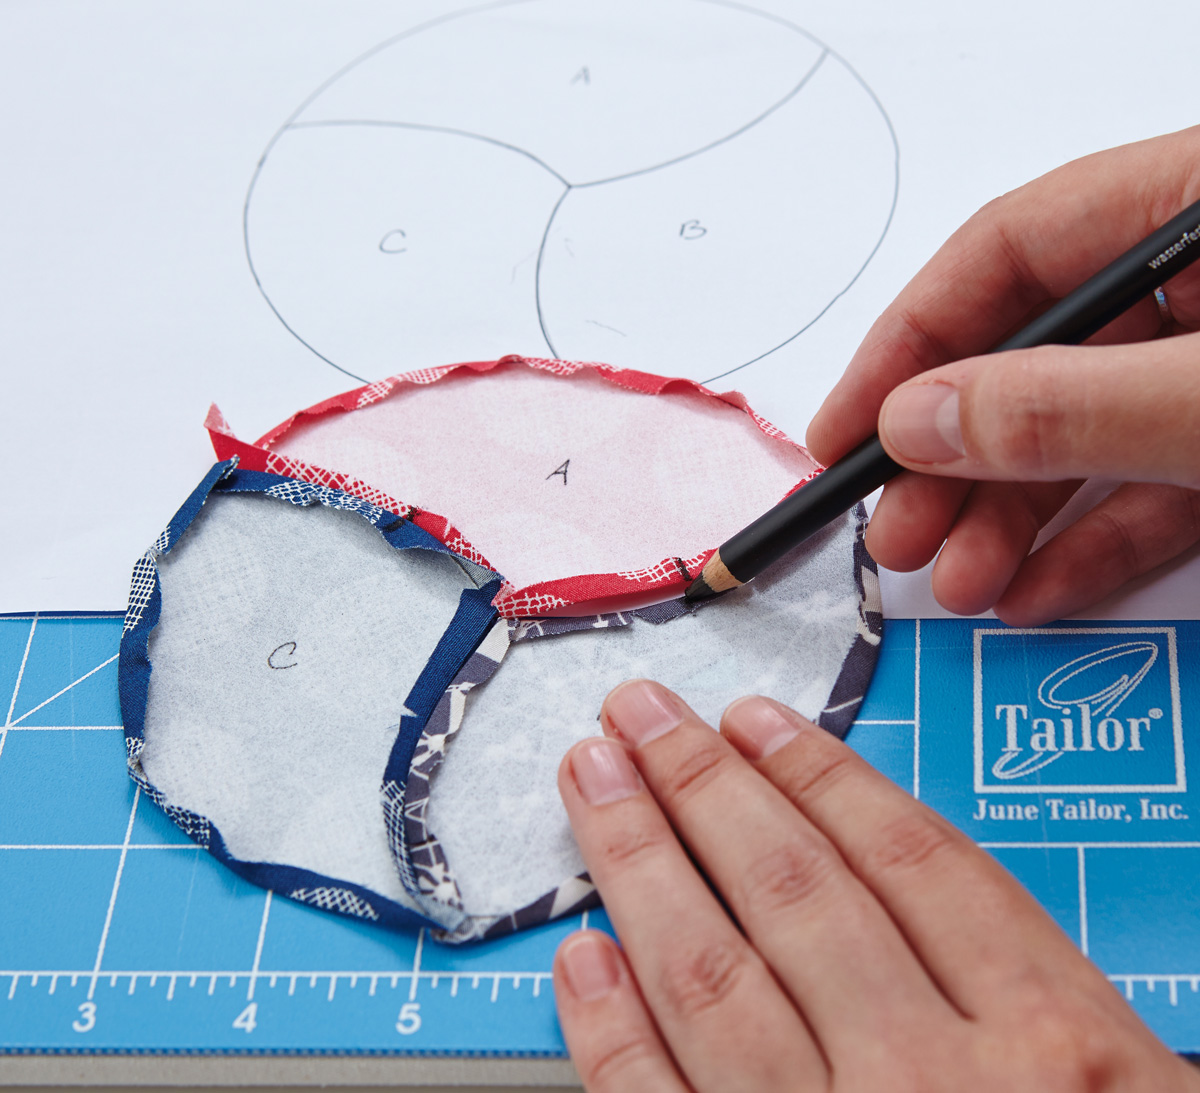
Draw a large circle (or any other shape) using a marker to outline your final design. Then using a compass, or a variety of circular objects, draw arcs through the shape using a pencil. Experiment with different designs, erasing and adding new lines, until you are happy. As long as the two ends of any line meet the edges of your outline or any other drawn line, your pattern will work.
Step 2
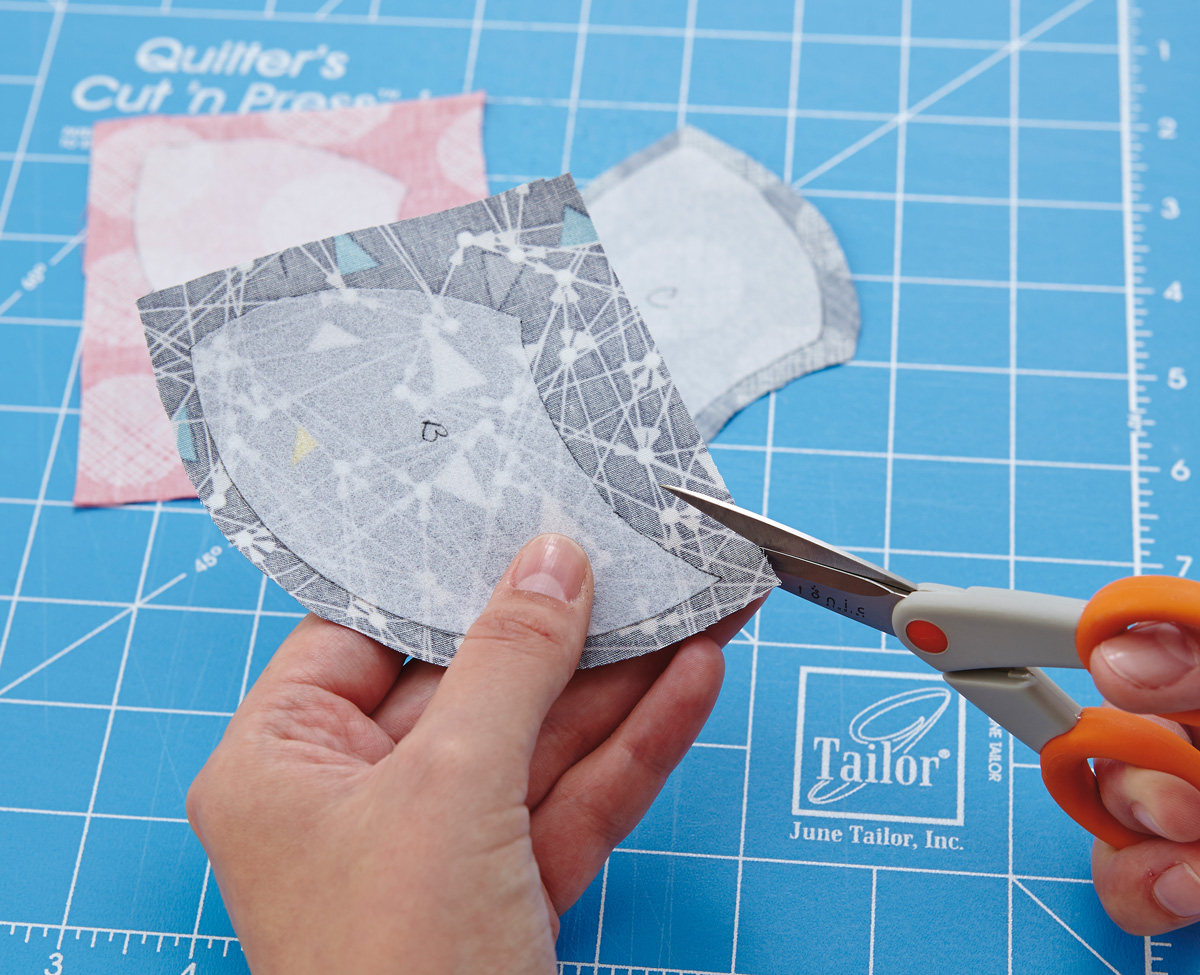
Add letter labels to each filled section of your design. Trace the design onto a piece of heavyweight interfacing, copying the letter labels too. Now cut out each section of the design. Press the pieces onto the reverse of different scraps of fabric and cut around the shapes leaving ¼in around each edge.
Step 3
Press the raw edges to the wrong side, clipping curves where necessary. Line up your pieces wrong side up, referring to your original drawing. Make one or two marks along joined curves. These will help you line up the pieces correctly later on.
Step 4
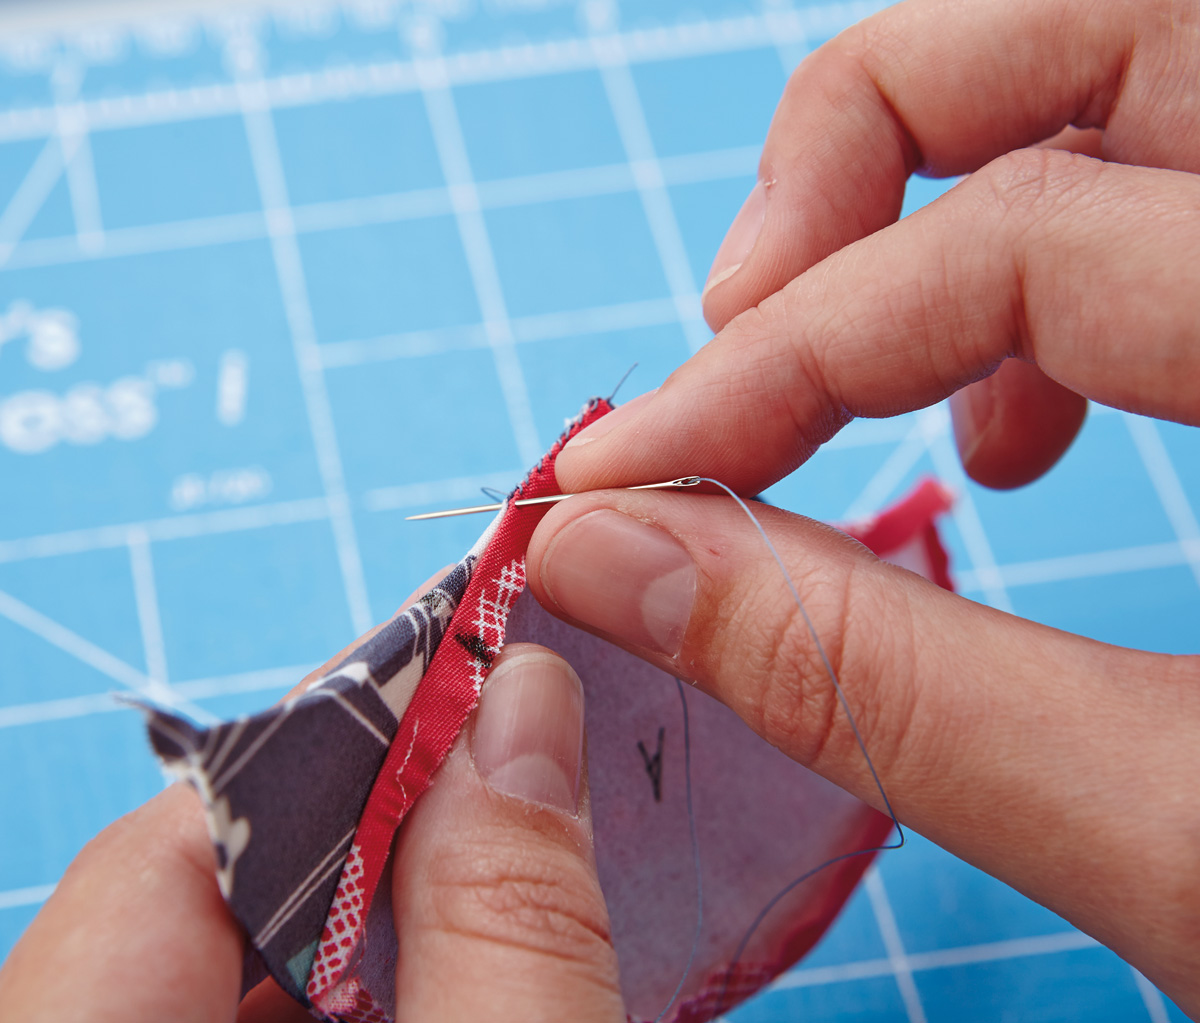
Line up two pieces, right sides together, aligning the end points. Begin whip stitching together at the corner, just as you would with English paper piecing. Continue stitching, until you reach the end of an edge, rotating the pieces as needed and matching your alignment marks from the previous step. Knot off your thread. Keep adding pieces until they are all joined. Gently press flat, and your circle is complete.
How to sew Drunkard's Path Blocks
Step 1
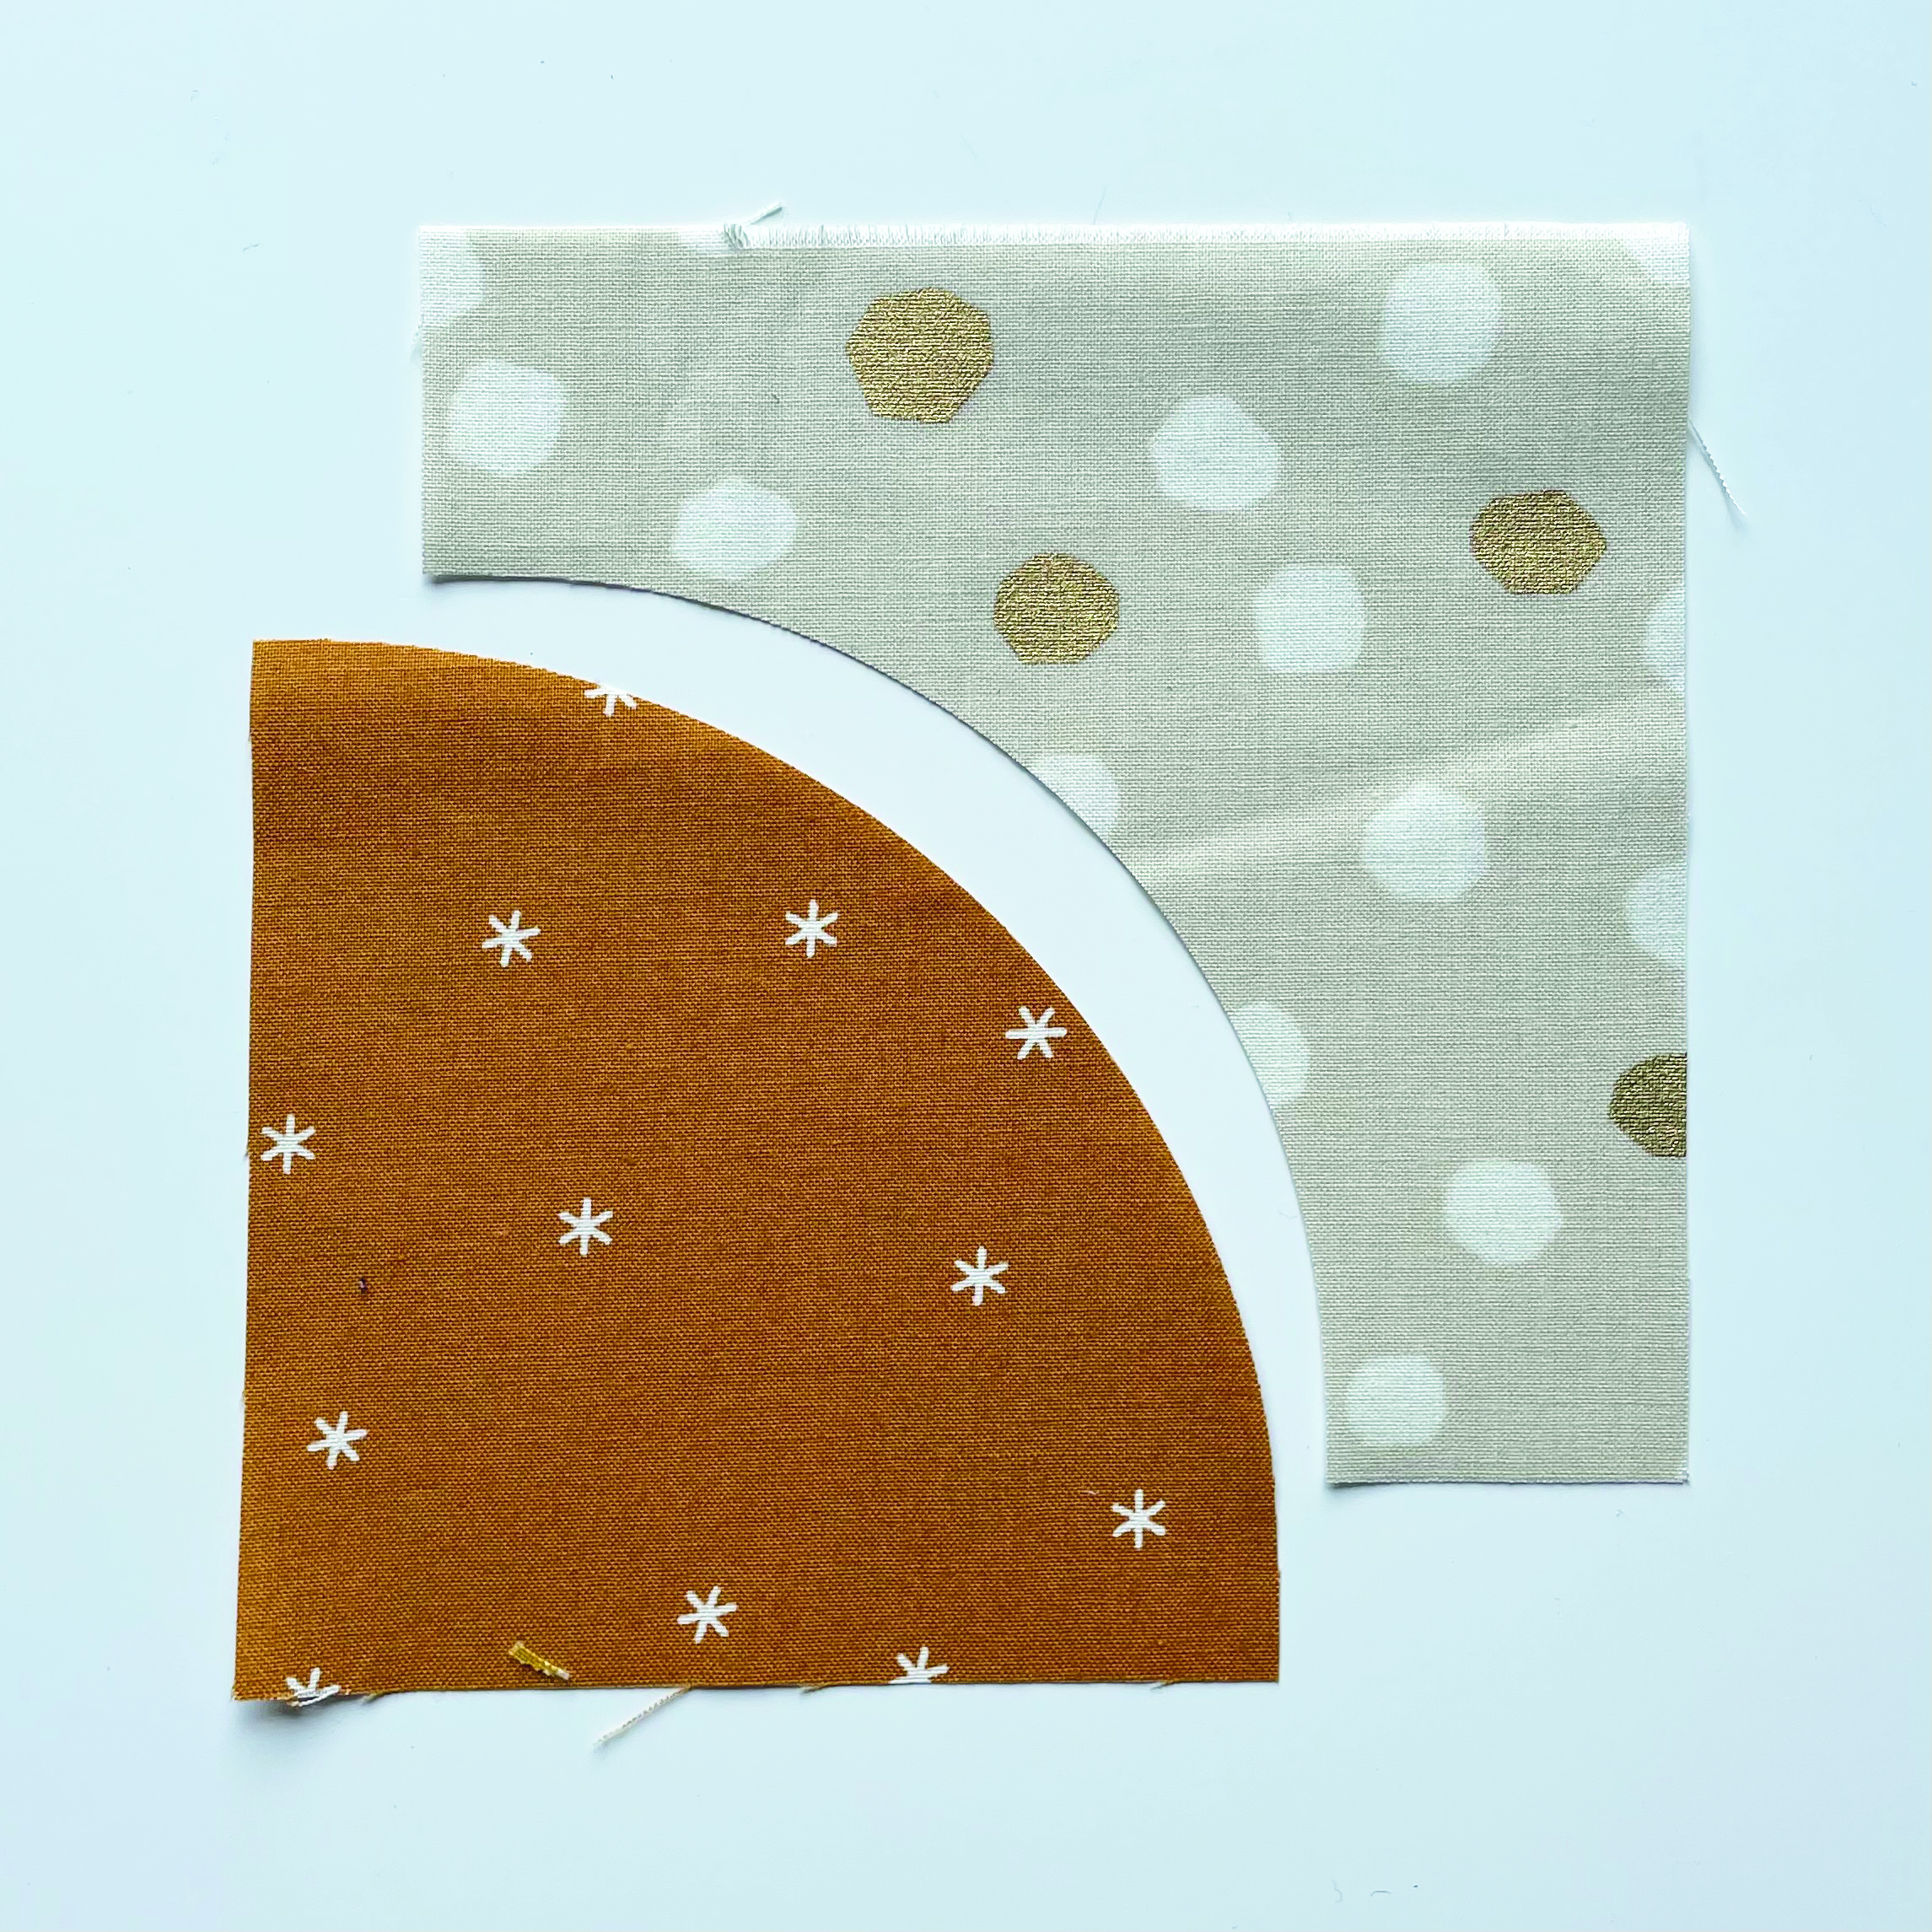
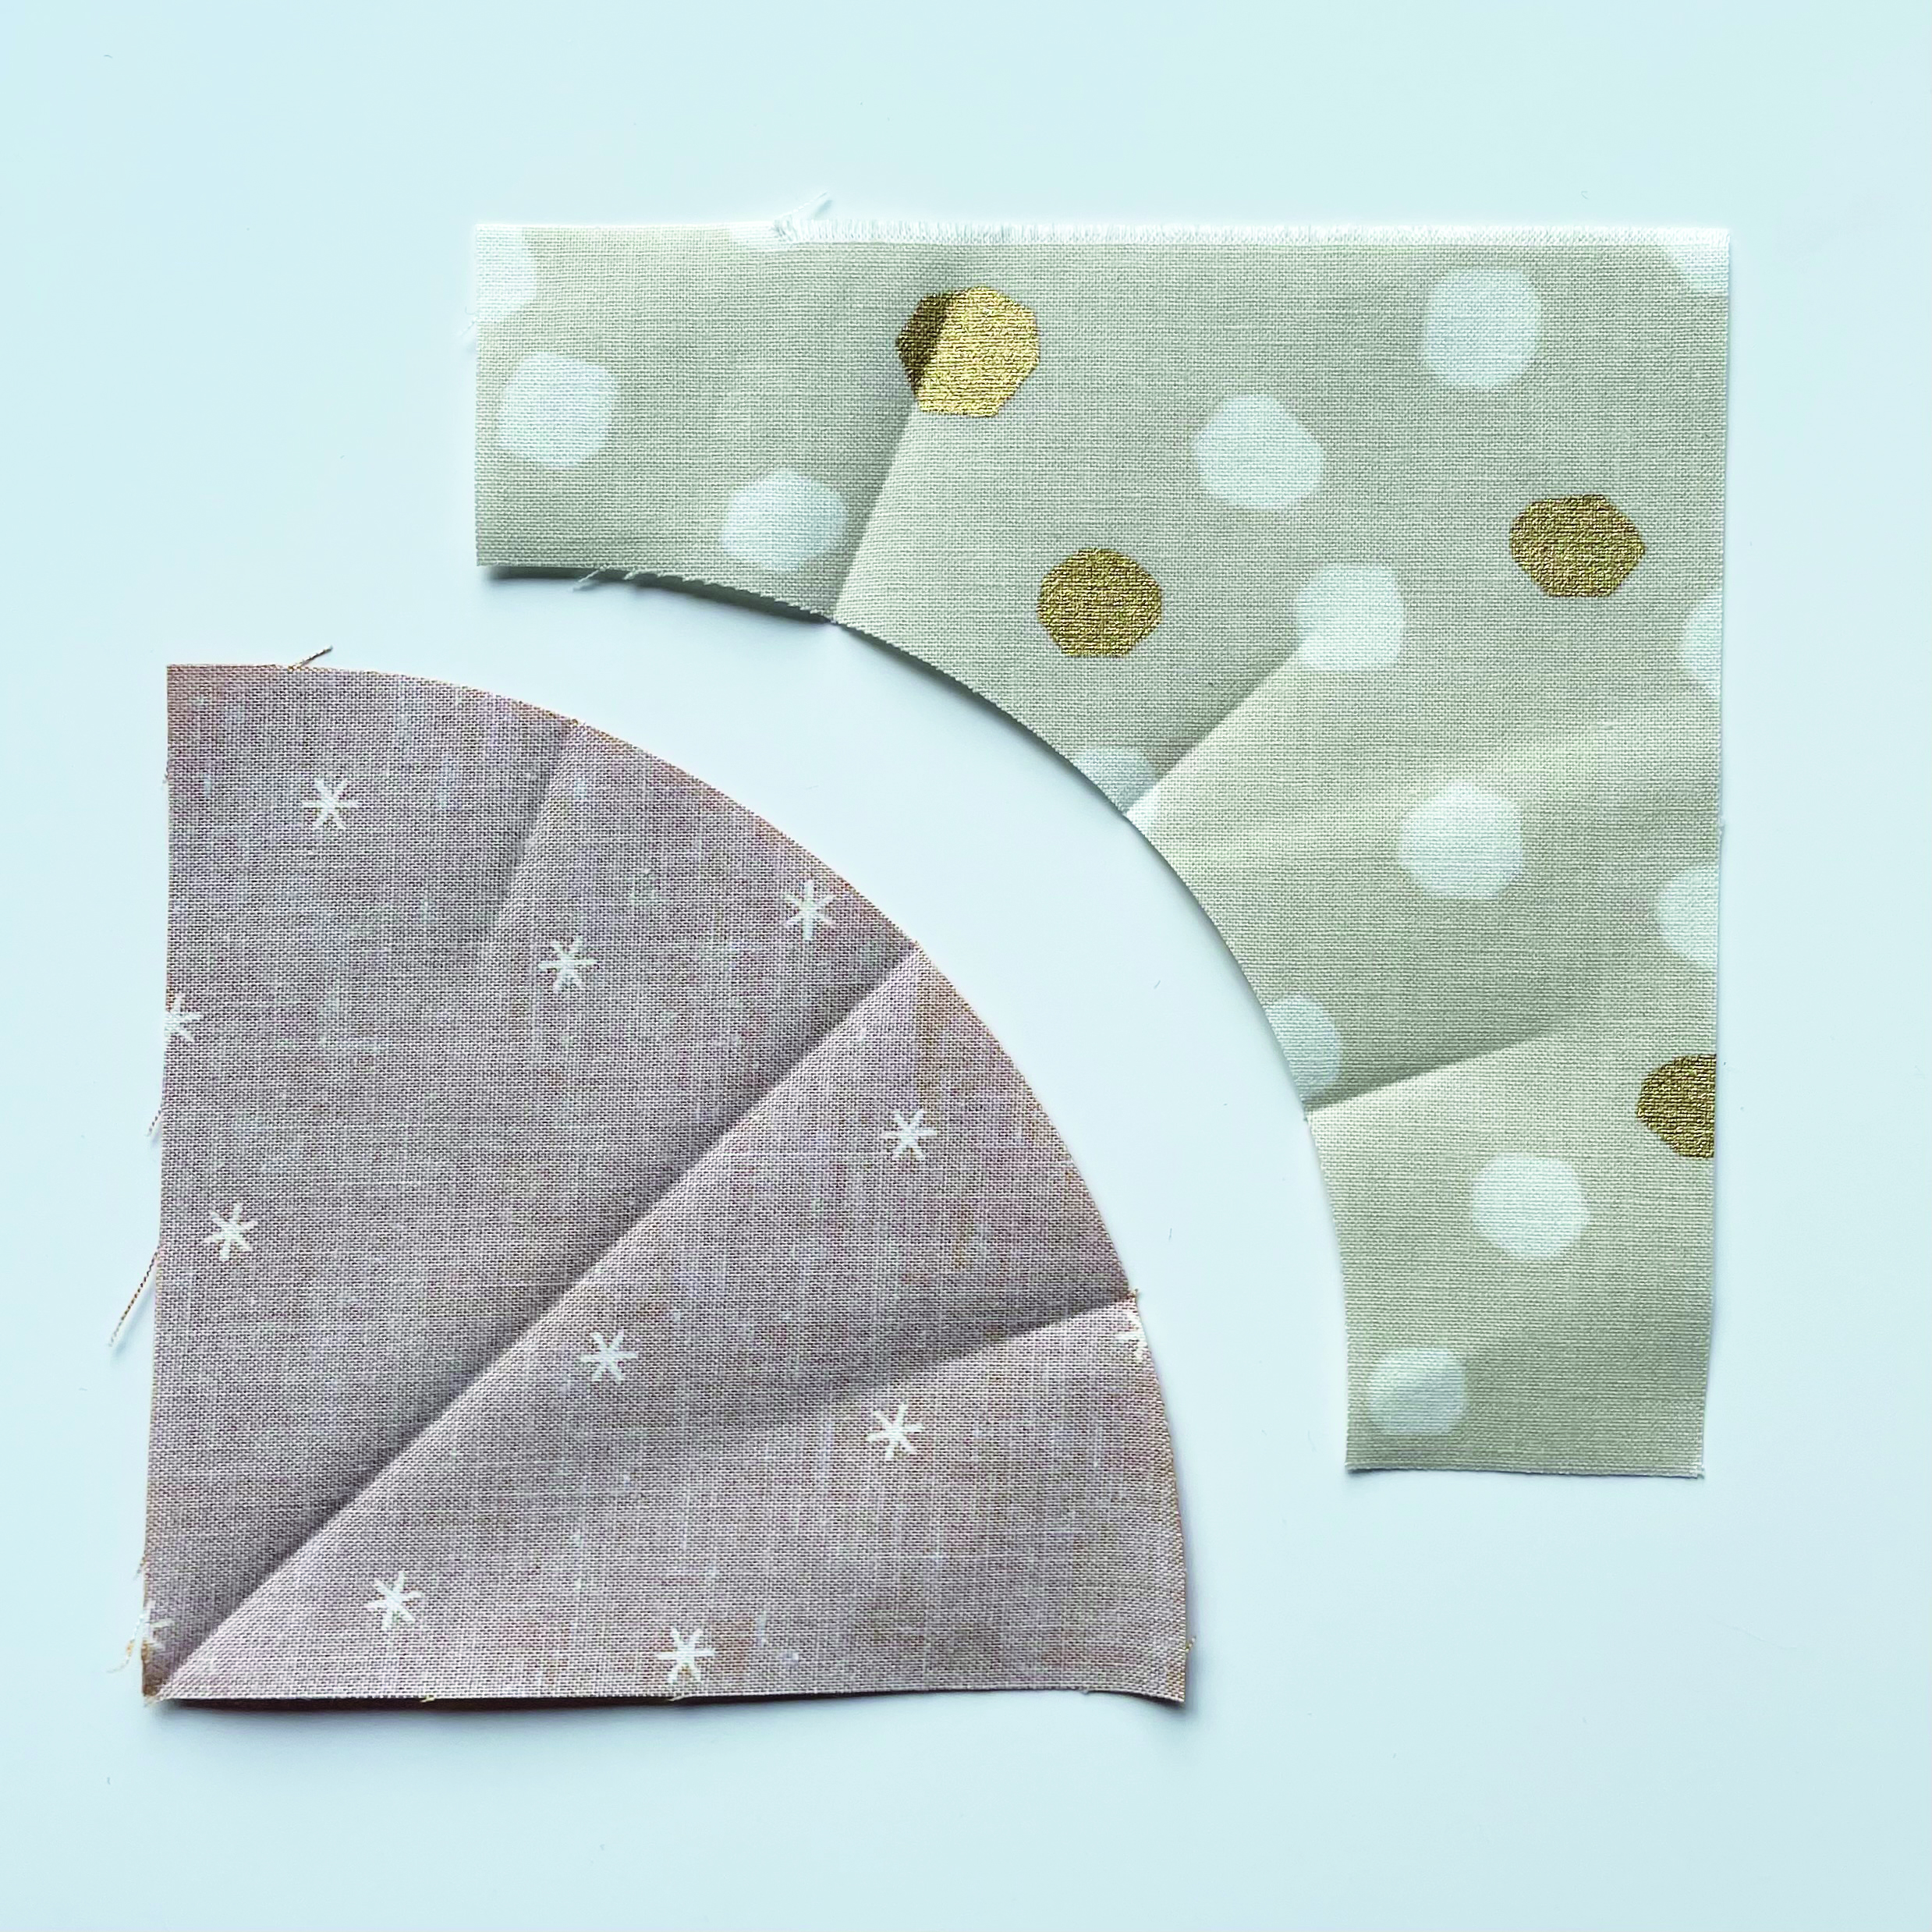
Each block uses two squares of fabric. Kate has used two 4½in squares, and the Love Patchwork & Quilting issue 107 Technique Focus templates which can be found on our template download page. Throughout the tutorial, you can use your own templates if you have different ones at home, just cut using the recommended square size for your templates. Use the templates to cut one square into an arc (discarding the quarter circle) and the other square into a quarter circle (discarding the arc). You will notice that the pieces do not directly align. This is because they include a ¼in seam allowance.
Step 2
Using a template will ensure that your straight edges follow the grain of the fabric – you want them to be stable. You also want the curved edge to be on the bias (diagonal of the fabric) so it has a little stretch, to help you ease it when you sew. There are lots of templates available on the market that allow you to cut out different sized circle and arc pairs. Take care when handling your pieces in the following steps so you do not inadvertently stretch the edges.

Step 3
Fold the quarter circle in half, wrong sides together, and finger press to mark the centre. Then, fold the ends of the quarter circle to the centre crease for a total of three crease marks. Repeat with the arc, folding the fabric right sides together.
Step 4
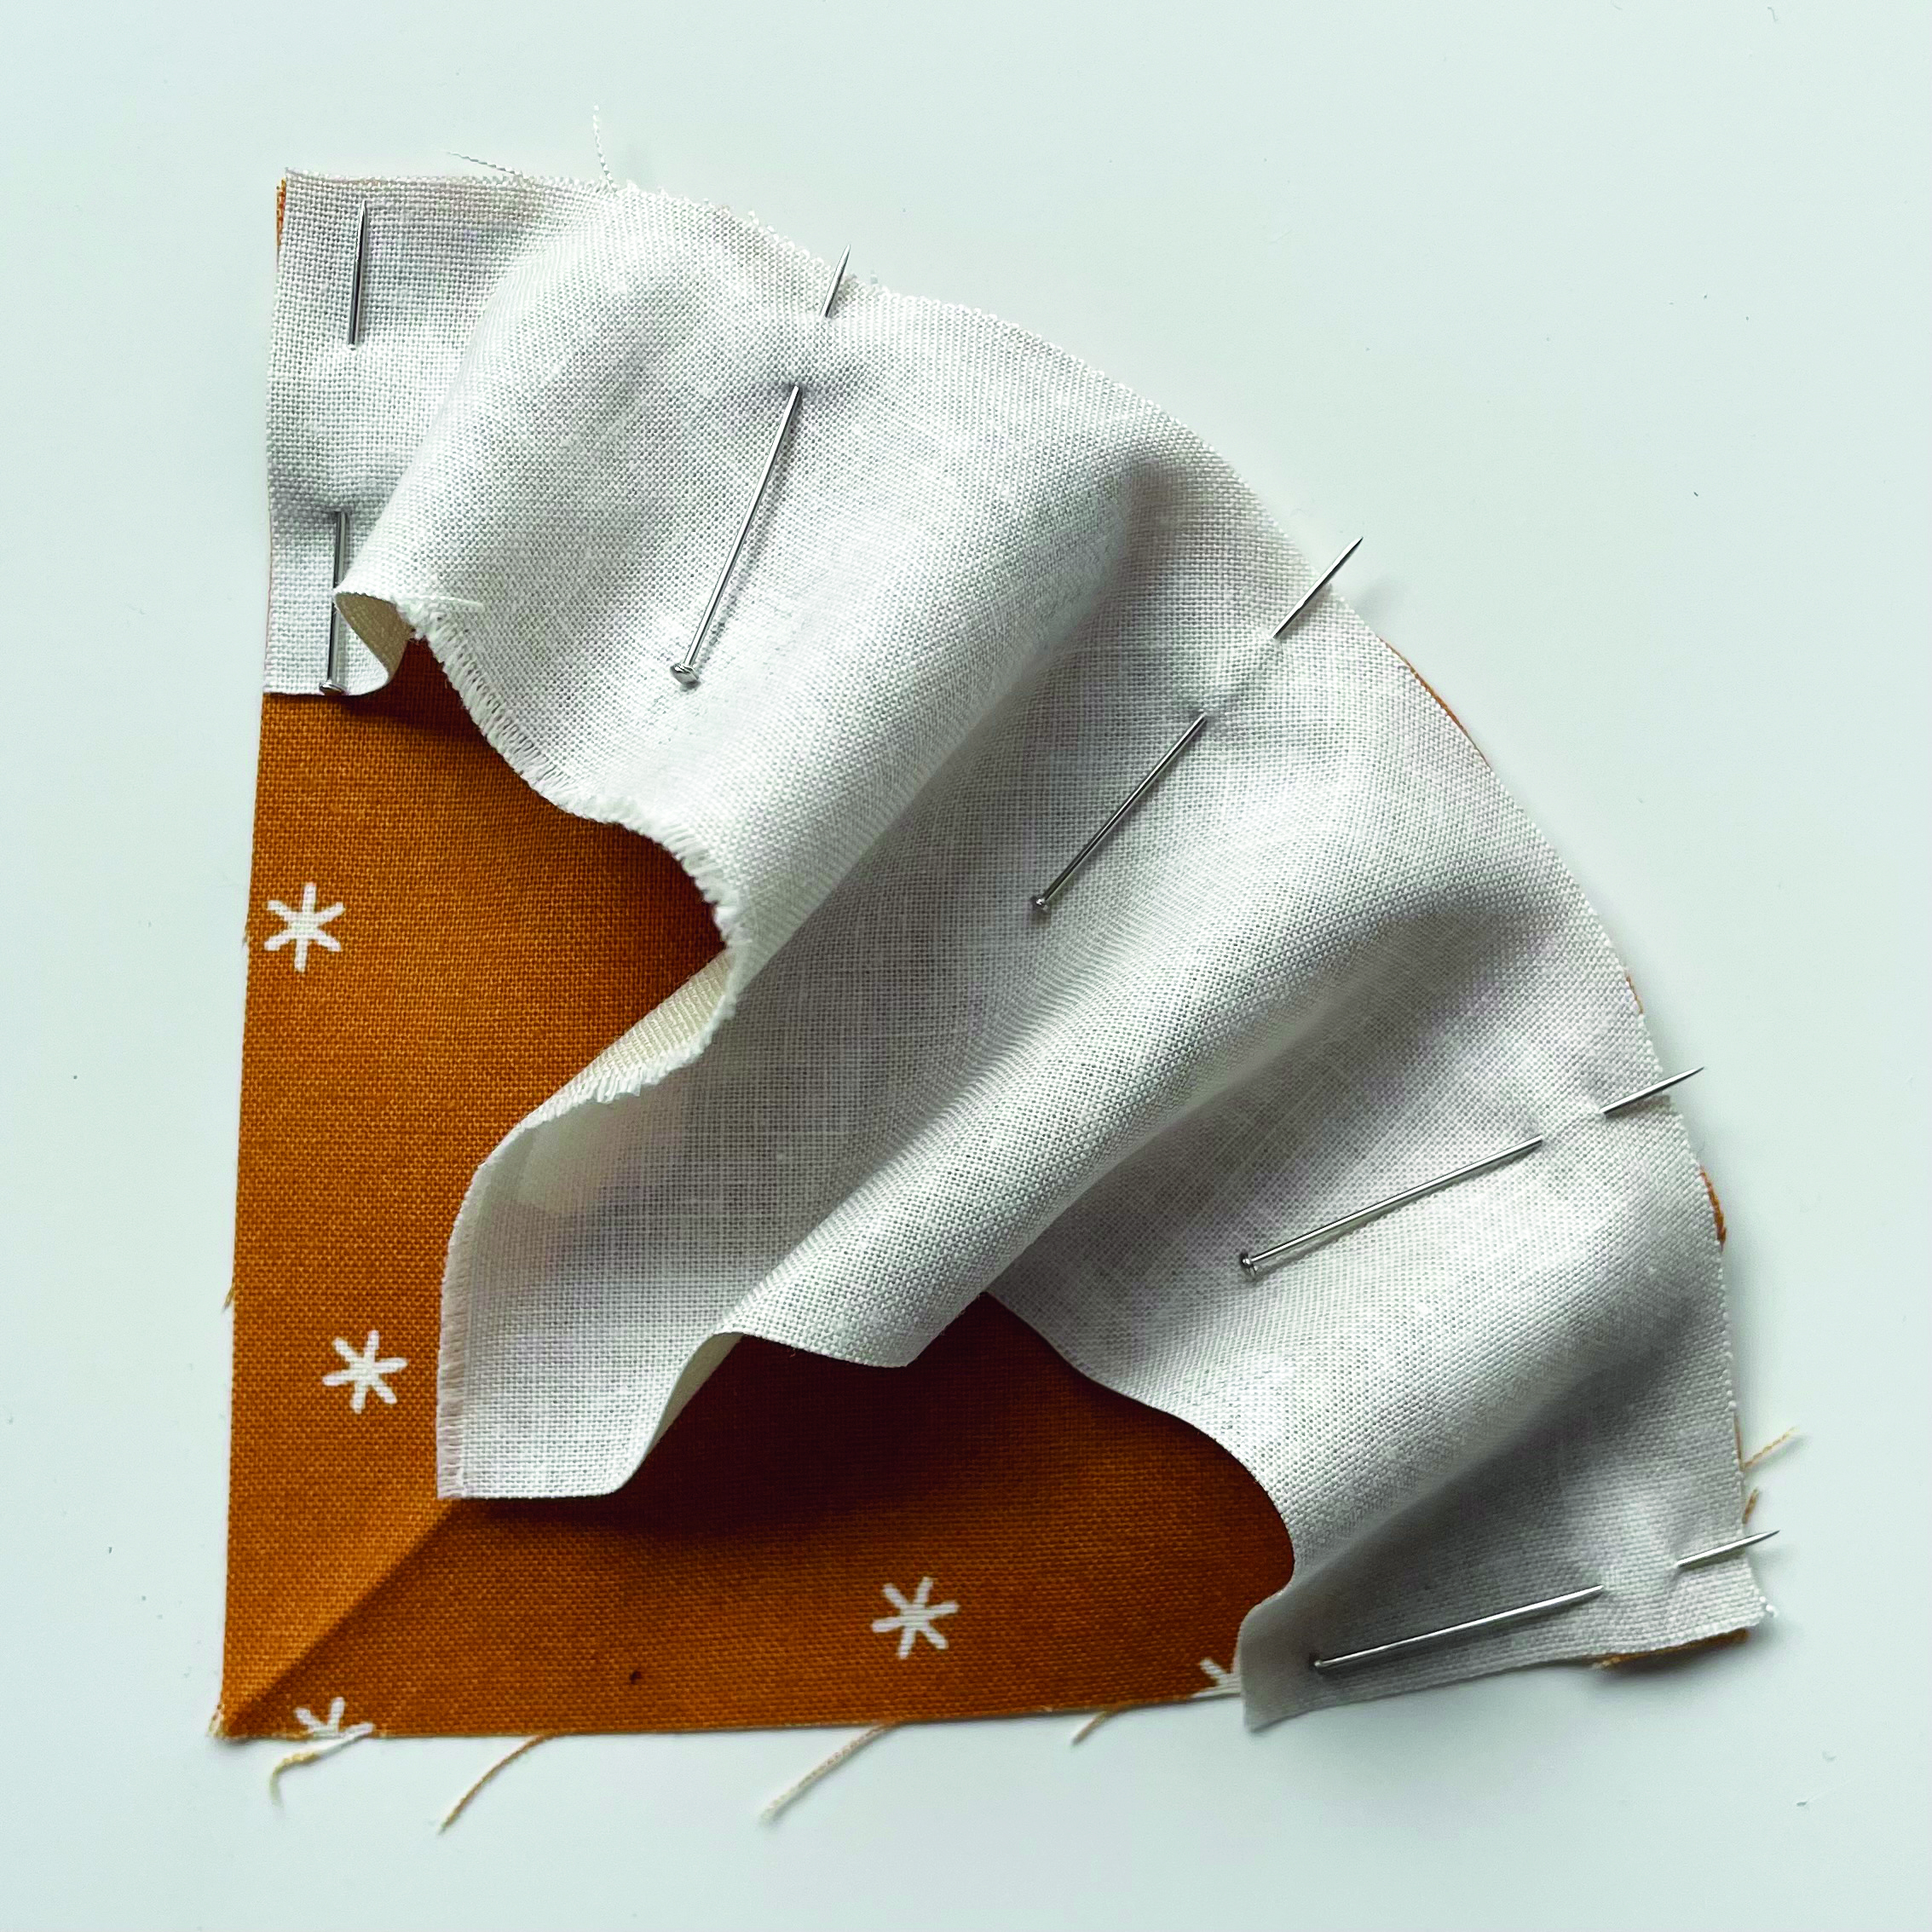
Place the arc on top of the quarter circle, right sides together, matching up the centre creases, which should nest into each other. Secure with a pin. Align the edge of the quarter circle with the edge of the arc and secure each end with a pin. Match the remaining crease marks and secure with a pin for a total of five pins.
Step 5
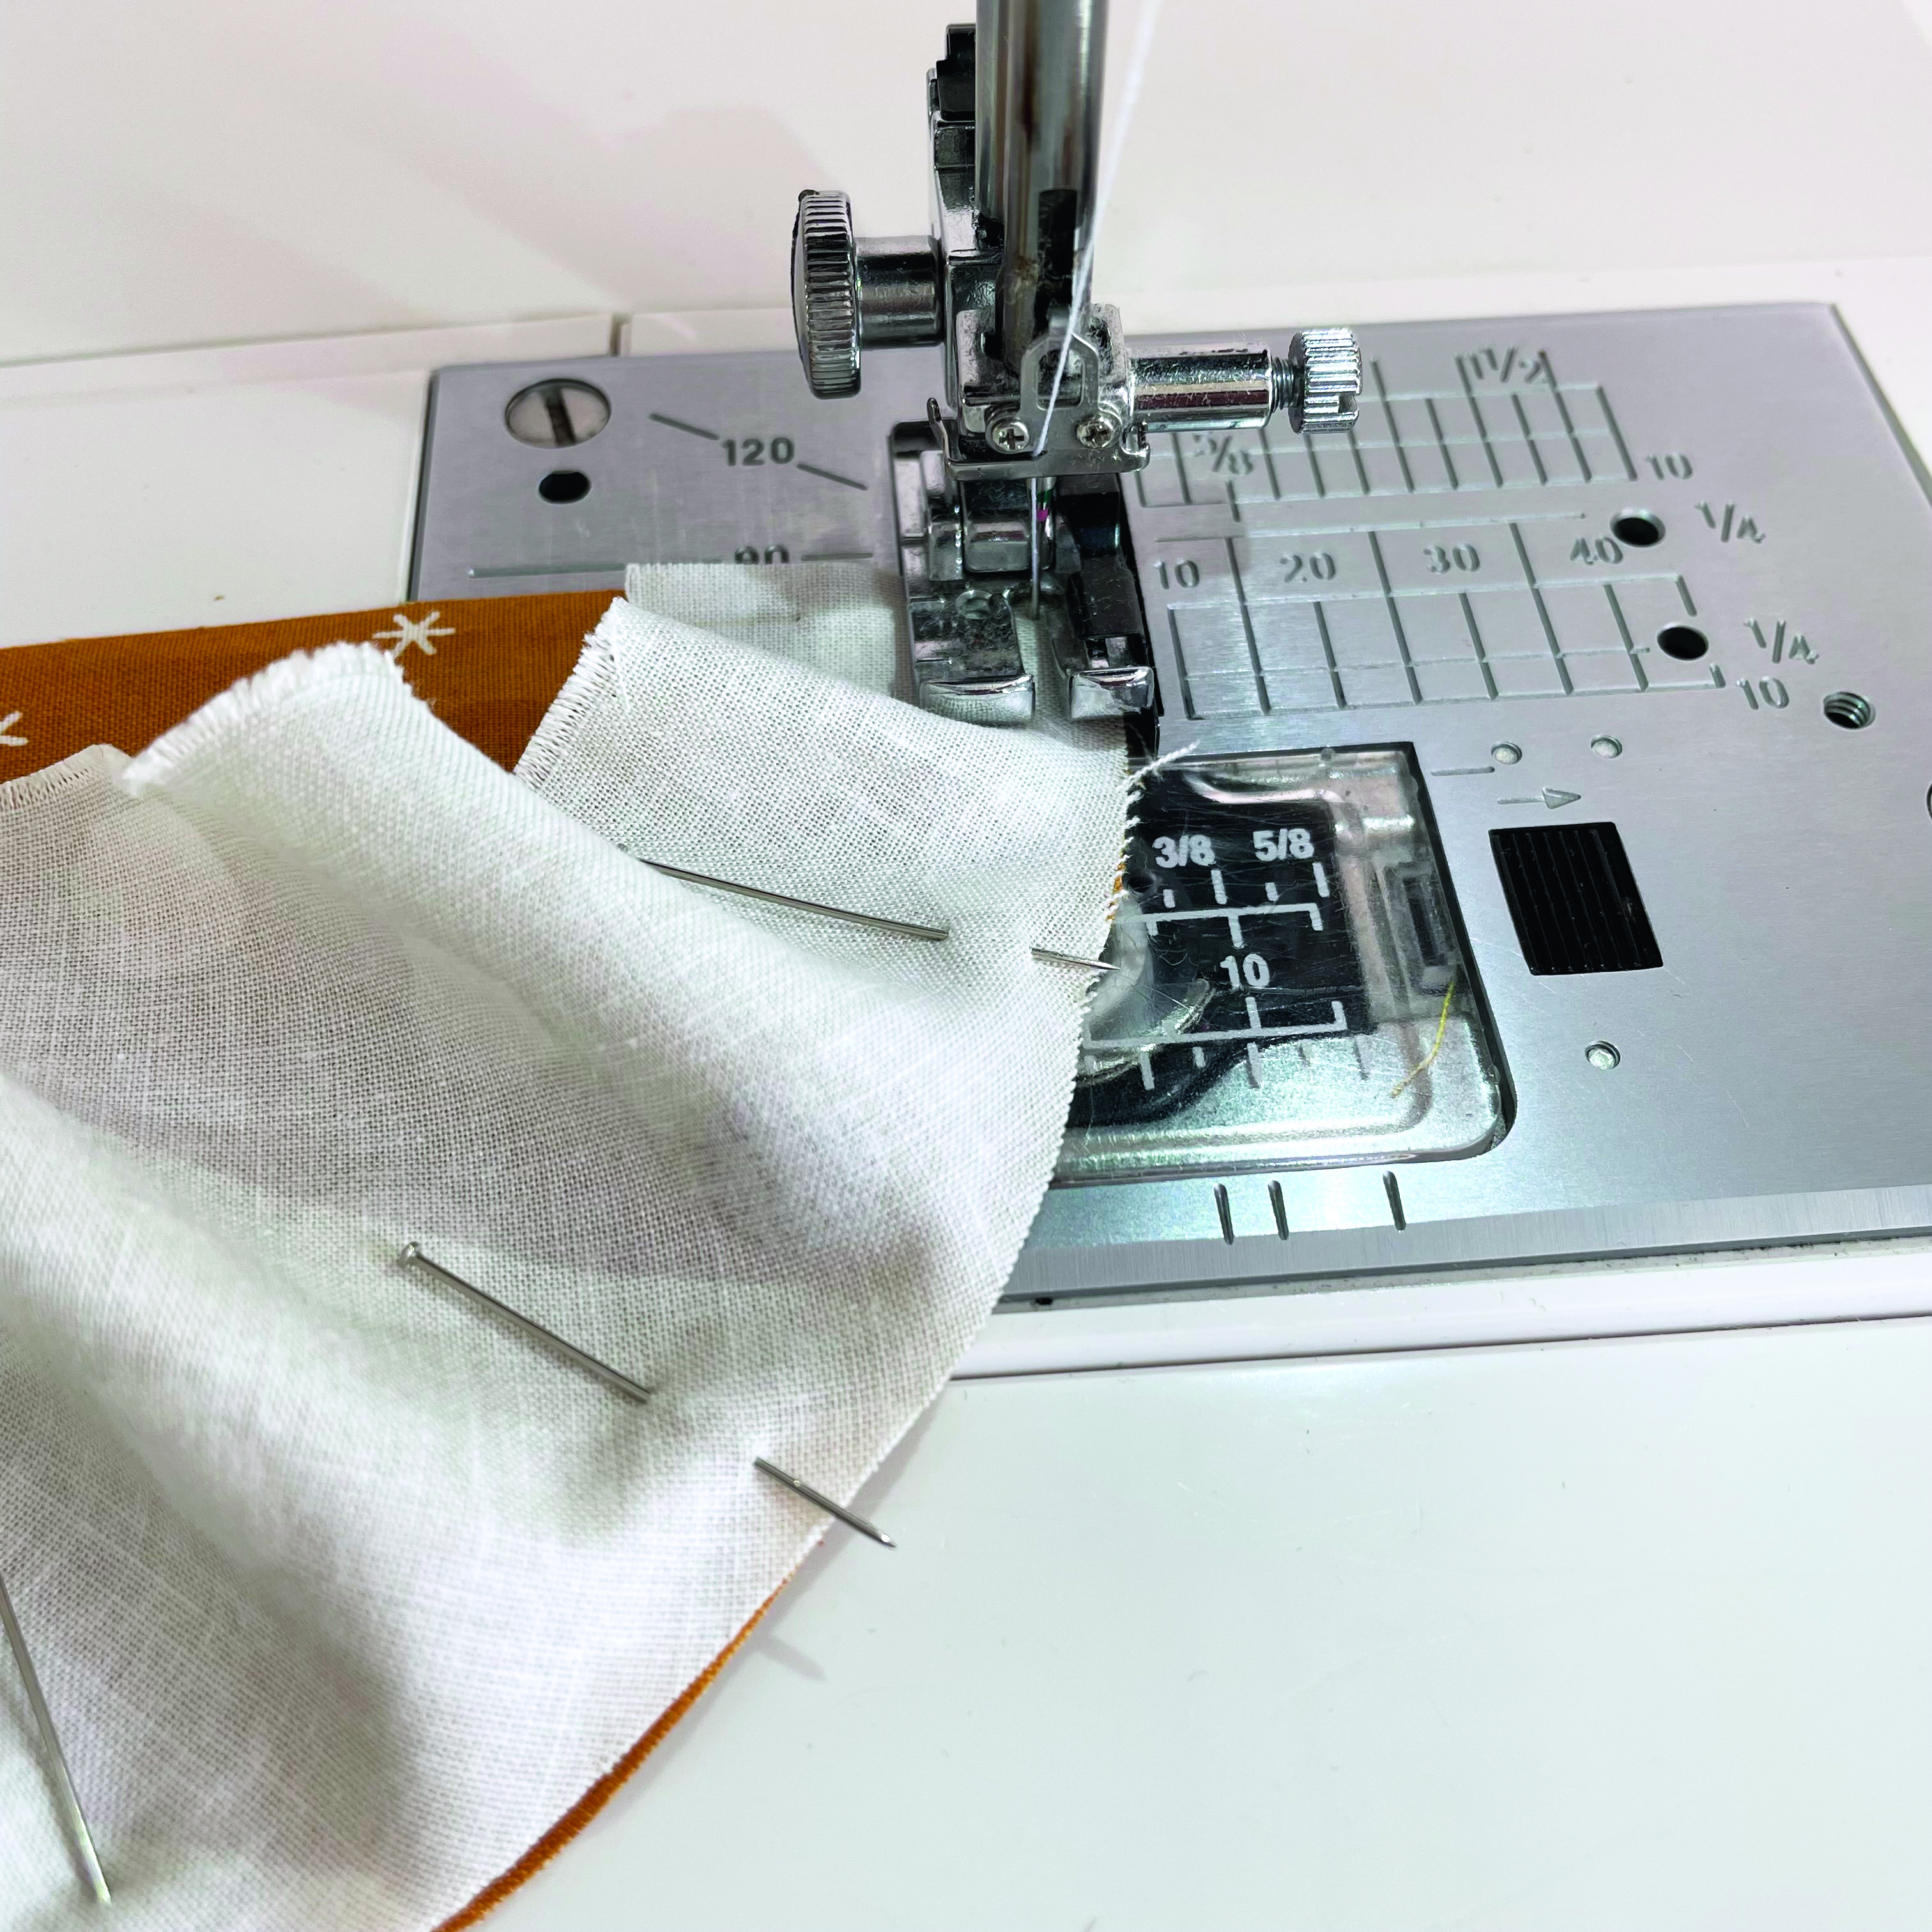
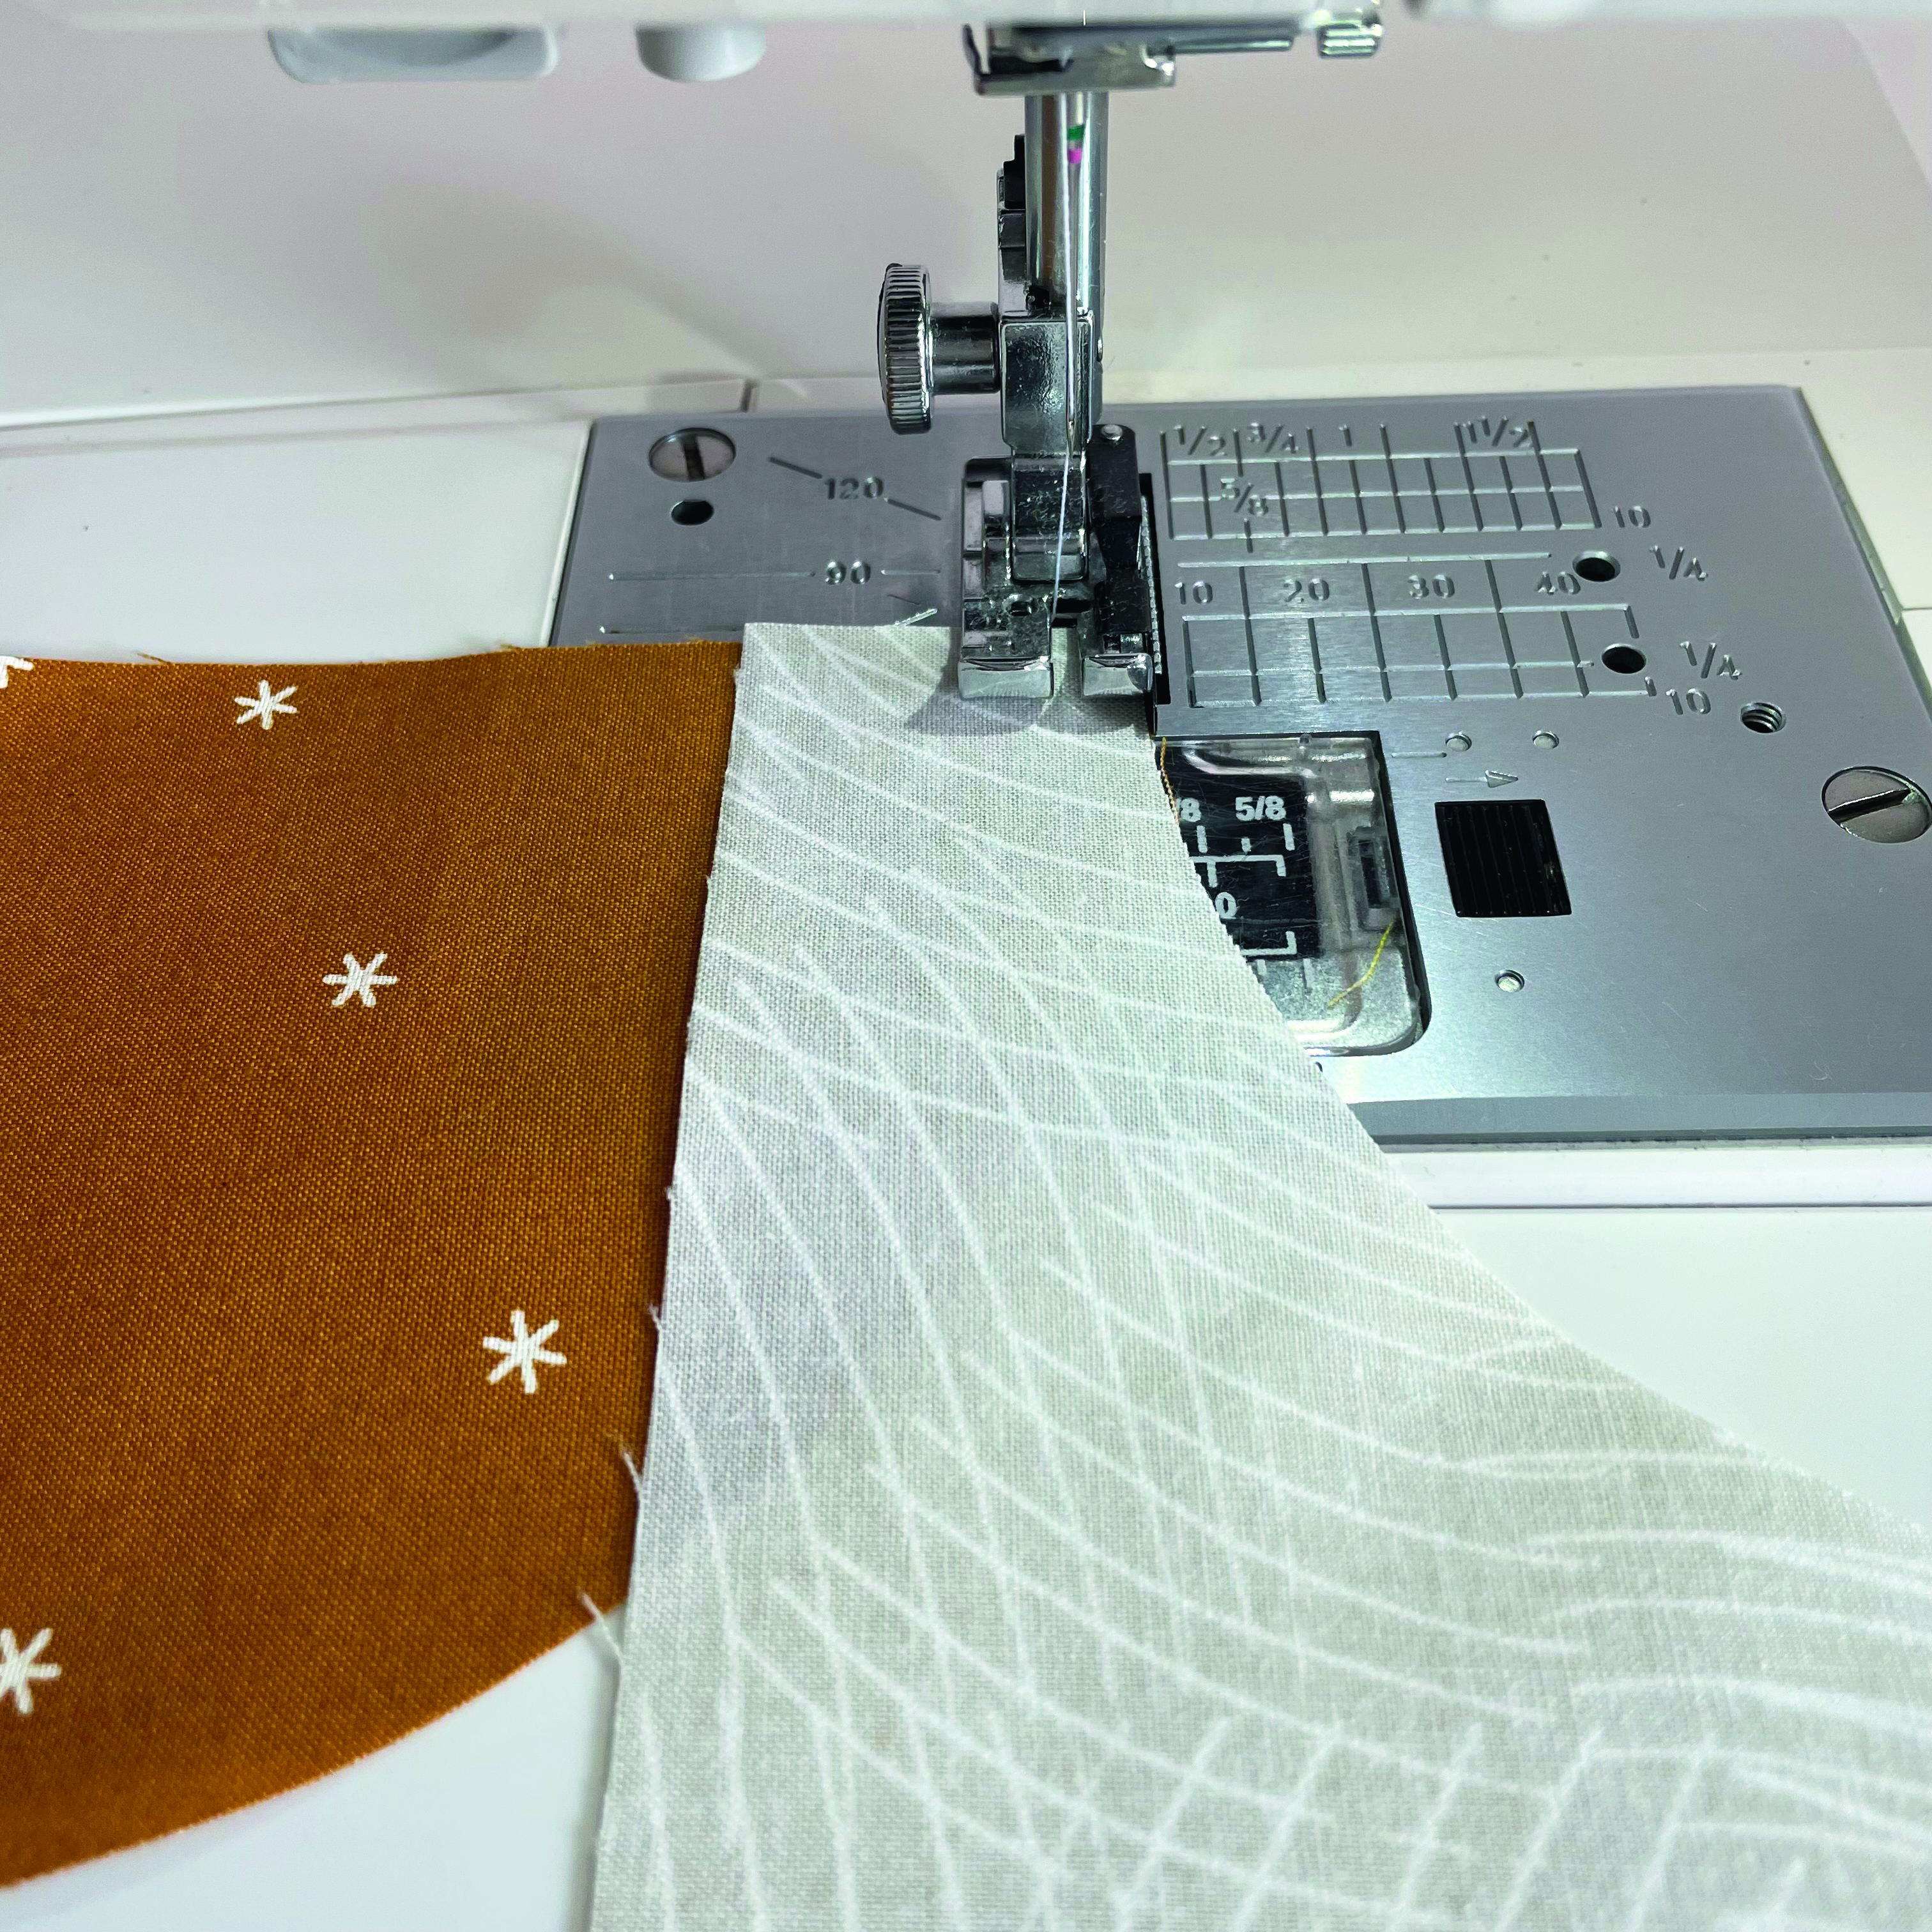
With the arc piece on top, slowly sew the pieces together along the curve, aligning the edges and removing the pins as you sew. Ensure the quarter circle remains flat and move the arc fabric as needed to avoid puckering. With your needle down, lift the presser foot regularly in order to manoeuvre the arc fabric. Some people prefer to sew the curve together with the arc piece underneath. This will work, but be advised, it gives you less opportunity to check that you are not creating puckers and creases in your arc fabric.
Step 6
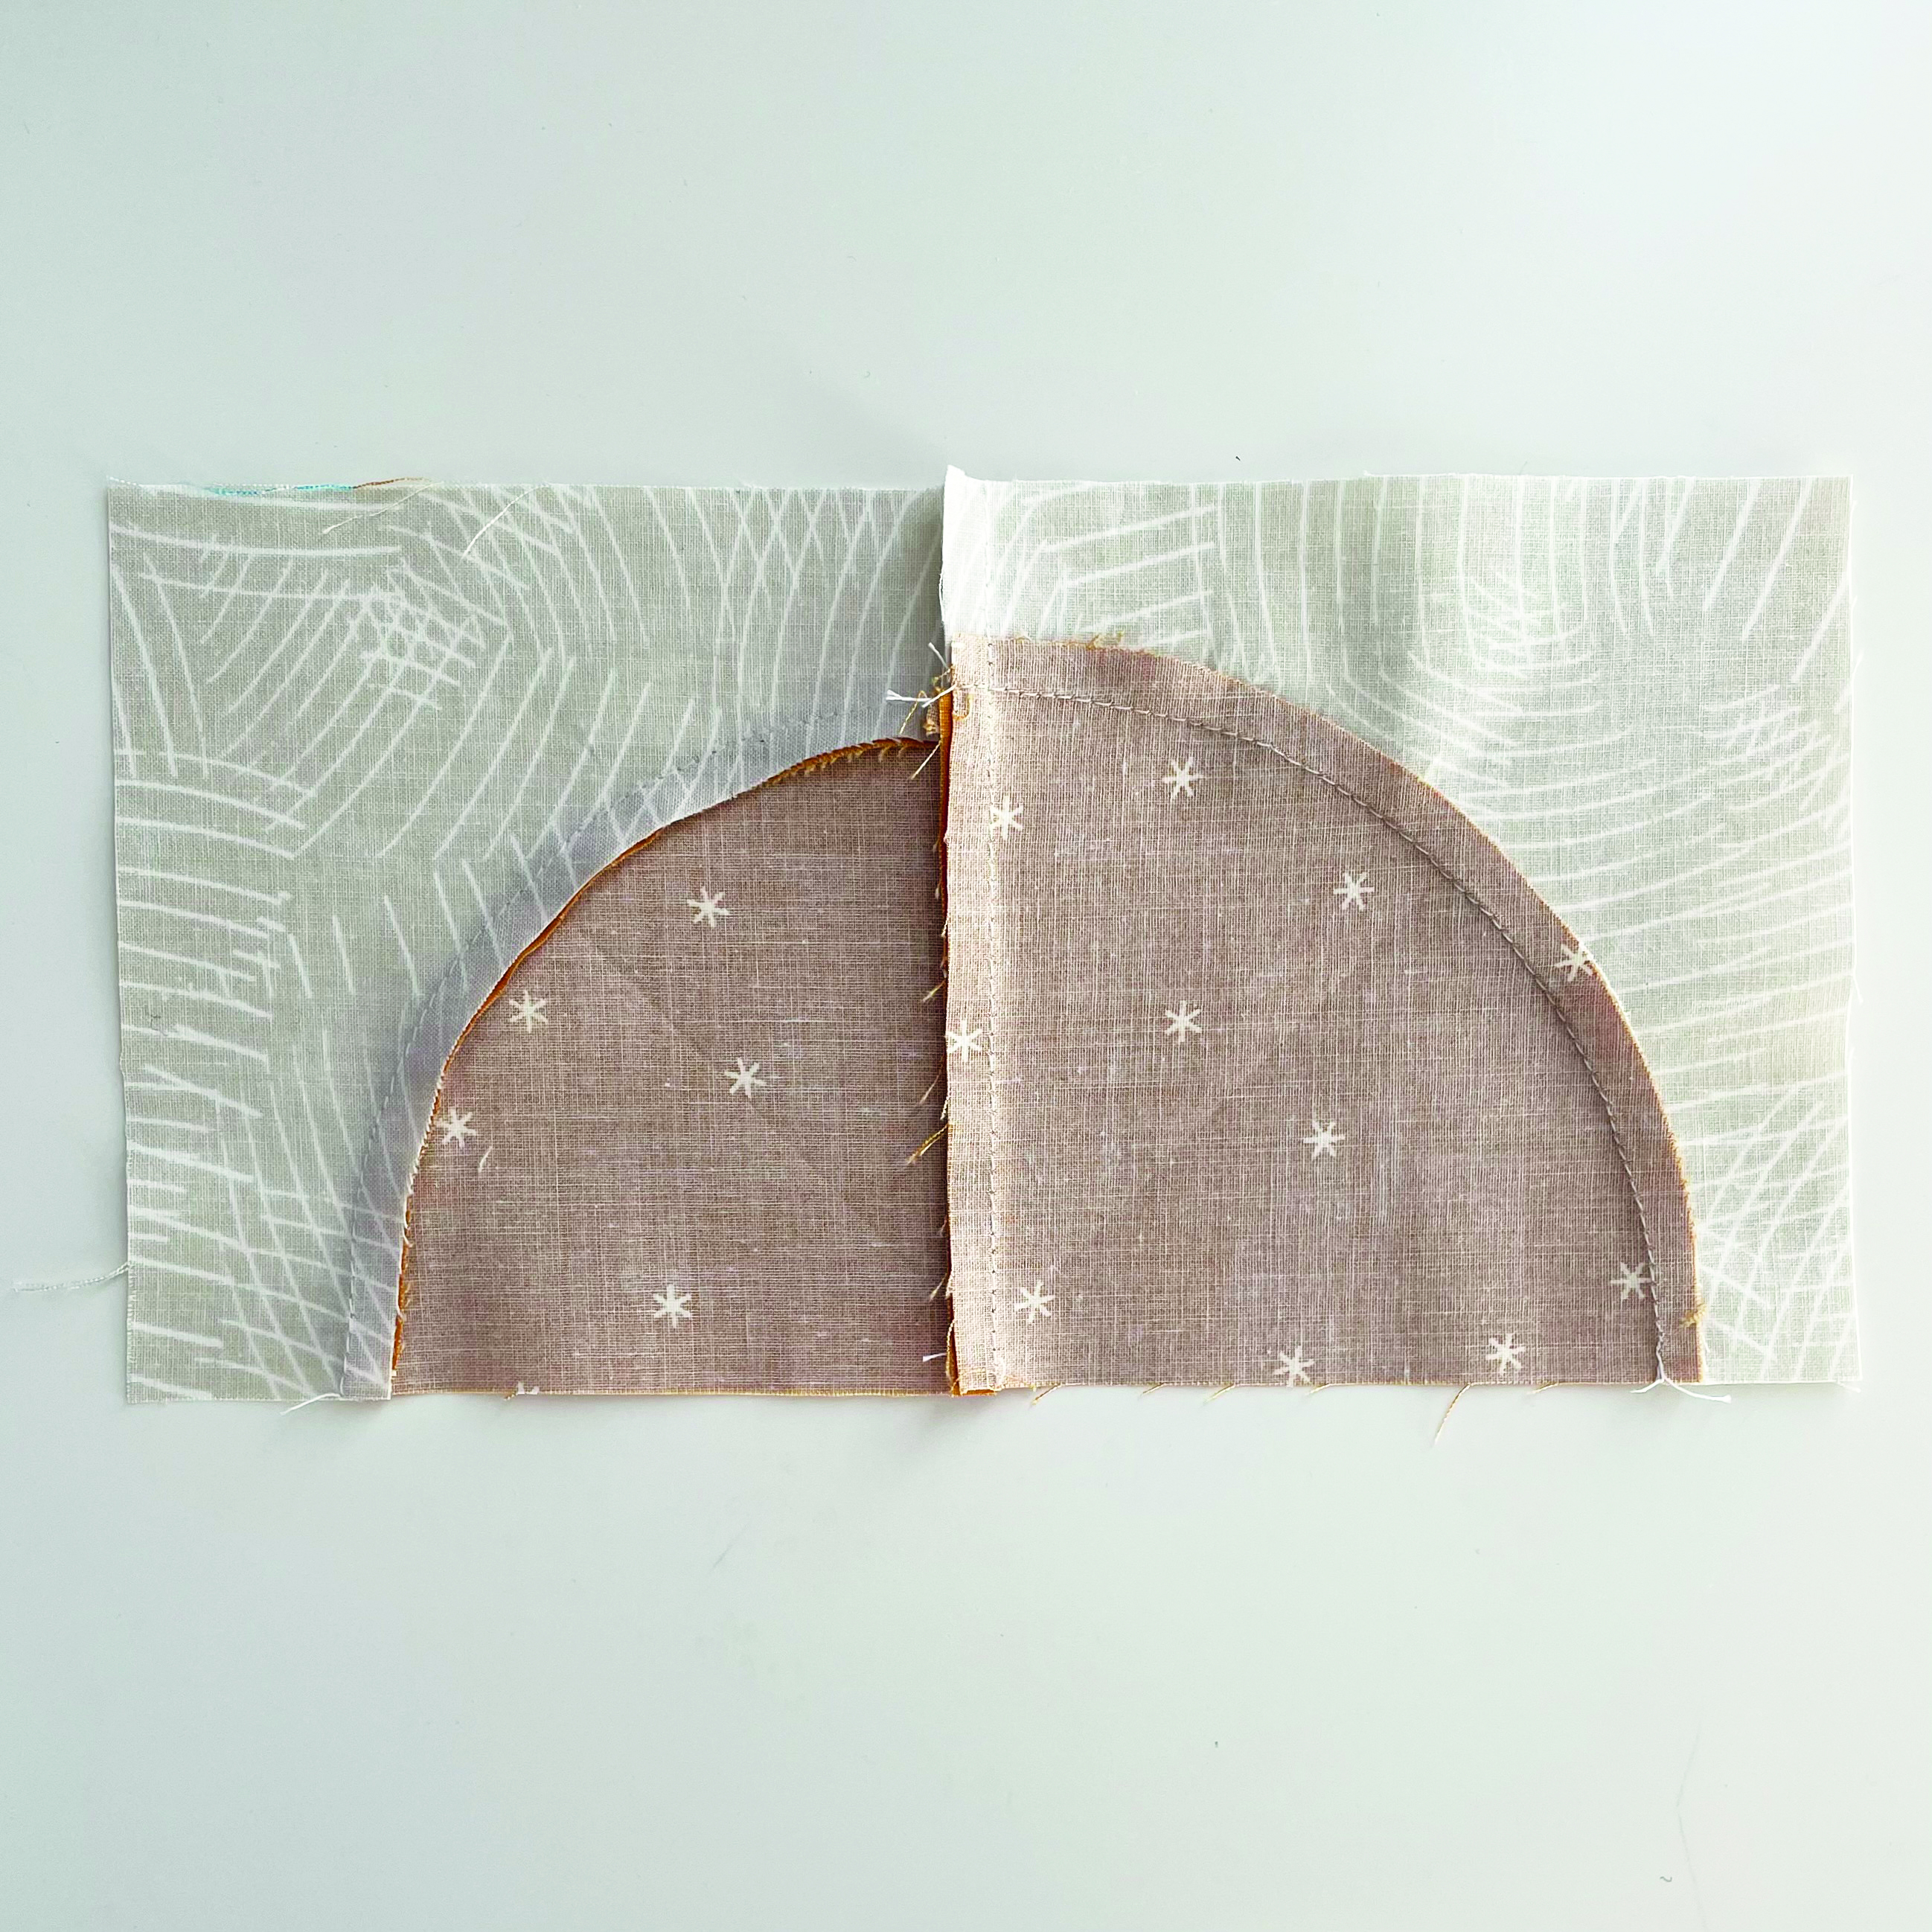
Press your pieces. Generally, it does not matter whether you press the seams to the arc or to the quarter circle – both will work. Small creases and puckers will press out. Note that there is no need to clip the seam allowance. If one fabric is much darker than the other, it would be best to press towards the darker fabric. In addition, if the sections of the circle meet (like in the centre of your quilt block), you can press one seam out and one seam in so they nest together when joined.
Step 7
After practising your curved piecing for a while, you may feel brave enough to try out the method where you do not pin the pieces in advance. First, start by placing the pieces right sides together, aligning one edge. With the arc piece on top, sew a couple of stitches at the edge to secure the pieces together. Then sew along the curve, aligning the edges as you sew, working slowly and carefully. Ensure the quarter circle remains flat and gently move the arc fabric as needed in order to avoid puckering. As you sew to the end of the curve, ensure the two straight edges align as they did at the beginning.
Try it now: Everyday Tote
Layer and piece colourful curved shapes for a handy tote to carry your quilting!
You will need
- Interfacing
- A variety of fabric scraps (we used ten different fat quarters from our stash)
- Contrast strip 22in x 9in
- Cotton/linen blend tote fabric, one (1) 17 ½in x 12 ½in piece and one (1) 17 ½in x 19 ½in piece
- Lining fabric 17 ½in x 32in
- Cotton webbing for handles, two (2) 18in pieces
Finished Size
16in square
Notes
All seam allowances are ¼in, unless noted otherwise.
Fabrics used
Prints used for the circles are in Chromatics by Art Gallery Fabrics.
Step one: Draw nine (9) 3in, 4in and 5in circles on your interfacing, for a total of thirty-six (36) circles. Make appliqué circles as described in steps 1–3 of the piecing curves guide above.
Step two: Layer small, medium and large circles and secure together with a dot of washable glue. Arrange your stacks of circles on the contrast strip and pin them in place. Next, stitch the circles in place by hand or machine. Then trim the strip to 17 ½in x 3 ½in.
Step three: Make one large circle following steps 4–7 of the piecing curves guide above.
Step four: Sew your two pieces of tote fabric to the top and bottom of your strip. Then sew your large pieced circle in the centre of the small piece of tote fabric.
Step five: Cut and sew two rectangles, right sides together, leaving an opening. Turn right sides out and press. Attach to your lining, sewing three sides, to make a pocket and closing the remaining pocket opening in the process. Centre your lining piece on top of the tote piece, wrong sides together.
Step six: Press under ¼in and then 1in of both short raw edges, toward the lining side. Insert the raw edges of your handles under the folds at each end, making sure they are aligned, and pin in place. Fold the handles up and topstitch along the folds of the tote.
Step seven: Fold the tote in half, with the lining sides facing each other. Sew along the two long sides using a ¼in seam. Turn the tote wrong sides out and press. Sew along both long sides again using a ½in seam. Turn your tote the right way out and you’re done!
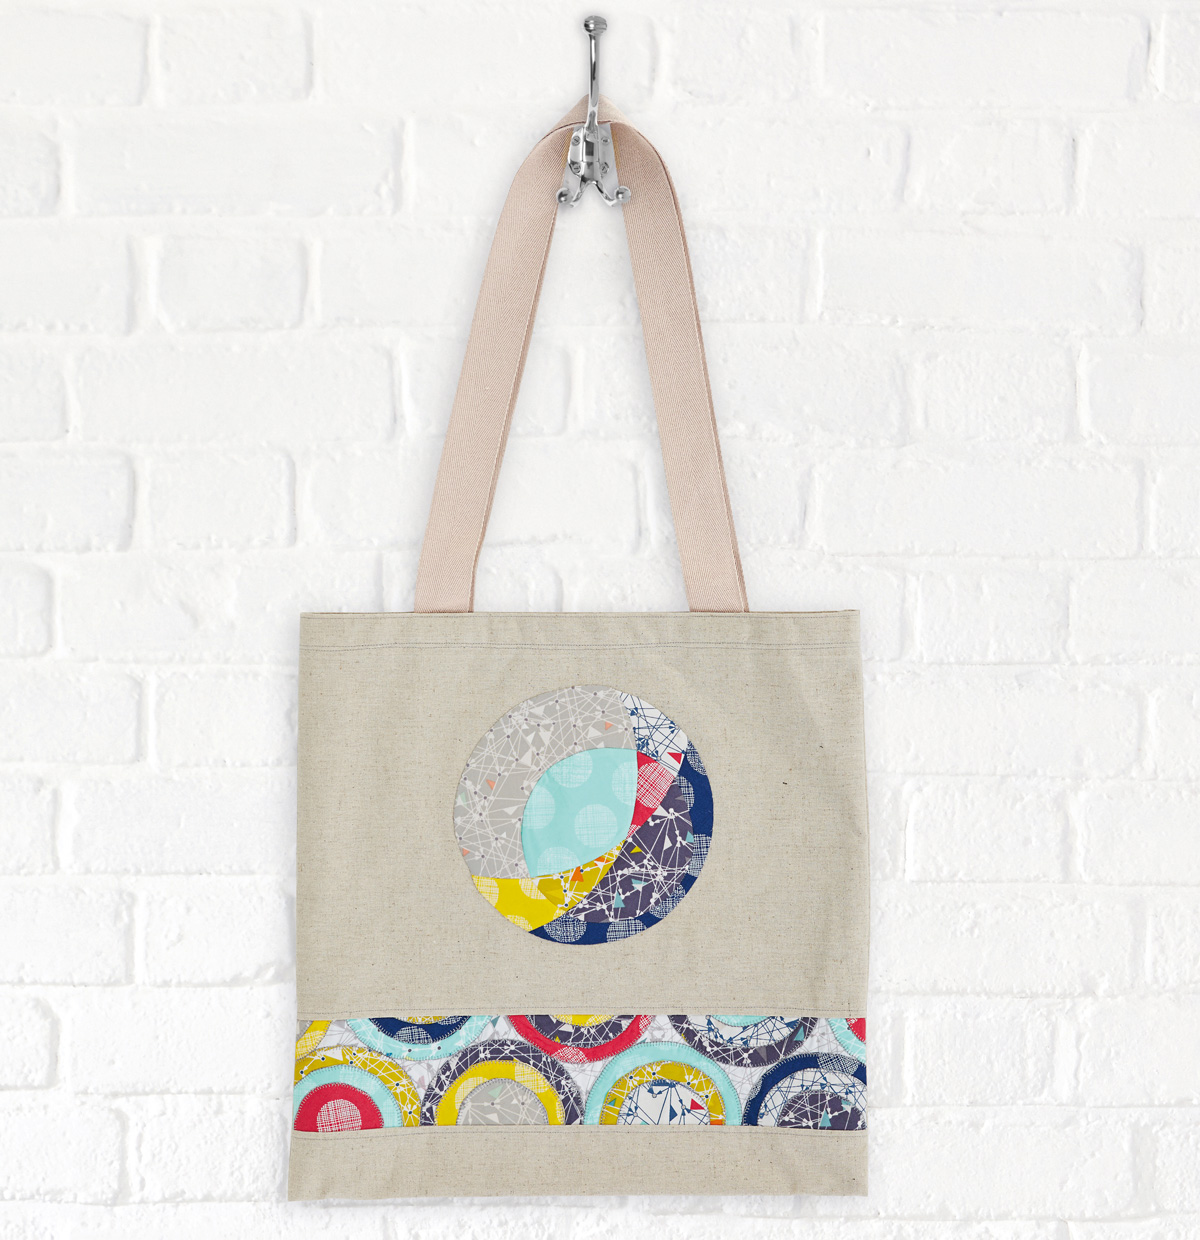
Try it now: Drunkard’s Path Flower Tote Bag
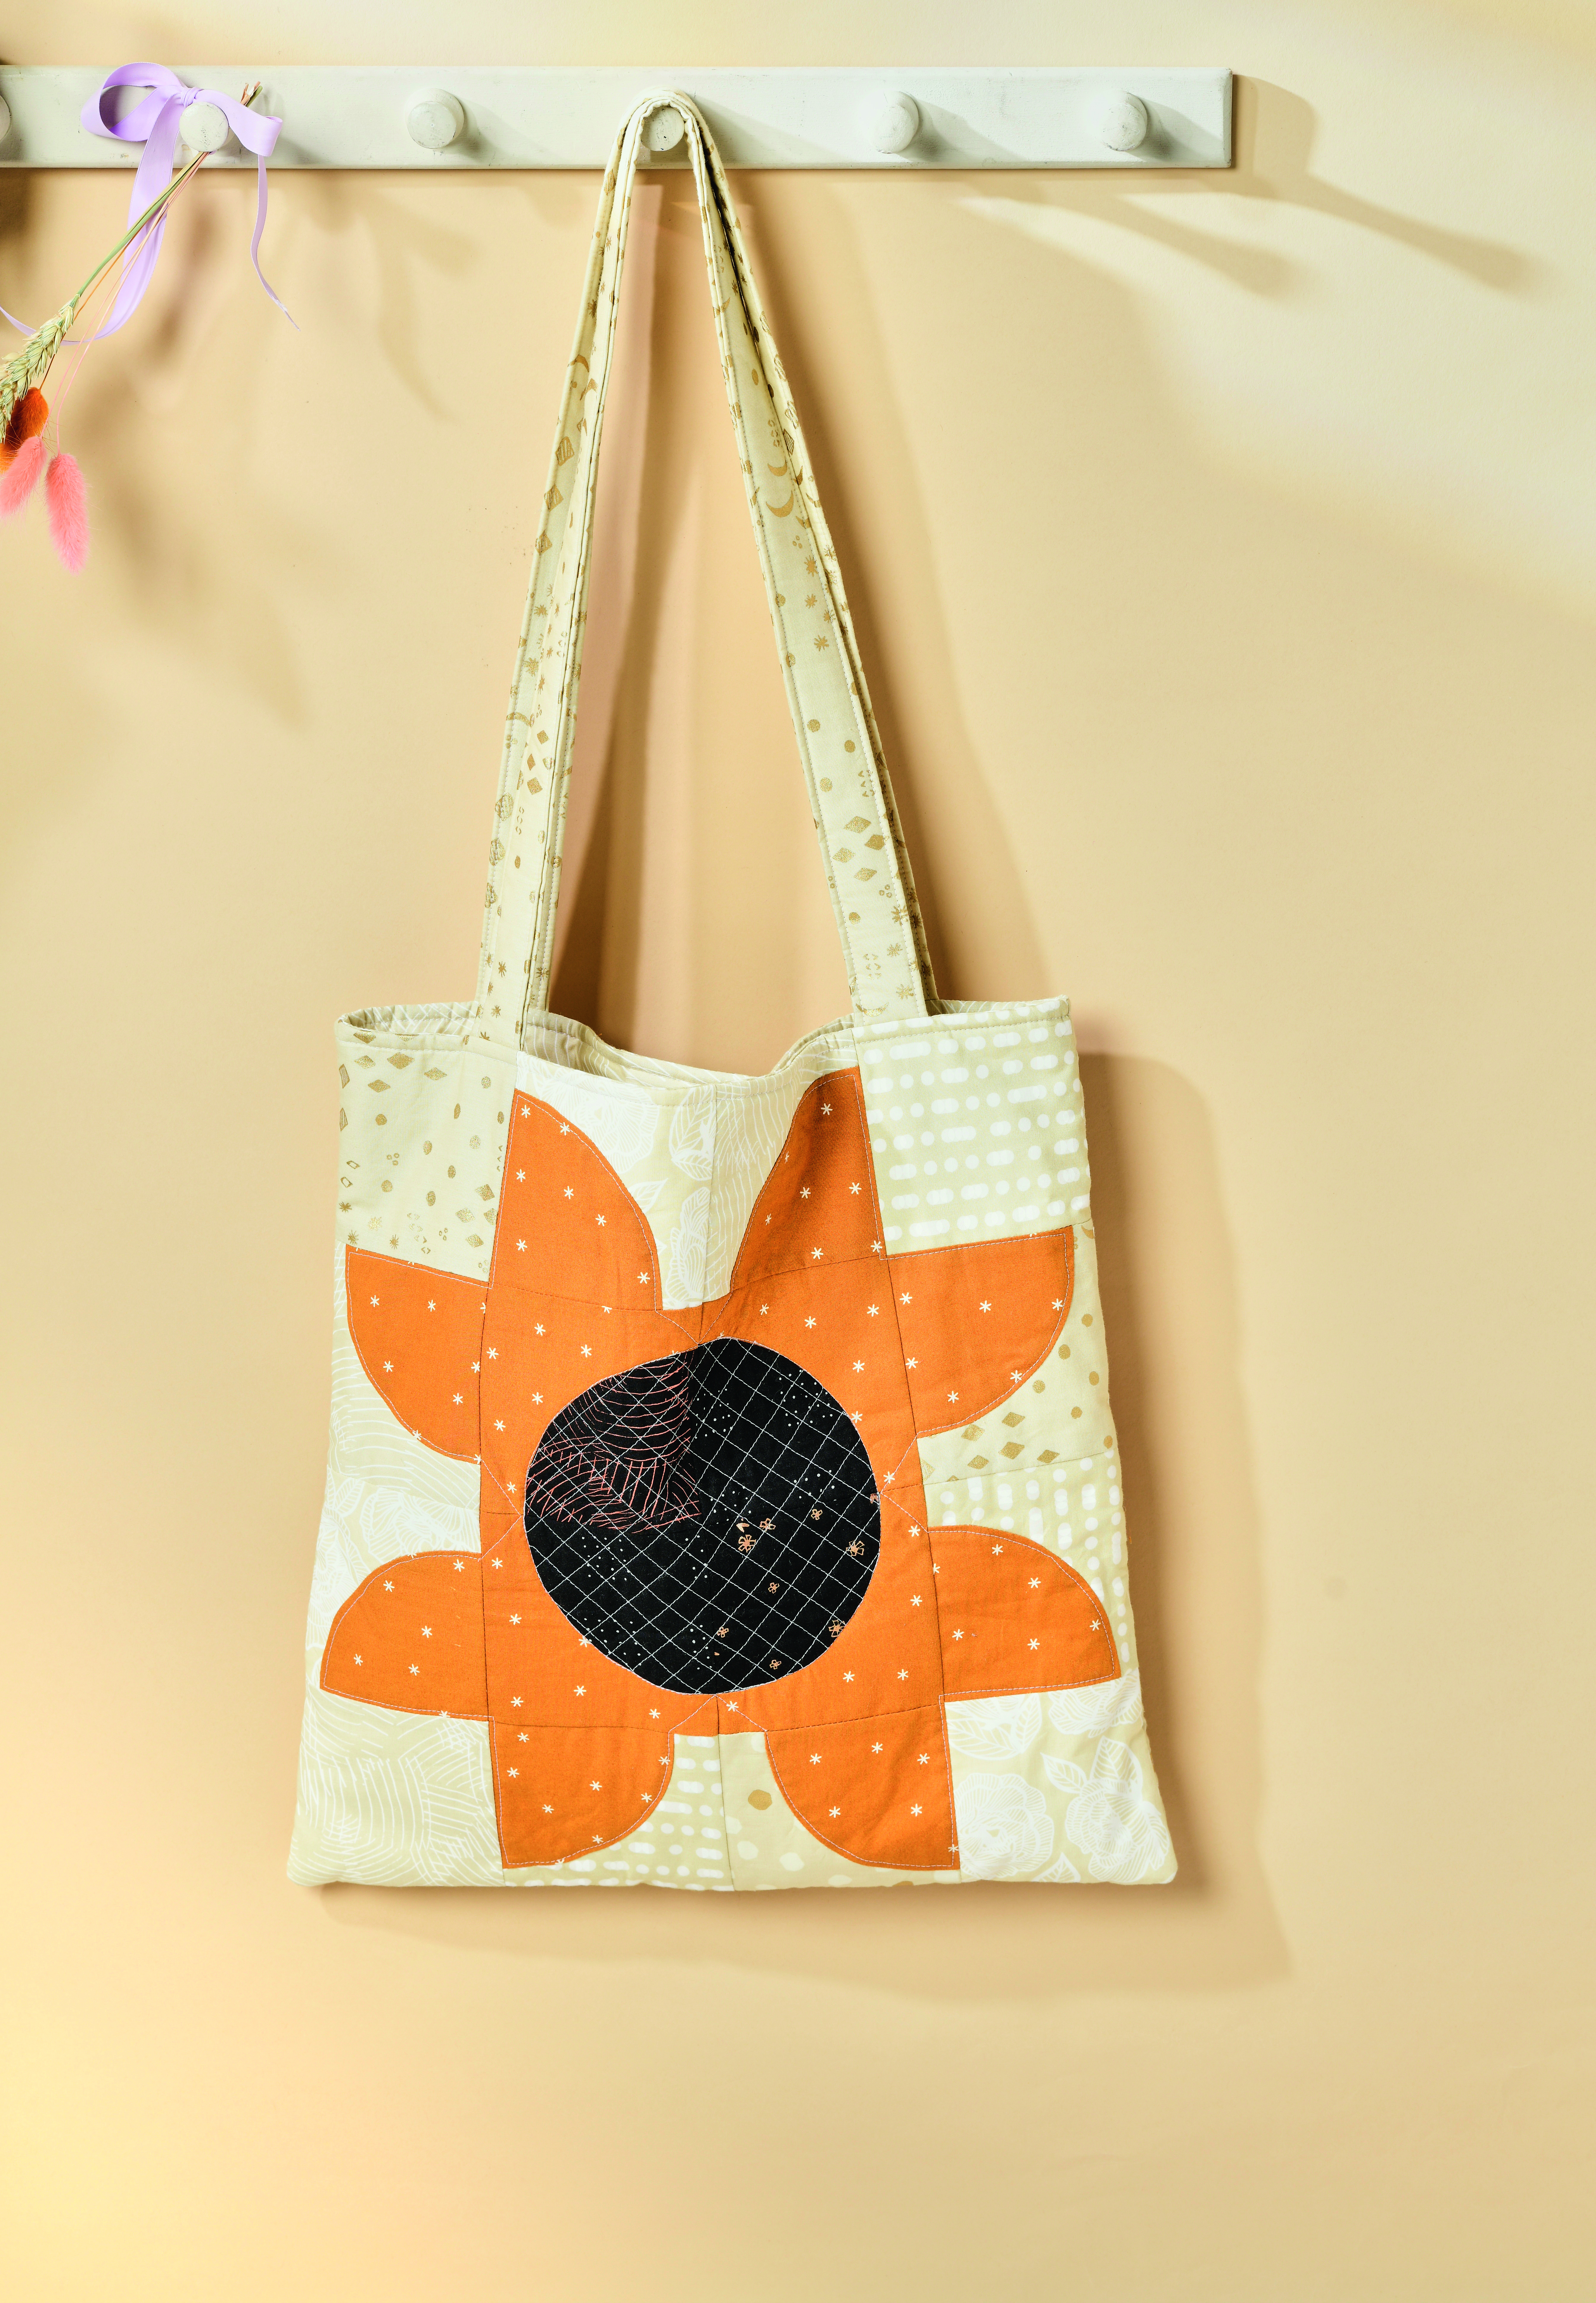
With your newfound Drunkard’s Path piecing skills, why not whip up this adorable retro flower tote bag?
You will need
- Fabric A (caramel) one (1) fat quarter
- Fabric B (black): one (1) fat eighth
- Assorted neutral fabrics: total of 1/4 yard
- Batting: 25in x 36in
- One (1) copy each of the Arc and Quarter Circle Templates from Love Patchwork & Quilting issue 107 (available here).
Finished Size
16in square
Notes
All seam allowances are ¼in, unless noted otherwise.
Fabrics used
Print fabrics are from the Brushed collection by Sarah Watts and the First Light collection, both for Ruby Star Society.
Step one: From Fabric A cut:
- Twenty four (24) 4½in squares. Subcutsixteen (16) Quarter Circle templates and eight (8) Arc templates.
Step two: From Fabric B cut:
- Eight (8) 4½in squares. Subcut eight (8) Quarter Circle templates.
Step three: From the assorted neutral fabrics cut:
- Twenty four (24) 4½in squares. Subcut sixteen (16) Arc templates, and leave the remaining eight (8) squares whole.
- Two (2) 16½in squares (lining).
- Two (2) 32in x 5in.
Step four: From the batting cut:
- Two (2) 18in squares.
- Two (2) 23/8in x 32in.
Step five: Follow the Drunkard’s Path blocks tutorial to sew the following blocks:
- Sixteen blocks with neutral fabric Arcs and Fabric A Quarter Circles.
- Eight blocks with Fabric A Arcs and Fabric B Quarter Circles.
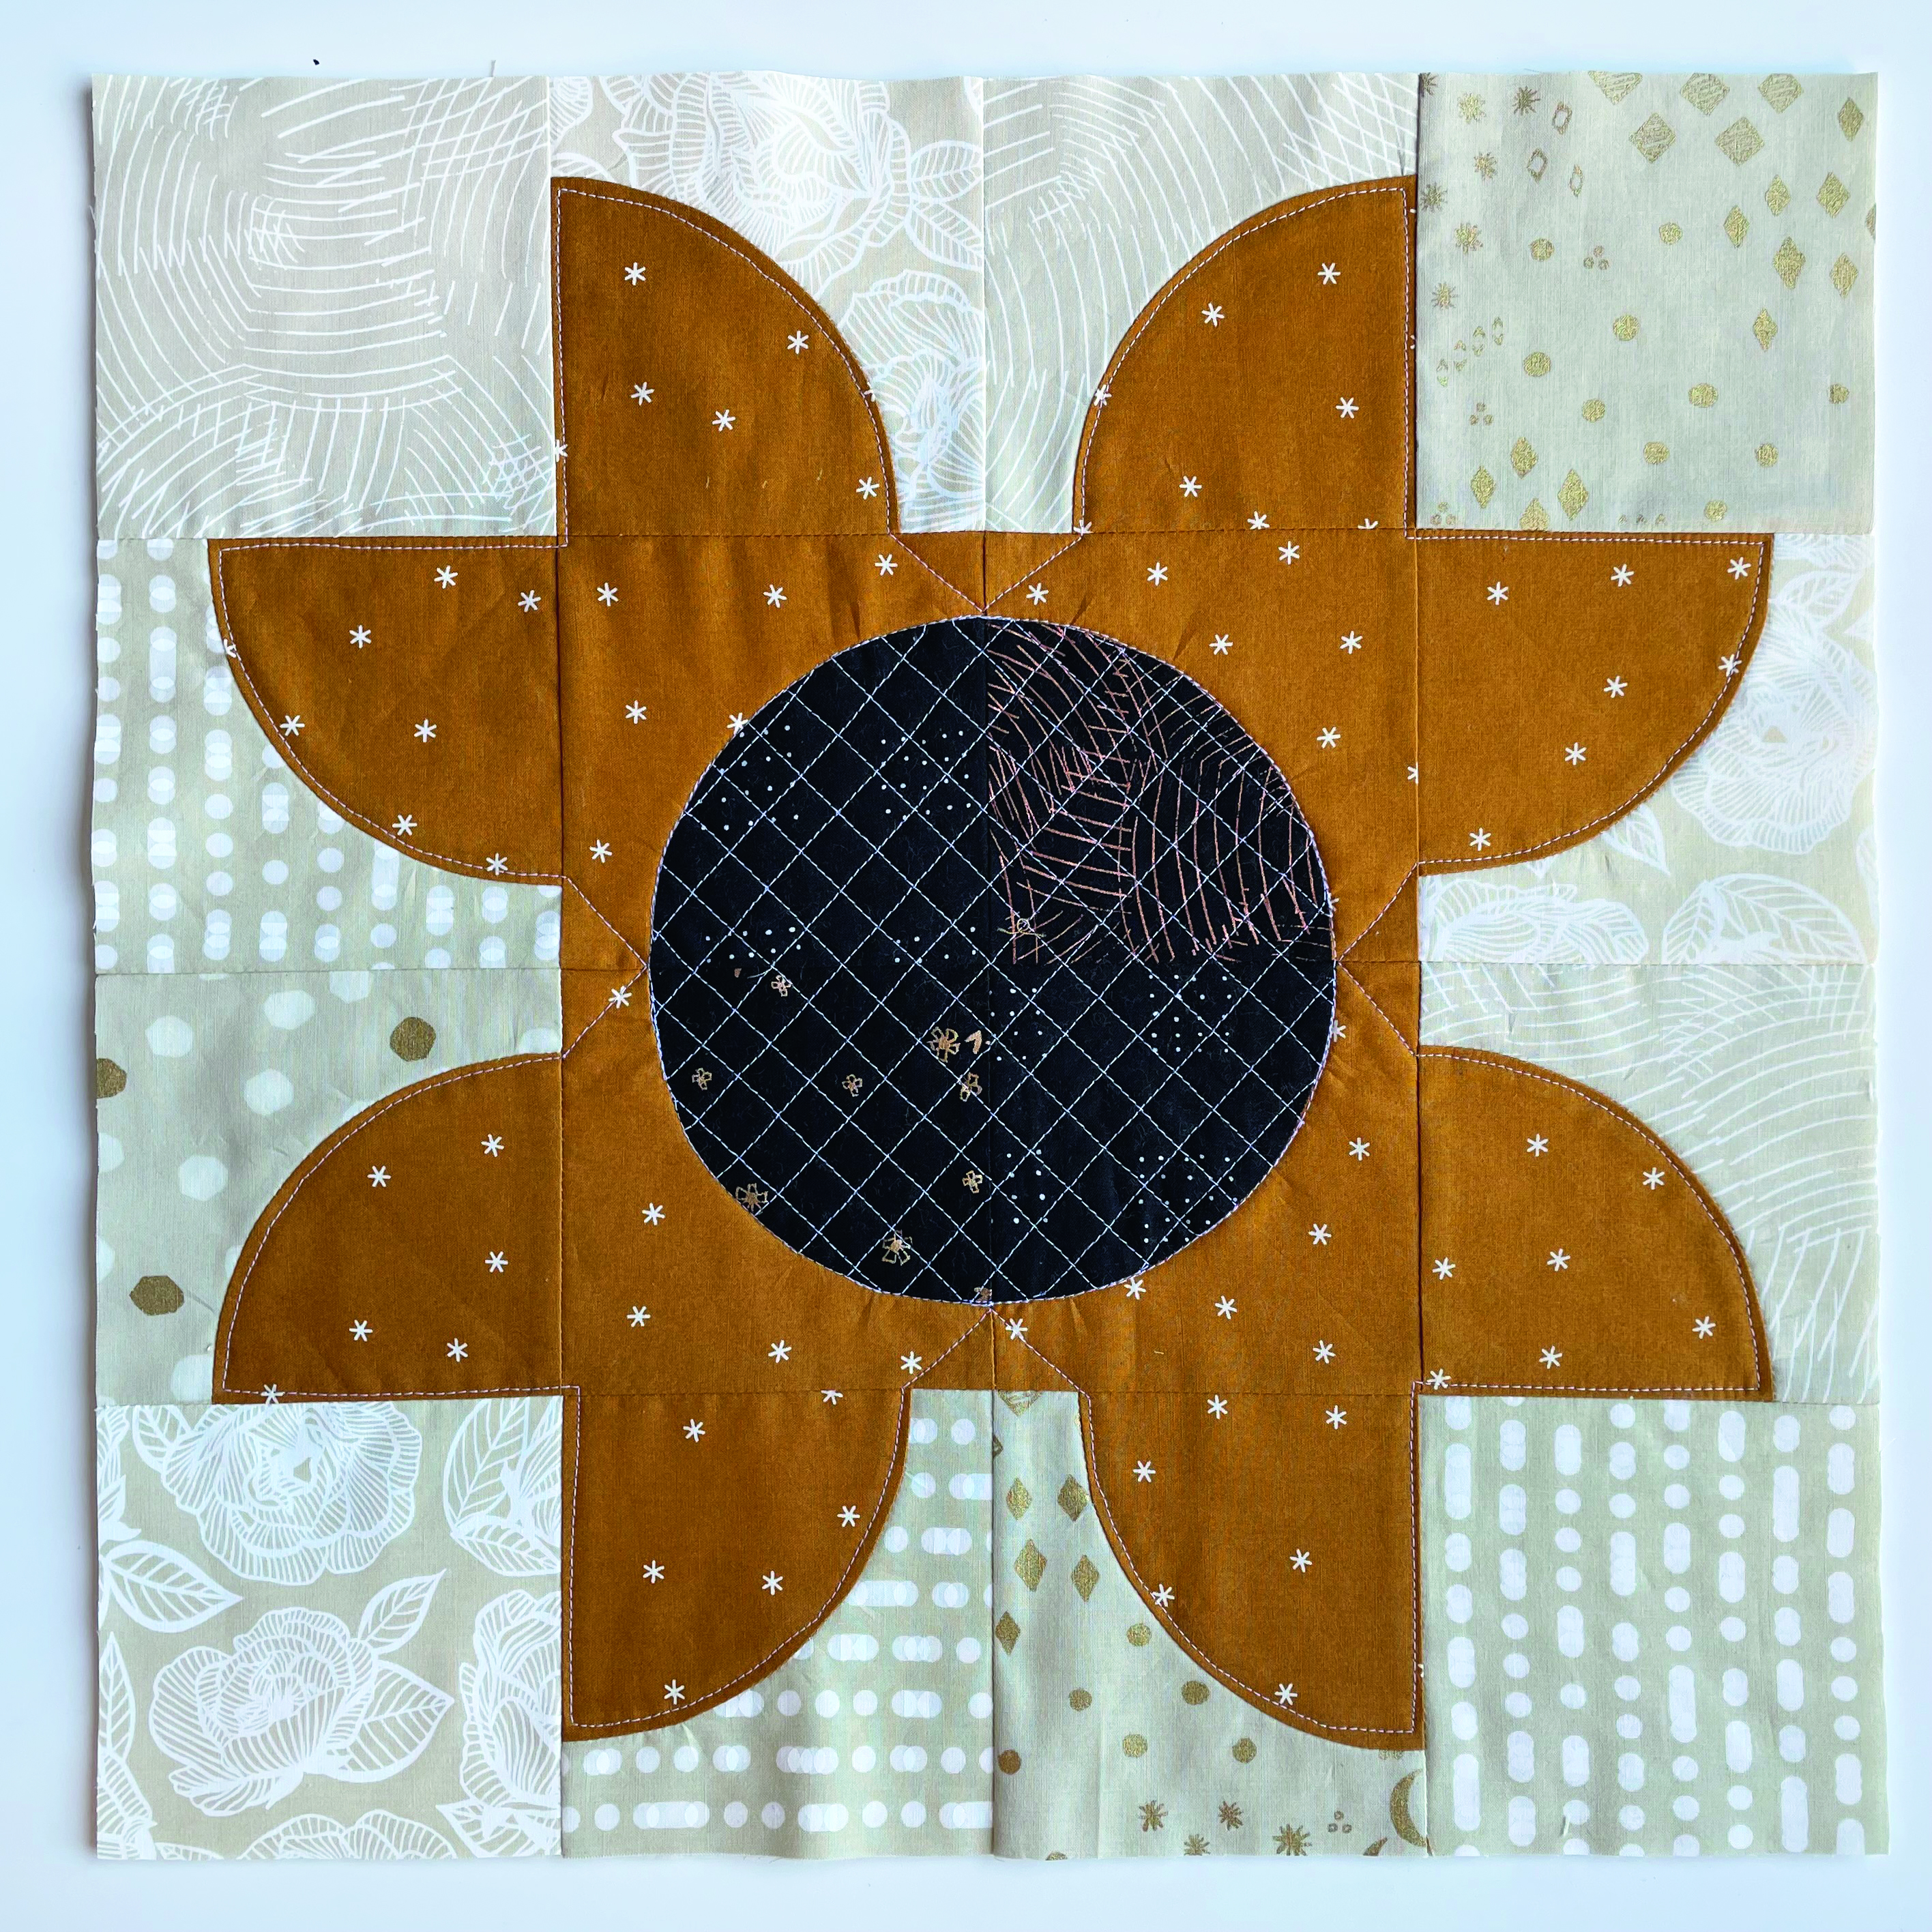
Step six: Referring to the below photography, arrange twelve A/neutral blocks, four A/B blocks and four neutral 4½in squares. Check that the curved seams are pressed so that each can nest with the curved seam next to it. If any needs changing, re-press.
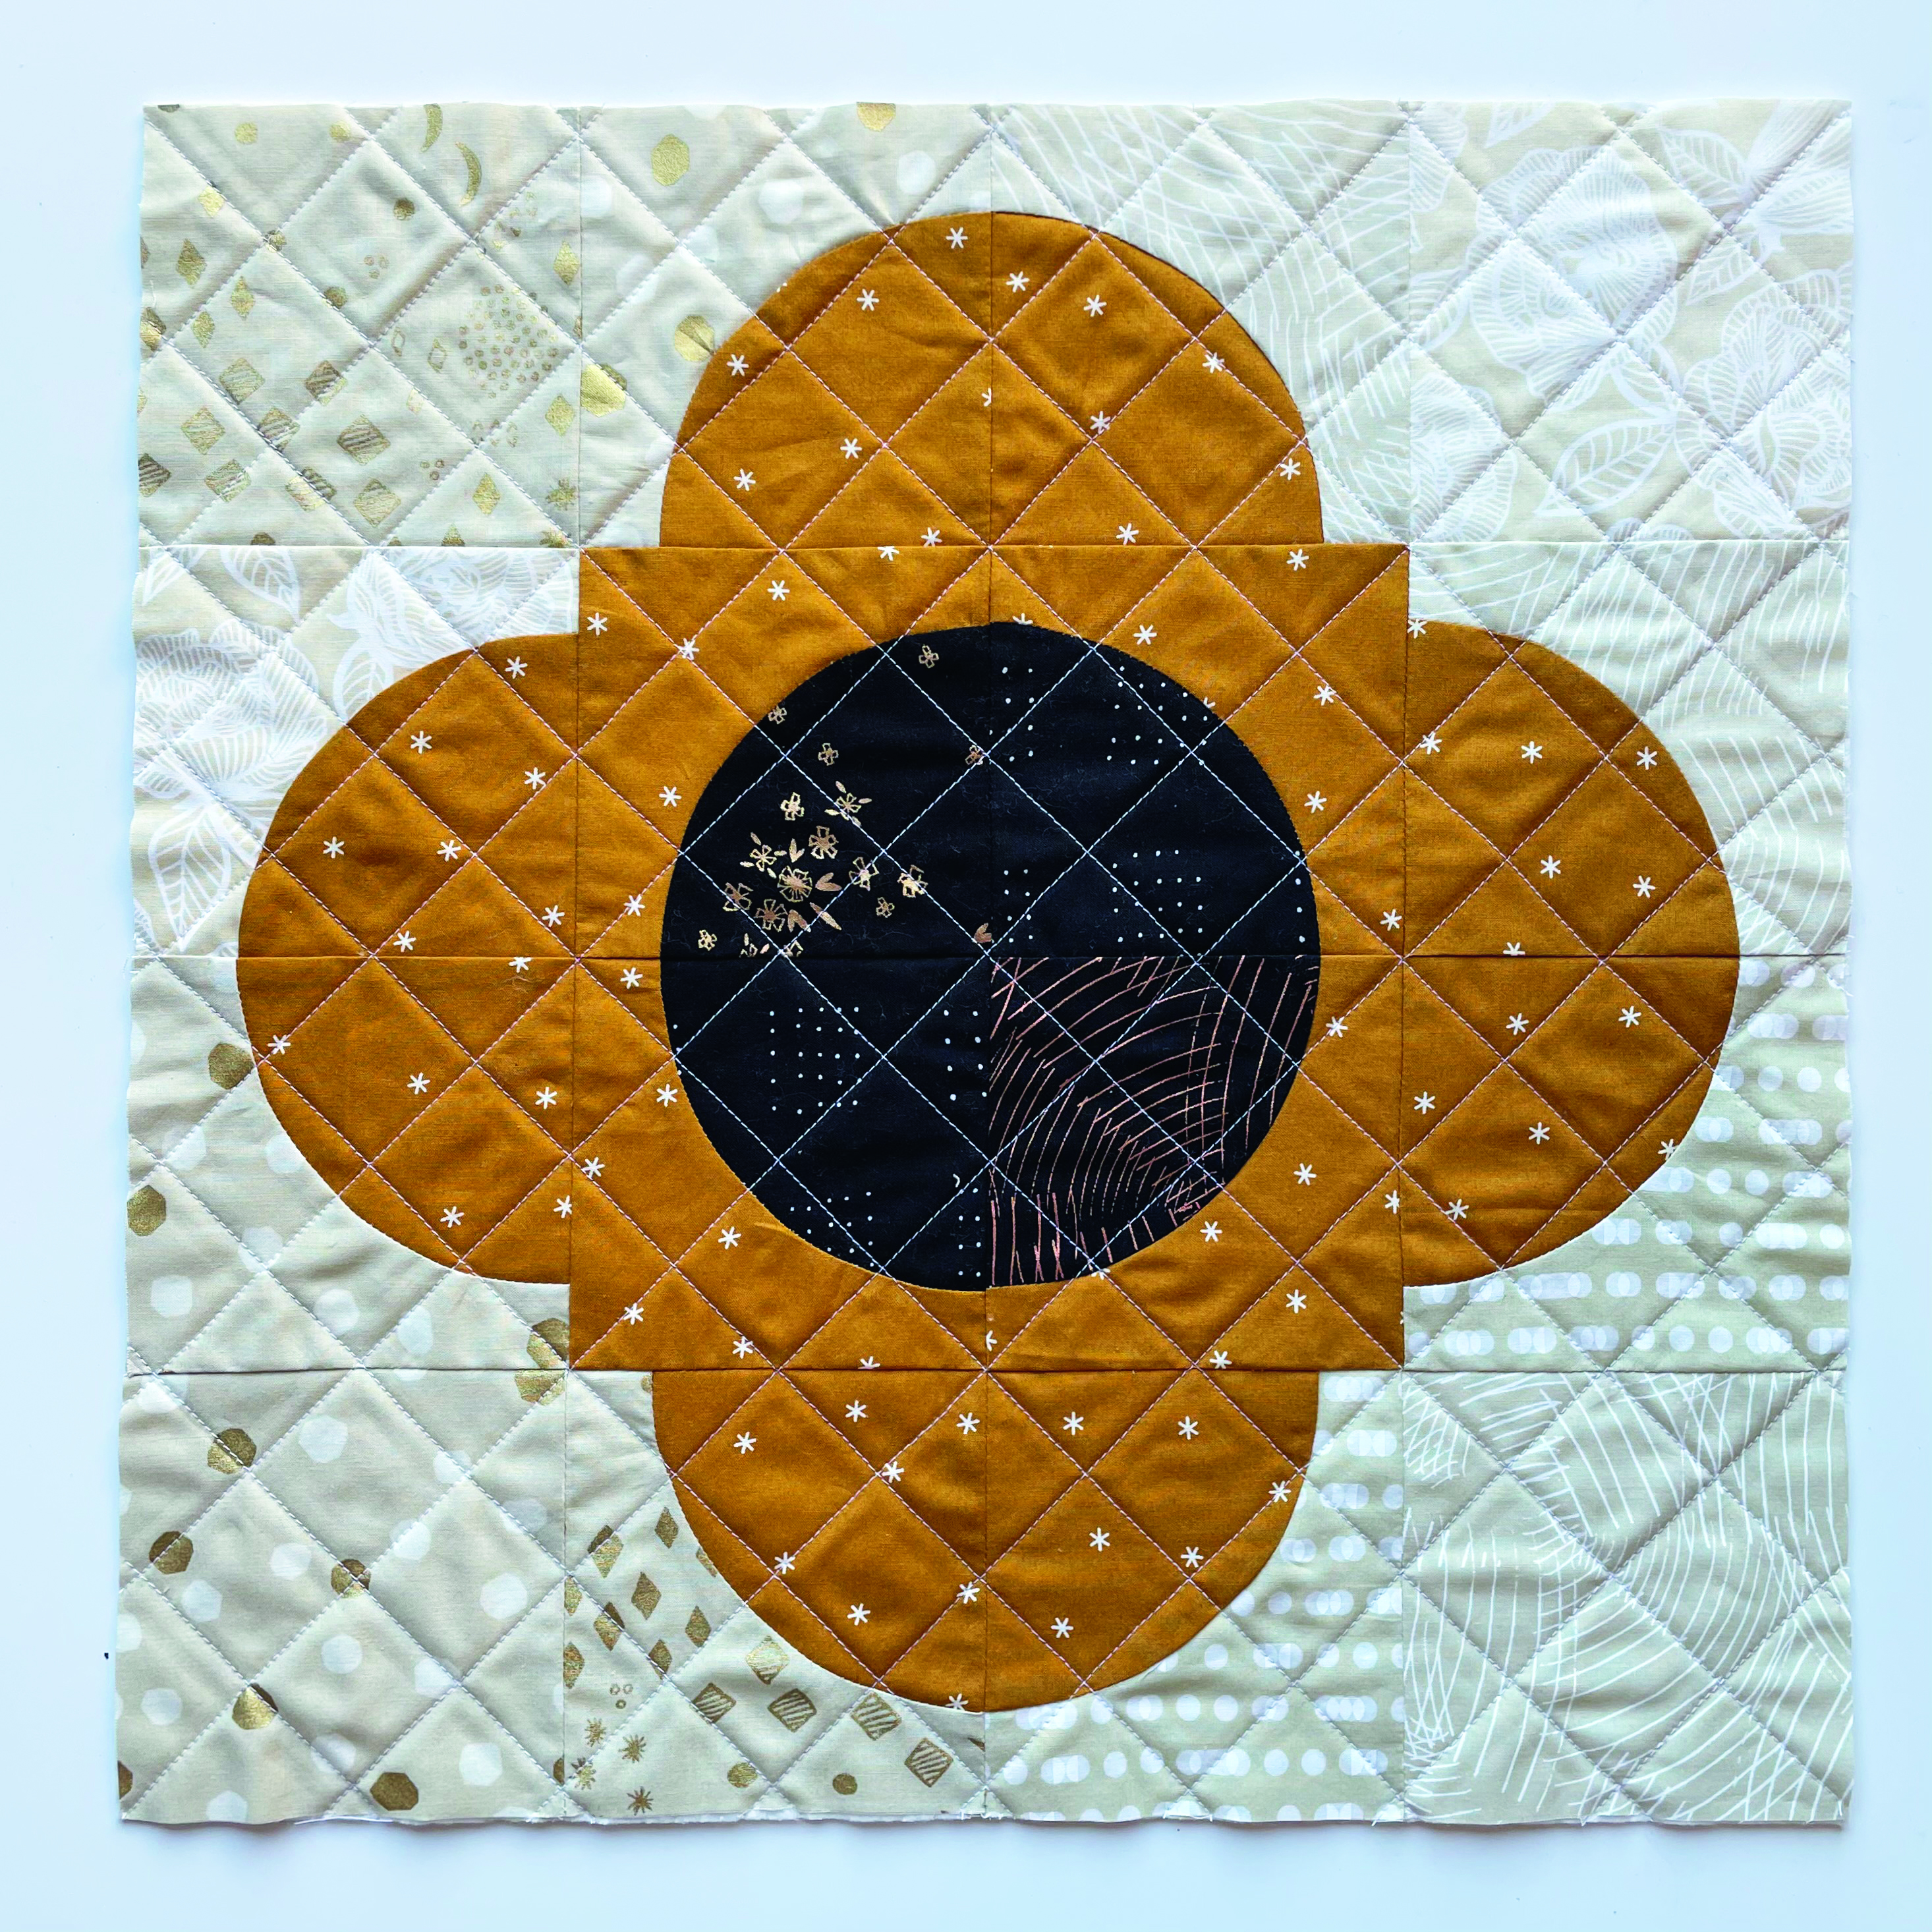
Step seven: Sew all of the blocks into rows. Press the seams to one side. Then, sew all of the rows together and press. Repeat the process detailed in steps 6–7 with the remaining squares, referring to the below photography for placement.
Step eight: Make a quilt sandwich by placing each pieced block centrally and with its right side up on top of the batting. Baste and quilt as desired. Trim off the excess batting and square up each panel to measure 16½in square.
Step nine: To make the bag straps, place one 32in x 5in strip right side down. Place a 23/8in batting strip on top in the centre. Press the long edges towards the centre on top of the batting strip. Fold the strip in half lengthways and press, enclosing the raw edges.
Then topstitch 1/8in from each long edge. Repeat this process to make a second strap.
Step ten: Take one of your quilted blocks. Pin one strap along the top edge, taking care not to twist the strap. The end of the strap should be 4in from each side. Baste the strap in place with a 1/8in seam allowance. Place one square of lining fabric on top of the bag panel, with right sides together. Sew along the top edge of the panel. Then, open the pieces out, pressing the seam toward the lining.
Step eleven: Repeat step 10 for the second bag panel. Place the two panels right sides together, aligning the seams. Sew around the outer edge, leaving a turning gap in the bottom of the lining and backstitching at each end. Turn the bag right side out through the gap in the lining and slip stitch the lining gap closed. Push the lining inside the bag. Press around the top edge of the bag and topstitch to finish.
