Master half-square triangles with our free modern mini quilt pattern
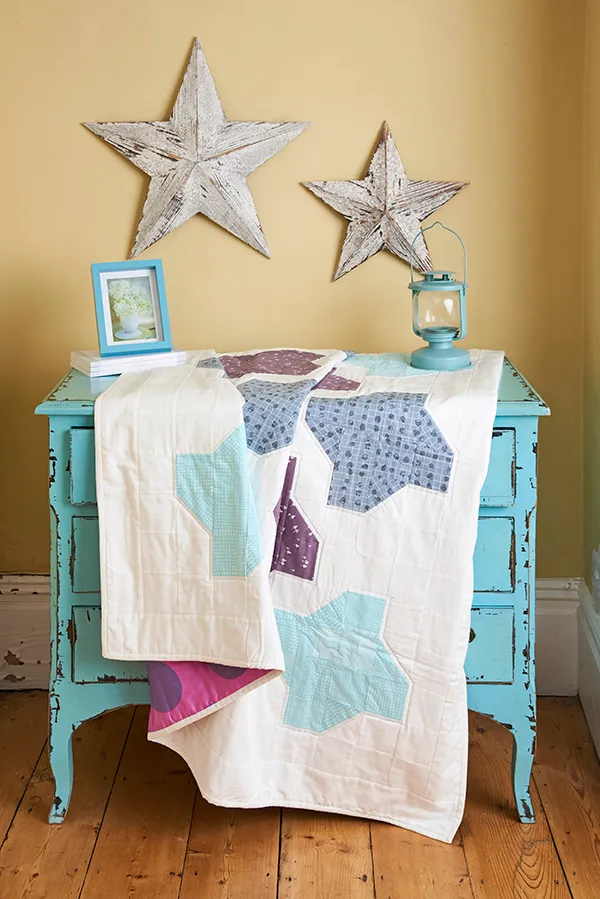
Practice and perfect your quilting skills with our fab free mini quilt pattern. This modern geometric design by Lou Orth is big enough to still be a useful and practical quilt, but the smaller size and repeated design mean you it won't take you weeks to make.
- Charm pack quilt patterns to spark your creativity
- Take your quilting to the next level with these modern quilt patterns
- Free Karma strip quilt pattern – turn pre-cut fabrics into a beautiful quilt
If you're relatively new to quilting this is a great pattern for beginners, as we'll show you all you need to know to piece simple half square triangle (HST) blocks and create this stylish quilt.
You can also create very different effects with your choice of fabrics in this design – will you go for bold and bright rainbow colours, or keep it calm with pretty pastels? The choice is yours!
Notes
- Press all fabrics well before cutting.
- Seam allowances are ¼ in, unless otherwise noted.
- HST = Half-square Triangle.
- RST = right sides together.
- WOF = width of fabric.
- WST = wrong sides together.
You will need
- Solid white fabric (includes binding): 31⁄8yds
- Grey print fabric: ¾yd
- Mint print fabric: ½yd
- Mauve print fabric: ½yd
- Backing fabric: 66in square (extra-wide fabric or pieced)
- Batting: 66in square
Finished size
60in square approx
How to make a modern mini quilt
Cutting out
Step one From the solid white fabric cut:
- Seven (7) 2½in x WOF strips.
- Six (6) 3½in x WOF strips.
- Fourteen 3½in x WOF strips. Subcut to give one-hundred and sixty-eight (168) 3½in squares.
- Three (3) 6½in x WOF strips. Subcut to give thirteen (13) 6½in squares.
Step two From grey print fabric cut:
- Four (4) 3½in x WOF strips. Subcut to give forty (40) 3½in squares.
- One (1) 6½in x WOF strip. Subcut to give five (5) 6½in squares.
Step three From each of the mint print and mauve prints fabrics cut:
- Three (3) 3½in x WOF strips. Subcut to give thirty-two (32) 3½in squares.
- One (1) 6½in x WOF strip. Subcut to give four (4) 6½in squares.
Make the half square triangles
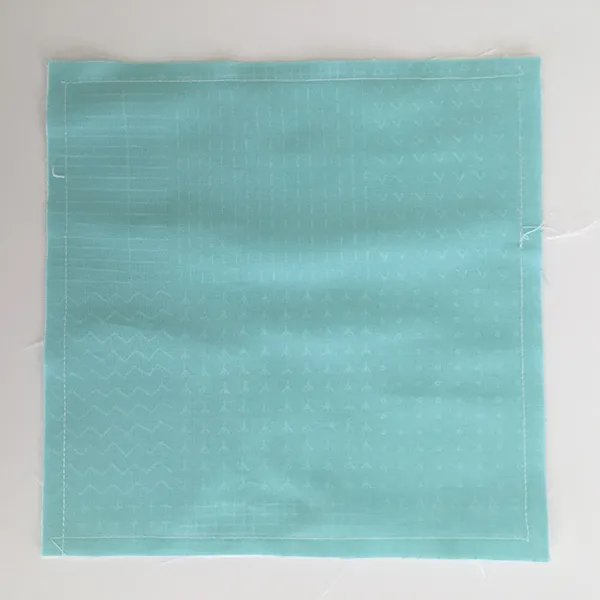
Step four Take one white and one print 6½in square and place them RST. Sew a ¼in seam around all four sides.
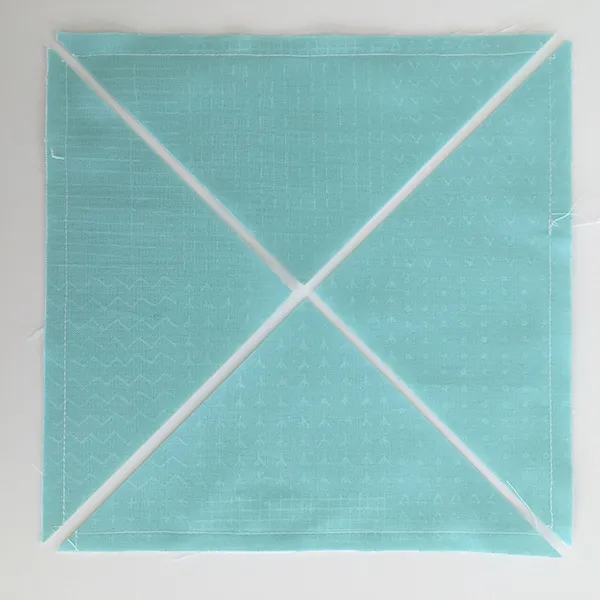
Step five Cut across both diagonals from corner-to-corner to create four triangles.
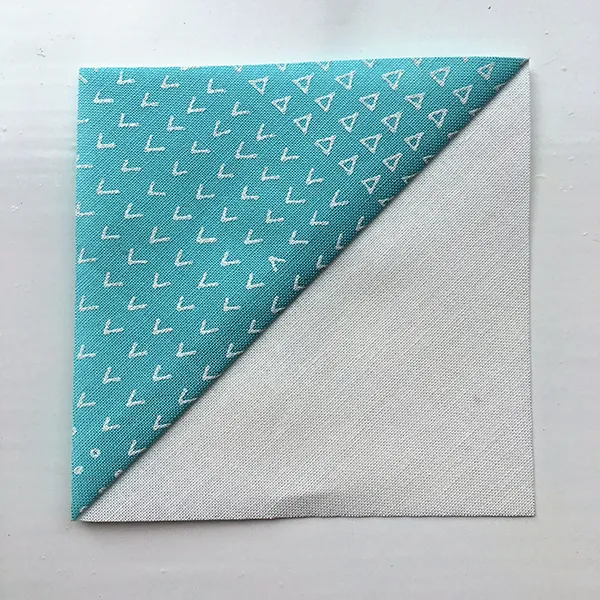
Step six Open out the triangles and press, and then trim each HST to 3½in square, making sure the seam runs diagonally from corner to corner.
Step seven Repeat steps 4–6 for the remaining 6½in white and print squares. Keep the HSTs from the same print fabrics together.
How to piece the quilt top
Step eight Referring to the layout diagram below, arrange your HSTs and 3½in squares into eighteen rows of eighteen units each. The HSTs and print squares are arranged to create a star-like pattern, so take care with the orientation of the HSTs.
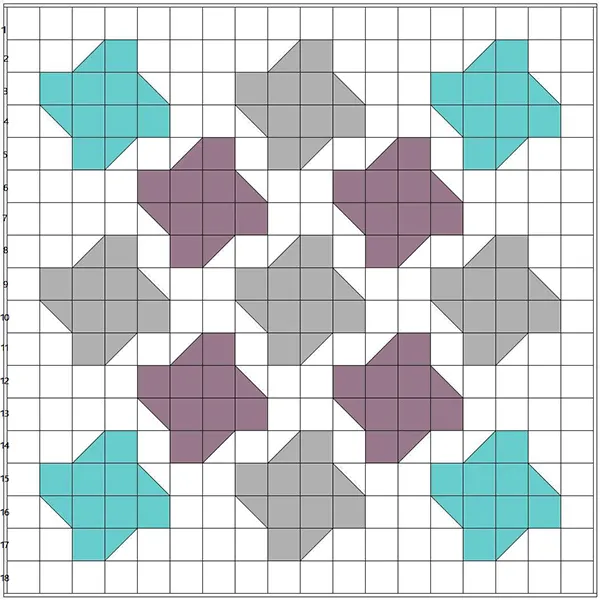
Step nine Join the units into rows and then join the rows to complete the quilt centre, which should measure 54½in square.
Step 10 Join three 3½in x WOF white strips end-to-end with straight seams and subcut to give two 54½in x 3½in strips. Join to the top and bottom of the quilt centre.
Step 11 Join three 3½in x WOF white strips end-to-end with straight seams and subcut to give two 3½in x 60½in strips. Join to each side of the quilt centre.
Quilting and finishing
Step 12 Make a quilt sandwich by placing the backing fabric right side down, the batting on top, then the quilt top centrally and right side up. The backing and batting are slightly larger than the quilt top. Baste the layers together using your preferred method.
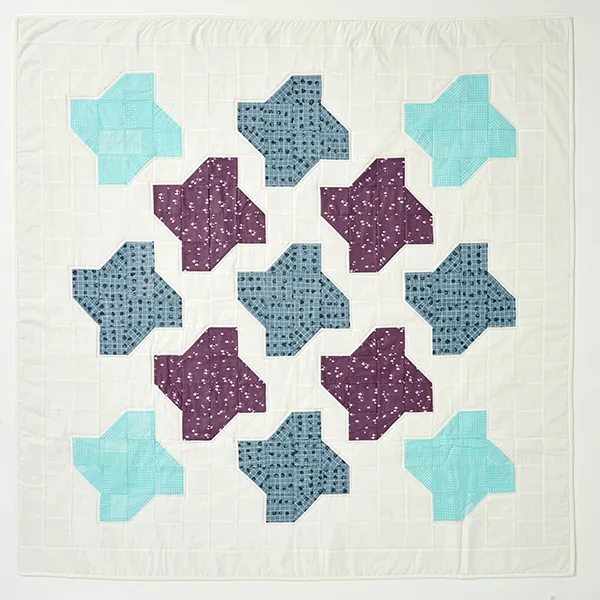
Step 13 Quilt as desired. Lou straight-line quilted around each star-like shape.
Step 14 Trim the excess batting and backing level with the quilt top edges and square up the quilt.
Step 15 Sew the binding strips together end-to-end using diagonal seams. Press the seams open and trim away the dog ears. Fold in half lengthwise, WST, and press.
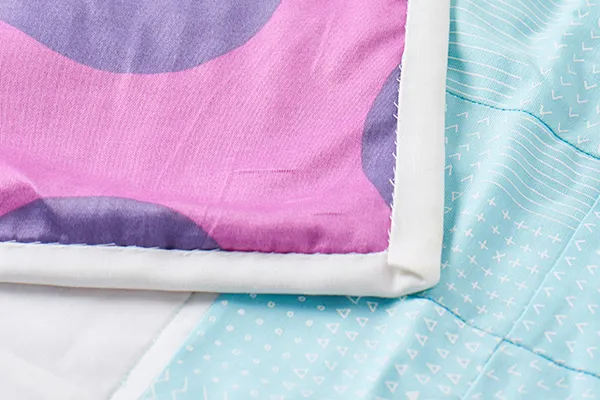
Step 16 Sew the binding to the right side of the quilt, folding a mitre at each corner, then fold the binding over to the back of the quilt and then hand stitch in place to finish.
More mini quilt makes to start today!
Mini quilts are a great way of learning new techniques and perfecting your skills with a small project. For more small-scale inspiration, check out our list of 25 of the best baby quilt patterns.


