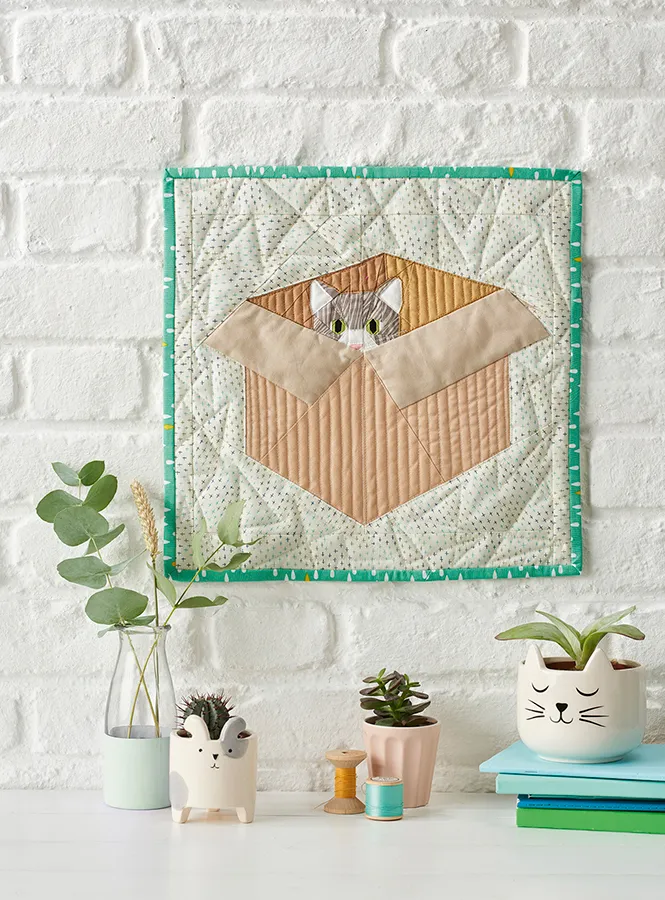
Make an adorable cat quilt with this free pattern
Is there anything cuter than a cat? Yep, a cat quilt pattern, free for you to make! The lovely Jo Carter originally designed this cat quilt block for Love Patchwork & Quilting (check out their latest issue for more cute quilts) but now it's here on Gathered just for you.
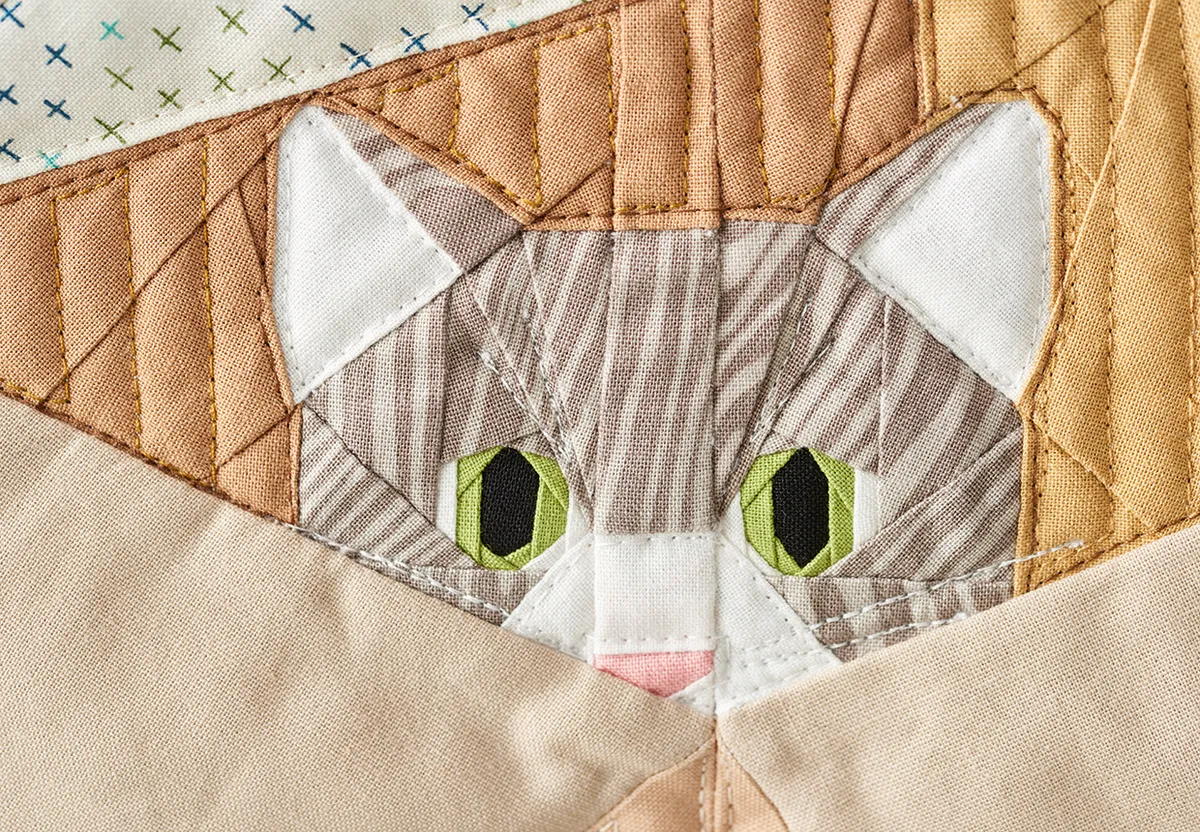
You'll love the level of detail you can achieve with Foundation Paper Piecing: the technique allows you to create his sweet face and green eyes, making him look more realistic. Stitch this little kitty quilt for yourself or give it to a cat-lover in your life – you could even change the cats colouring to match their pet.
If you're new to the world of quilting, don't worry, you can still sew this little fella. Just head over to our quilting for beginners guide for technical help and our best sewing machine for quilting round-up for detailed machine reviews.
Or, treat yourself to a long arm quilting machine. But for now, it's time to hand over to Jo and her cat quilt pattern!
Jo Carter's cat quilt pattern
You will need
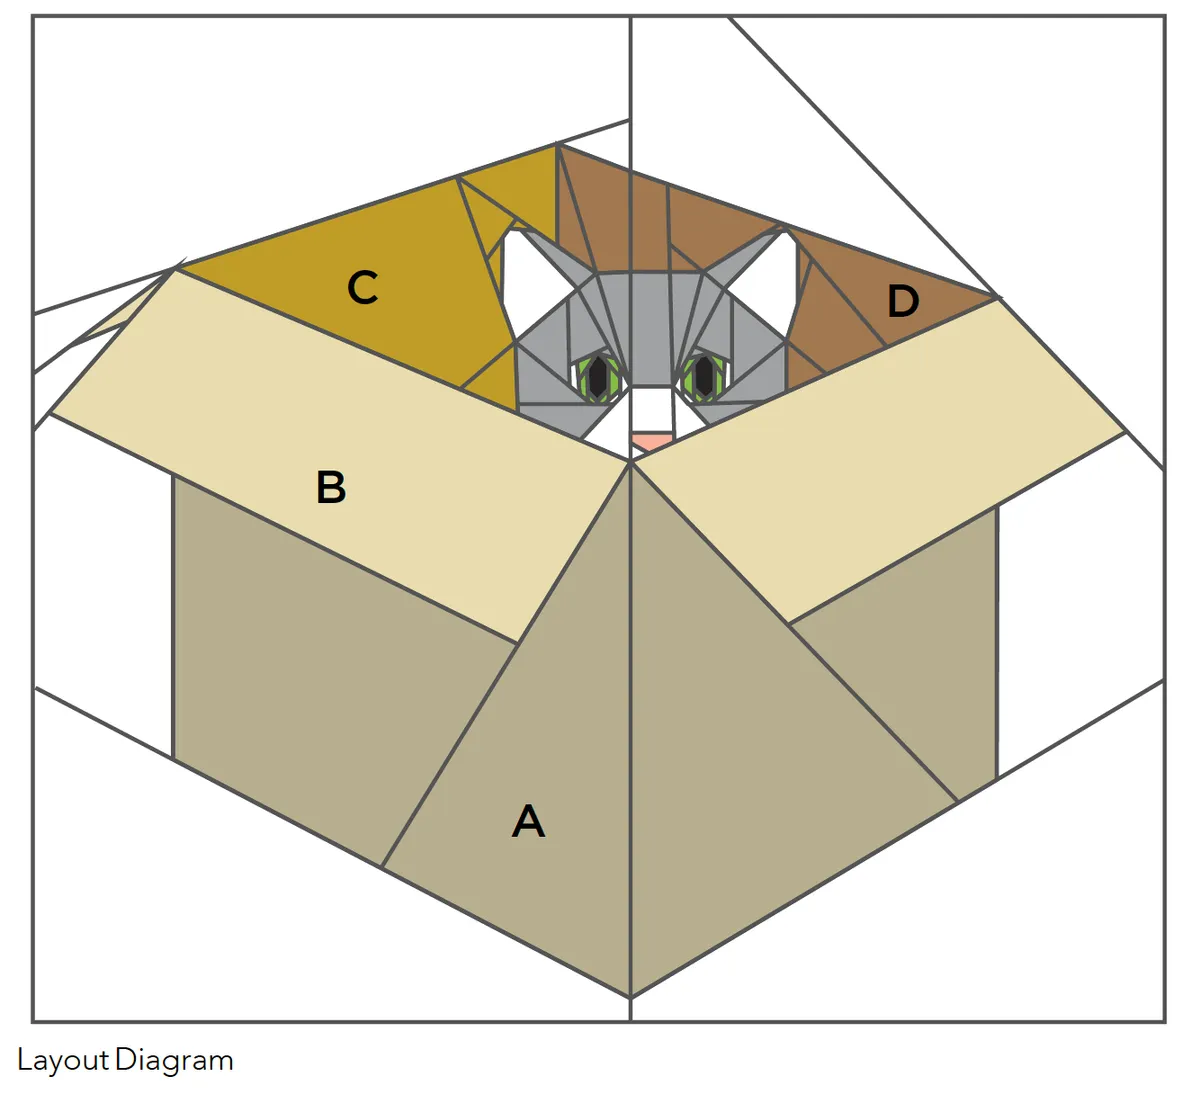
- Background fabric: one (1) fat quarter
- White fabric (ears and muzzle) 8in square
- Grey cat fabric: 14in square
- Light brown box fabric (Fabric A) 16in square
- Beige box fabric (Fabric B) 12in square
- Medium brown box fabric (Fabric C) 14in square
- Dark brown box fabric (Fabric D) 14in square
- Green scrap (eyes) 5in square
- Black scrap (eyes) 2in square
- Pink scrap (nose) approx 1½ in square
- Backing fabric: 17in square
- Batting: 17in square
- Binding fabric: ¼yd
- One copy each of Cat Section A–M templates
Finished size
15½ in square
Notes
- Seam allowance is 1/4in throughout, unless otherwise noted.
- Press seams to the side, unless otherwise instructed.
- Templates include seam allowances around the outer edge only.
- Download templates from Love Patchwork & Quilting templates issue 60 (Peek a boo templates)
- FPP = Foundation Paper Piecing.
- WST = wrong sides together.
- WOF = width of fabric.
Fabrics Used
- Grey cat fabric is Knock On Wood in Light Grey by Deena Rutter for Riley Blake Designs.
- Background fabric is Twinkle in Snow/ Night Sky, Eat, Drink and Be Ugly by Sandy Gervais for Moda.
- Fabric B is Spectrum Solid in Beige by Makower. Fabrics A, C, D and scraps are all Kona Cotton Solids by Robert Kaufman:
- Fabric A: Parchment.
- Fabric C: Honey.
- Fabric D: Biscuit.
- Scraps are Snow, Peapod, Black and Primrose.
- Find the full collection of Robert Kaufman Kona Cotton Solids at Wool Warehouse (woolwarehouse.co.uk)

Layout Diagram