Making the stalks
Step 1
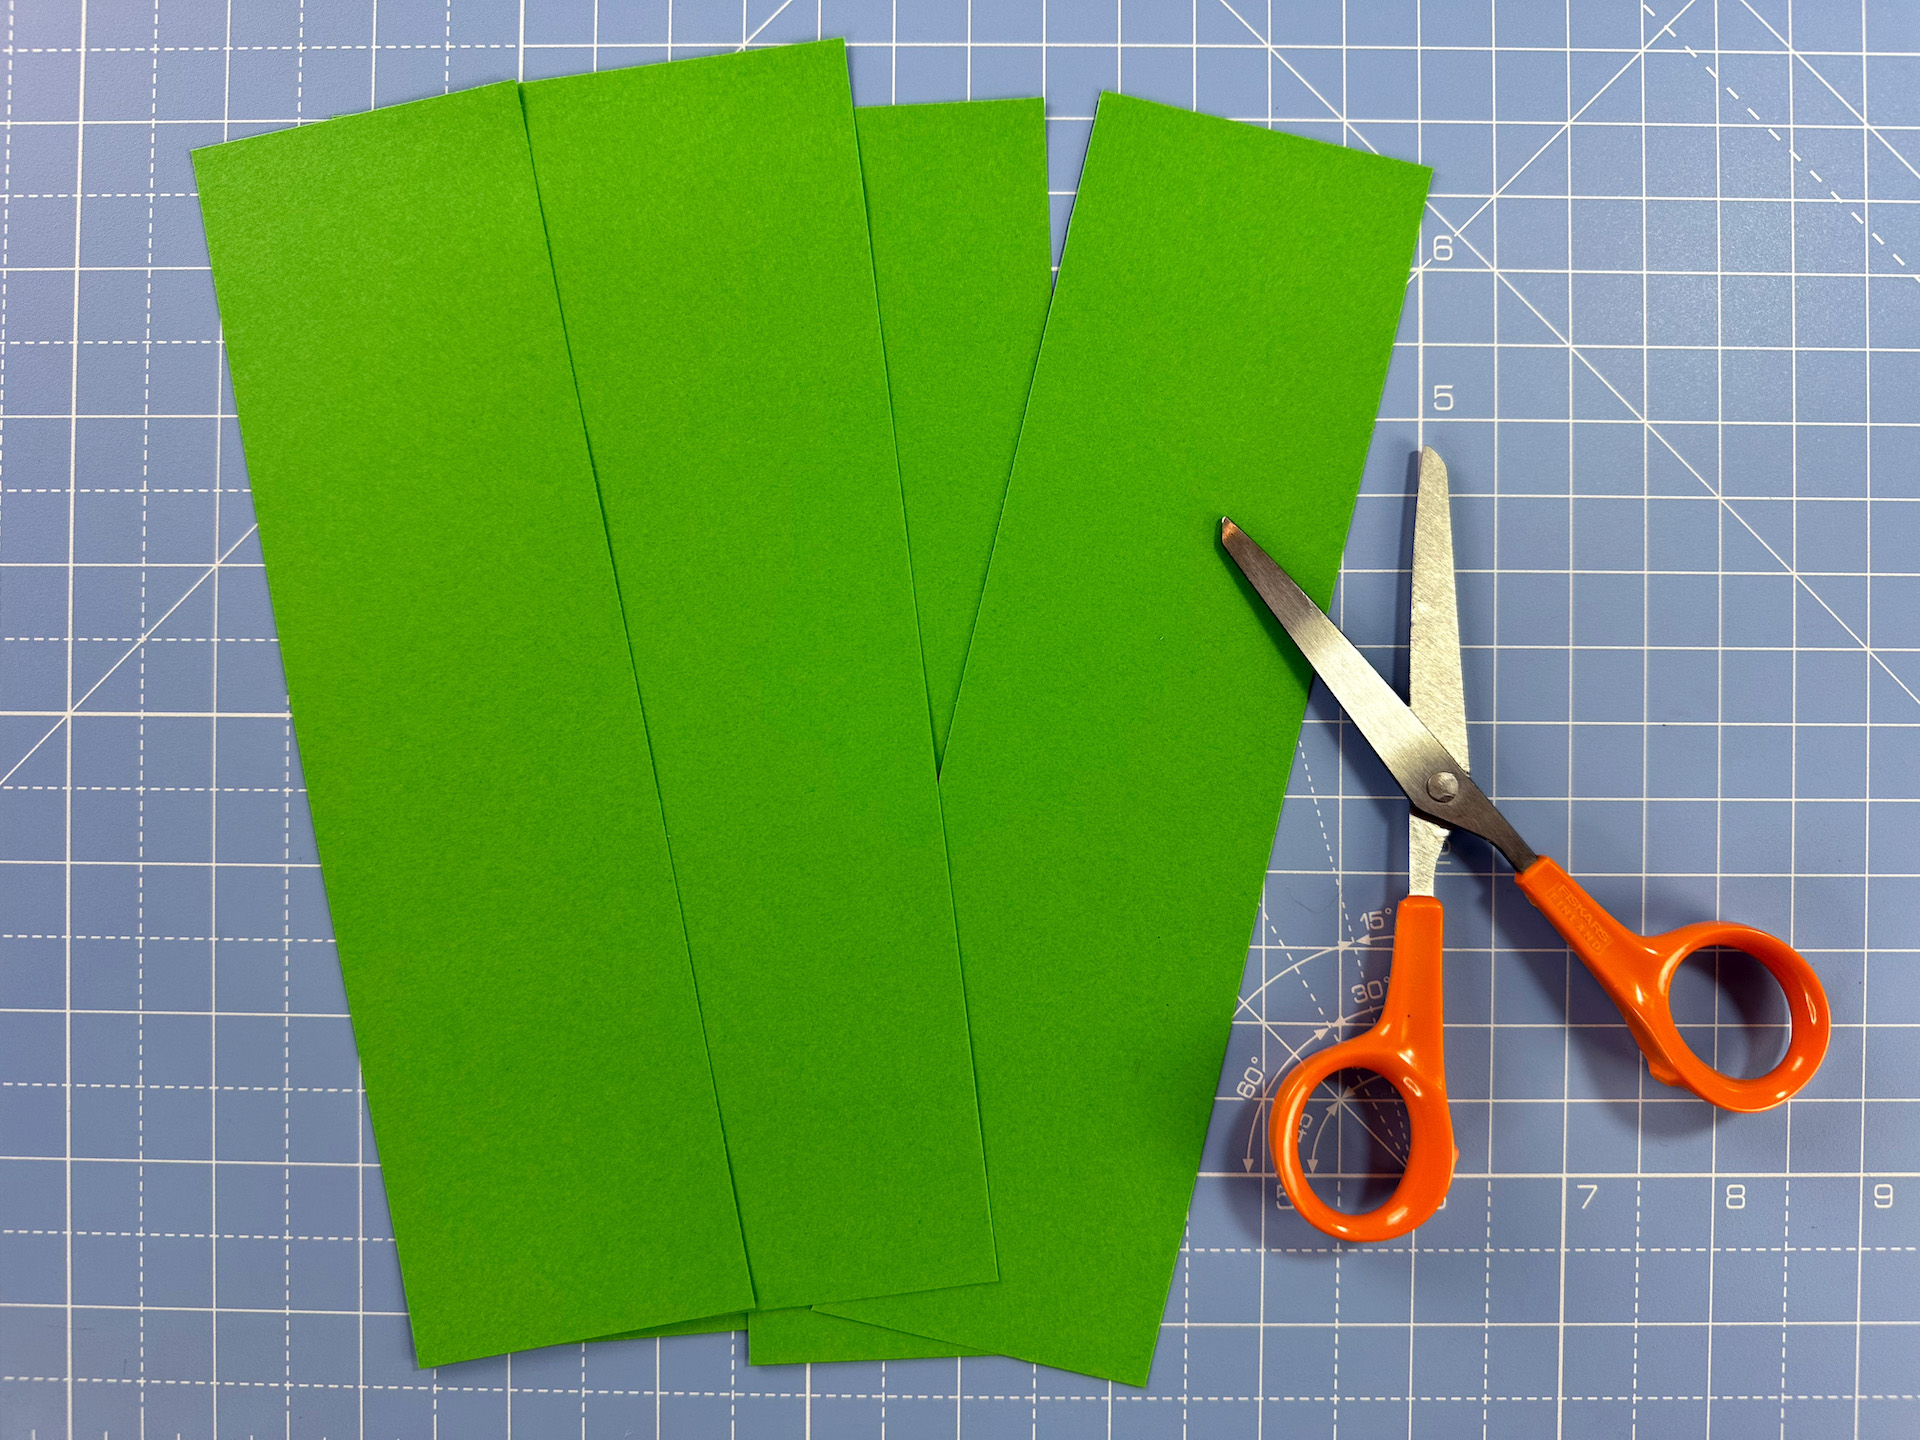
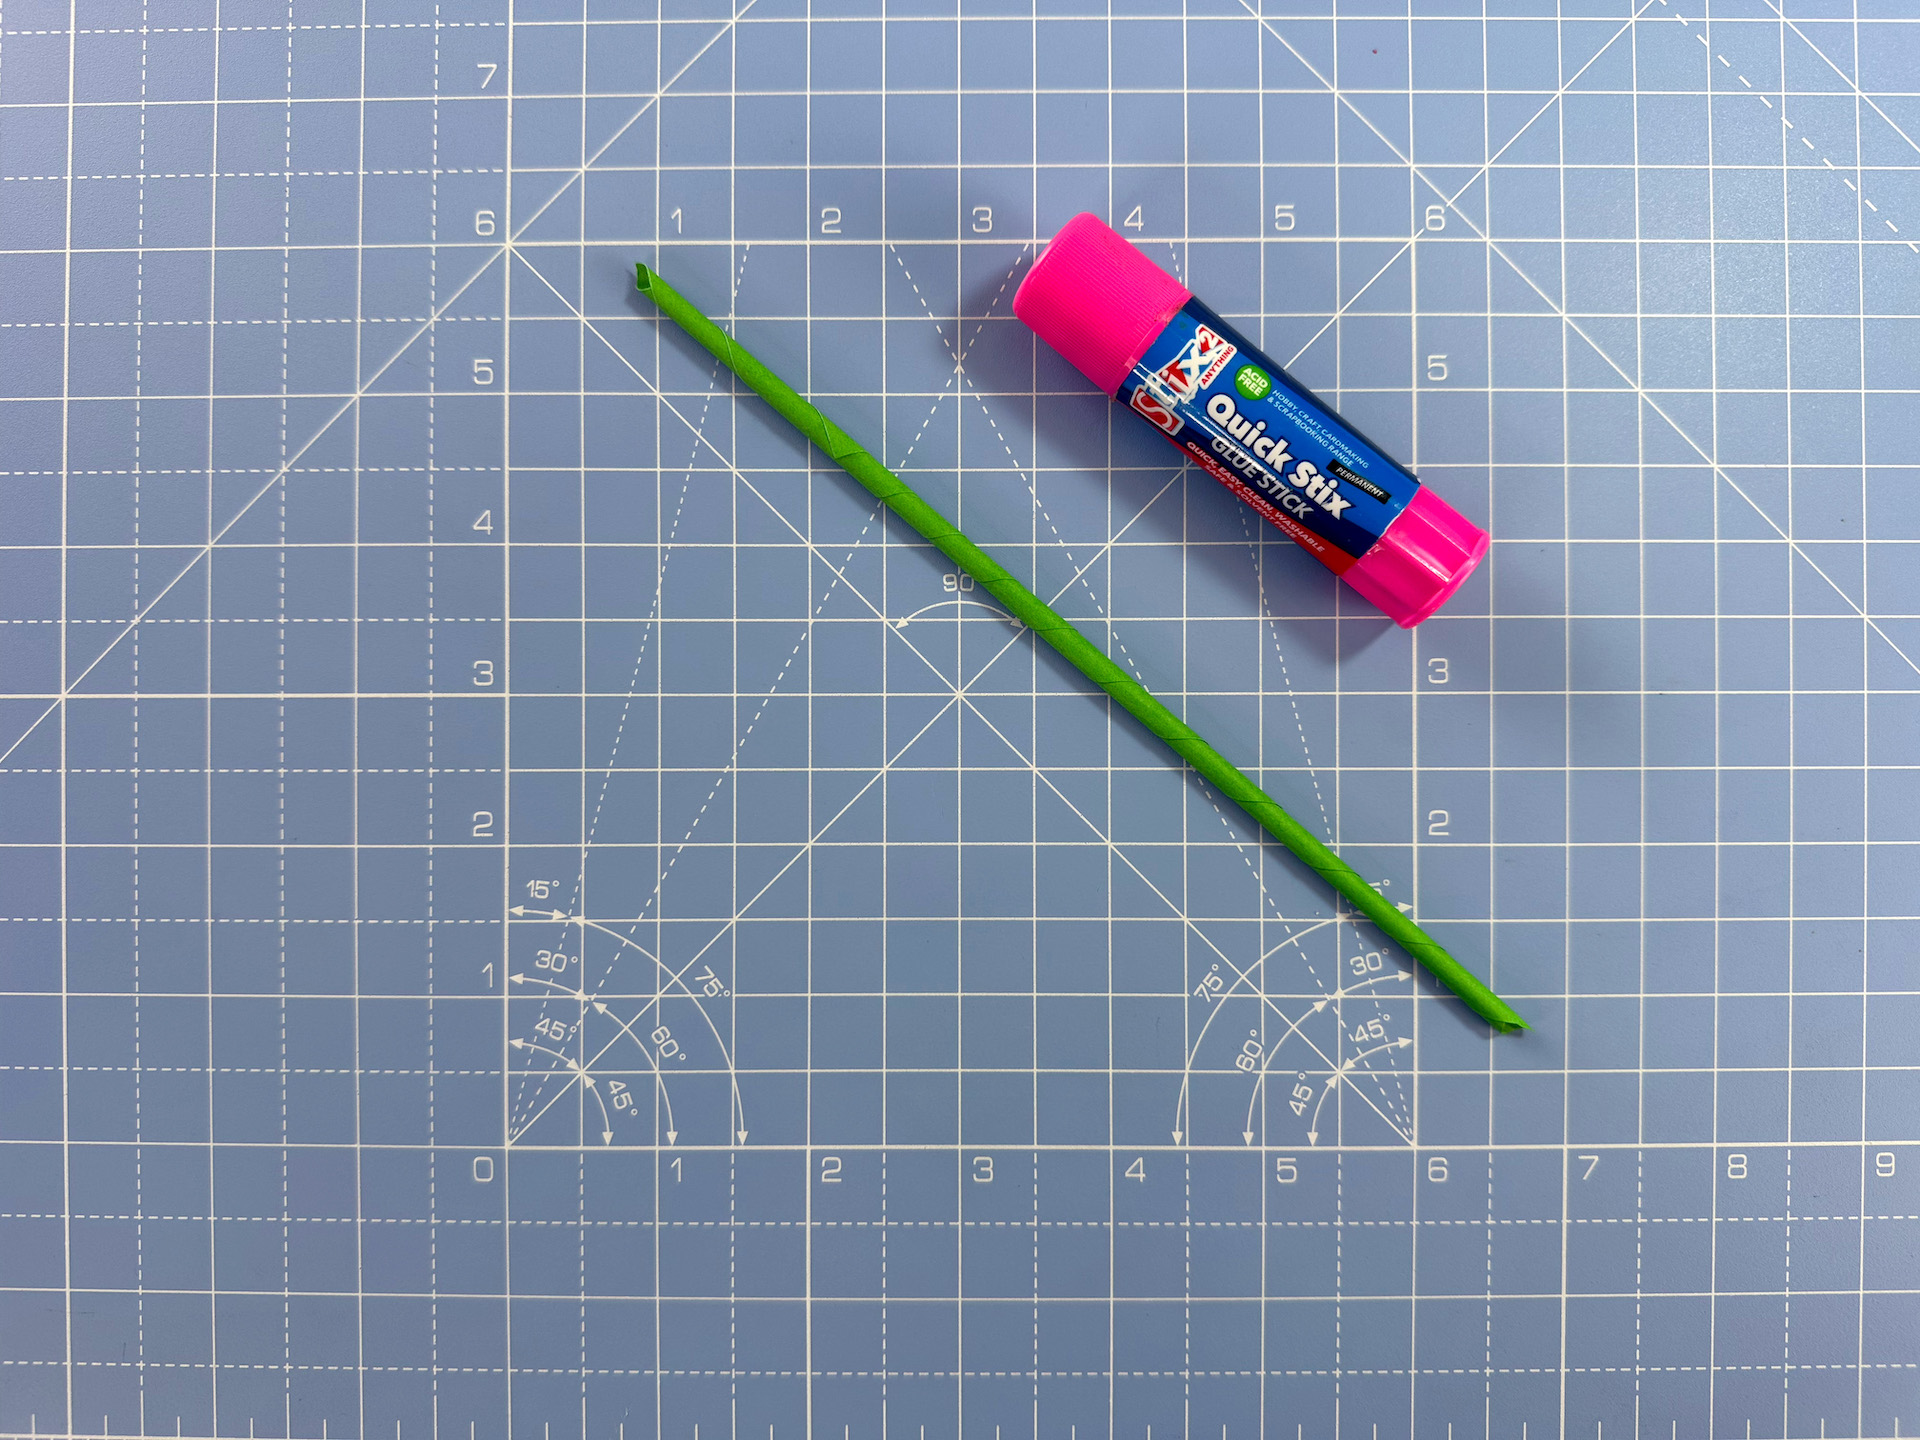
We’ll start with the stalks. You can use any size paper for this, but if you’re making a bouquet where you’ll need lots of stalks, the best way is to start with an A4 piece of plain green paper. Cut the paper into 6cm strips (each strip will become one stalk).
Step 2
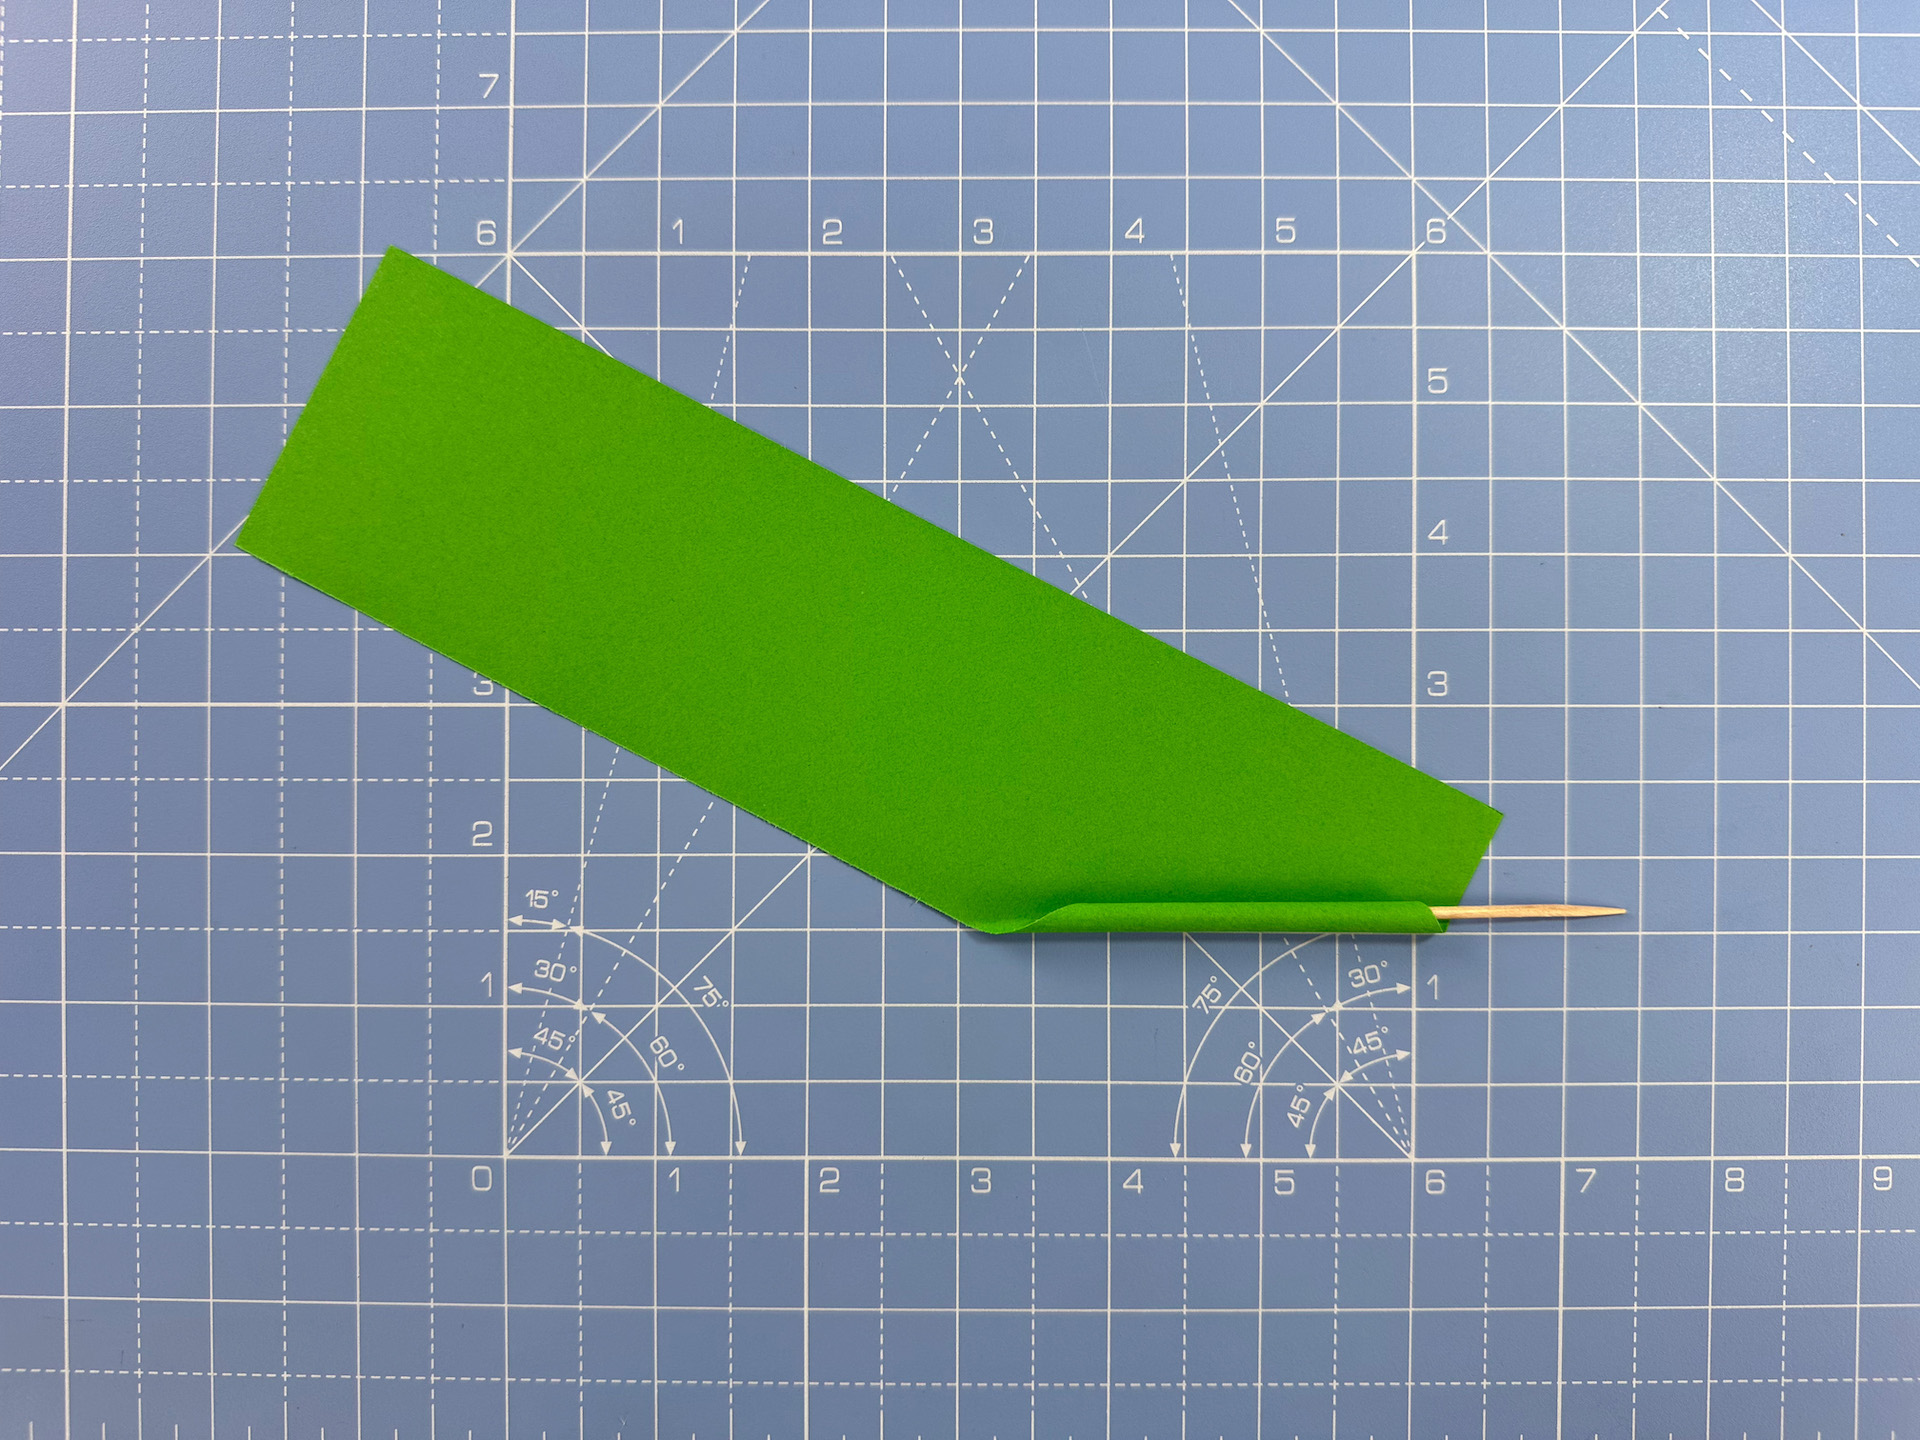
Starting in one of the corners, tightly roll the paper to form a long, thin tube. If you’re struggling to get the roll going, wrap the paper around a cocktail stick and you’ll find it’s easier.
Step 3
Put glue at the end to secure the stalk.
Step 4
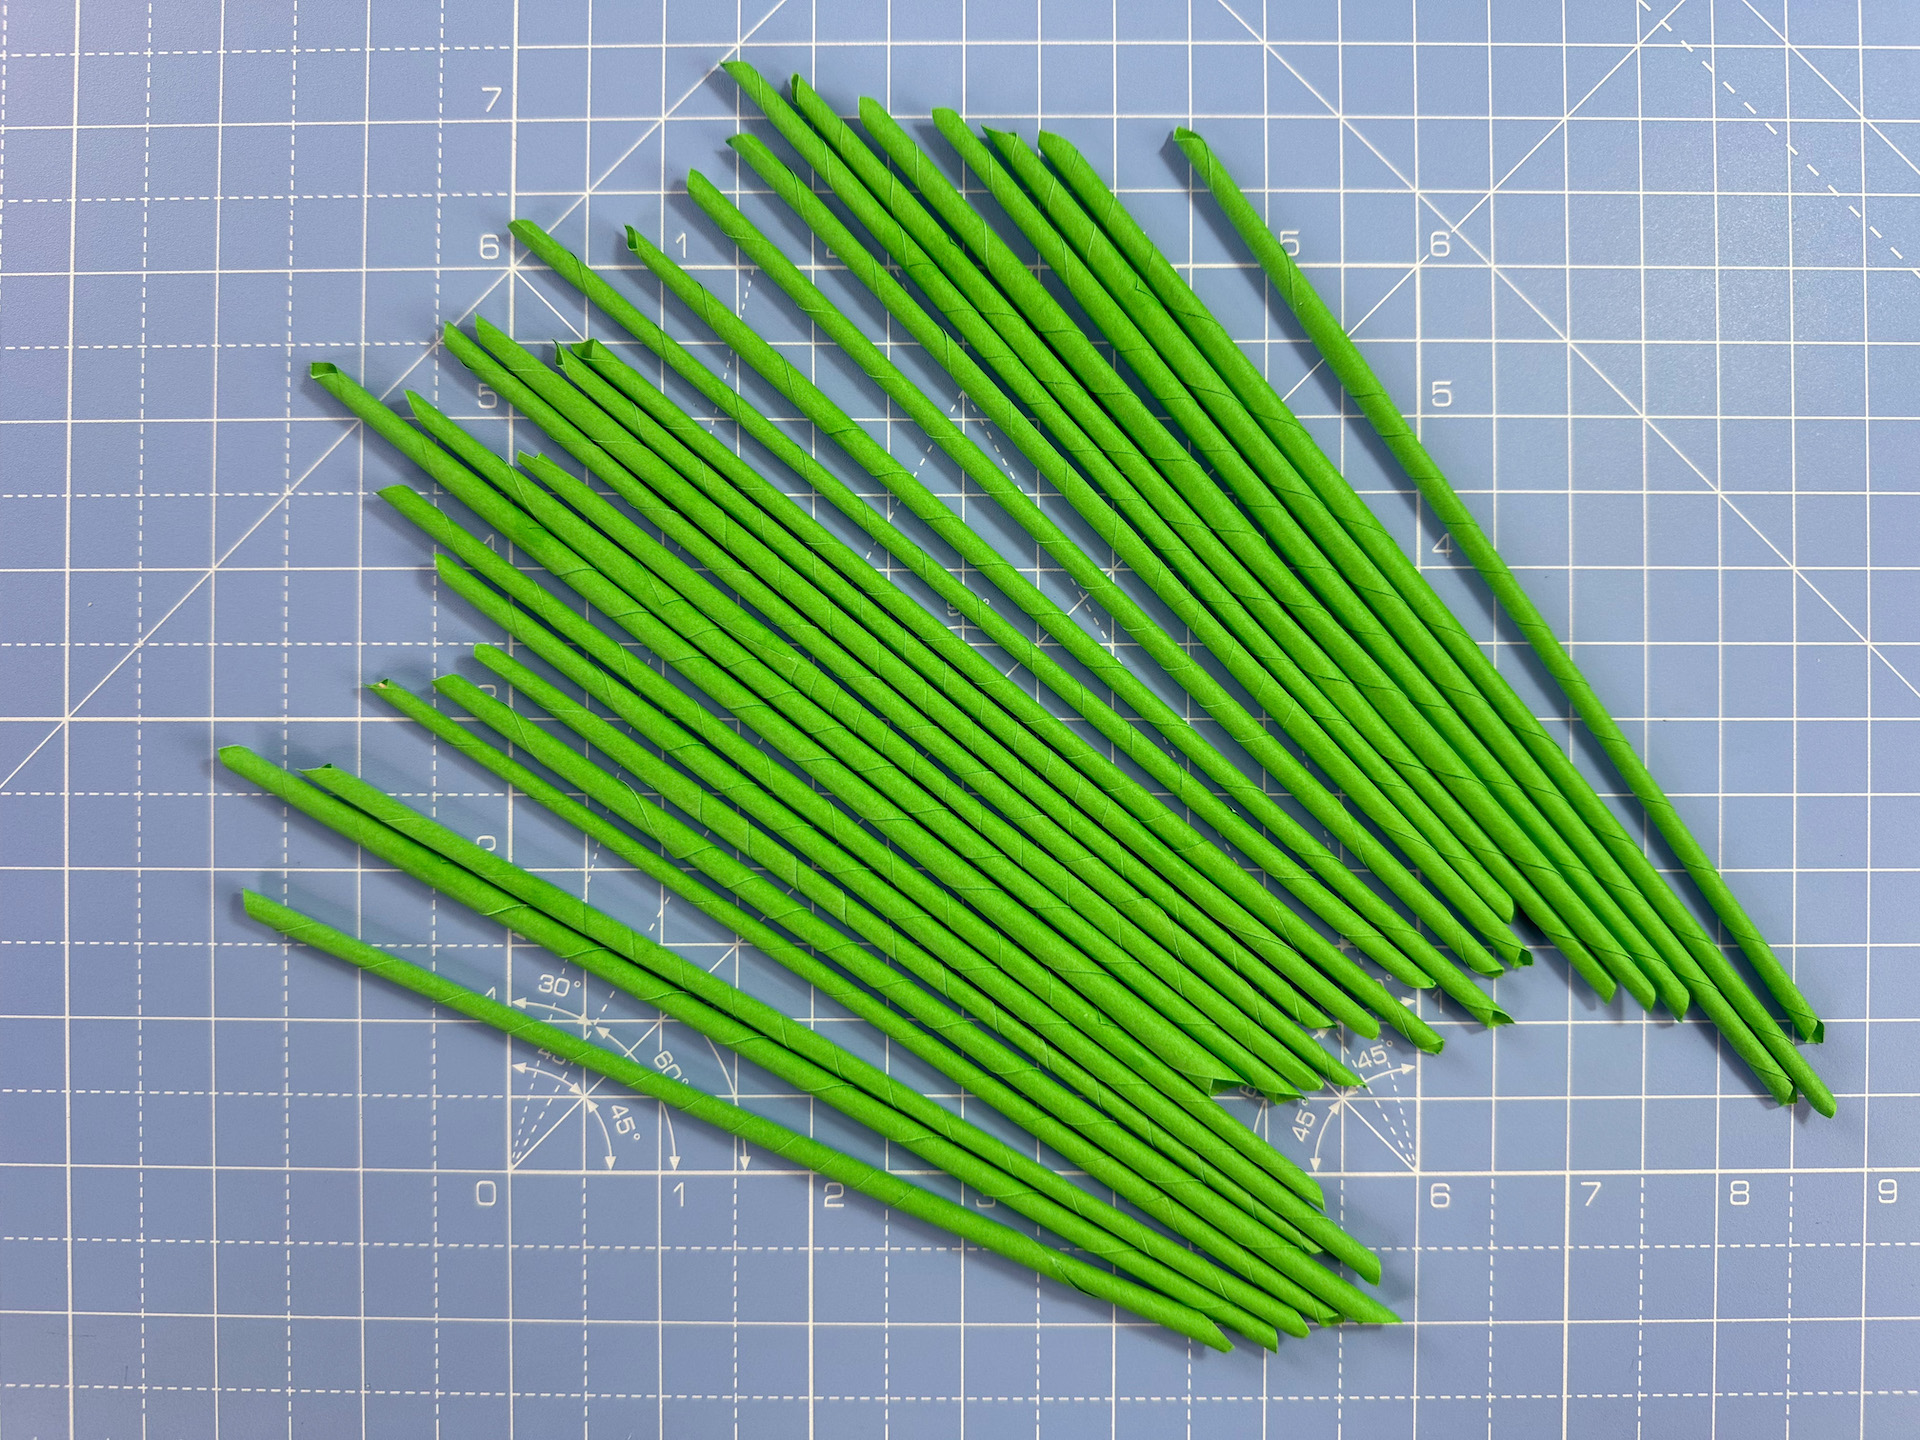
Repeat to make however many stalks you need for your origami bouquet. In our final bouquet, we used 25 stalks.
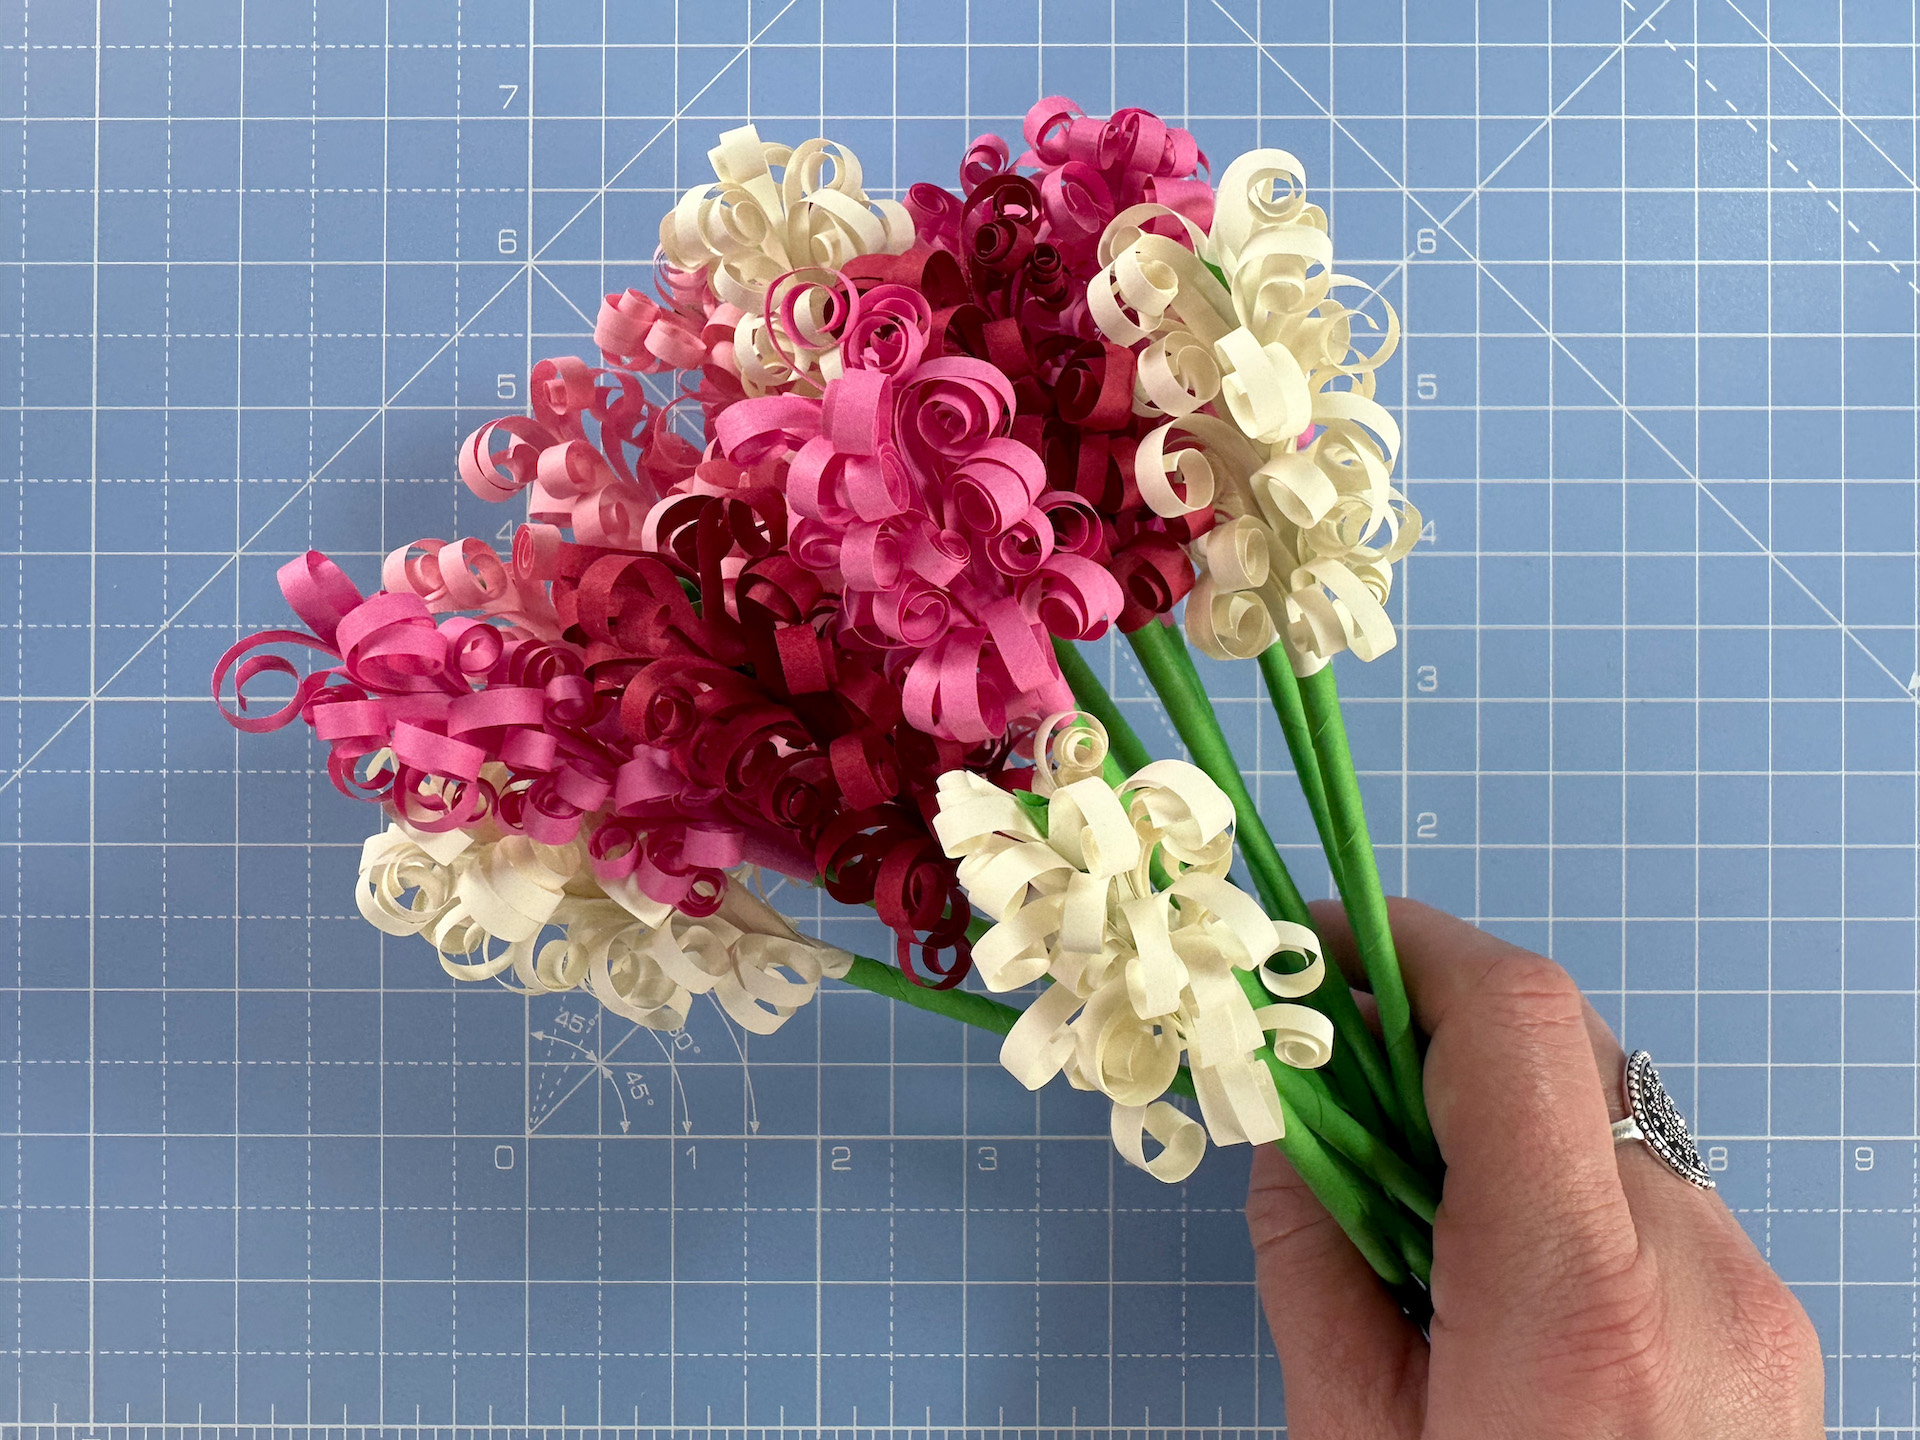
How to make a paper hyacinth
Step 1
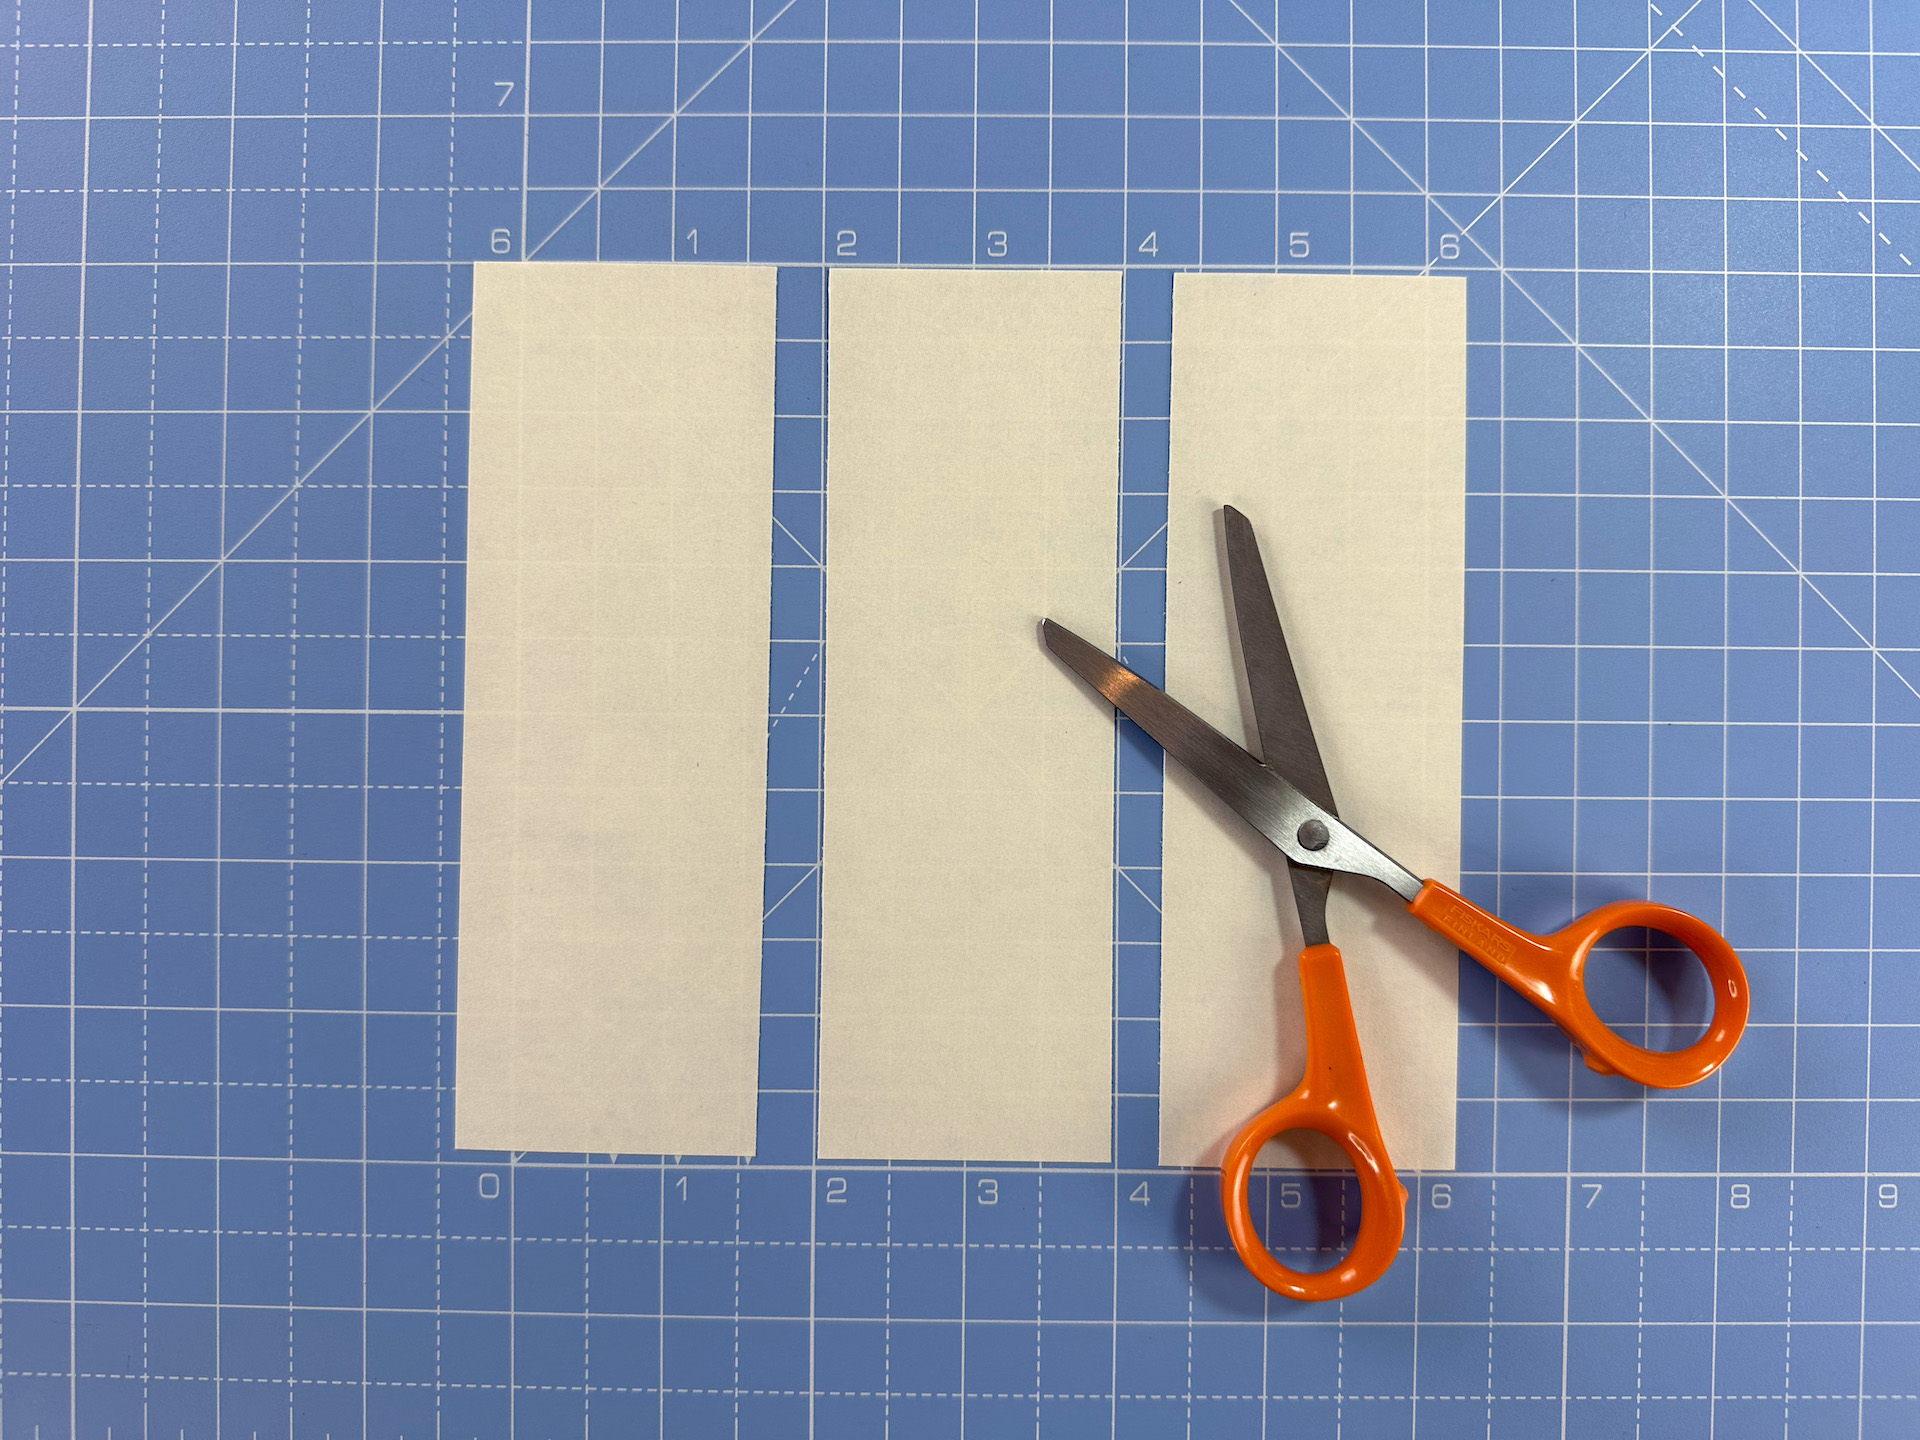
Cut a piece of paper to measure 5 x 15cm. The easiest way to do this is to start with a 15 x 15cm piece of origami paper, and cut it into three equal strips.
Step 2
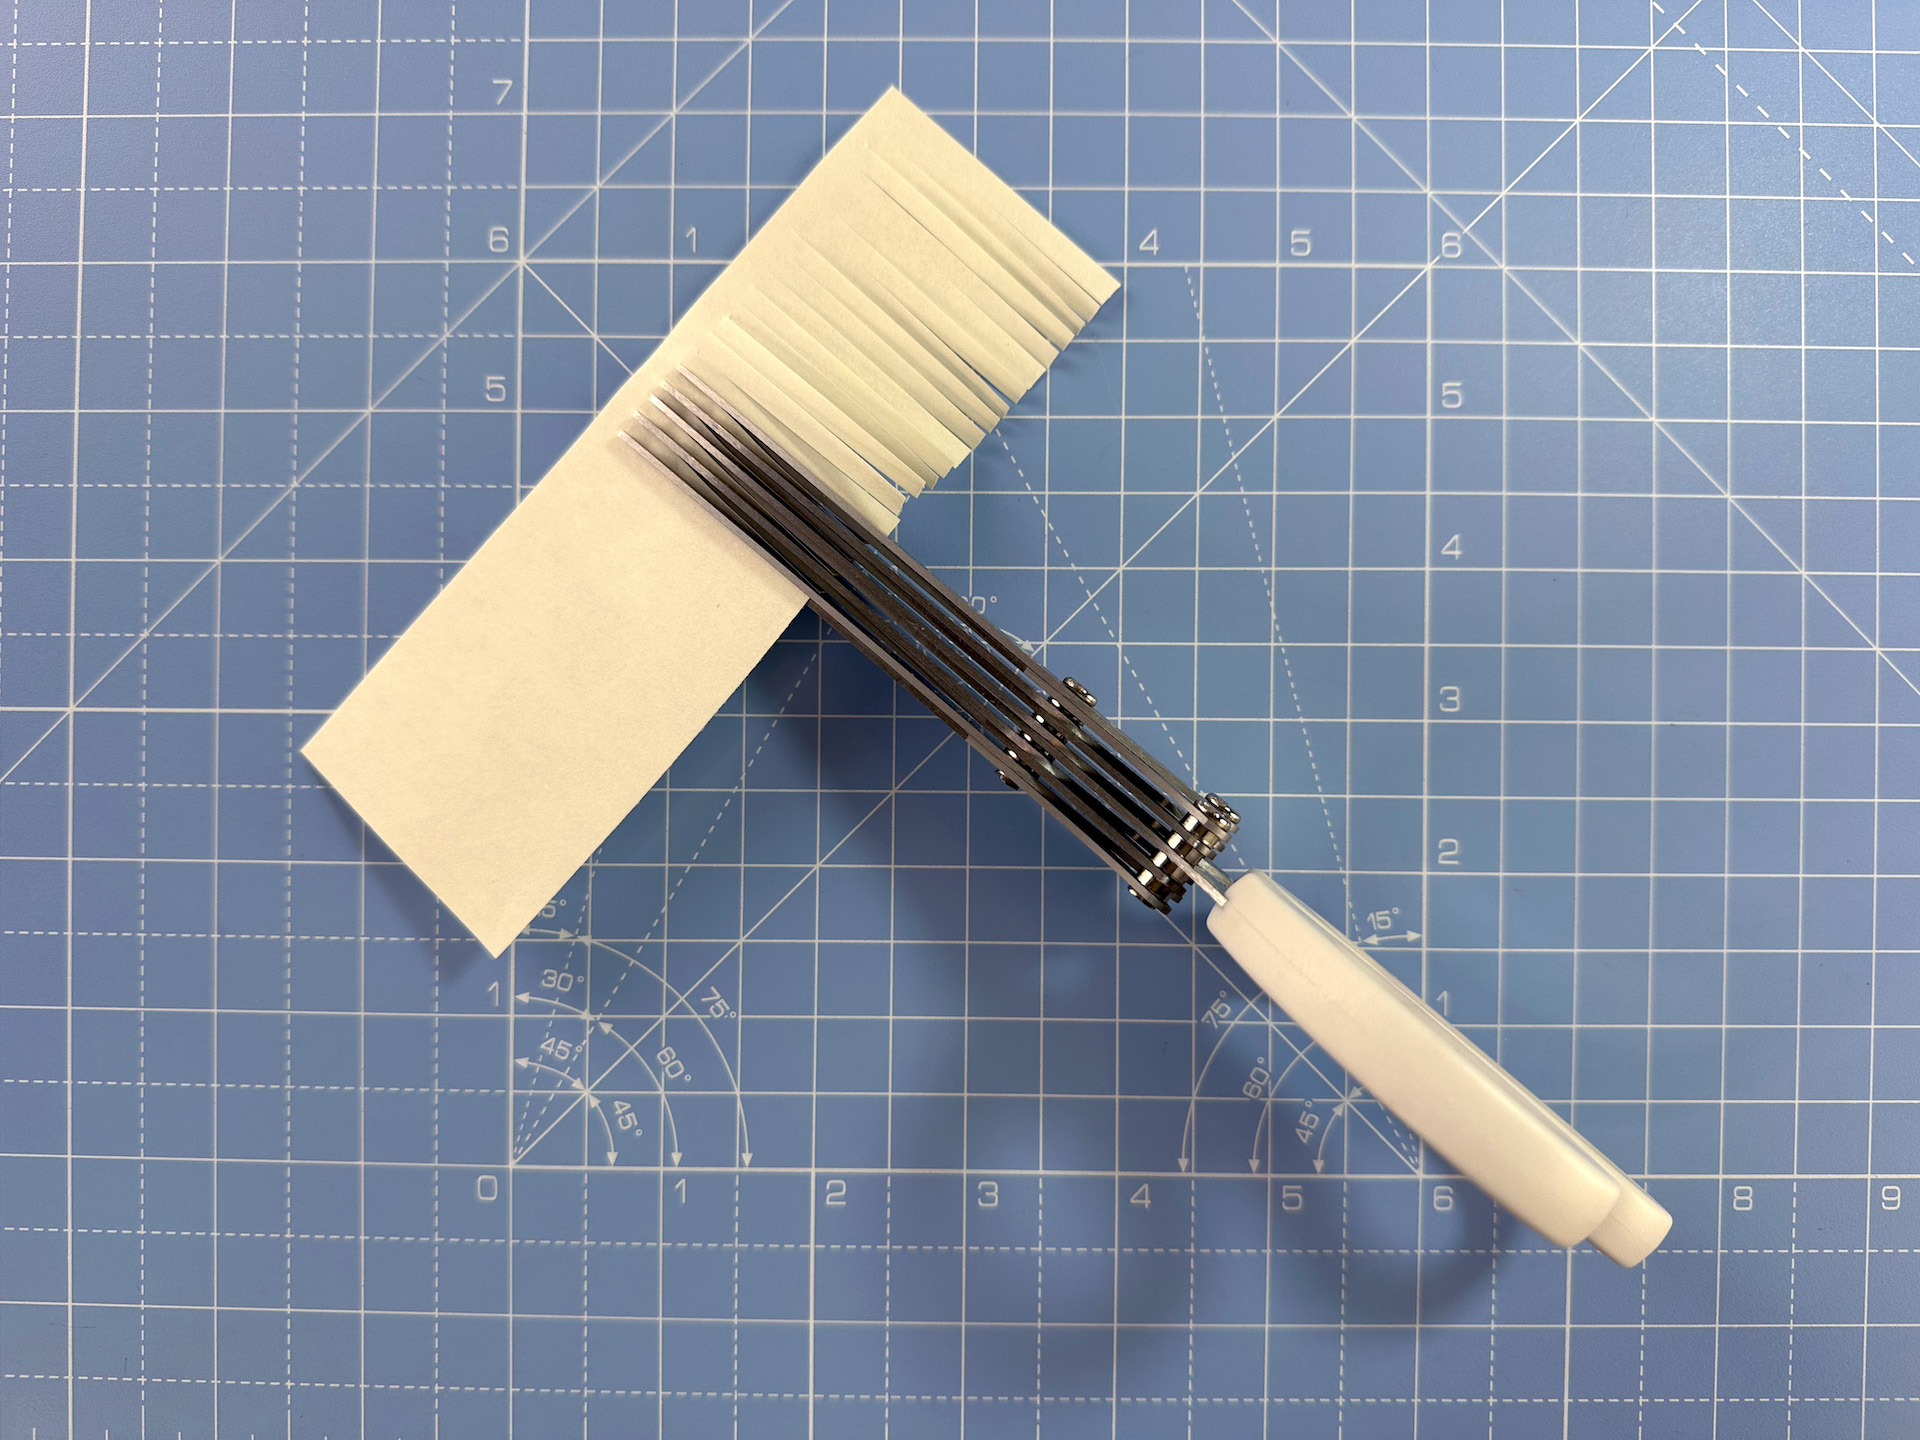
Cut a fringe along the length of the paper. Leave enough room at the edge to be able to add some glue later. Don’t worry too much about the thickness of the fringe (ours are 4mm from using fringe scissors), as you won’t really notice once the paper hyacinth is complete.
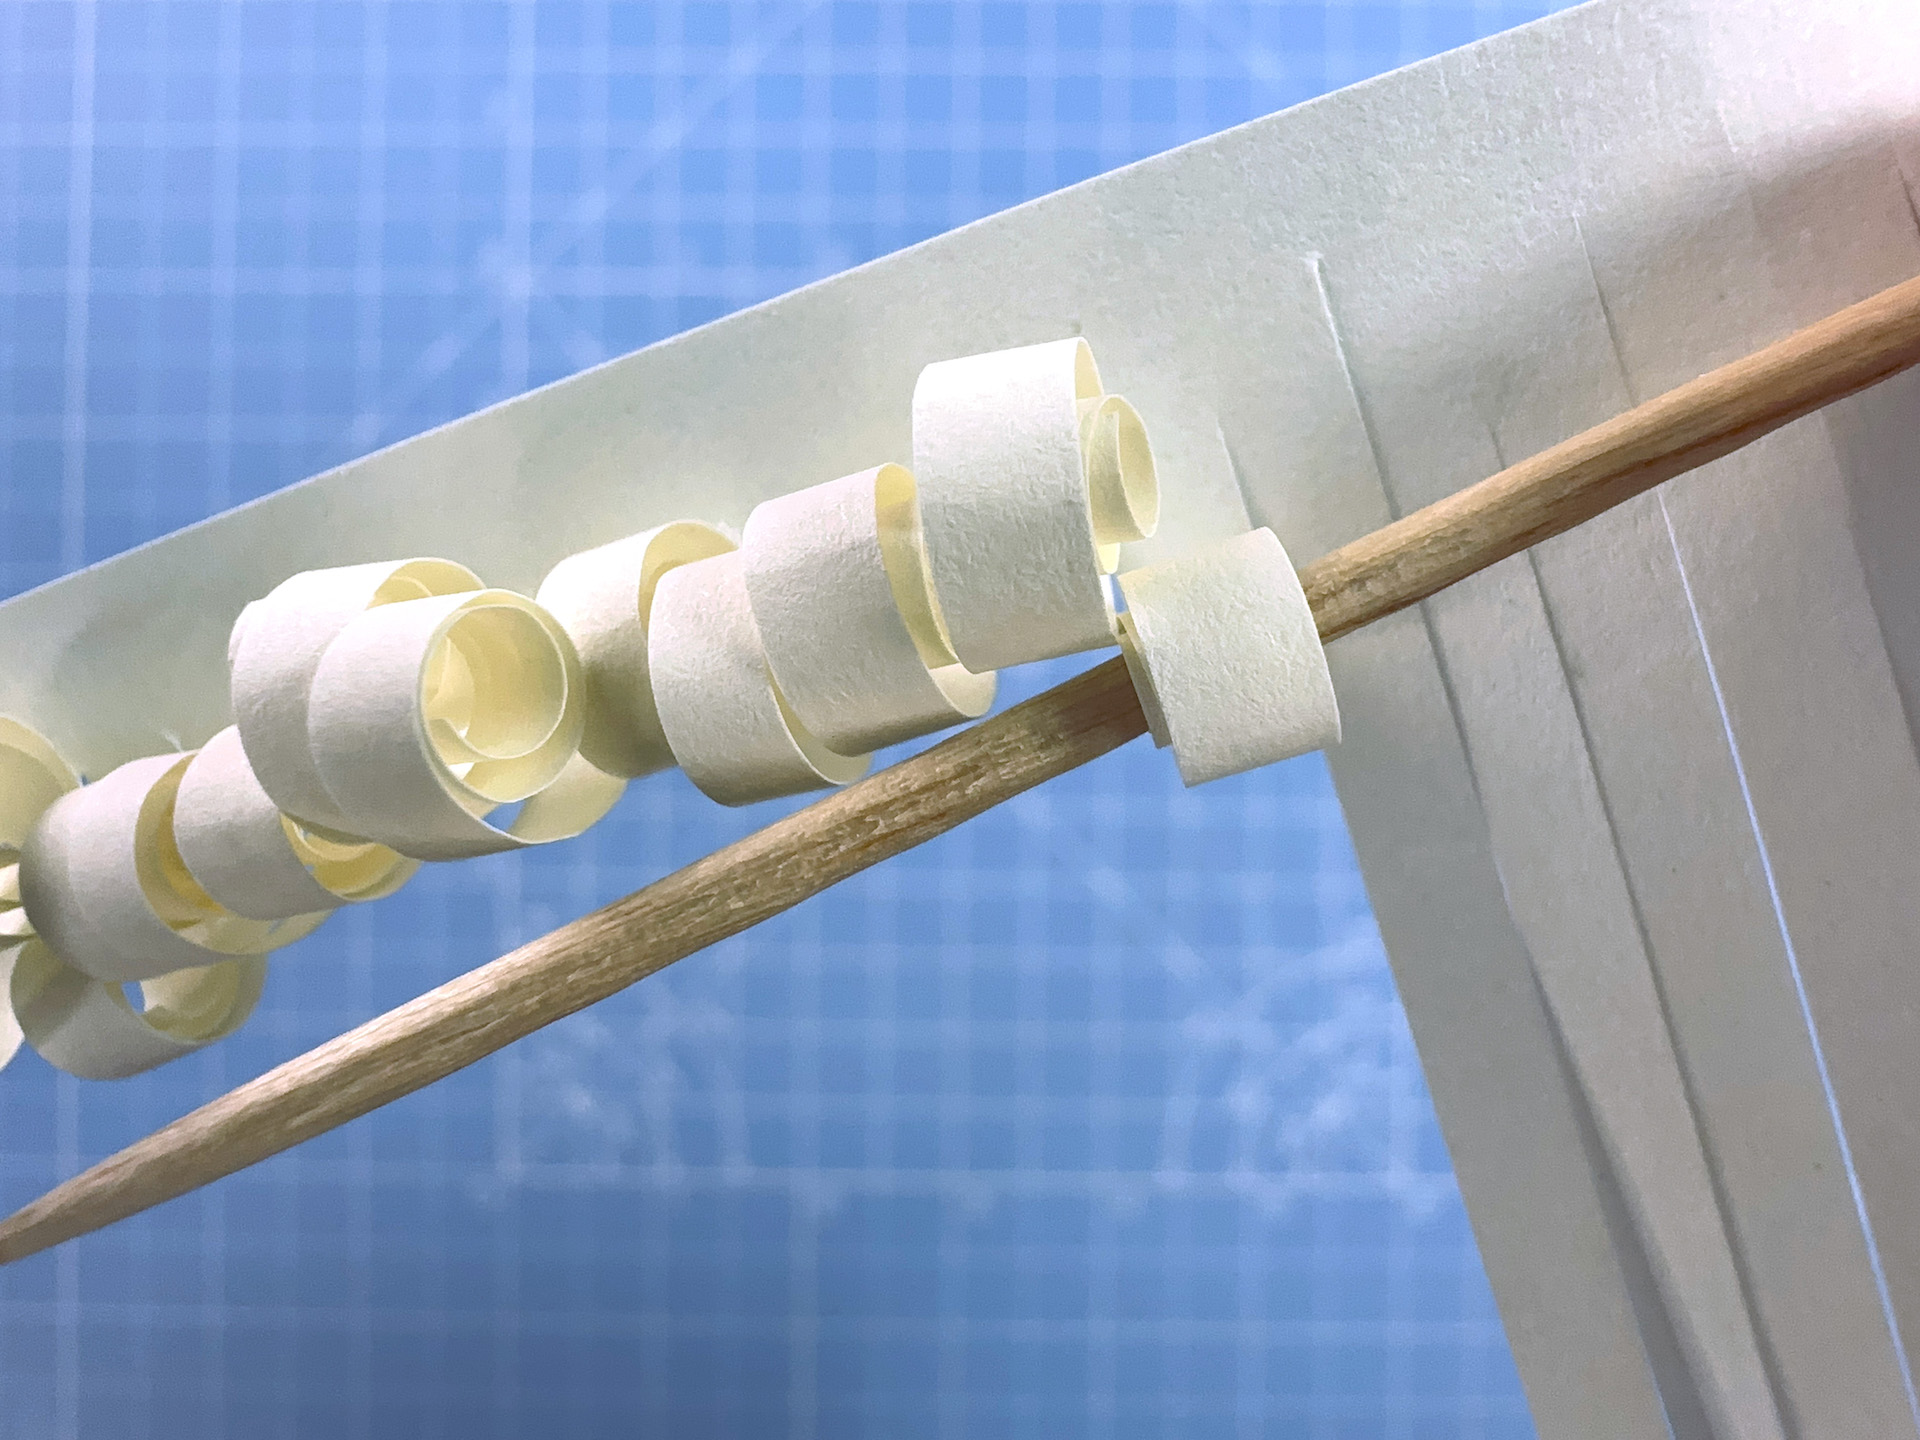
Step 3
Curl each part of the fringe around a cocktail stick. You’ll need to go slowly as it’s easy to rip the paper at this point, but once you get the hang of it you can curl multiple bits of the fringe at the same time.
Step 4
Keep going until it’s all curled. 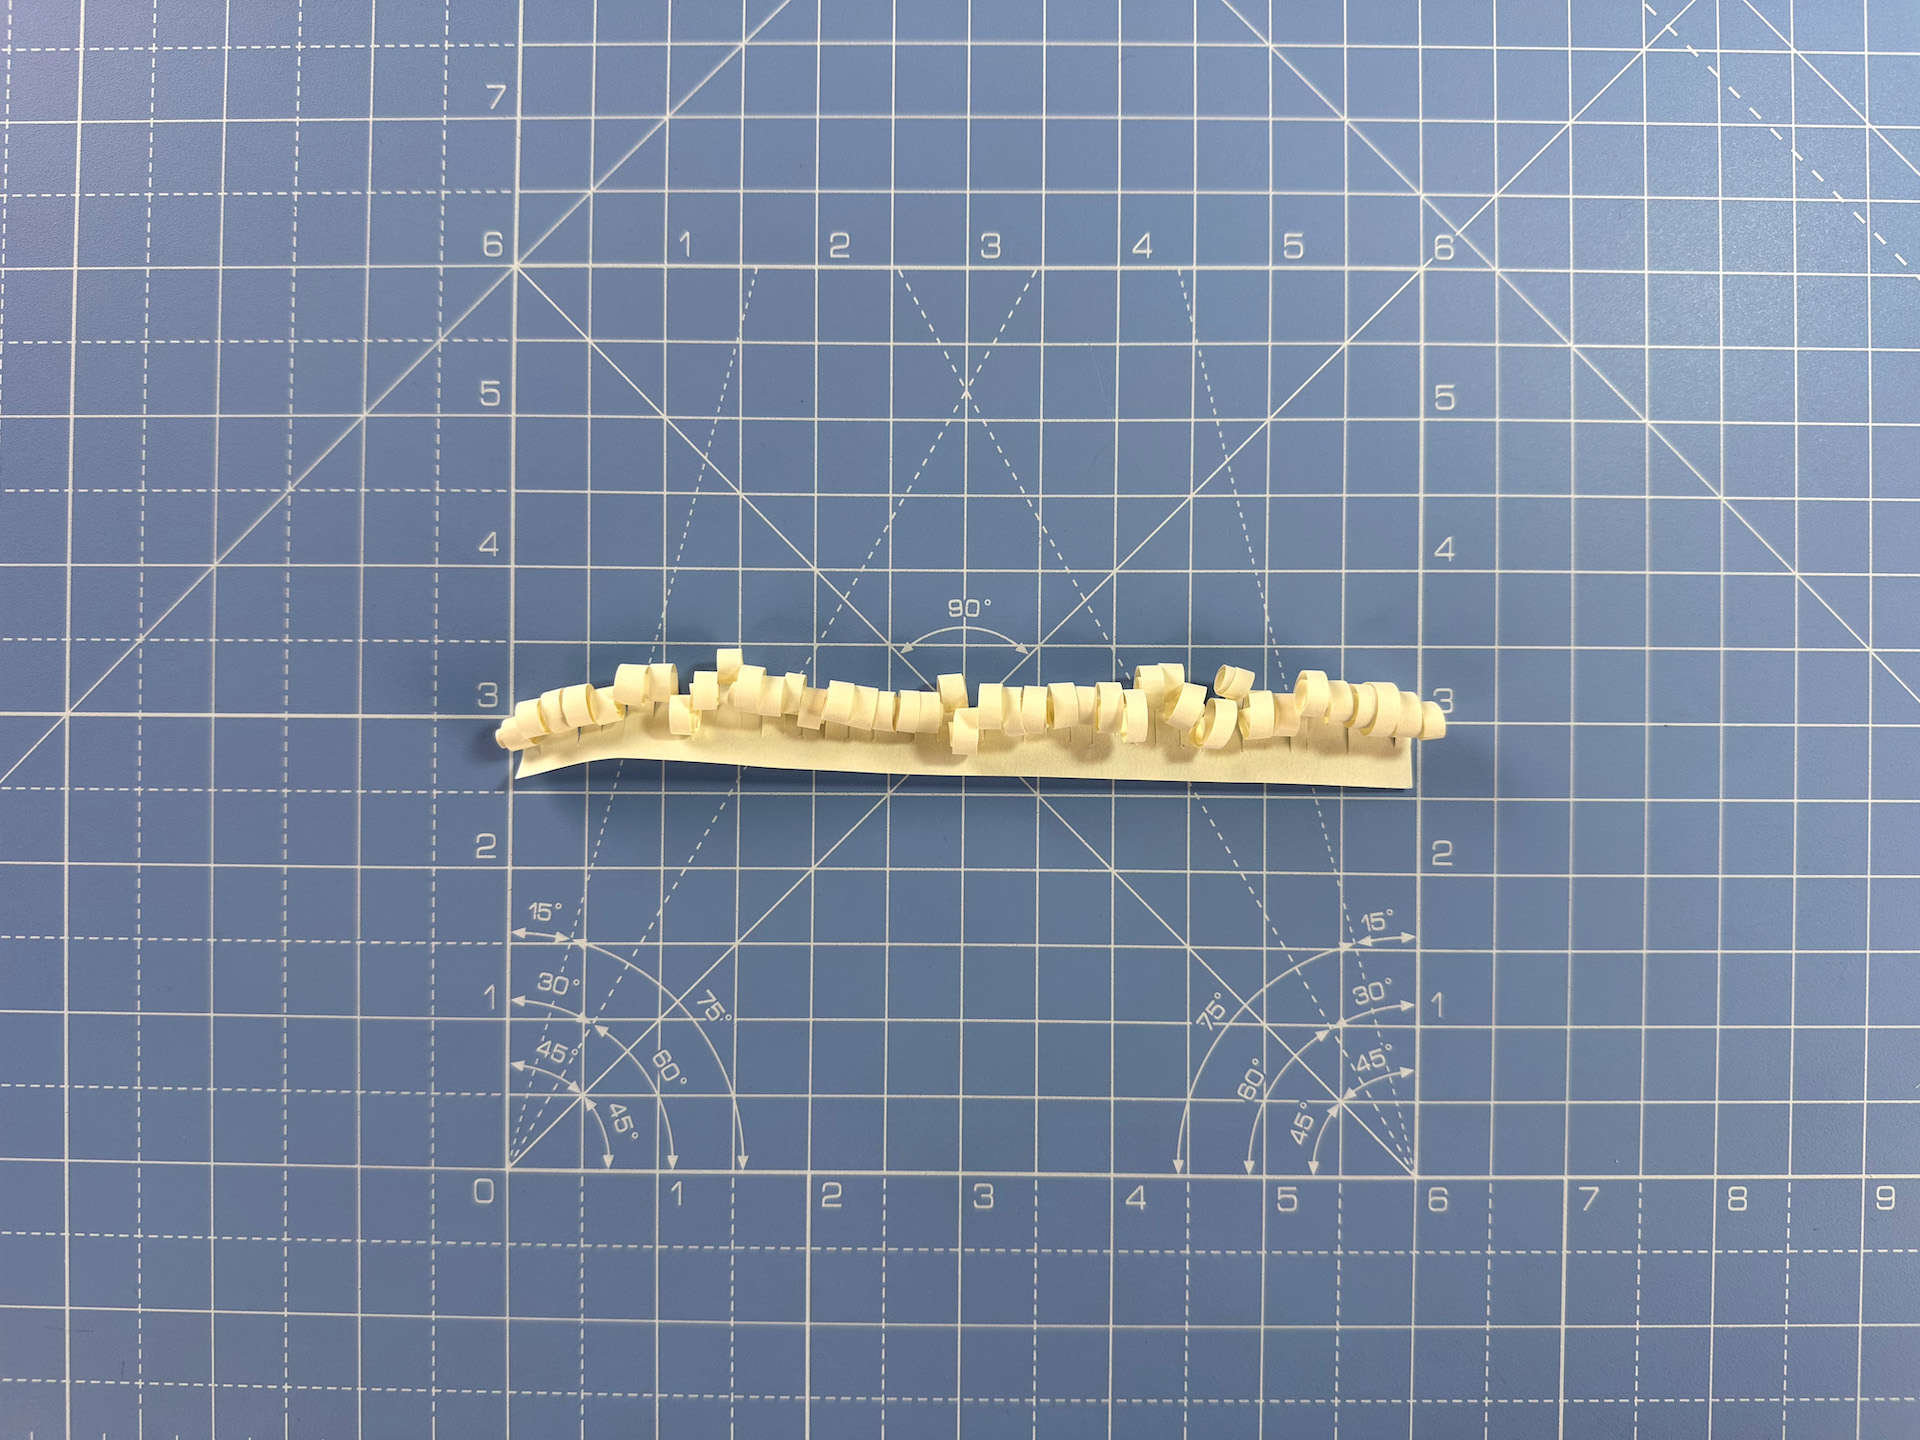
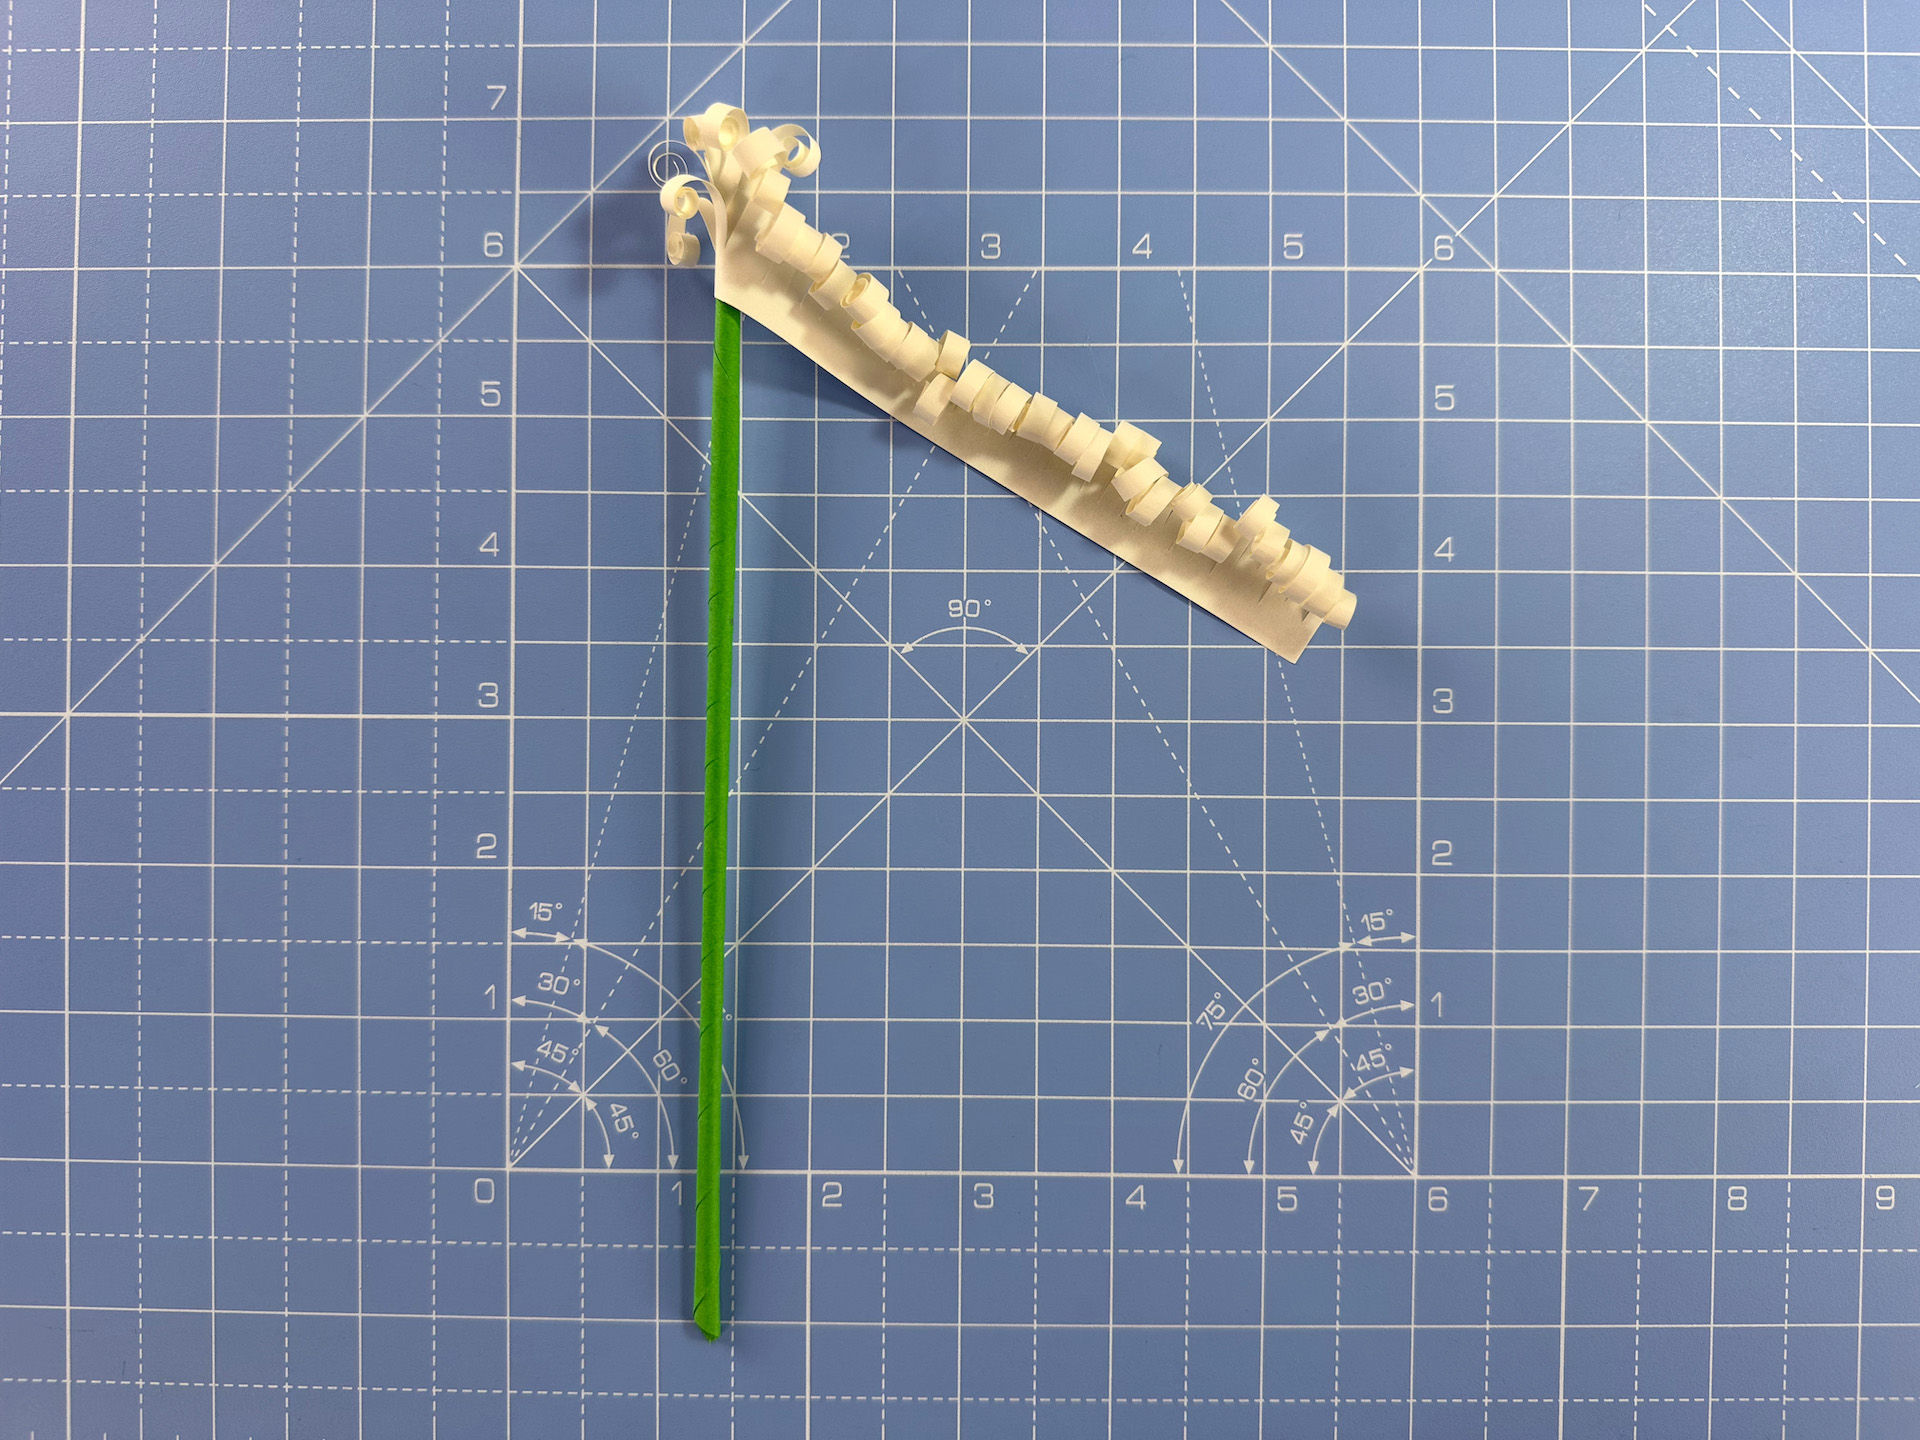
Step 5
Put a line of wet glue along the edge of the fringe (on the reverse side to the way the curls are facing), and position it diagonally along the stalk, start to wind the fringe around the stalk.
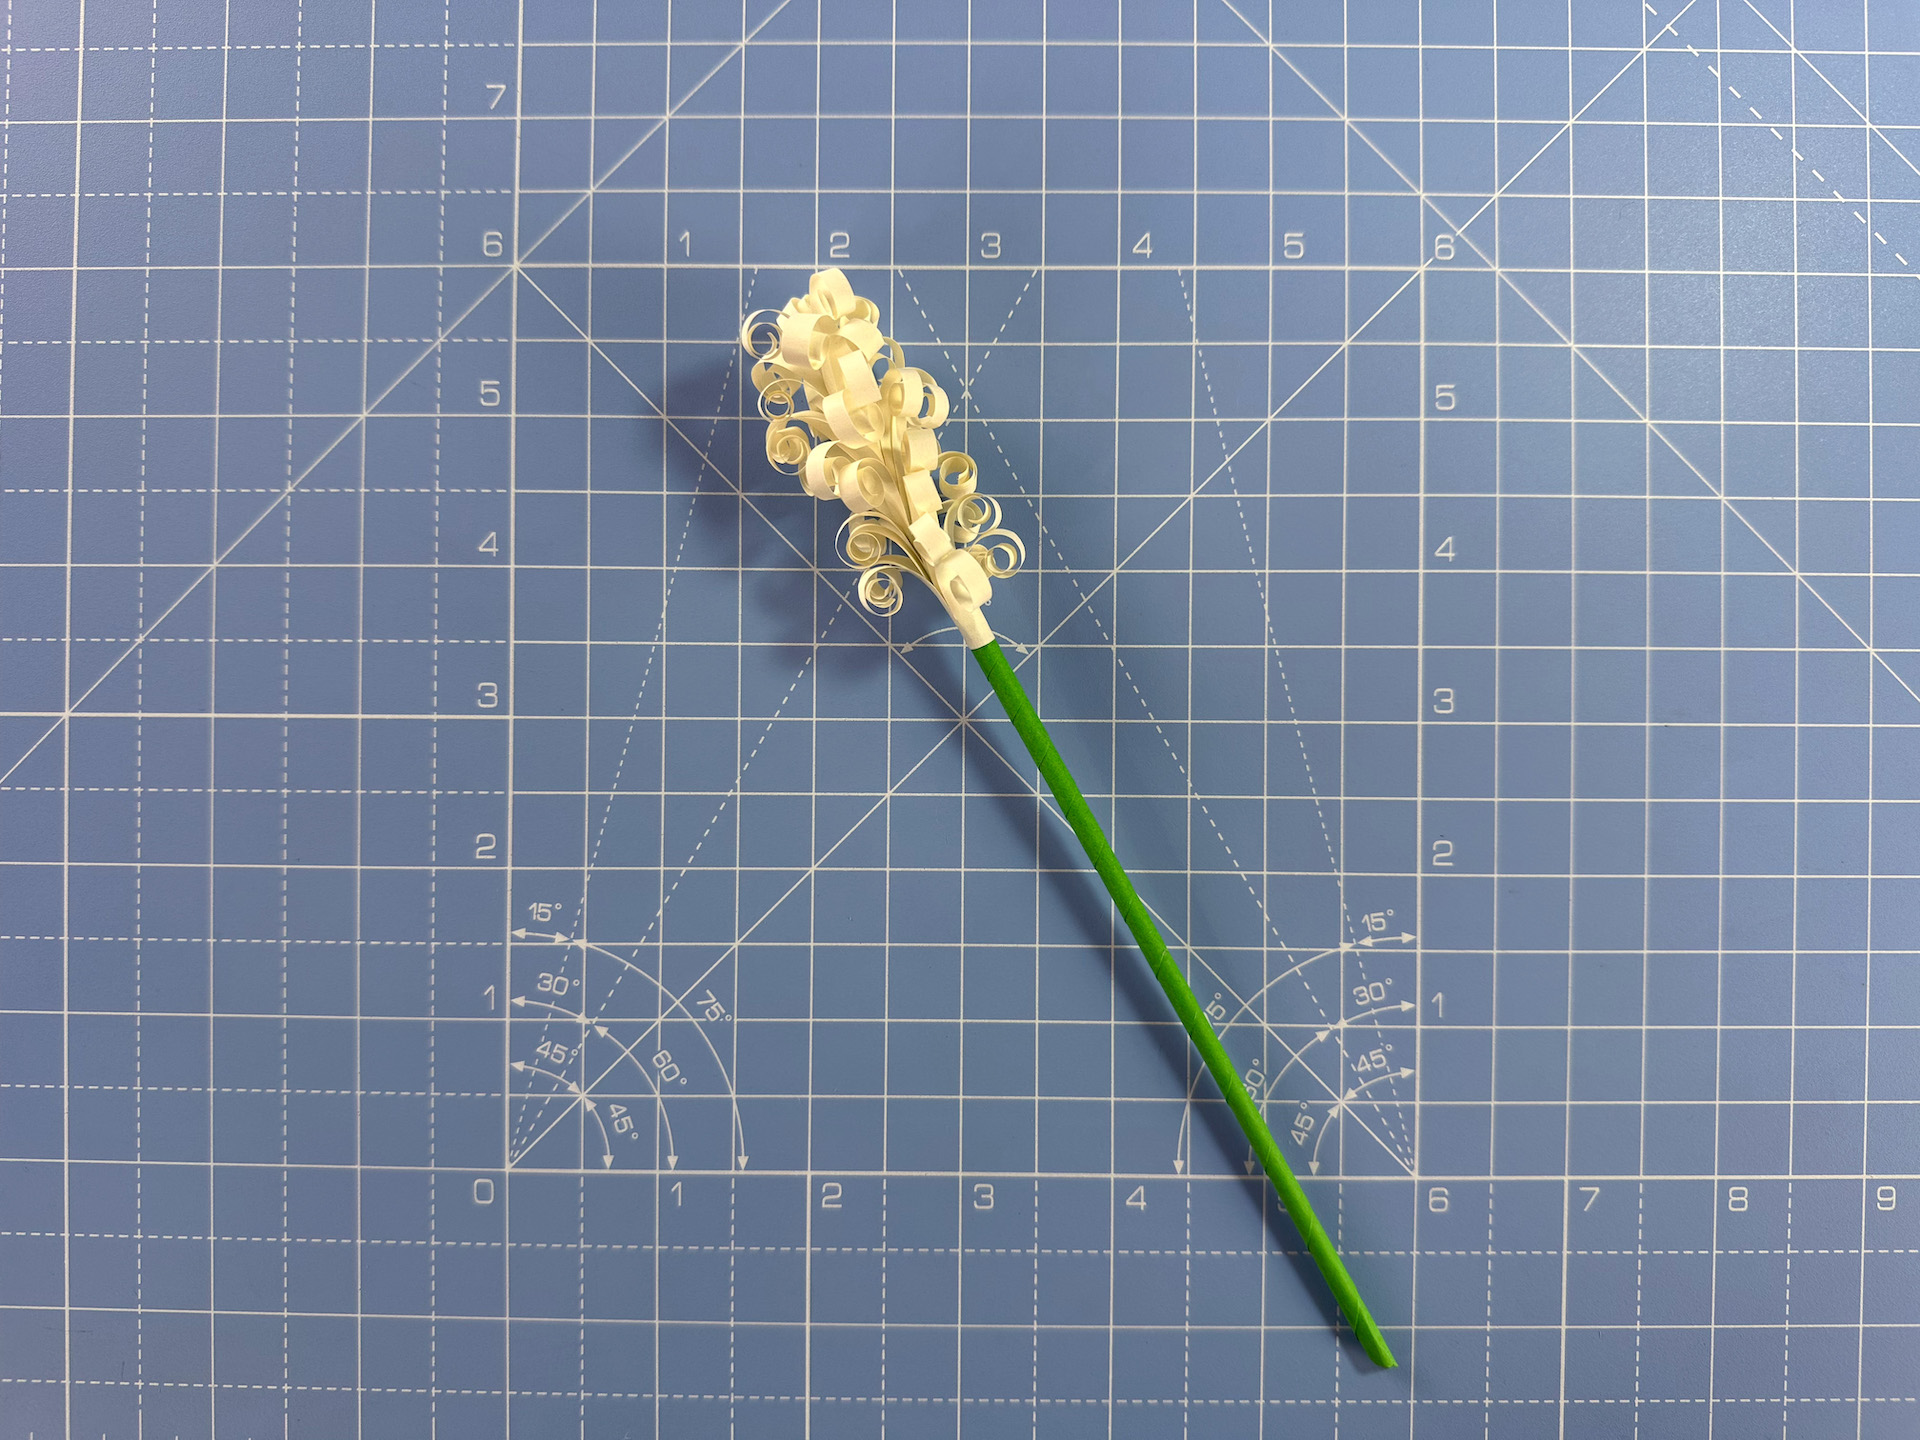
Step 6
Keep going until you’ve wound all the fringe around the stalk. Wiggle the final section into place while the glue is still wet, then set to one side to dry.
Step 7
Make more paper hyacinths in the same way. Vary the colours if you like, or keep them the same. We’ve made a whole bunch here, but for the bouquet itself, we’ve used 10 paper hyacinths.
Side note: if you start with a narrower strip of purple paper (say, 3 x 15cm), you can make paper lavender in the same way.
How to make an origami bud
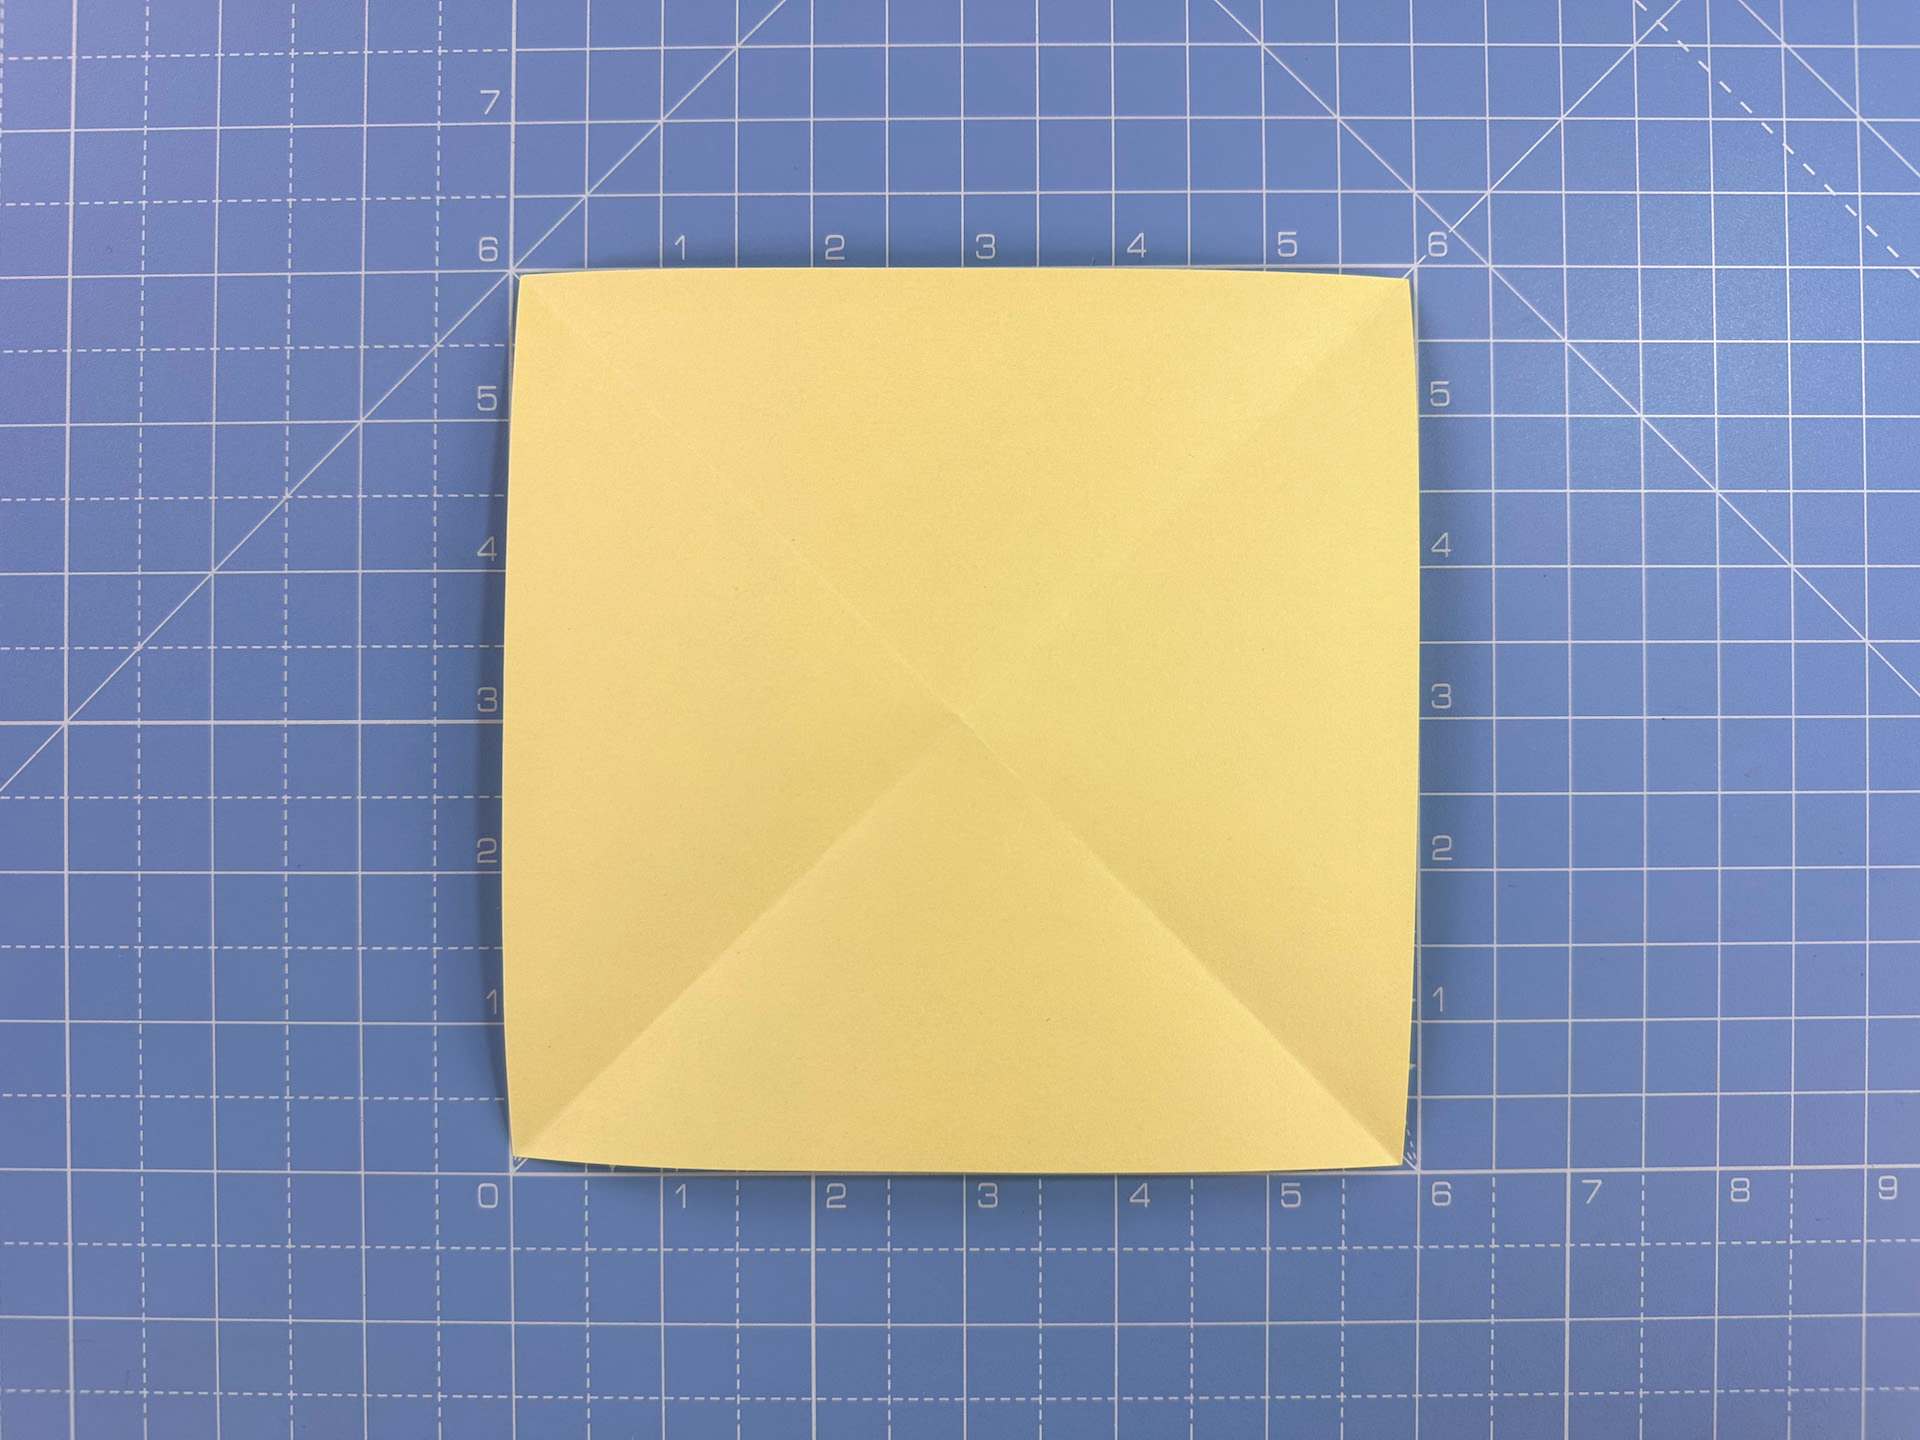
Step 1
Use a piece of 5 x 5cm paper. For the purposes of this tutorial, we are using a 15 x 15cm piece so you can clearly see where the folds go.
Fold in half along both diagonals.
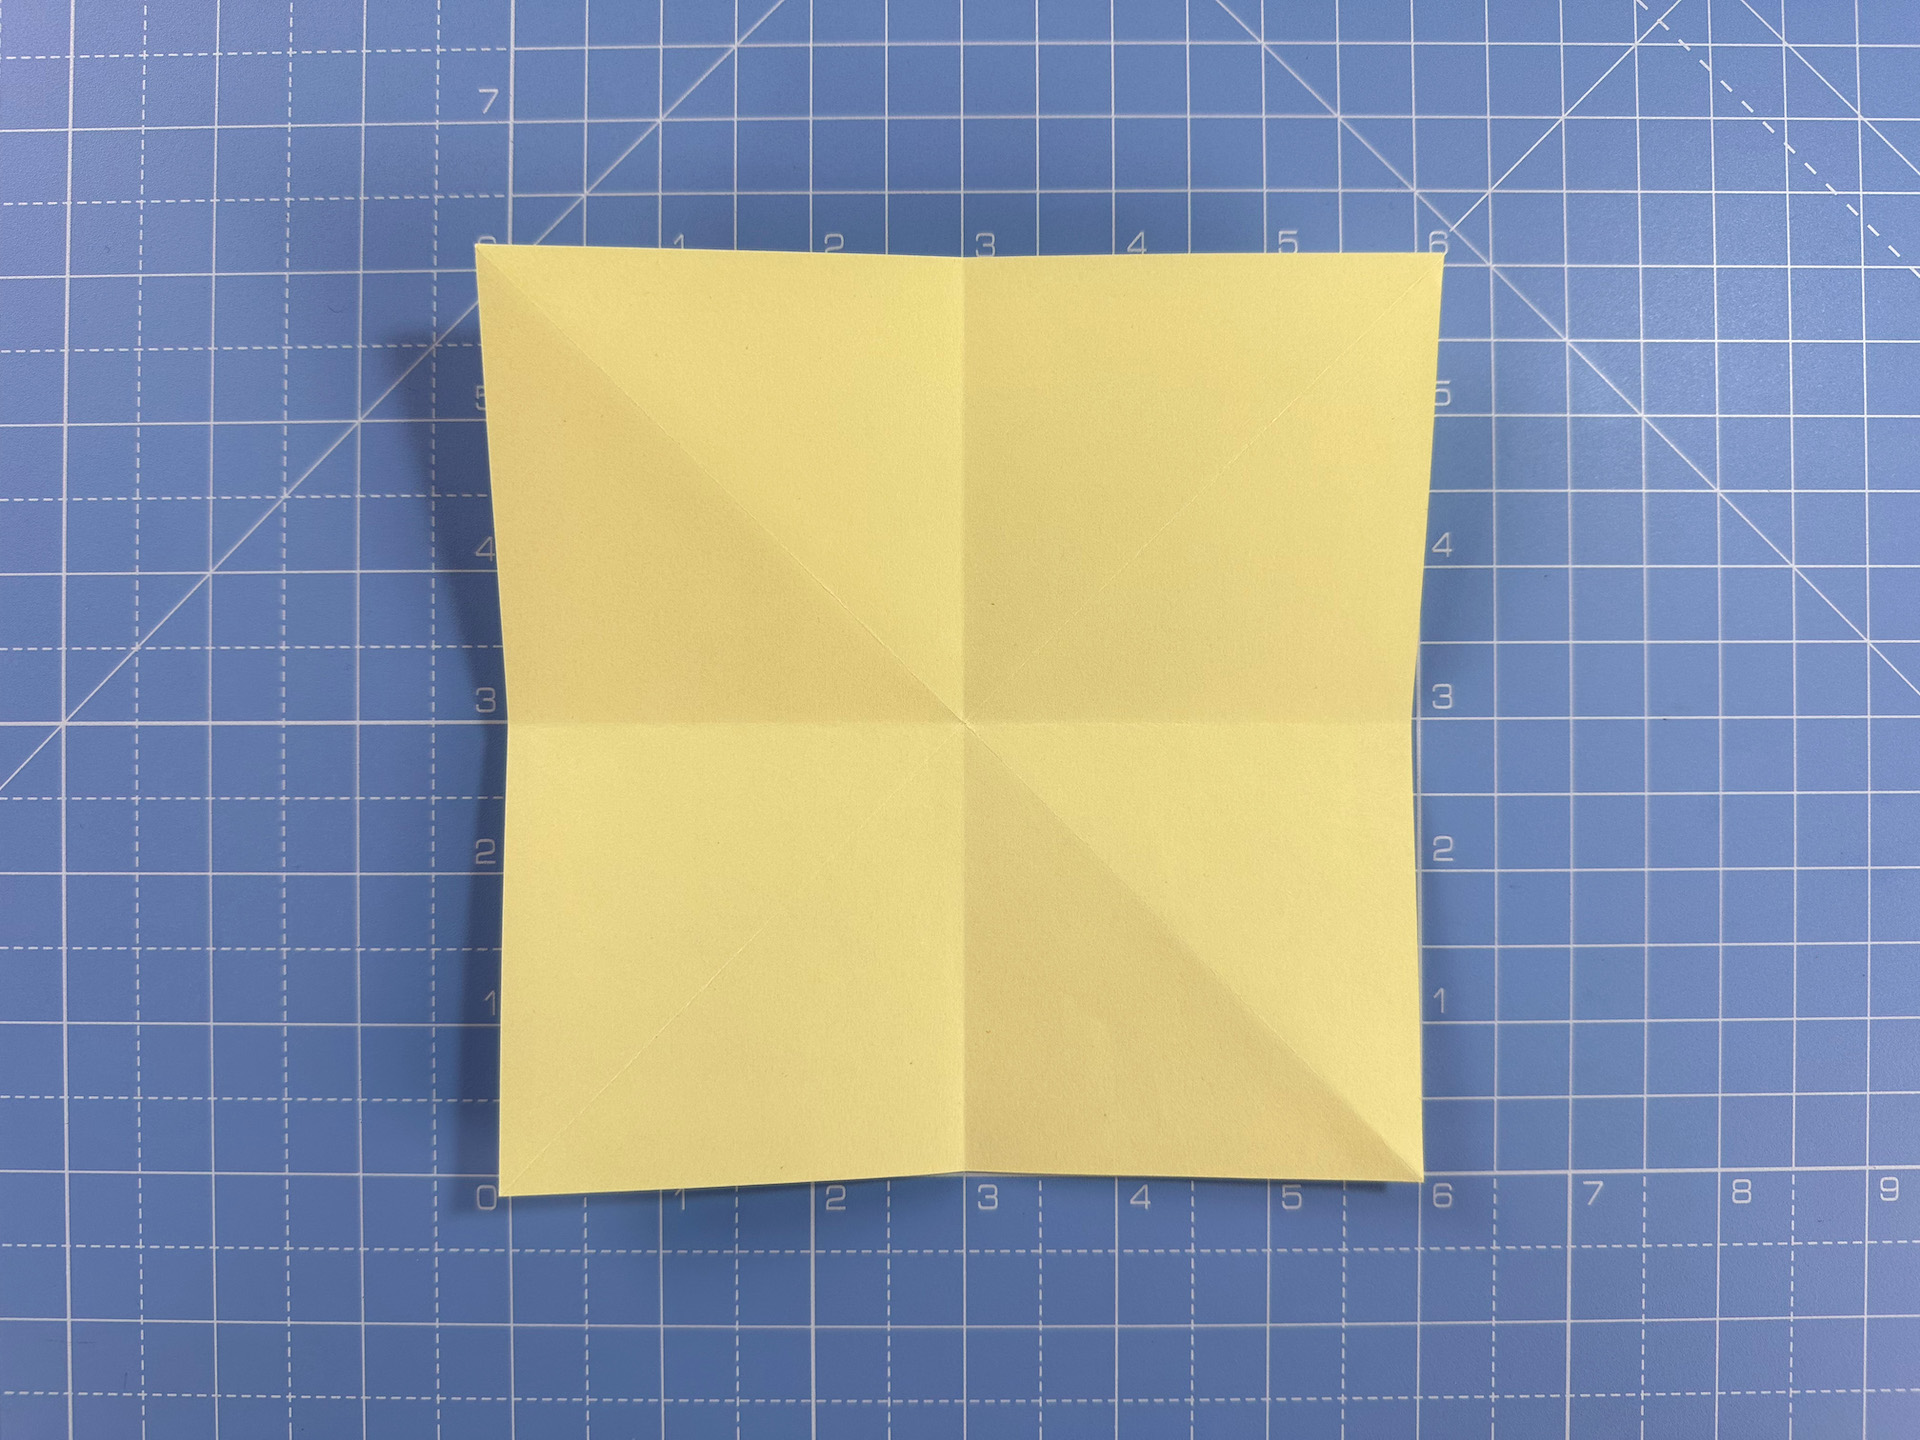
Step 2
Turn the paper over and book fold along both the horizontal and vertical.
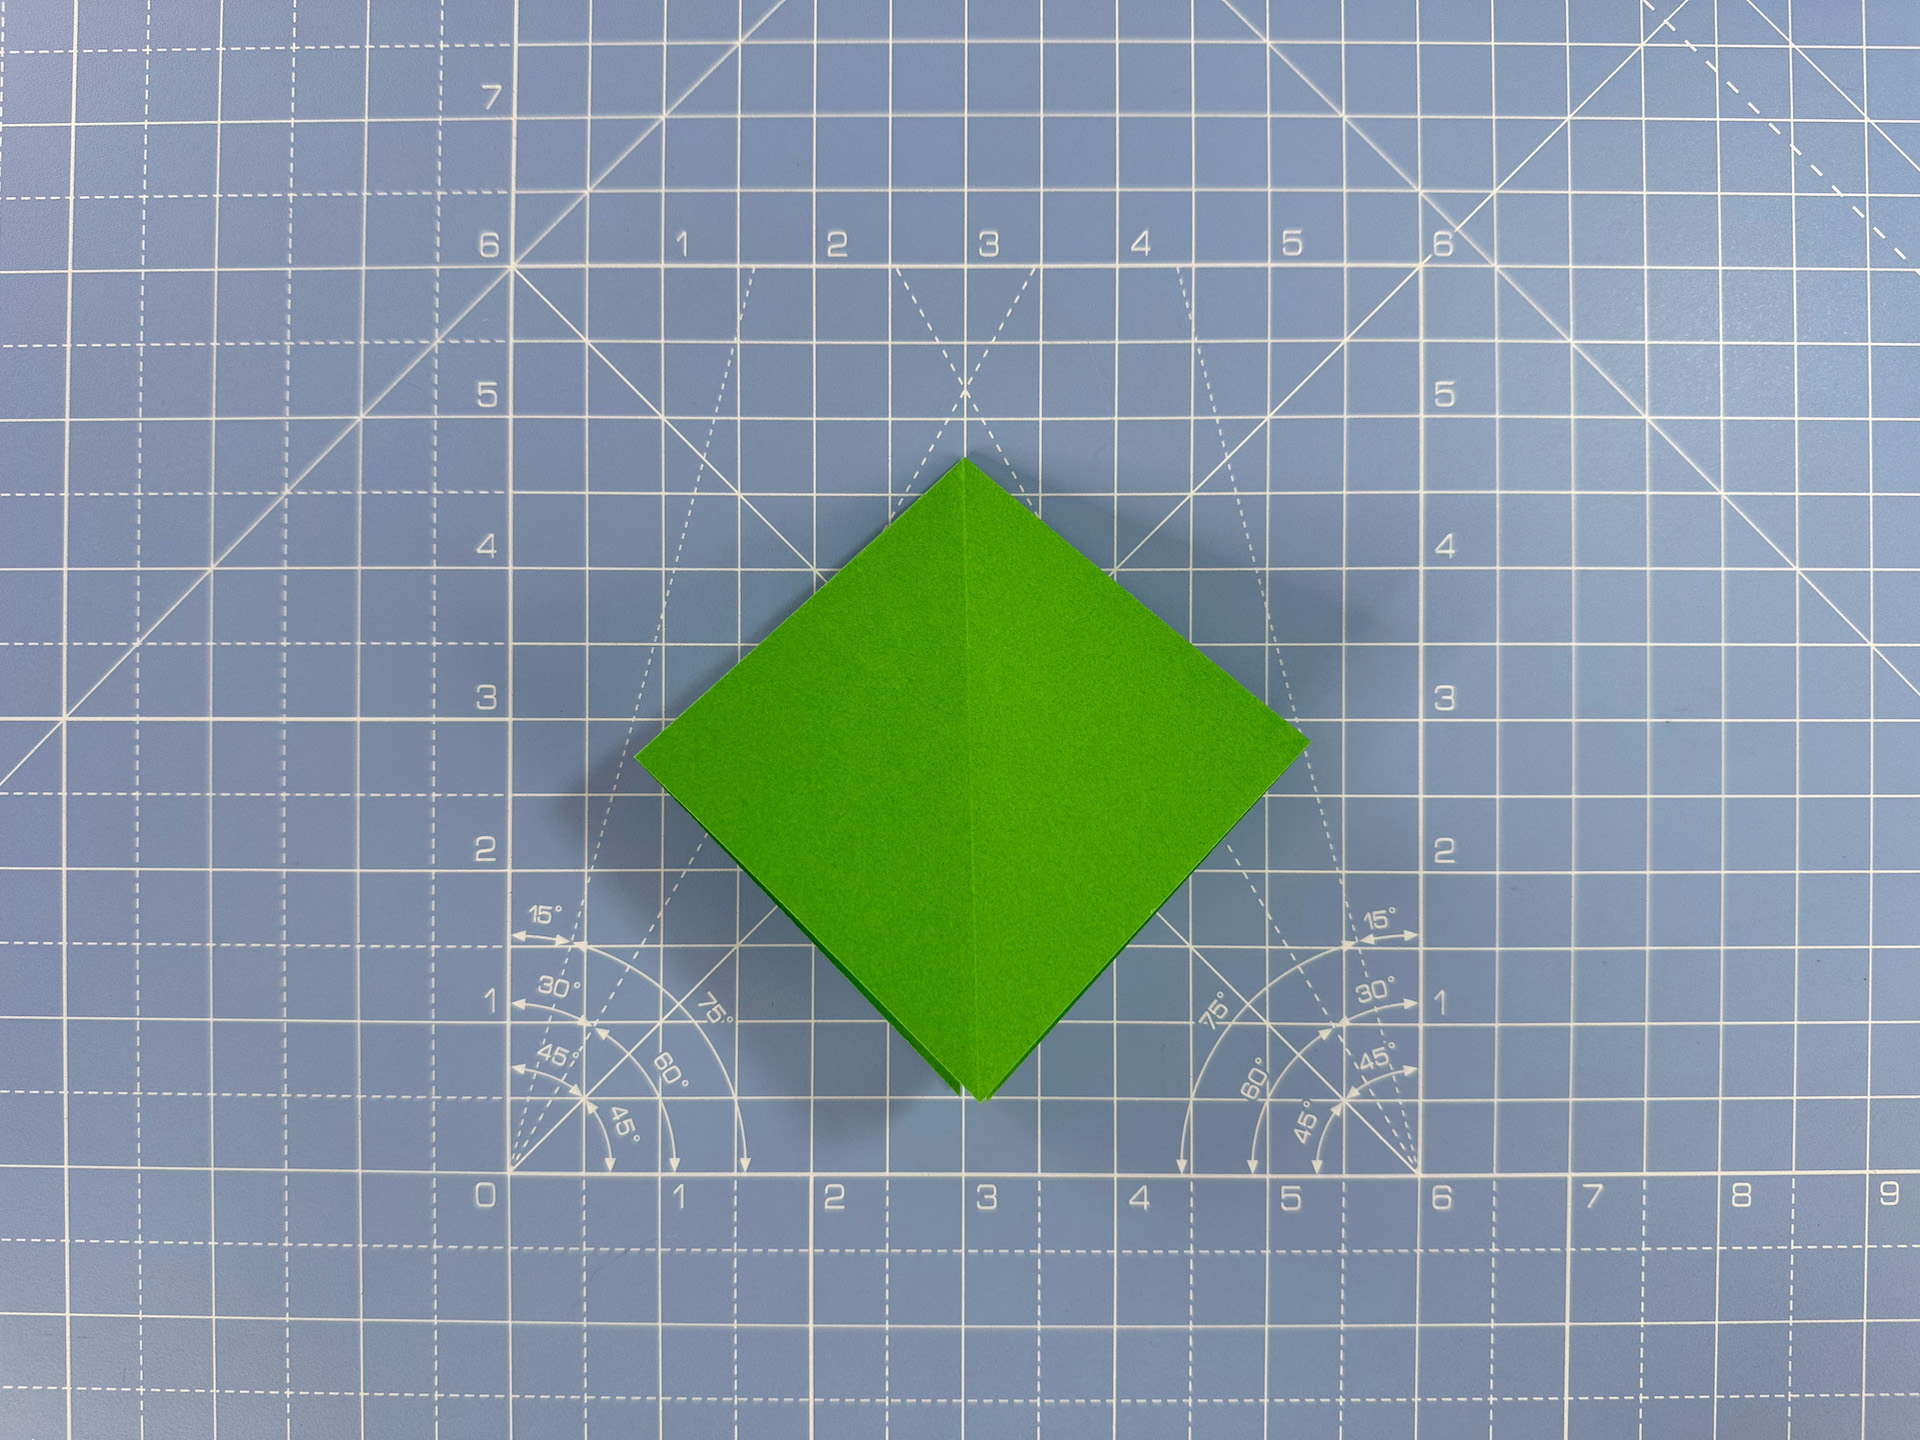
Step 3
Collapse the paper into a square diamond.

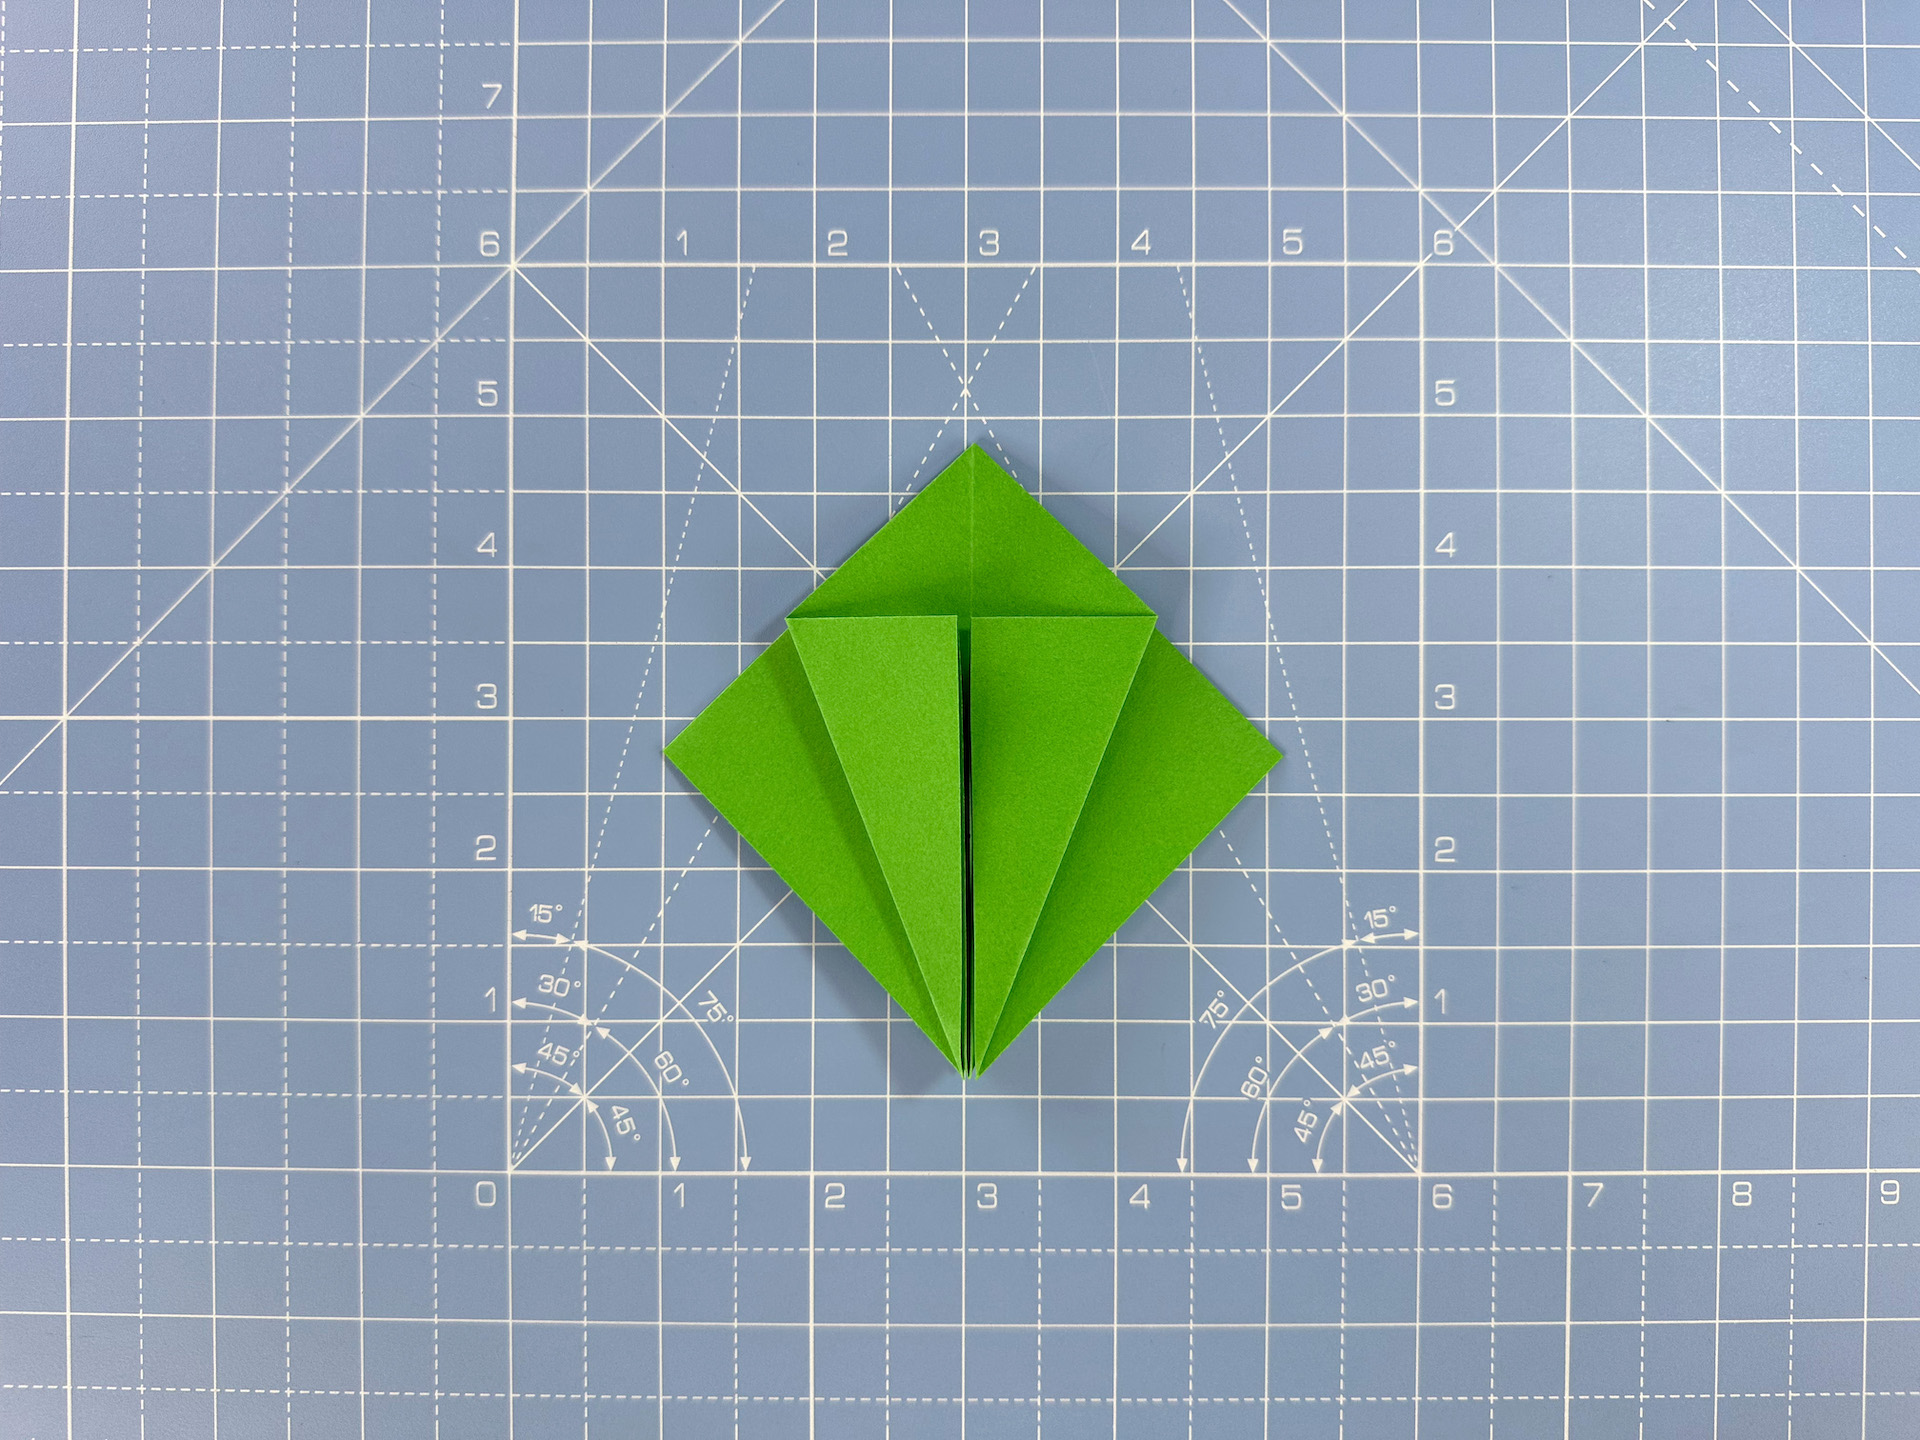
Step 4
Make sure the open end is facing towards the top, then fold the bottom (closed) edges up to meet the centre line, to create a kite shape.
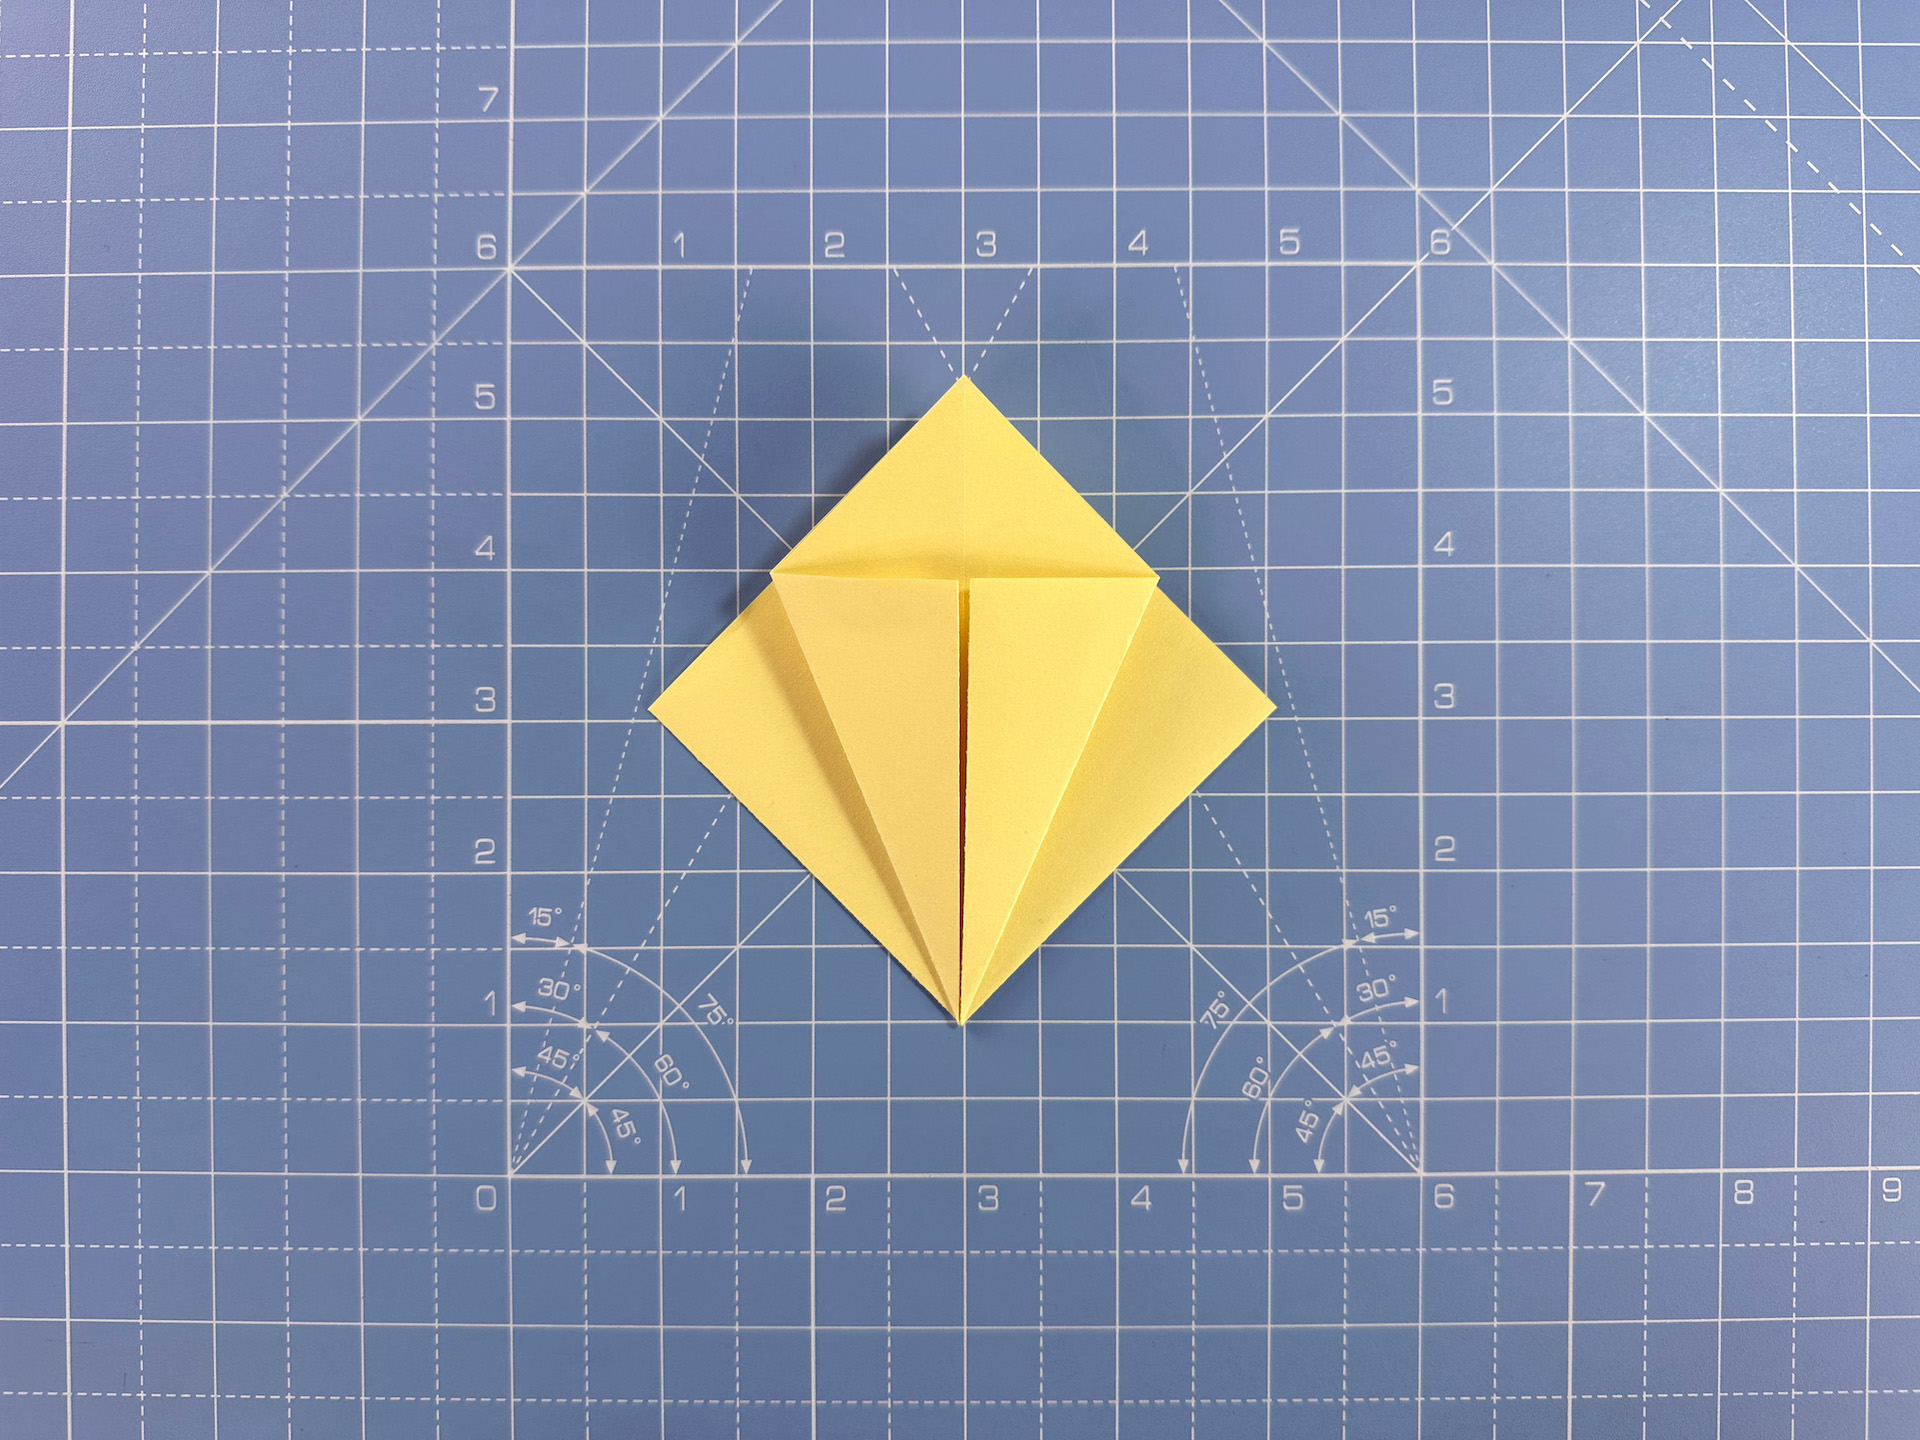
Step 5
Repeat on the other side.

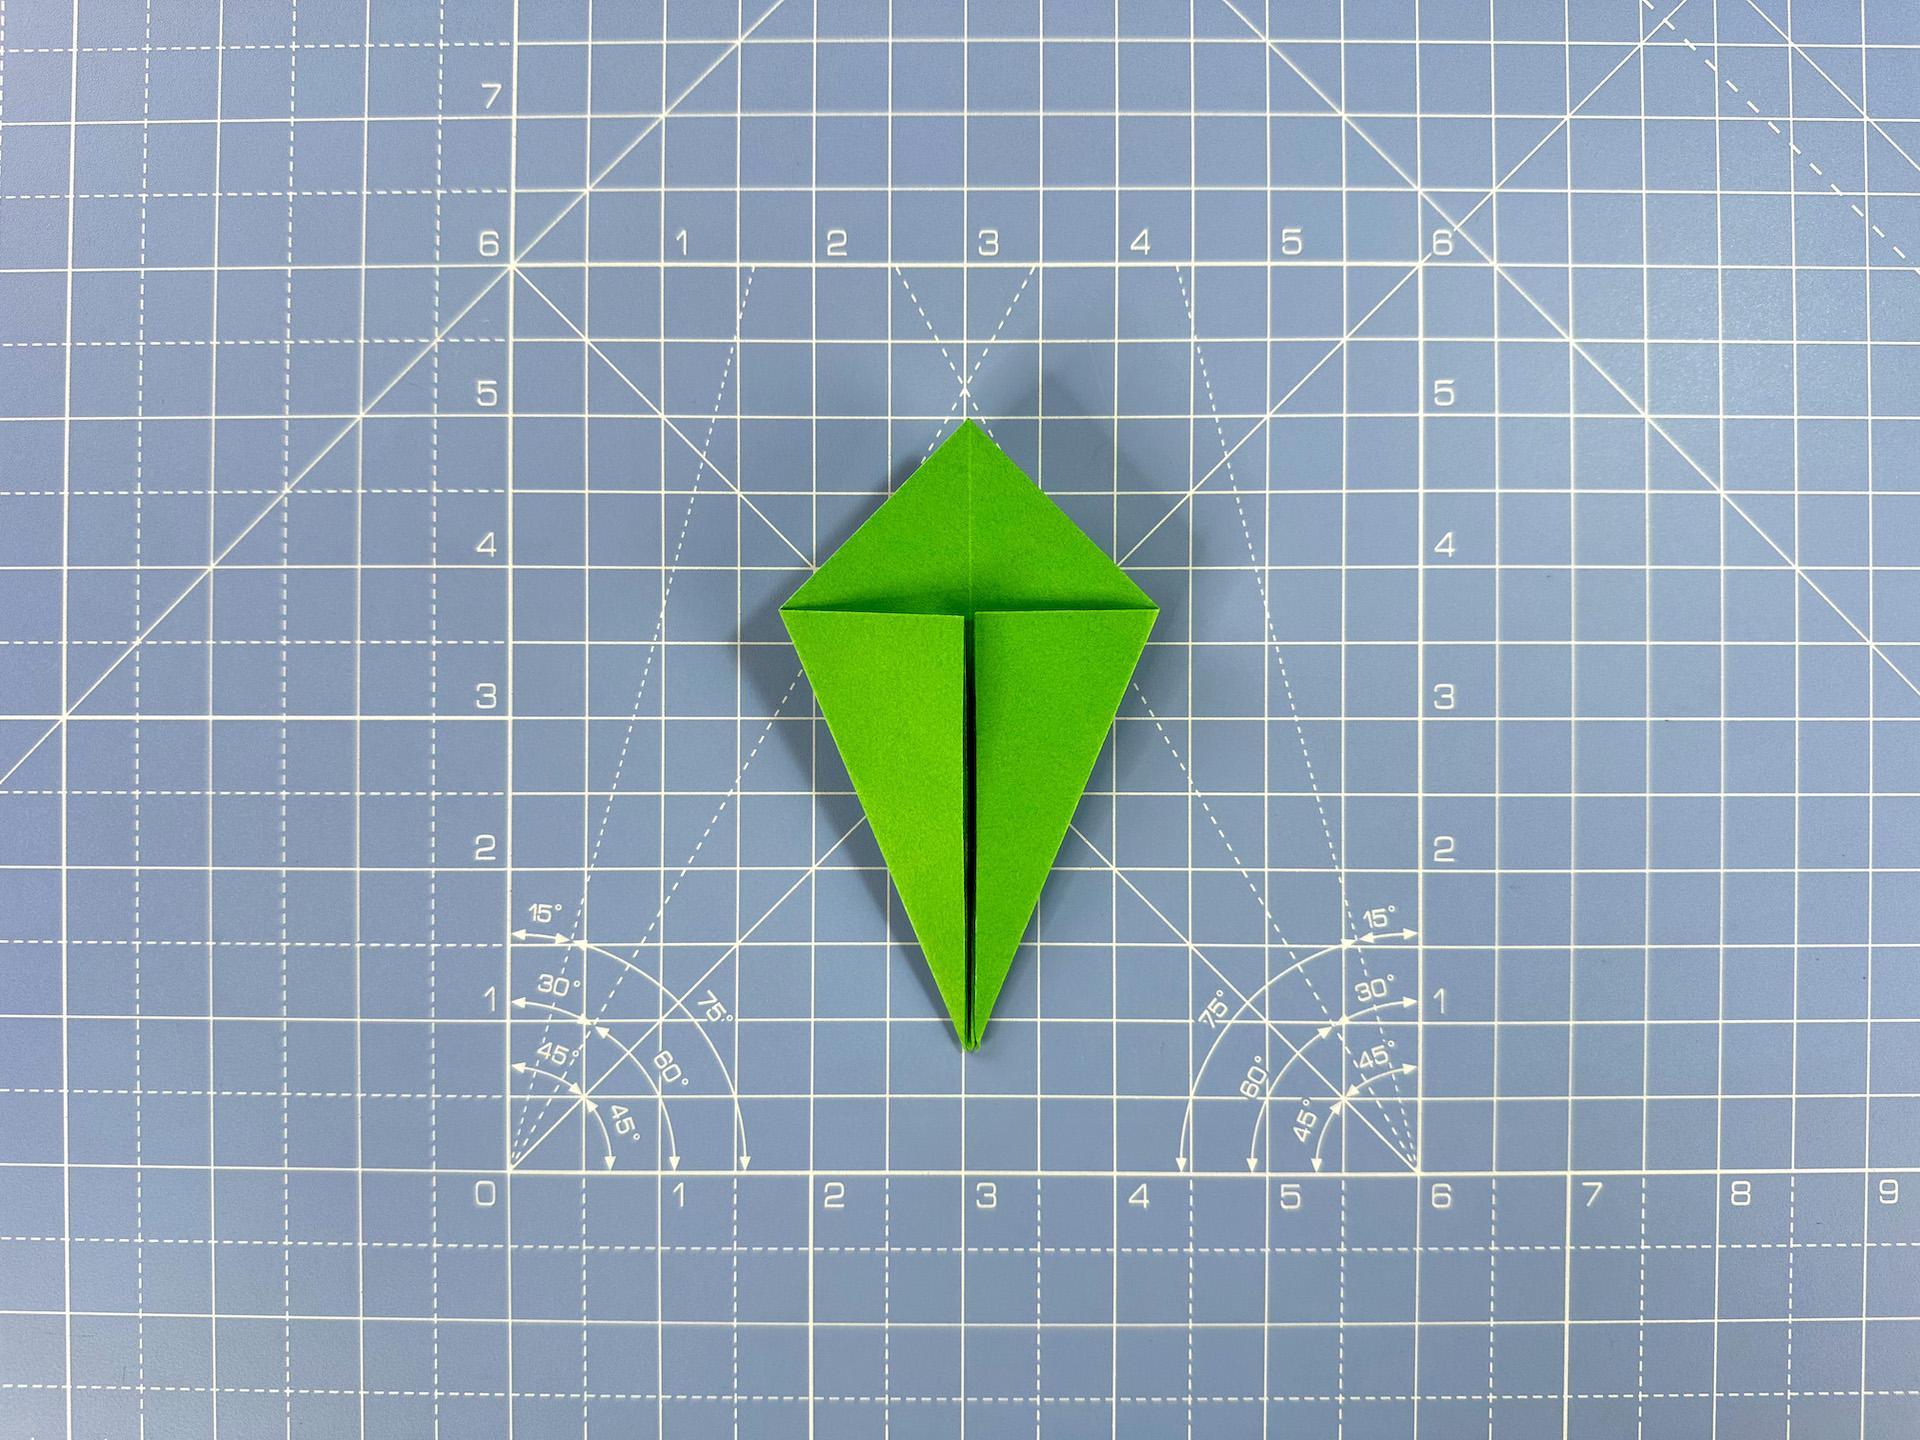
Step 6
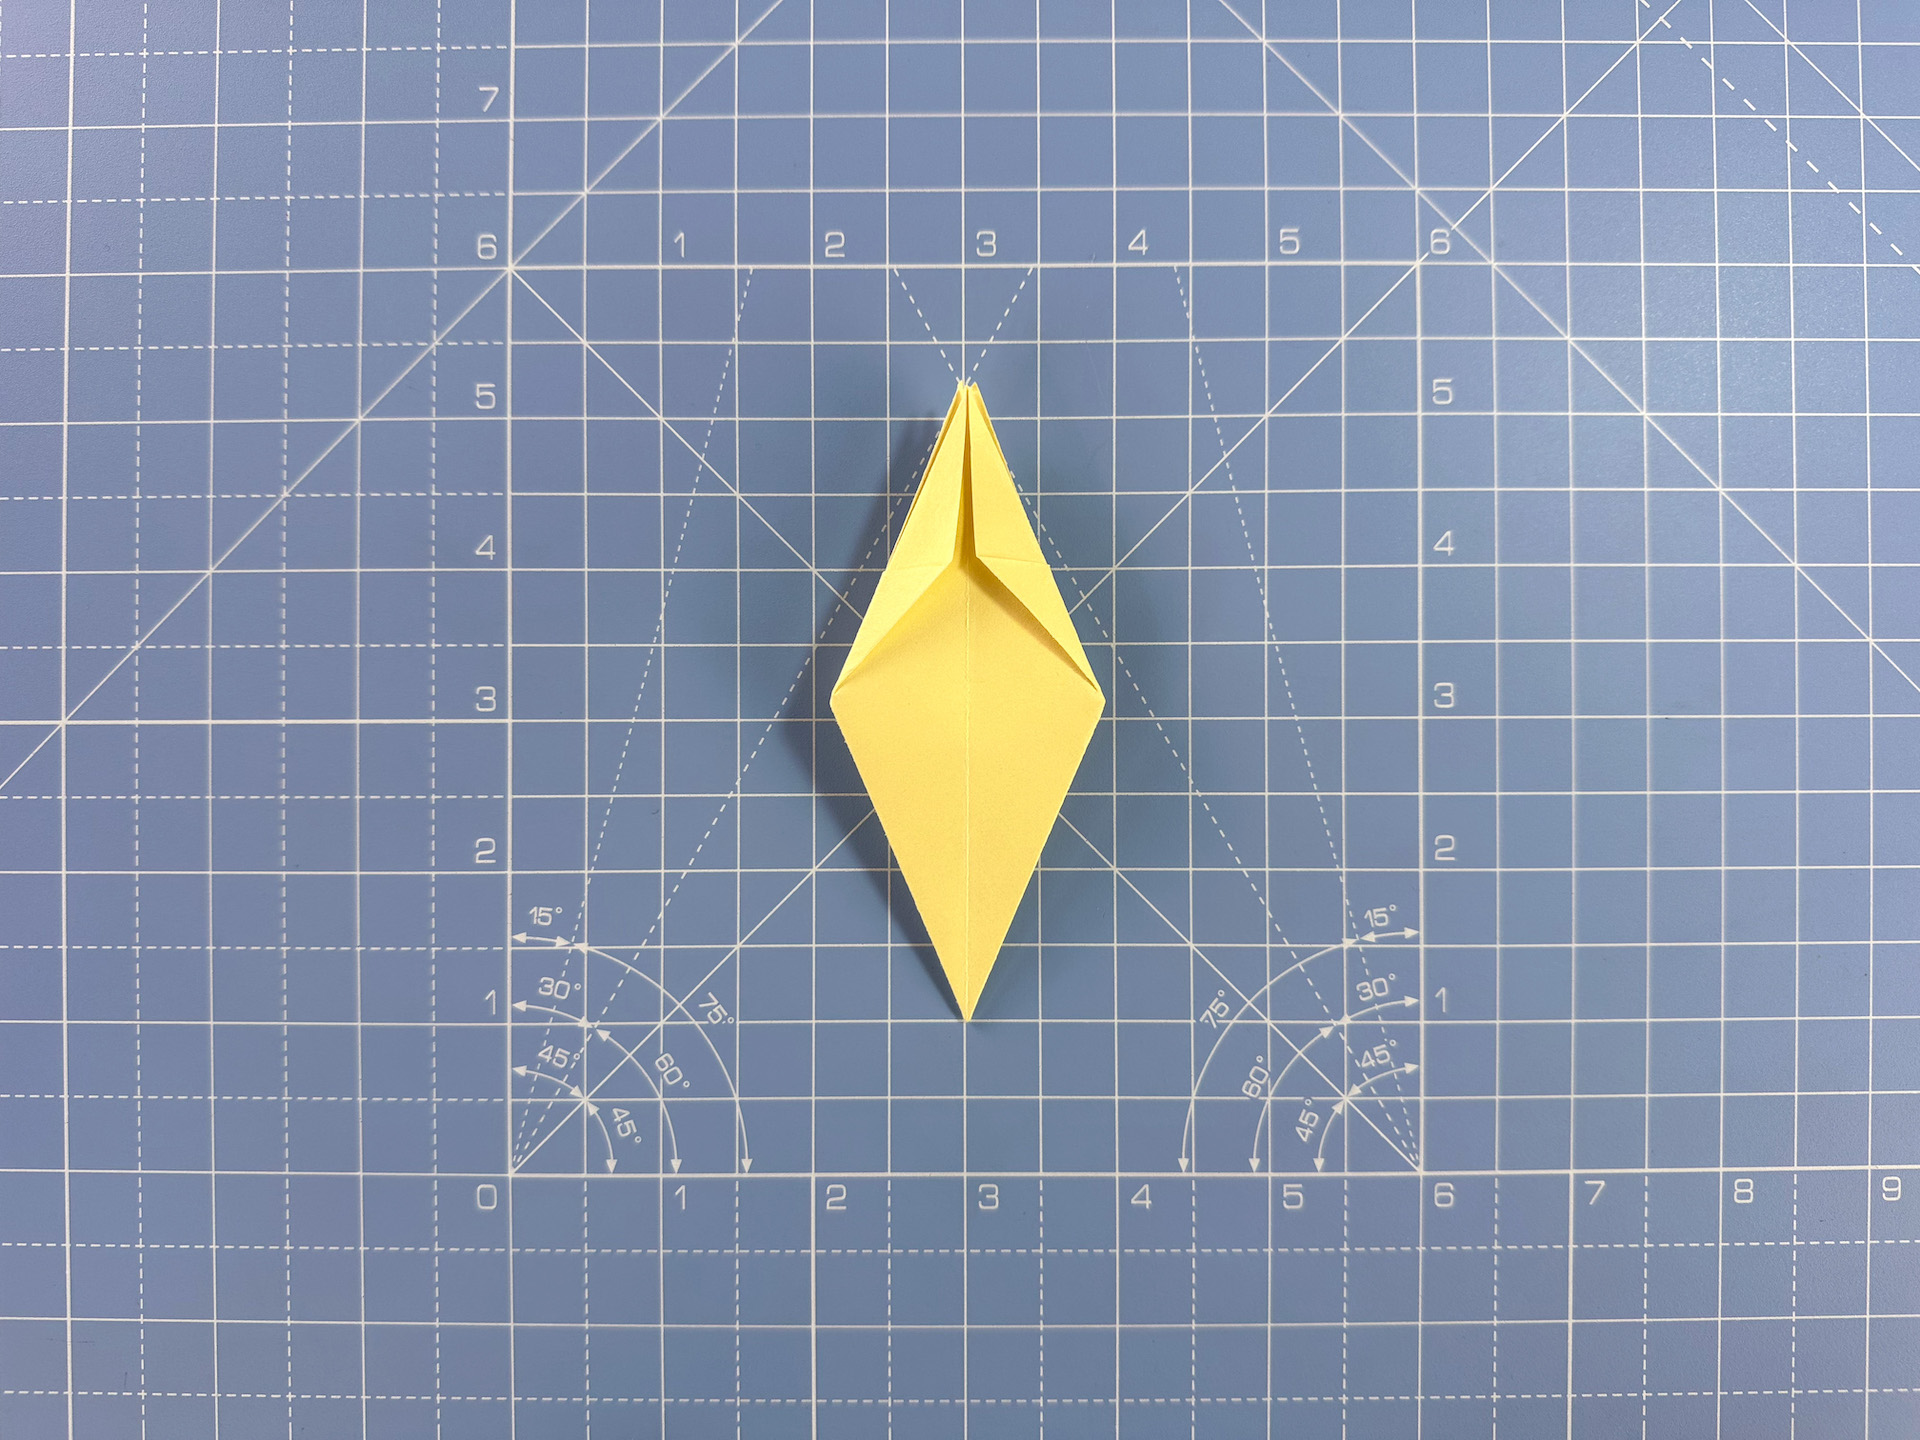
Fold the top corner in to meet the centre line.

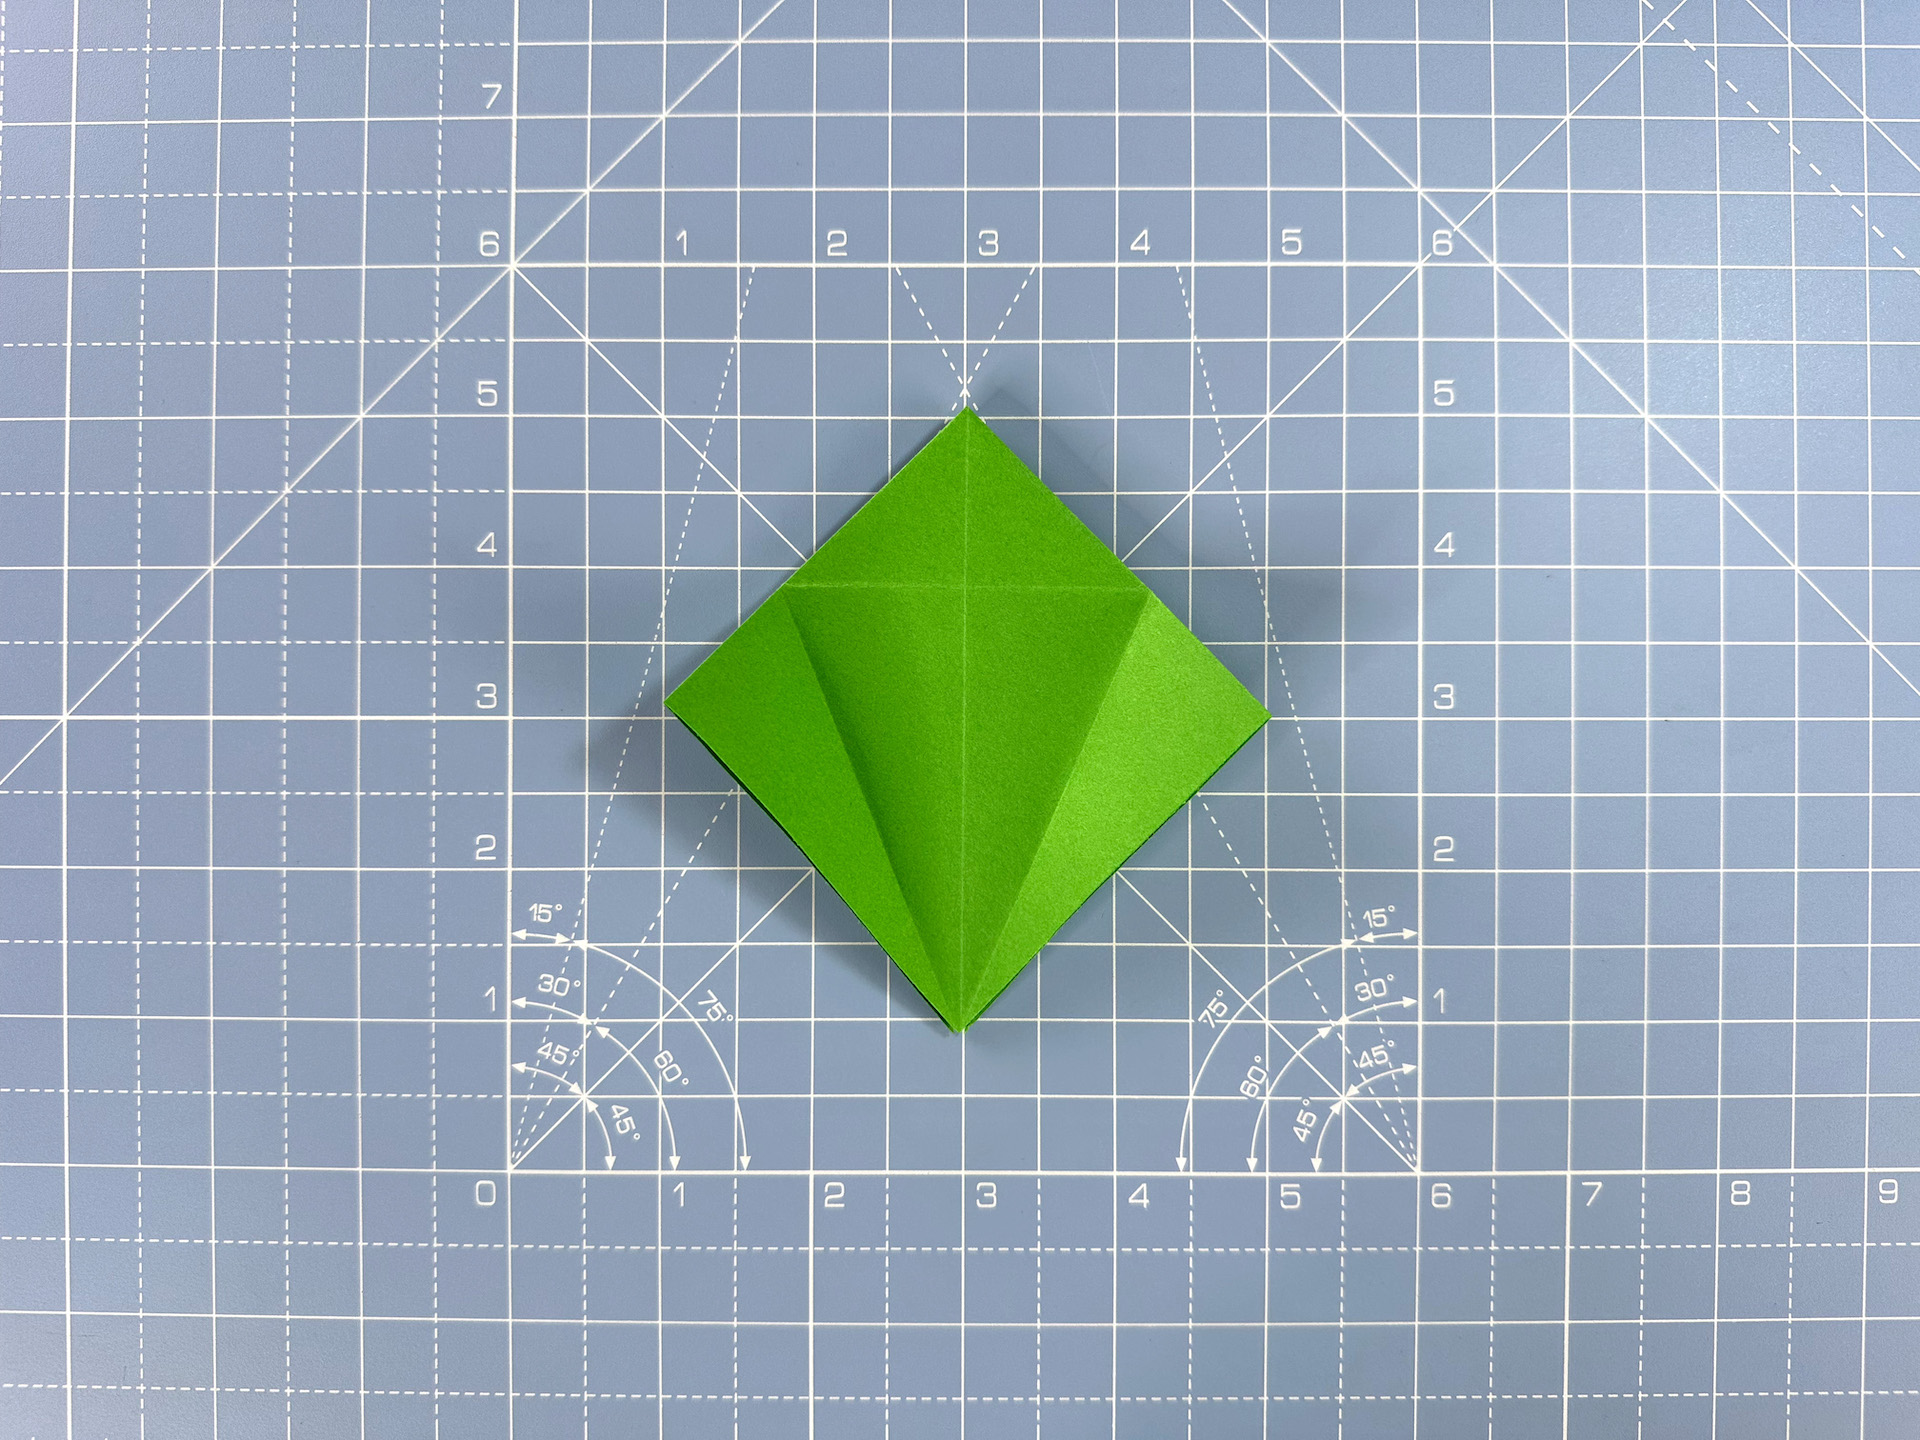
Step 7
Open the fold you just made, then using this fold, open the paper then squash-fold to create a small diamond shape in the corner.

Step 8
Repeat to create a small diamond shape on the other three corners (front and back).

Step 9
Fold one flap in front, and one flap behind.

Step 10
Fold the backs of the small diamond shapes down, so that it mirrors the other side.
Step 11
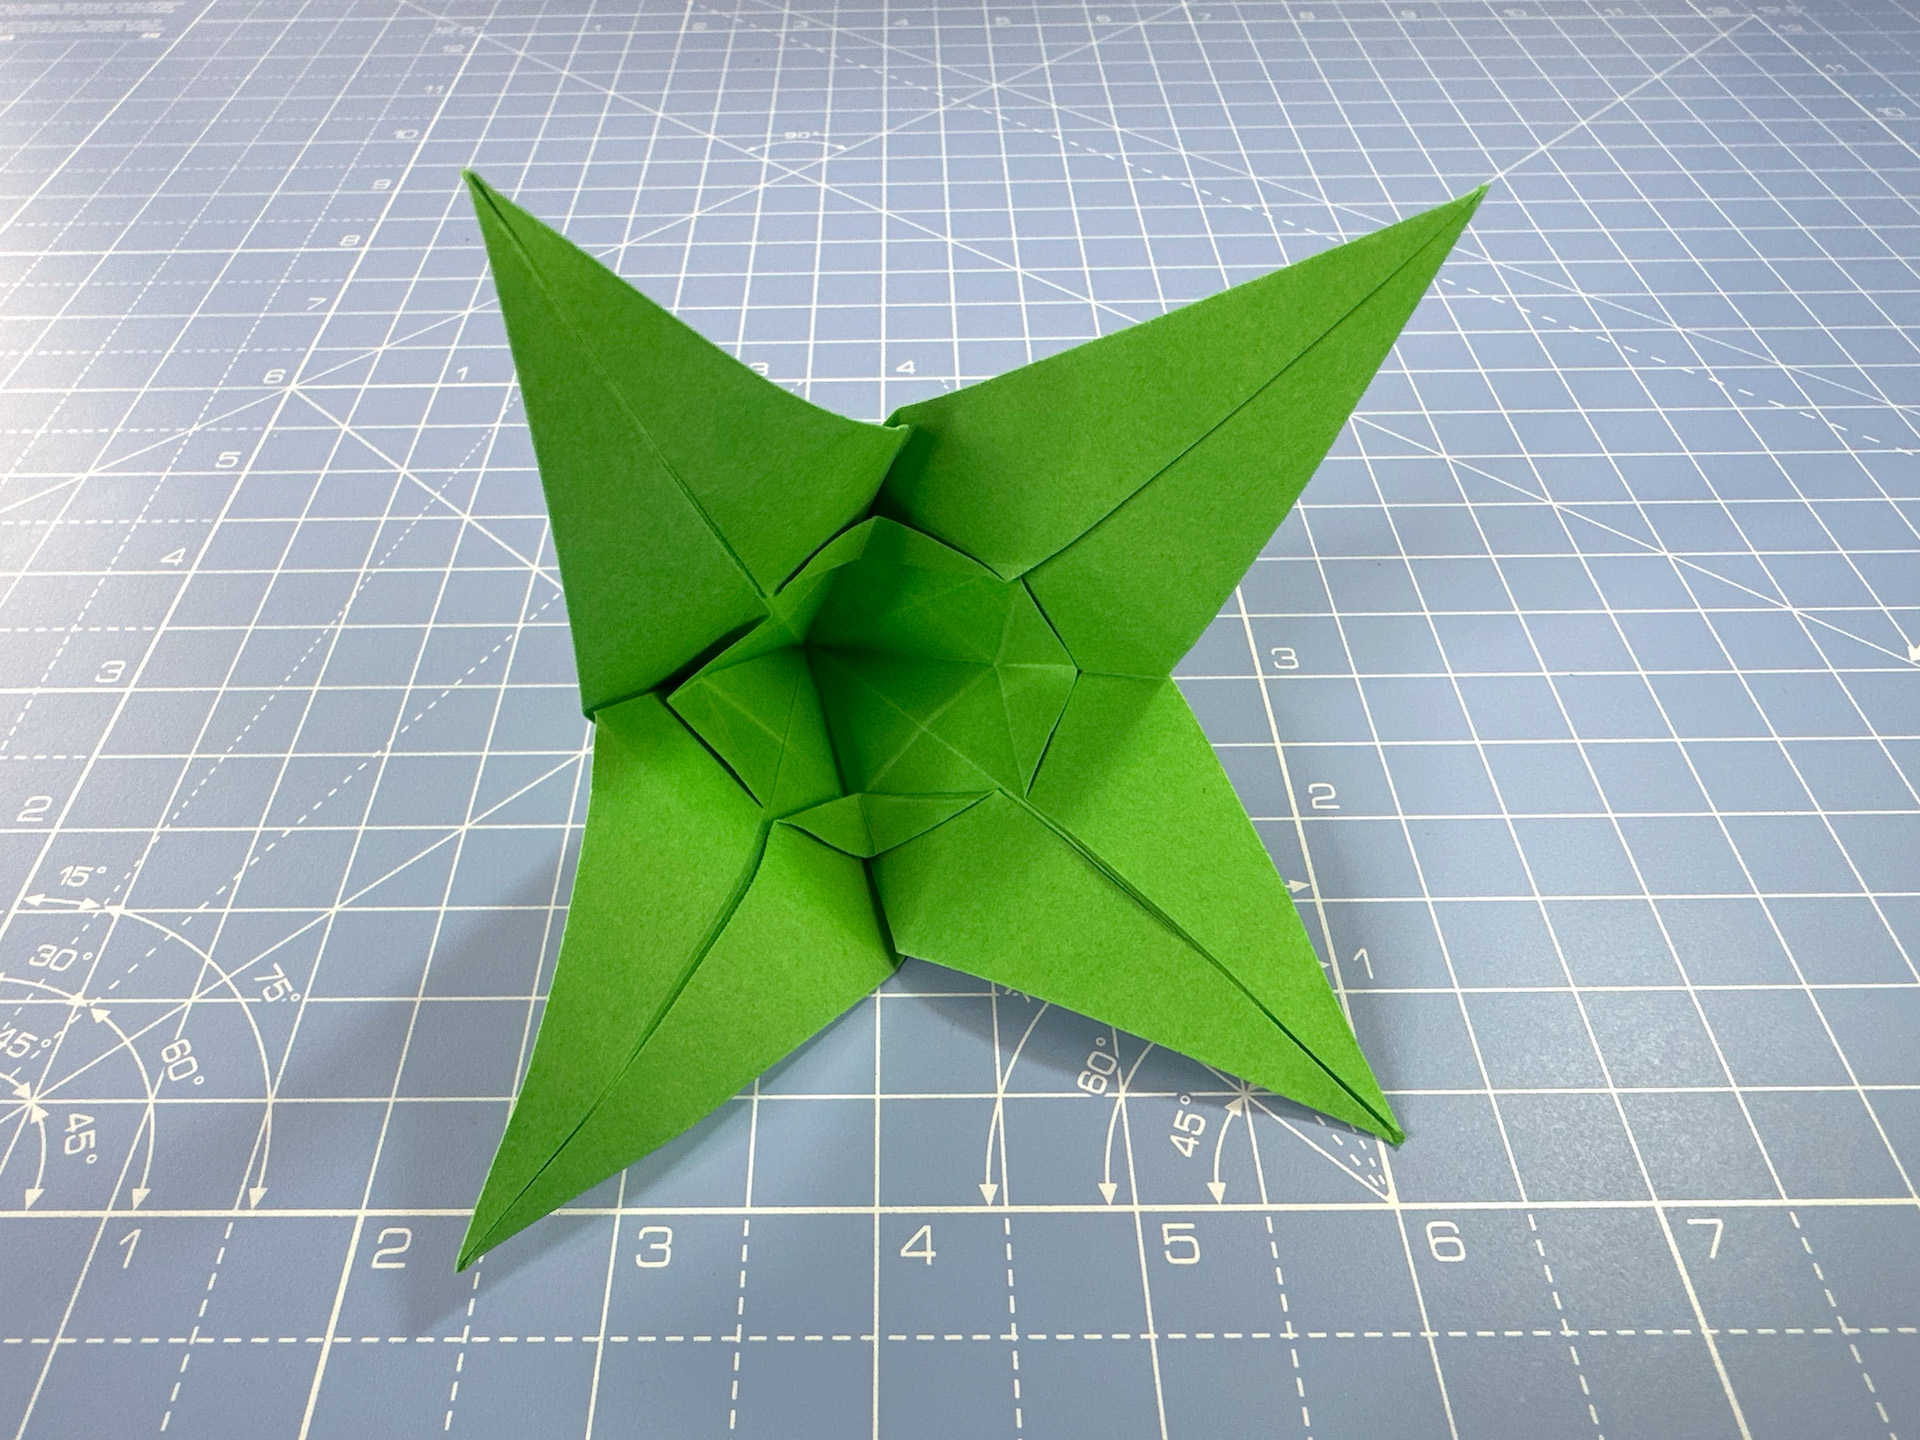
Gently open the bud by folding all four petals down.
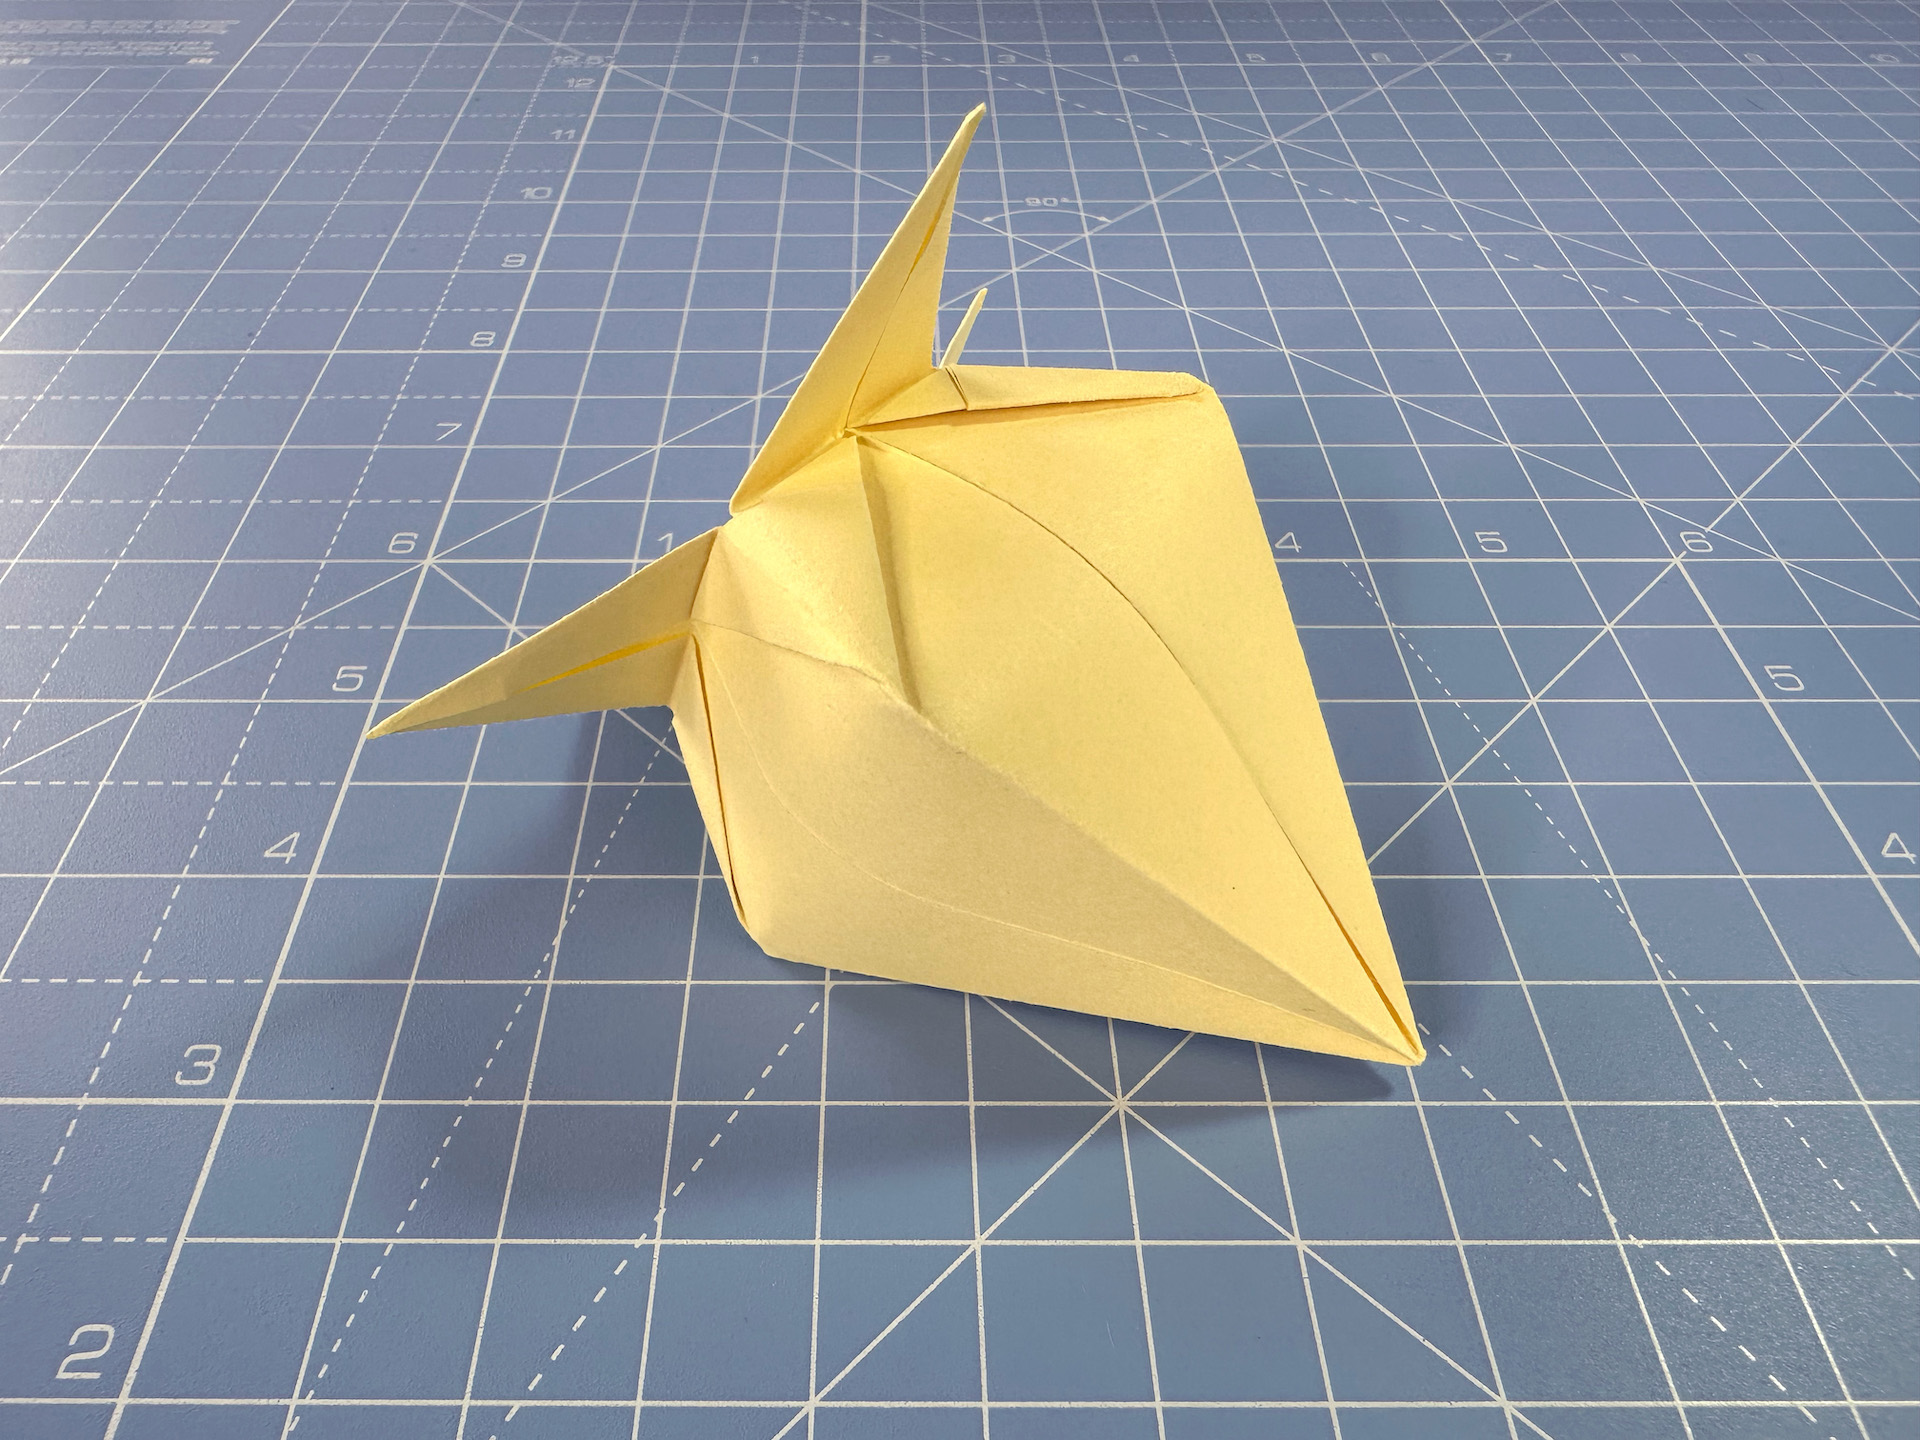
Step 12
Fold these long triangular petals up and inside the model. That’s the first part of your origami bud done!
Step 13
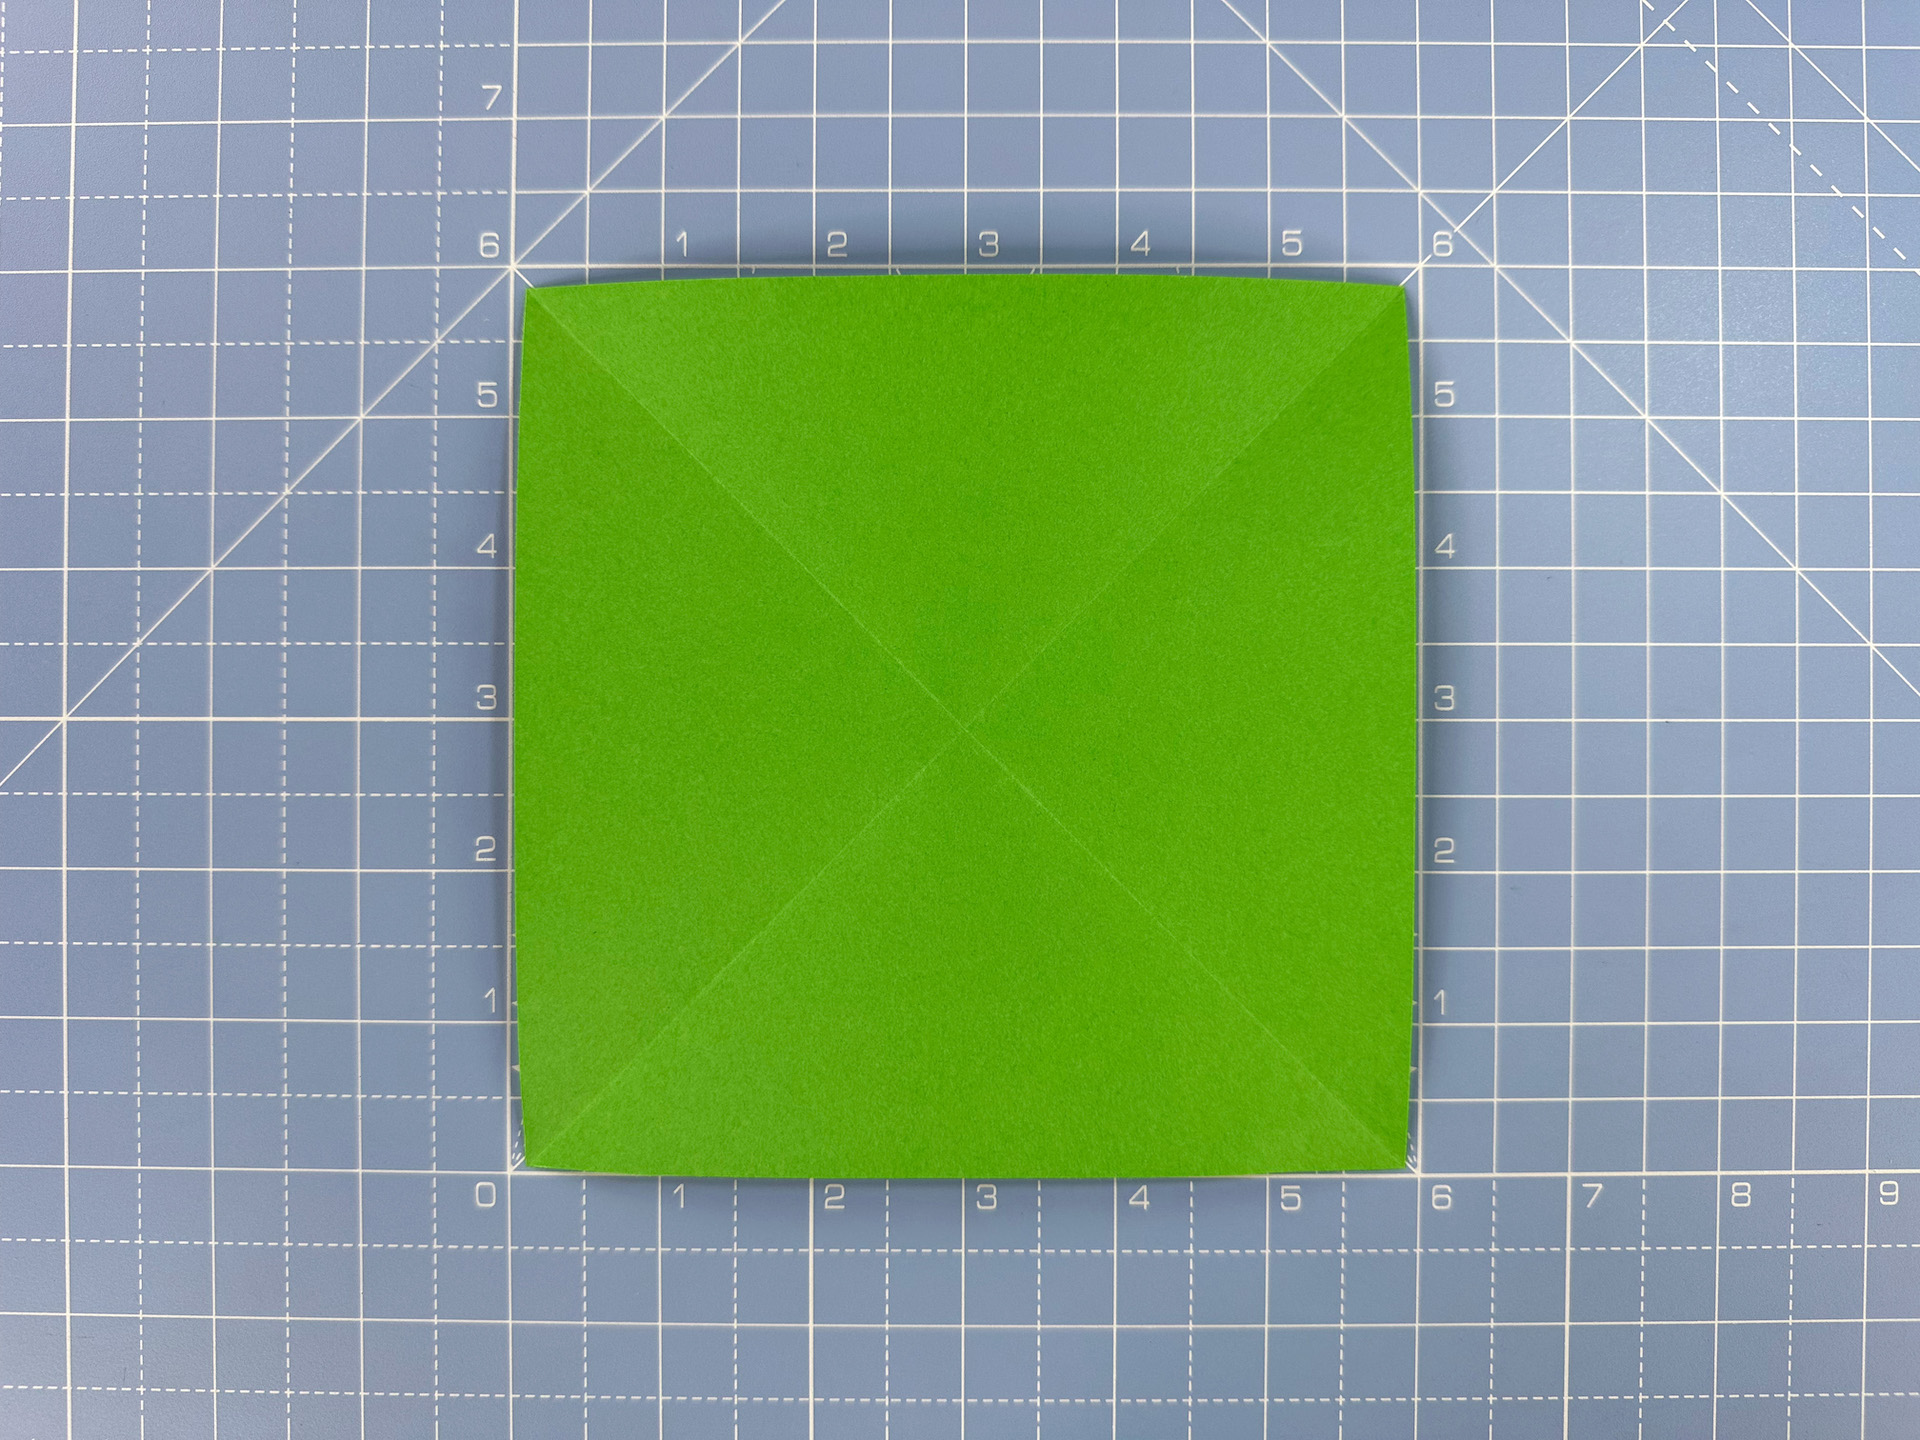
Next, we’ll make the leafy part of the bud. Use a green square of paper in the same size as you made the bud. 5 x 5cm is ideal, but for the purpose of this tutorial we’re using 15 x 15cm to clearly show you where to fold.
Fold in half along both diagonals.
Step 14
Turn the paper over and book fold along both the horizontal and vertical.

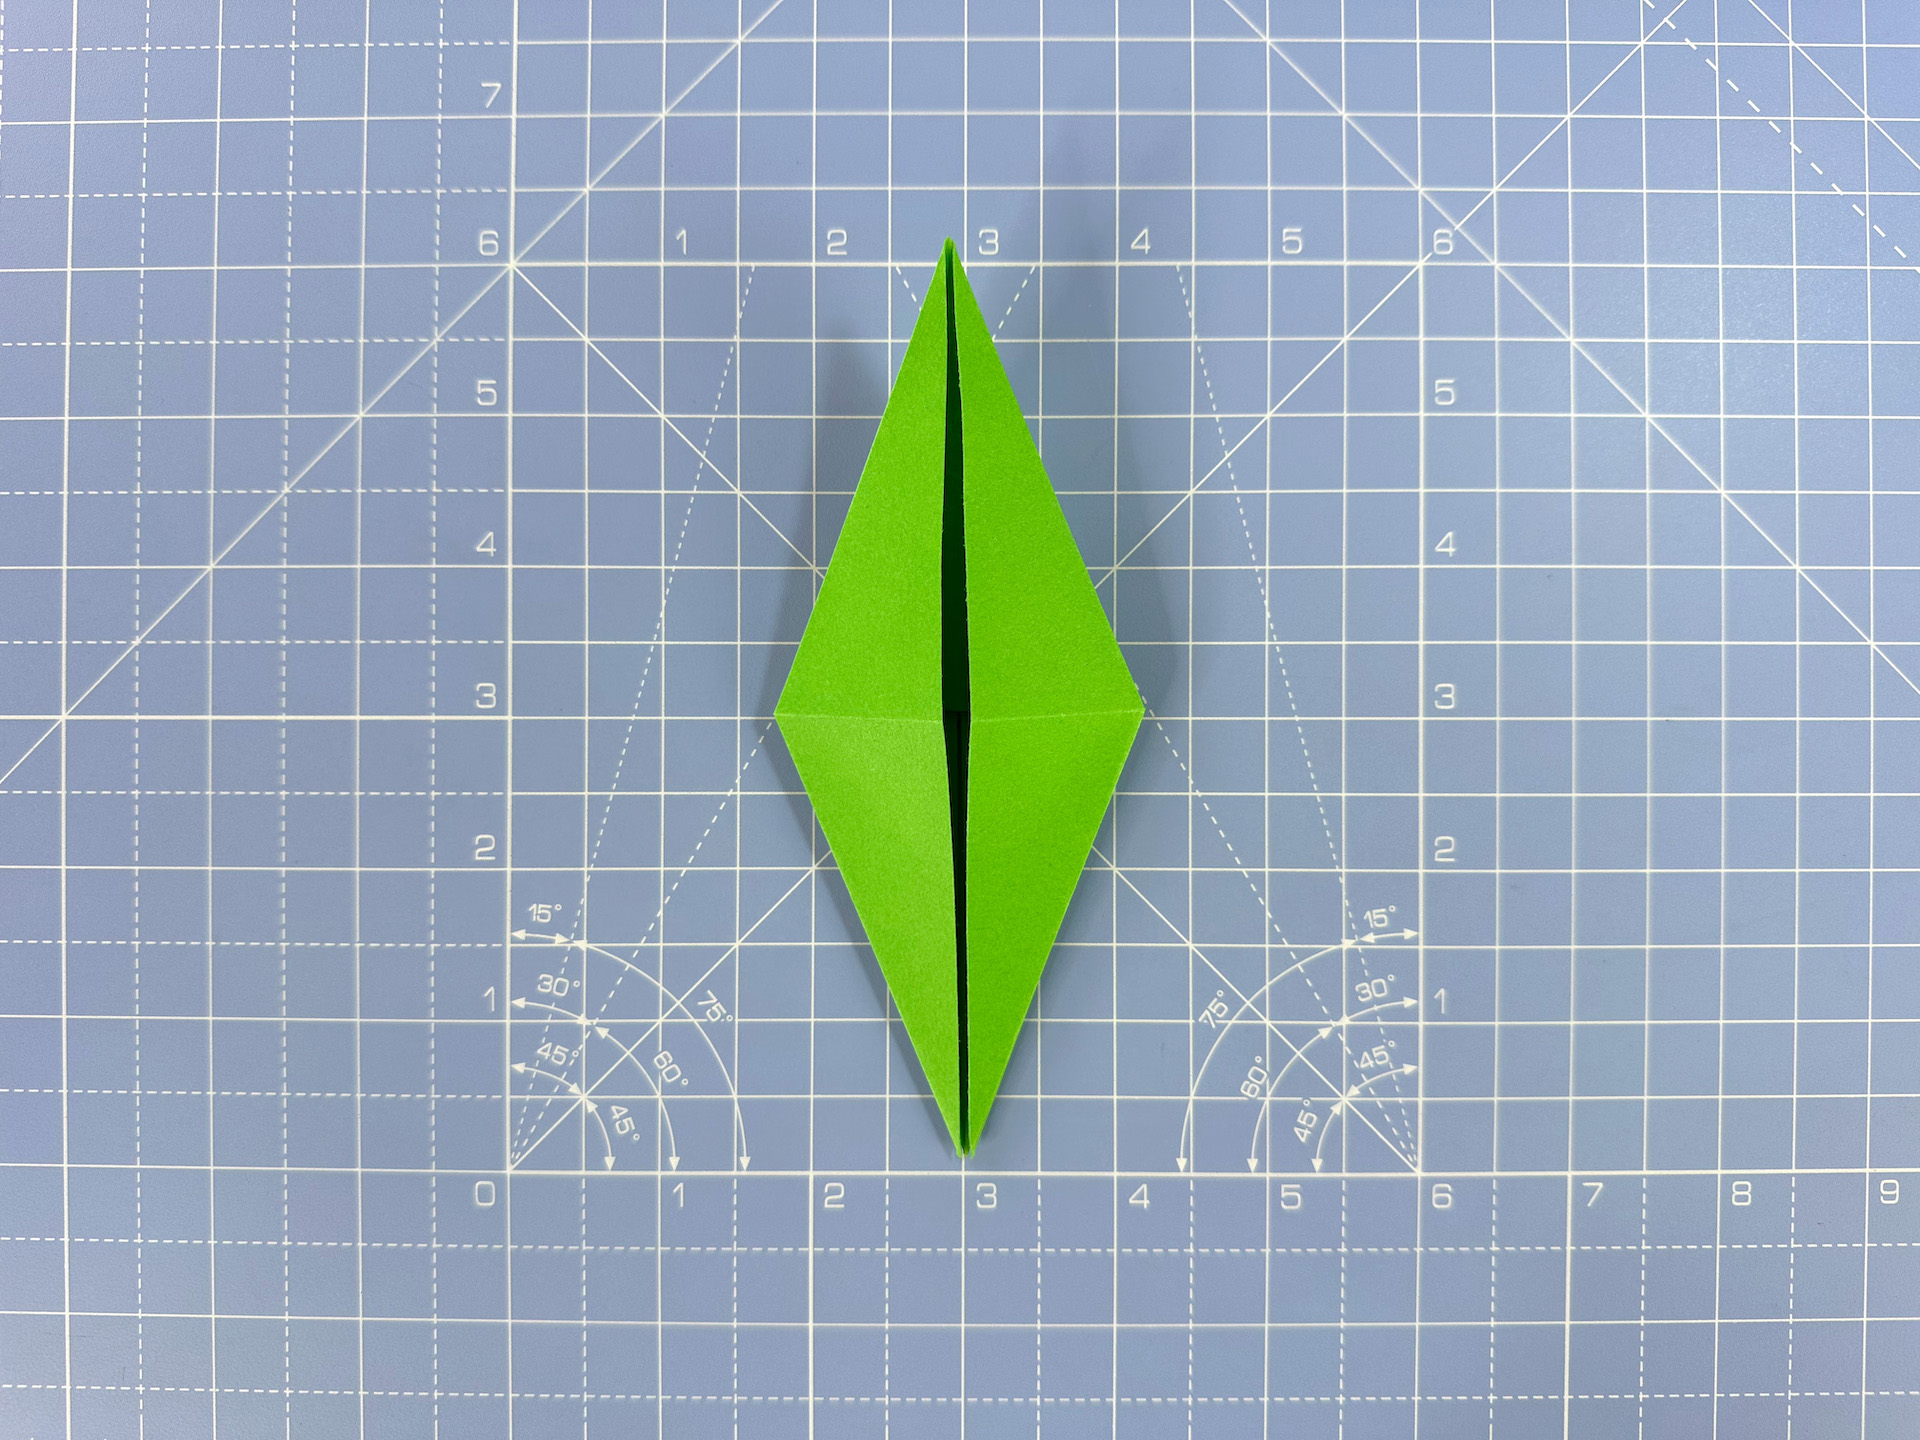
Step 15
Collapse the paper into a square diamond shape.
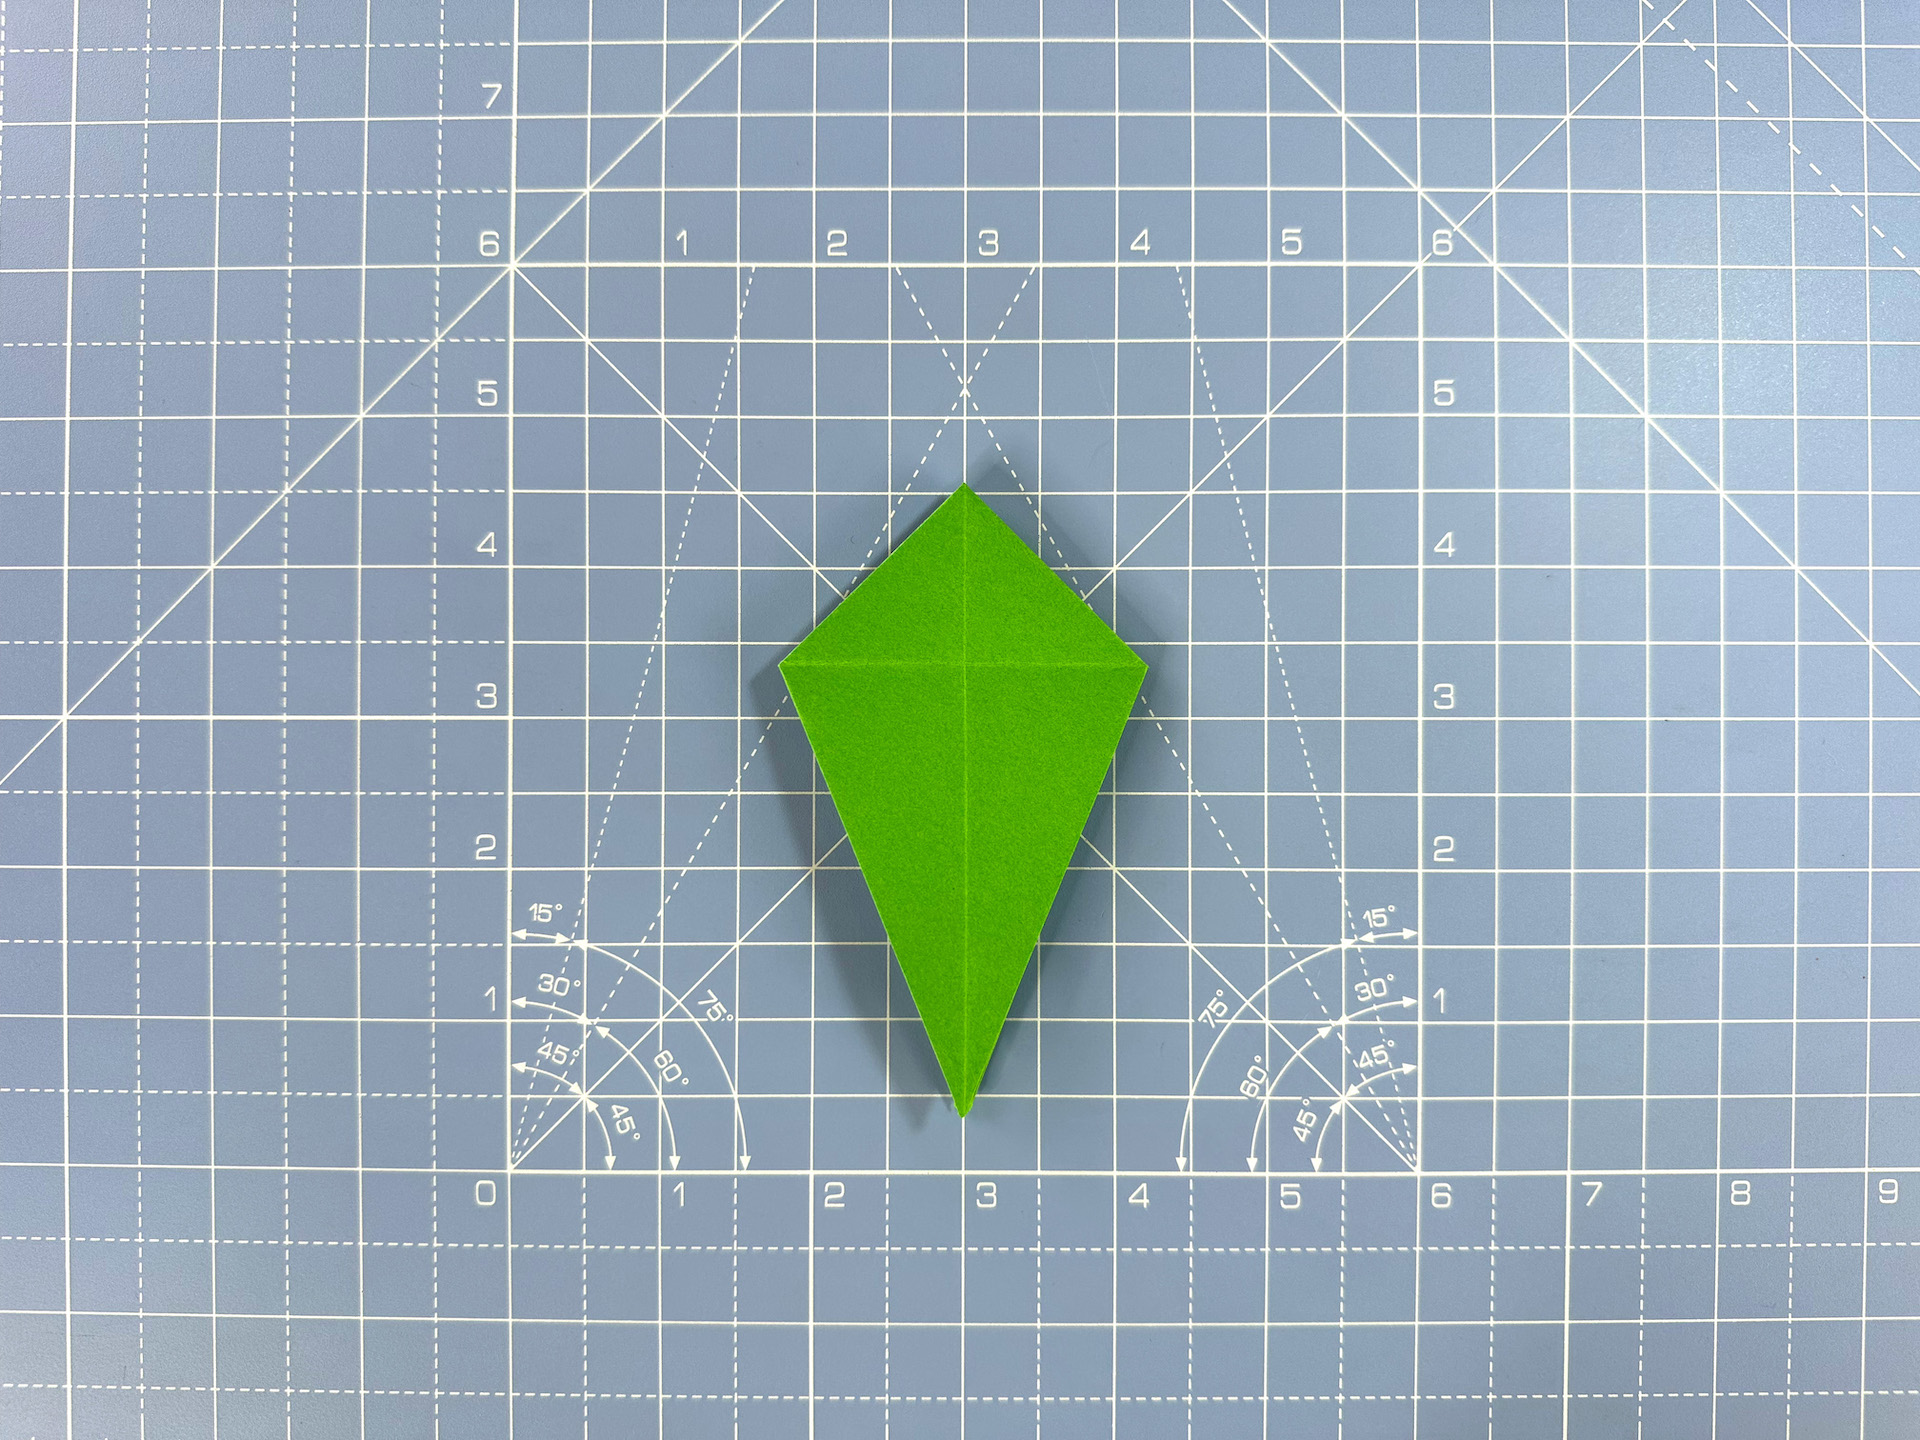
Step 16
With the open end facing down (the opposite way to the bud), fold the bottom corners to meet the middle.
Step 17
Repeat on the other side to create a kite shape.
Step 18
Fold the triangle at the top down. Crease well then unfold. This will make the next step easier.

Step 19
Open the flaps.
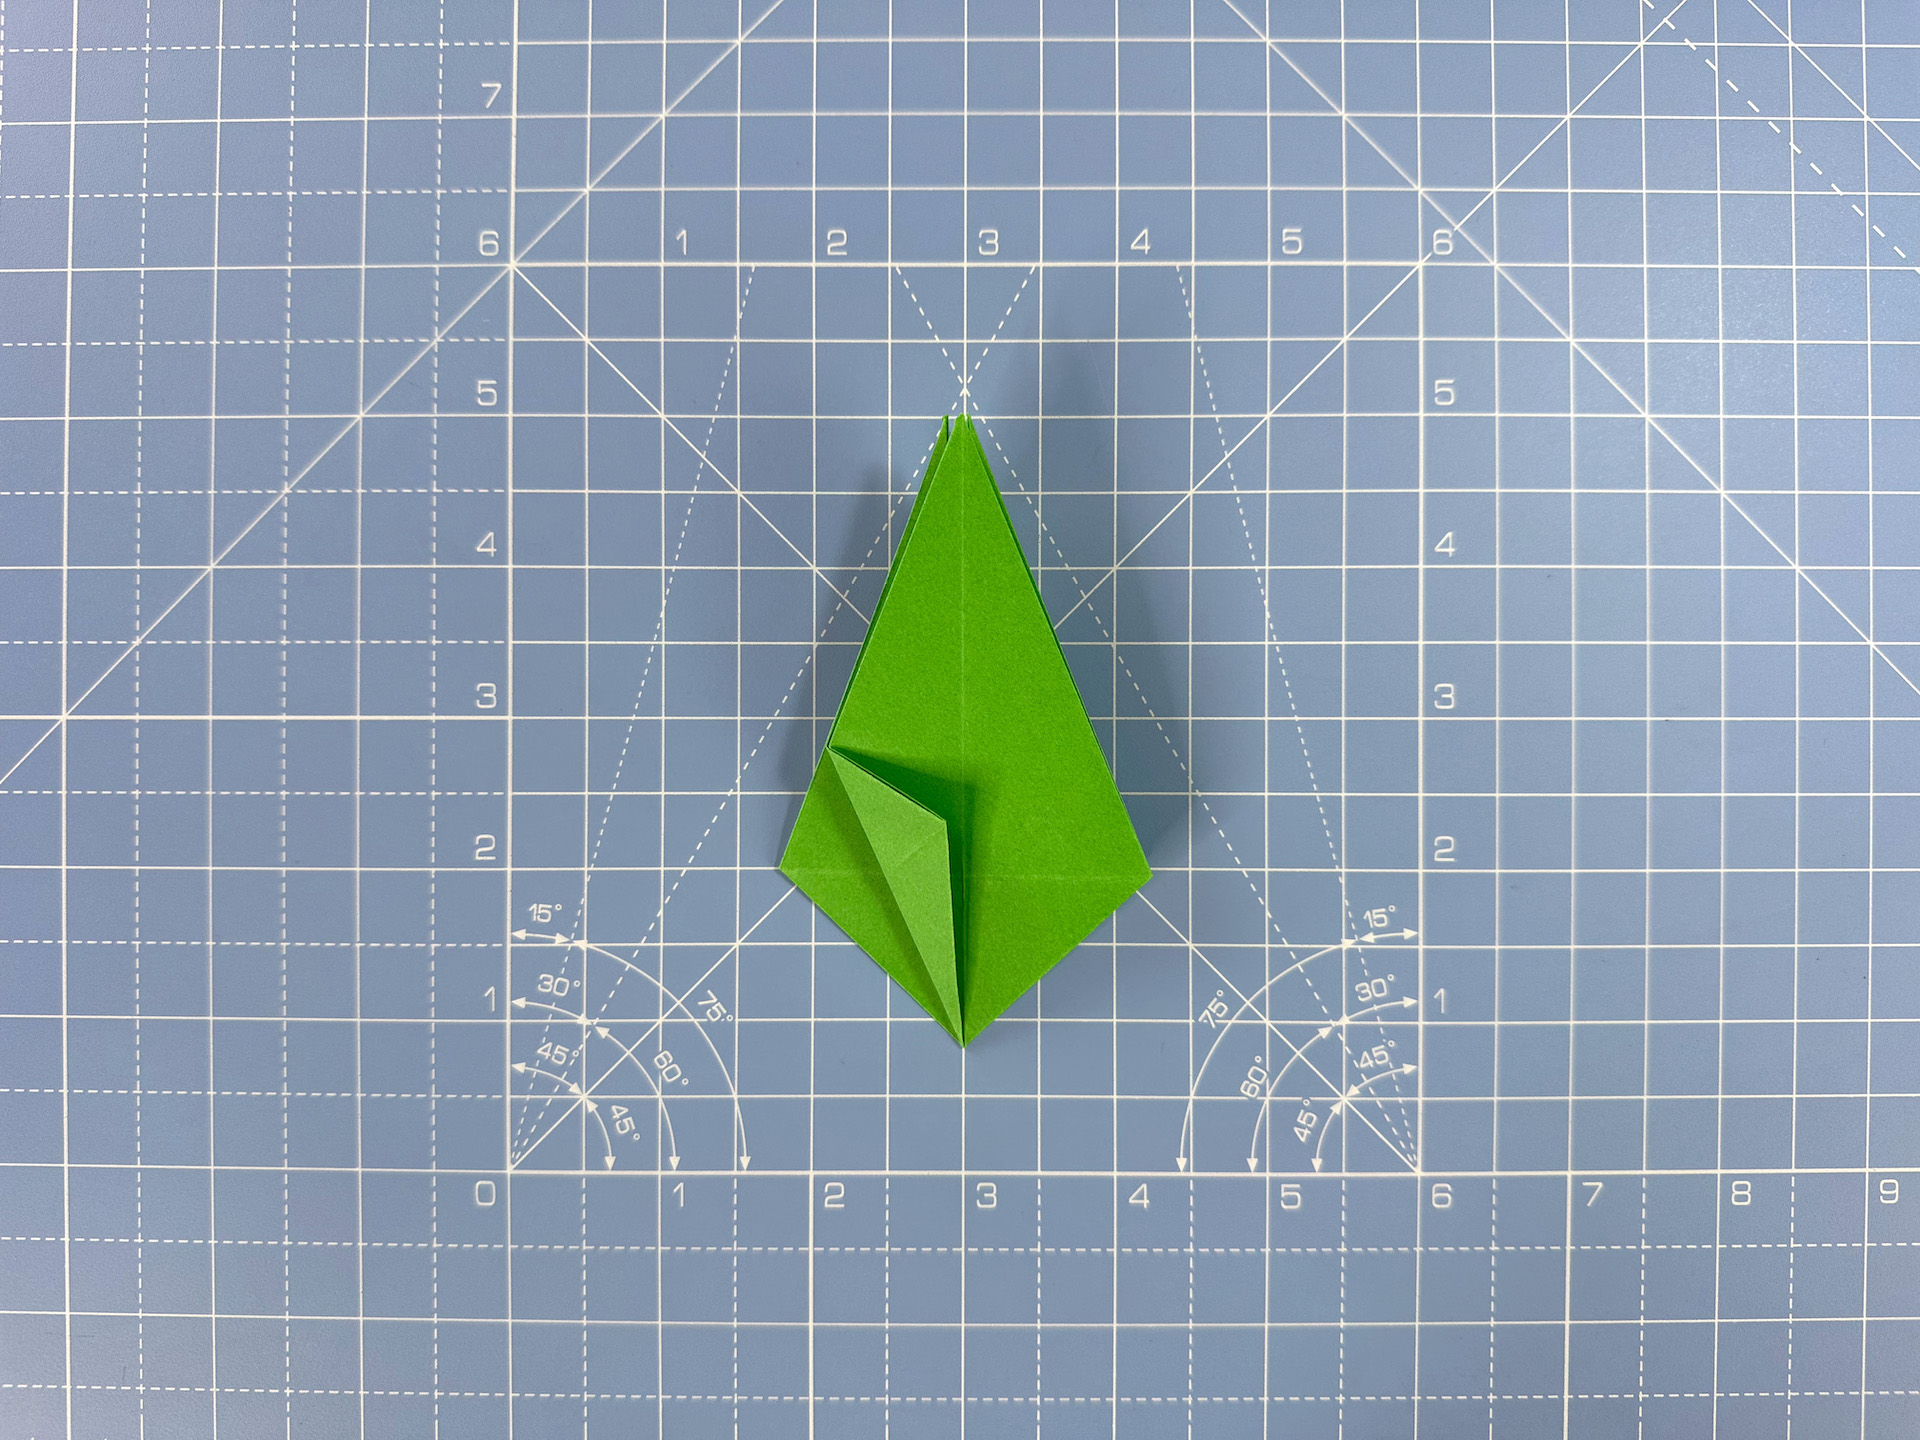
Step 20
Fold the top layer of the paper up to create an elongated diamond. Crease well.
Step 21
Fold back down. You’ve essentially tucked those side flaps inside the shape.
Repeat on the other side.
Step 22
Rotate the model so the open end is facing up, then on one side only, fold the bottom corner to meet the central line.
Step 23
Repeat on each of the four faces – but only on one side of the model.

Step 24
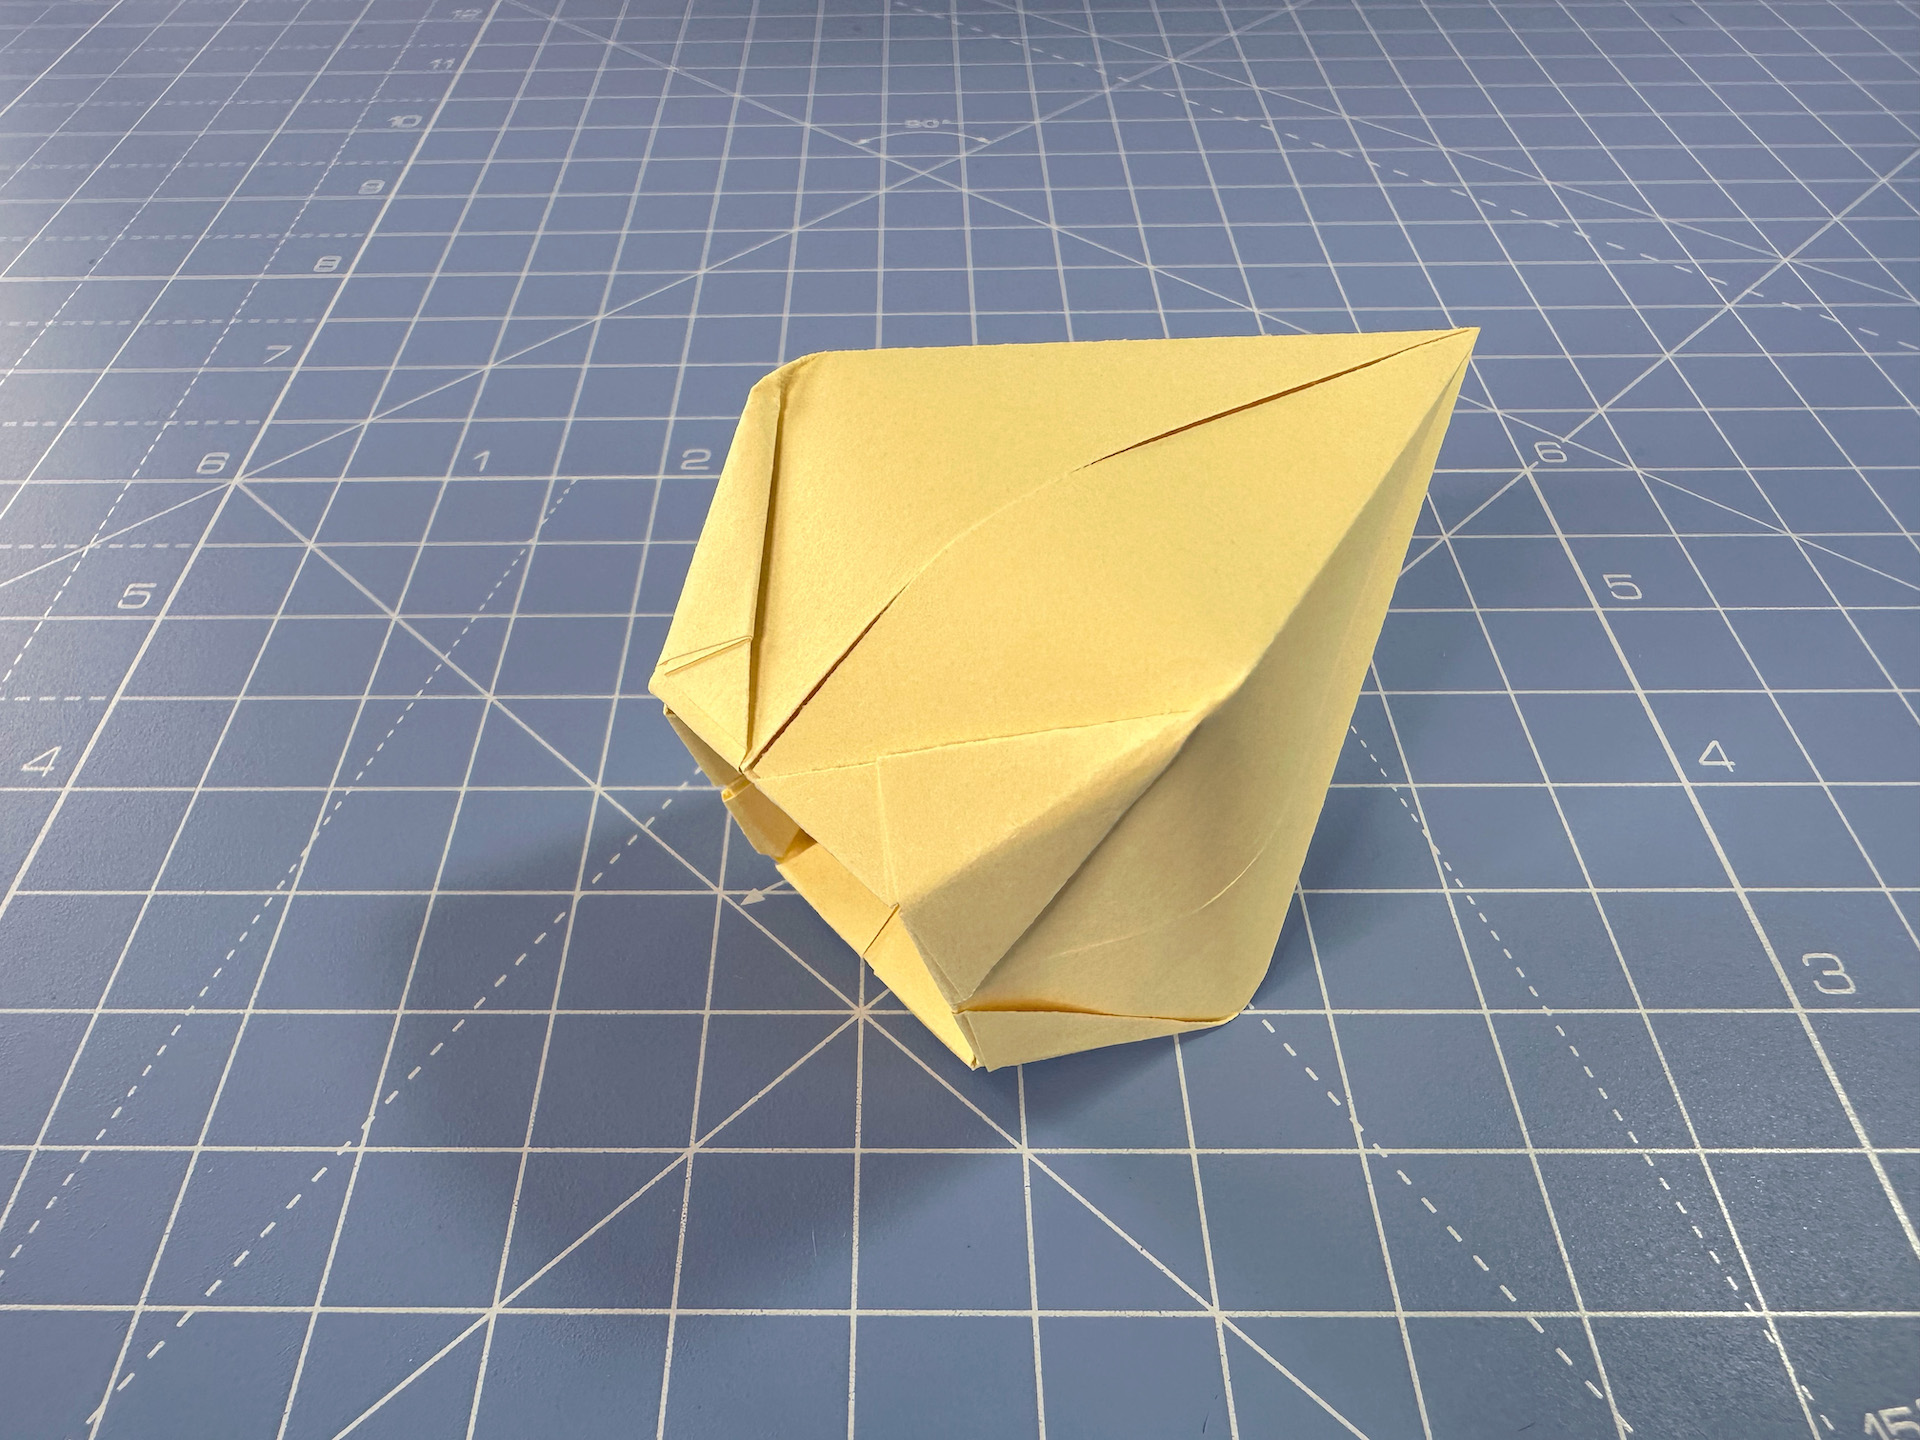
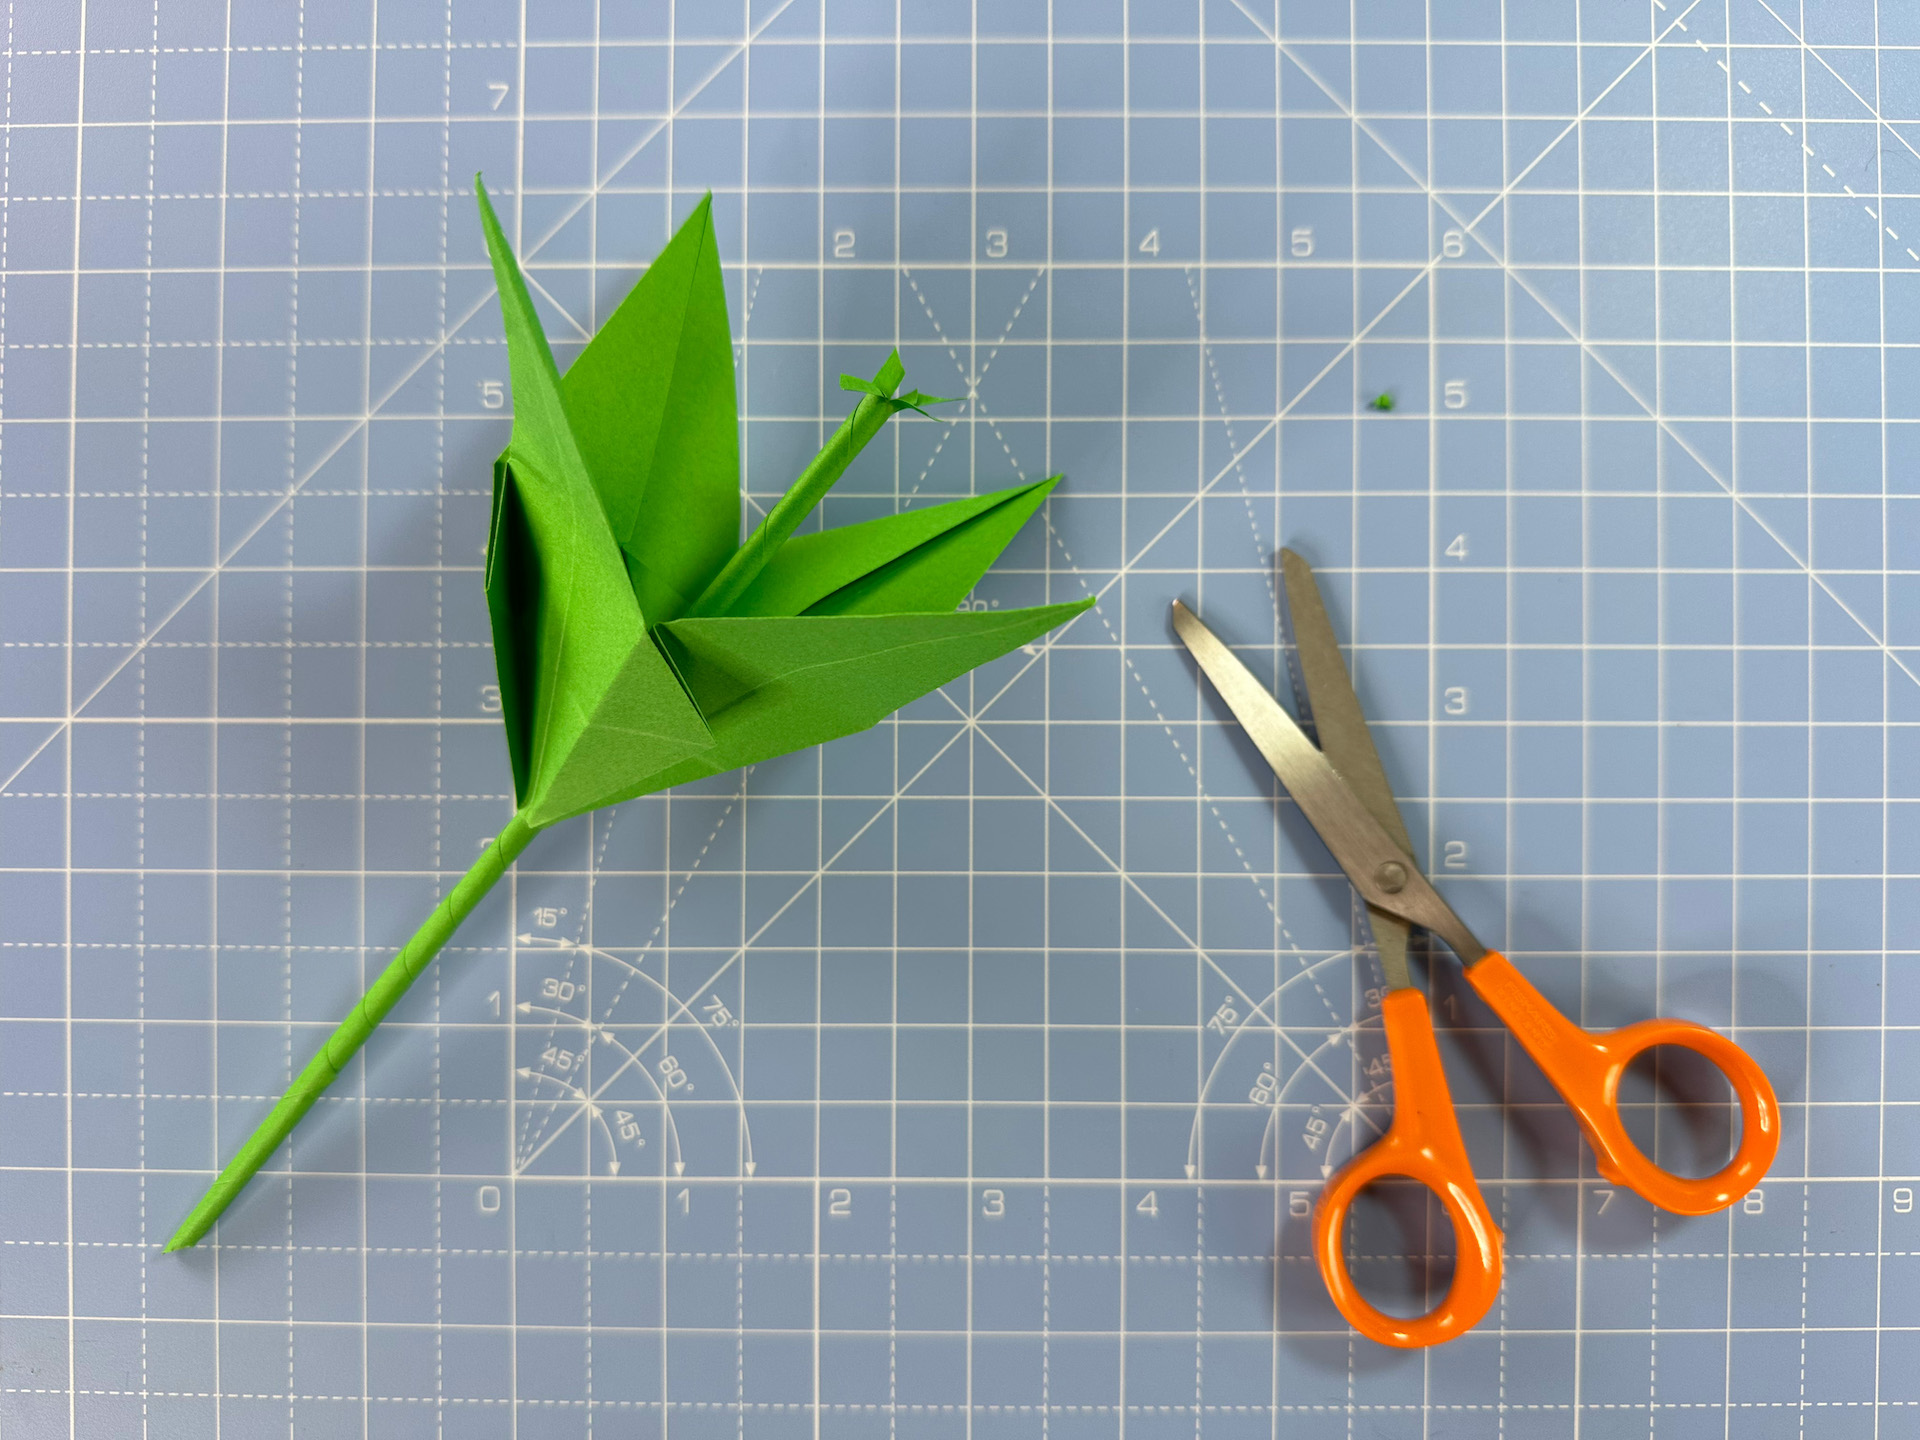
Gently open up the model by folding the leaves down.
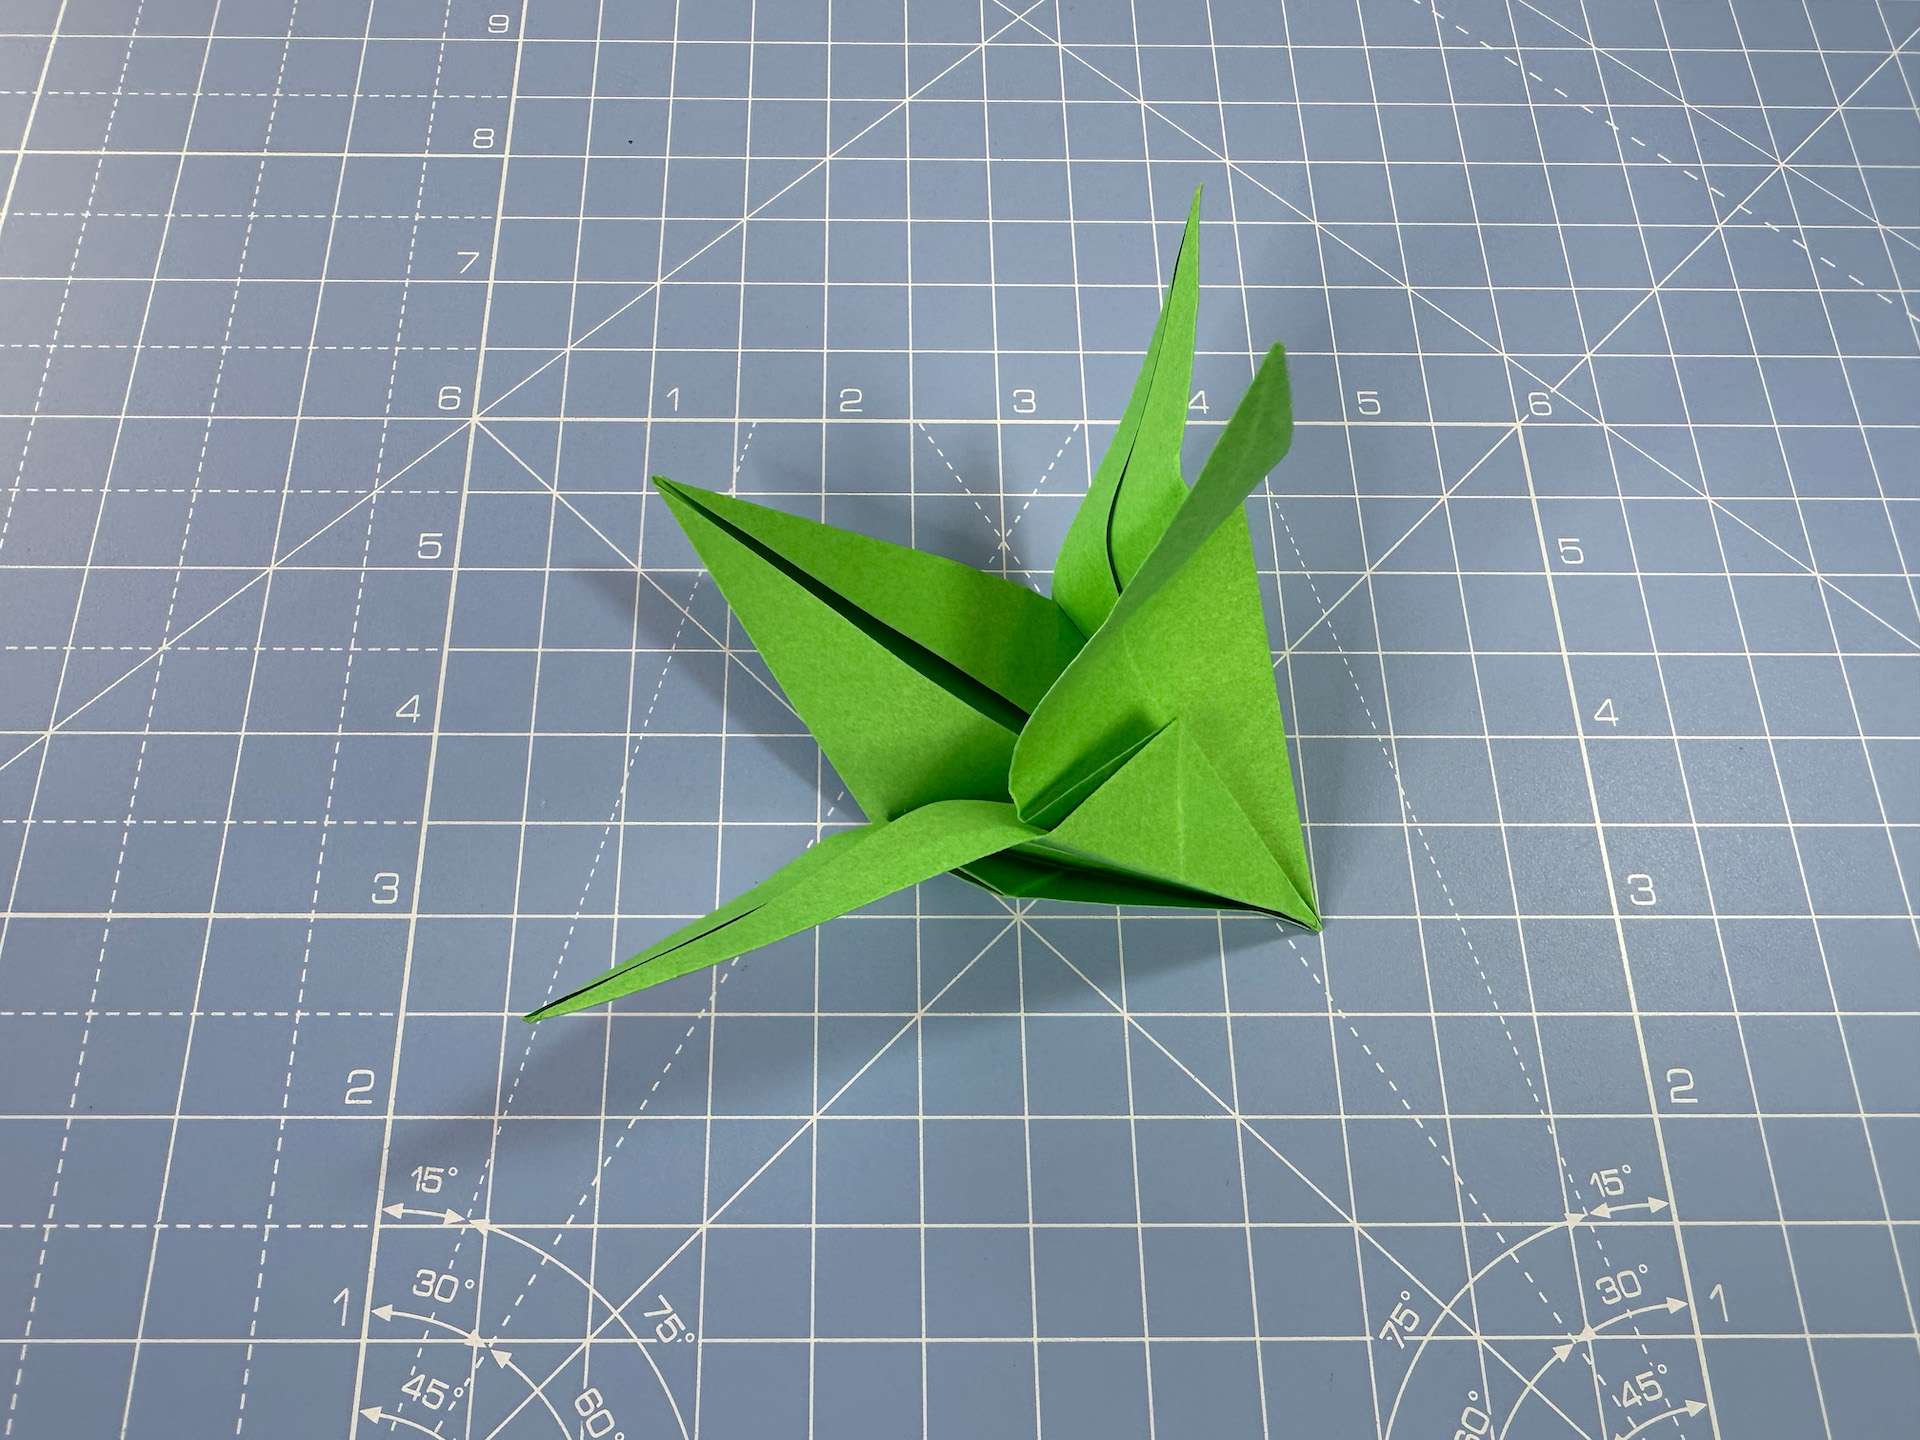
Step 25
Squash down the corners inside the model to hold in place. That’s the foliage of the origami flower bud complete!
Attaching the bud
Step 1
As we did in the tulip tutorial, cut a hole in the bottom of the green foliage. Cut a fringe in the top of a stalk, then put glue on the underside of this fringe. Thread the stalk through the hole, pressing the foliage into the glue, to secure.
Step 2
Glue the bud on top of the foliage. Curl the edges of the leaves for the finishing touch. Make as many buds as you would like for your origami flower bouquet. Our bouquet has five buds. Here is a side-by-side comparison of the tutorial bud (using 15 x 15cm paper) and the size you’re aiming for (using 5 x 5cm paper).

Make more origami flowers to populate the bouquet
Step 1
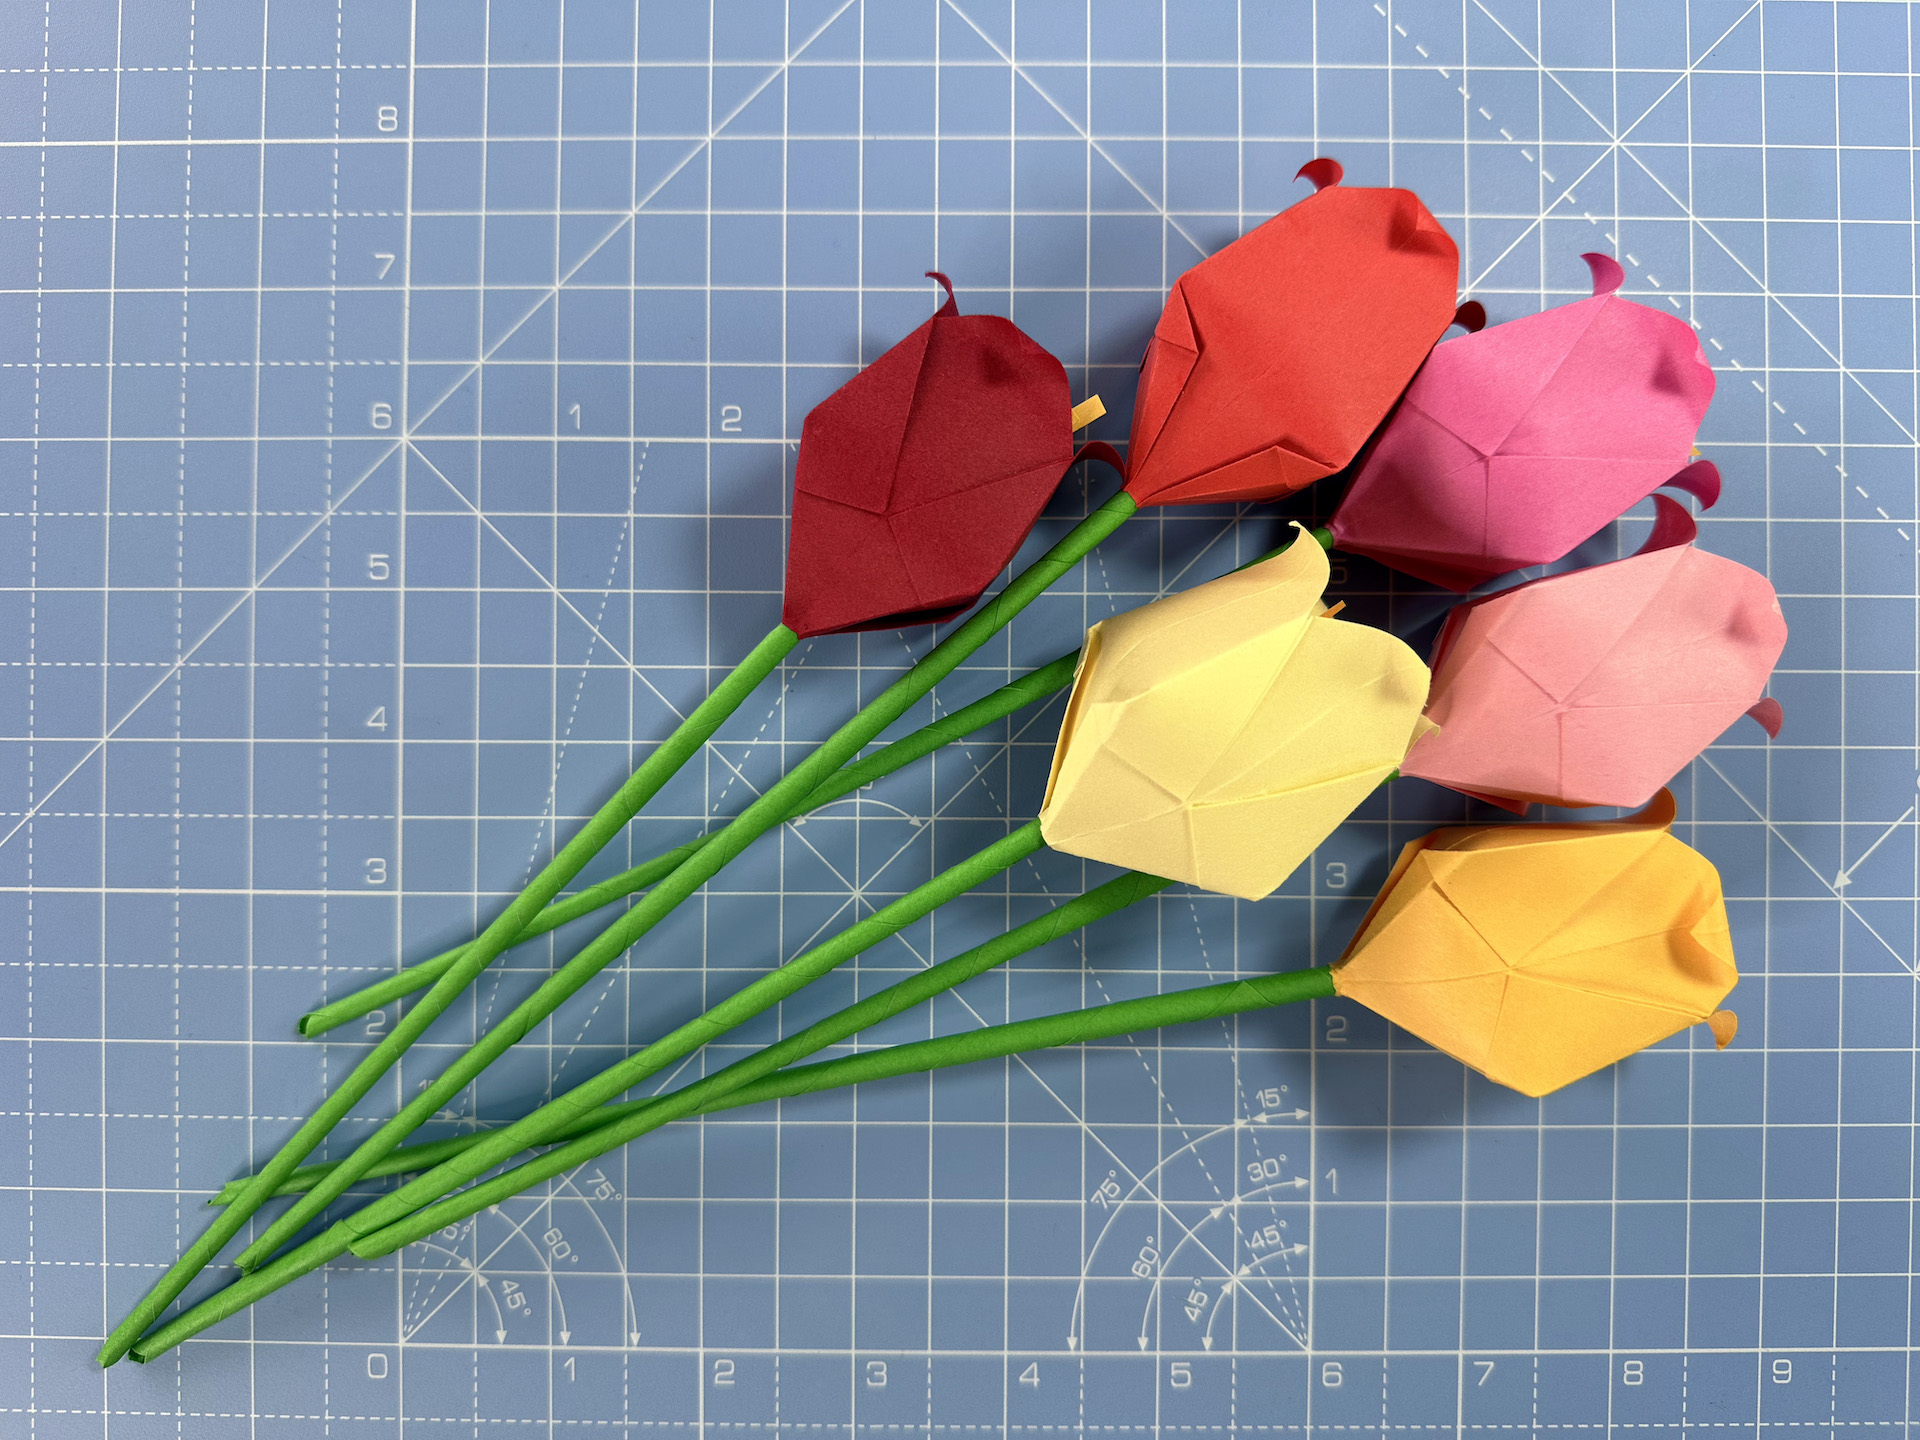
Make some additional origami flowers following our origami tulip tutorial. You can attach leaves if you want, or leave them ‘naked’ like we have. In the final origami bouquet, we’ve used the tulips as the statement flower, and we’ve used five.
Whip up some foliage
Step 1
Make some origami leaves following the steps in our origami tulip tutorial. Instead of attaching them to the tulips, attach them to the top of a stalk. Flatten the top of the stalk, and use wet glue so you can pinch the leaf around the stalk. Hold in place with a paper clip while the glue dries.

Make the funnel
Step 1
You can assemble your origami bouquet in one of two ways. First, arrange the flowers then wrap the bouquet, or second, create the wrap for your bouquet and then arrange your flowers inside the pre-made wrap.
We’re going to show you the second method. Just like real flowers, origami flowers are easy to accidentally squash. But, unlike real flowers, we don’t need to worry about giving them water. When we’re assembling the bouquet, we can use that to our advantage by creating an inner funnel that will hold our flowers.
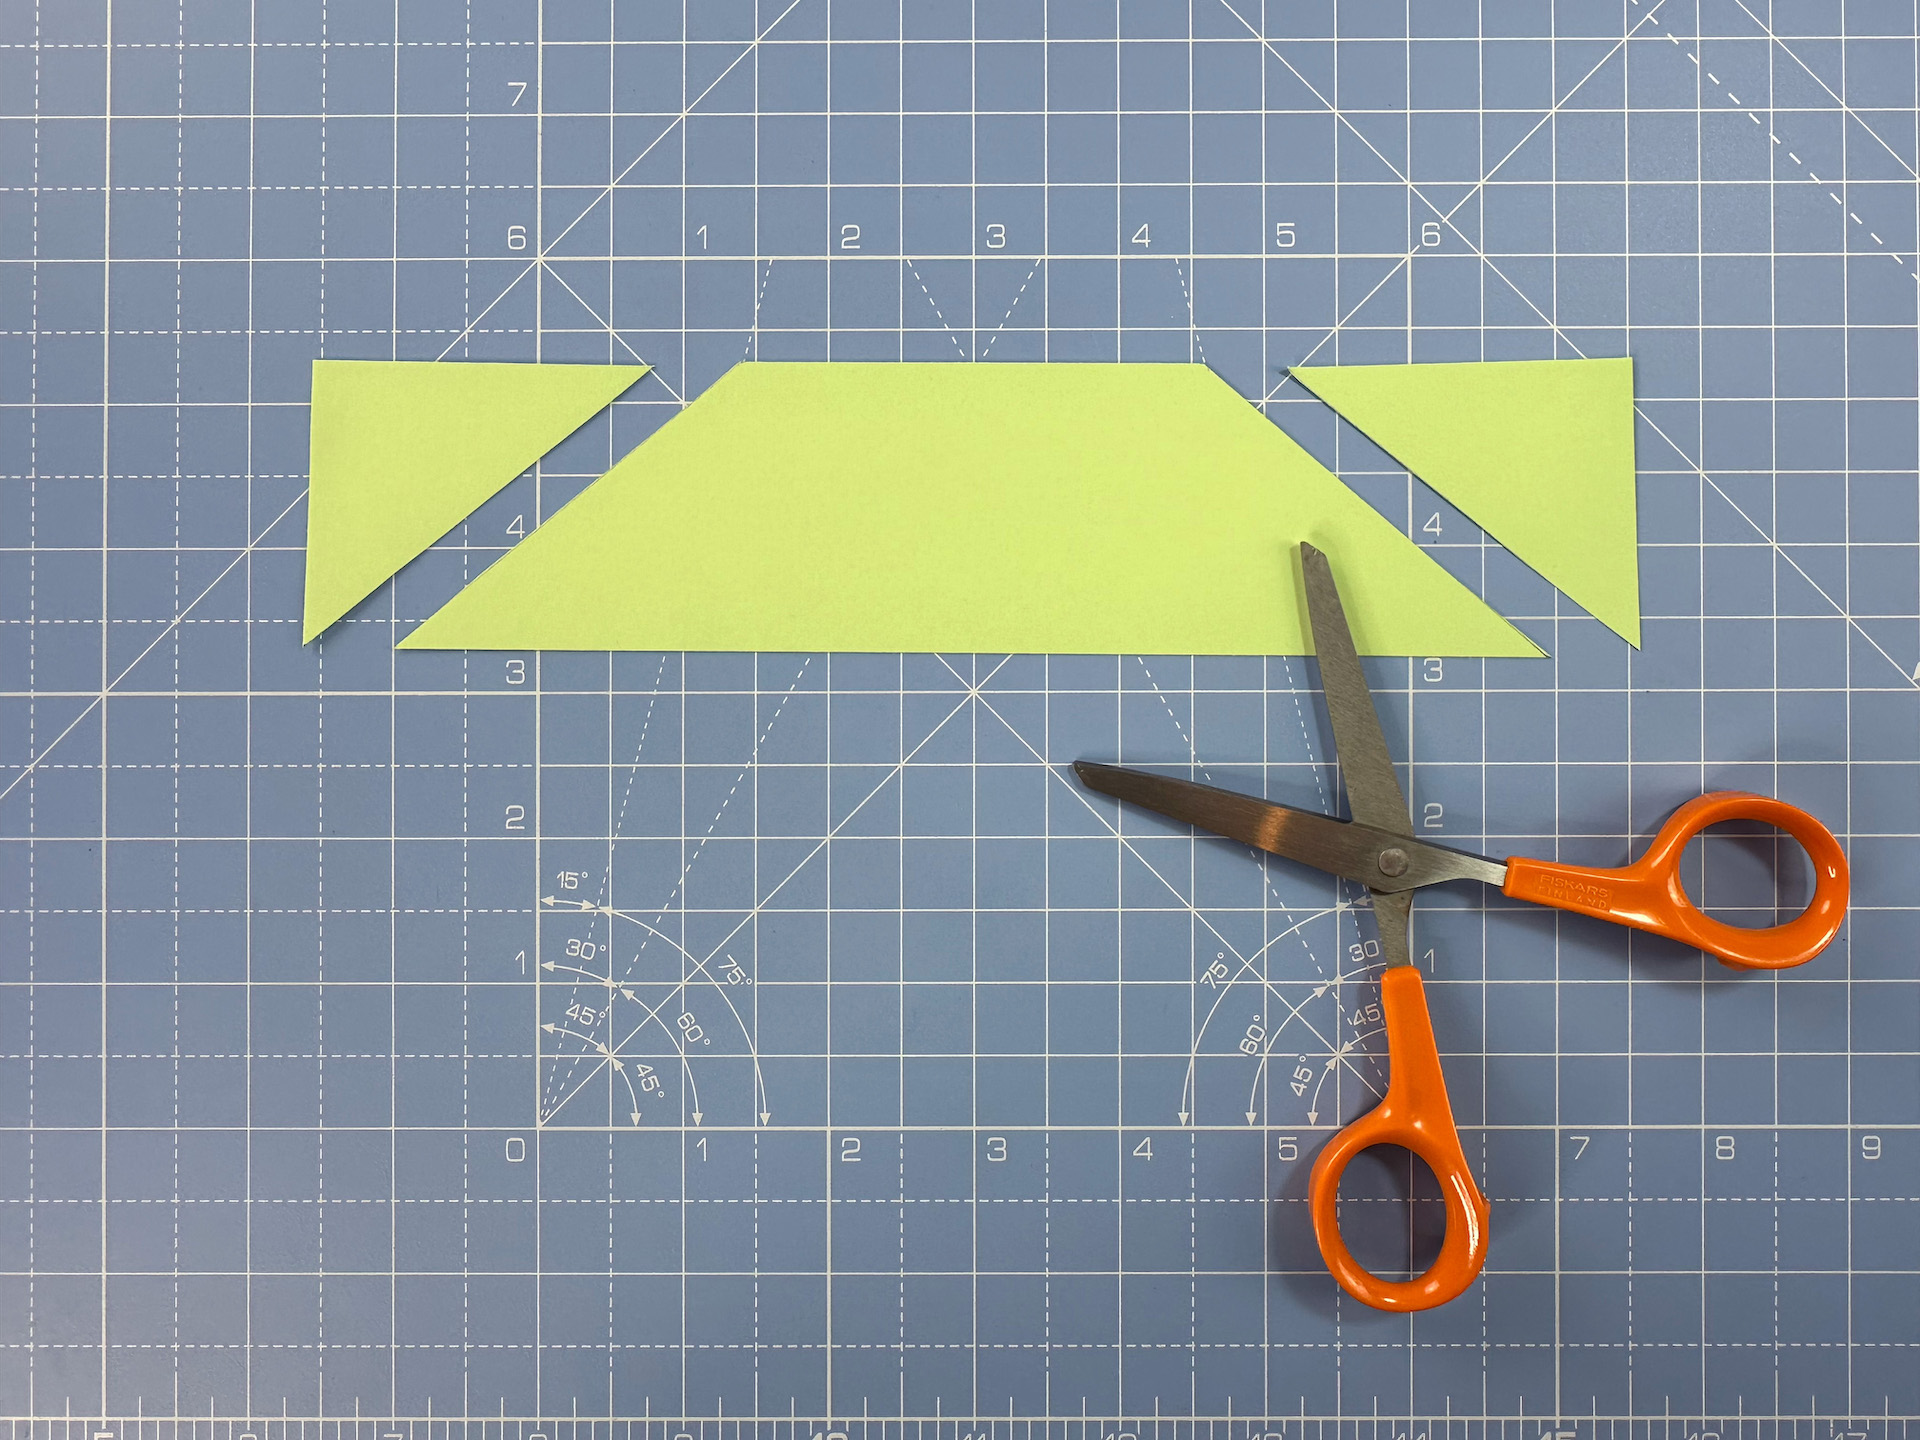
Cut a piece of card 20 x 5 cm. From each end, measure 6cm in.
From these marks, draw a line to the corners.
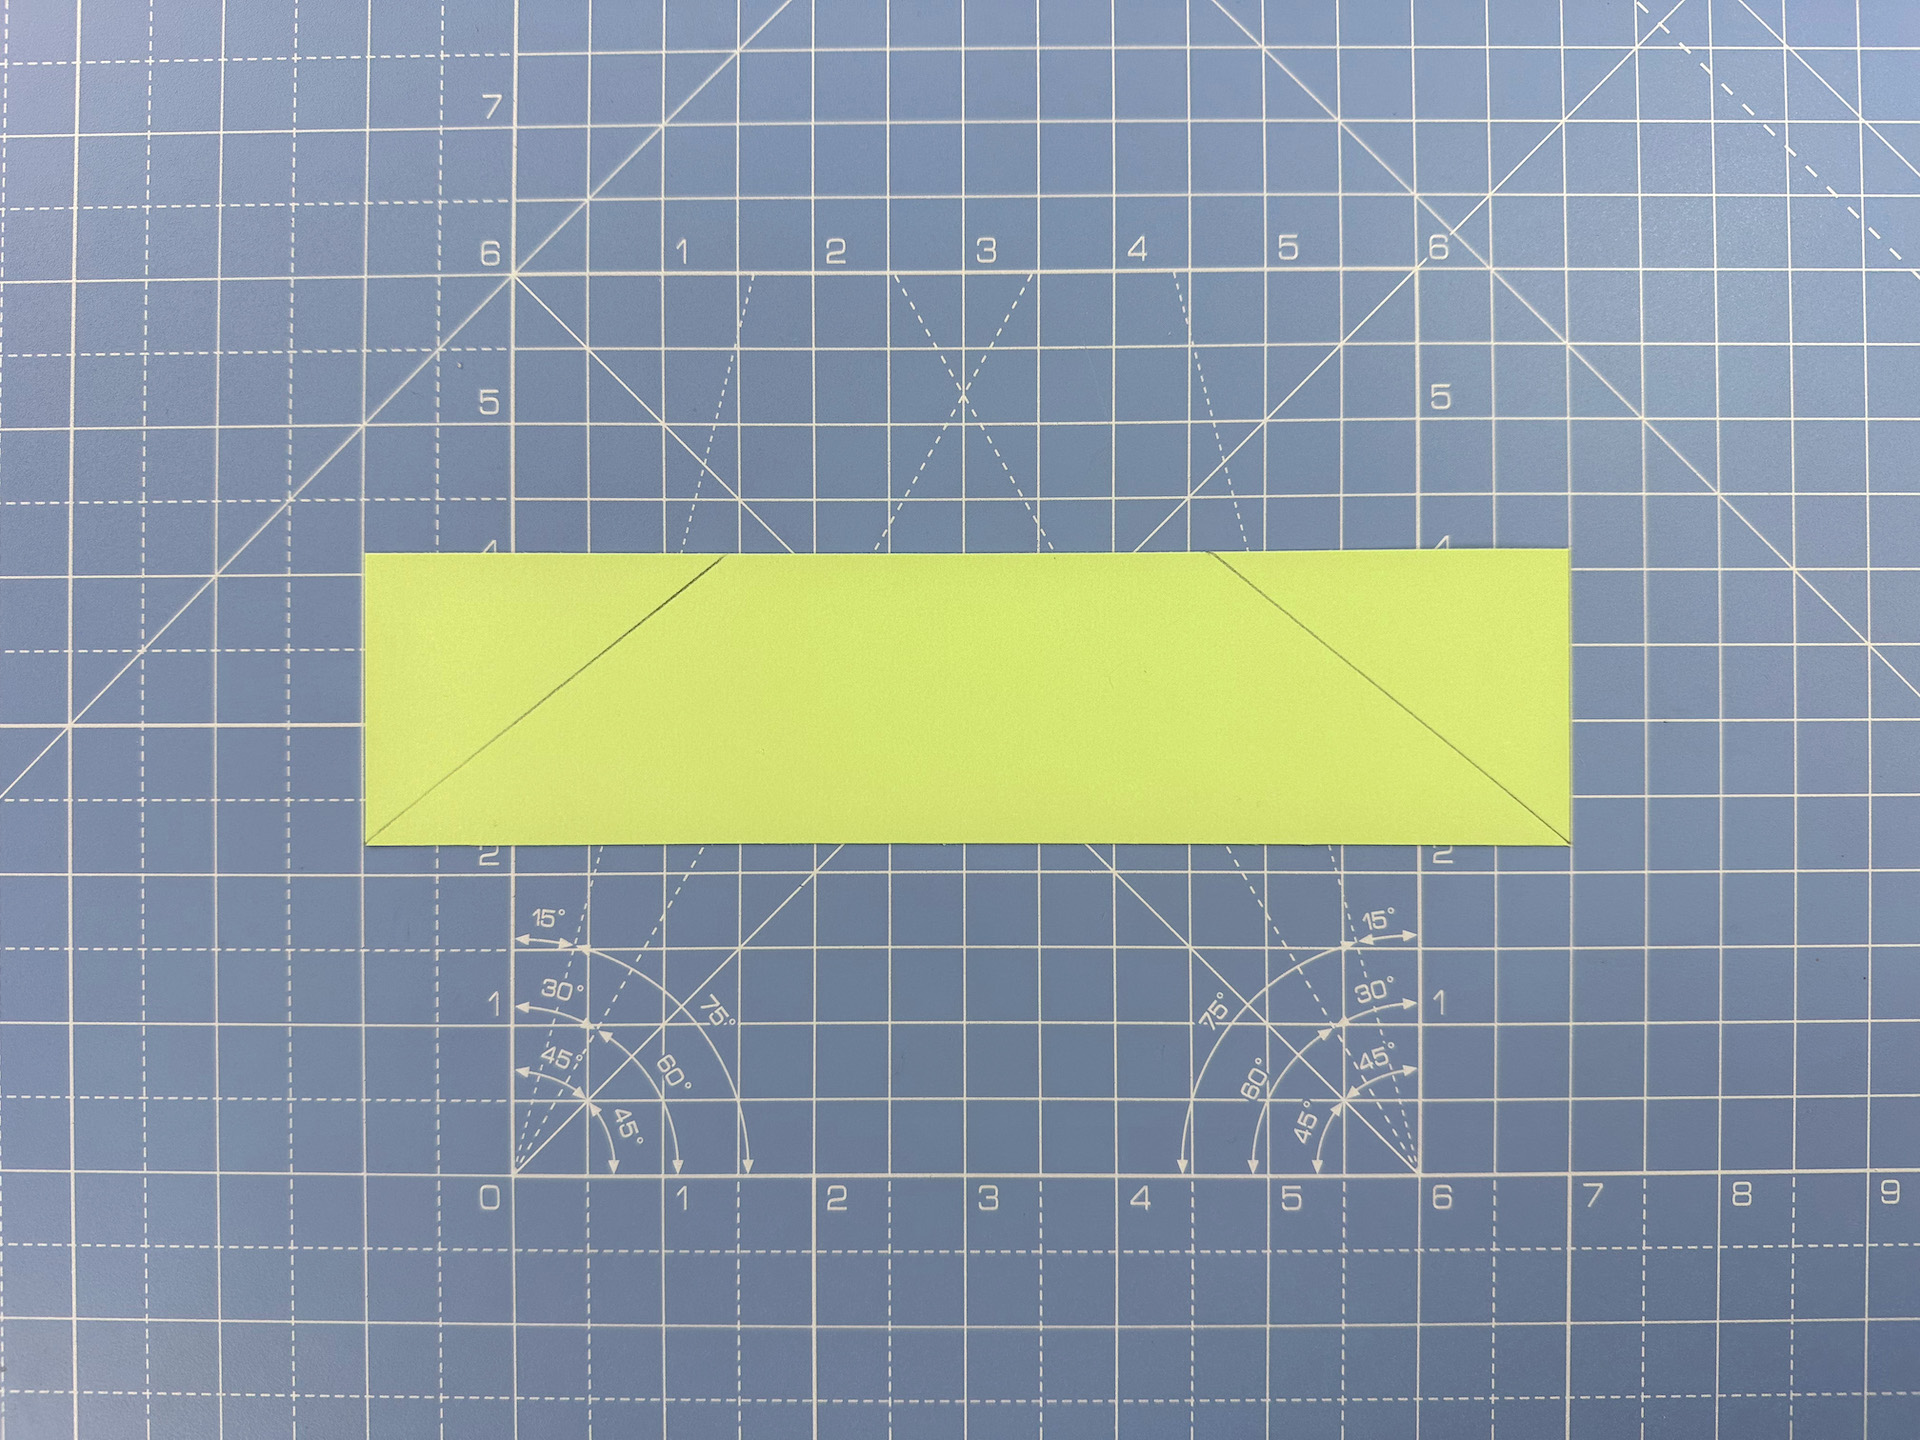
Step 2
Cut the two triangles off either end, so it looks like this.
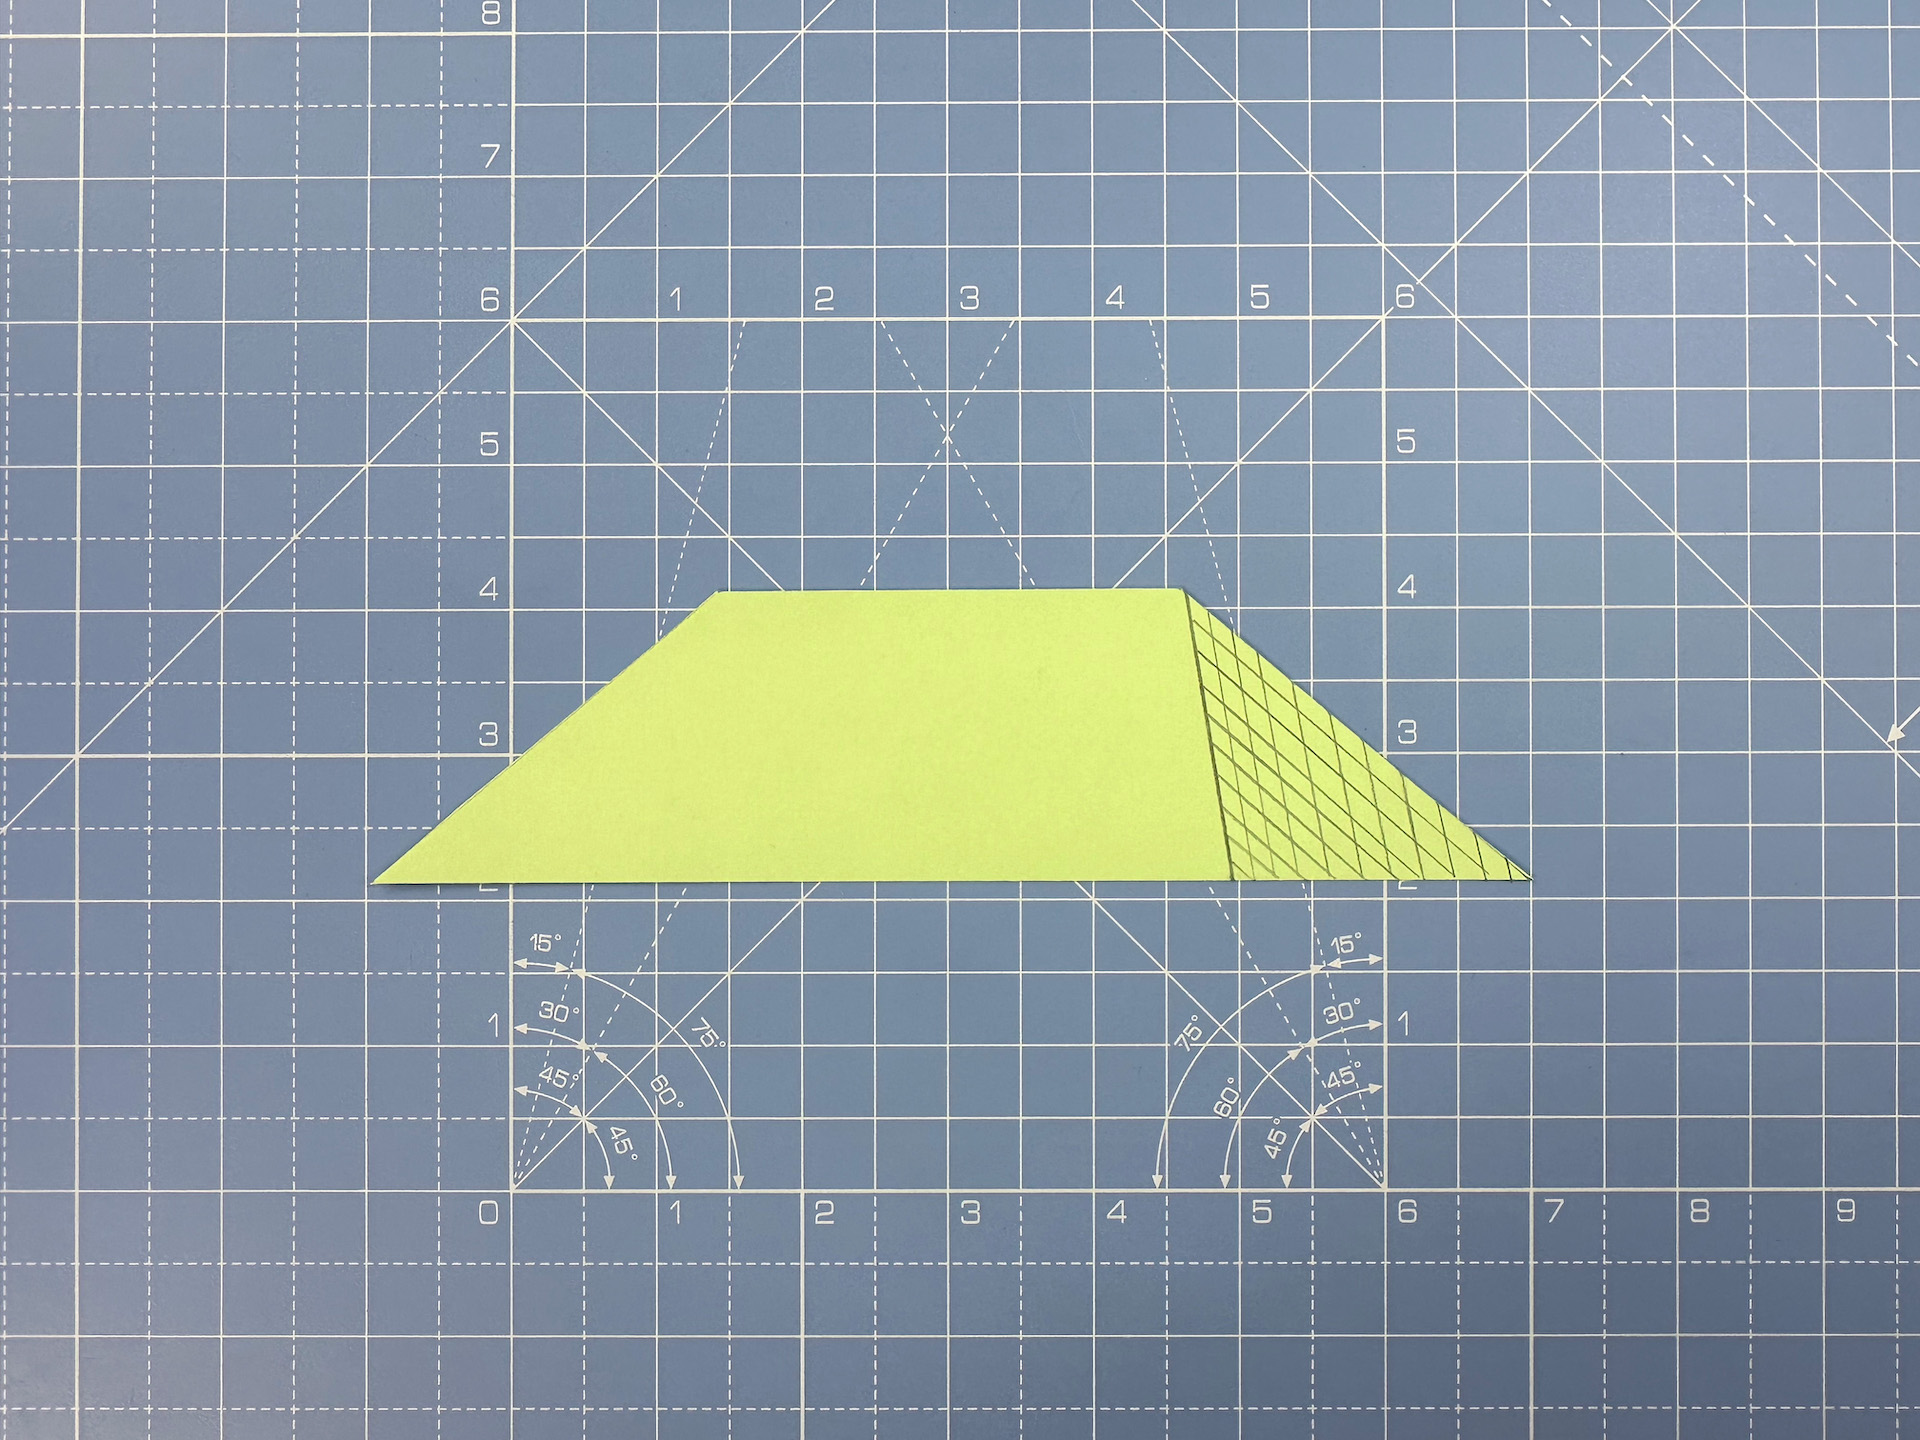
Step 3
Put glue on the area indicated by the cross hatch.
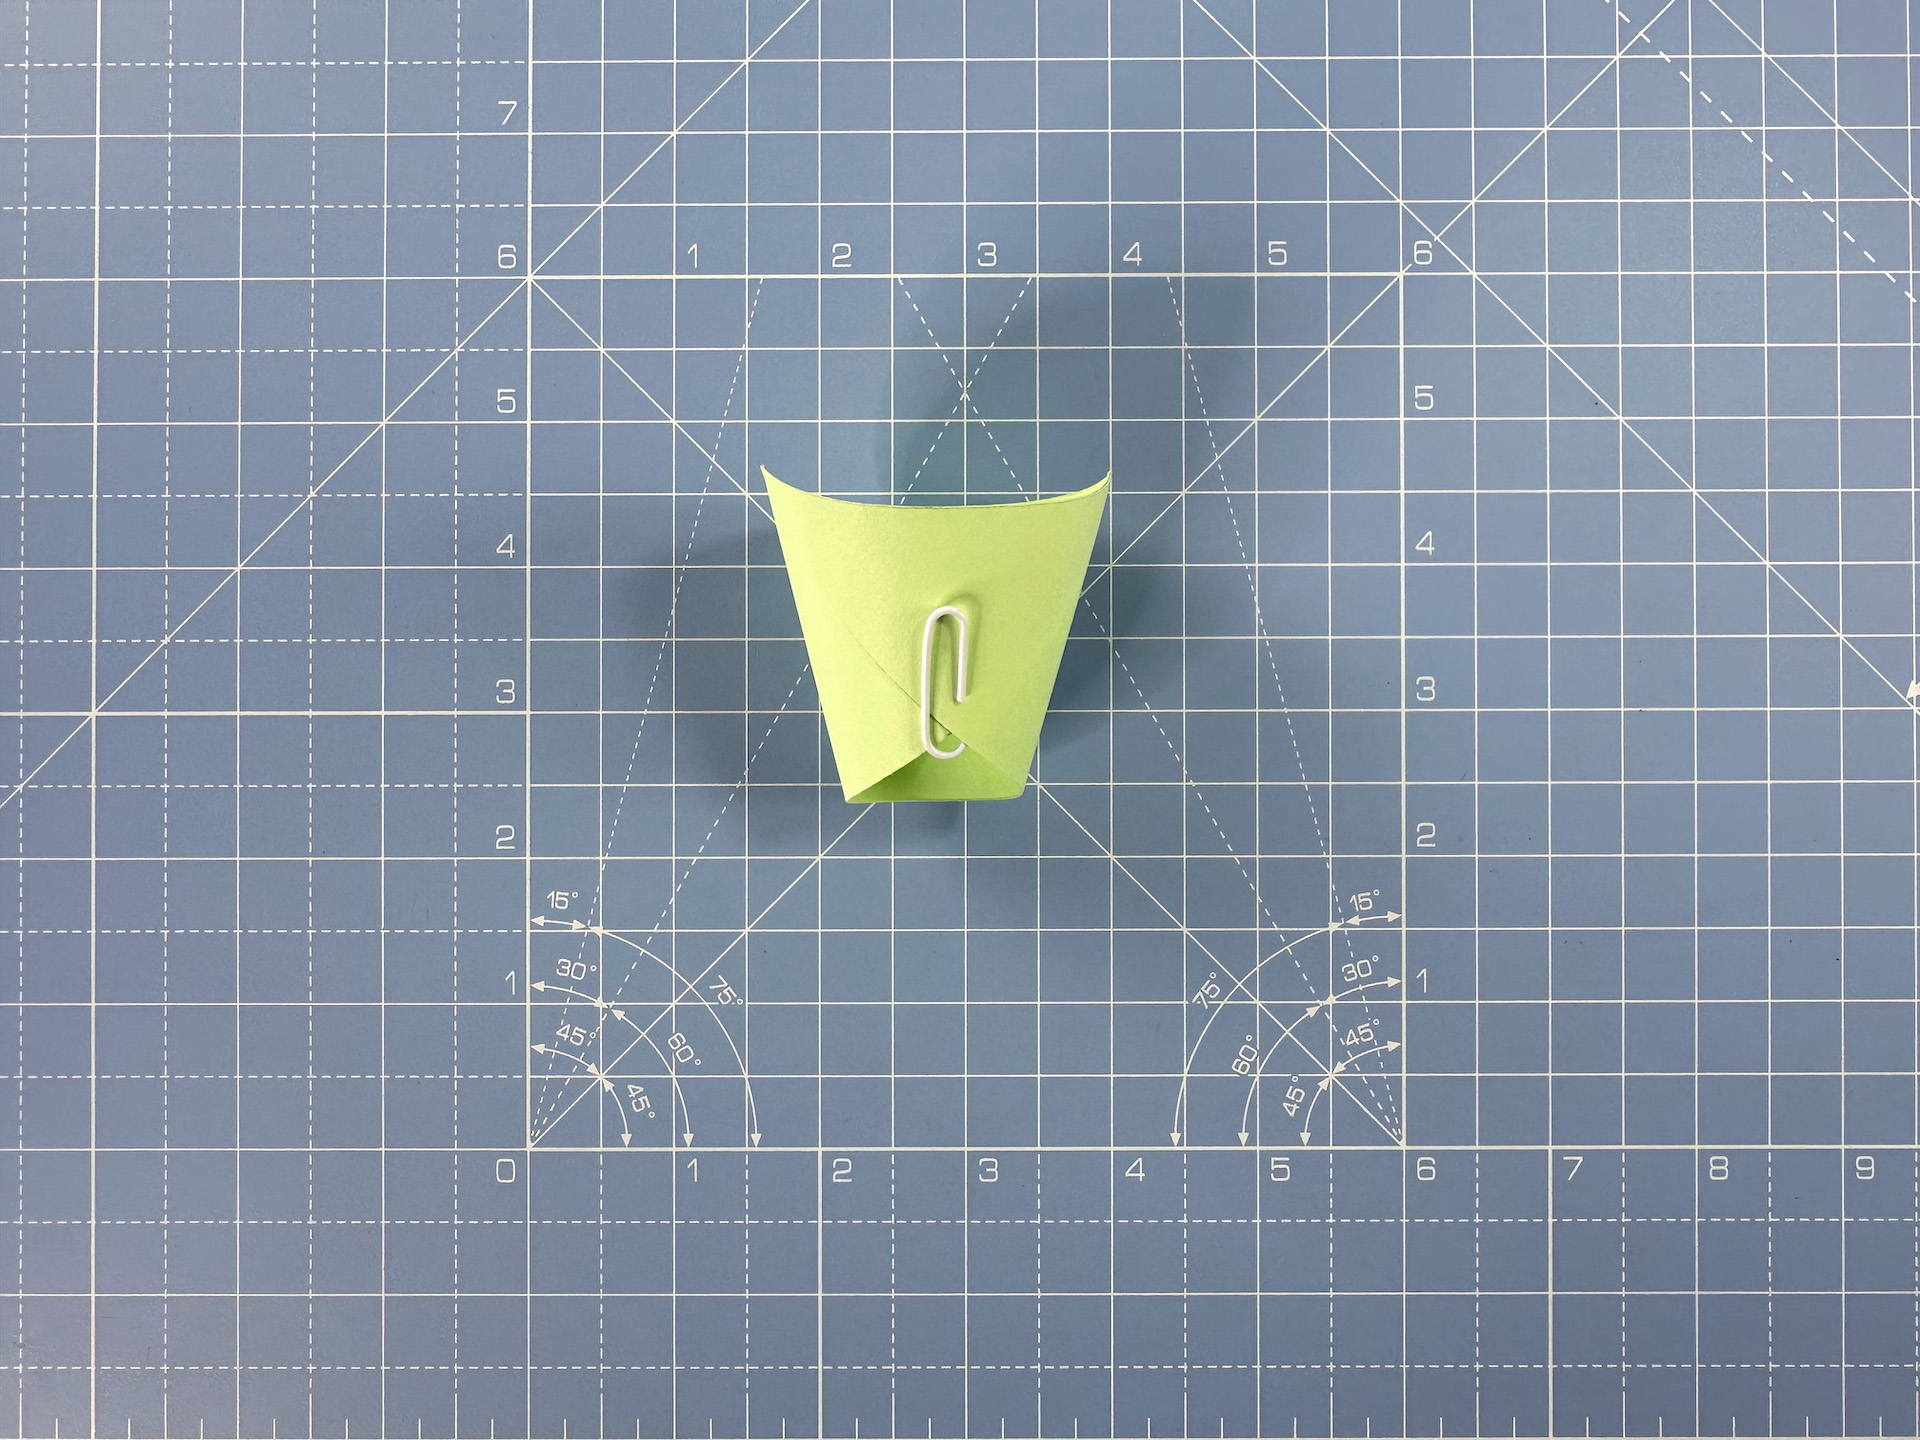
Step 4
Bring the sides together to create a funnel. If you’re using wet glue, hold in place with a paper clip while it dries.
How to wrap your origami bouquet
Step 1
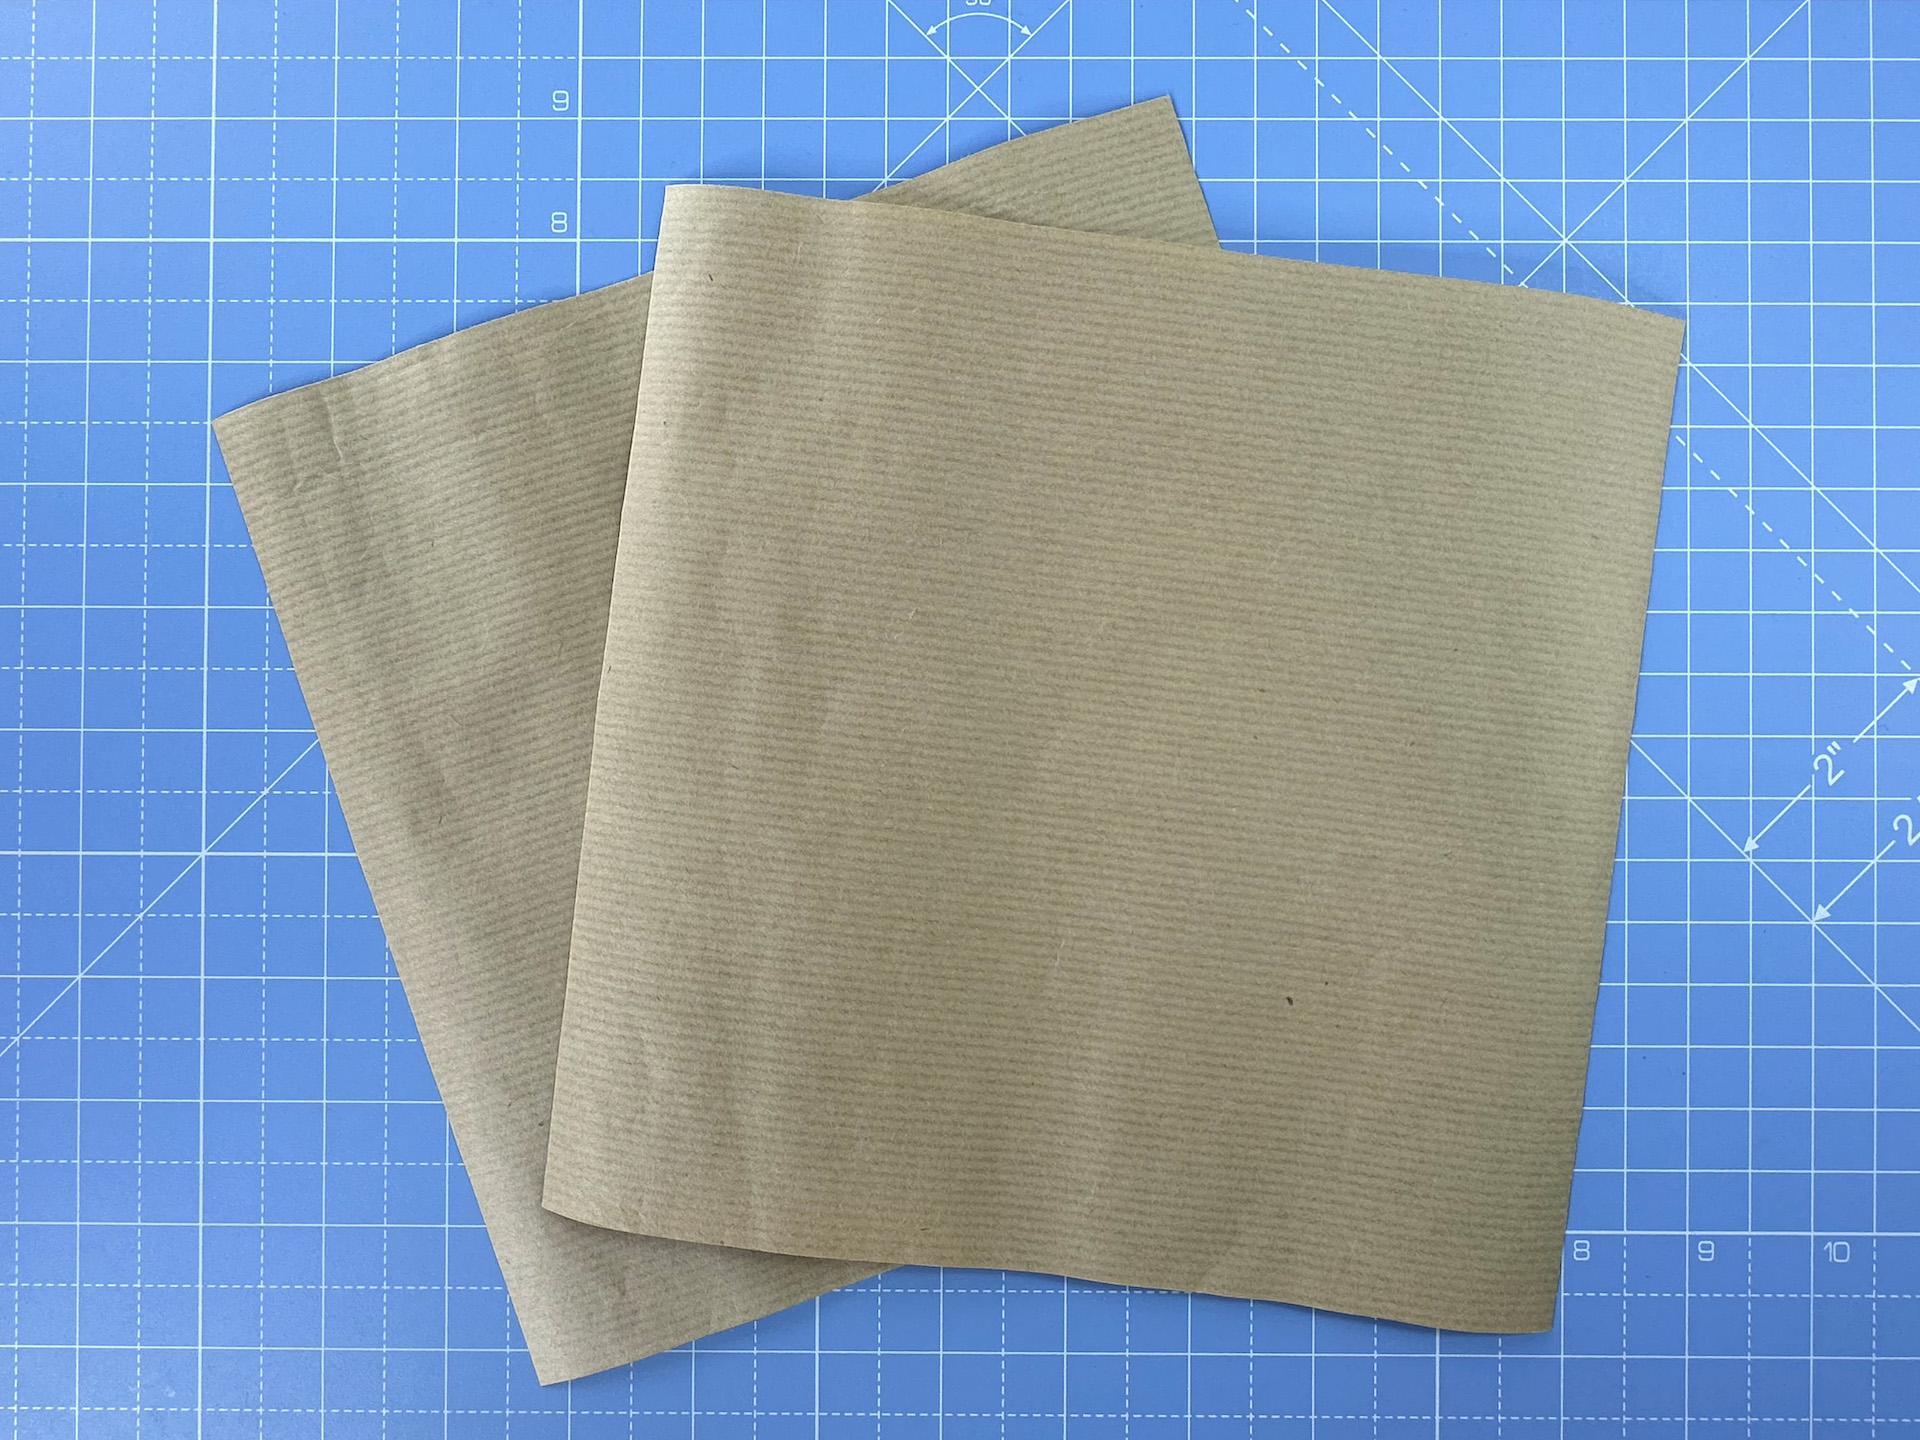
Cut two pieces of paper 21 x 21cm. This will be what you’re using to wrap your bouquet, so thin paper is ideal. We’re using kraft paper, but you might like to opt for thin handmade paper, origami paper or even newspaper.
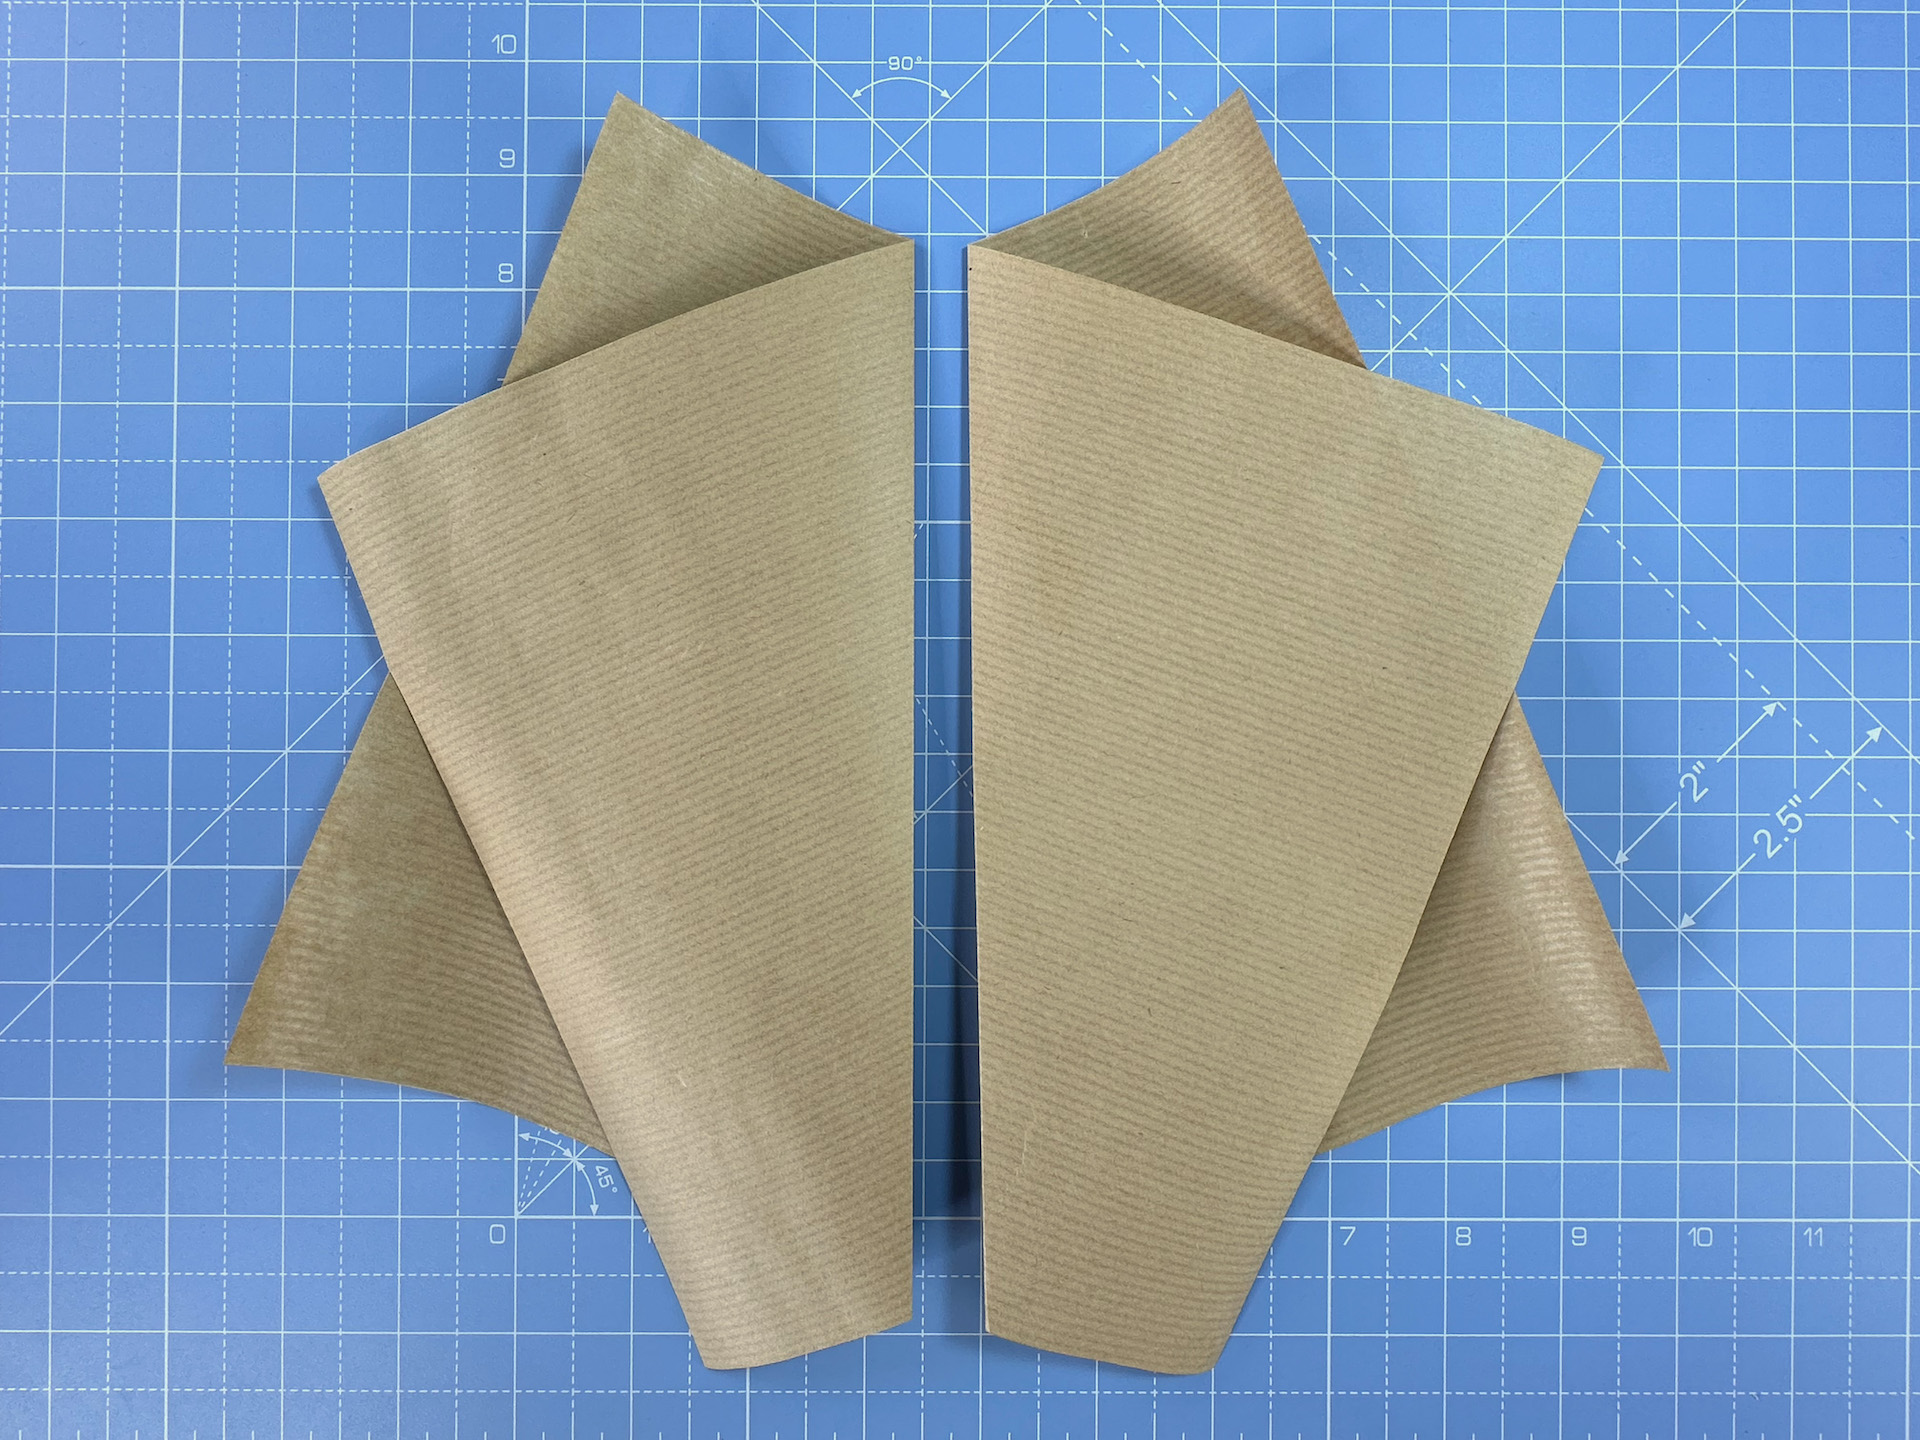
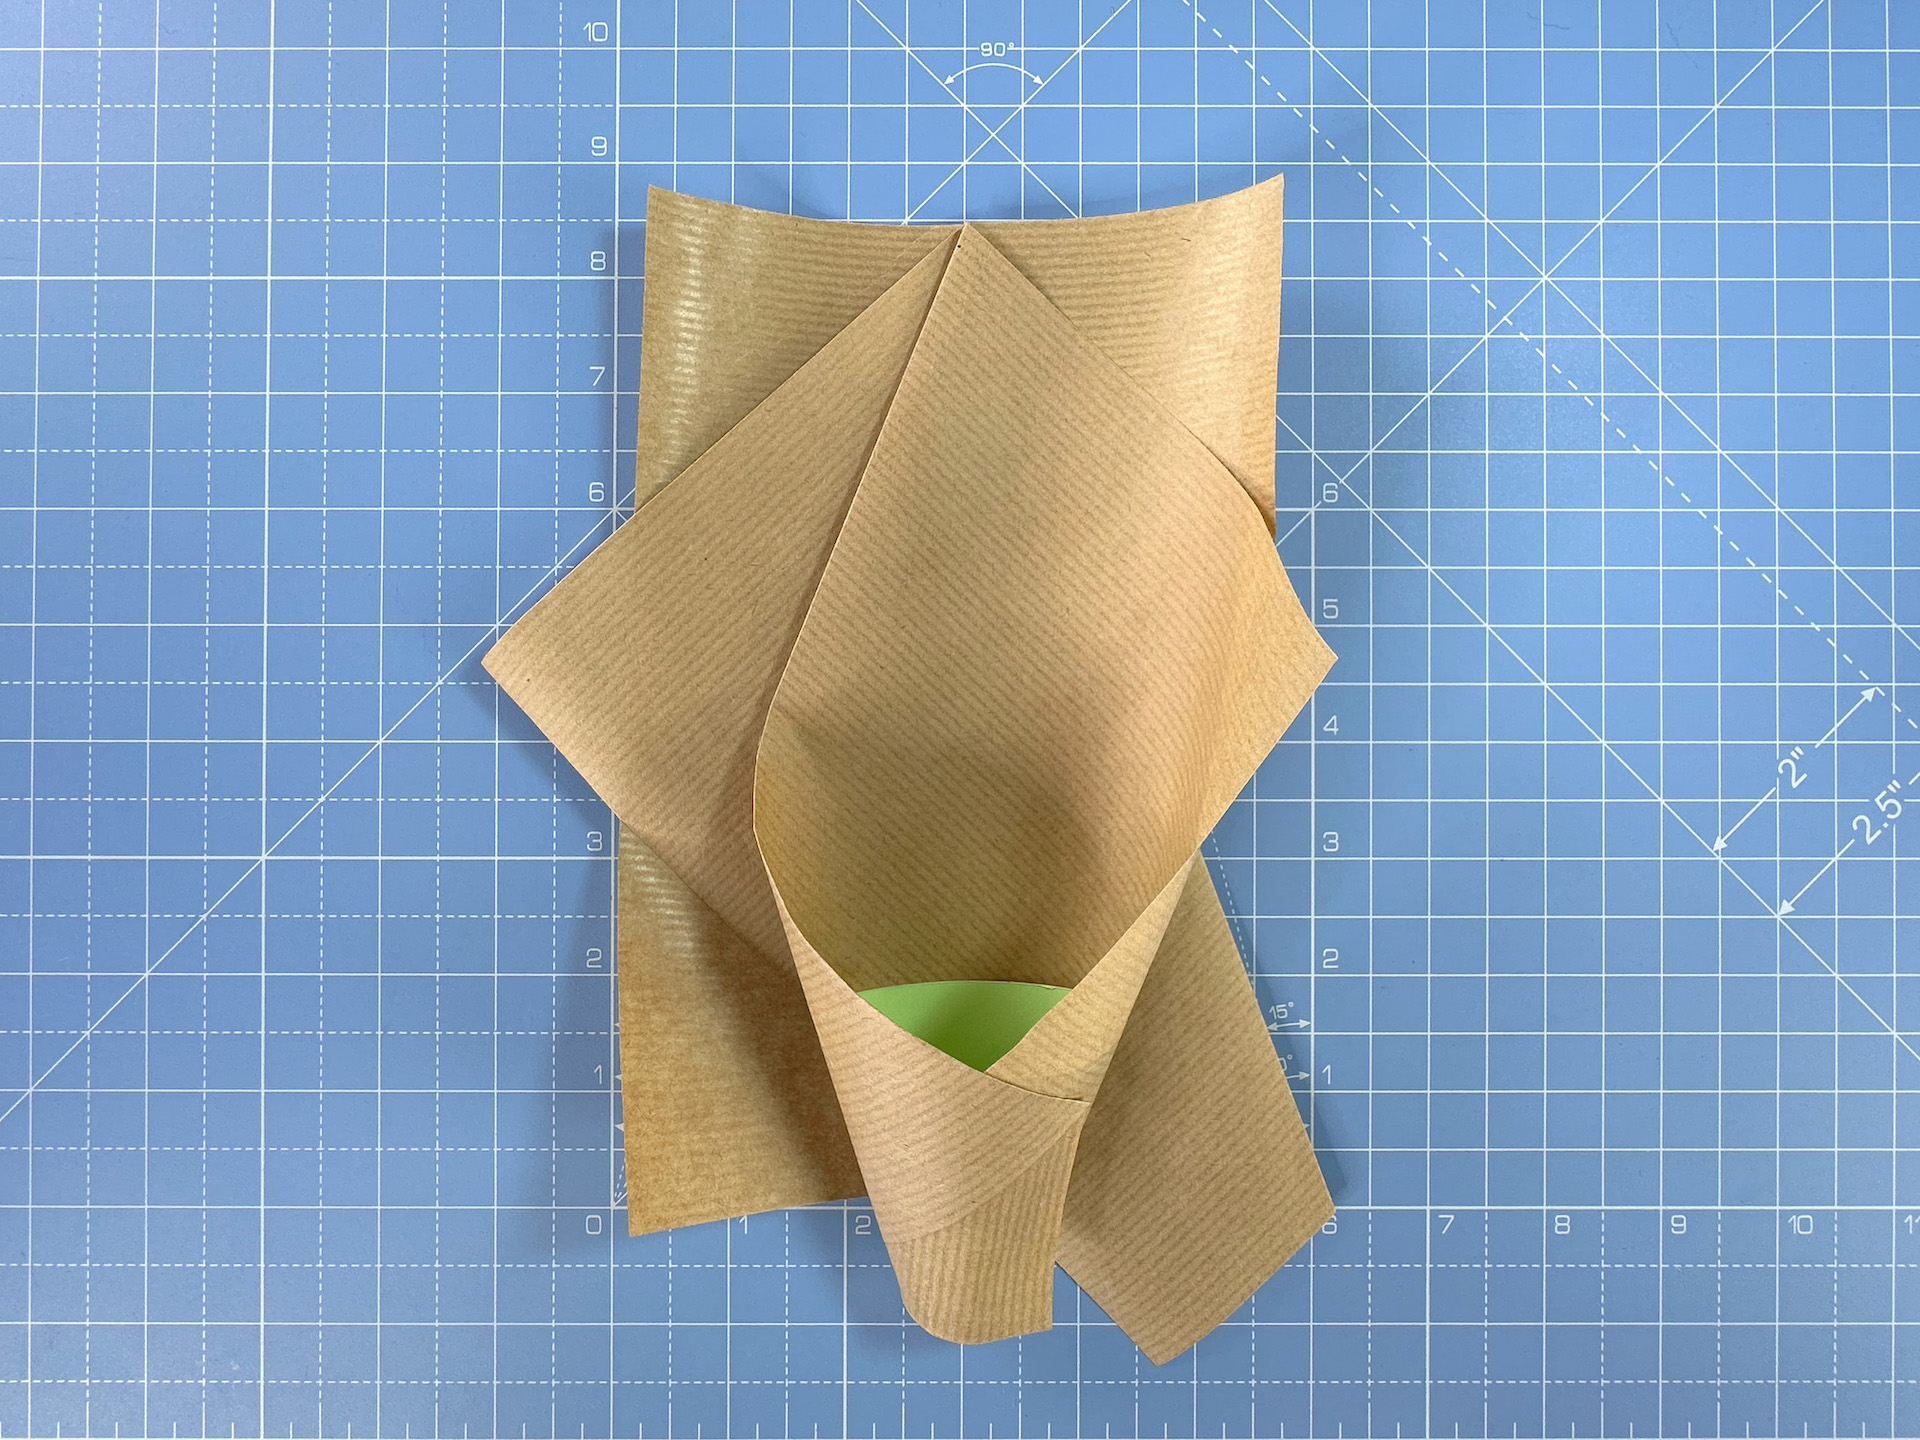
Step 2
Make a diagonal, off-centre fold on both pieces. Fold one piece to the left, and the other to the right. You’re aiming for them to be reflections of each other.
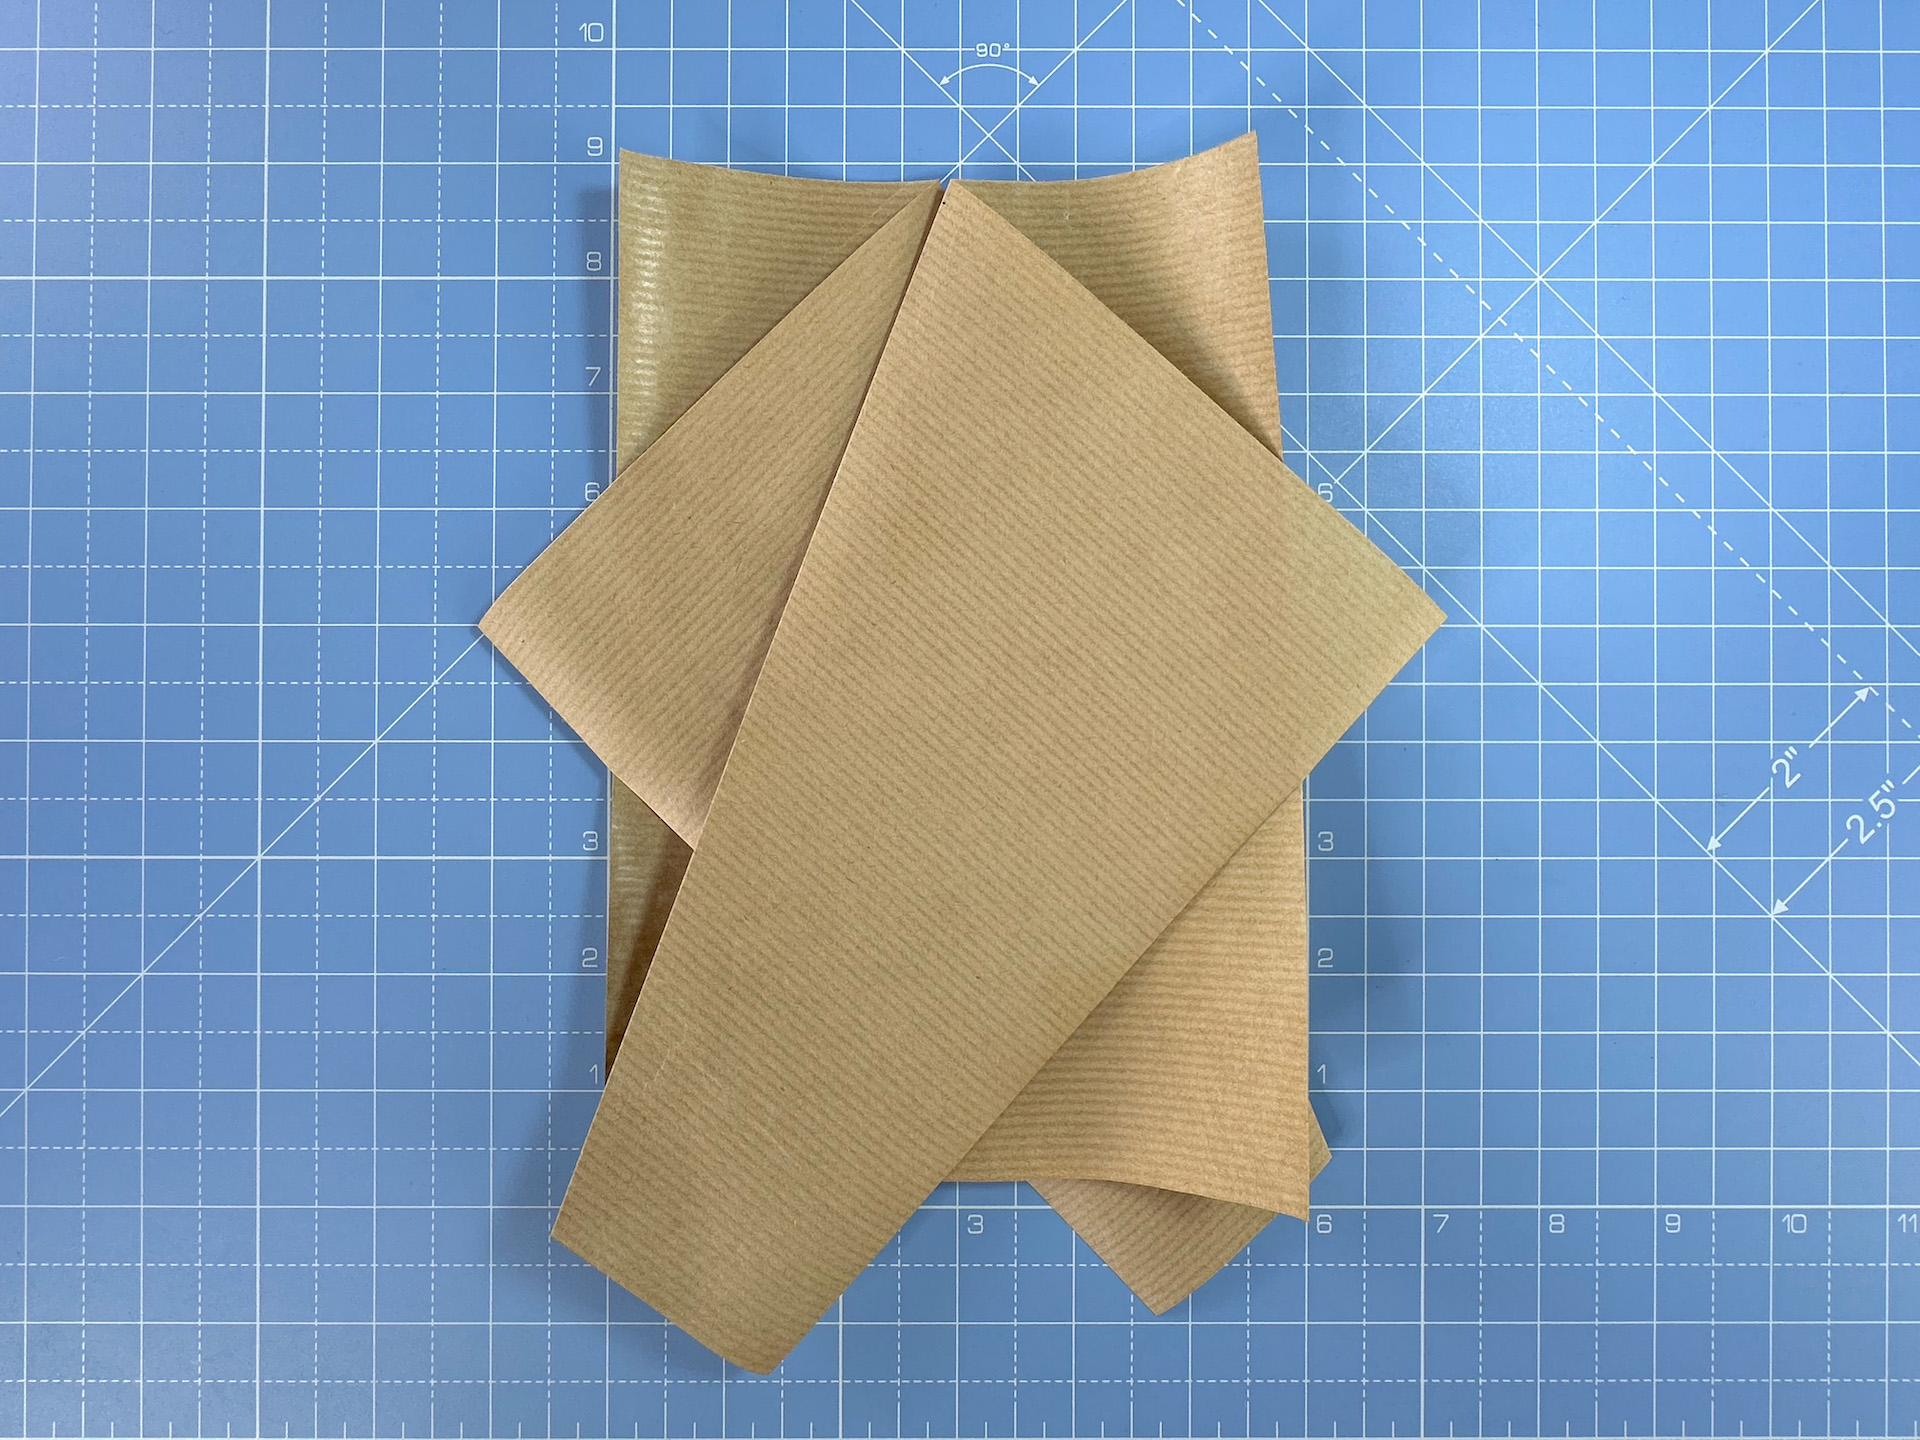
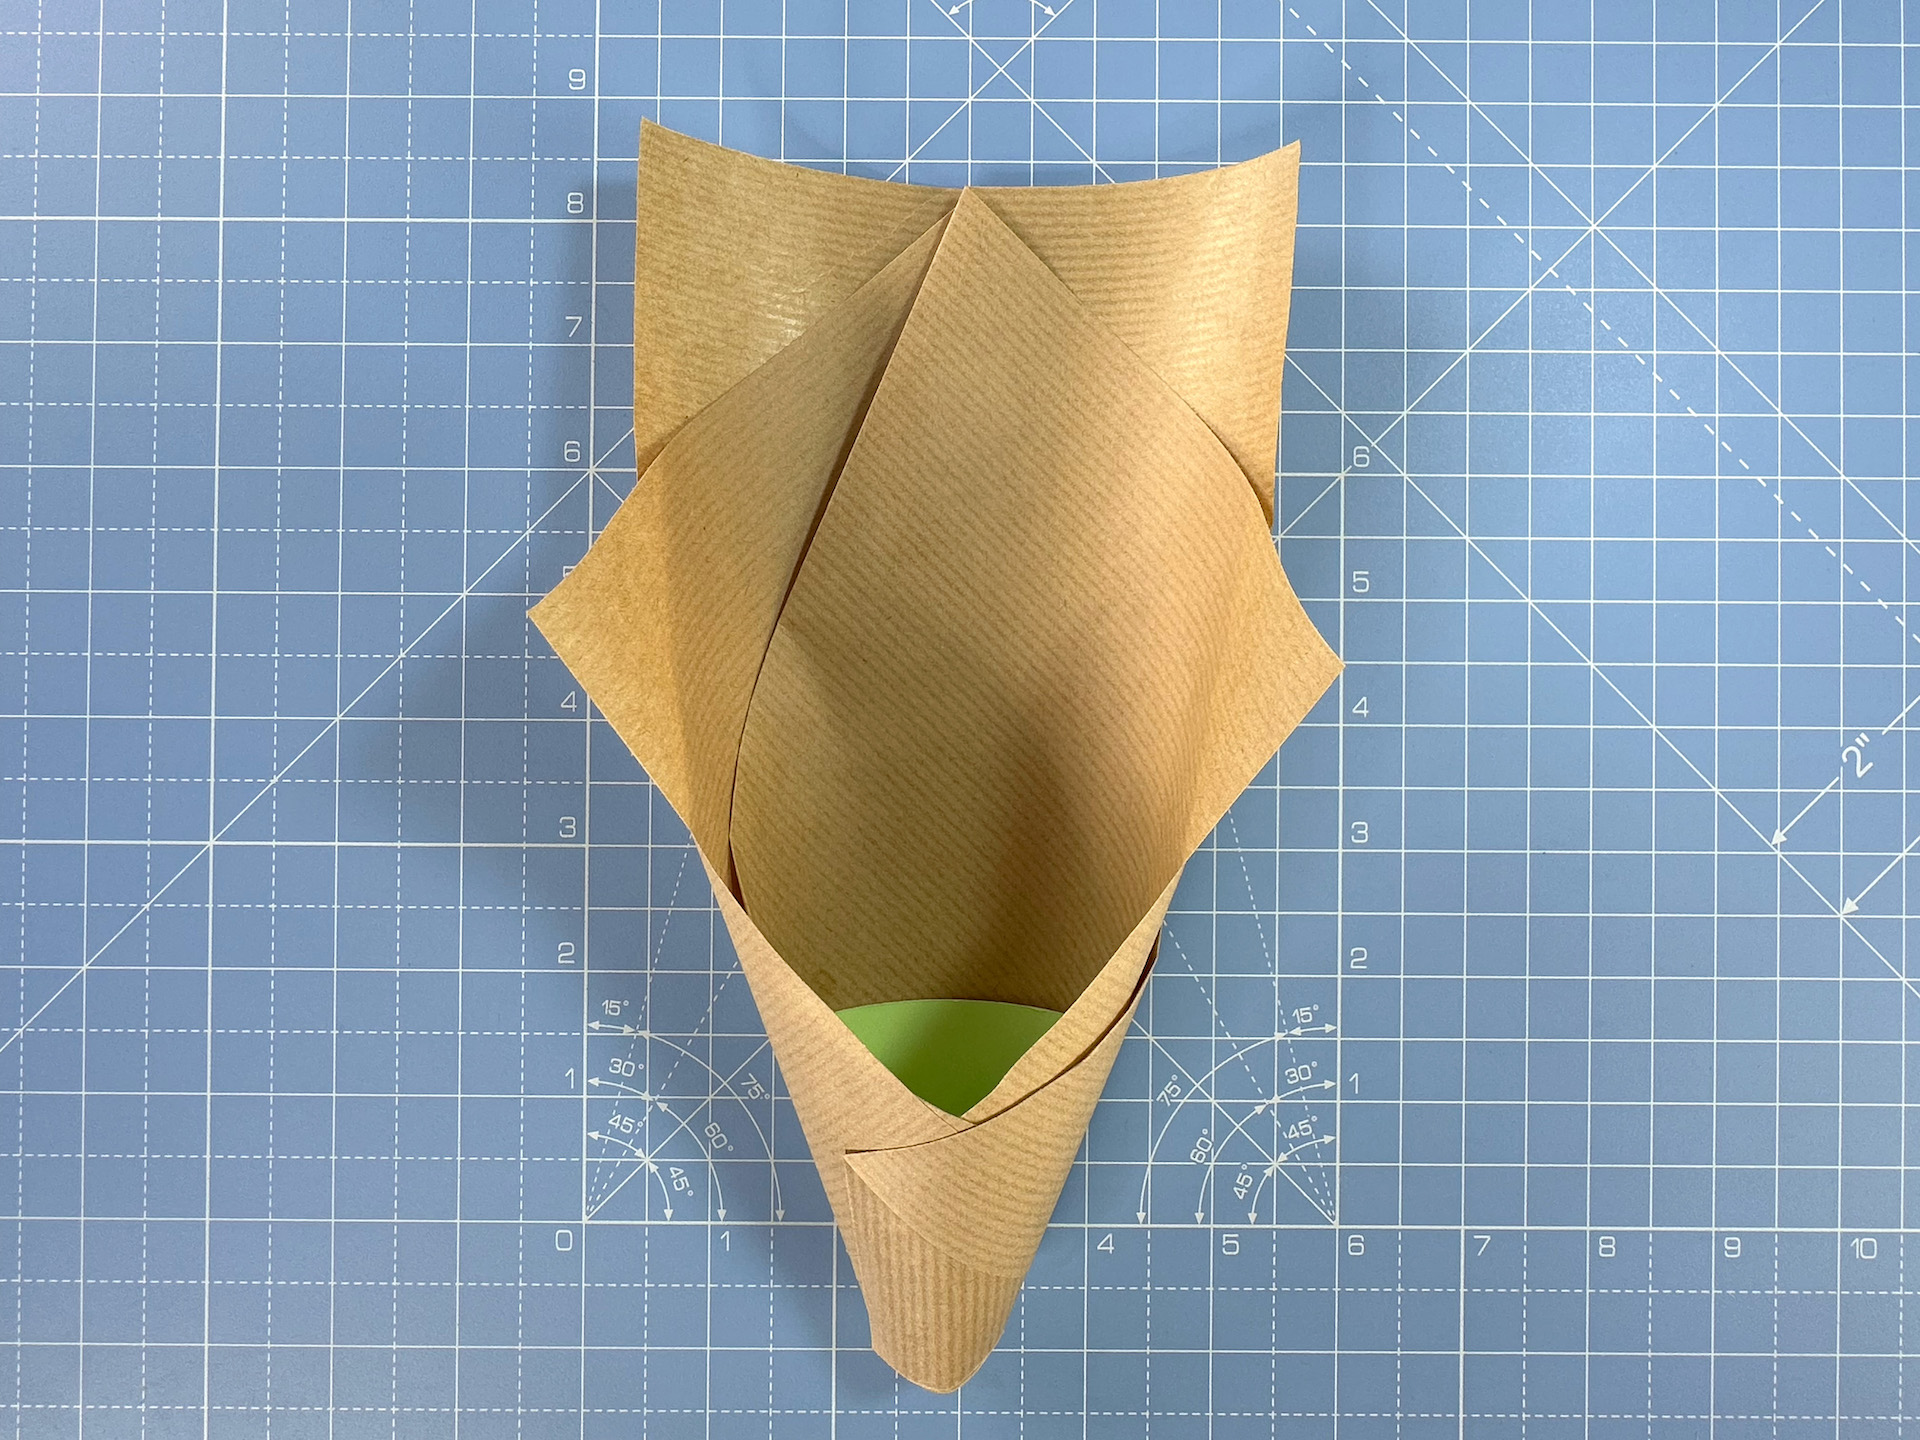
Step 3
Arrange the two pieces, one on top of the other, like this.
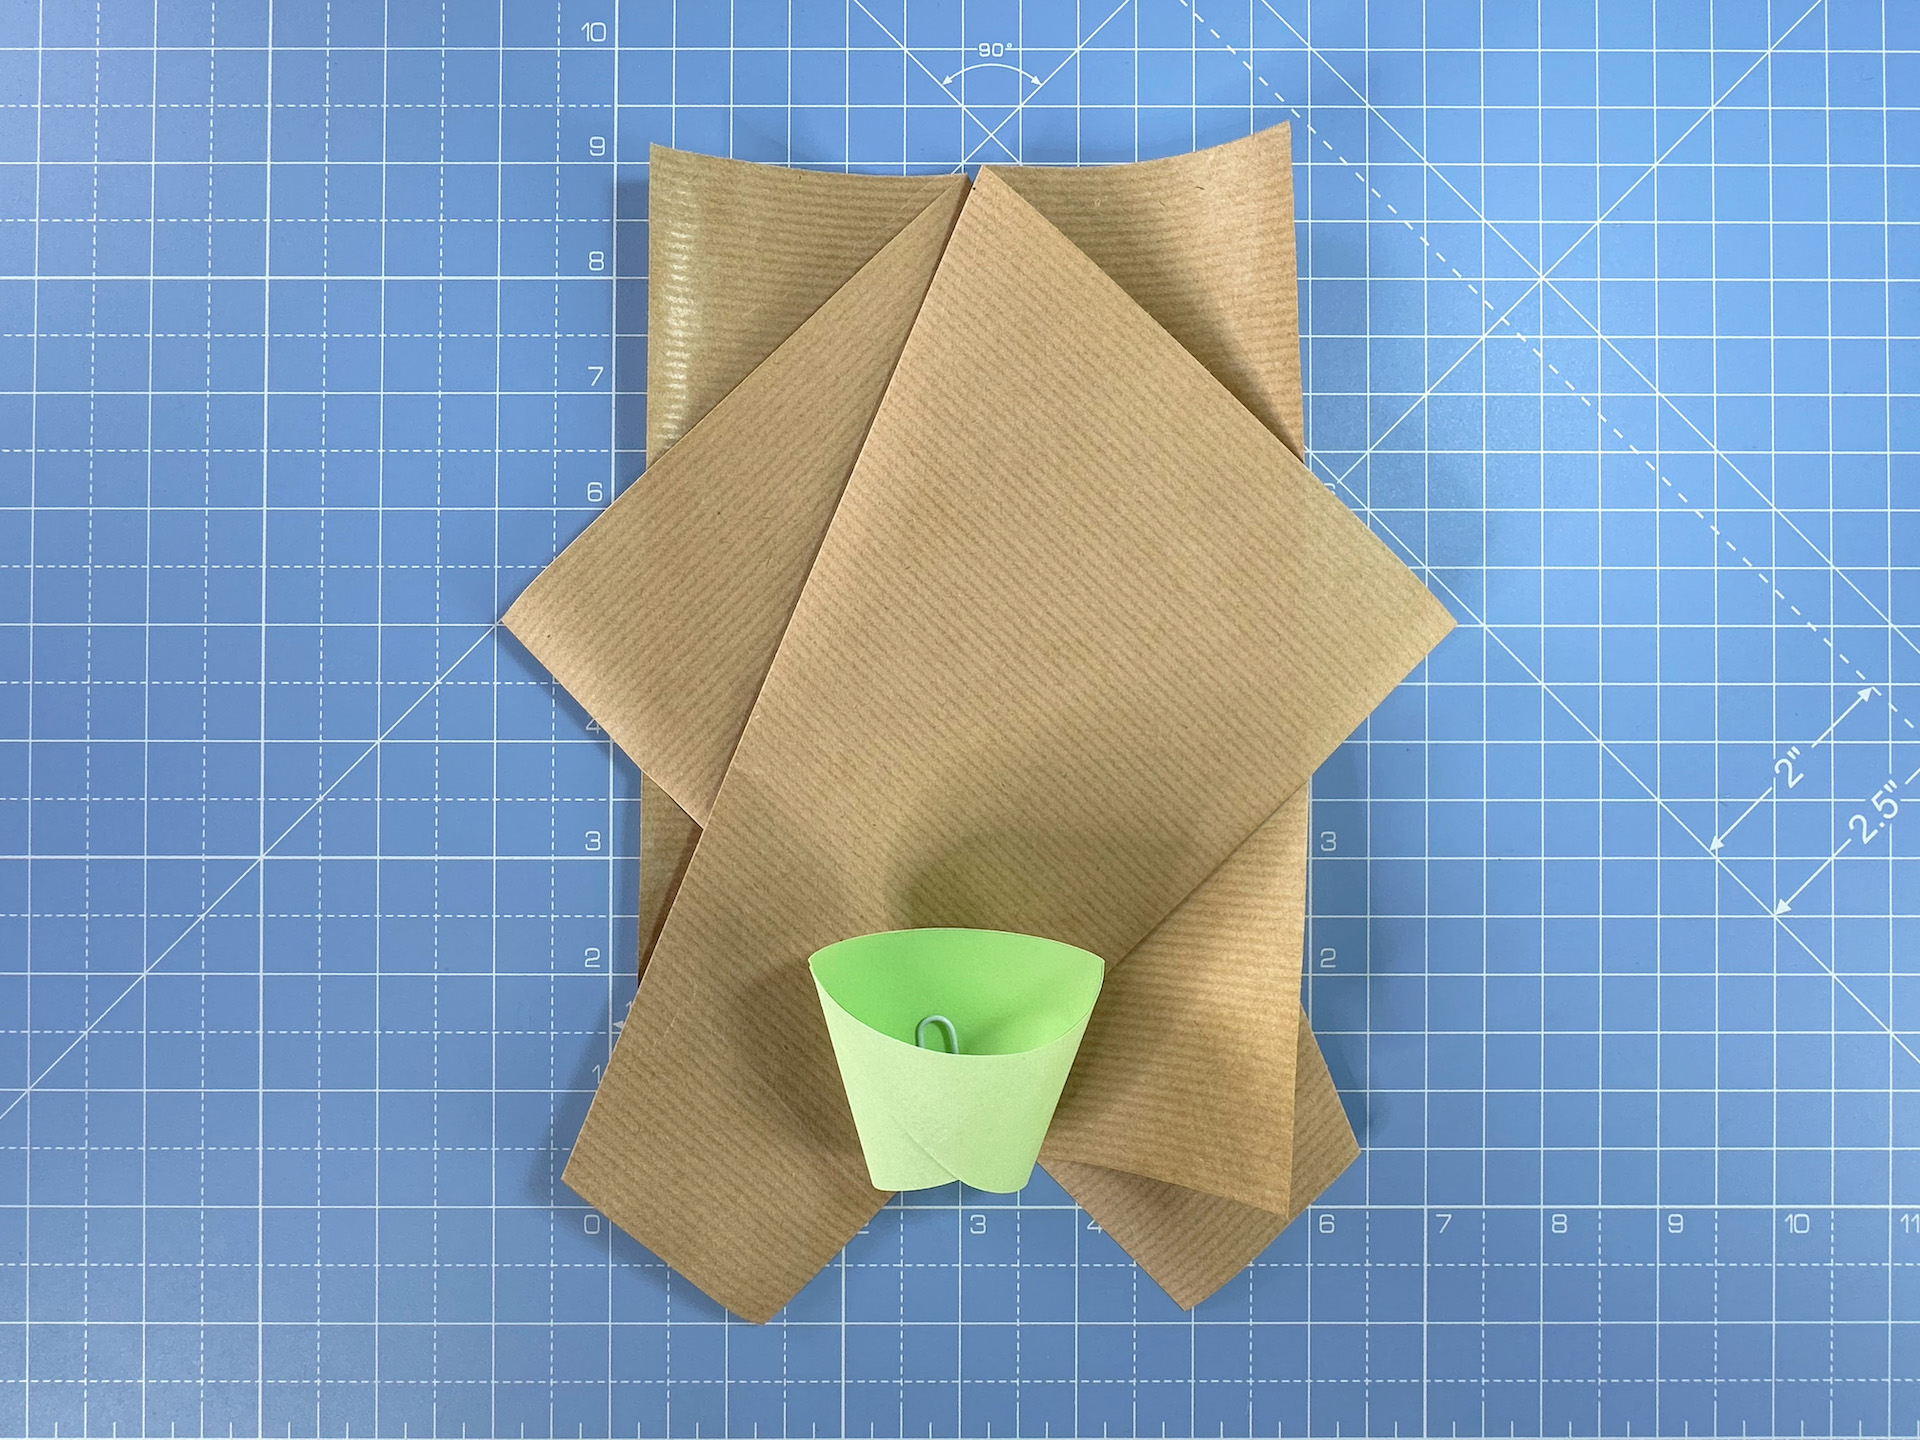
Step 4
Place the funnel on top, and hold in place with a paper clip.
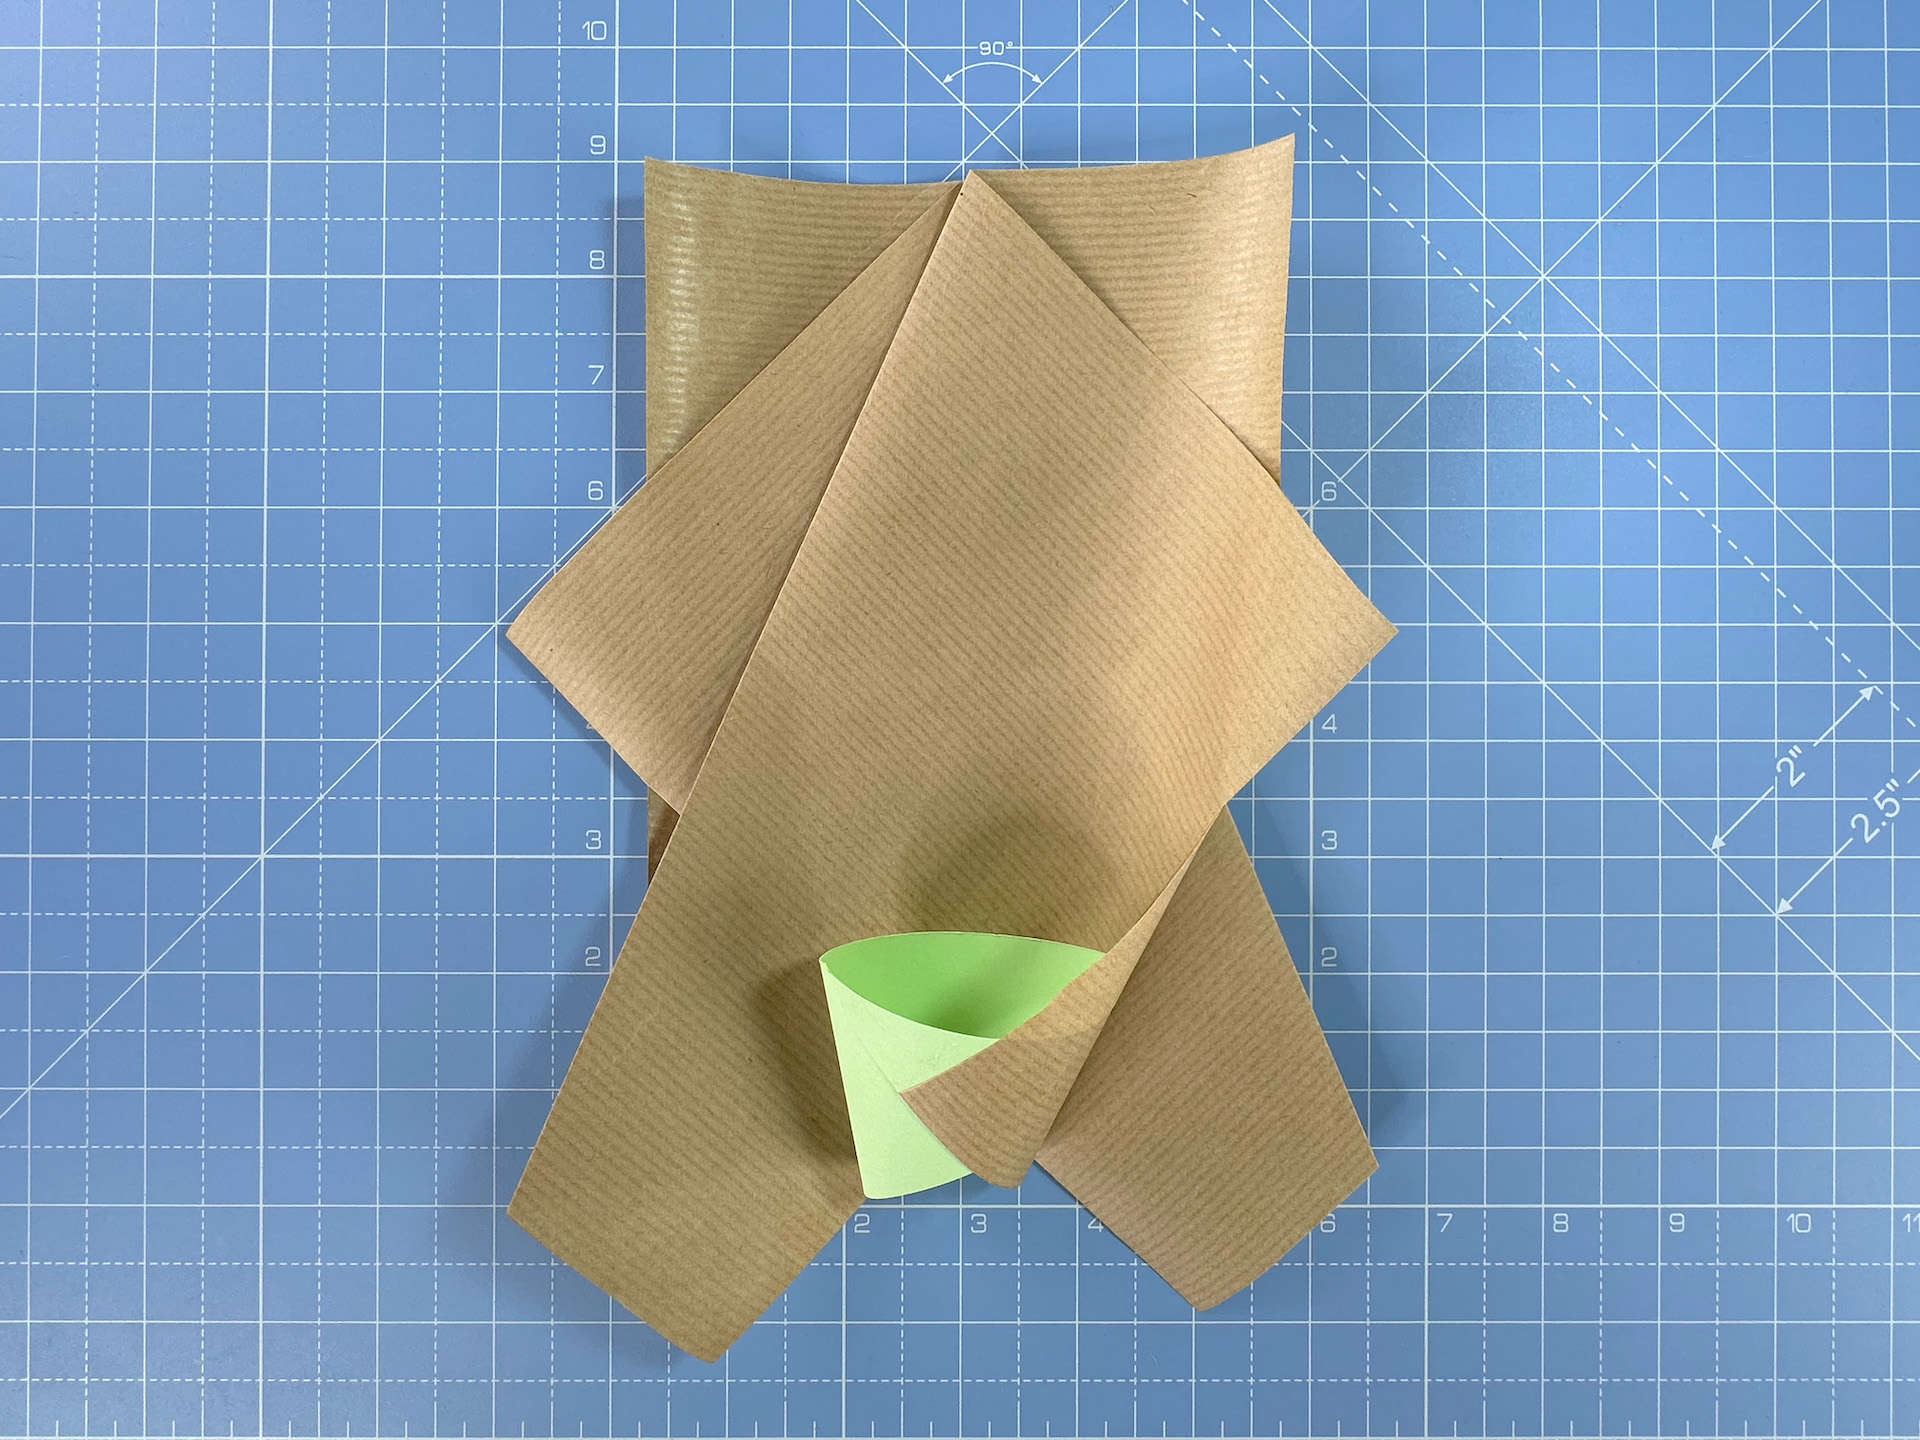
Step 5
Put glue on the right-hand side of the paper (a gentle glue such as Pritt Stick is ideal for this) then wrap around the funnel to secure.
Step 6
Repeat on the other side.
Step 7
Keep going until all the paper is stuck onto the funnel.
Arrange your origami flowers for the bouquet
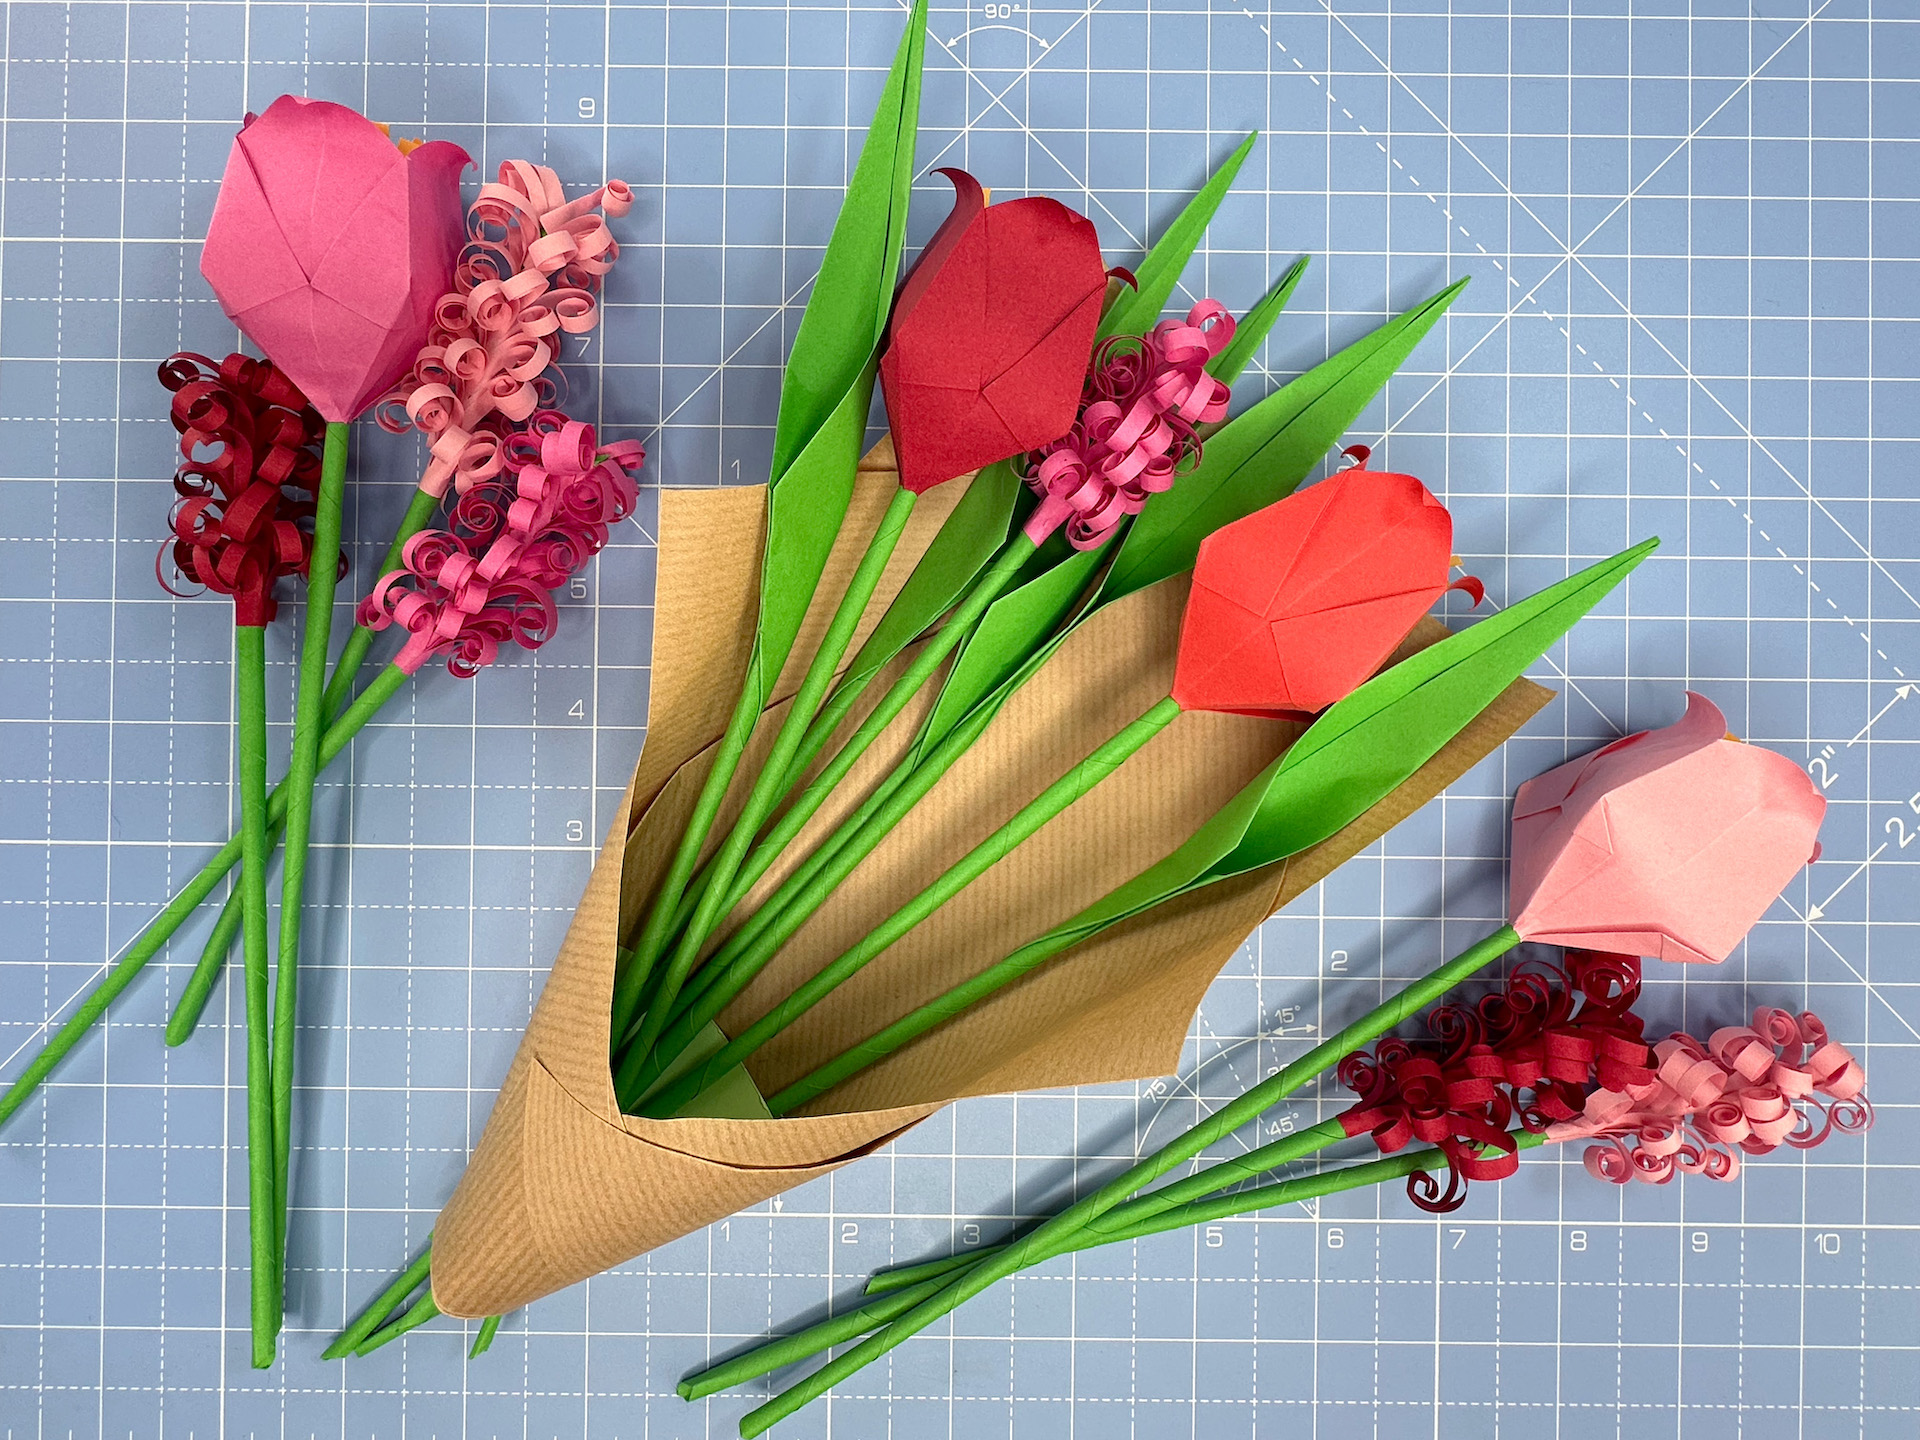
Step 1
It’s up to you how to arrange the flowers, but you might like to start by planning the approximate positions of your statement flowers. We’ve opted for five tulips as our statement flower. If you want to make your origami flower bouquet exactly as we’ve made ours, here are the precise number of flowers used:
- 25 stalks (one for each of the flowers and leaves)
- 5 x tulips
- 5 x leaves (not attached to the tulips)
- 10 x hyacinths
- 5 x buds

Step 2
Because this origami flower bouquet has a ‘back’ to it, it’s easier to start at the back, then work your way to the front. (If it was a circular bouquet, you’d want to start in the middle.)
Add in two tulips and some foliage at the back of your bouquet.
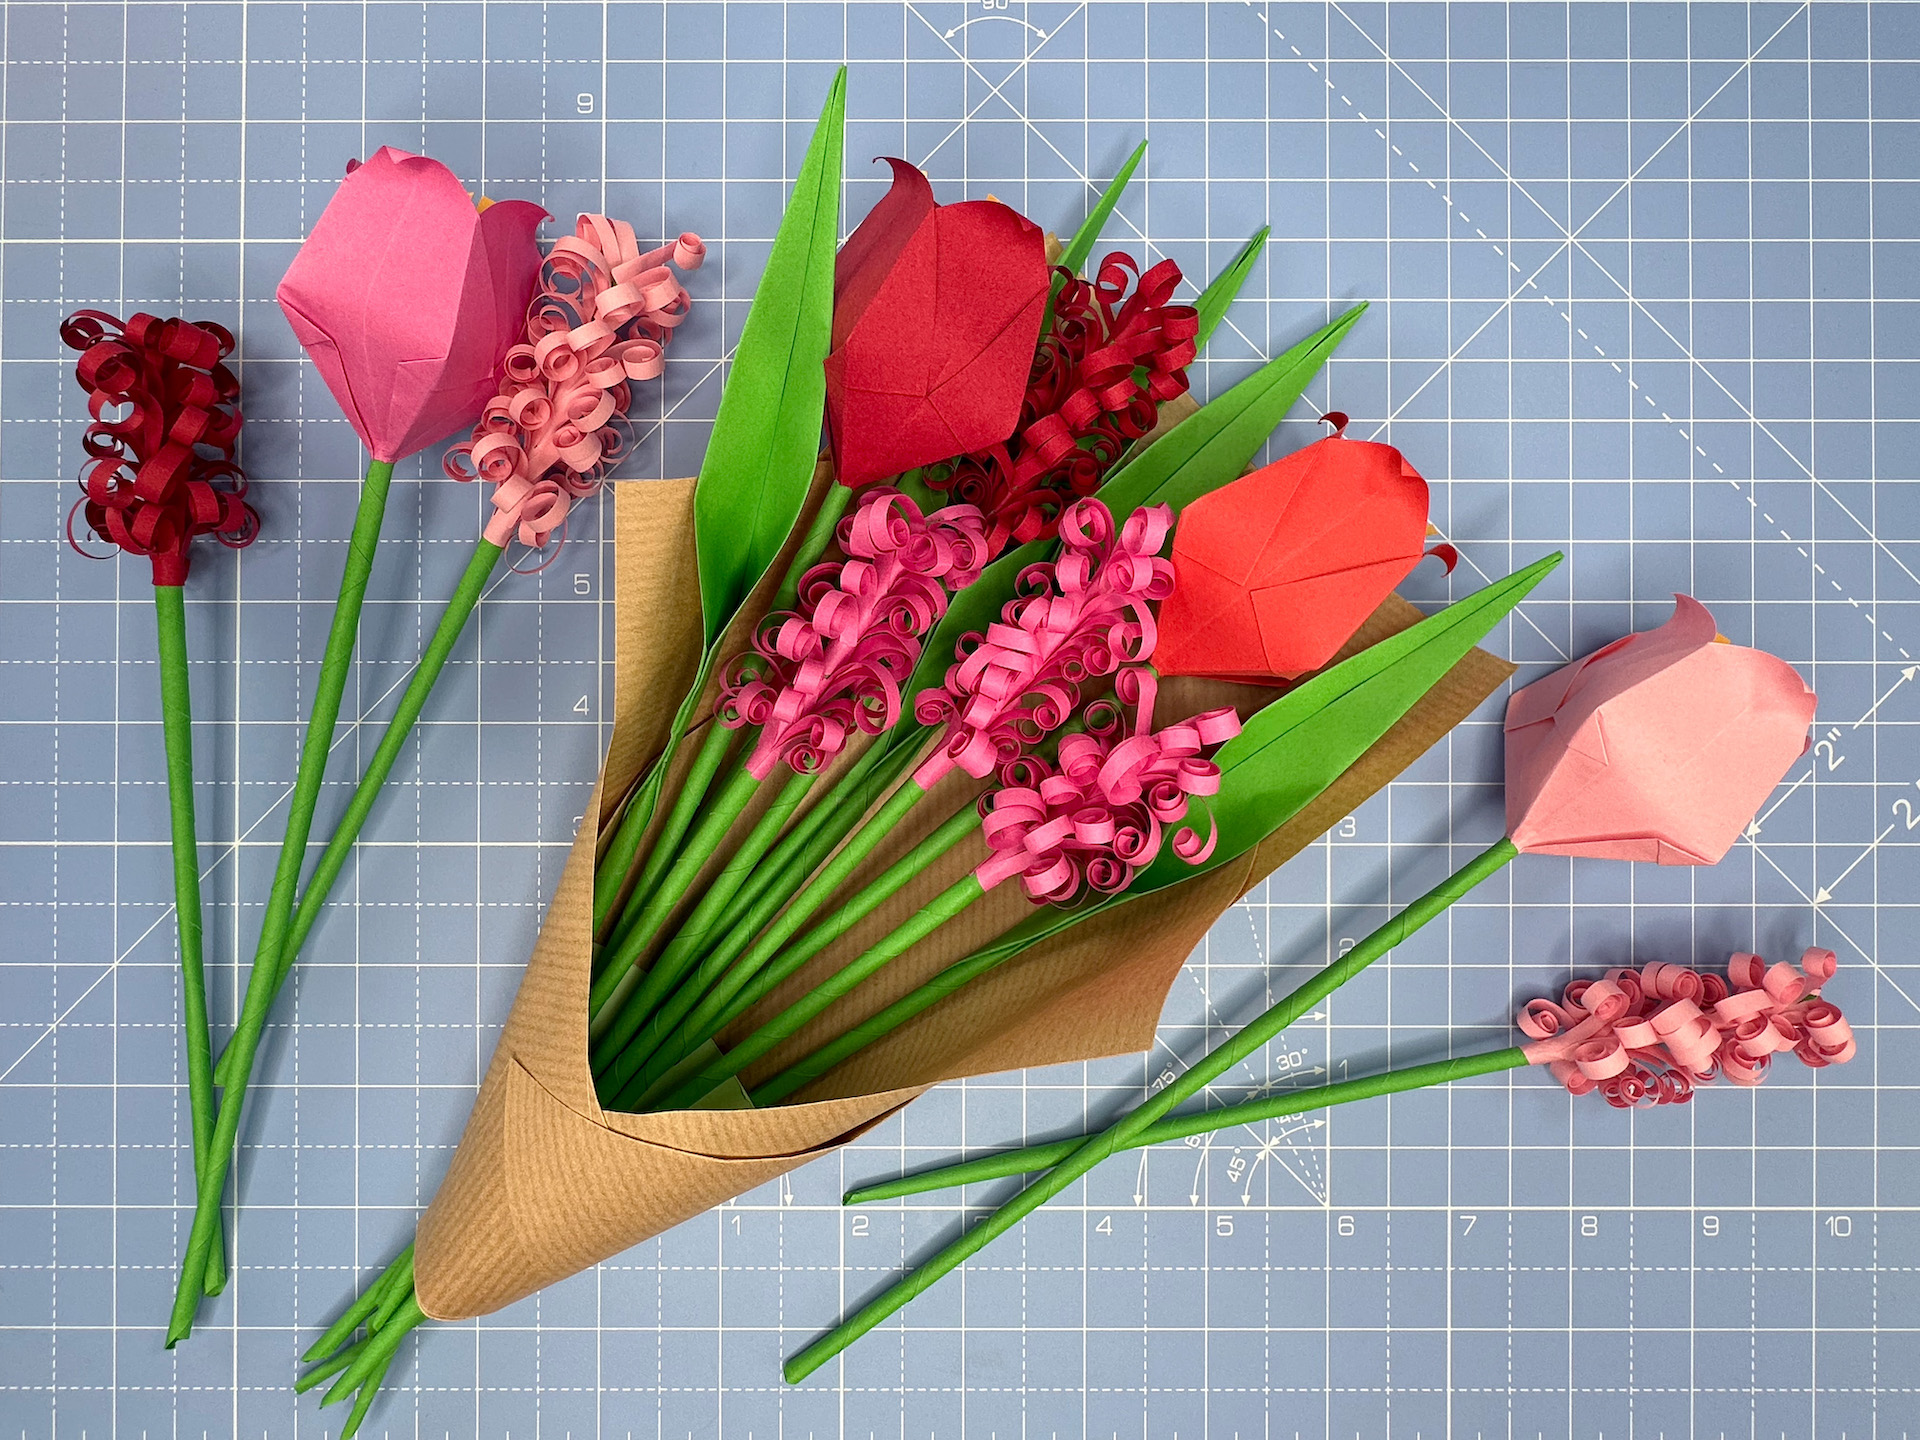
Add in some filler flowers (the hyacinths).
Step 3
Working your way forward, add in some more filler flowers.
Step 4
Add in two more tulips in front of this. Fill in the gaps with some more paper hyacinths.

Step 5
Add in your front tulip, with some filler flowers either side.

Step 6
Add in a few buds, here and there. At this point, your origami flower bouquet will hold itself together and you’ll reach a point where you can’t fit any more in.

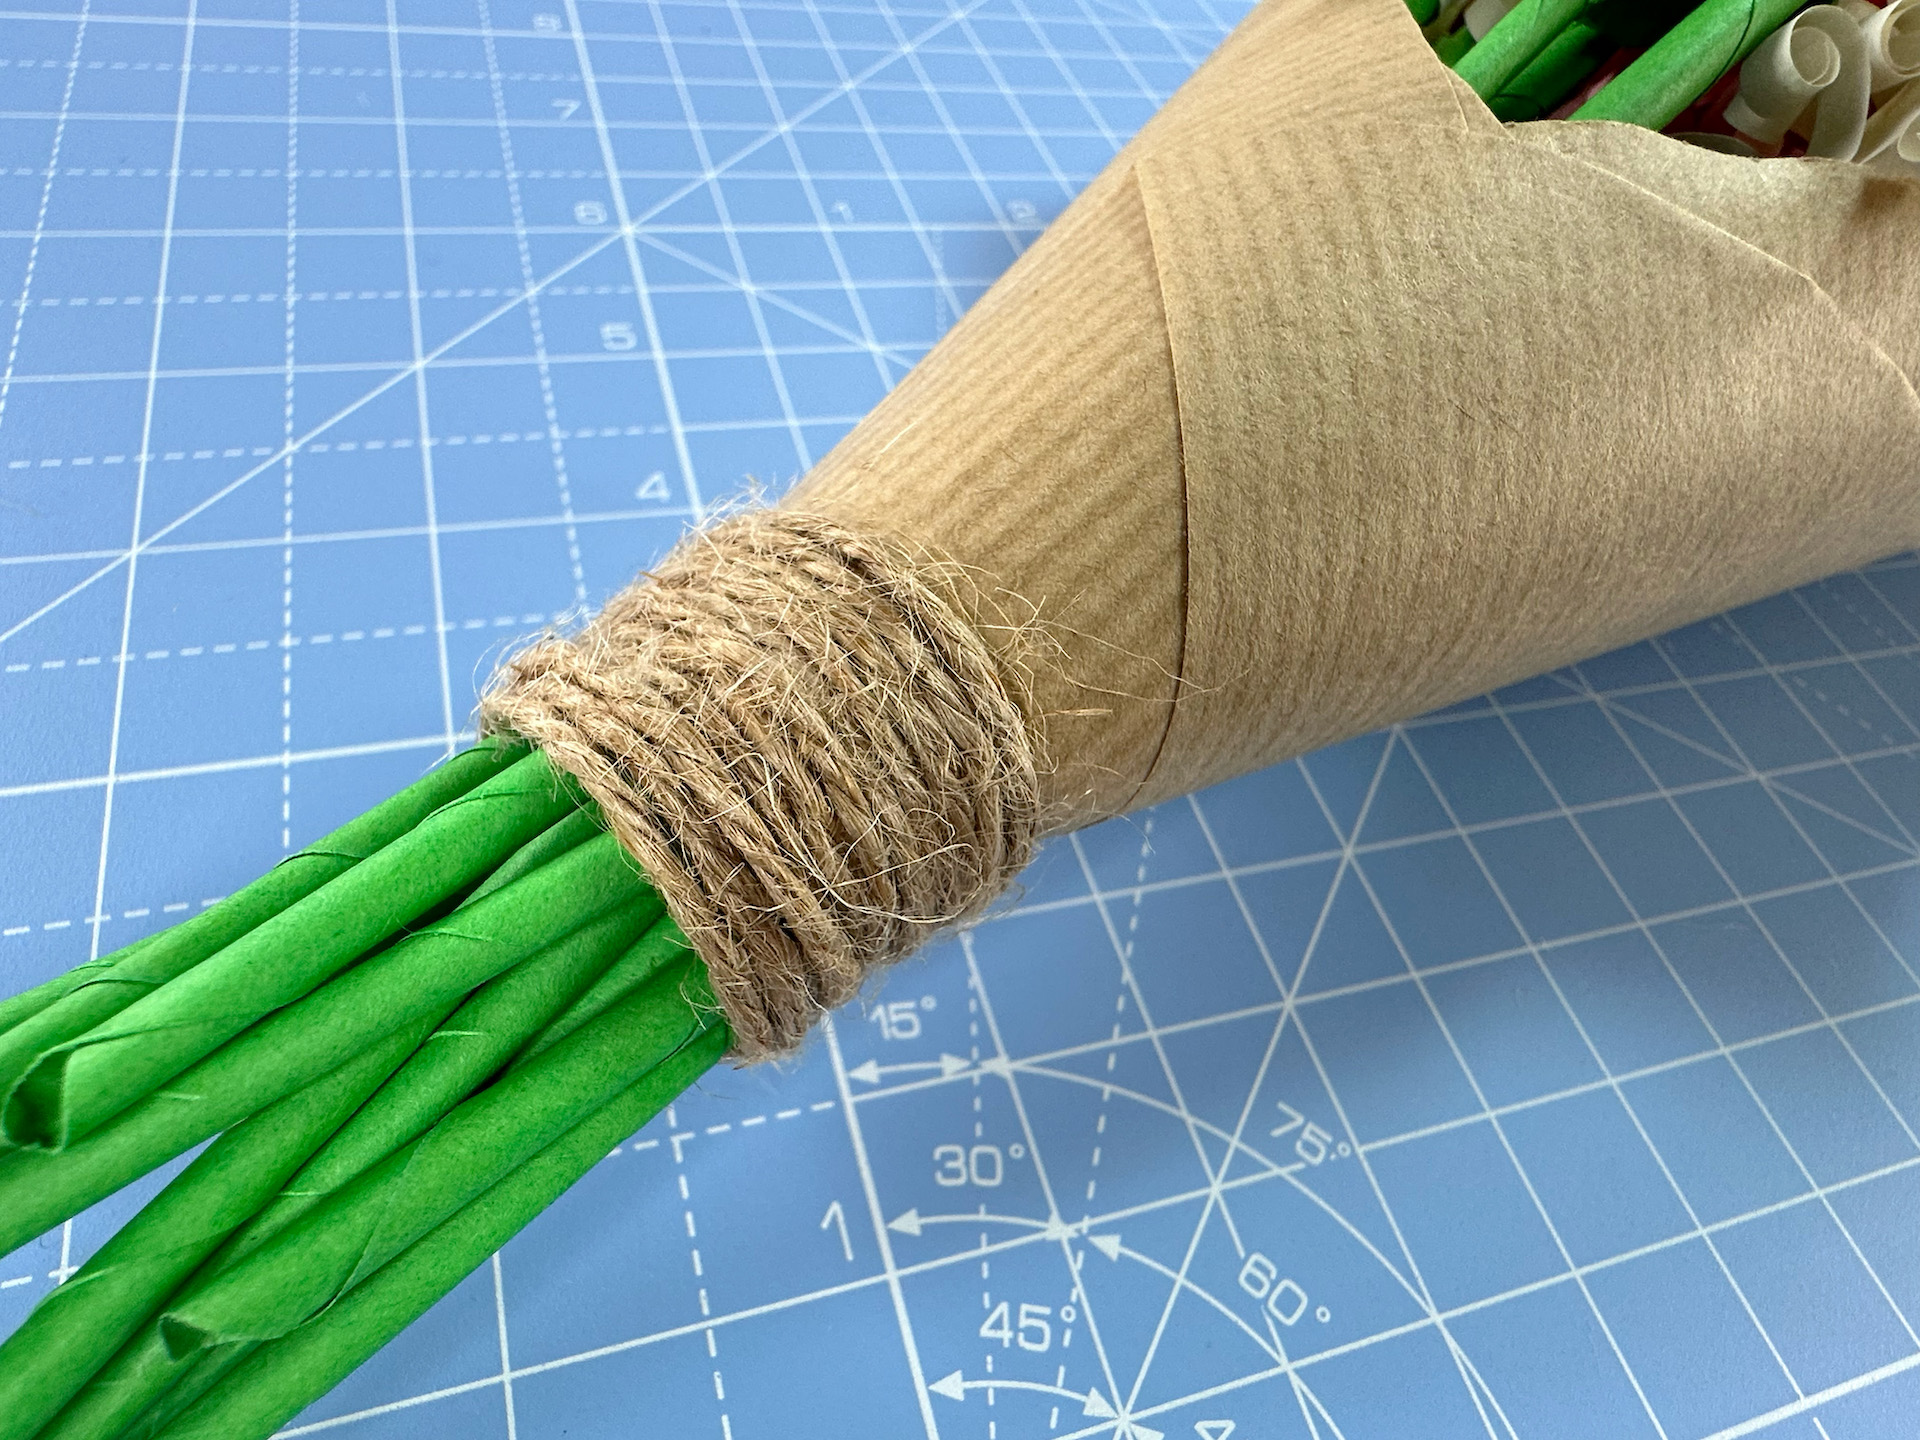
Step 7
This step is optional, but gives a nice, finished look to your origami flower bouquet. Bind the end of the paper with twine and tuck the ends in at the back.
Step 8
Give your origami flower bouquet a final once-over, just to make sure everything is where you want it. If any of the paper hyacinths have become unravelled, re-curl them around a cocktail stick now they’re in place. Rotate the tulips and buds so the most favourable side is facing outwards, then sit back and enjoy your work.