Step 1
Cut your pieces of paper
To make the origami boats, cut one 14.8 x 21cm and two 10 x 14cm pieces of patterned paper. Use lightweight paper (100gsm or less) as this will be easier to fold.
Fold your origami boat
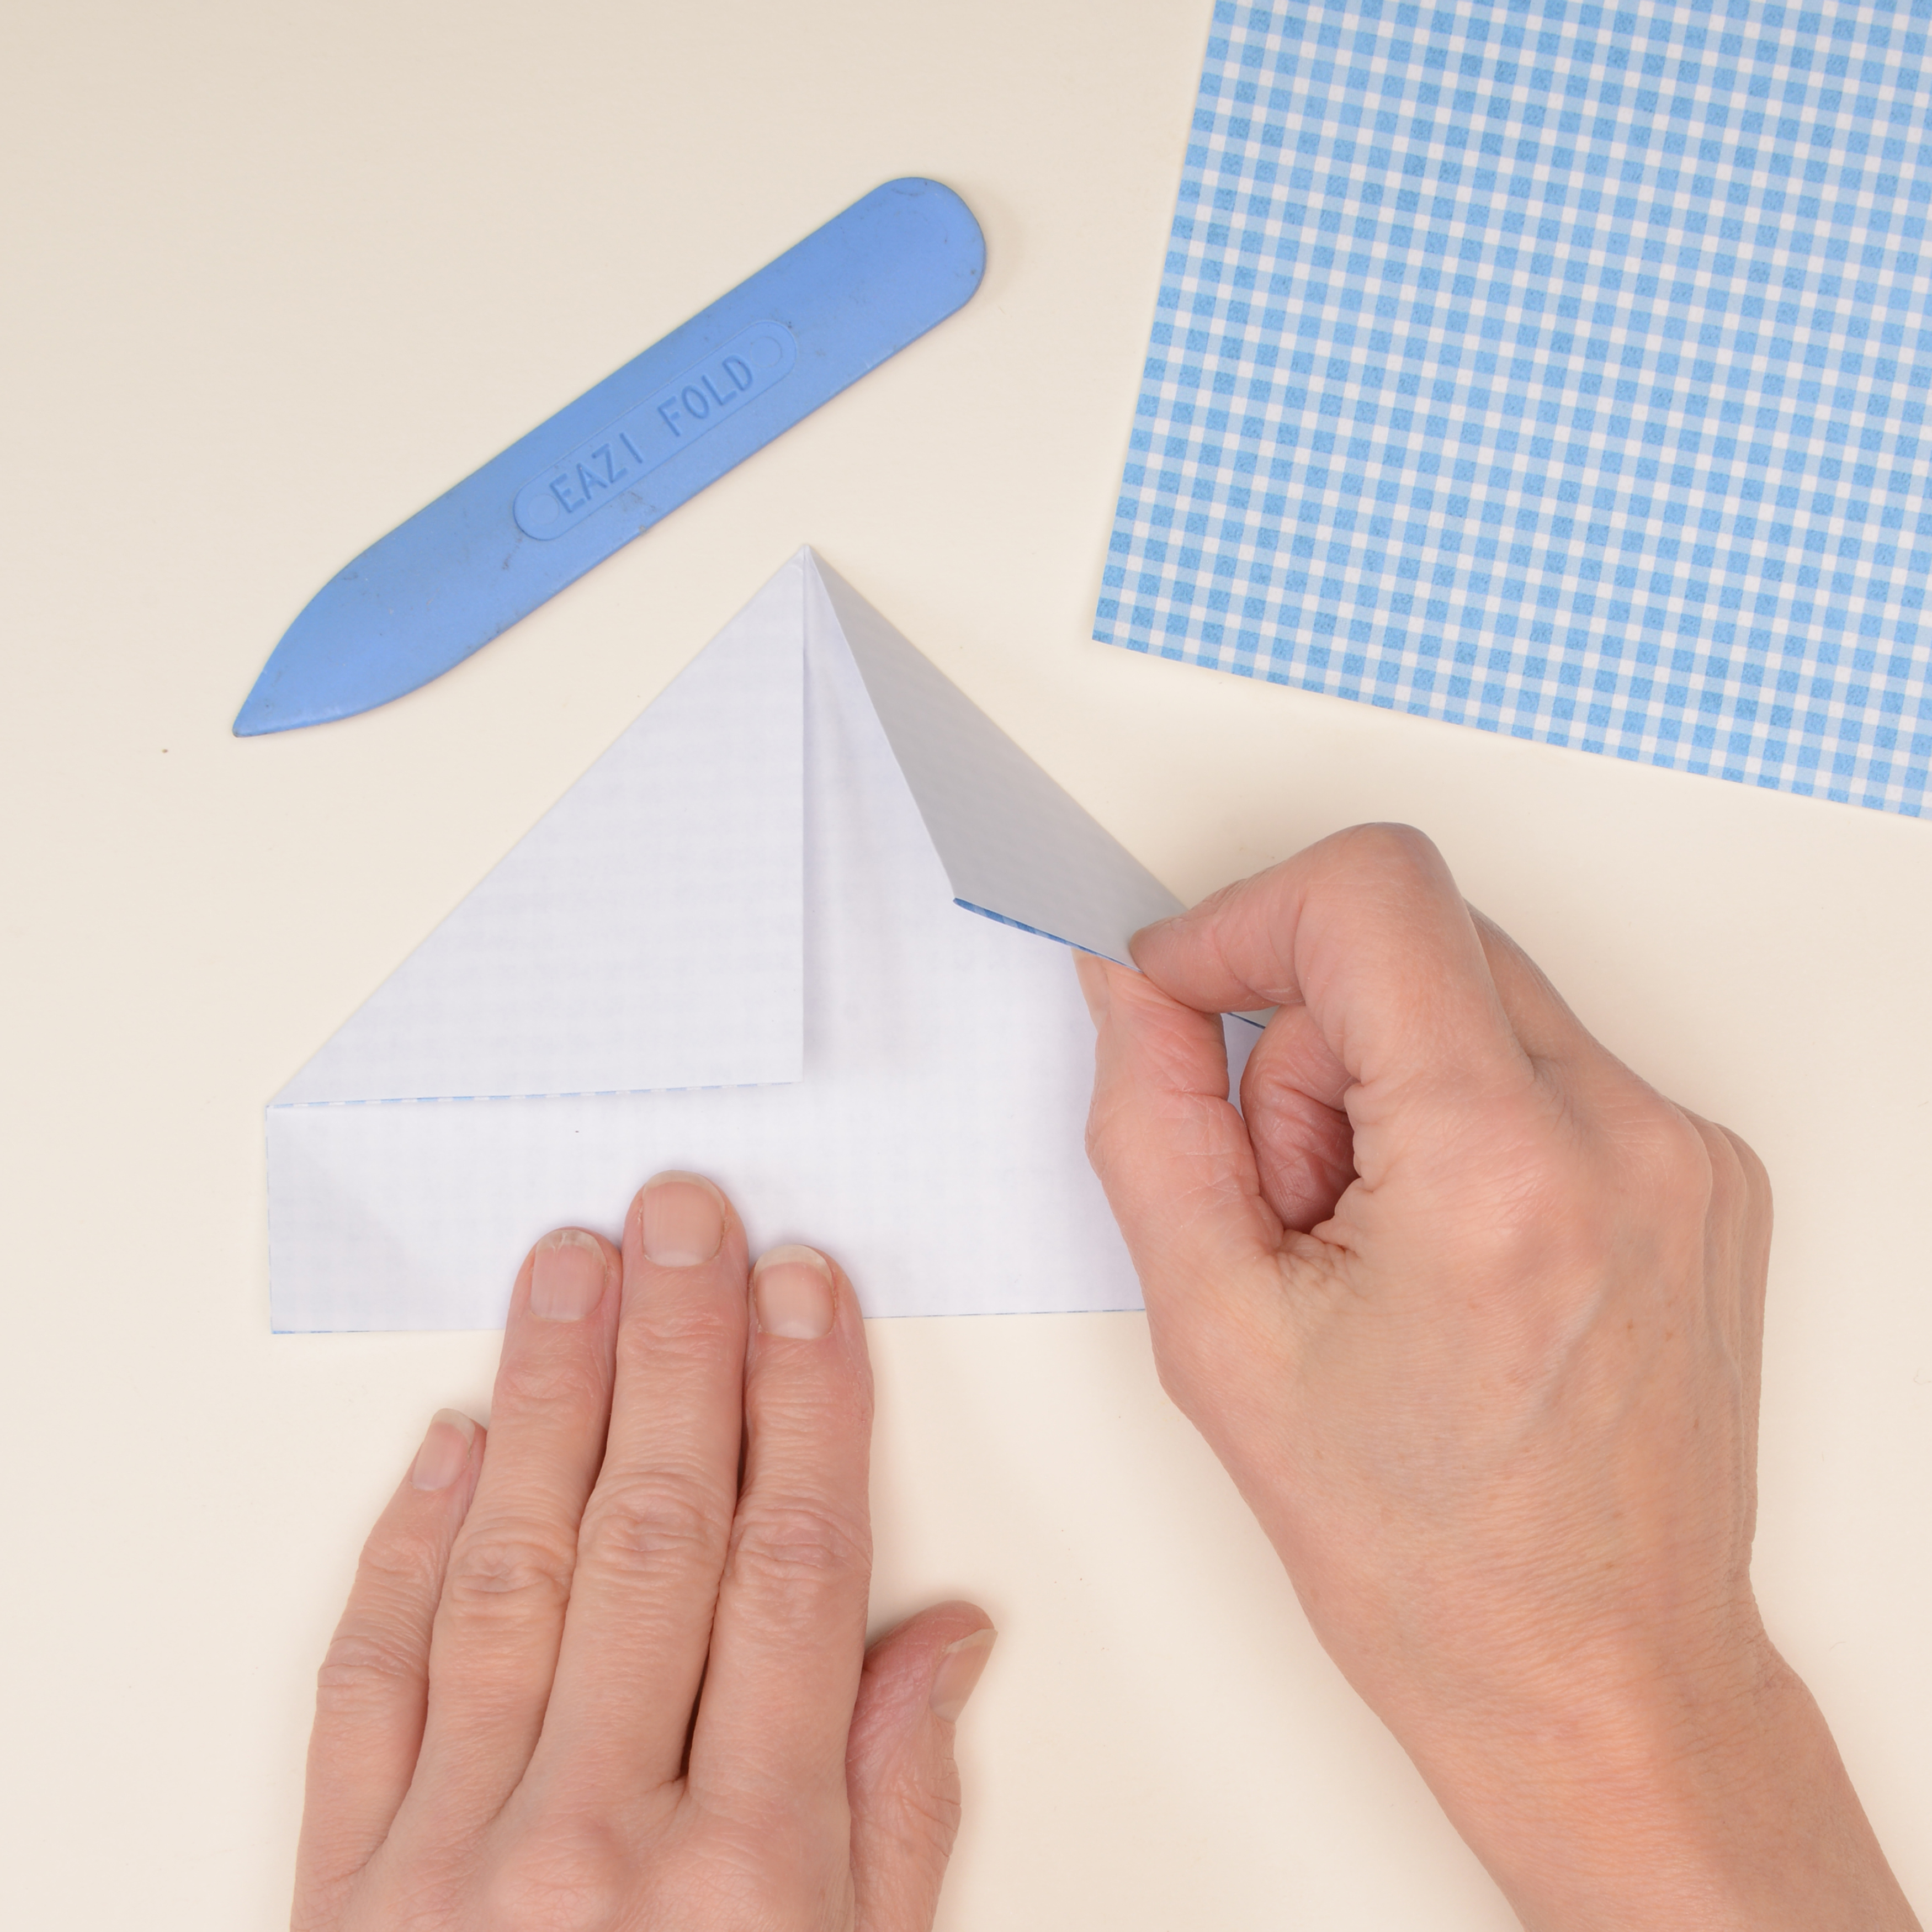
Turn each piece of paper so that it is in portrait, and fold each in half along the horizontal with the pattern on the inside. With the fold at the top, bring the top corners down so that they meet in the centre.
Step 2
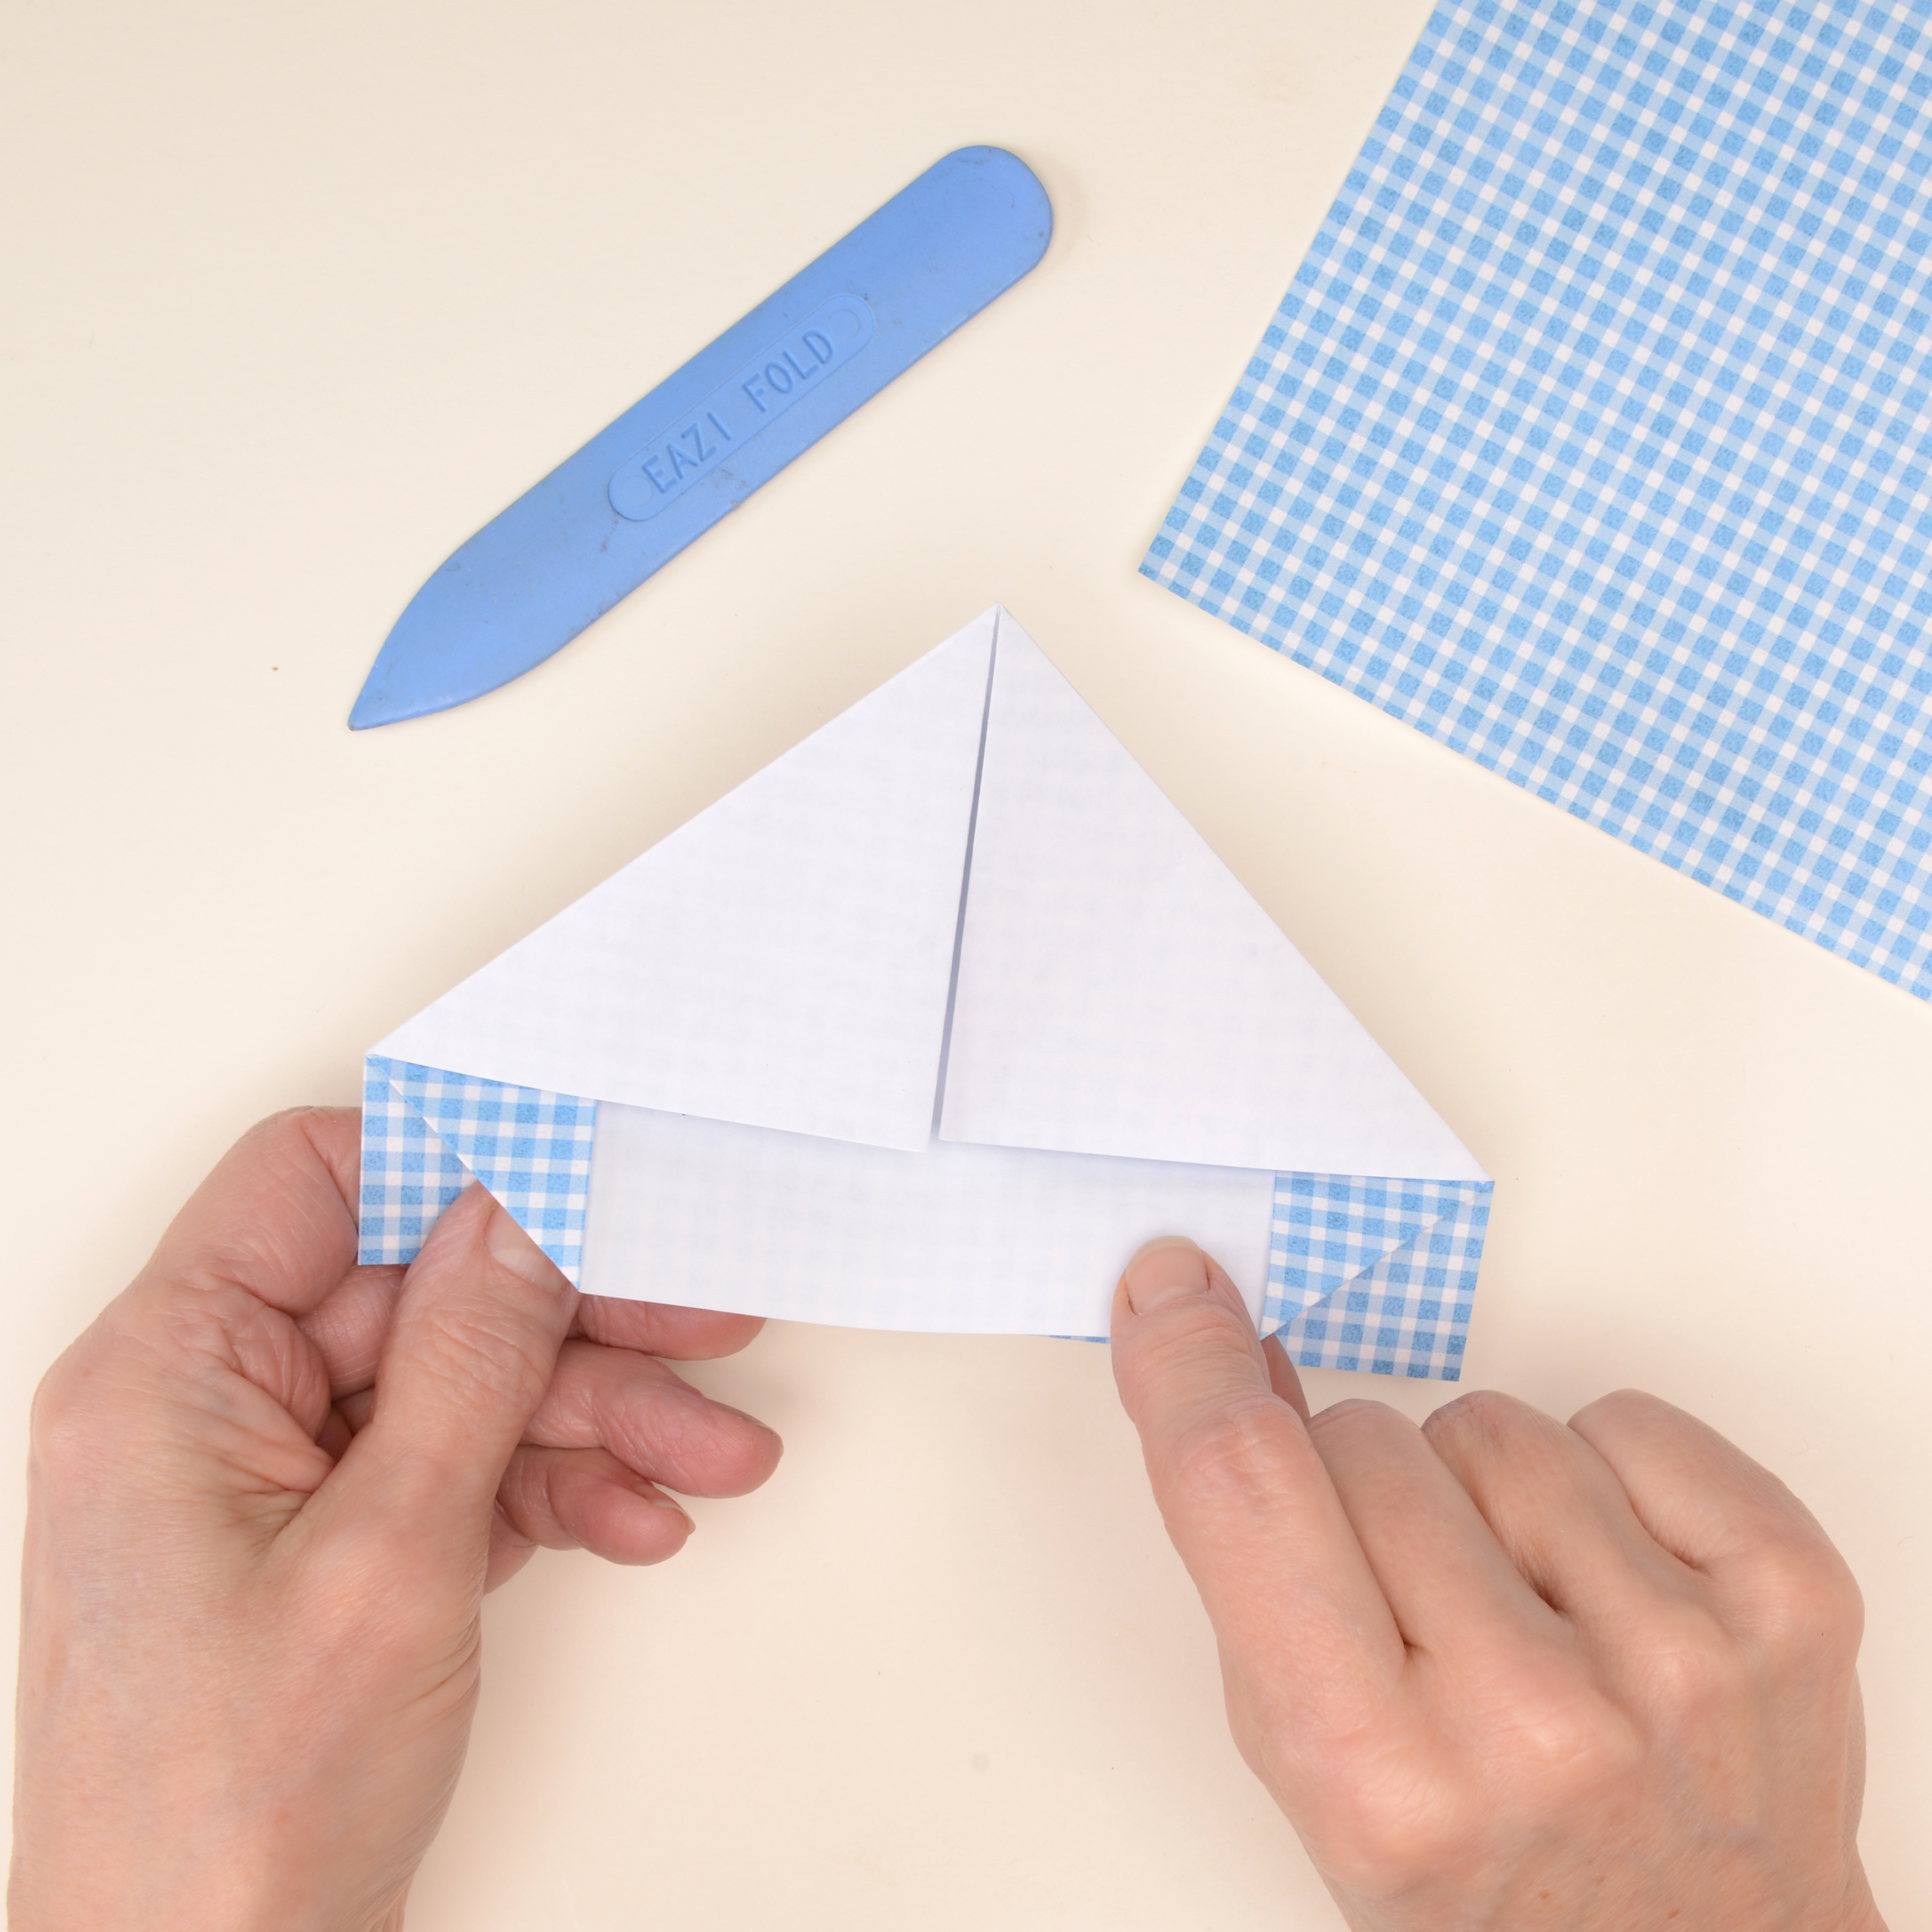
Fold the bottom corners of each edge up to meet the bottom of the two triangles (as shown). Then, fold this flap up around the triangles. Repeat on the other side to create a ‘hat’ shape.
Step 3
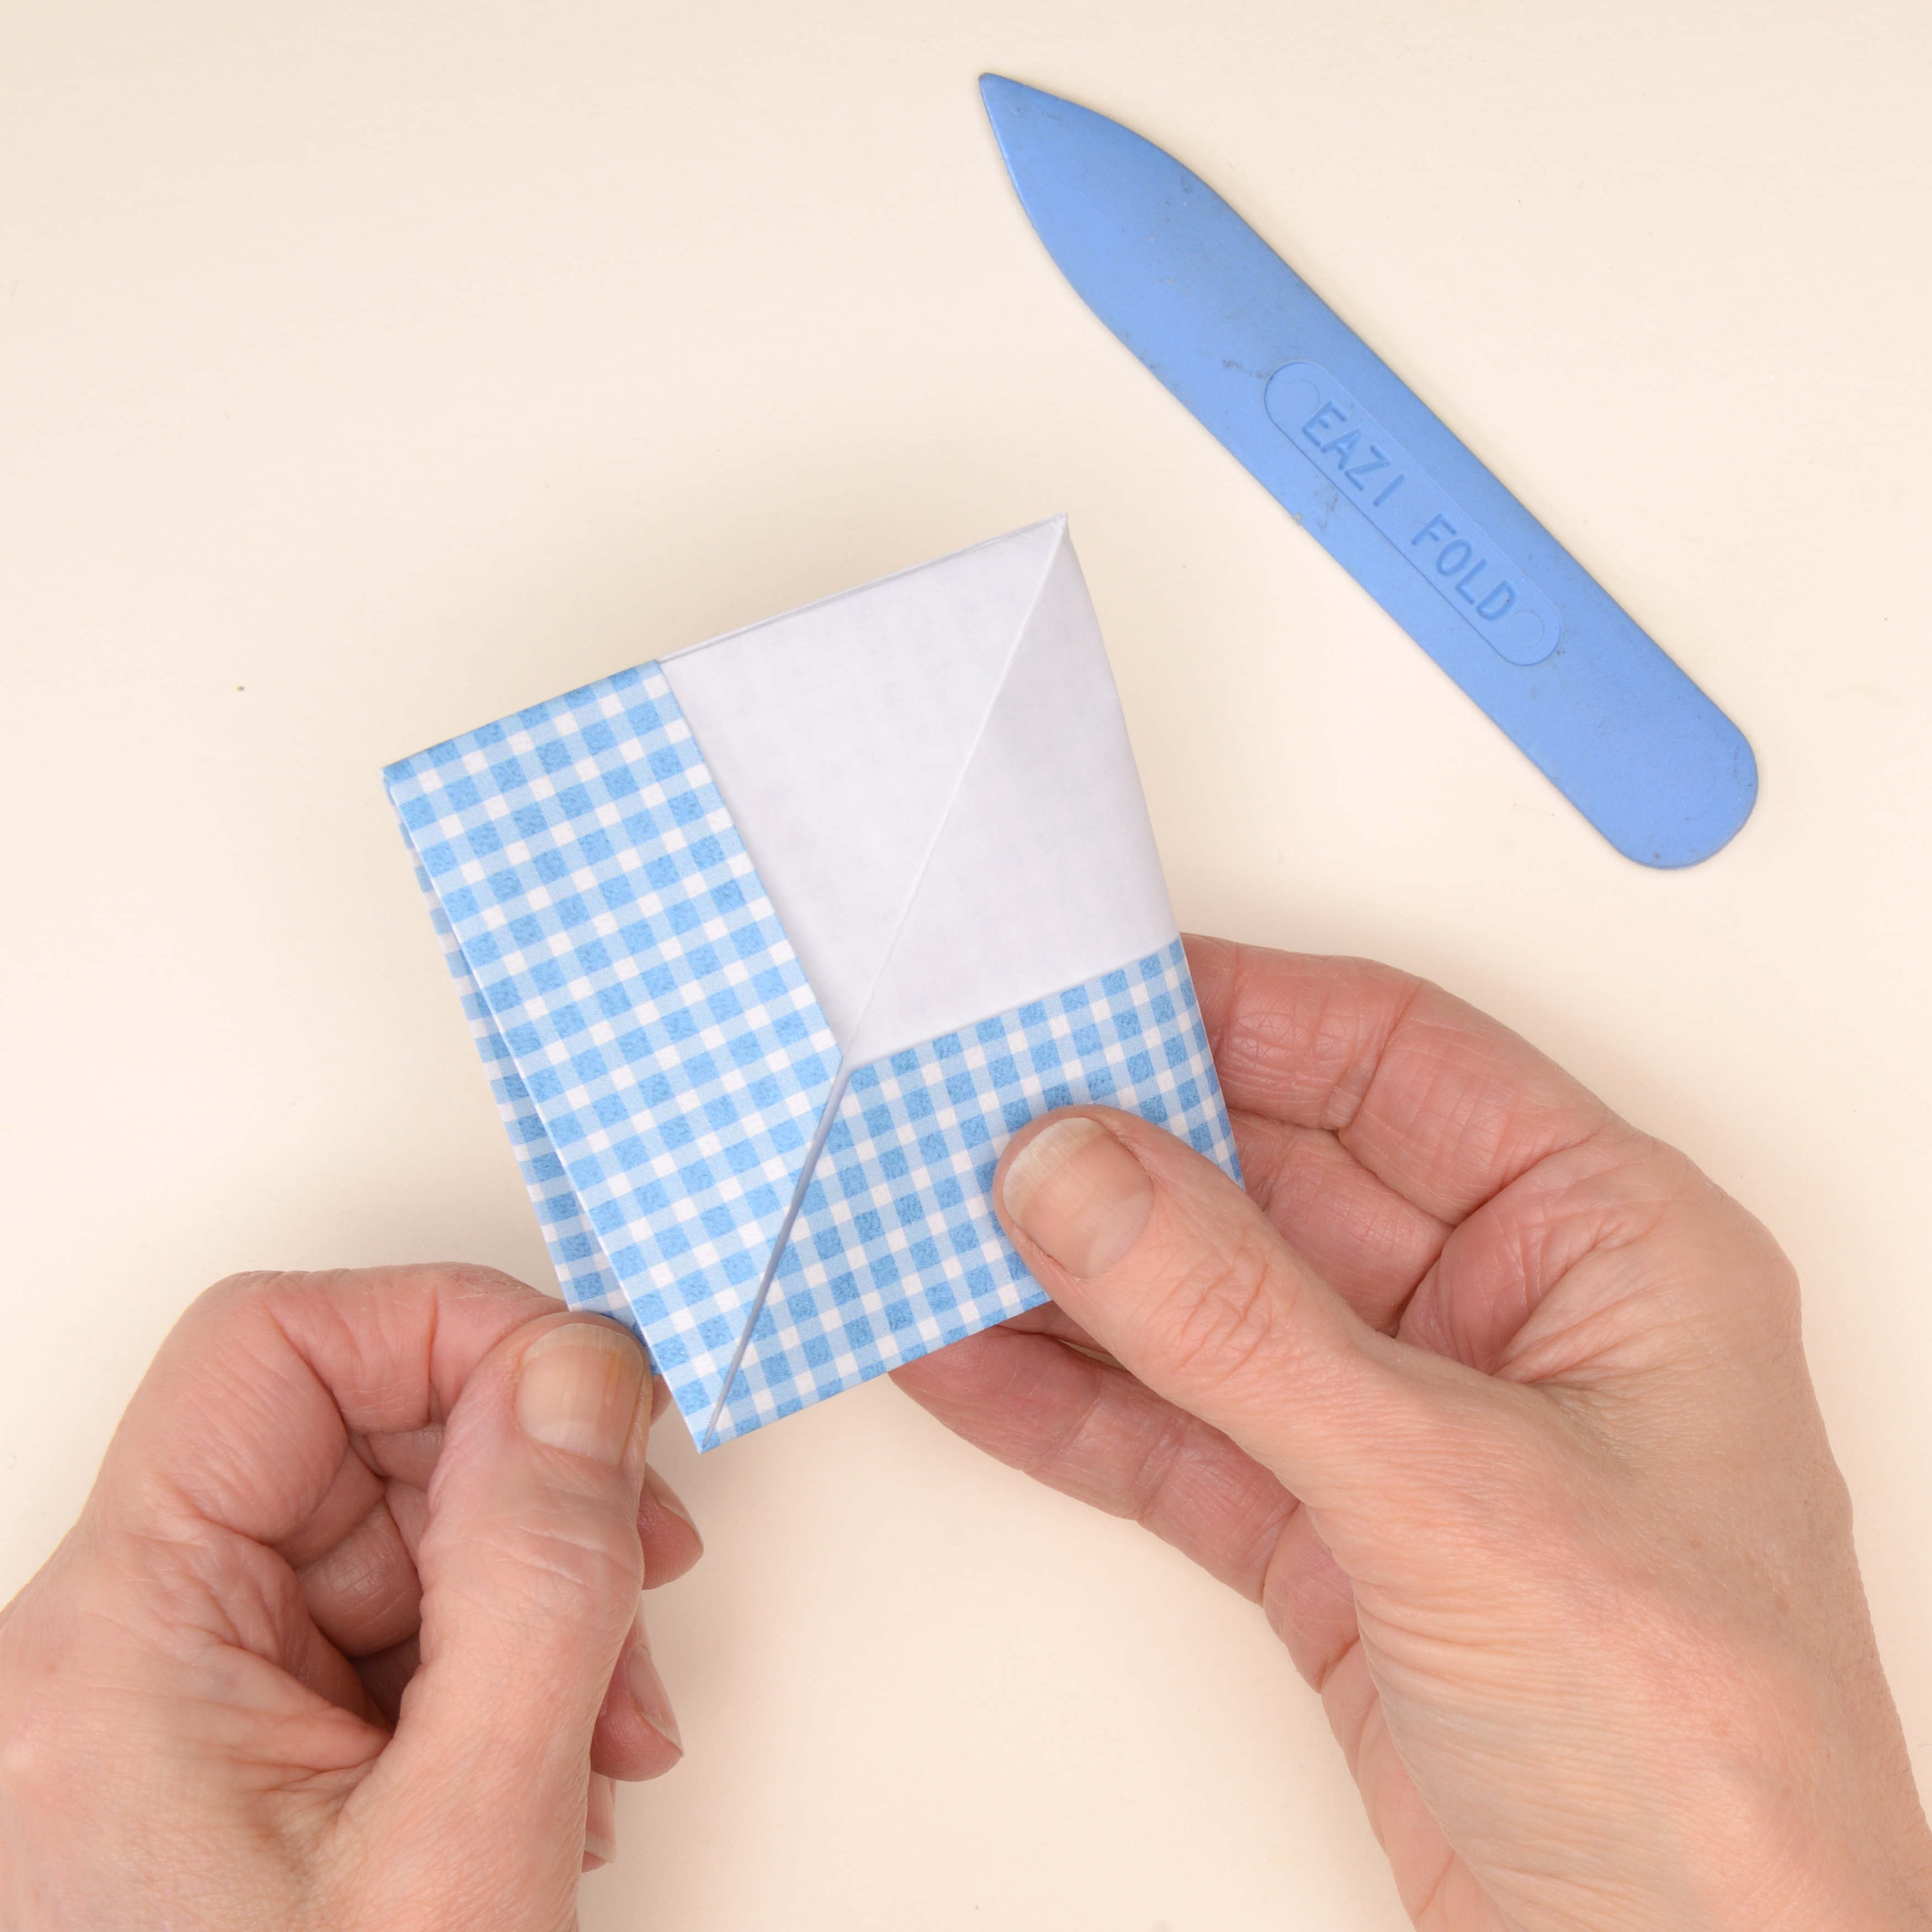
Pulling out both the front and back sections, open the triangle out along the longest edge and then flatten it into a square as shown. Use a bone folder to flatten the folds and create a crisp edge.
Step 4
Fold the patterned edge of the square all the way up, and align with the top corner. Repeat on the other side to form a smaller, patterned triangle.
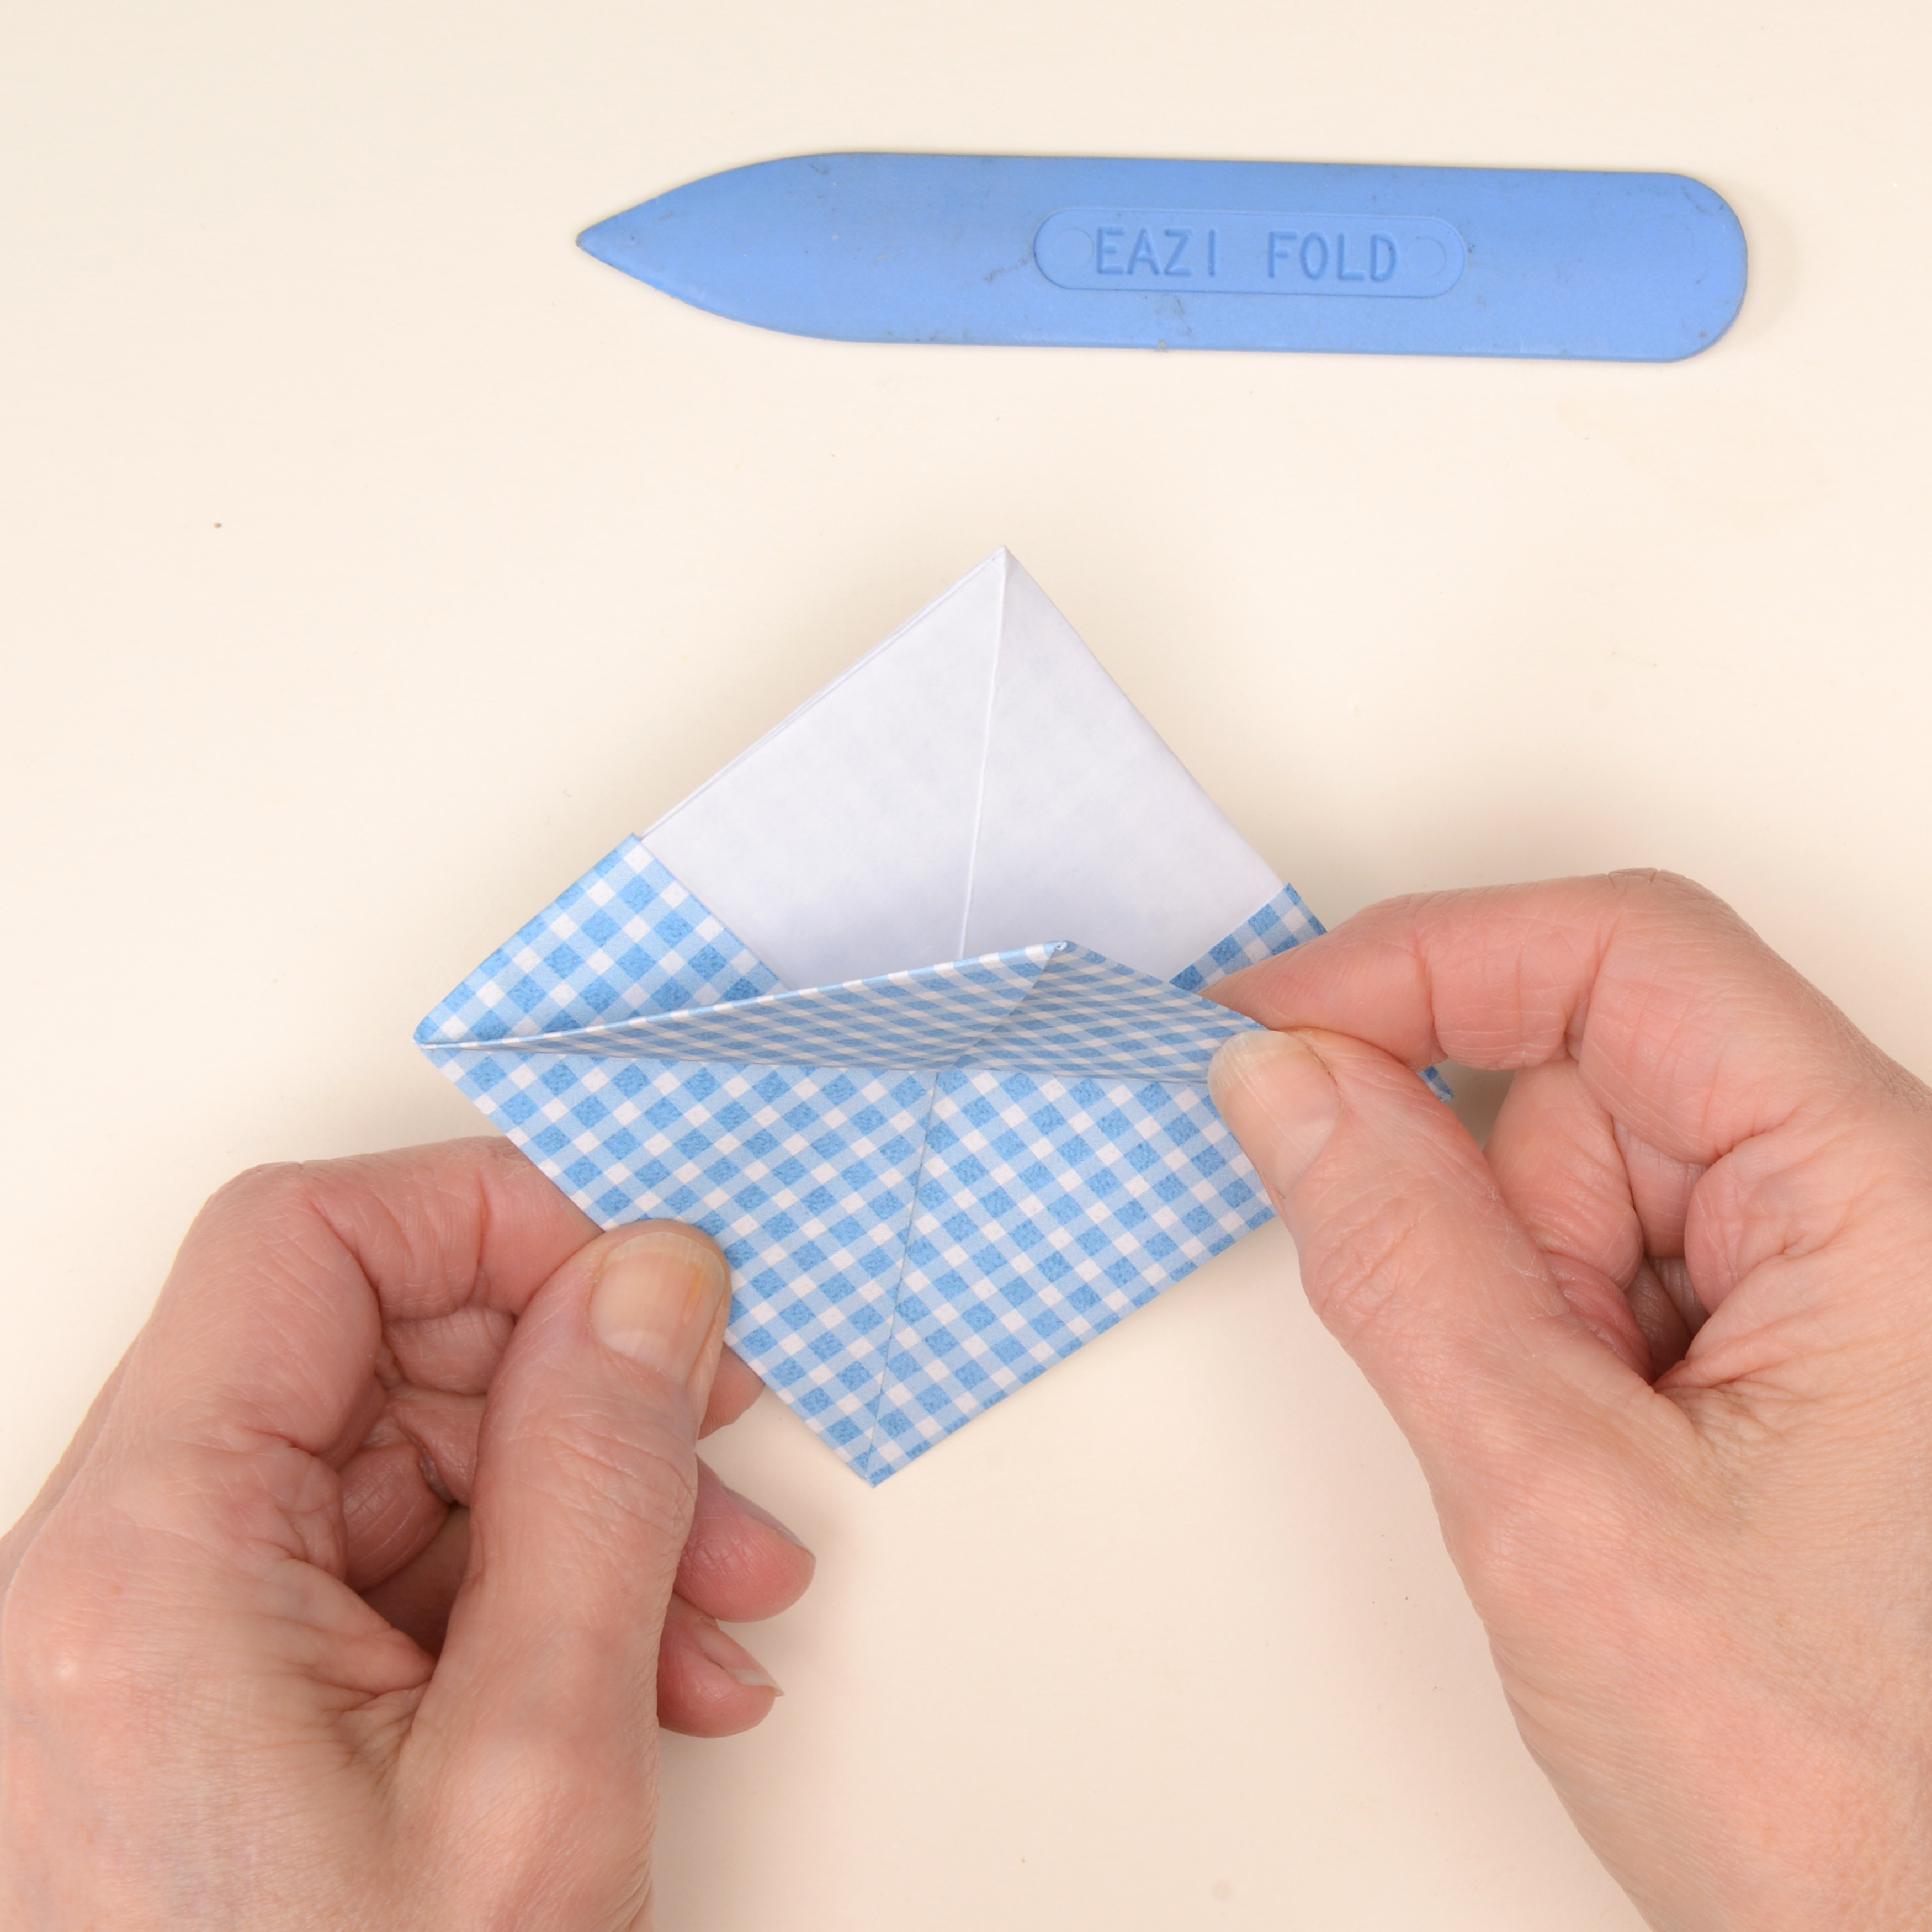
Step 5
Repeating the motion from step 3, take both sides of the triangle’s base, and open it up along the longest edge. Flatten into a square.
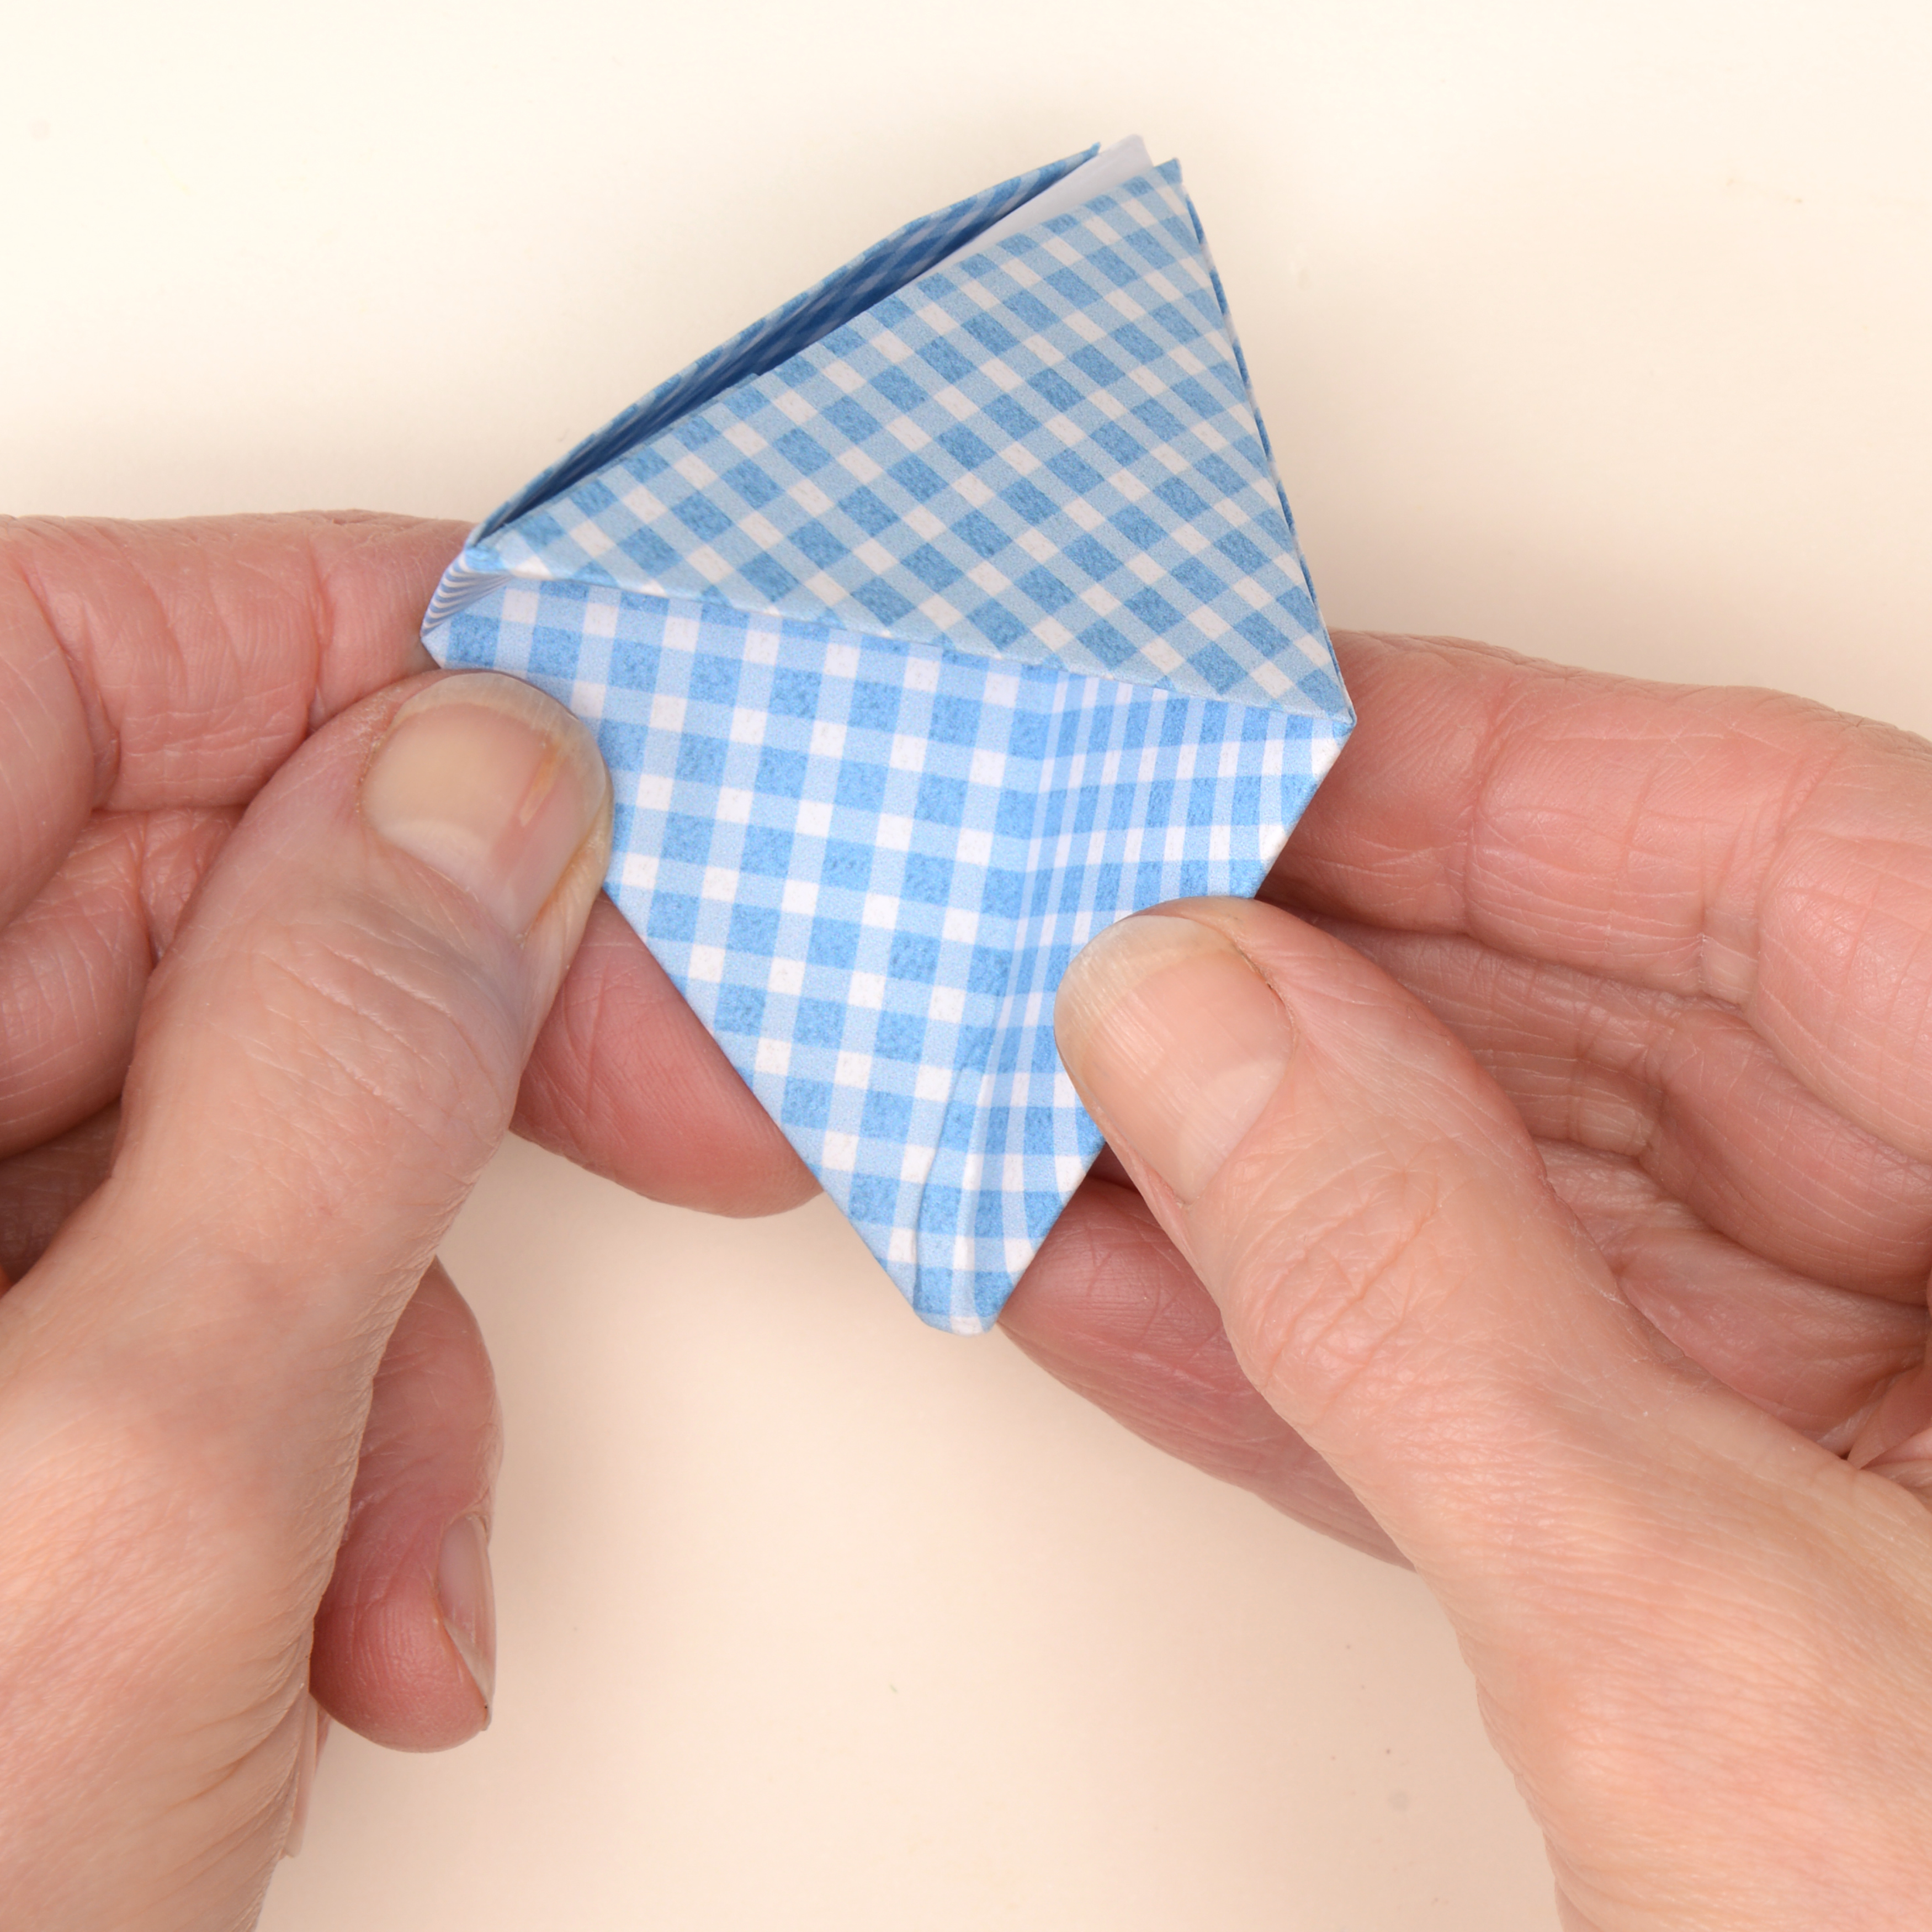
Step 6
Gently pull the two flaps on either side of the square outwards from the top and flatten them into a boat shape.
Optional step: If you are making the mobile:
Attach a 30cm piece of string to the white peak using tape or glue (don’t worry, this will be hidden in the next step).
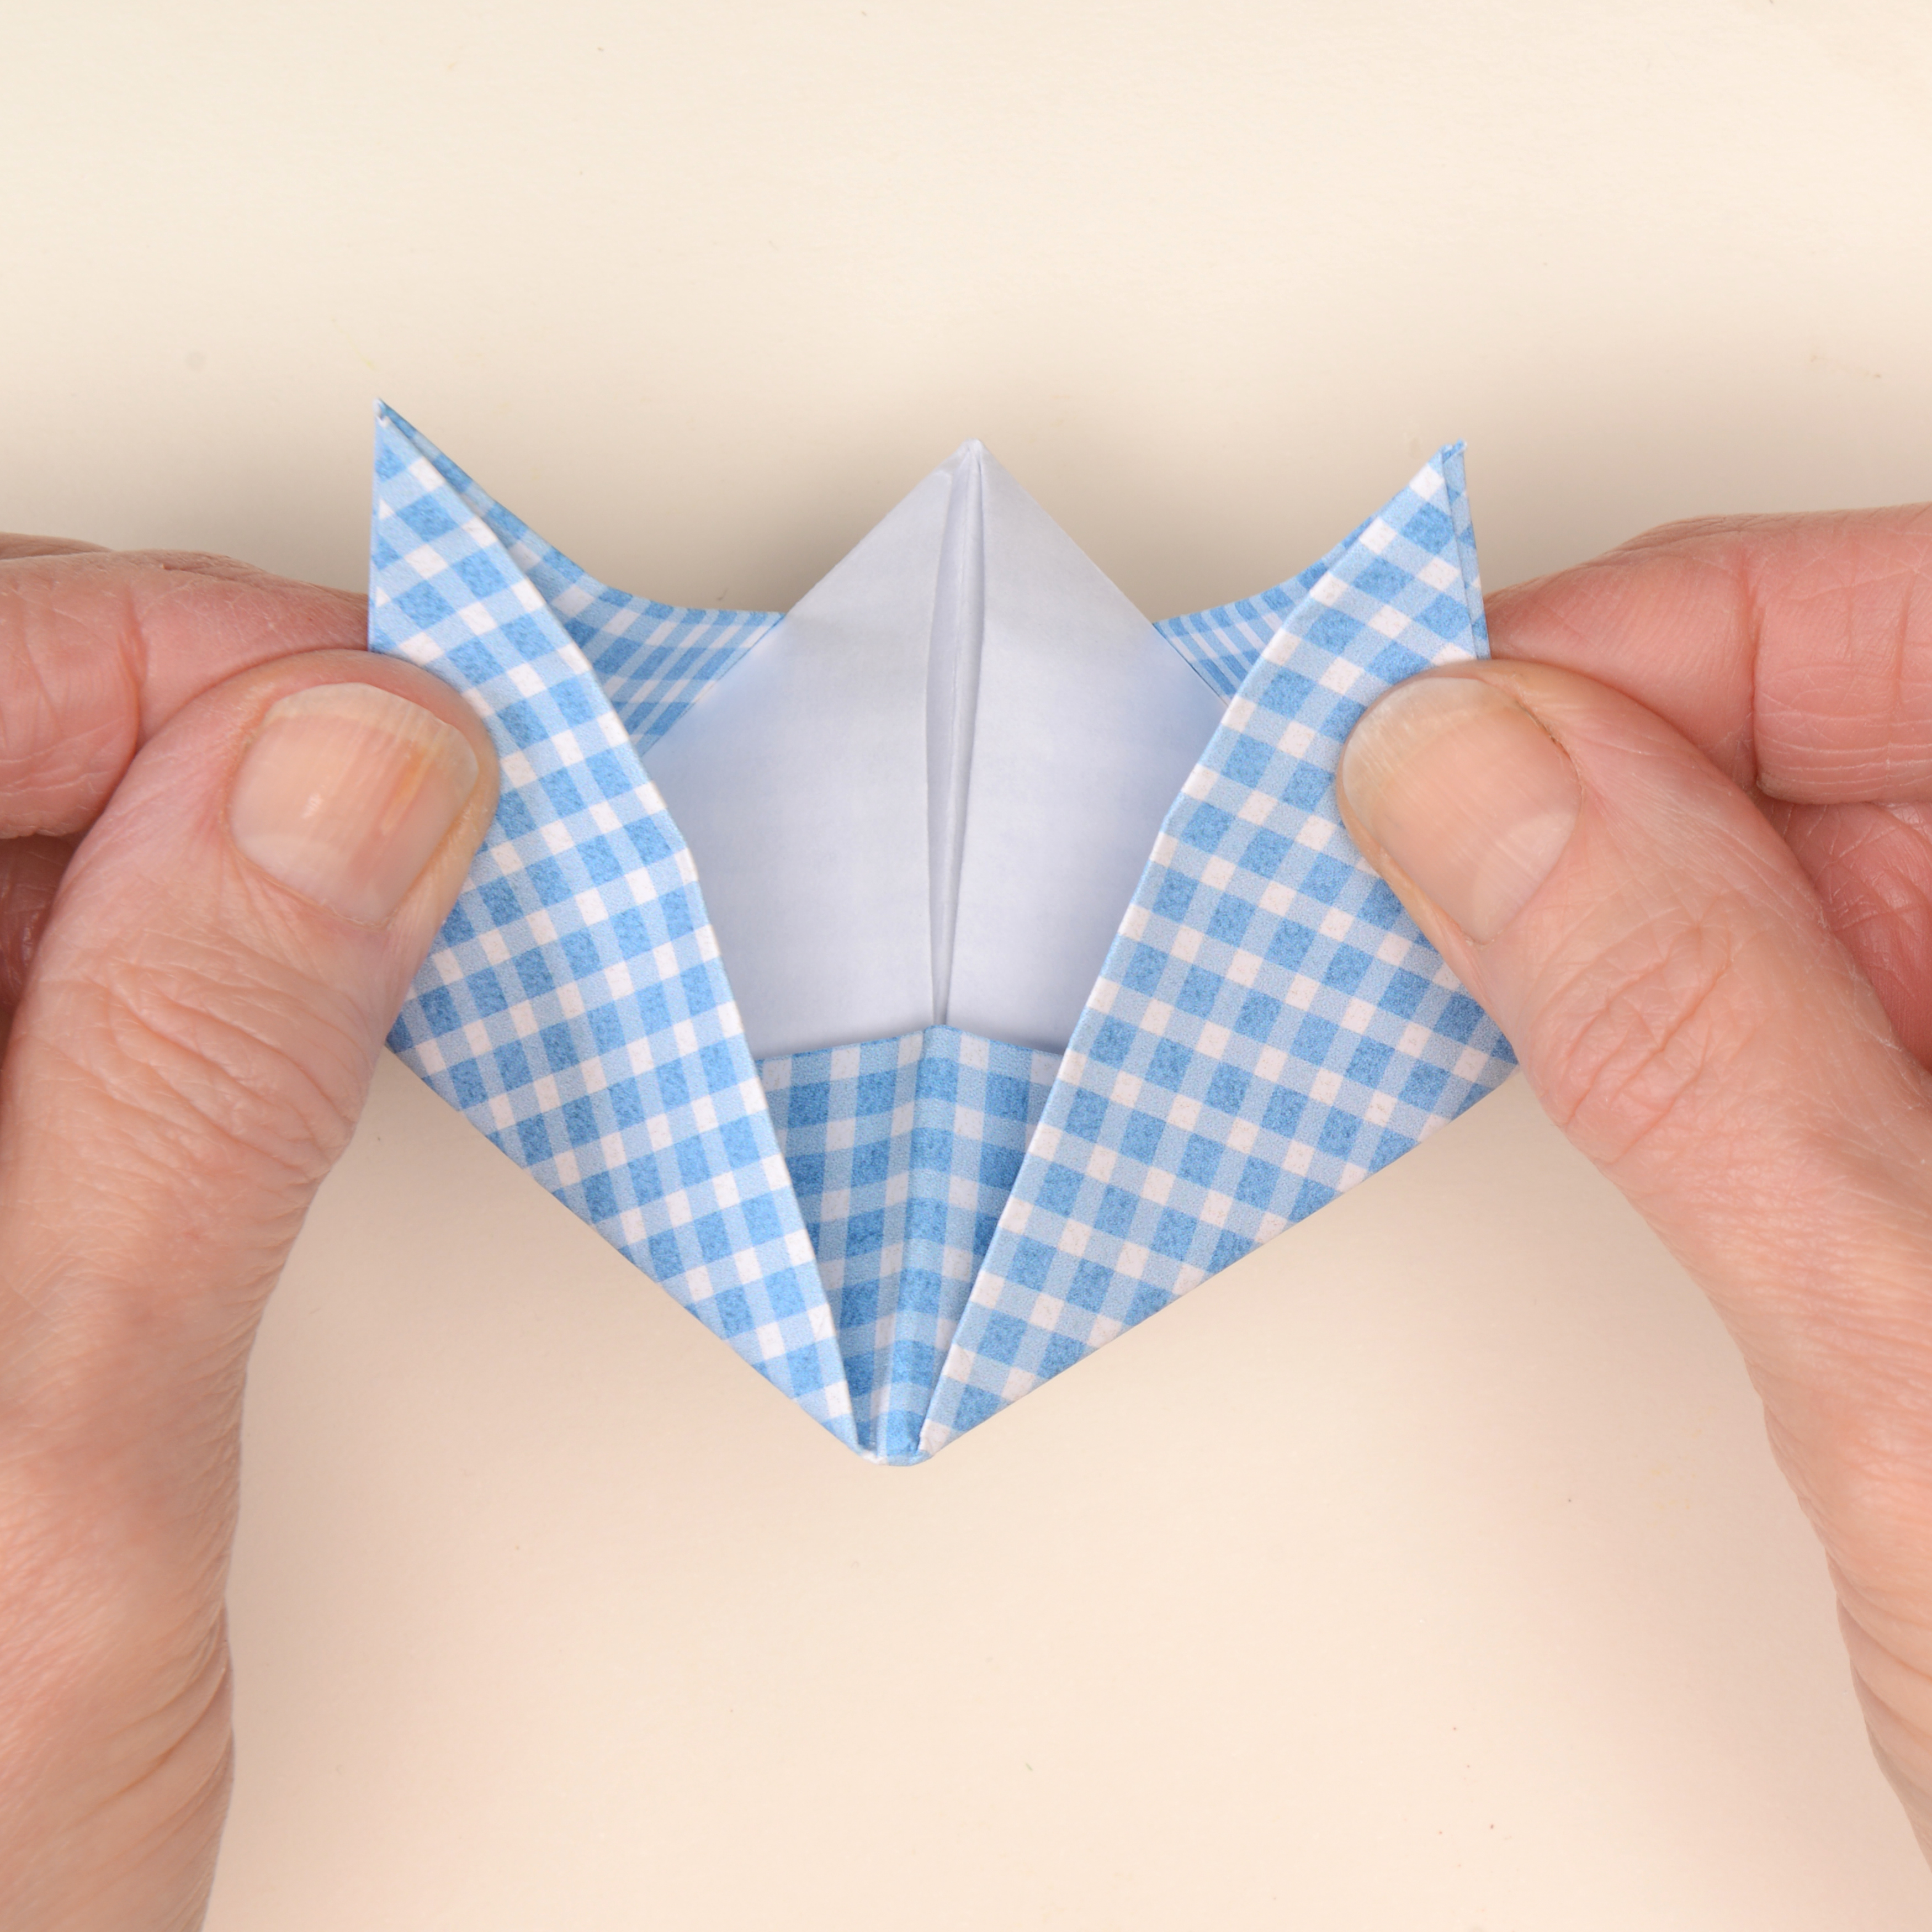
Step 7
Make the boat sail
Fold two pieces of patterned paper in half and cut two triangles of slightly different sizes. Attach to create the boat’s sail and hide the string.
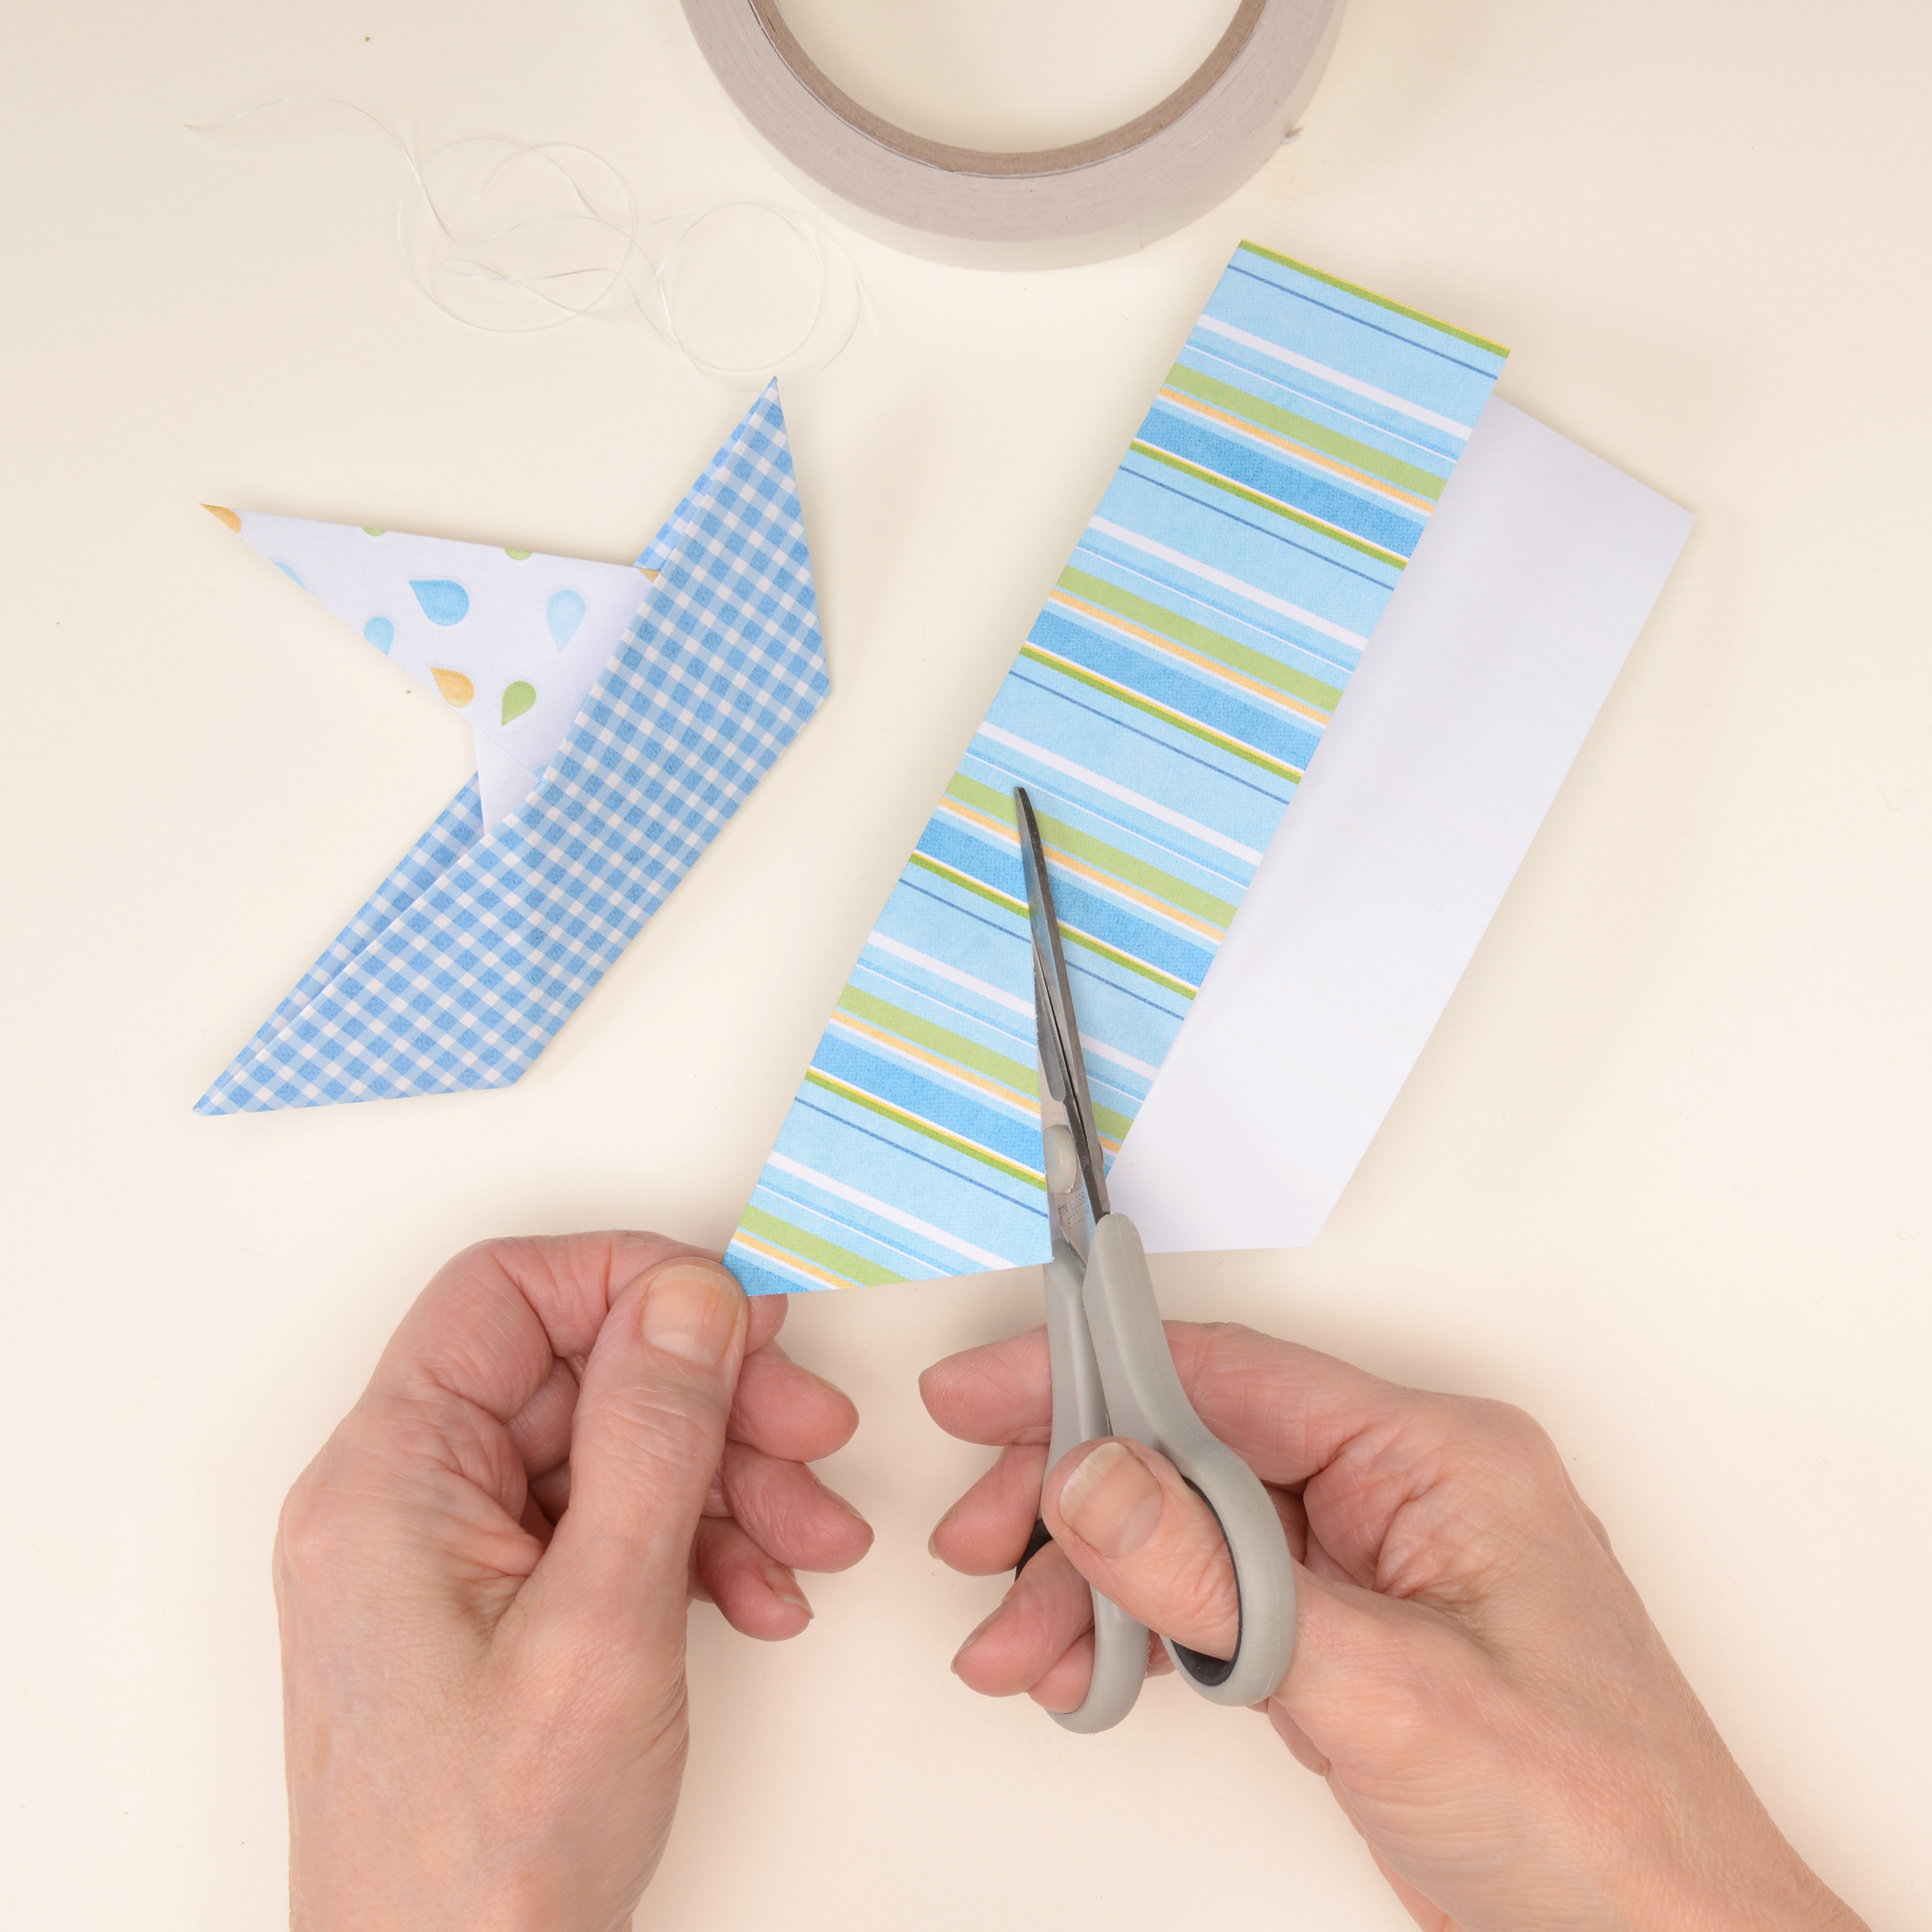
Step 8
Create the clouds
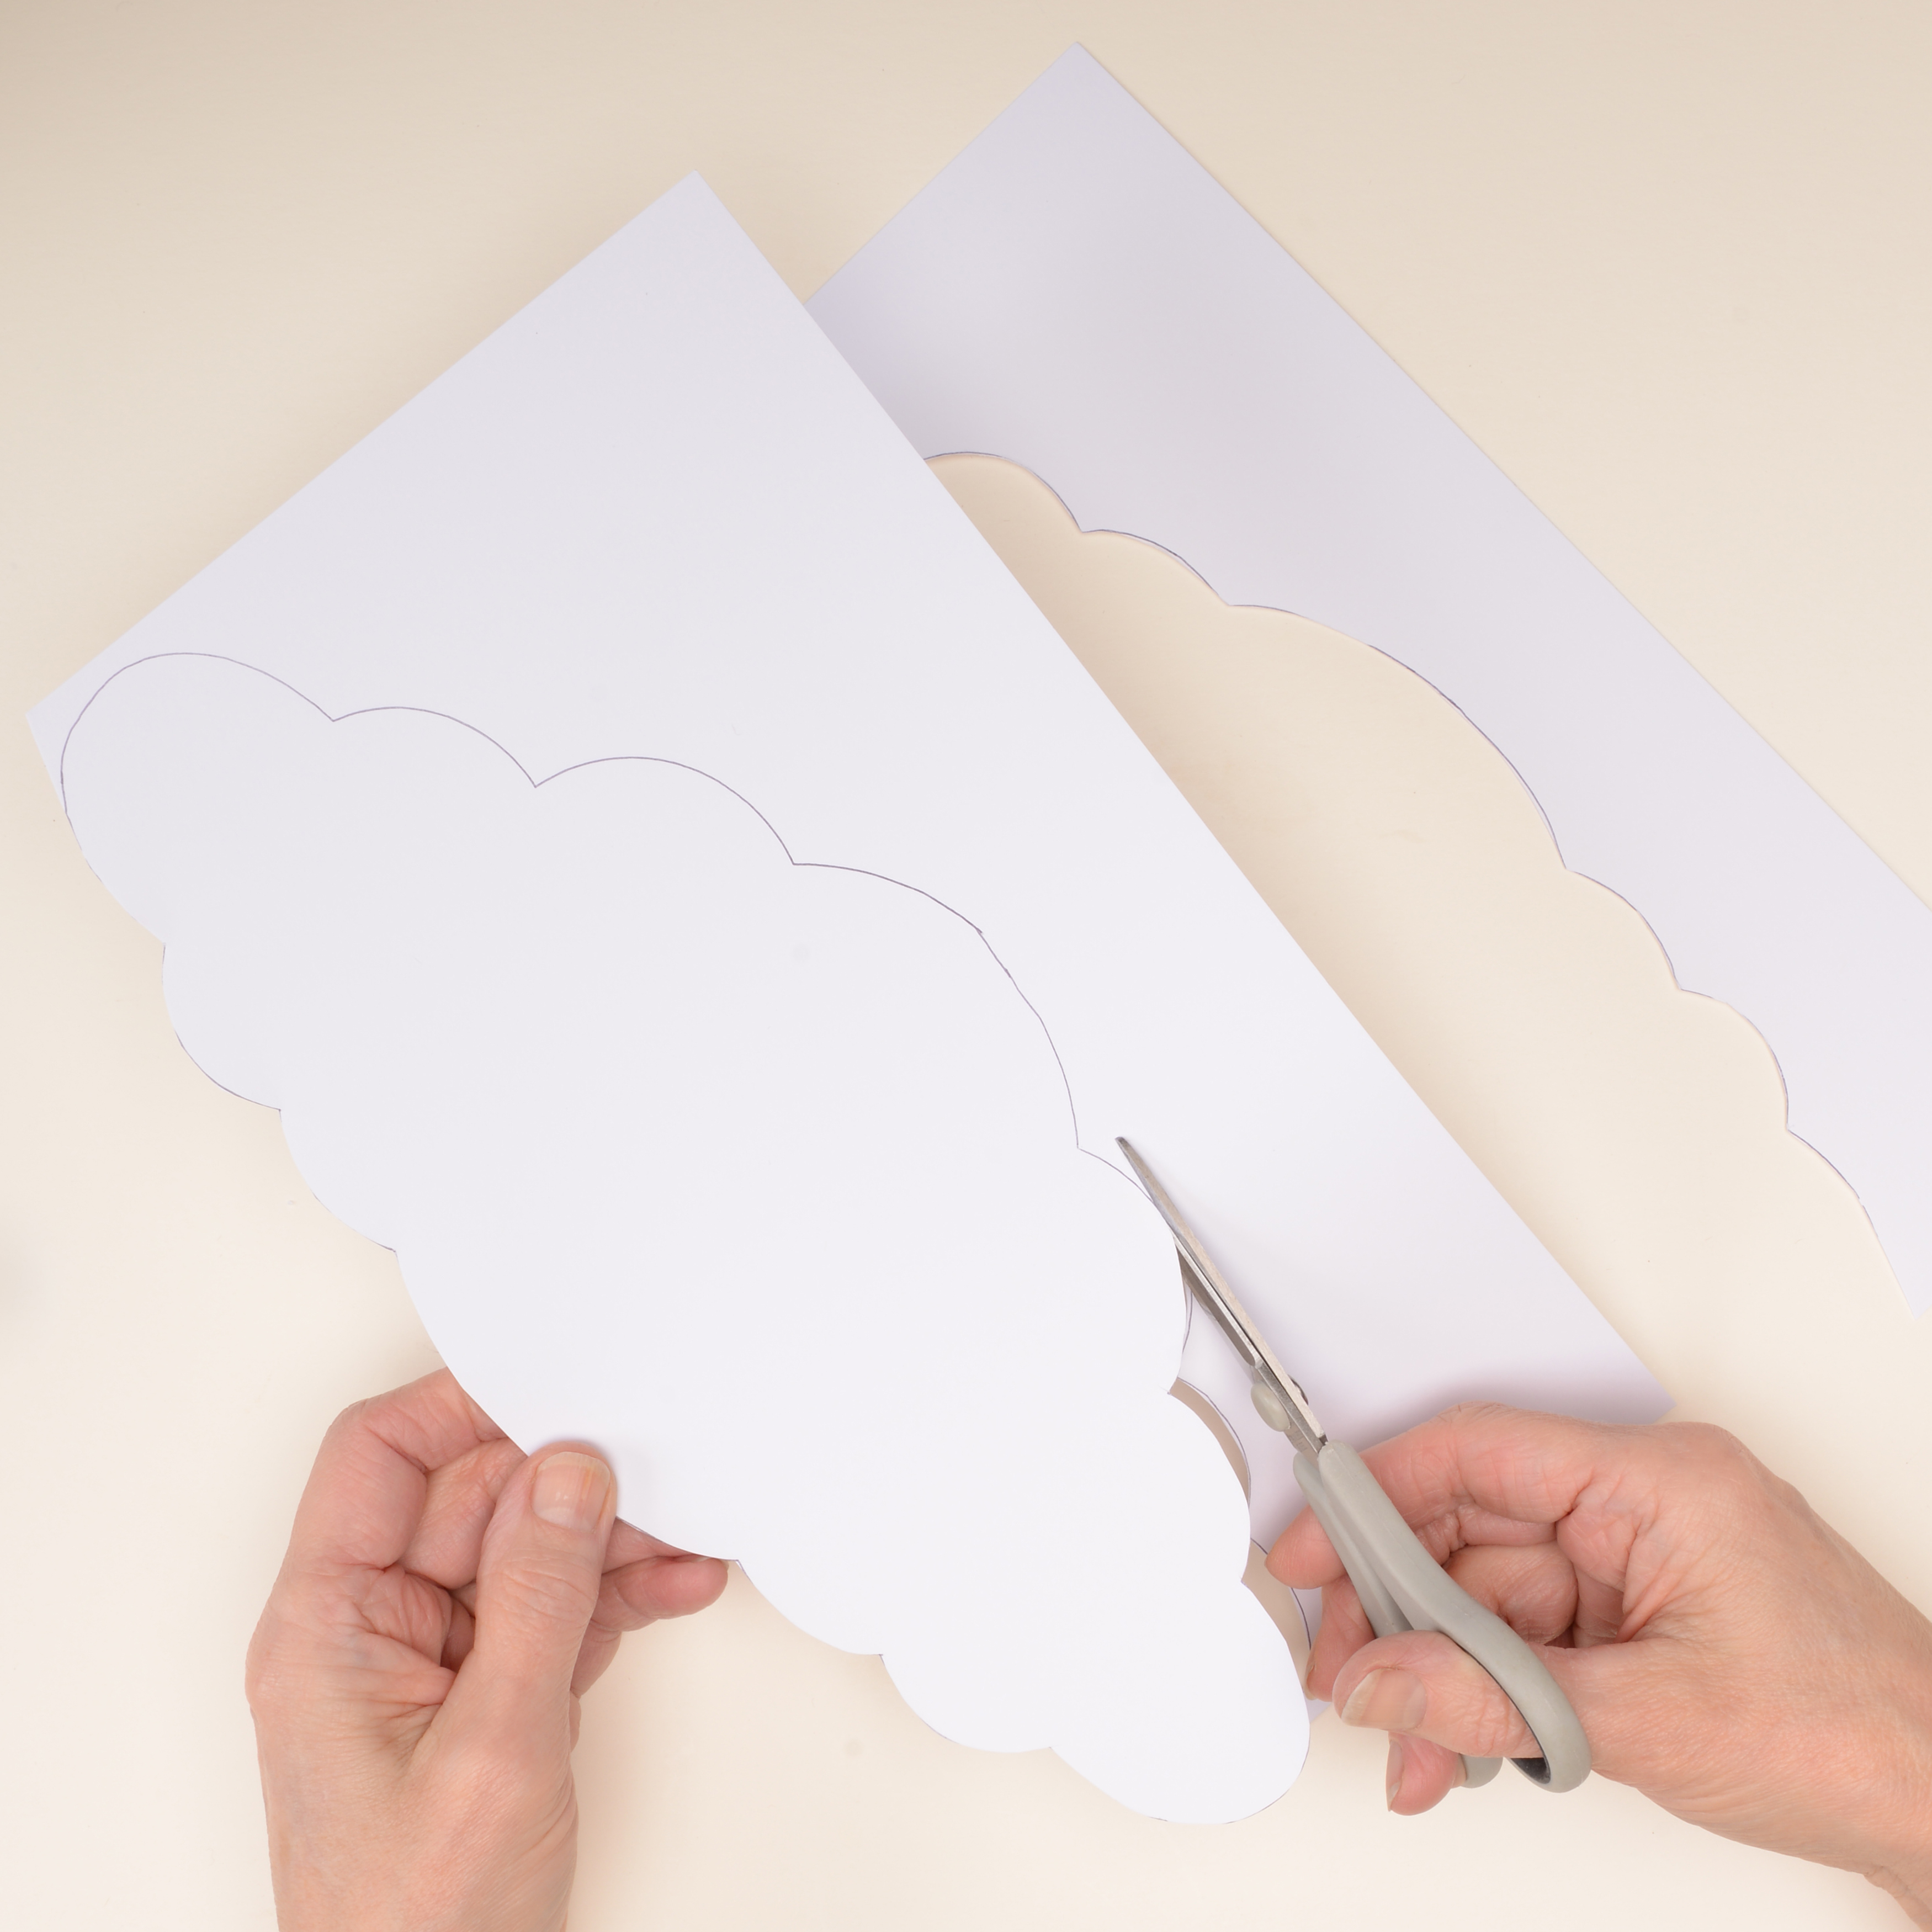
Draw and cut out six large cloud shapes from a sturdy white card. Fold each of these in half and put adhesive on one side of the clouds only, and start sticking the clouds together. Stop before you add the final one.
Step 9
Add your string
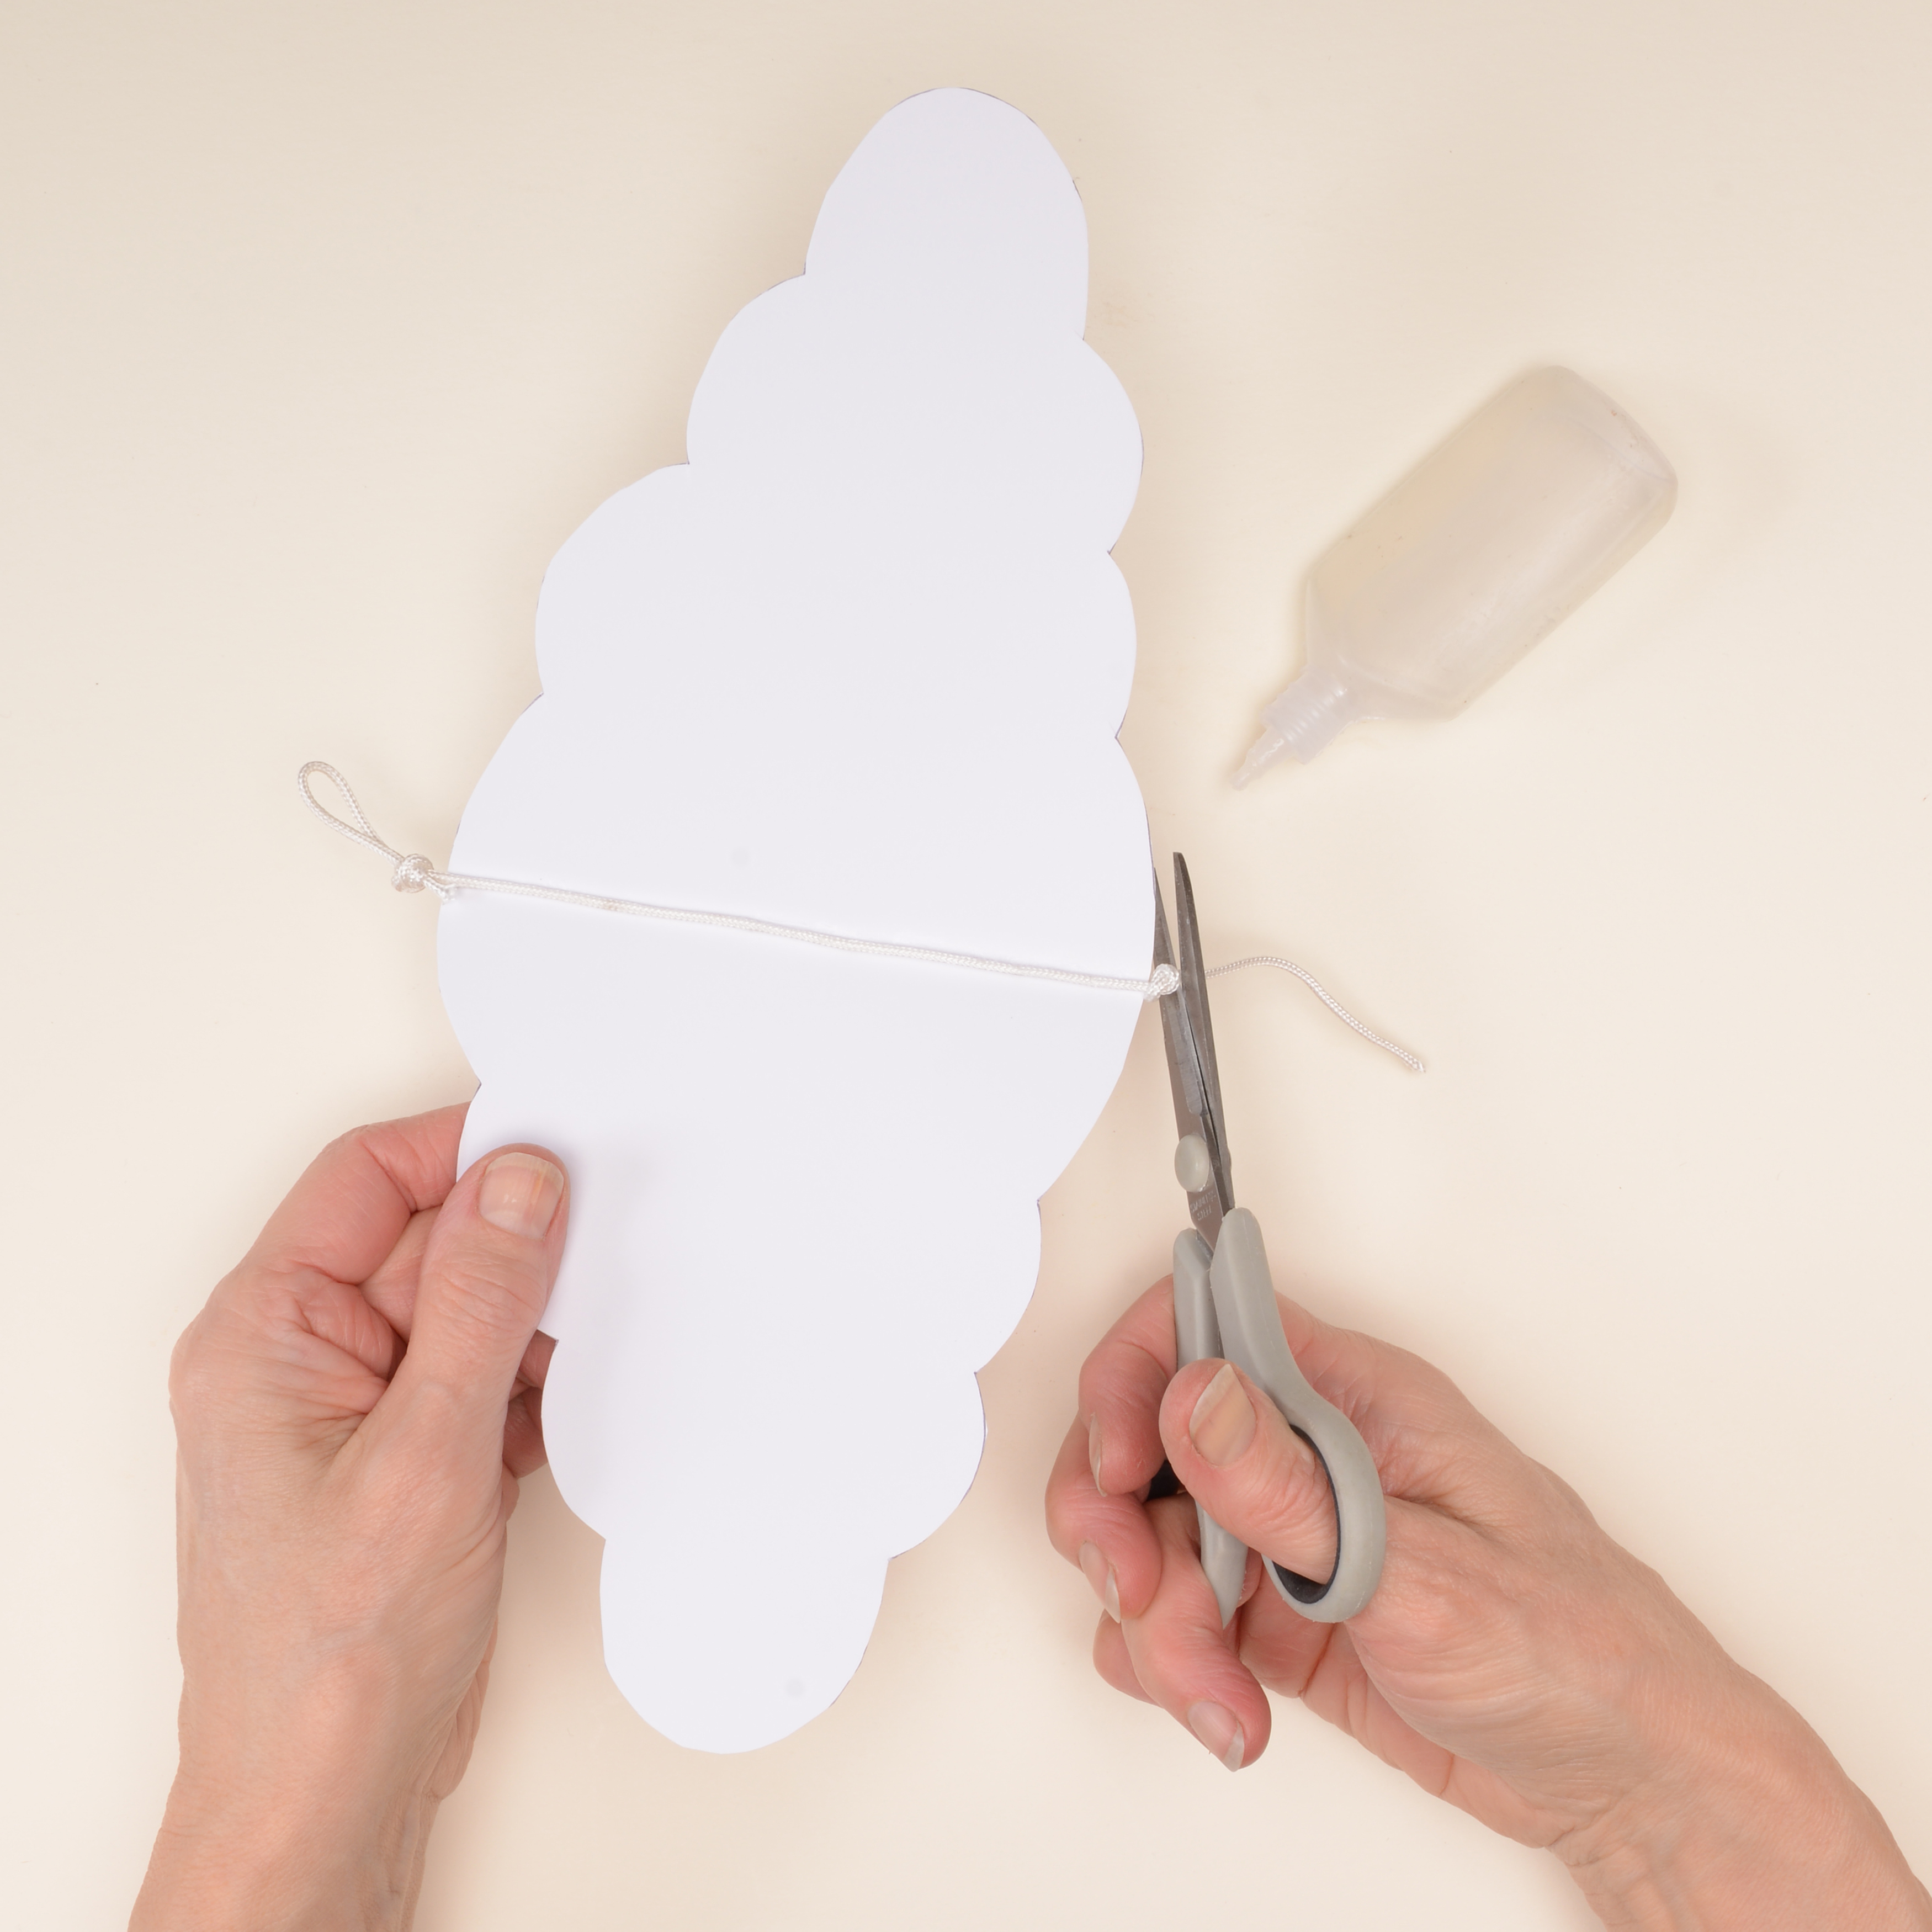
Before sticking together the final two halves of the last clouds, add a piece of string (tie a loop at the top) down the centre of the clouds. Add the string attached to the largest boat to secure the boats to the cloud. Trim the string and tie into a knot at the bottom.
Step 10
Create the smaller clouds
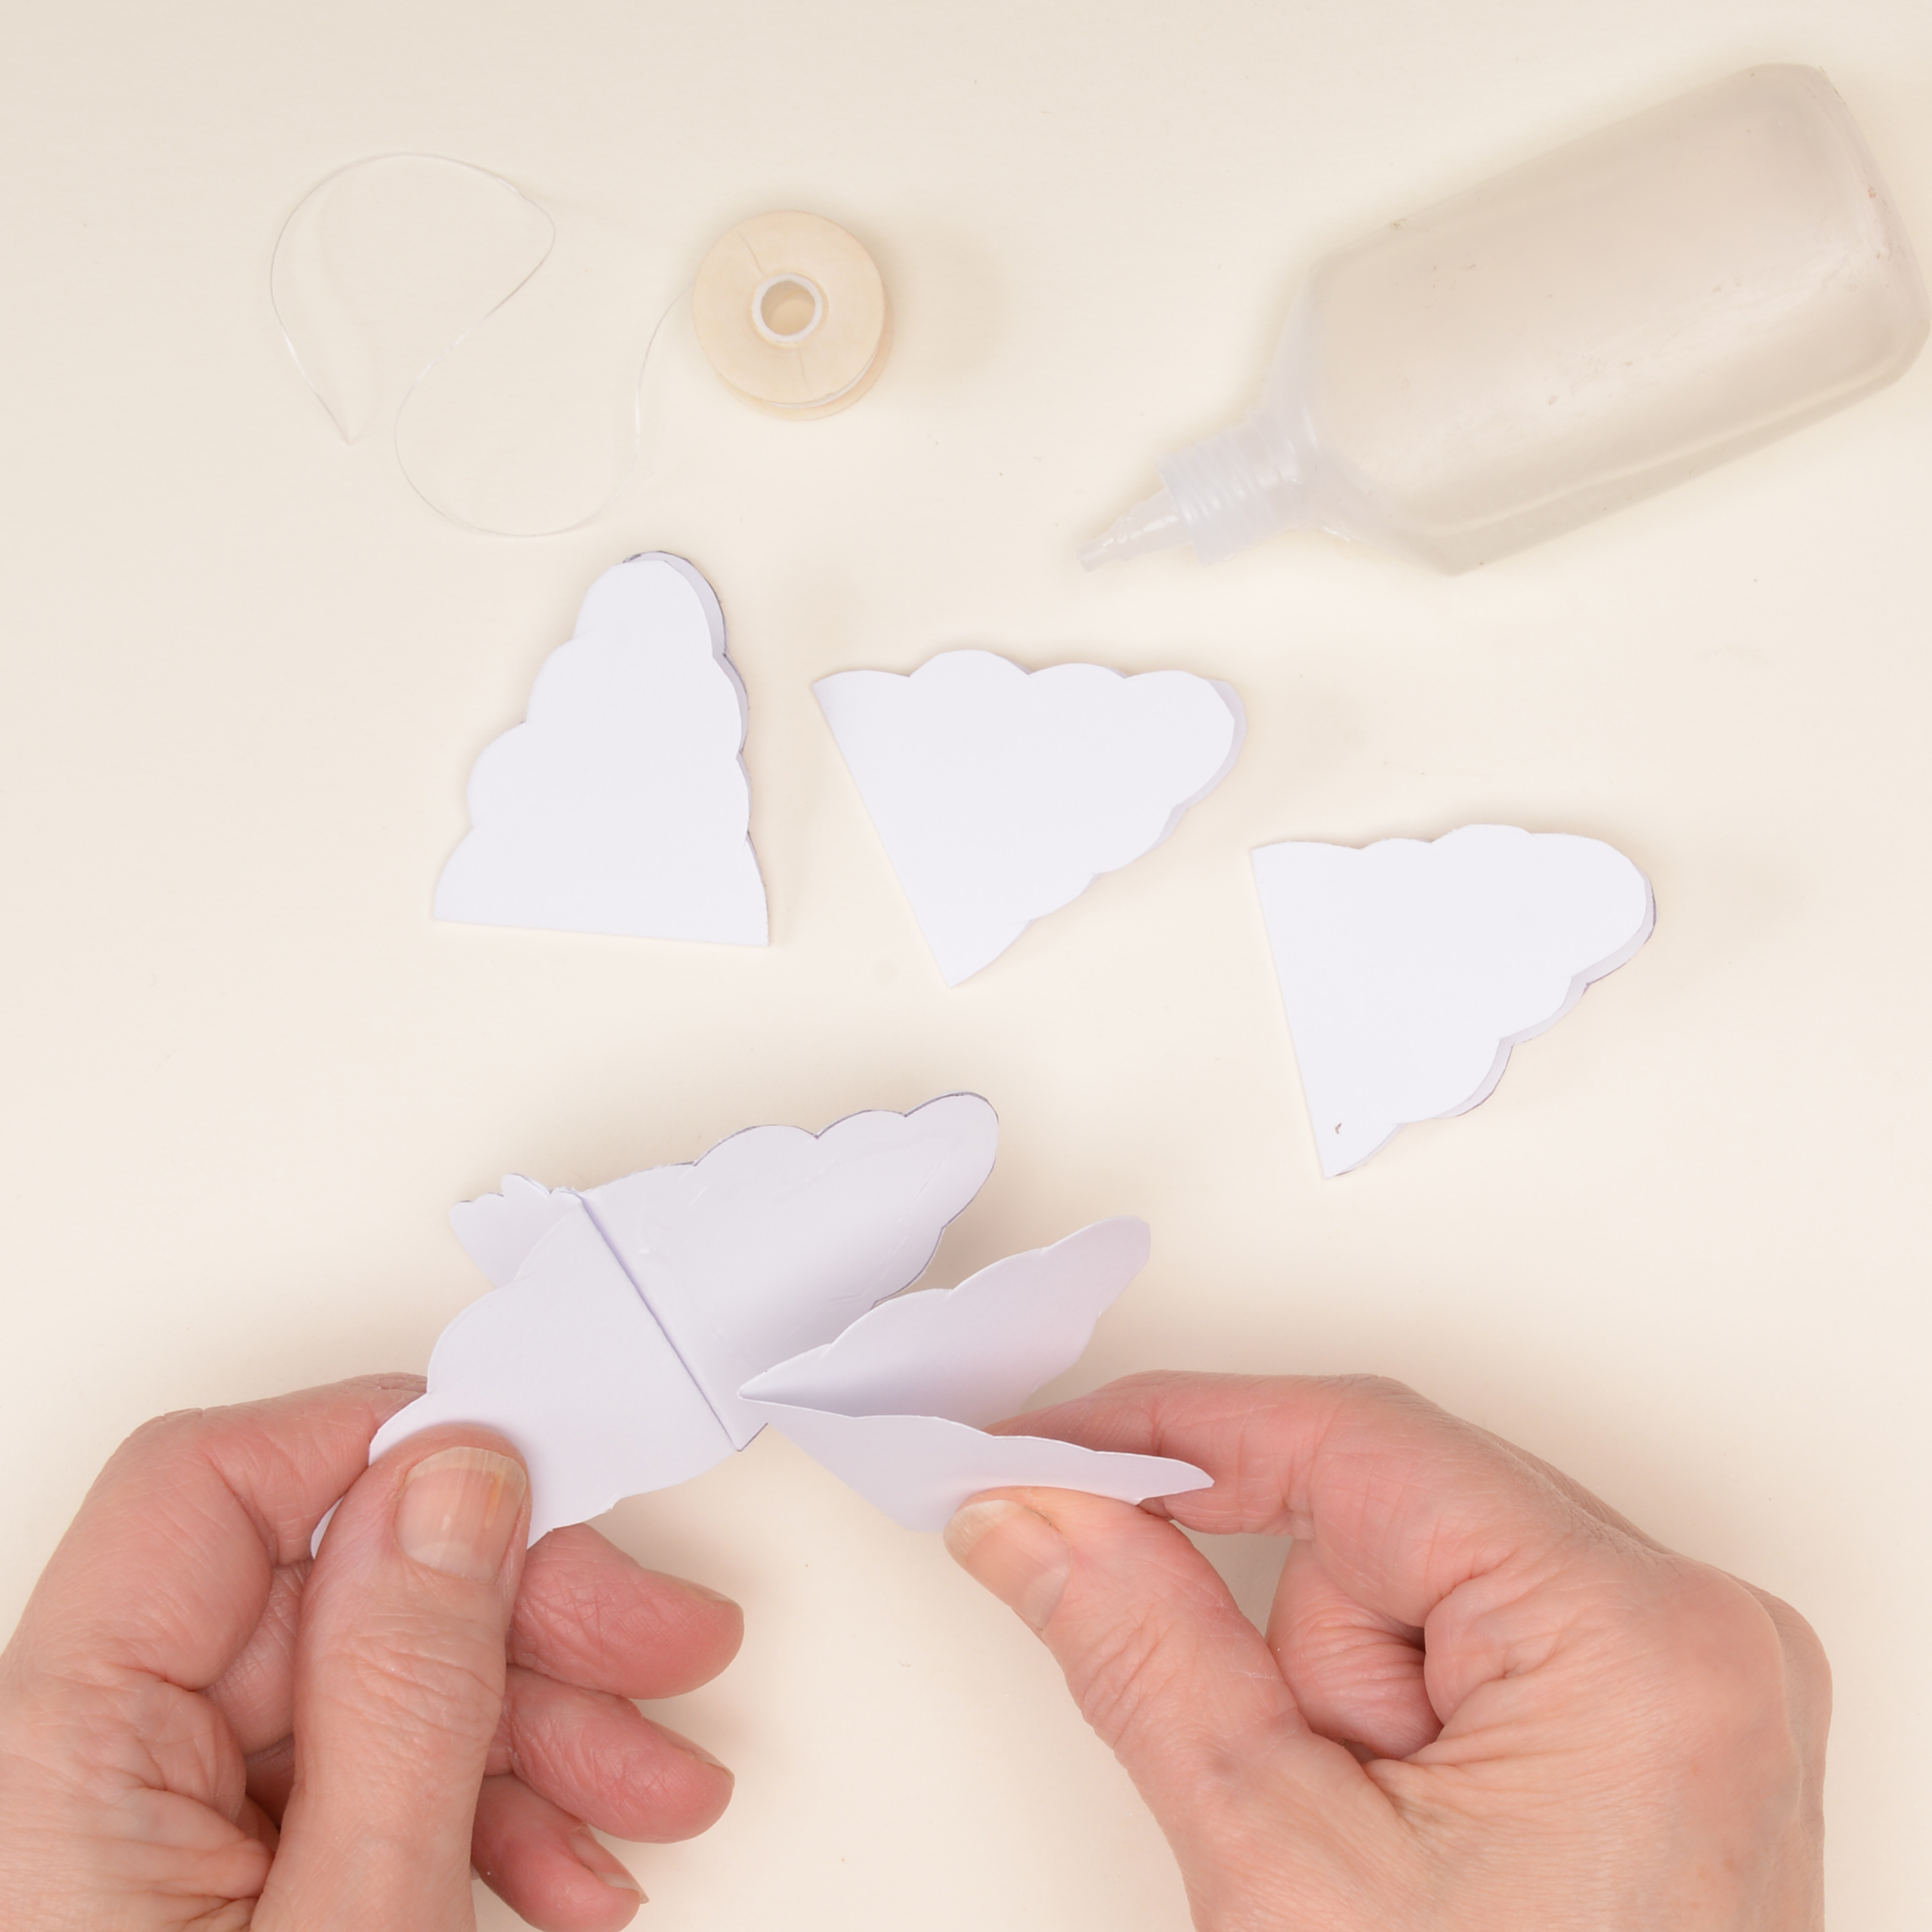
Draw and cut out 18 small cloud shapes and repeat the same process as for the larger cloud to make three small clouds. Attach 15cm of string down the centre of each cloud.
Step 11
Create two seagulls
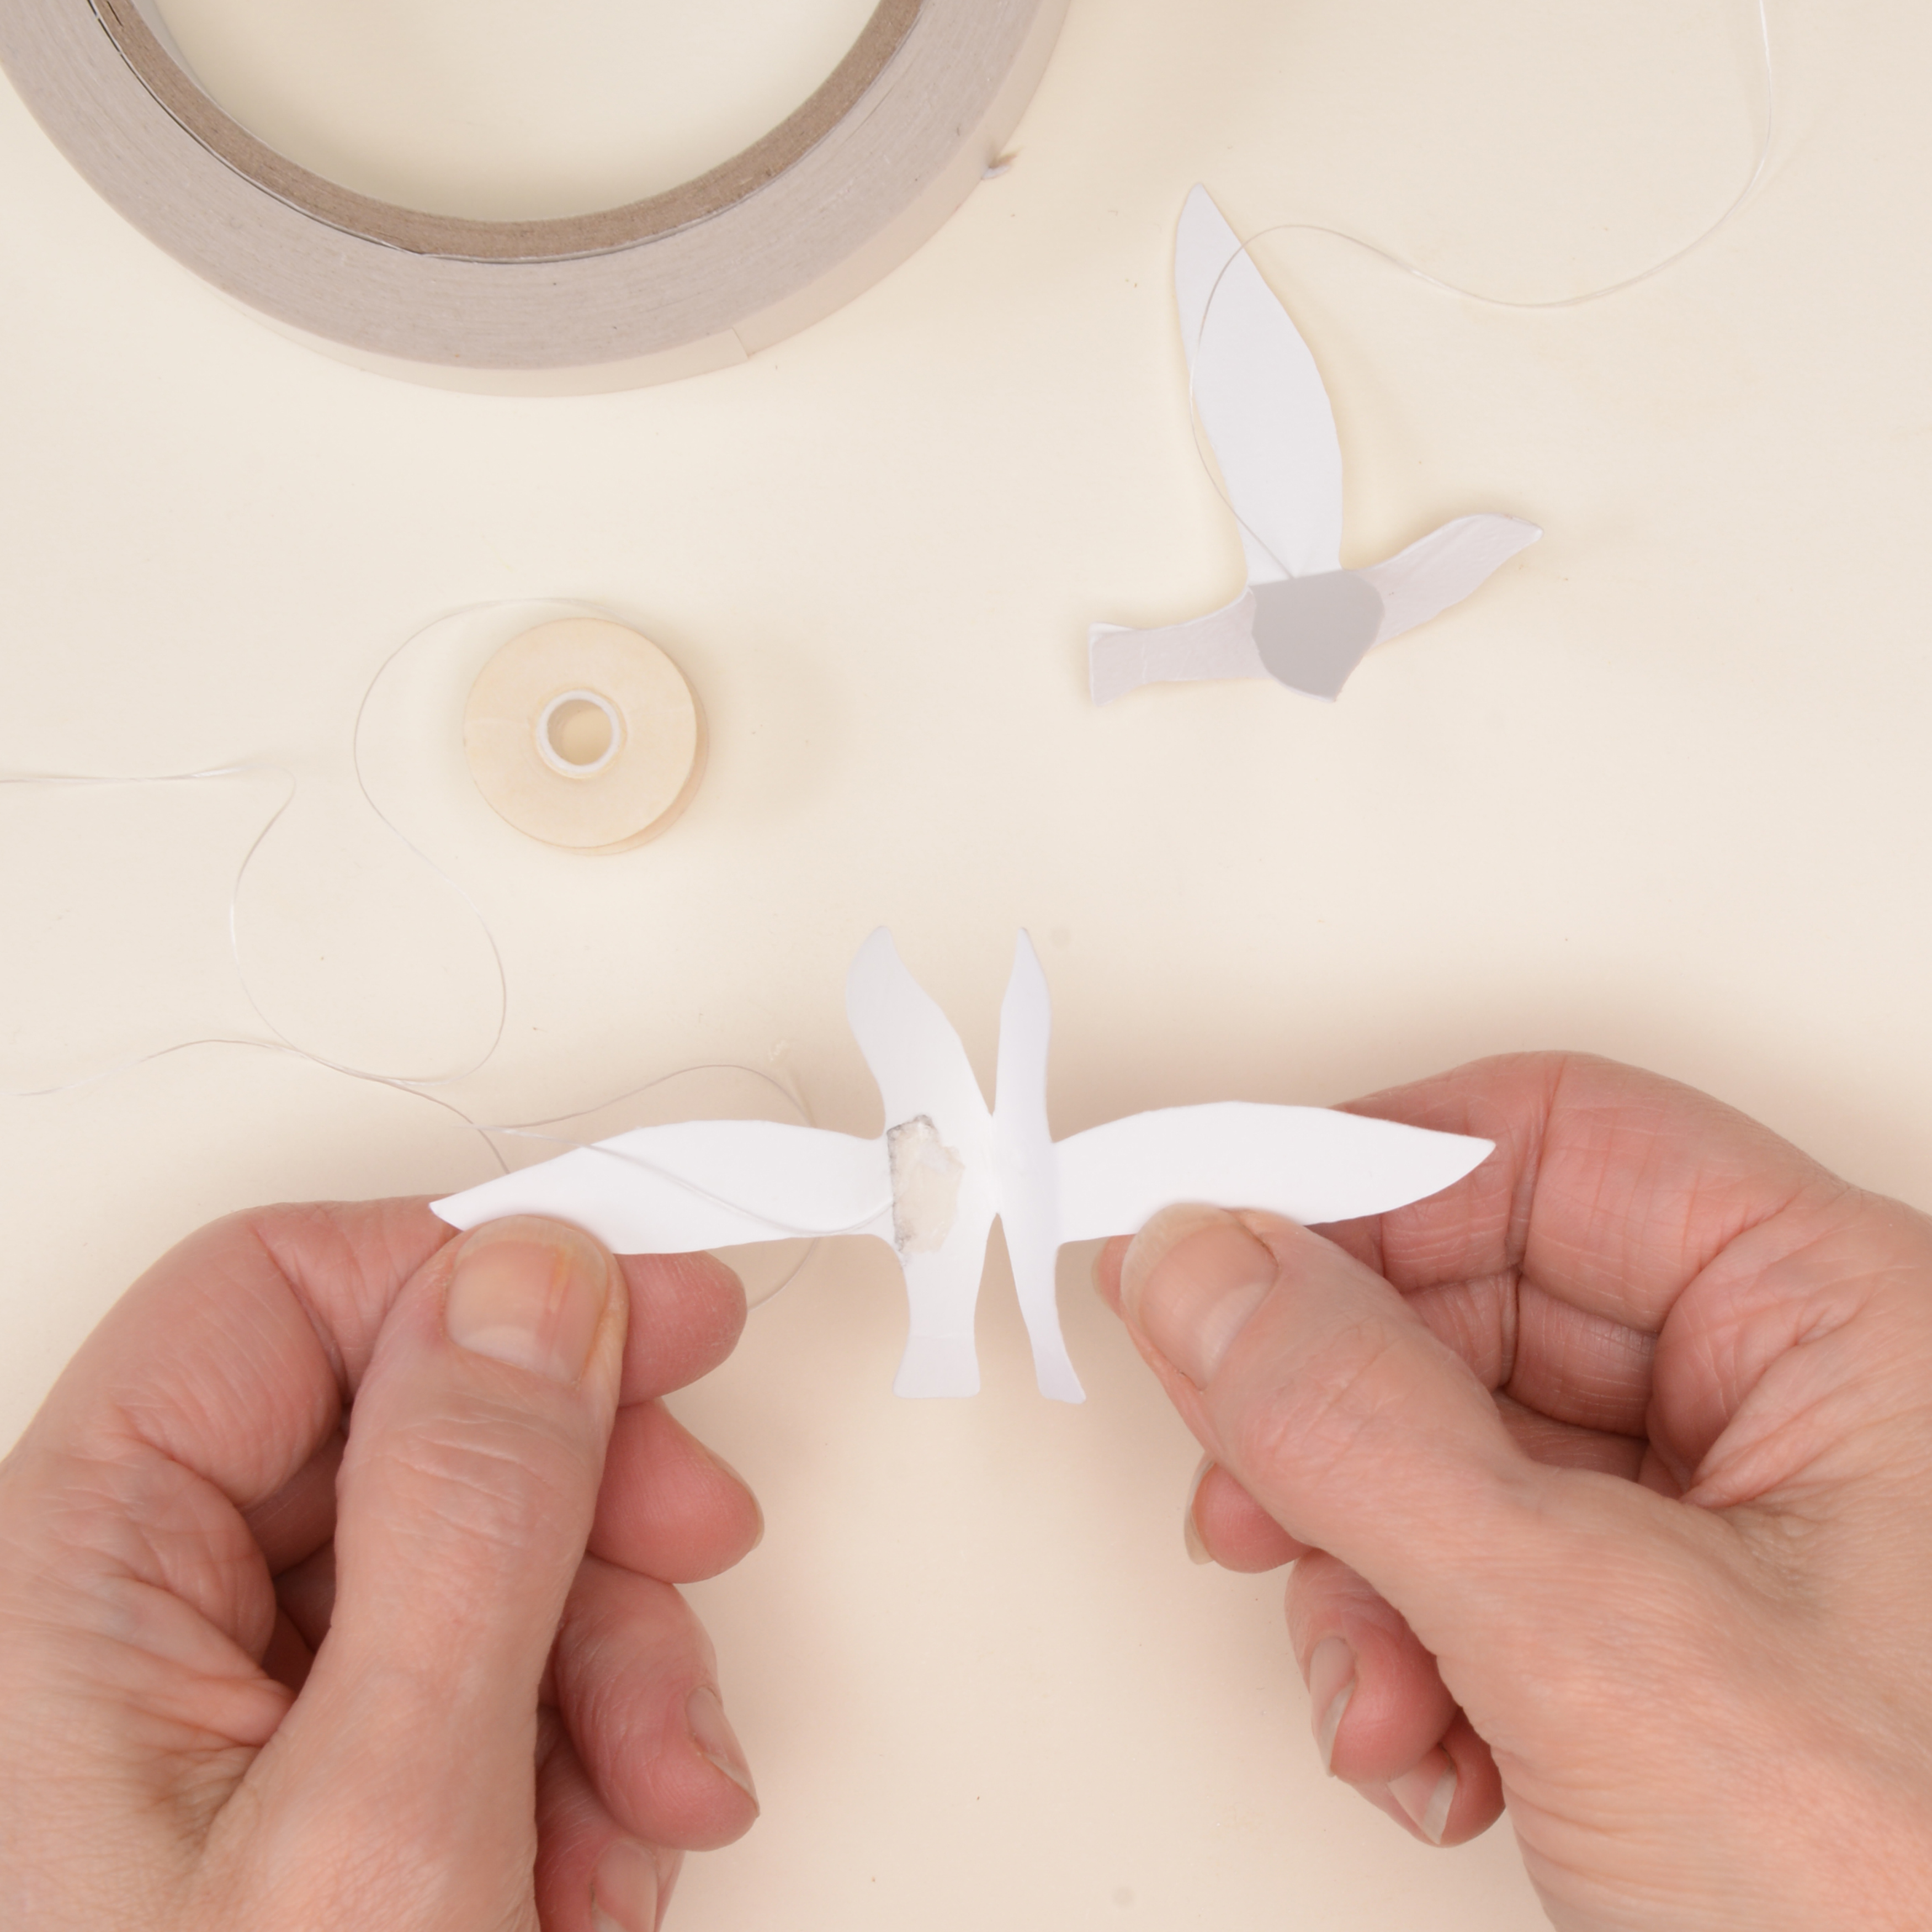
Cut out two white seagull shapes from the white card. Score down the centre of each, add a piece of string and stick the bodies together. Fold the wings down 1cm from their base for a cool 3D effect.
Step 12
Add your twine to finish the mobile
Punch seven holes into the large cloud, one at the bottom of each cloud face and one in the centre.
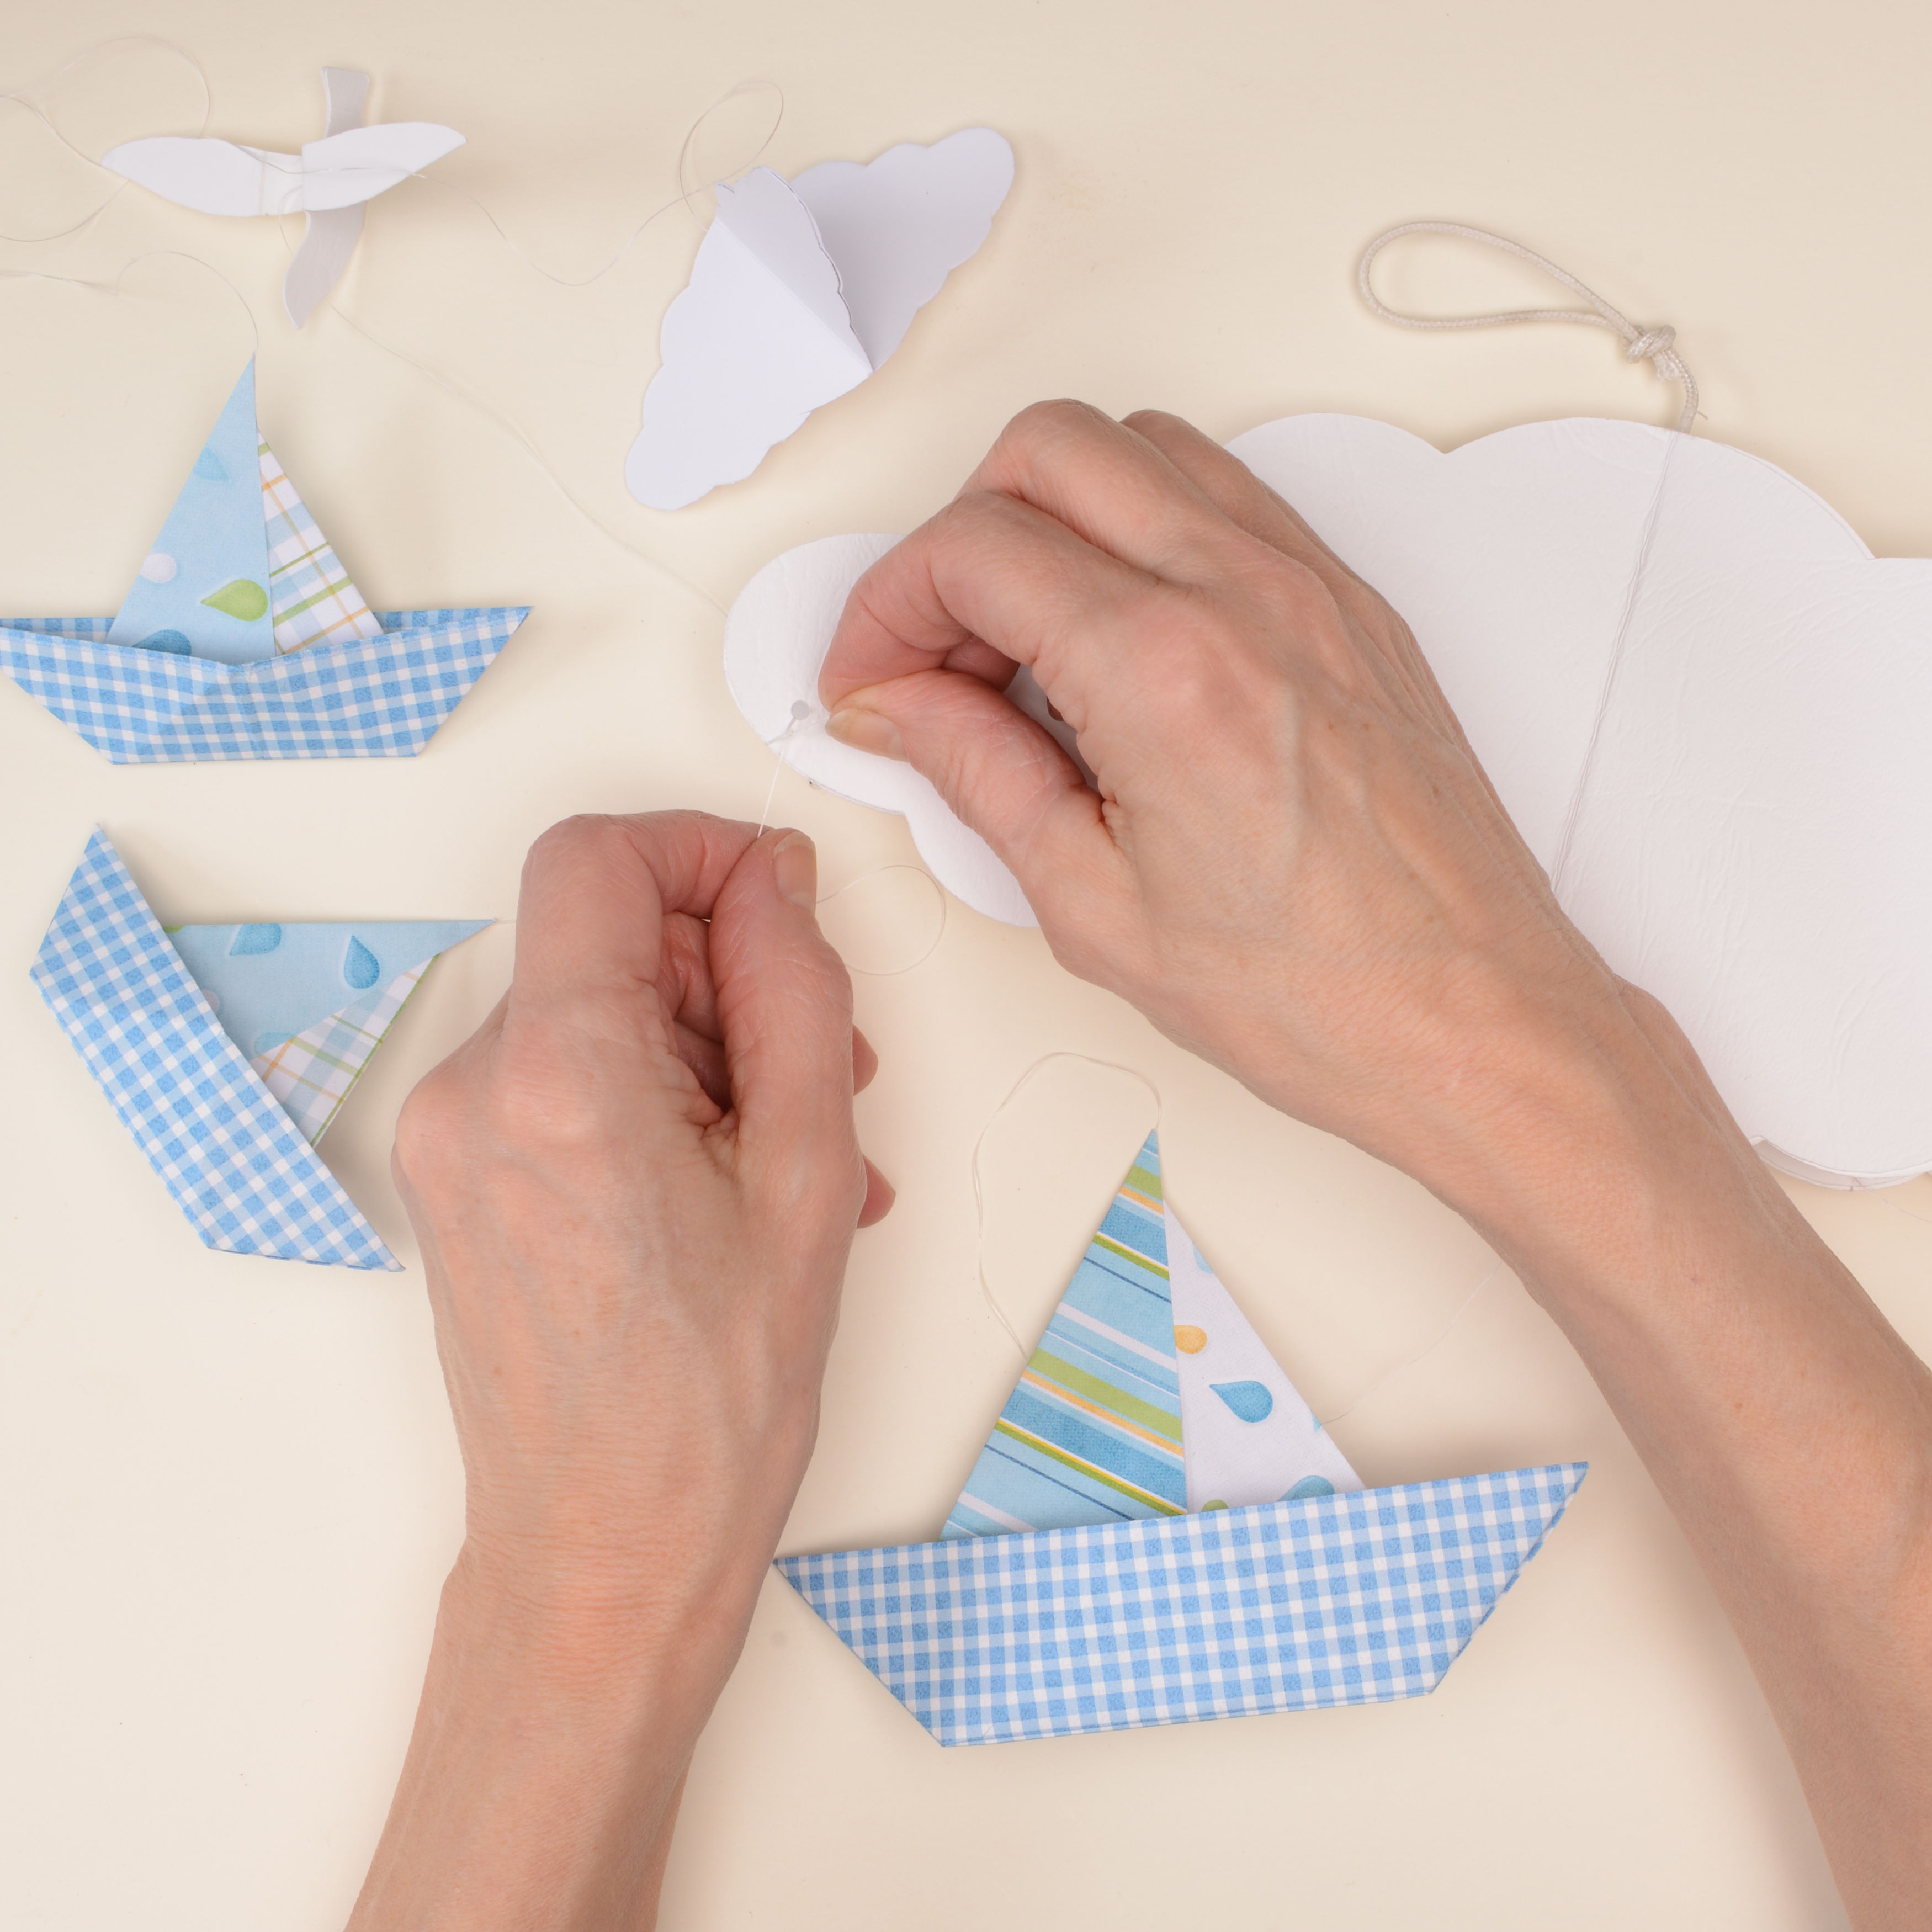
Thread twine through each of the punched holes, then attach the small boats, clouds and seagulls to the large cloud to finish.
Hang up and admire your handywork!
