To make the blush pink orgiami Christmas star
Step 1
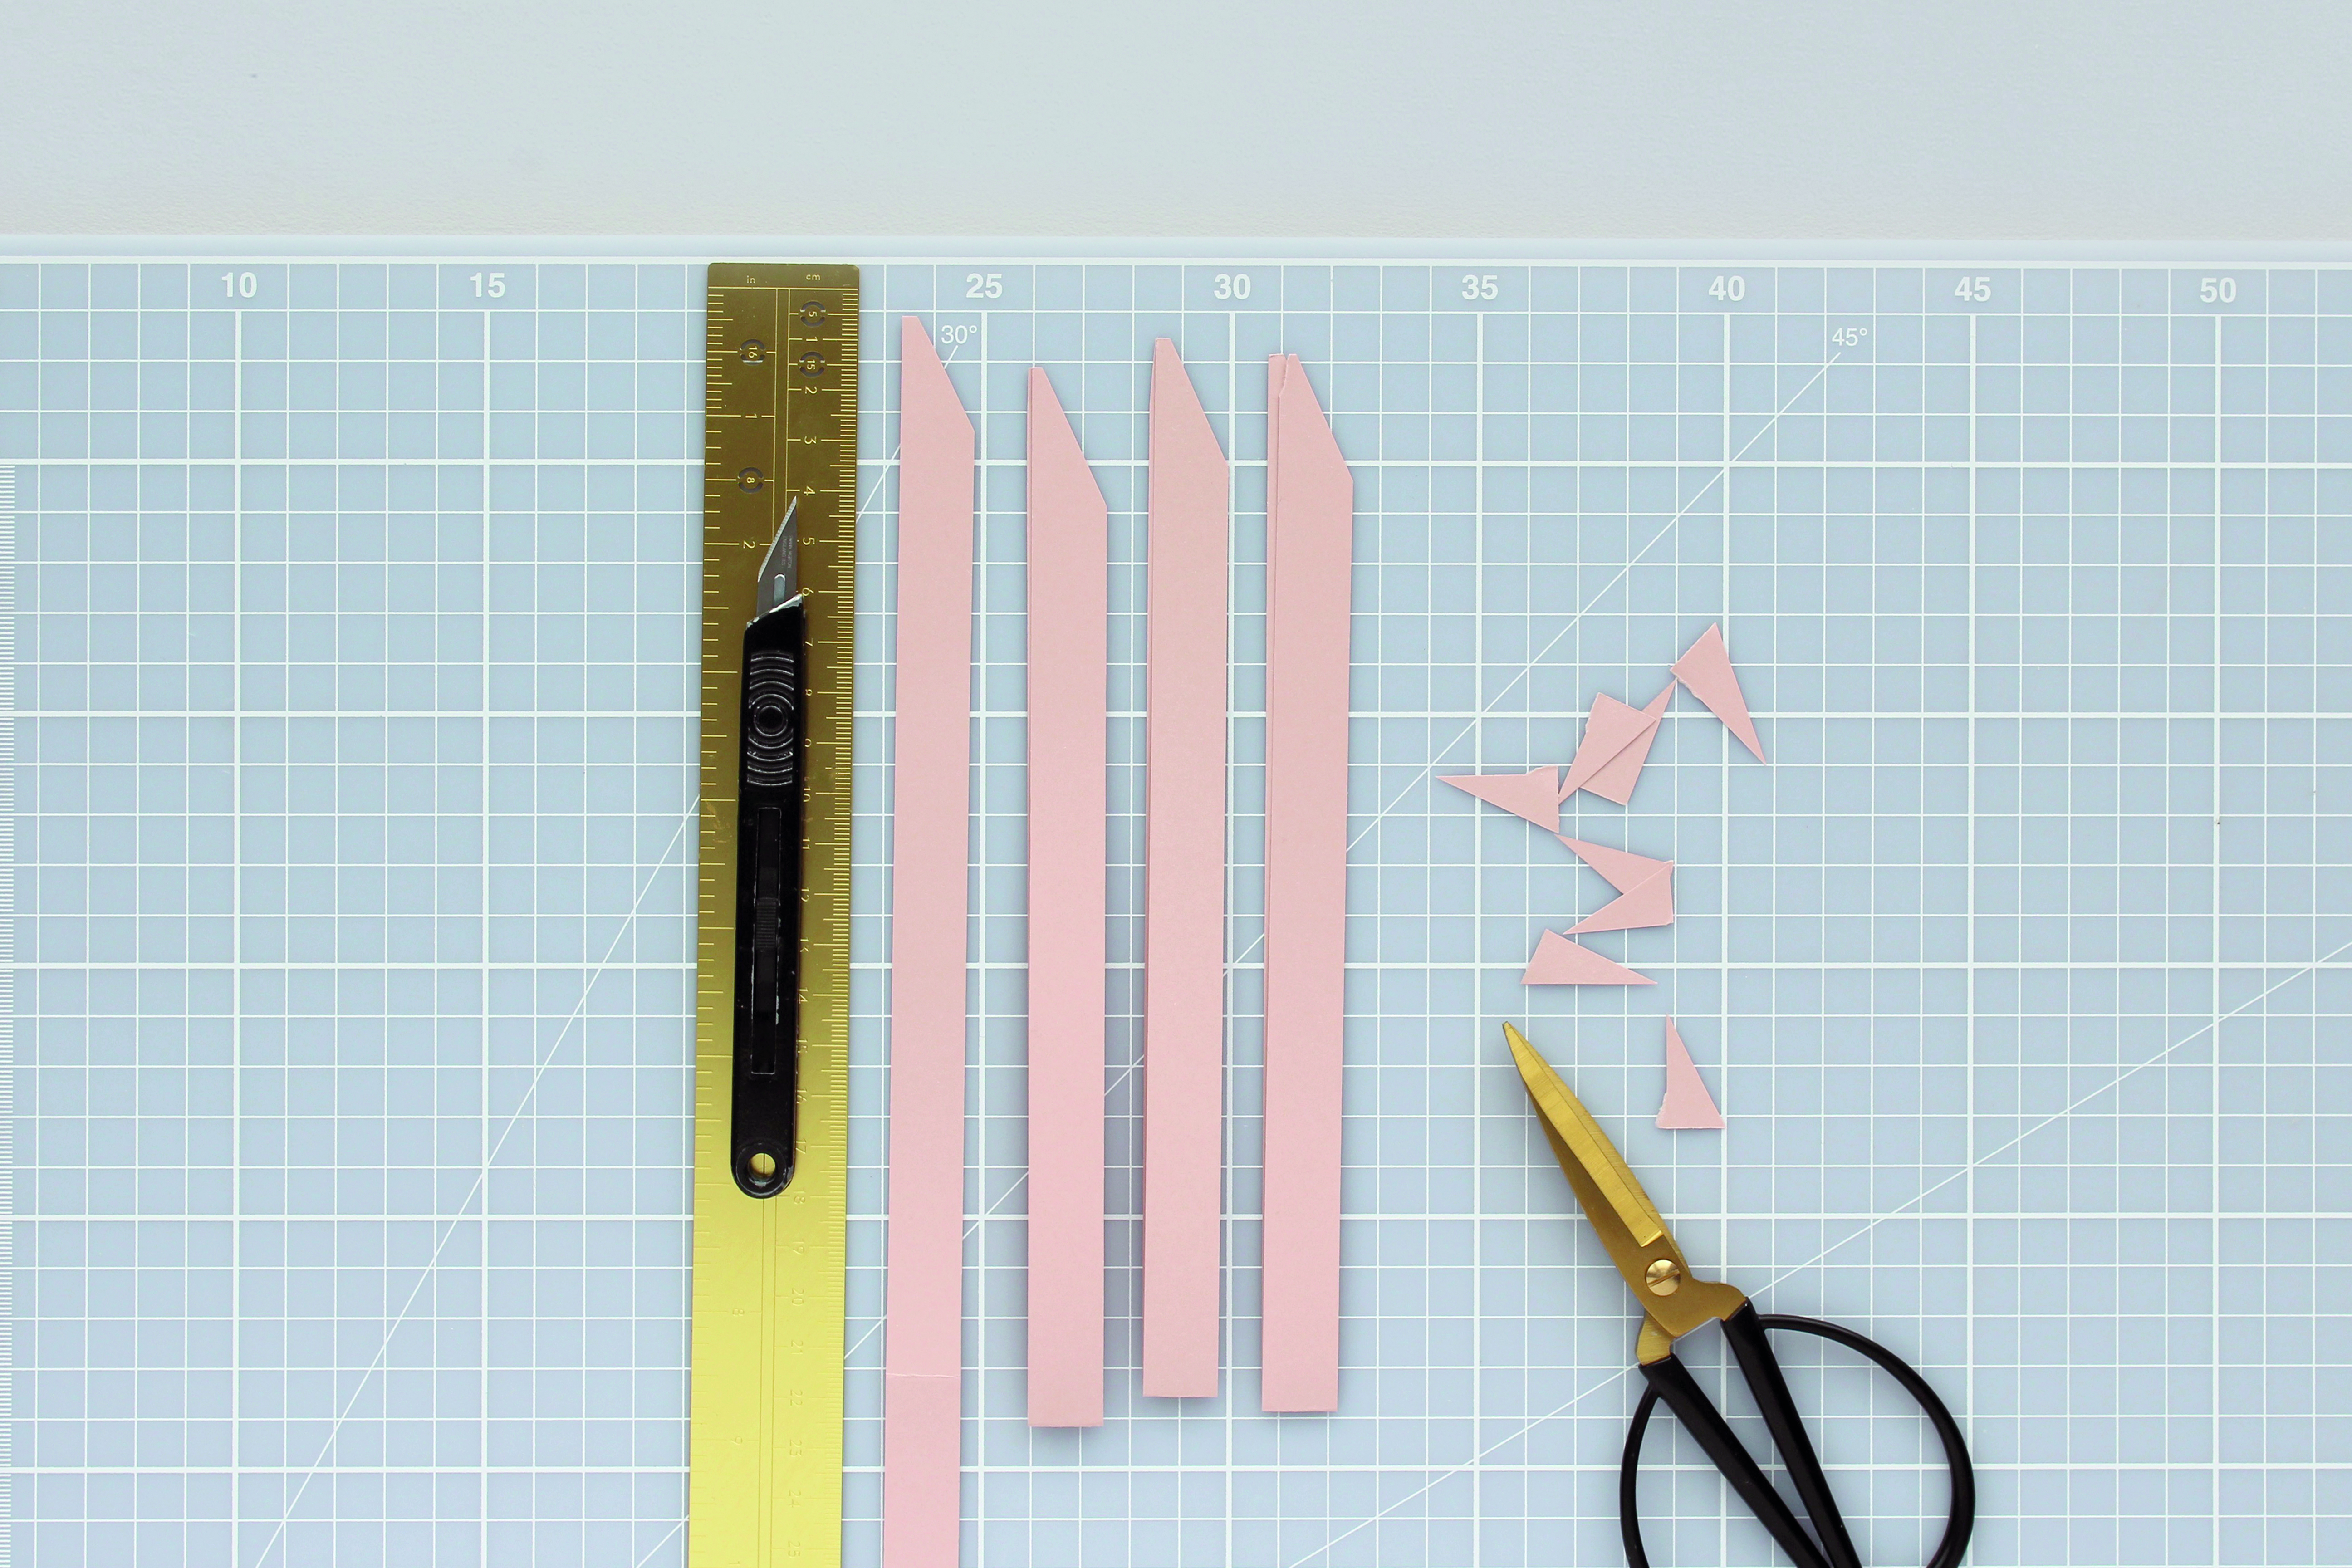
To make a blush pink origami star, start by cutting four 1.5 x 42cm (5/8 x 143⁄4") strips of paper. Fold each strip in half along the length, then cut the two ends into a point, as shown.
Step 2
Place a folded strip on a flat surface, positioning the fold at the top and the pointed end at the bottom. Slide a second folded strip horizontally over the centre of the first, with the fold at the right-hand side, and sandwiching it around the first folded strip
Step 3
Slide a third folded strip vertically over the centre of the second strip, positioning the fold at the bottom, and sandwiching it around the second folded strip.
Step 4
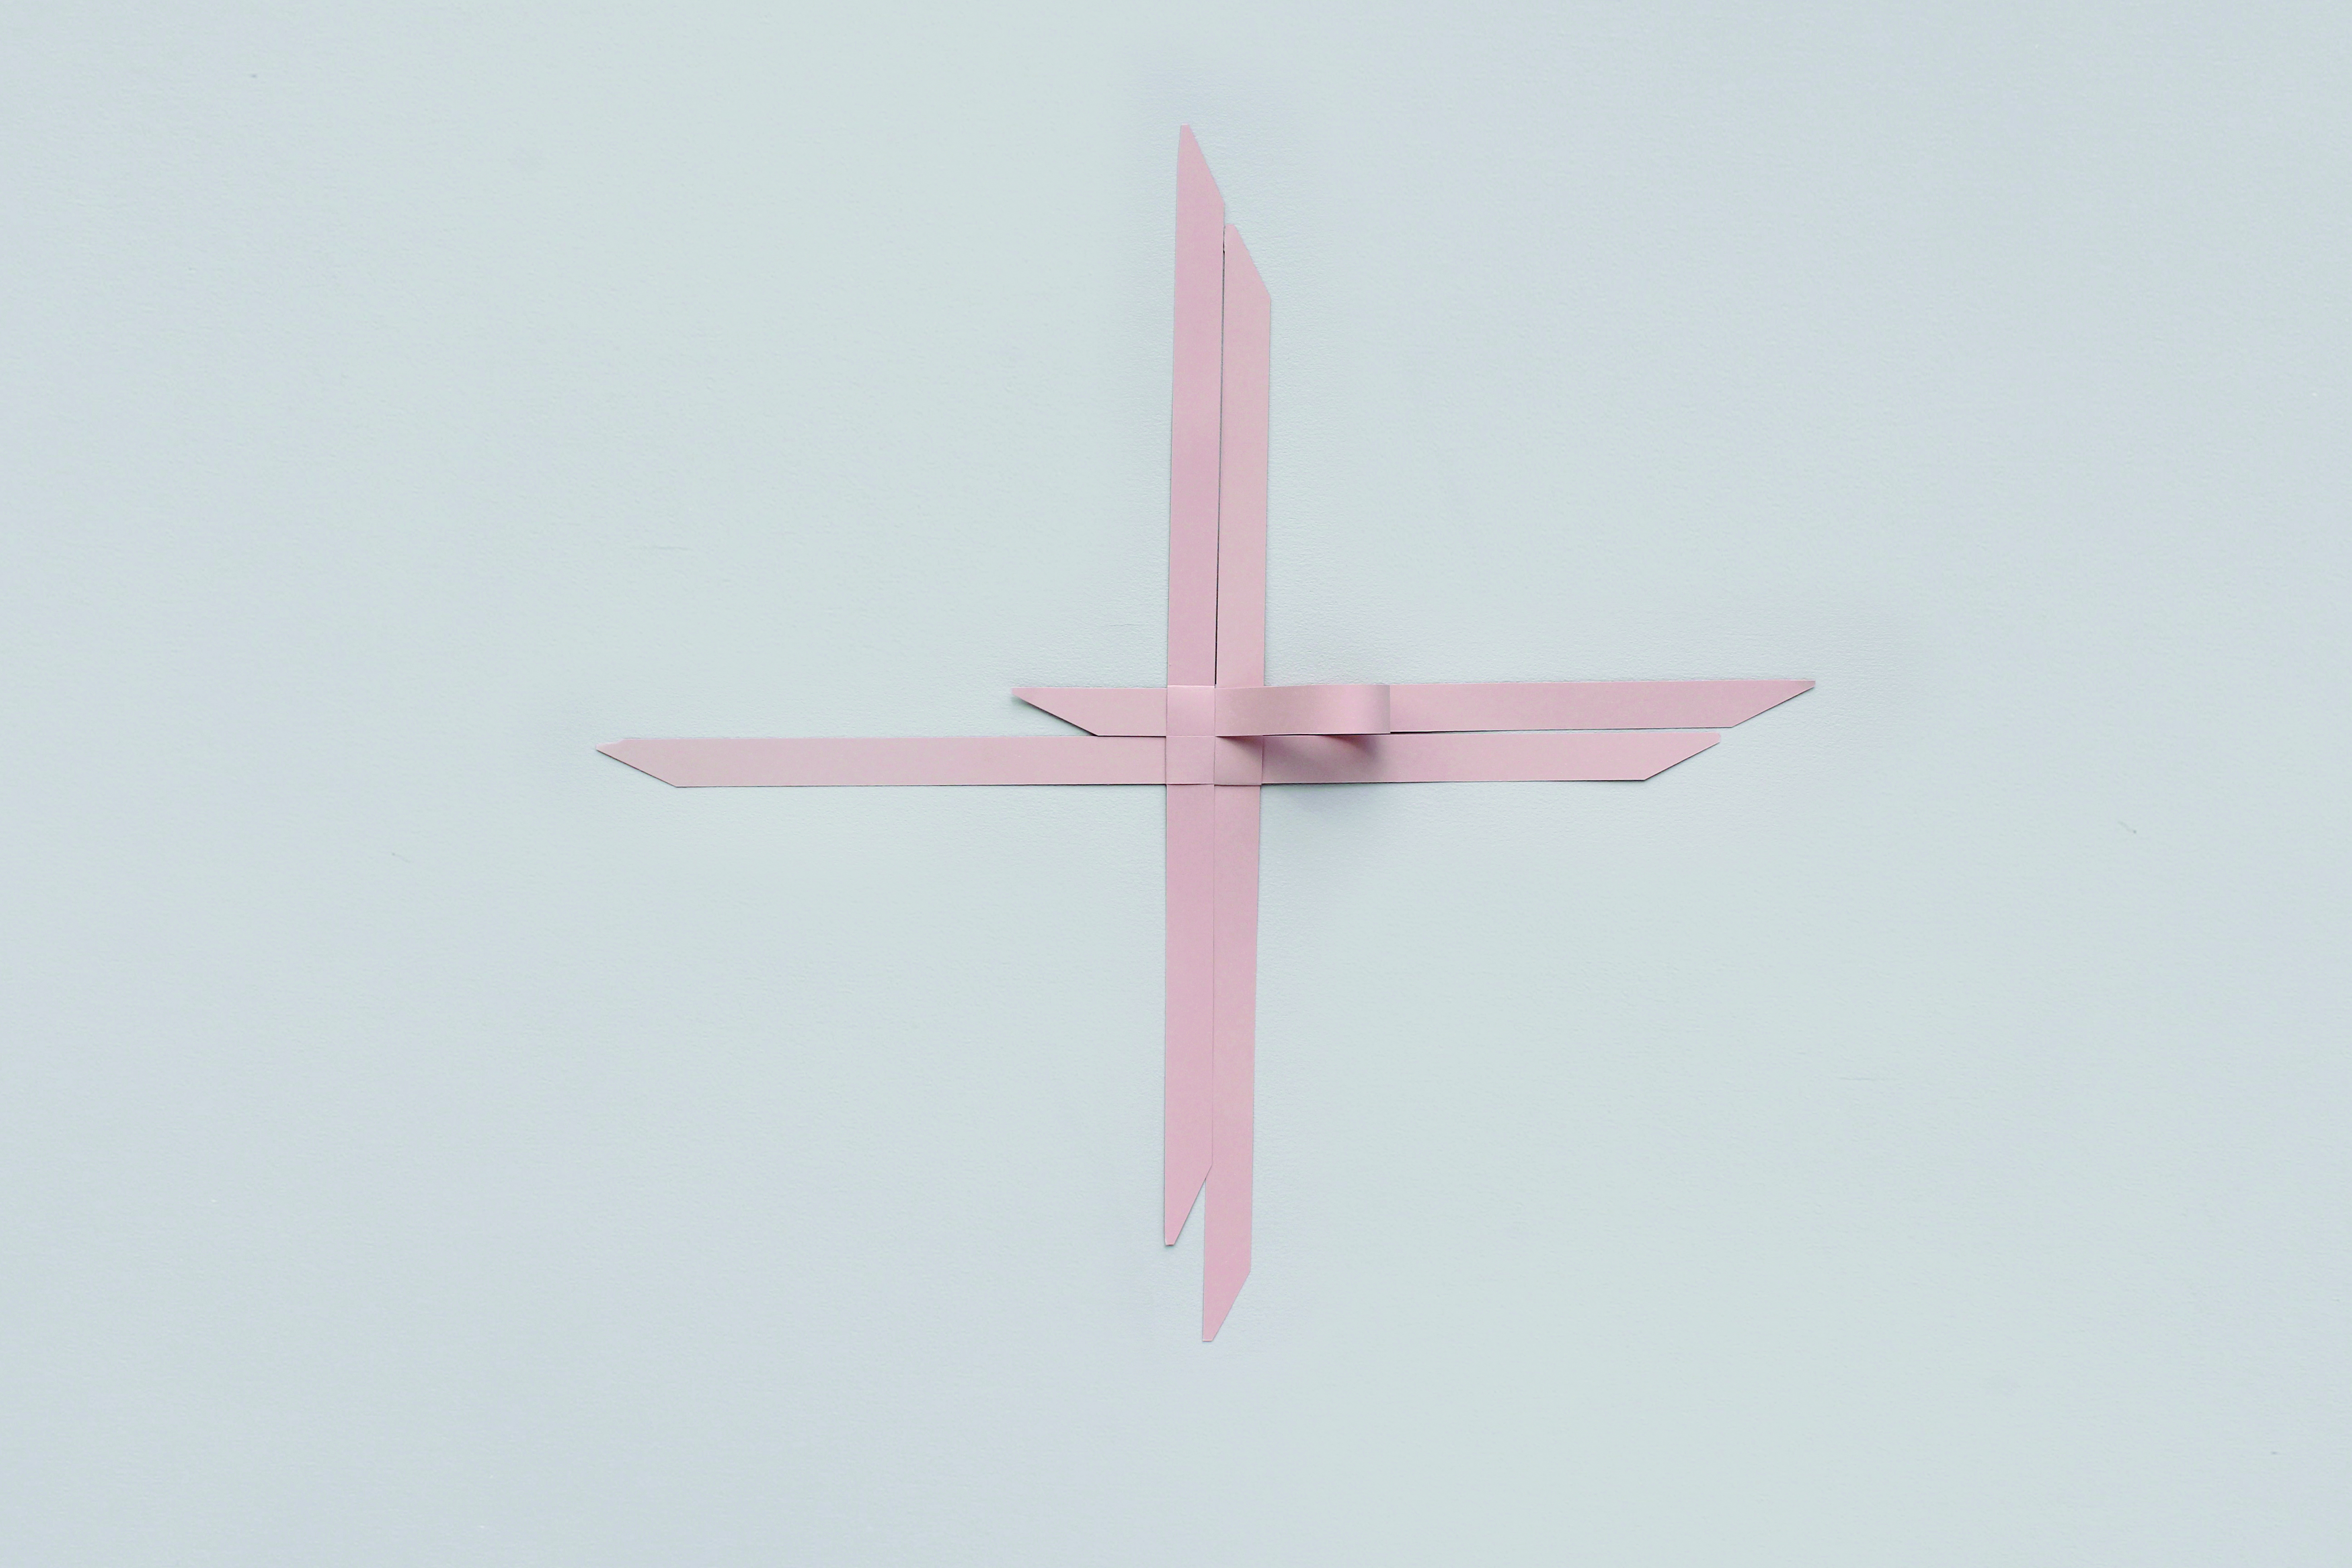
Slide the fourth folded strip horizontally over the third strip, positioning the fold at the left, then thread the pointed ends in between the layers of the first strip.
Step 5
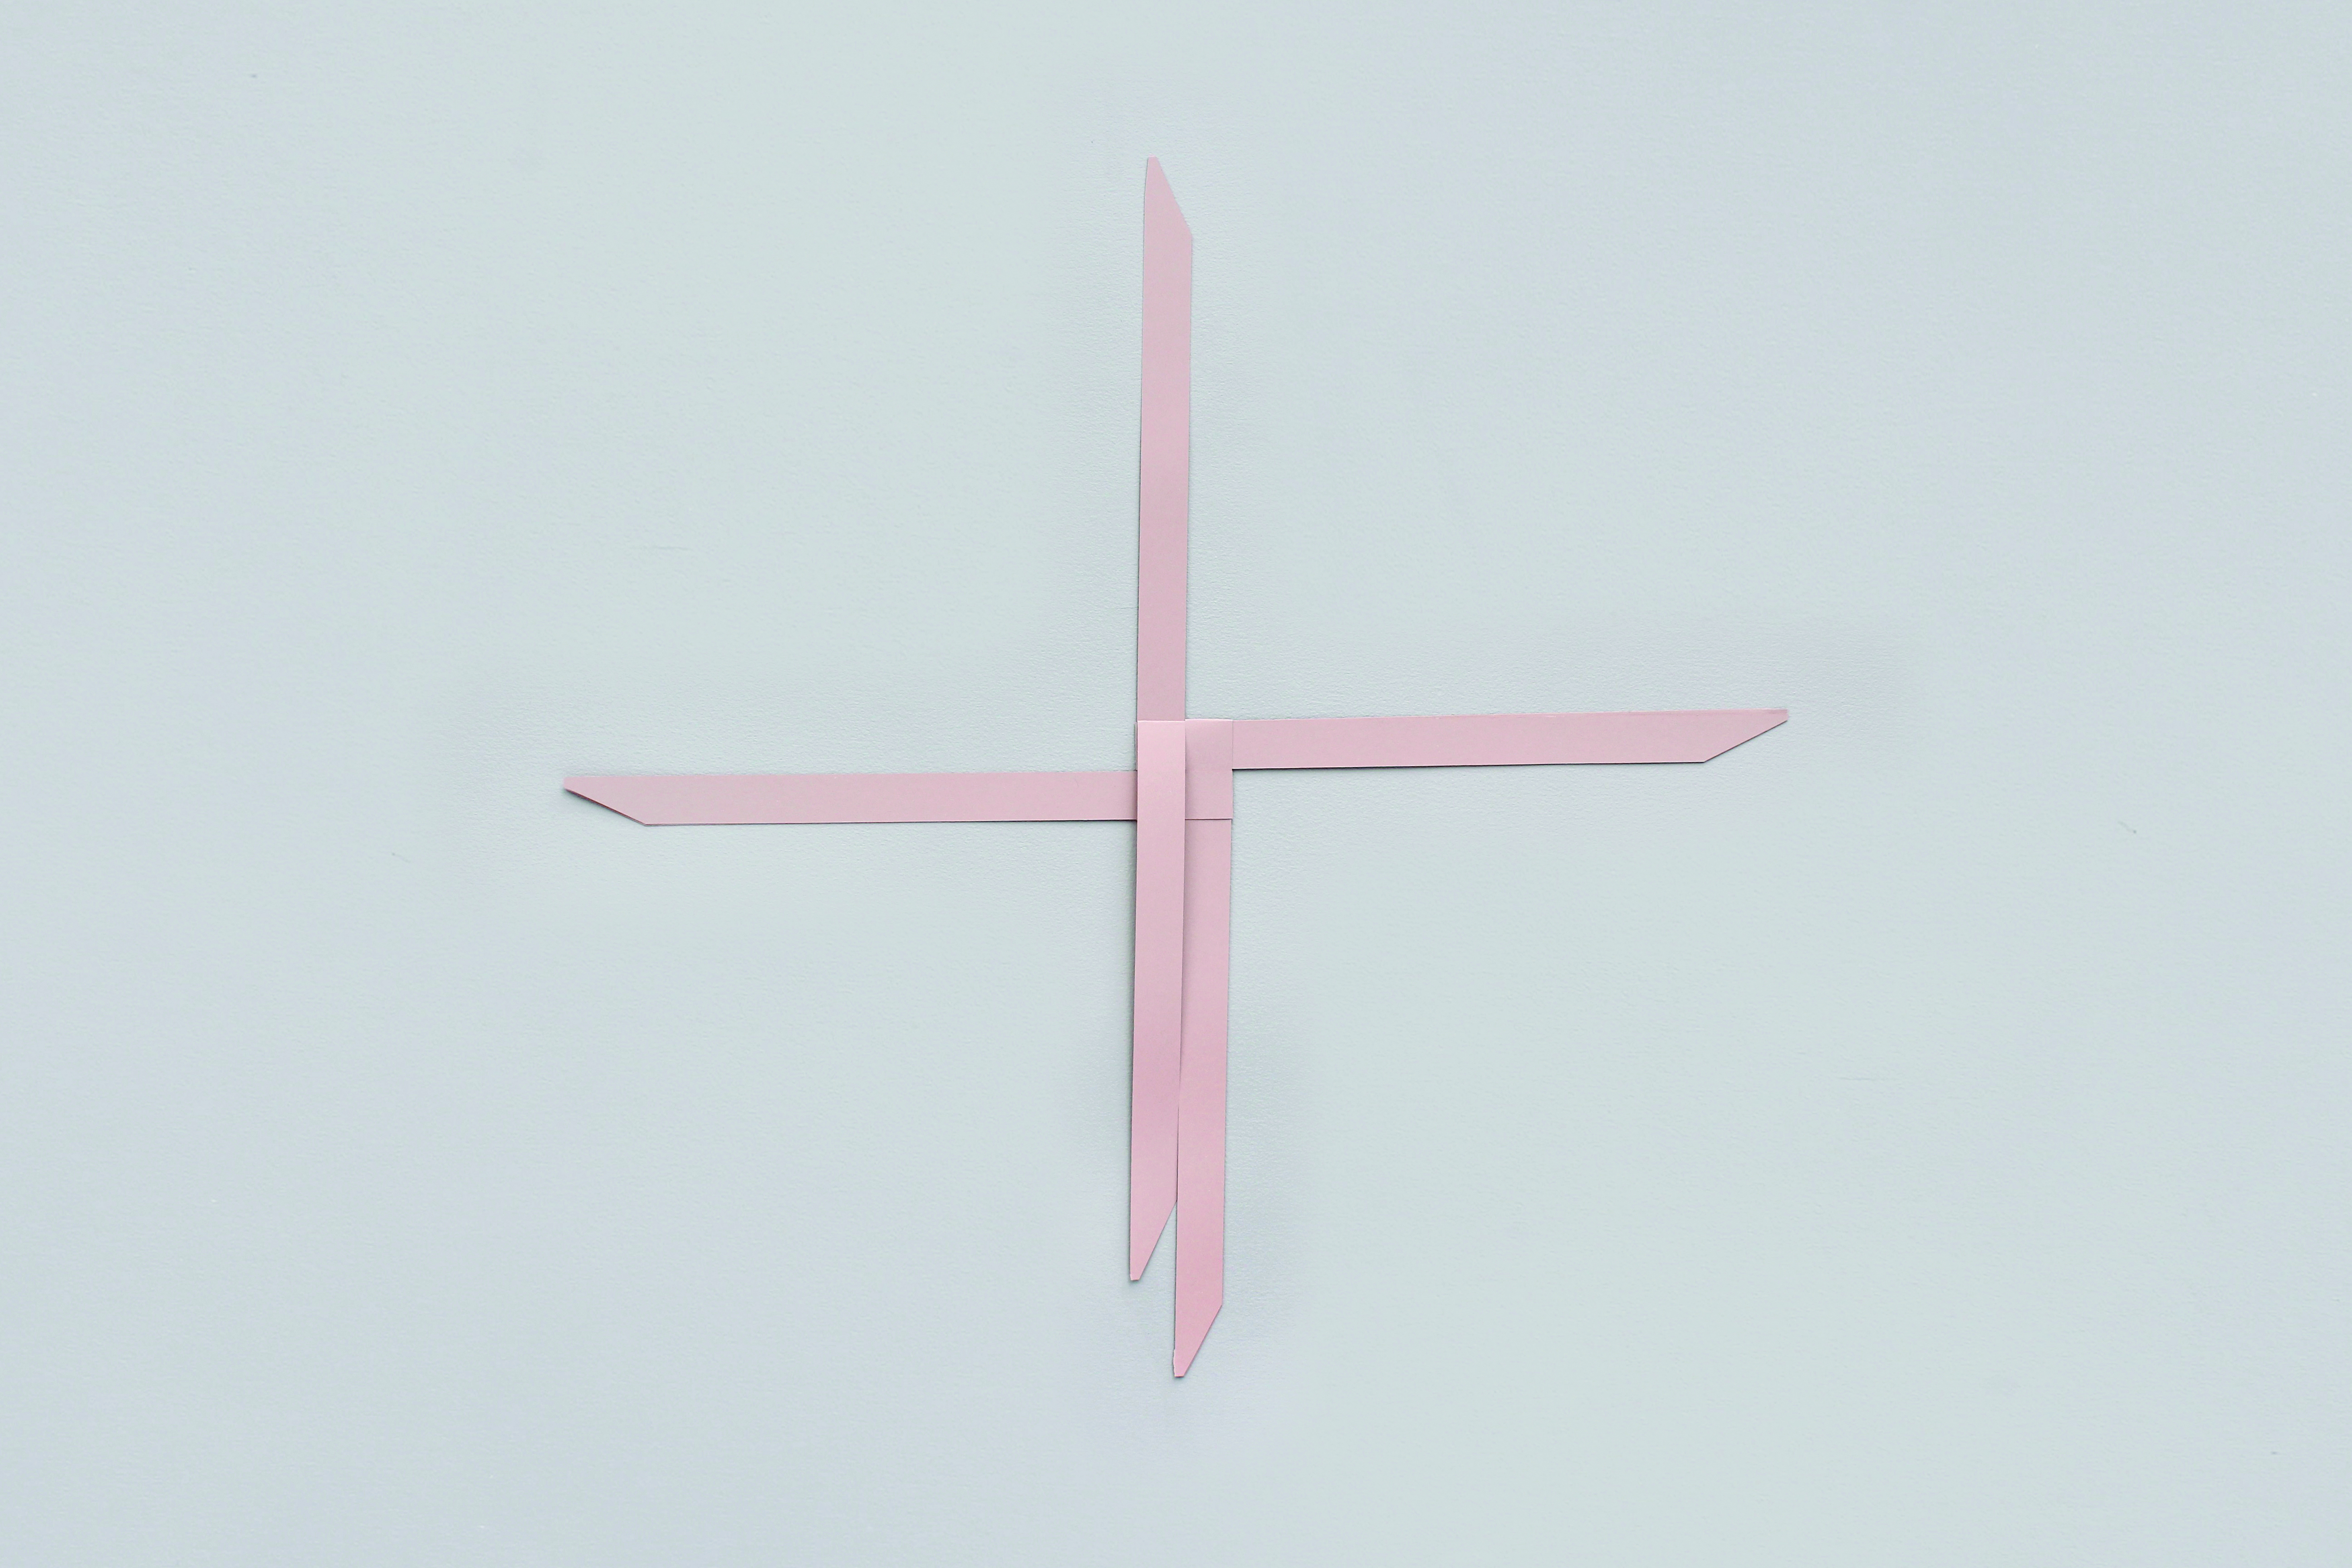
Pull the strips so they all lock together in the centre without any gaps. Fold the upper layer of the top strip down.
Step 6
Fold the upper layer of the left strip to the right, then fold the upper layer of the bottom strip up.
Step 7
Fold the upper layer of the right strip to the left, over one strip, then thread the pointed end of the strip through the loop. Pull the strip tightly to lock it in place.
Step 8
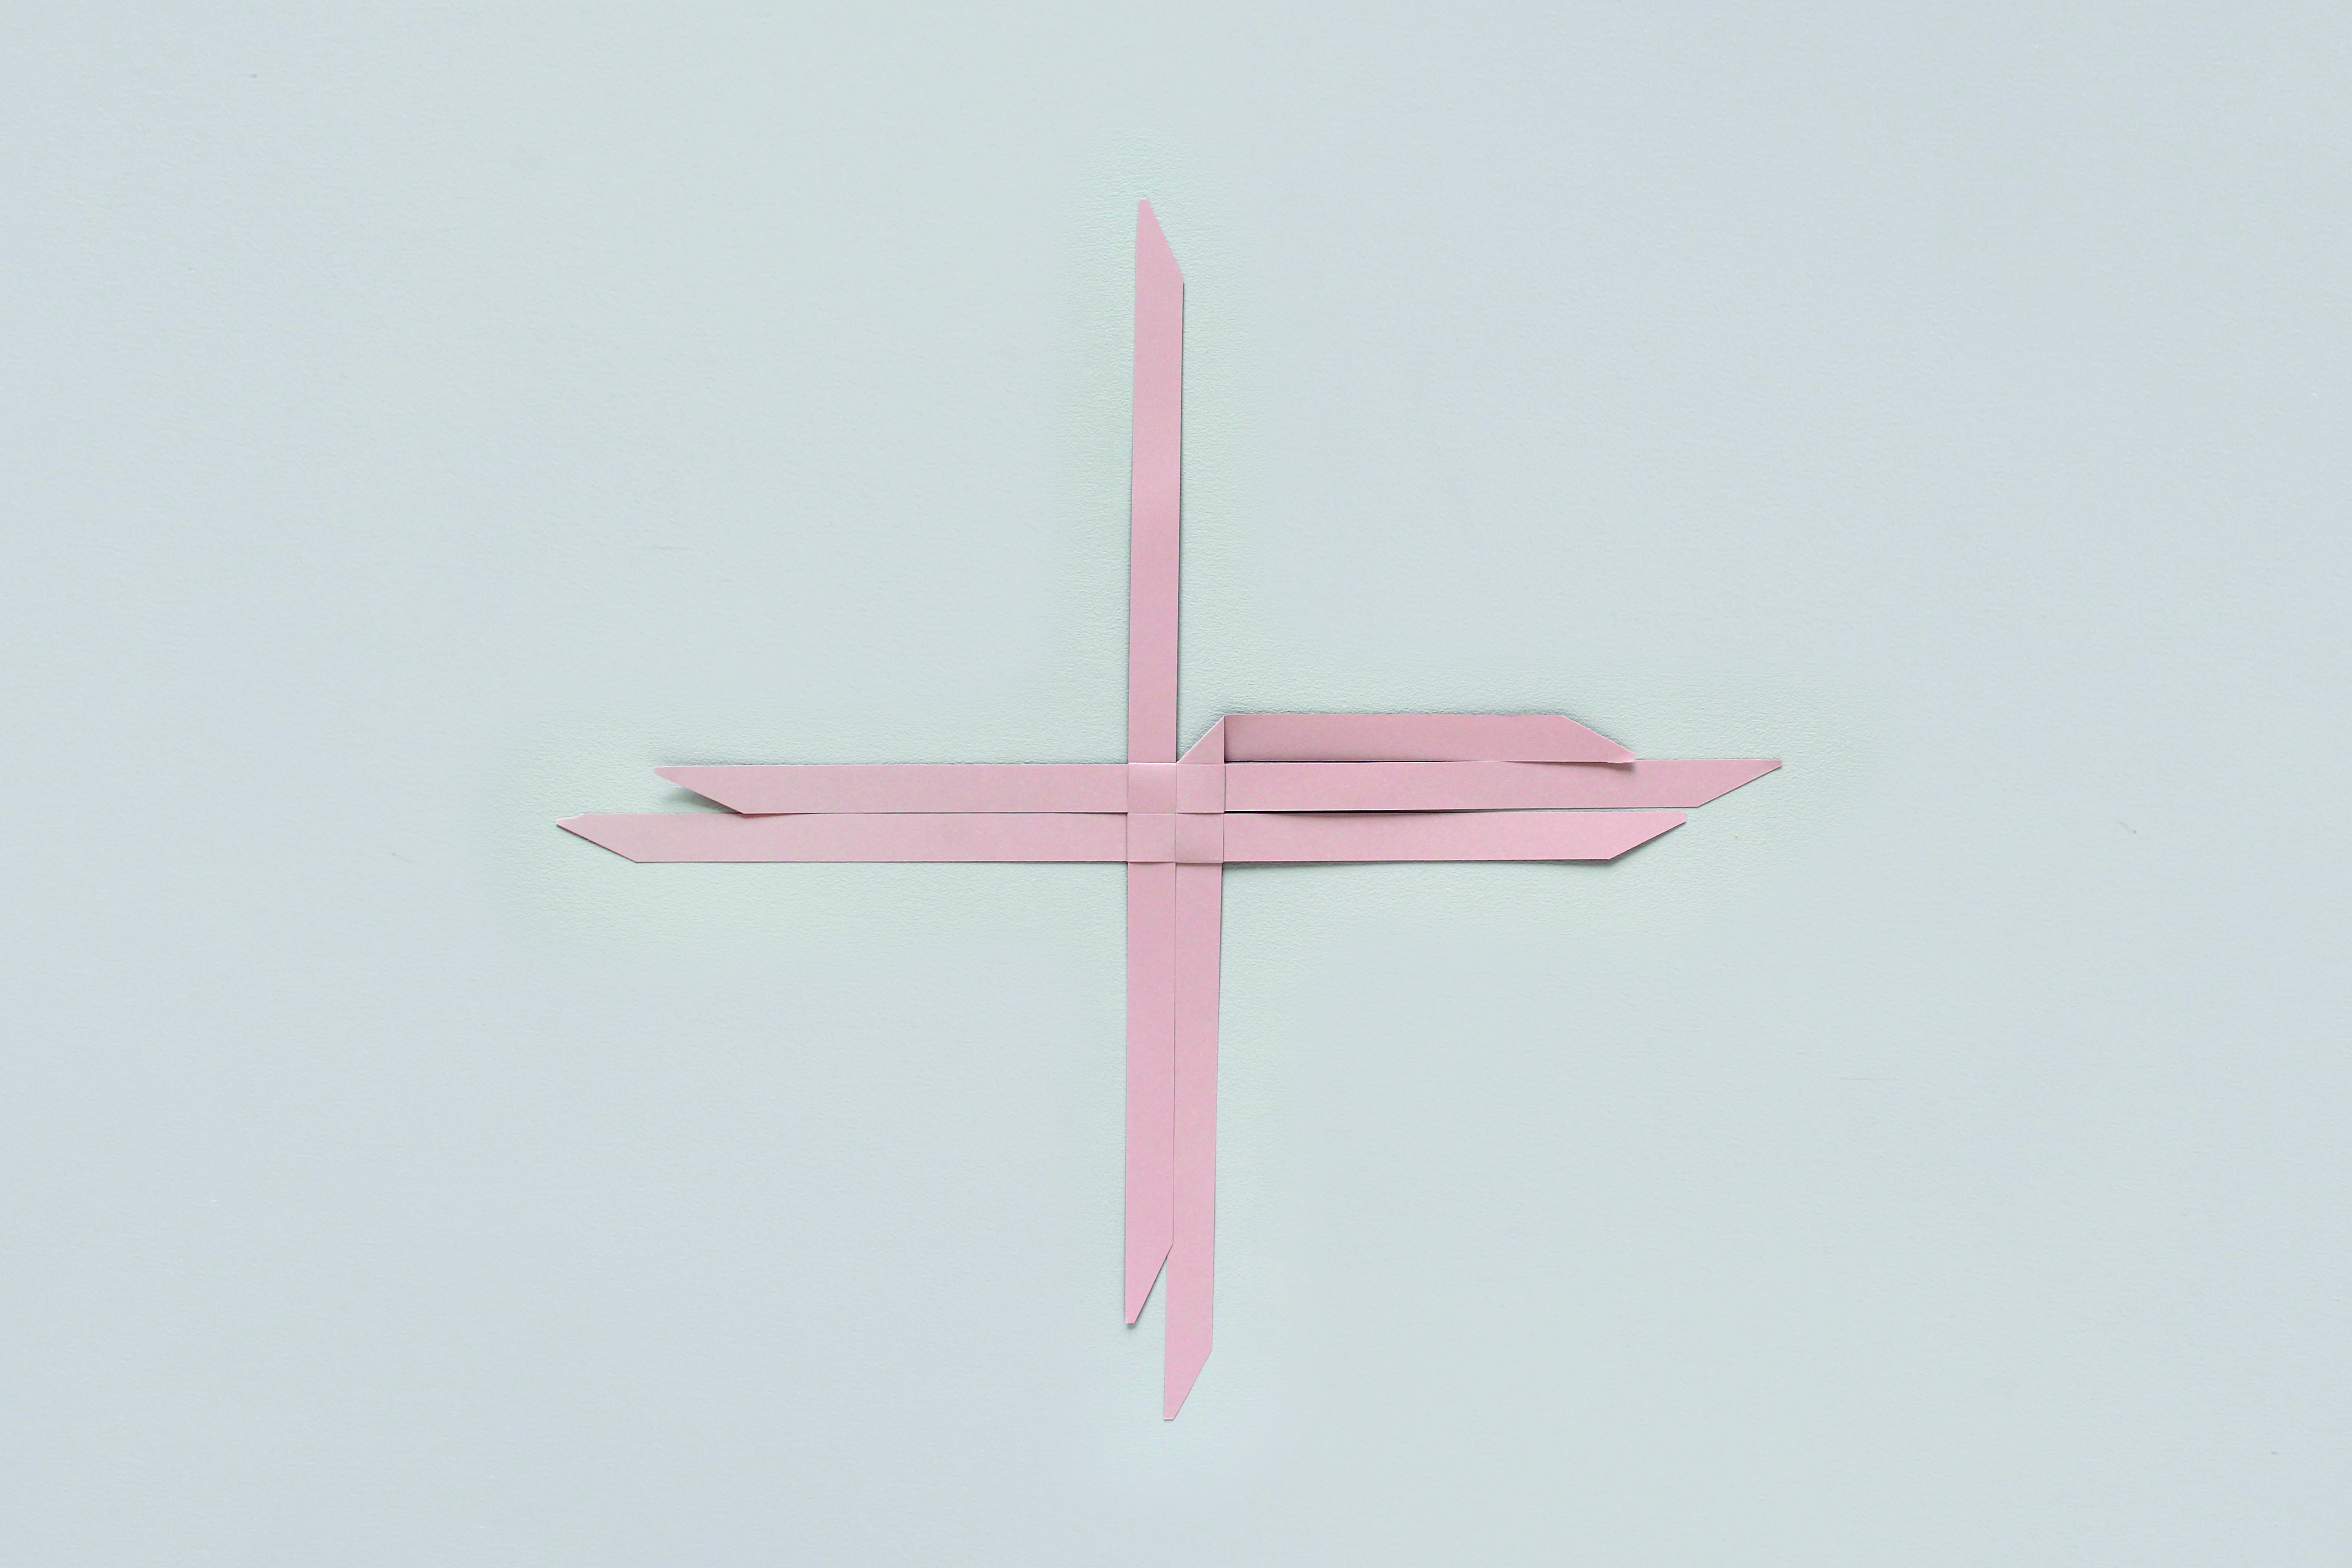
Take the top right strip and fold it backwards and to the right, so the strip is at a 90° angle to its previous position, with a 45° fold.
Step 9
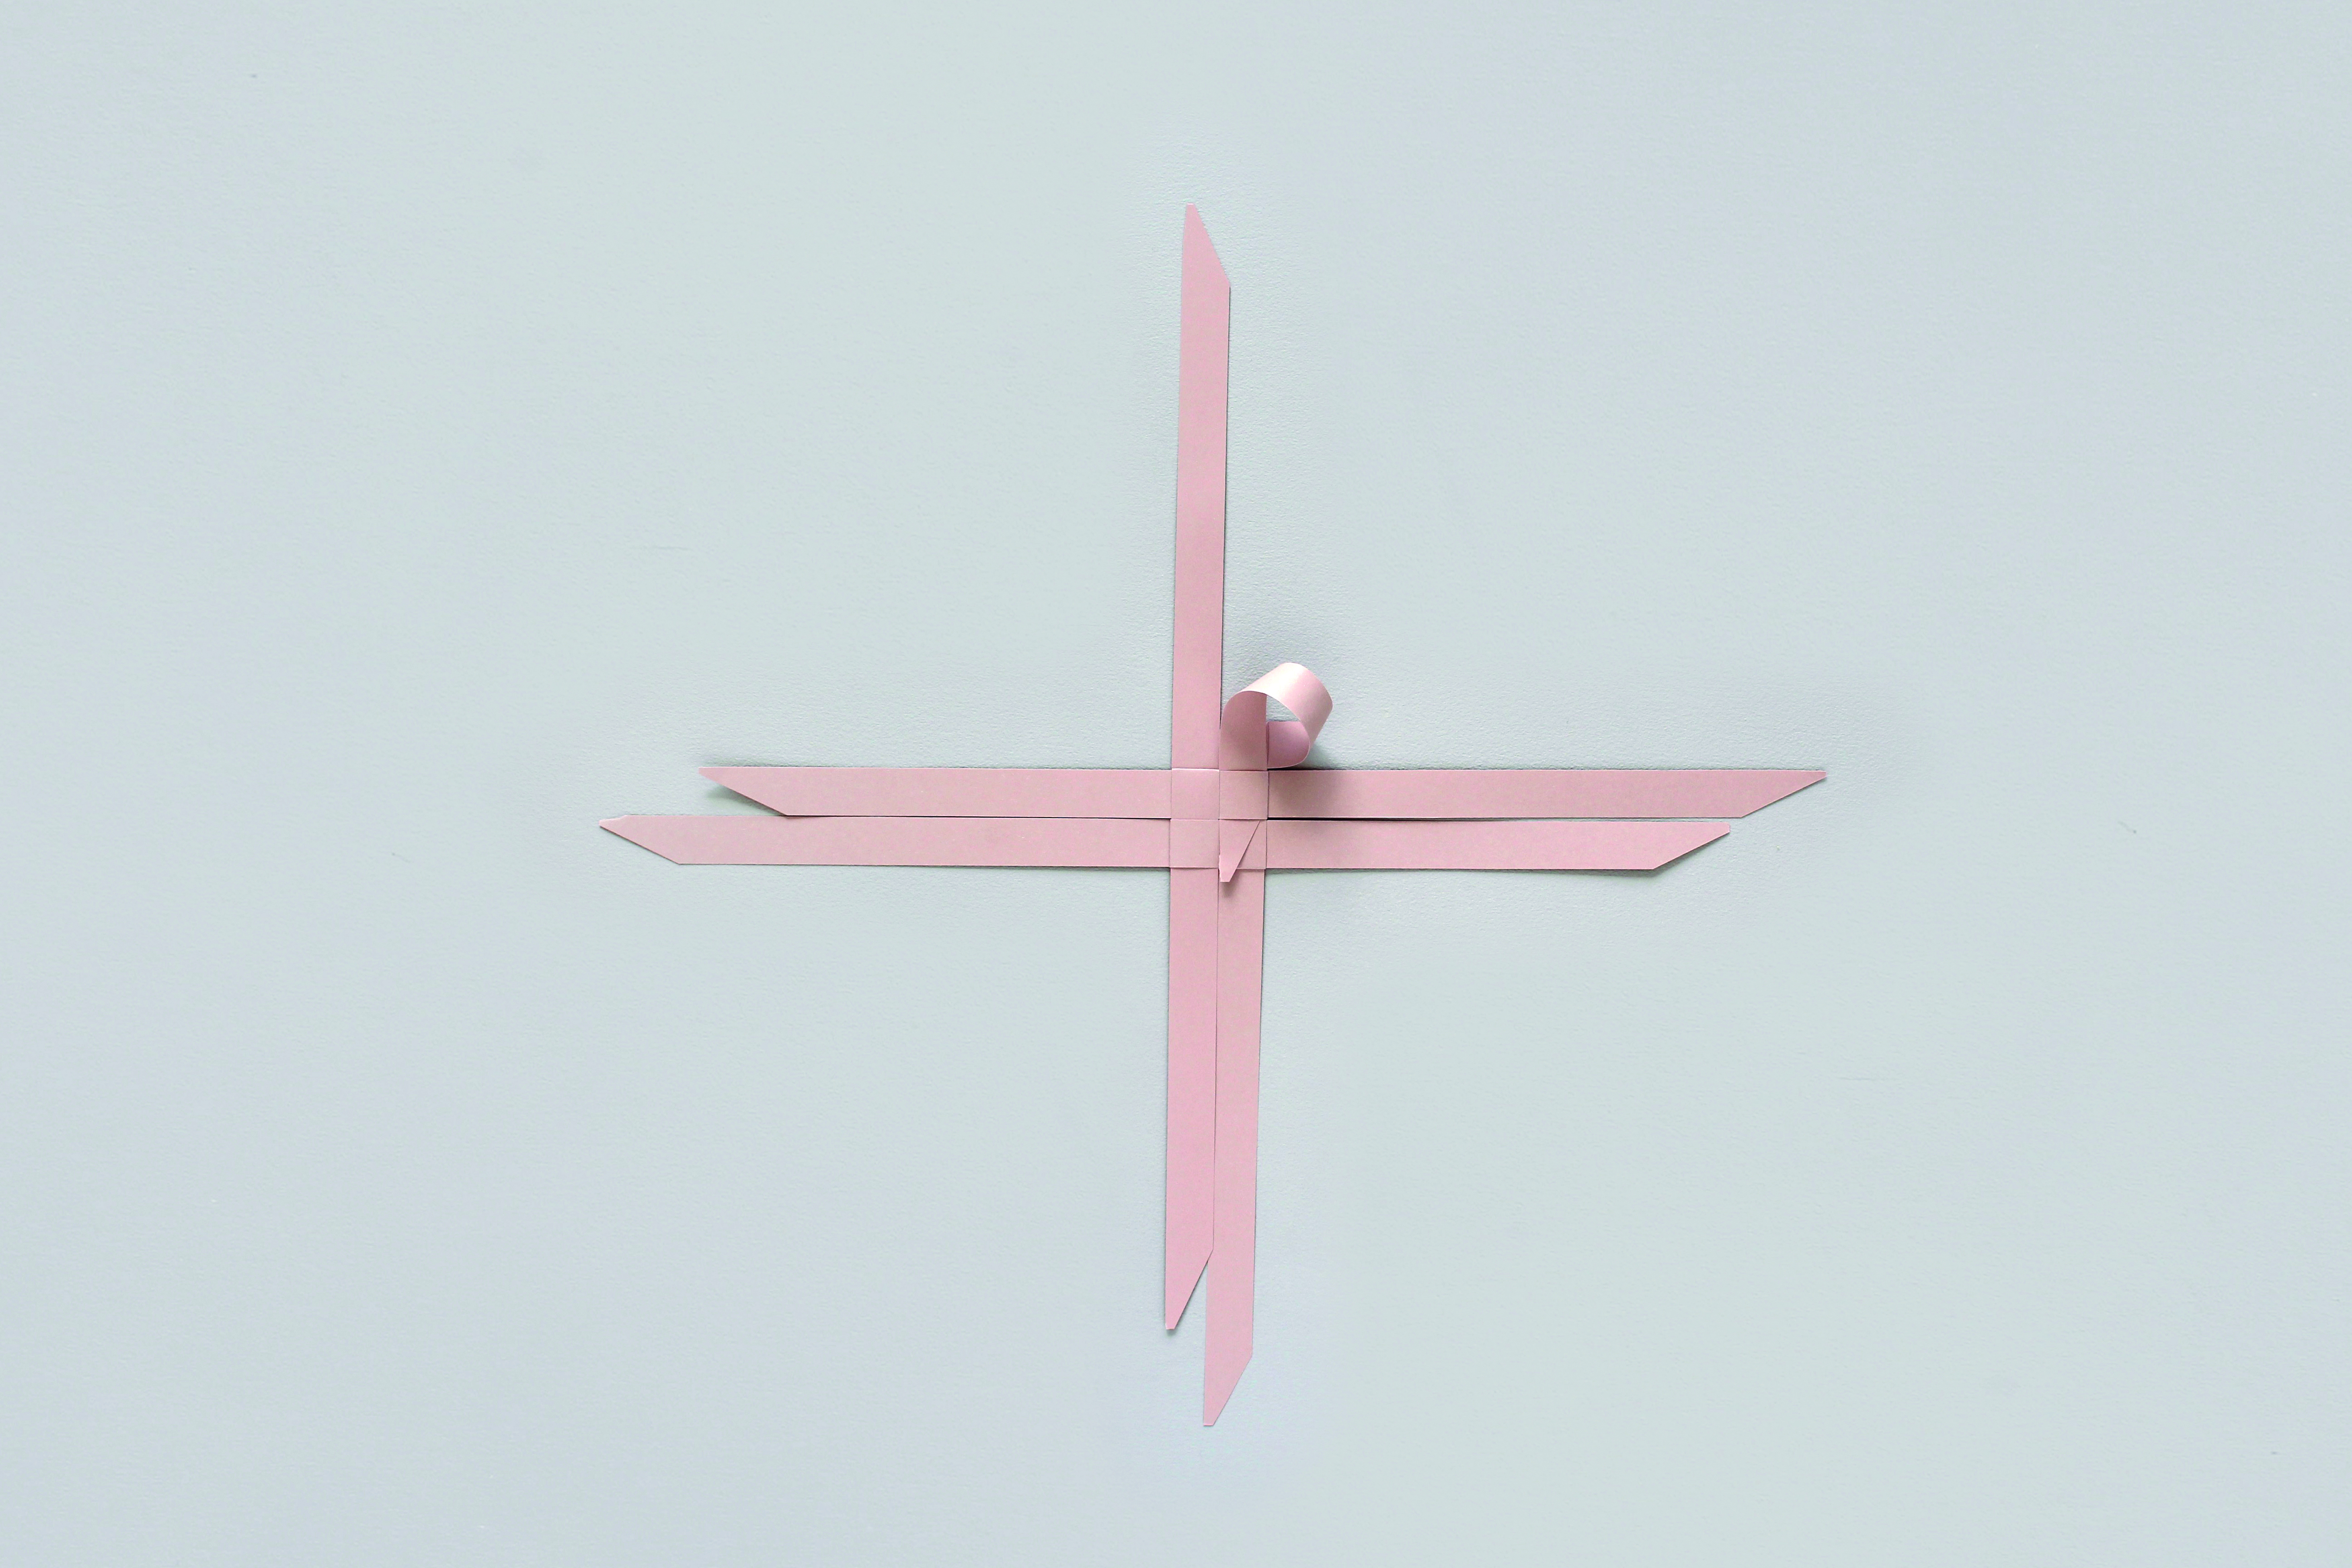
Take the pointed end of the strip folded in Step 8 and loop it up, as shown, before threading it down through the loop below the fold.
Step 10
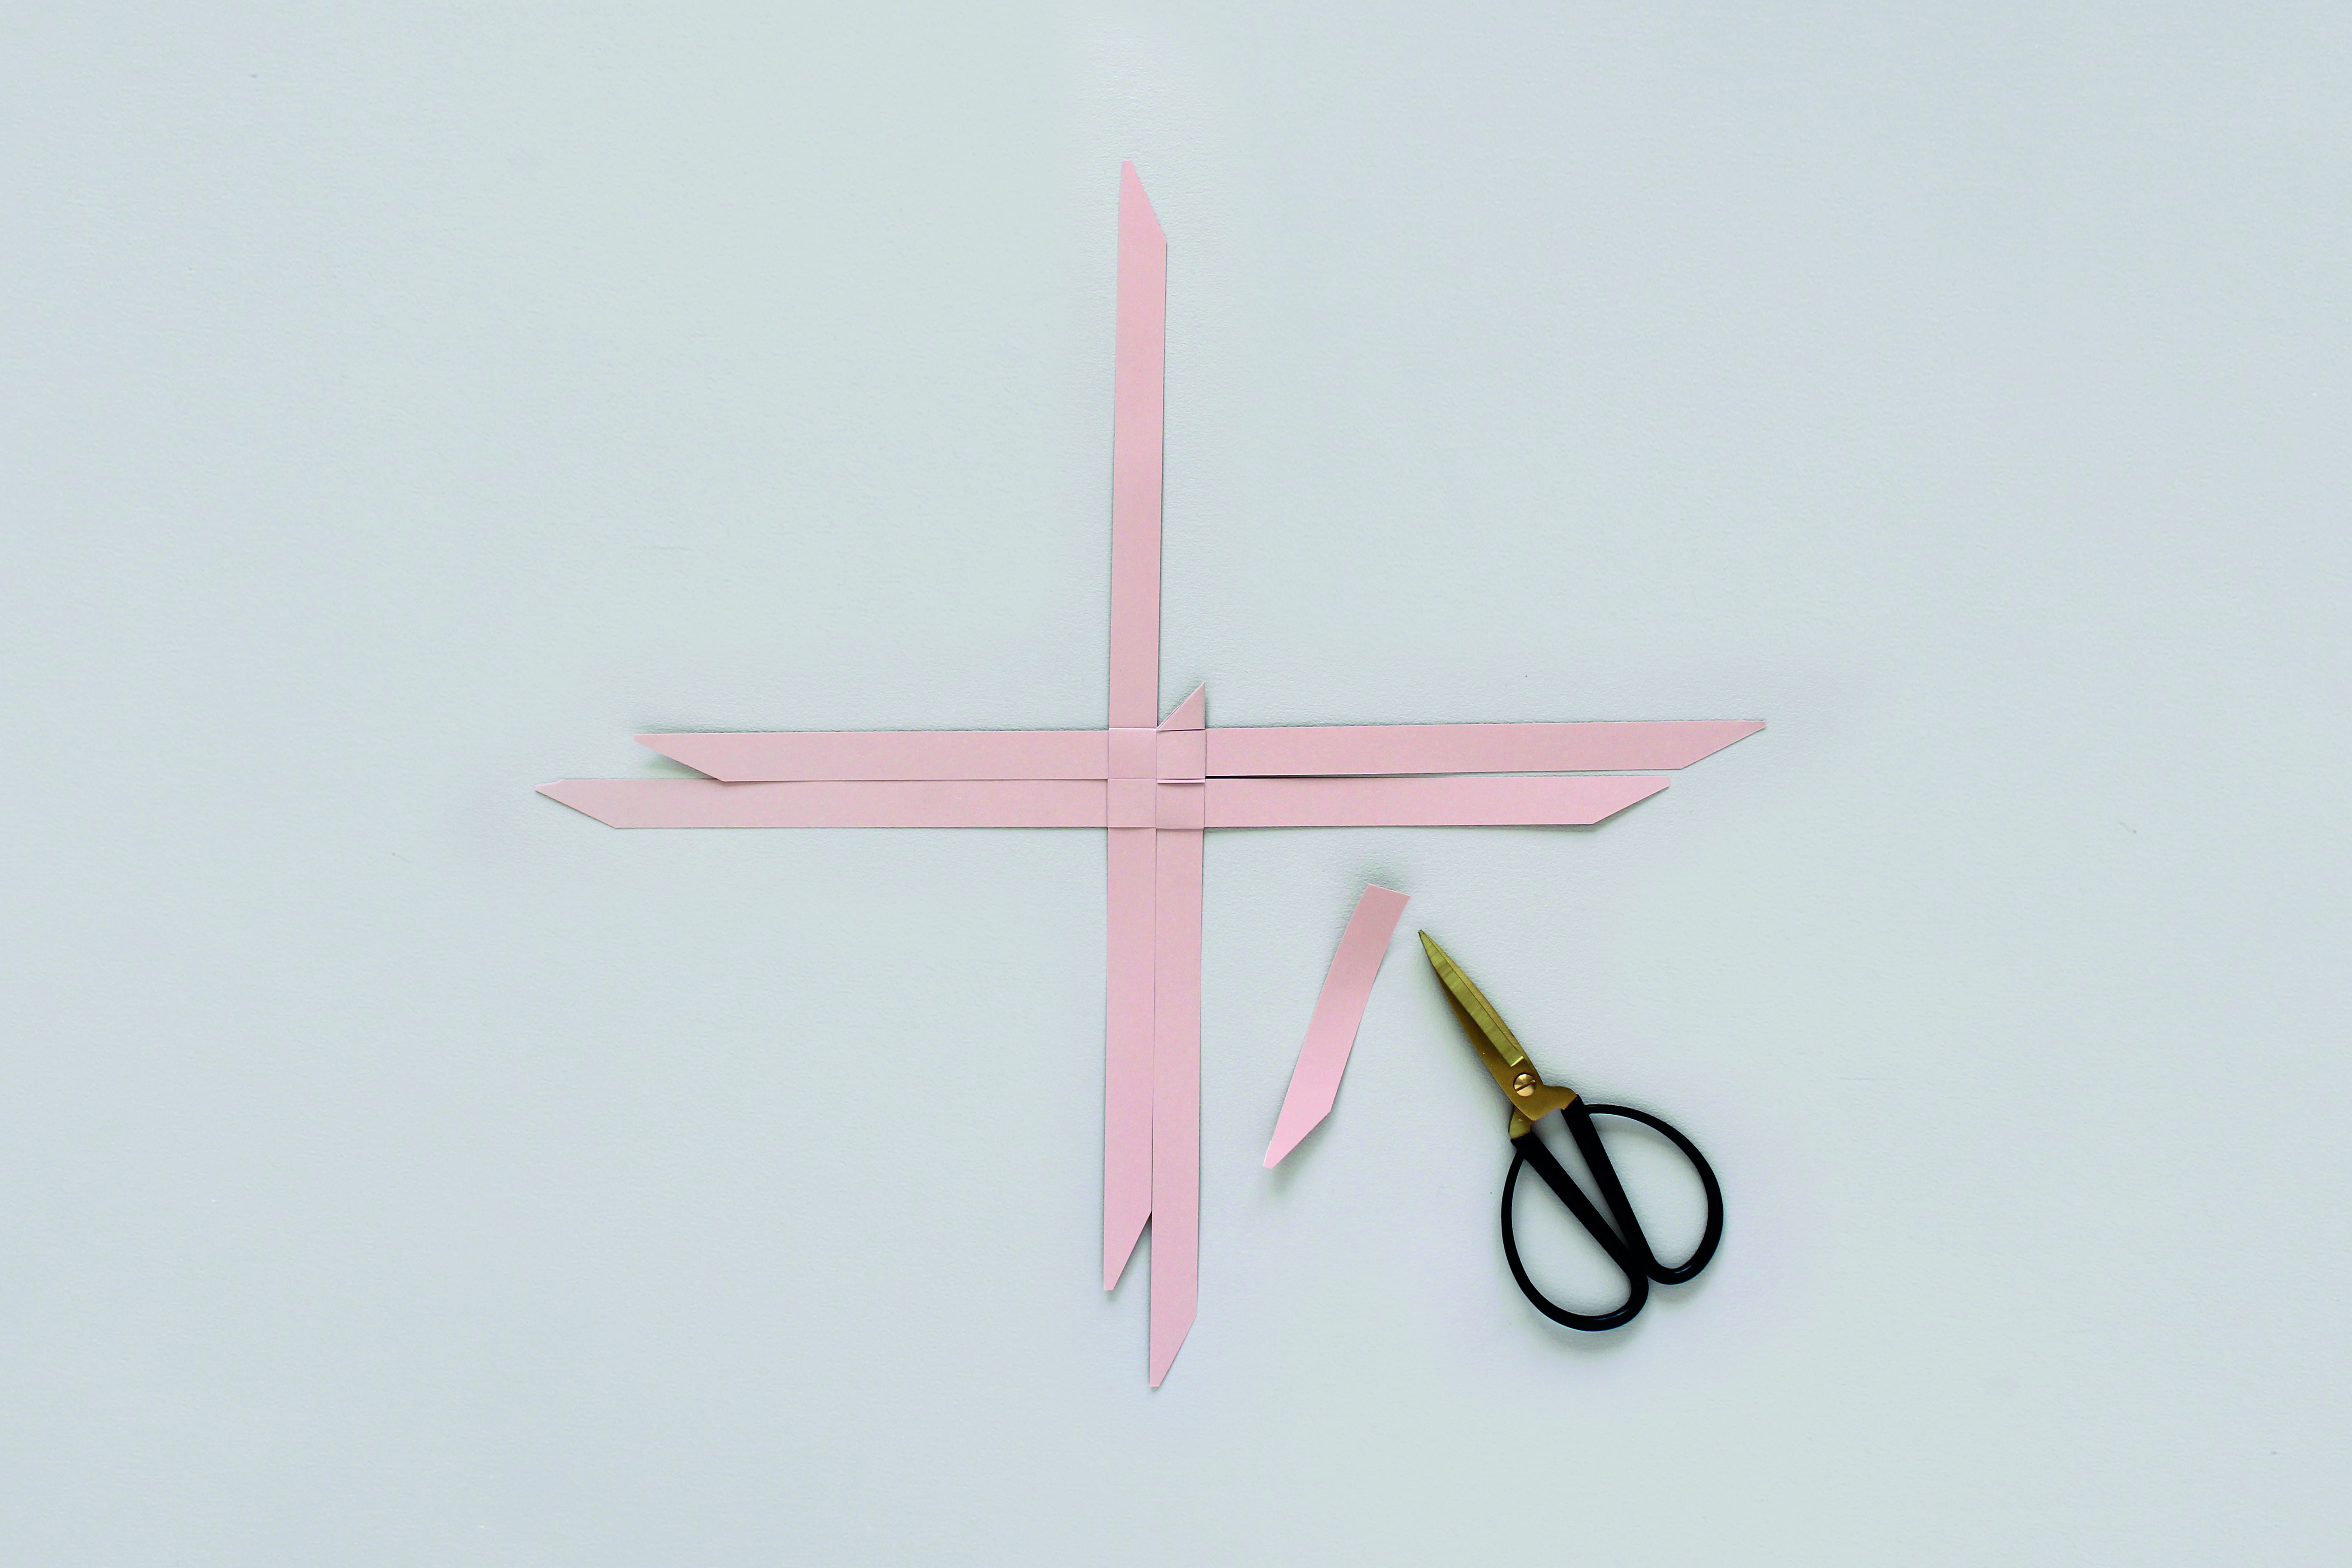
Pull the strip all the way through, working the top into a neat point before flattening with your finger. Trim off the excess, as close to where it exits the loop as you can.
Step 11
Turn the piece 90° to the right and repeat Steps 8-10.
Step 12
Turn the piece 90° to the right again, repeat Steps 8-10, then turn the piece 90° to the right and repeat Steps 8-10 once more.
Step 13

Turn the piece over. Repeat Steps 8-9, pulling the strip all the way through and working the top into a neat point before flattening. This time, instead of trimming the excess, fold it upwards at 90°, so it points vertically away from it.
Step 14
Turn the whole piece 90° to the right and repeat Step 13.
Step 15
Turn the piece 90° to the right and repeat Step 13, then turn the piece 90° to the right and repeat Step 13 once more.
Step 16

Take the upward-pointing strip on the right and bring it towards you and to the right, creating a neat 45° fold at the base, as shown.
Step 17

Take the pointed end of the strip folded in Step 16 and loop it back on itself, then thread it through the top left loop of the star, as shown.
Step 18
 Pull the strip all the way through the loop so it makes a 3D triangle on the top of the star. Trim off the excess, cutting it as close to the edge of the shape as possible.
Step 19
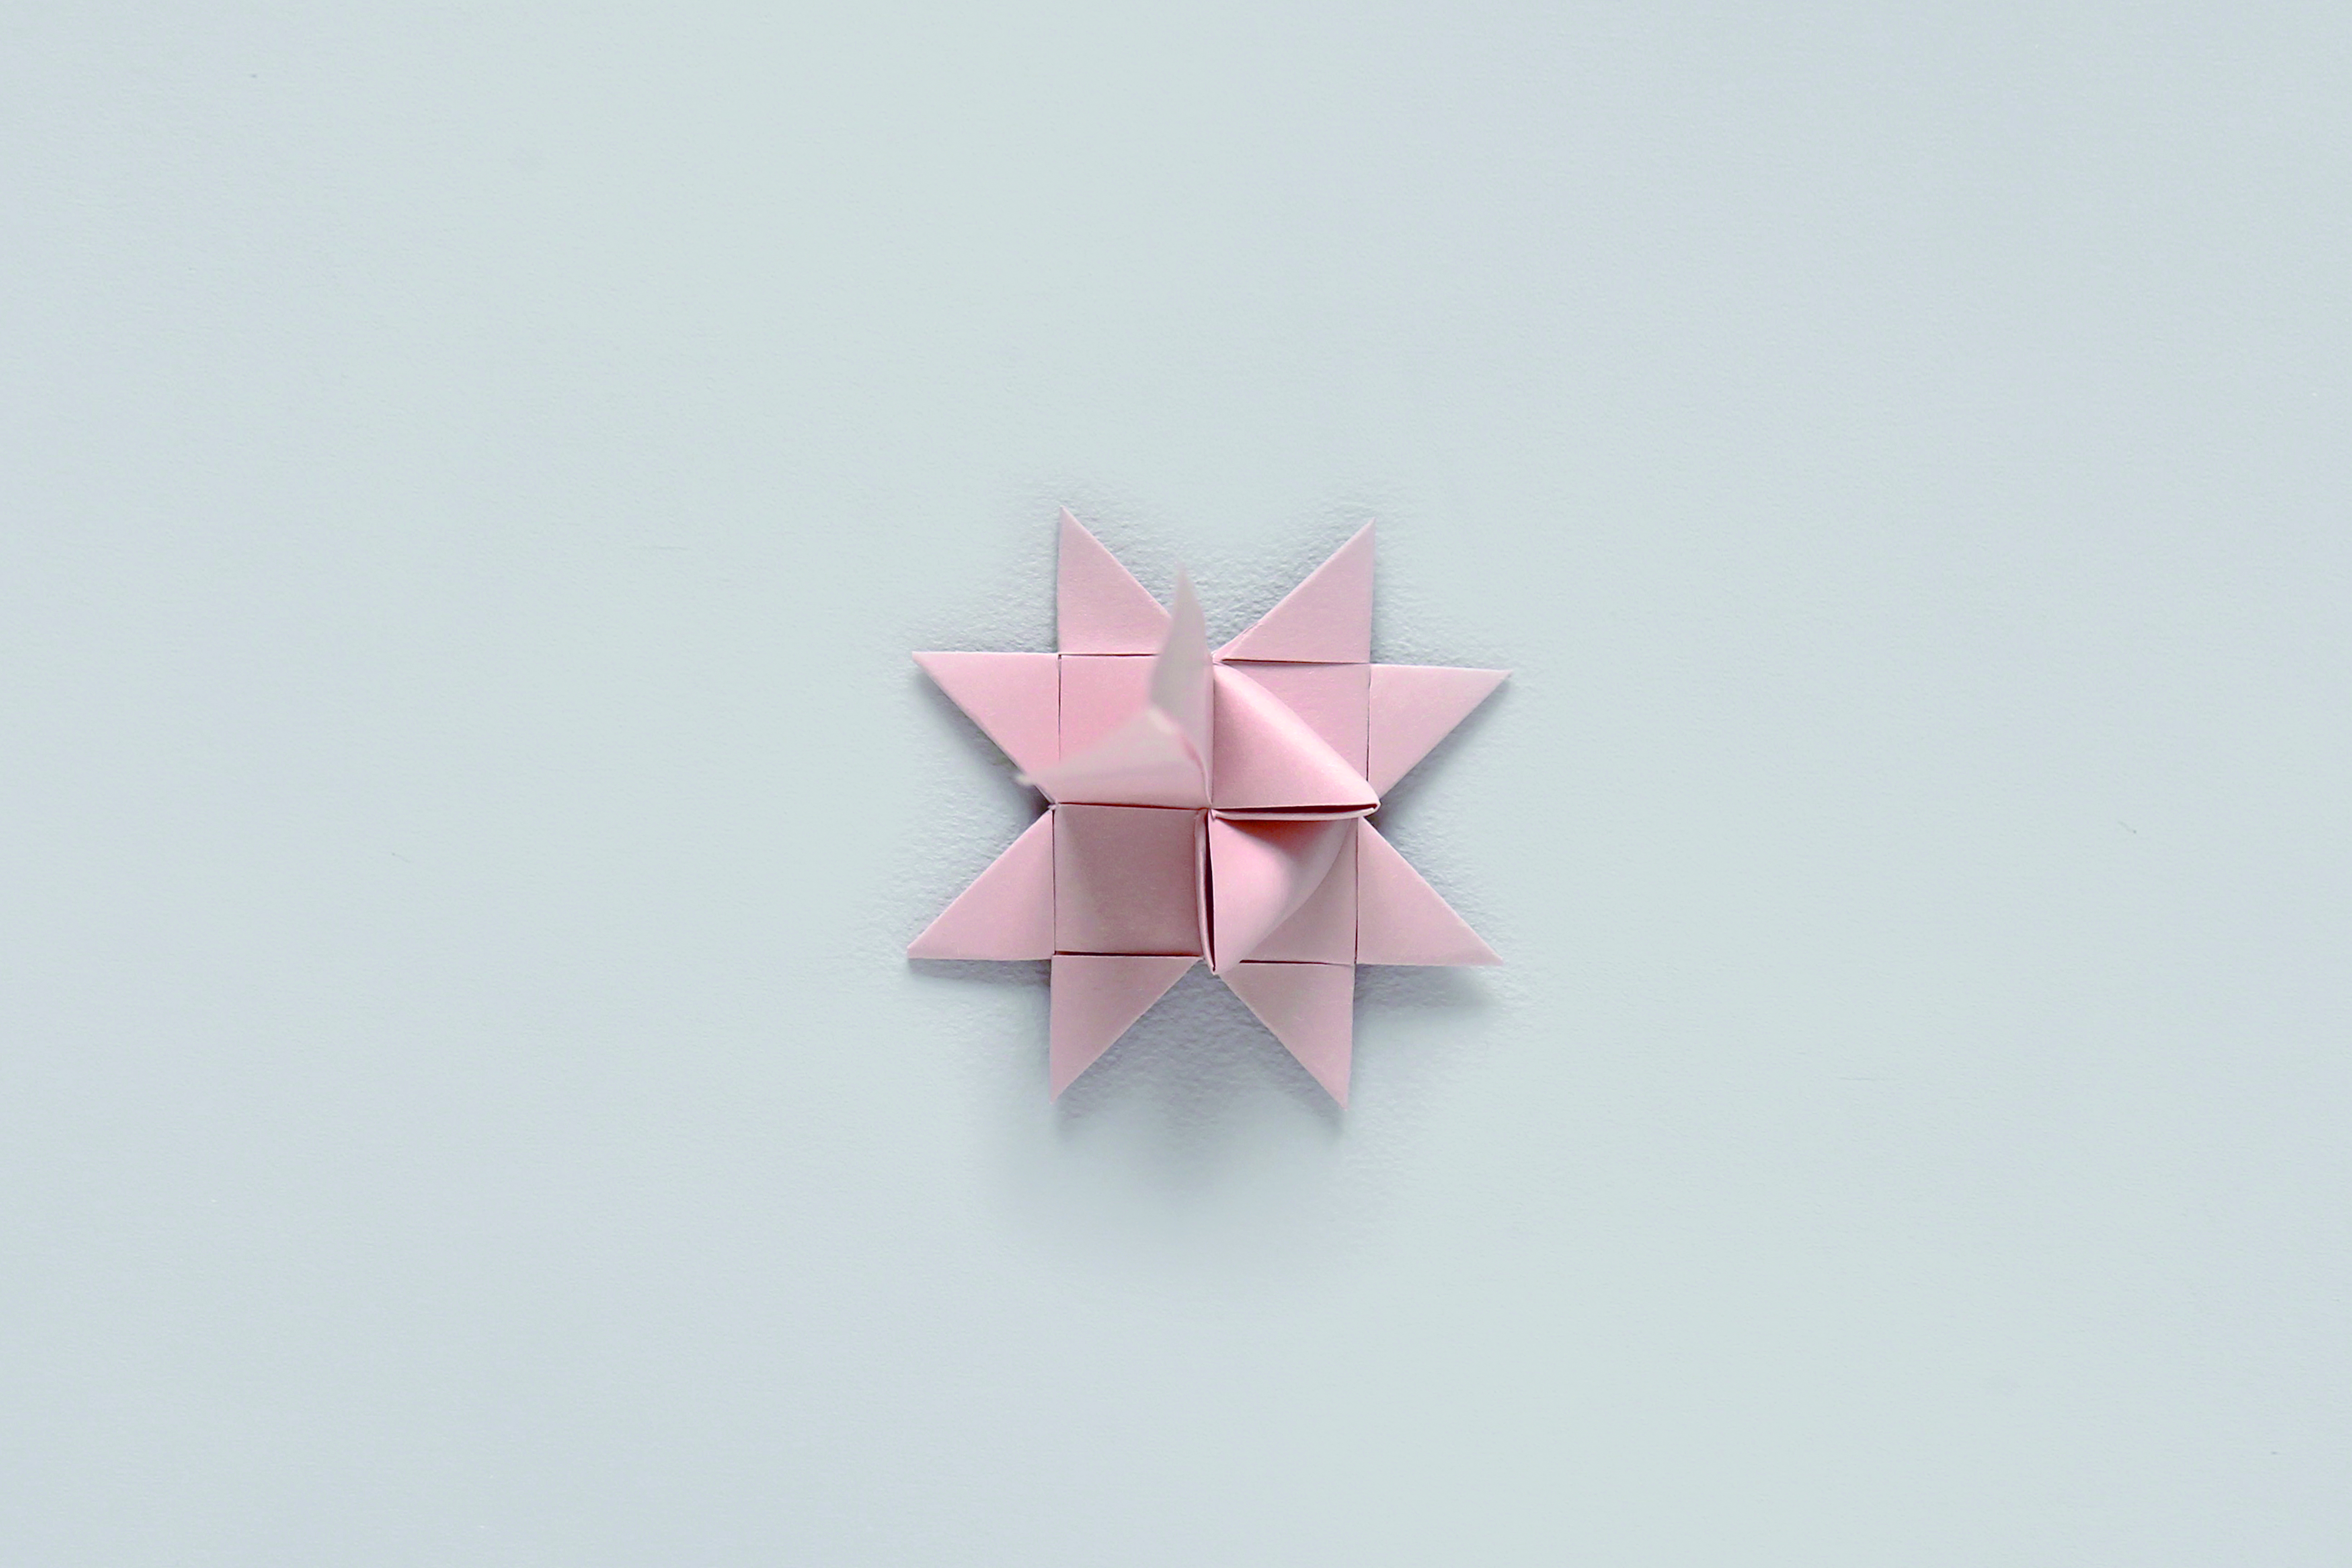
Turn the piece 90° to the right and repeat Steps 16-18.
Step 20
Turn the piece 90° to the right and repeat Steps 16-18 again, then turn the piece 90° to the right and repeat Steps 16-18 once more. Repeat Steps 1-19 using the other coloured and patterned papers to make eight origami stars in total.
How to make the white origami star
Step 1
To make the creased star, use the template to cut a star from white paper. Use a ruler and the embossing tool to score along the mountain and valley fold lines.
Step 2

Push each mountain fold into a peak, using one hand to push from the back and the other to gently squeeze the sides. Push each valley fold into a trough, squeezing the two mountain folds on either side together, encouraging the scored line to fold down. Repeat with the blush pink and black papers to make seven stars in total.
Step 3
Using the template and a craft knife, cut seven snowflakes from the white paper.
Step 4
To assemble the wall hanging, use a pin to make a hole in the top and bottom of each shape. Cut five 60cm (23 5/8") lengths of thread.
Step 5
Thread a needle with the first length of thread, then thread on a shape, followed by a crimp bead.
Step 6

Using the main image as a guide to colours and order, continue threading on paper shapes followed by crimp beads, and wooden beads followed by sequins, then crimp beads.
Step 7
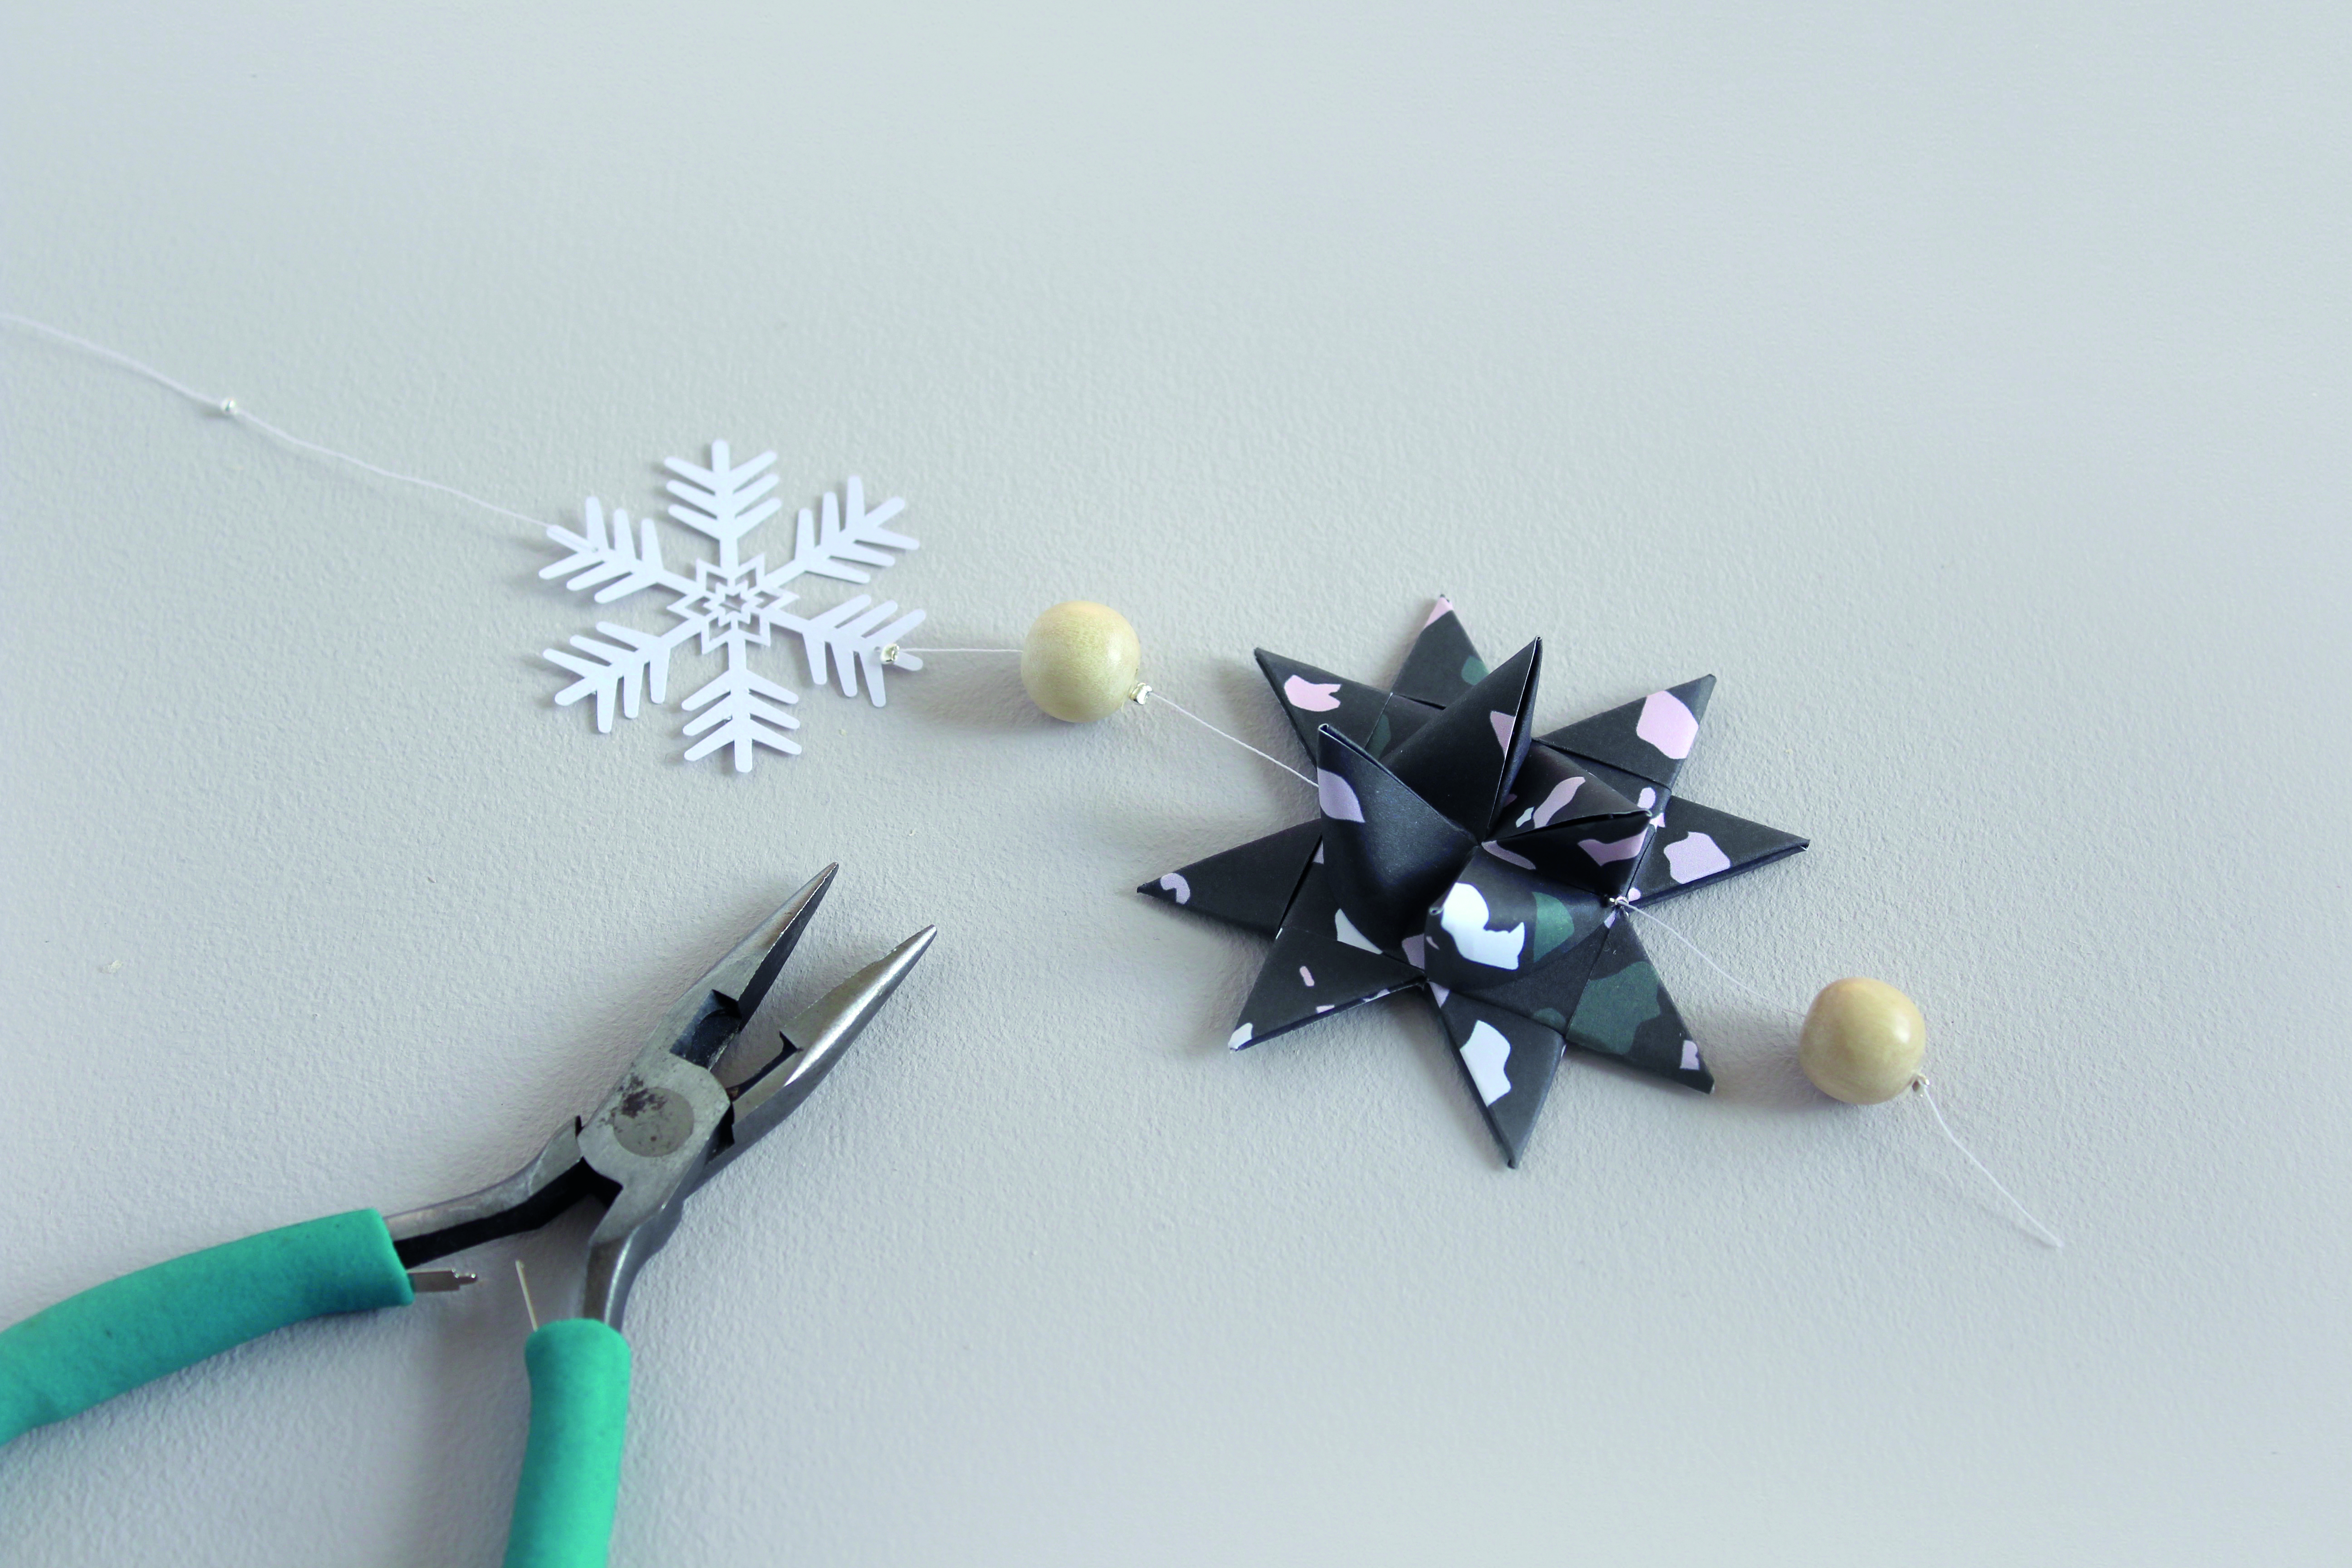
Once the first thread is filled, space out the shapes and beads along the length. Starting at the bottom, use the pliers to squeeze the crimp beads closed. Repeat to decorate the other four threads.
Step 8
Tie each decorated thread onto the branch, spacing them out evenly.Cut a 70cm(275/8")length of twine and tie around either end of the branch for hanging.






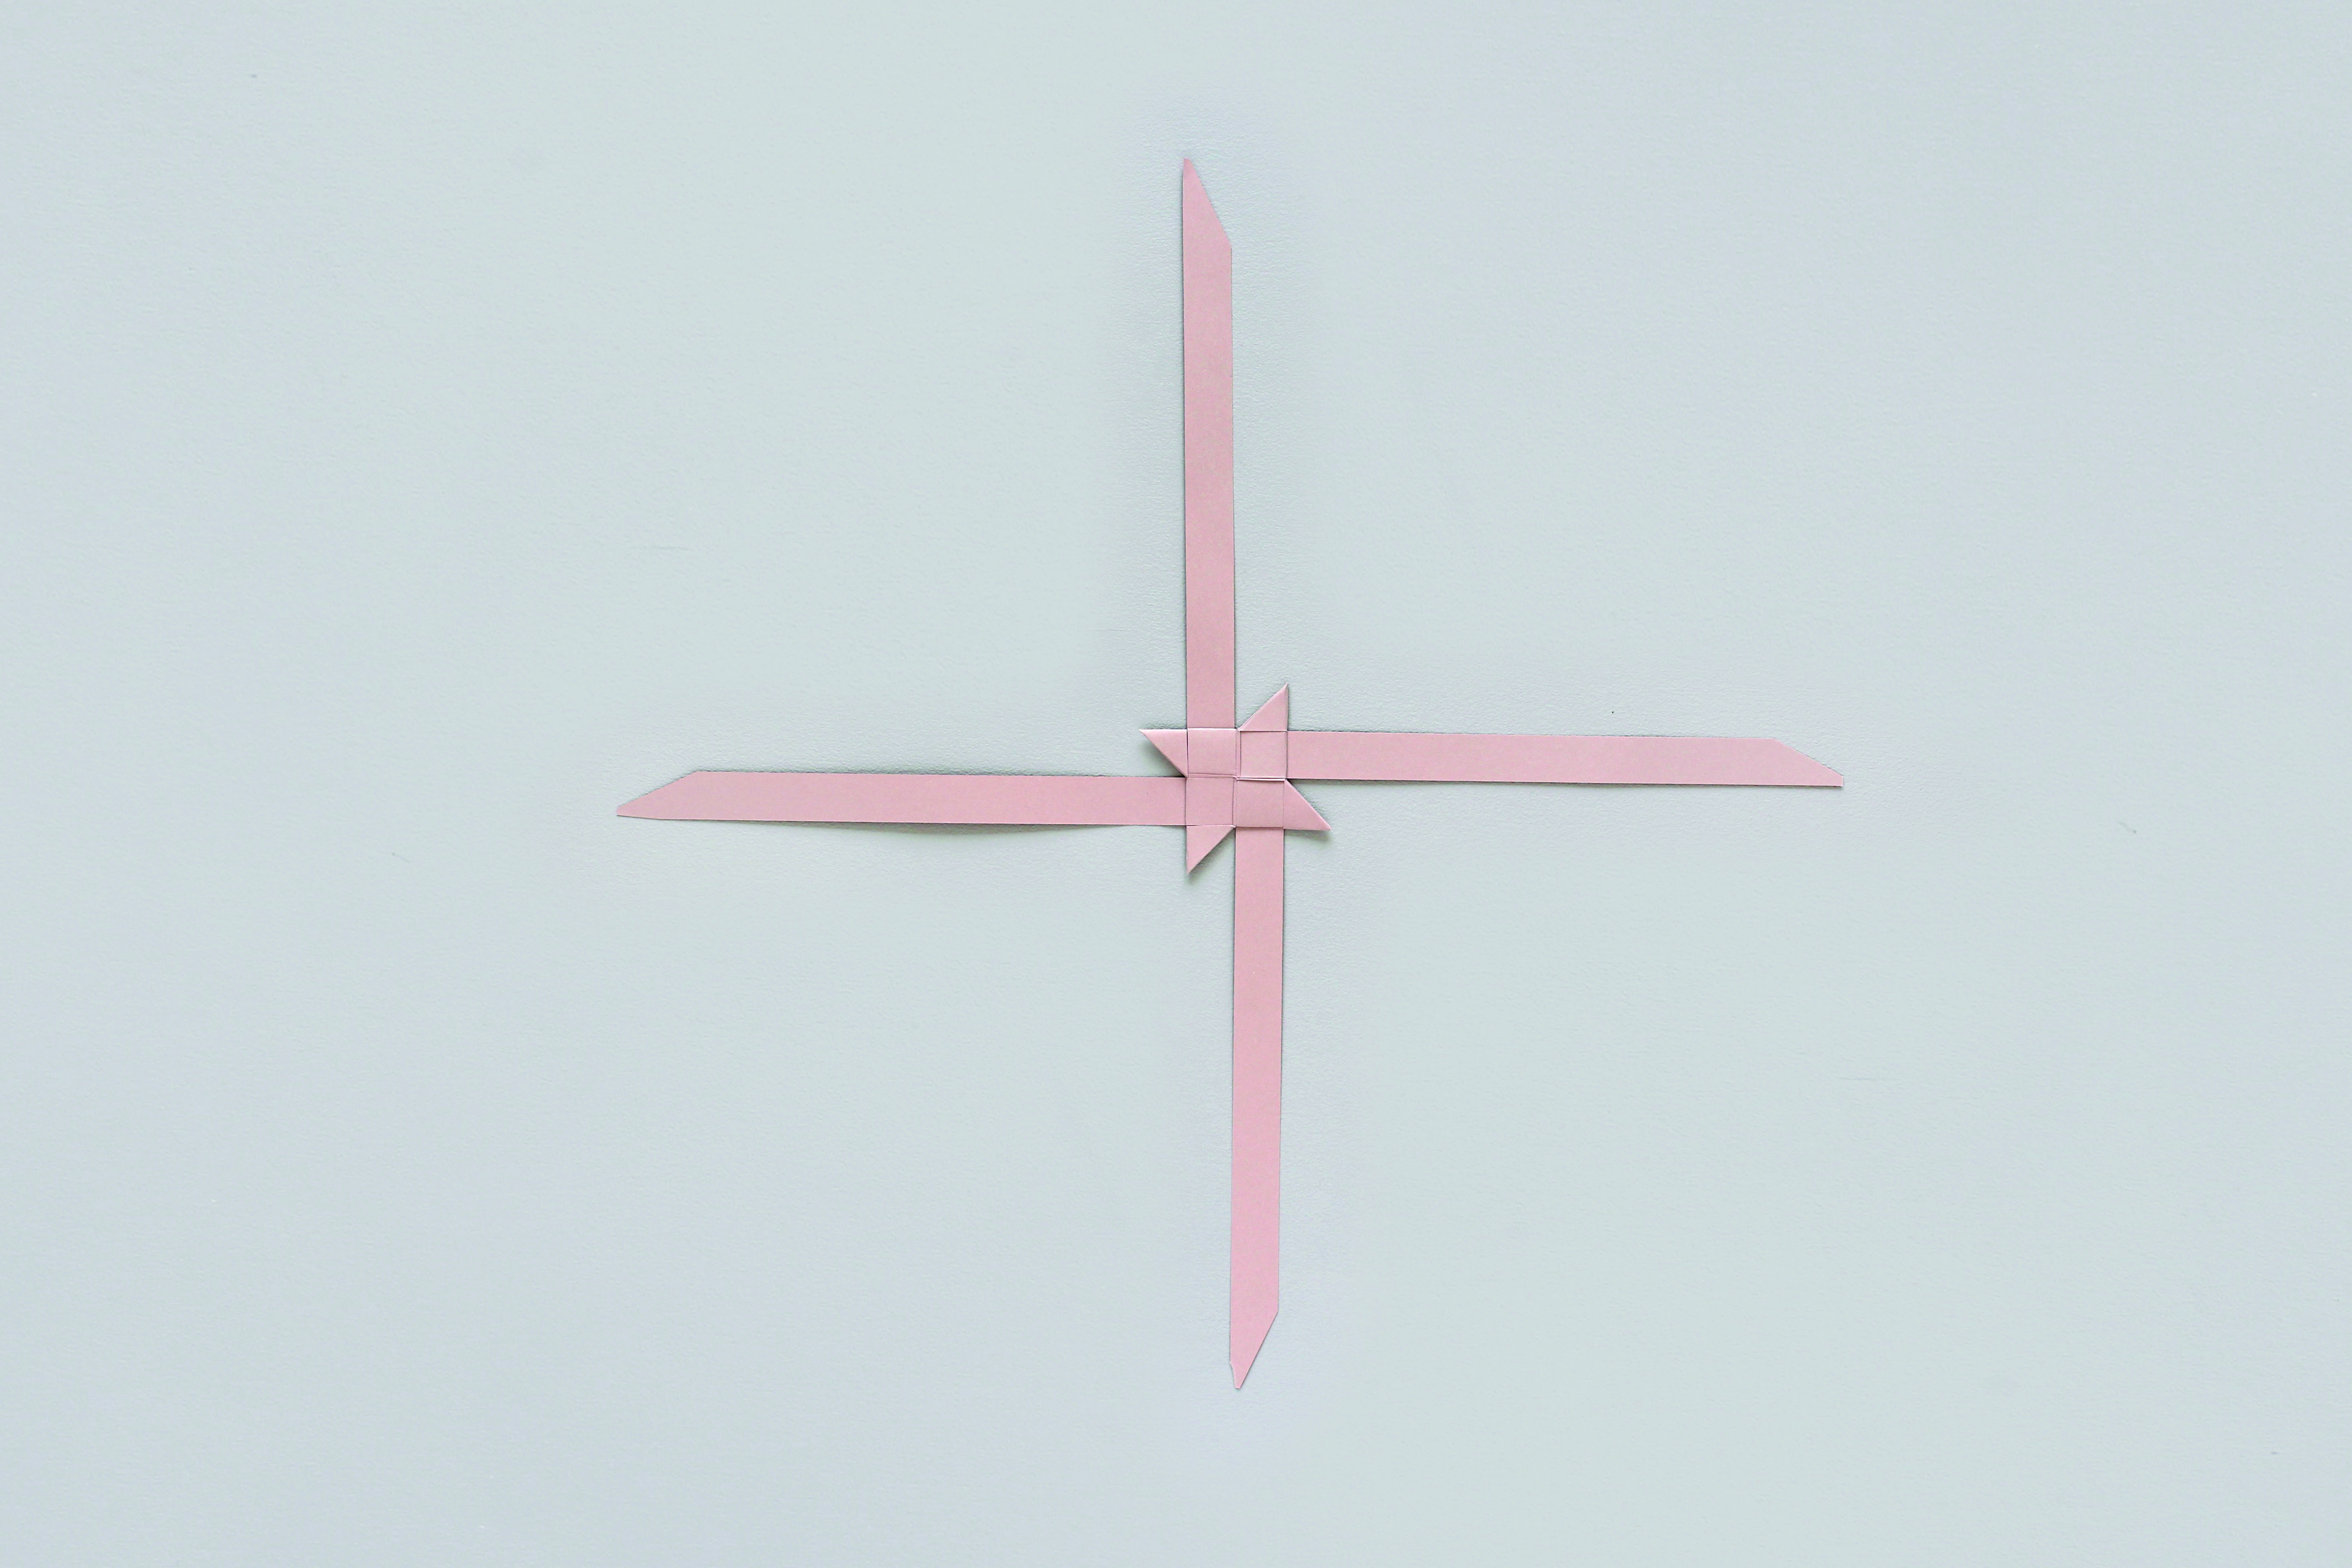


 Pull the strip all the way through the loop so it makes a 3D triangle on the top of the star. Trim off the excess, cutting it as close to the edge of the shape as possible.


