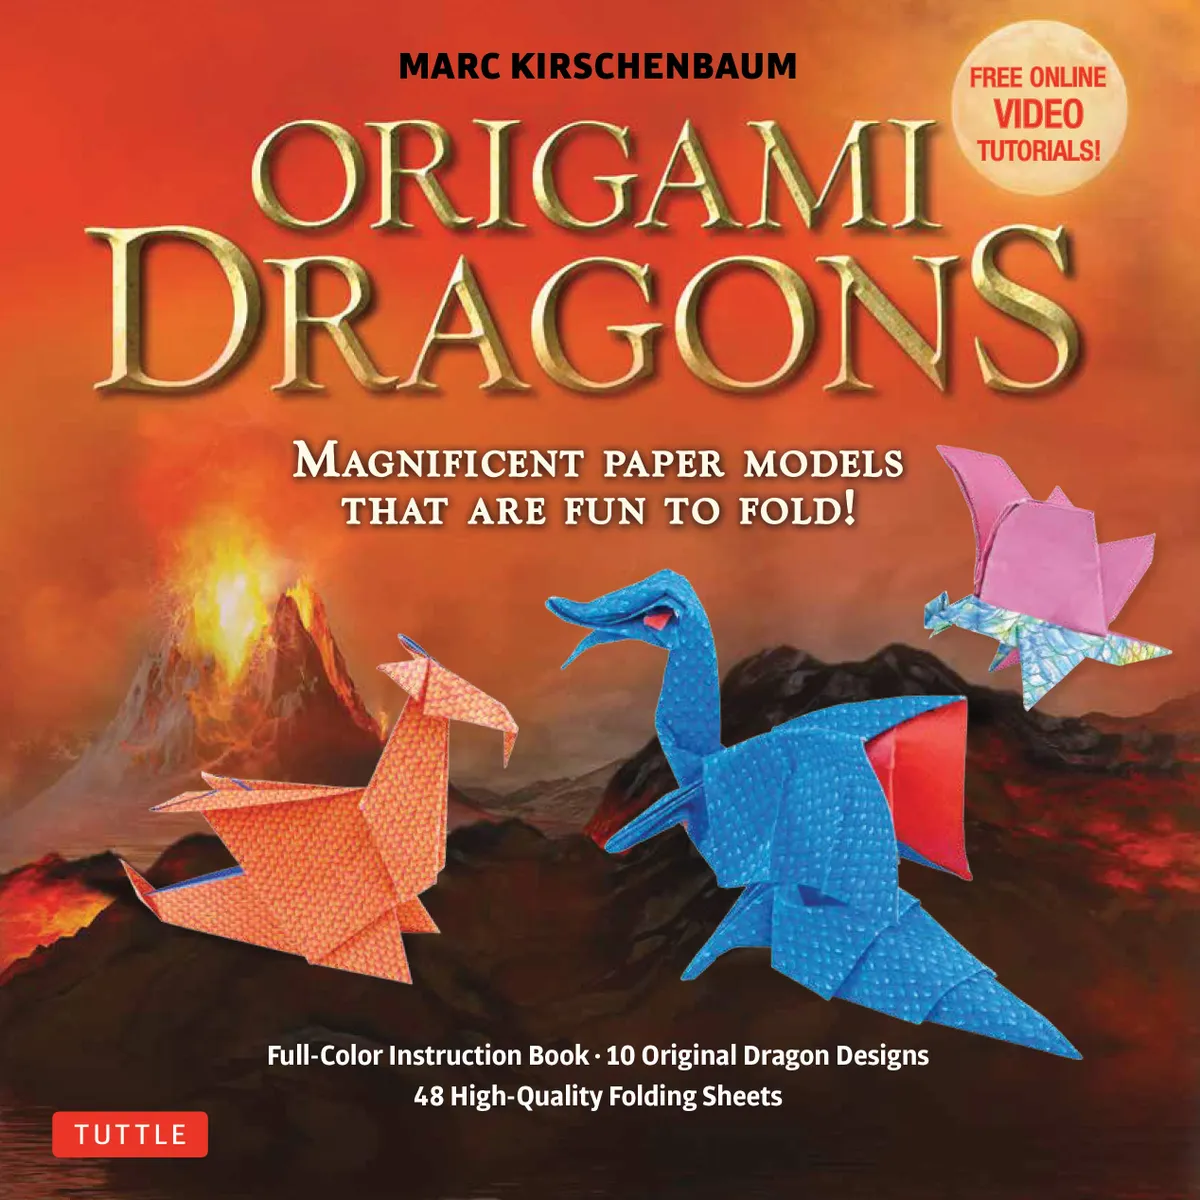
Step 1
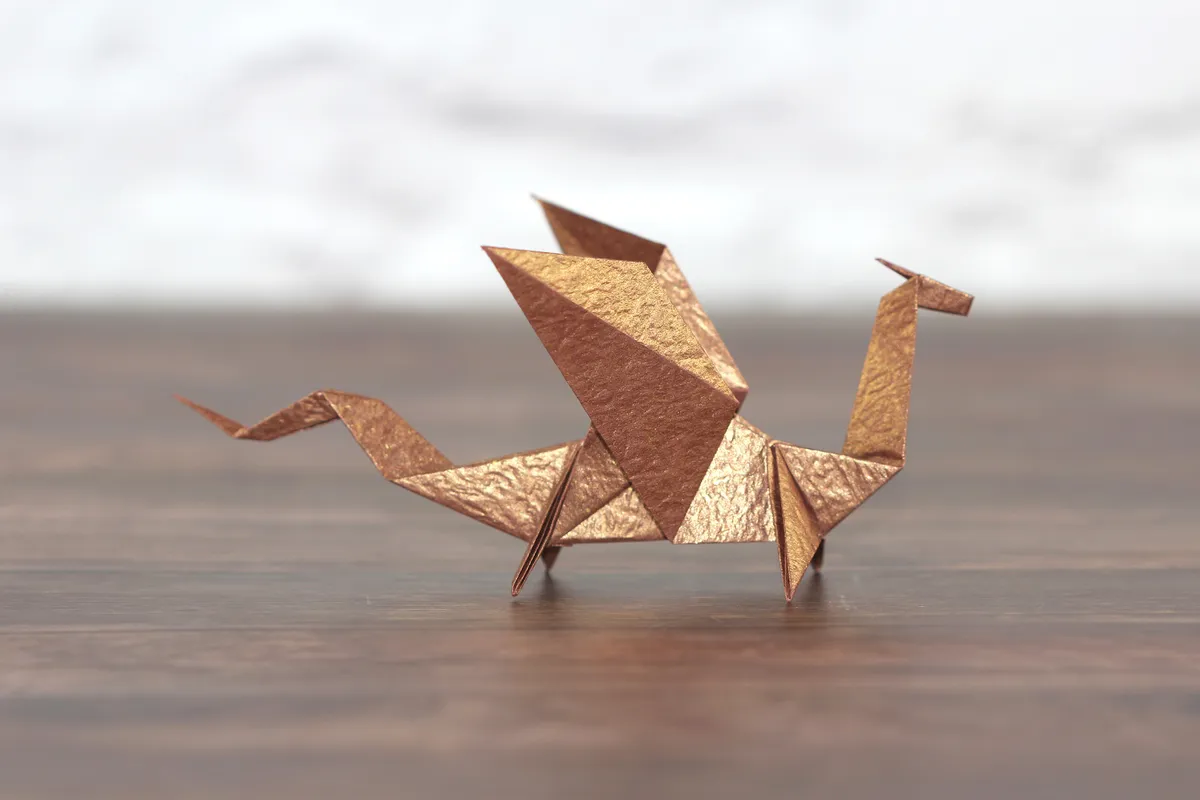
Start with a square piece of paper. We’re using a piece 25 x 25 cm, although the piece we used for the final model, the shiny brown dragon, is 20 x 20 cm.
If you’re folding this origami dragon for the first time, we recommend using a slightly larger piece of paper (rather than the usual 15 x 15 cm), as folding the dragon’s legs can be quite stiff and it’s harder to manipulate if you’ve only got a small area.


Step 2
First, fold your paper diagonally, from corner-to-corner, both ways. Burnish the fold (i.e. press the creases) with a bone folder to achieve a nice, crisp crease – this will make it easier for you later on. Open the paper back up again.


Step 3
Fold your paper in half, both horizontally and vertically. Burnish the fold again, and open back up.


Step 4
With the reverse of your paper facing upwards, bring the top corner and the two side corners down to meet the bottom corner. The two sides will now be ‘inside’ the square. Burnish the creases.


Step 5
Rotate the square, so the open corner is at the bottom and the closed corner (the original centre of the paper) is at the top. Fold the two lower sides to the vertical line in the middle, and crease well.


Step 6
Turn your paper over and repeat on the back: fold the two lower sides to the vertical line in the middle and crease well.


Step 7
Fold down the triangular section at the top. Crease well and unfold, then repeat on the reverse.


Step 8
Open the flaps so that it’s back to looking square.

Step 9
Lift the bottom corner up, using the fold you made by folding the top triangle down as the centre point. The sides will come in and you’ll end up with an elongated diamond shape. Burnish the folds.


Step 10
Repeat on the other side.


Step 11
Fold the top corner back down so that it meets the bottom corner again. Do this on both sides, and you’ll end up with a kite shape.
If you want to do your own research and take this further – in origami, this is known as a ‘bird base’, and it’s the starting point of lots of great designs.


Step 12
Fold the top down to meet the horizontal line. Crease well and unfold.


Step 13
Open the paper slightly, and you’ll notice that the fold you’ve just made is shaped like a square. Push this square down and inside the model, so that it turns inside out and sinks inside the top of the kite shape.
It helps if you mountain fold the edges of the square before pushing it down. This has a technical name, it’s called ‘sinking the fold’.

Step 14
Working on each corner in turn, crease from the centre line to the outer corner, and fold down to create a small flap. Do this on both sides.


Step 15
Repeat on the reverse.


Step 16
Fold the left flap along the central vertical crease, and fold over to the right (like you’re turning the page in a book). Repeat this on the reverse to hide the small creases we made in steps 14 and 15.

Step 17
Bring the front and rear flaps upwards, leaving the middle flap so that it still faces down.


Step 18
Next, take the right side of the upper flap and fold so that the right edge is lined up with the horizontal. Partially crease, pressing the paper only until the vertical line. When you open it back up, you’ll have a diagonal crease that only goes to the middle.


Step 19
Repeat with the upper left side of the flap. This time, fold it the other way, lining the left edge up with the horizontal line in the middle, and crease only until the centre vertical line.

Step 20
Open it back up and you’ll see you have a triangle-shaped crease.

Step 21
Using this new triangle-shaped crease, bring the top point down and flatten the creases so that you have a skinny triangle positioned horizontally. While completing this fold, a new vertical fold will be created. In origami, this fold is known as a ‘rabbit’s ear’.


Step 22
Turn the model over and repeat steps 18-21 on the other side. Make sure the two rabbit’s ear folds are pointing in the same direction.


Step 23
Fold the two bottom flaps upwards and flatten the crease well.

Step 24
Fold the top left-hand flap down, lining the inner edge with the horizontal bottom edge and making a new diagonal crease.

Step 25
Repeat on the other side with the right-hand flap. Burnish the folds.

Step 26
Fold these flaps back up.

Step 27
Fold the flaps down.

Step 28
Using the new creases that you’ve just made, fold the left-hand flap up and inside the layers. You’re essentially reversing the direction of the folds, and this fold is known as a ‘crimp’.

Step 29
Repeat this move on the other side, forming a second crimp in the opposite direction.

Step 30
Working on the left-hand side, narrow the paper by folding the upper edge of the front layer down to the lower edge. Crease well.

Step 31
Unfold this flap you’ve just made, and fold it inside the model.

Step 32
Flip the model over, and repeat on the reverse of the model. This will be the tail of your origami dragon.


Step 33
Turn the model back over again (so it’s the same way round as when we started), and repeat steps 30-32 on the right-hand side of your origami dragon. This will be the neck of your origami dragon.


Step 34
This is what your origami dragon should look like from the top!

Step 35
Next, take the central front flaps and fold it up, at an angle. Start the crease at the join at the bottom. This is one of the wings for your origami dragon!

Step 36
Fold the small triangle on the left-hand side down, to create one of the back legs. It’s quite stiff to fold, so you might need to use a bone folder to achieve a good crease.

Step 37
Fold the small triangle on the right-hand side to the left.

Step 38
Now fold this triangle downwards to match approximate direction of the rear leg. This is the front leg of your origami dragon!

Step 39
This step is optional. If you want a ‘fuller’ look to your dragon’s wings, pull the back layer of the wing out. A new diagonal crease will form, and once you’re happy with the positioning, flatten the paper to hold the wing in place.
It’s starting to look like an origami dragon!


Step 40
Turn your paper over, and repeat step 36 on this side to create the other rear leg.

Step 41
Following the shape of the wing on the other side, fold up the second wing.

Step 42
Like before, open up this second wing and crease the fold to secure it in place.

Step 43
Fold the front leg to the right.

Step 44
Fold the front leg down, so that it matches the one on the other side.

Step 45
This is what your origami dragon should look like from the top! Notice the four legs sticking out at the sides.

Step 46
Orientate your paper, so that it’s the same way round as this.

Step 47
Fold the neck up, making a valley fold at the base. Flip it inside-out, creating an inside-reverse fold. This will hold the neck in position so that it doesn’t fall down.

Step 48
Approximately halfway up, make another diagonal fold in the paper.

Step 49
Like before, flip this fold inside out to create the head.

Step 50
Approximately 1/3 down the head, fold the tip back again. Before you crease this fold, make sure that the tip extends further than the length of the head.

Step 51
Again, flip this fold inside-out (or make a ‘reverse fold’ to use the correct terminology) to form the horns.

Step 52
Almost finished! The last thing we need to do is shape the tail. Fold the tail upwards at an angle.

Step 53
Like when you were making the neck, flip the fold inside-out (reverse fold) to hold it in position.

Step 54
Decide where you want the tail to wiggle, we’ve gone for halfway up, and fold the tail forward. Flip it inside-out to secure and crease the fold.


Step 55
Add another reverse fold near the tip.

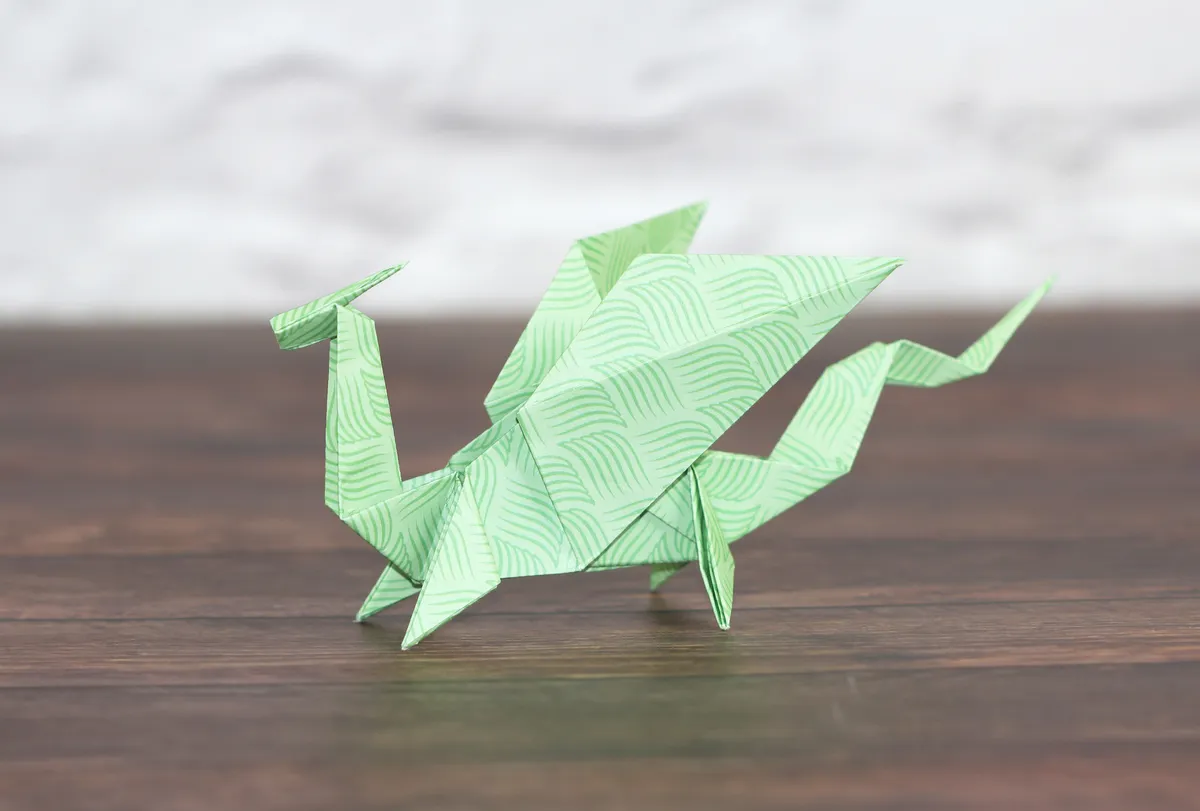
Step 56
Congratulations! You have completed an origami dragon!