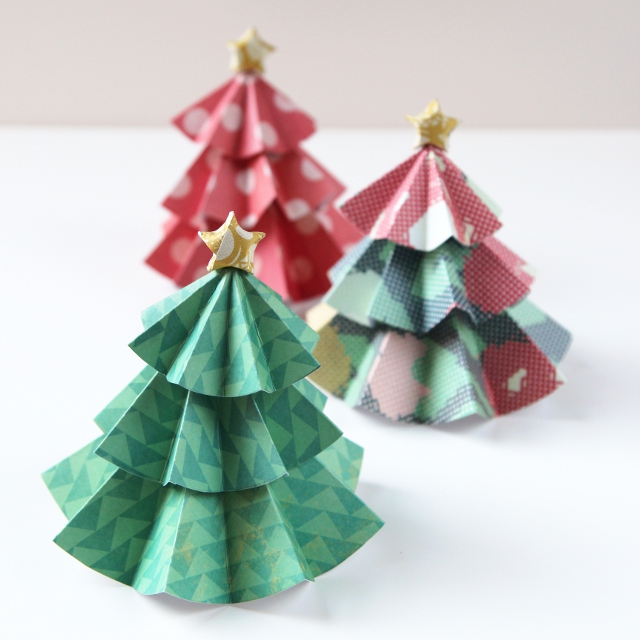
Craft a magical 3D origami Christmas tree this holiday season

Craft a magical 3D origami Christmas tree this holiday season

Unleash your creativity this holiday season by crafting a stunning 3D origami Christmas tree! Whether you're a seasoned paper artist or a beginner looking for a fun project, this festive creation will add a magical touch to your décor.

Published: September 30, 2024 at 9:52 am

Even the smallest of dwellings require a little tree so we're going to show you how to make an origami Christmas tree. This one is made from pretty Japanese papers in green, silver and gold and is very straightforward to make based on a simple folded fan shape.

You could just as easily make yours from gift wrap, or go for an all-white look for sophisticated elegance. If you'd like to try even more paper folding goodness then check out our easy origami for beginners post which will give you eleven more projects to work on!

If you like this article, how to make an origami Christmas tree, why not check out some of our paper crafts – like these origami Christmas decorations or these easy origami projects, or how about getting your glue gun and making this realistic paper rose?

We love seeing what you make, so don’t forget to share your craft projects with us on Instagram and Facebook.

3D Origami Christmas tree tutorial

We have a selection of free patterned papers from Papercraft inspirations, Cardmaking & Papercraft and Quick Cards which you can use to make your origami tree!

You will need:

  • 14 paper rectangles, two of each measuring 21 x 28cm (81⁄4 x 11in), 18 x 28cm (7 x 11in), 16 x 28cm (61⁄4 x 11in), 13.5 x 26cm (51⁄4 x 101⁄8in), 12 x 26cm (43⁄4 x 101⁄8in), 9 x 25cm (31⁄2 x 97⁄8in), 6 x 22cm (23⁄8 x 85⁄8in)
  • Piece of patterned paper measuring:
  • 11.5 x 11.5cm (41⁄2 x 41⁄2in) for the trunk
  • One sheet of A4 (US letter) silver paper for the base
  • Two 30cm (12in) wooden barbeque skewers
  • Thin wire
  • Pencil and ruler
  • Craft knife and cutting mat
  • Small pair of scissors
  • Glue stick and quick-drying glue tube
  • Darning needle

How to make an origami Christmas tree

Ready to learn how to make an origami Christmas tree? Let's get started!

The base

Step 1

Start by making the base for your origami Christmas tree. Cut strips of paper 2cm (¾in) wide. Take the first strip, run a glue stick along one side and start winding it up into a tight coil. As you come to the end of one strip, glue on another strip and continue winding, until you have a disc at least 3.5cm (1³⁄8in) wide. The wider the base the more stable the tree will be; to ensure your tree stands straight, make the base as flat as possible.

Step 2

DIY Origami Christmas tree step 2

Taking one of the larger paper rectangles, place it pattern side down with one of the short edges facing you and fold over by 1.5cm (5⁄8in). Turn the paper over and fold the other way, again by 1.5cm (5⁄8in). Continue to concertina fold in this way to the end of the strip (if you are left with a spare bit that is not big enough to fold, trim it off).

Concertina fold and trim

Step 1

DIY Origami Christmas tree step 3

Trim the ends of the folded strip to a point, curving the cut slightly to give the edges of your origami Christmas tree a scalloped point.

Glue to make a semi-circle

Step 1

DIY Origami Christmas tree step 4

Fold the pleated strip in half and press firmly at the crease. Run a glue stick along one edge of the fan shape and stick to the other edge to make a semi-circle.

Stick two semi circles together

Step 1

DIY Origami Christmas tree step 5

Fold the correspondingly-sized paper rectangle in the same way, then stick the two semi-circles together to form a complete circle. This is the base of your origami Christmas tree!

Make six other branch layers

Step 1

Take a small piece of wire approx 14cm (5½in) long. Fold it in half and poke the ends through at the centre of the circle from front to back on either side of the two joined semi-circles. Turn over and twist the ends of the wire together to secure. This completes a branch layer.Repeat steps 2–6 to make the other six branch layers from the pairs of paper rectangles.

Step 2

DIY Origami Christmas tree step 6

Take the patterned paper square (for the trunk) and run the glue stick over the reverse side leaving a 2cm (¾in) strip unglued along one edge. Starting at the unglued edge, roll up to make a tube approx 1.5cm (5⁄8in) in diameter. Cut into sections as follows: one measuring 2.5cm (1in), three measuring 2cm (¾in) and two measuring 1.5cm (5⁄8in).

Thread the paper branch circles onto skewers

Step 1

DIY Origami Christmas tree step 7

Starting with the second smallest circle, begin to thread the paper fold circles onto the skewers, placing the skewer ends through the holes where the wire joins the two semi-circles. Setting aside the two smallest paper tubes, use the paper tubes in ascending size to separate the paper fold circles. Push the circles/tubes along the length of the skewers to approx 1.5cm (5⁄8in) from the top.

Secure the tree to the base

Step 1

Once the largest circle has been threaded on, it is time to secure the tree to the base. Prepare the base by using the darning needle to pierce two holes approx 1cm (³⁄8in) apart either side of the centre. Thread on one of the set-aside small paper tubes, place a blob of quick-drying glue into each hole, and push the skewers right down into the holes.

Step 2

Thread the other small paper tube onto the skewers at the top of the tree, place a blob of quick-drying glue onto the end of each skewer and stick the smallest paper fold circle on to finish your origami Christmas tree.

How to make an origami Christmas tree – top tip

The pleated circles also make wonderful decorations. Fold some really large ones in gold and silver and hang them up for a stunning display.

DIY Origami Christmas tree

More origami Christmas trees!

1. Two-in-one

Origami Christmas tree by Gathering Beauty

This beautiful origami Christmas tree is made from circles of pretty patterned paper with an origami lucky star as the tree topper – get the full tutorial for how to make this origami Christmas tree over at Gathering Beauty!

2. Flower-inspired origami Christmas tree

Origami Christmas tree by Origami Spirit

This Christmas tree is a clever adaptation of an origami flower and a creation of Vicente Dolz. To make this tree you’ll need seven flower units for the branches, one piece for the trunk, and a star. Get the full tutorial (plus a handy video) over at Origami Spirit.

3. Easy origami Christmas tree

Origami Christmas tree by Jo Nakashima

Practise your paper folding skills with this easy origami Christmas tree by origami artist Jo Nakashima. Get the full video tutorial over at Jo Nakashima website.

4. Kirigami Christmas tree

Kirigami Christmas tree by Foldability

These paper Christmas trees make beautiful decorations and can be made with just one square sheet of paper and a pair of scissors. It is best to use any paper between 70 – 100 gsm such as computer paper, wrapping paper or magazines – whatever you have around the house! Get the full tutorial over at Foldability.

5. Paper Christmas tree

Paper Christmas trees by Kinder Art

This is a fun project, and one that is really easy (and quick) to make! You need little more than paper, glue and a few glittery bits to pull off something that requires just a few minutes of your time, yet looks like it took hours to plan and create. Get the full tutorial for this paper Christmas tree over at Kinder Art.


Make your decor sparkle with DIY origami Christmas trees

We hope you’ve enjoyed this project, how to make an origami Christmas tree! Use your tree to brighten up your Christmas display, or use it as a eye-catching centrepeice on your Christmas table.

Make your Christmas homemade with origami

Origami warm-up complete, it's the perfect time to expand your skills with these magical Christmas origami decorations.

More Christmas projects