How to make the tulip flower
Step 1
This tutorial is made up of three parts: a flower, leaf and stalk. The flower is made from a piece of paper 10 x 10cm, and both the leaf and stalk are made from a piece of paper 7.5 x 15cm (the easiest way to do this is to cut a regular 15x15cm piece of origami paper in half).
You don’t need to use dedicated origami paper for this tutorial as there are no tricky folds. Regular paper will do!
For the purpose of this origami tulip tutorial, we are using paper that is purple on one side and yellow on the other.
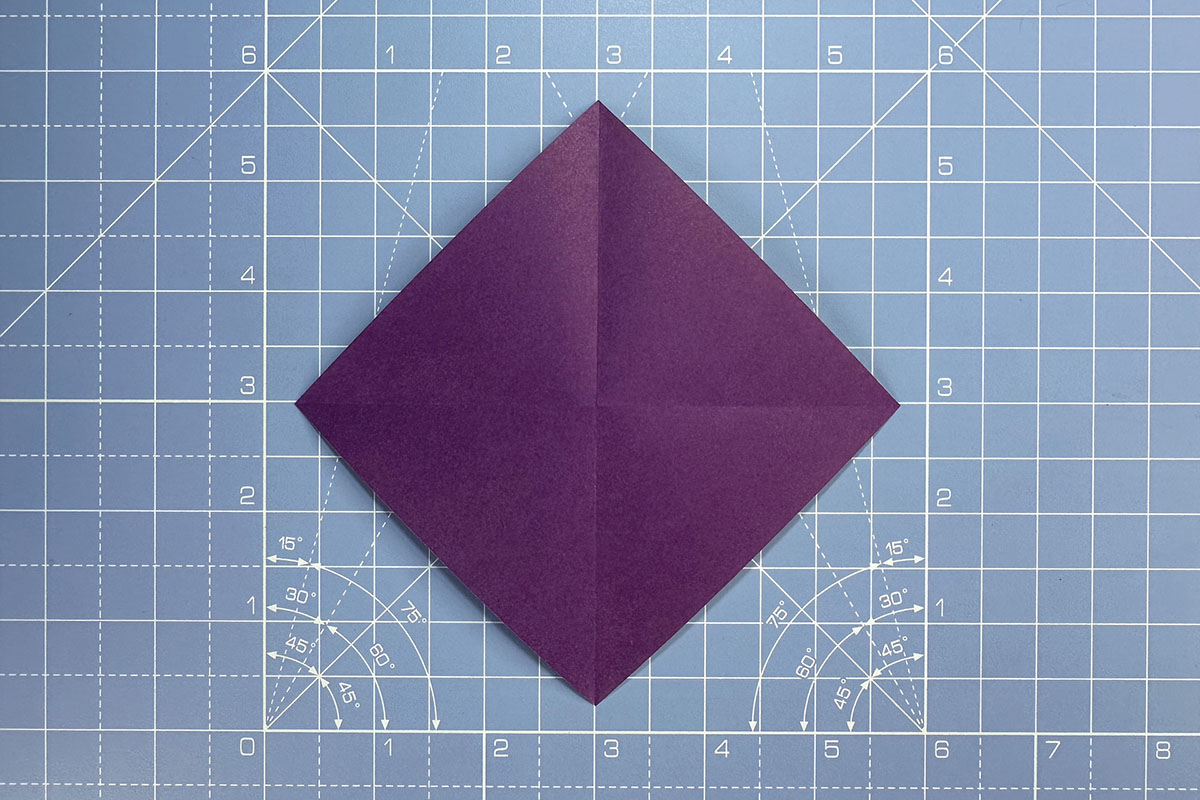
Start with the coloured side facing up (the side you want on the outside of your flower).
Fold along the diagonals. Unfold.
Step 2
Turn the paper over.
Book fold along the horizontal and vertical. Unfold.

Step 3
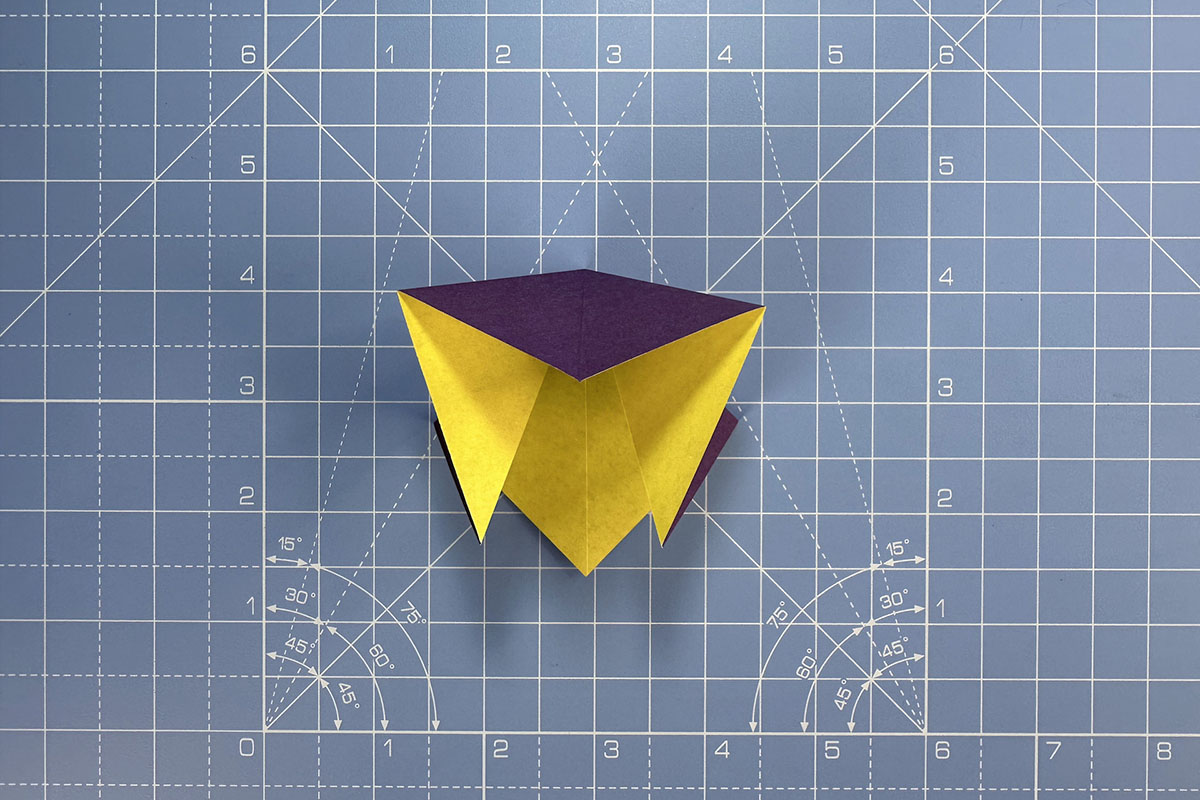
Bring the corners together so they meet. You’re essentially collapsing the paper in on itself, and the end goal is a square shape. When you do this, make sure you end up with two flaps on either side.


Step 4
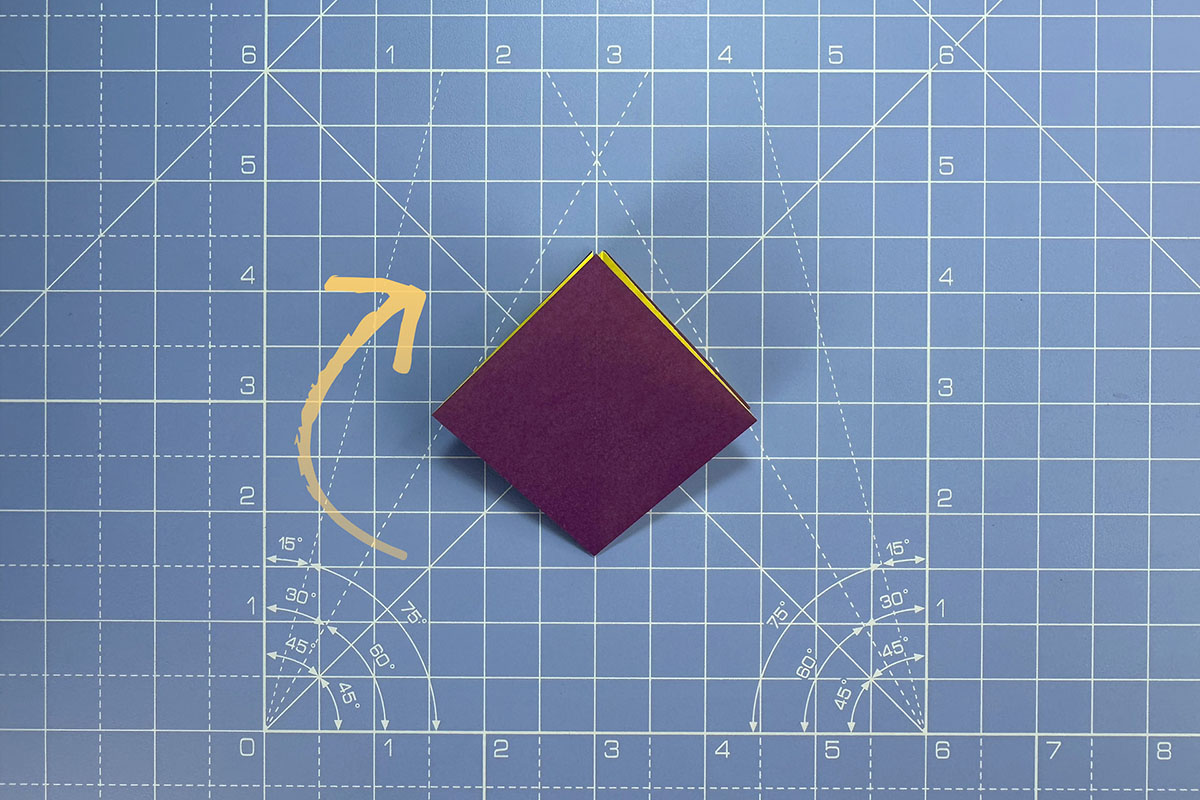
Rotate the paper so the open end is facing upwards.
Step 5
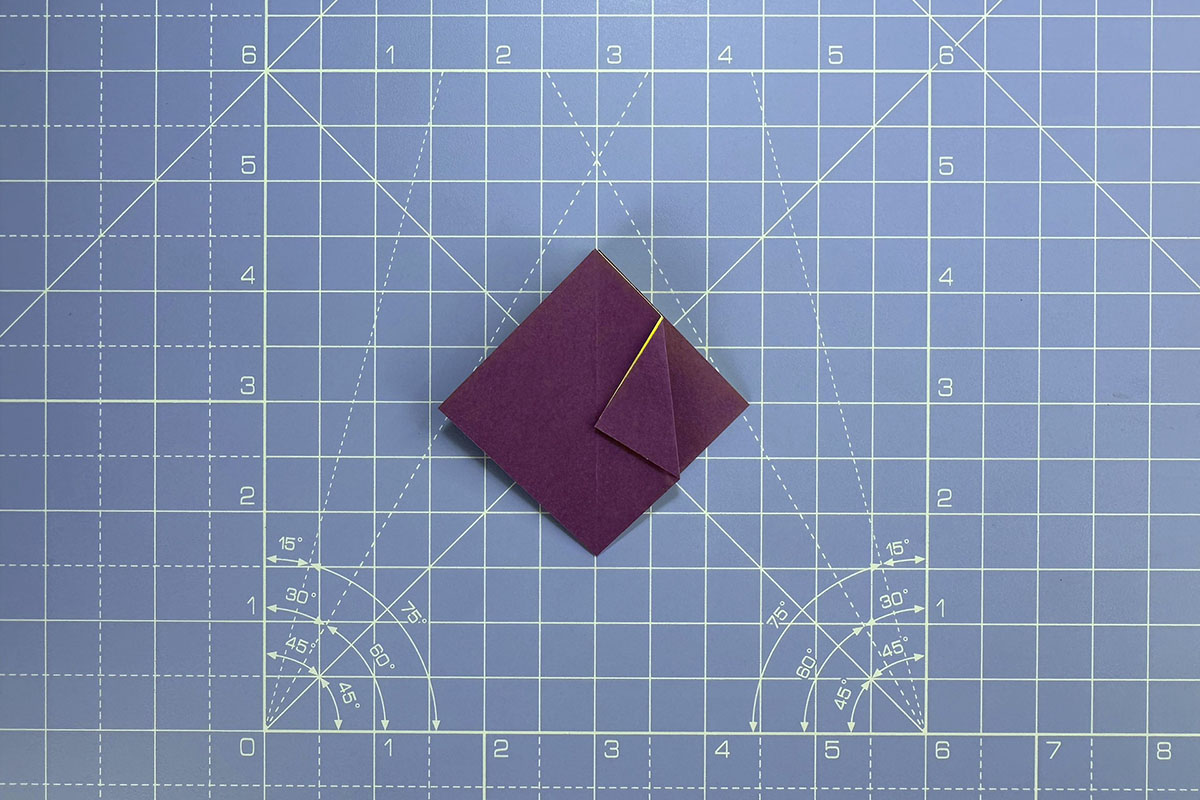
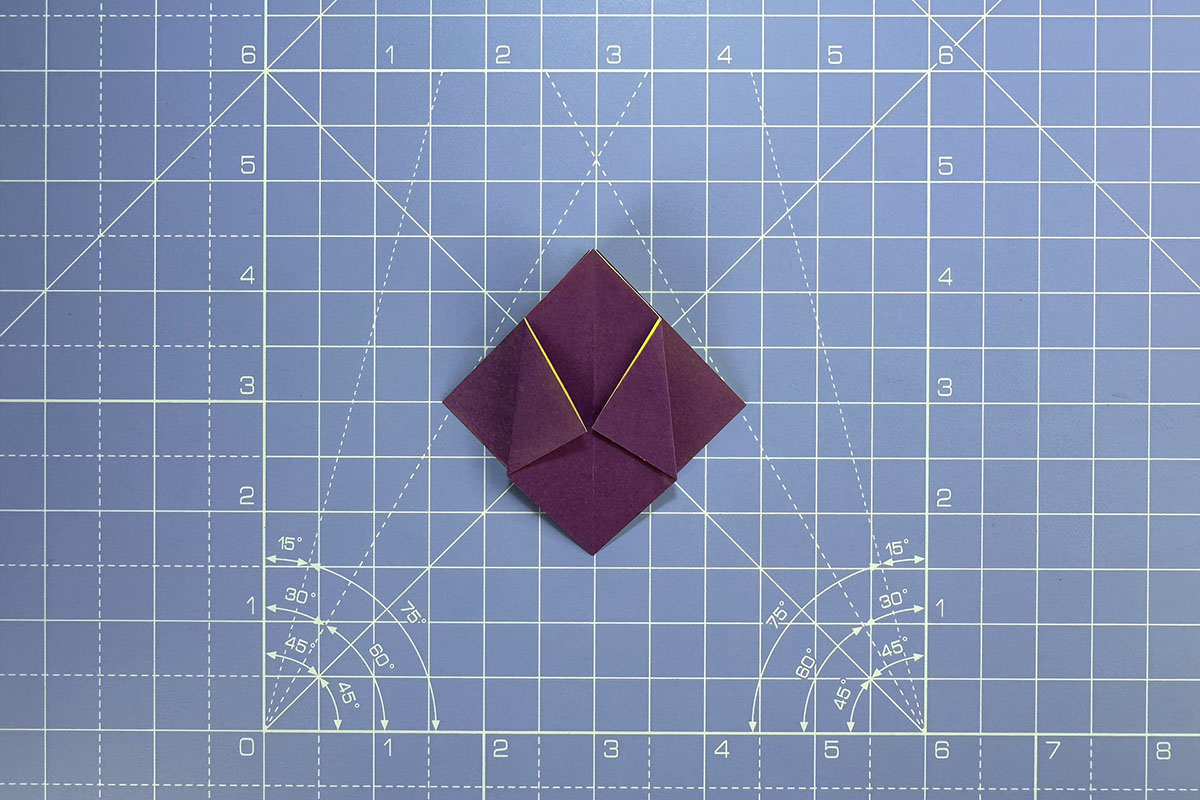
Working on the top layer only, fold the right-hand flap over, so that the outside corner now touches the centre line. Leave a small gap at the top, as shown. Burnish the fold.
Step 6
Repeat step 5 on the left-hand side.
Step 7
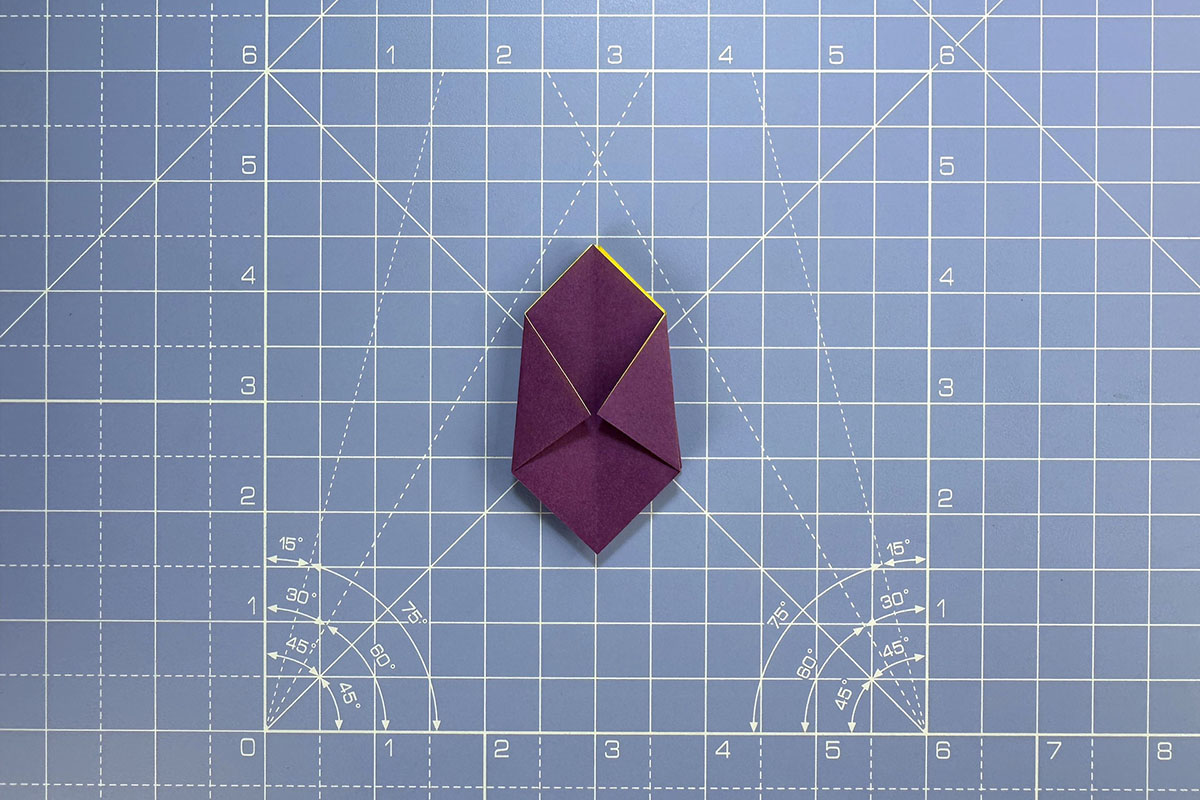
Turn the model over, and repeat steps 5-6 on the other side.
Step 8
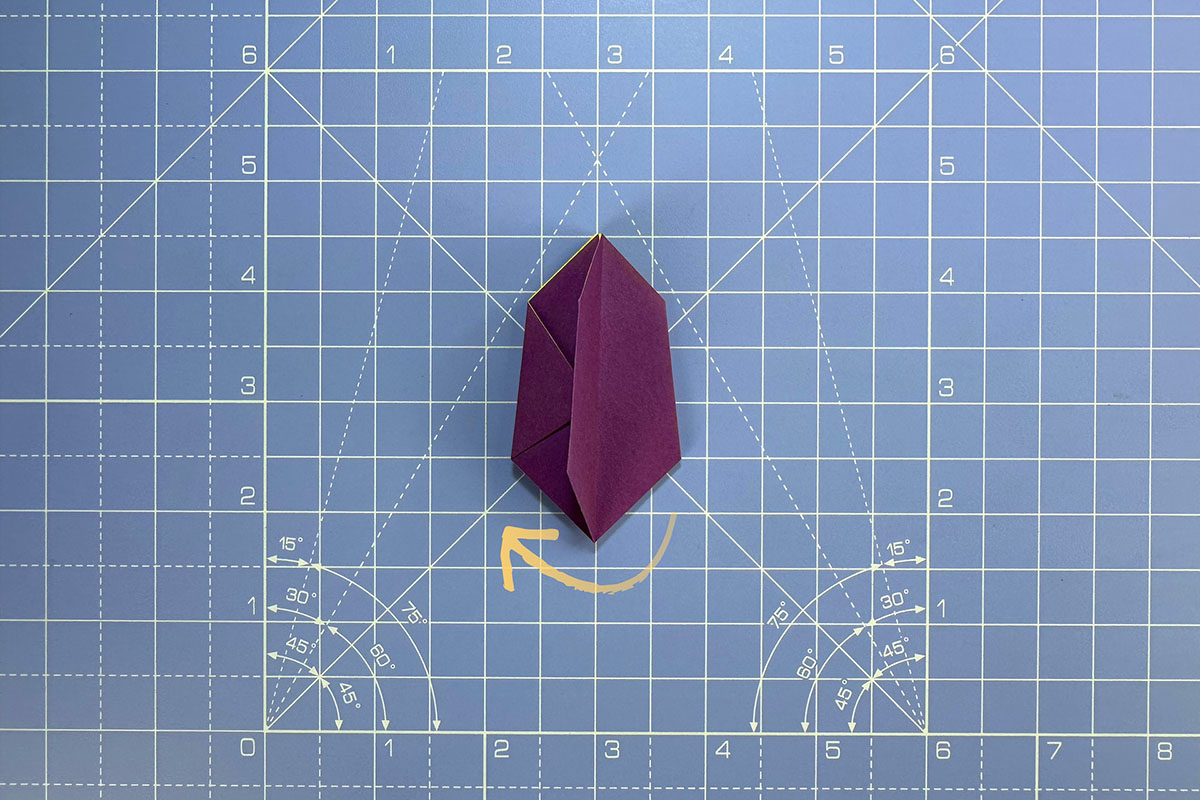
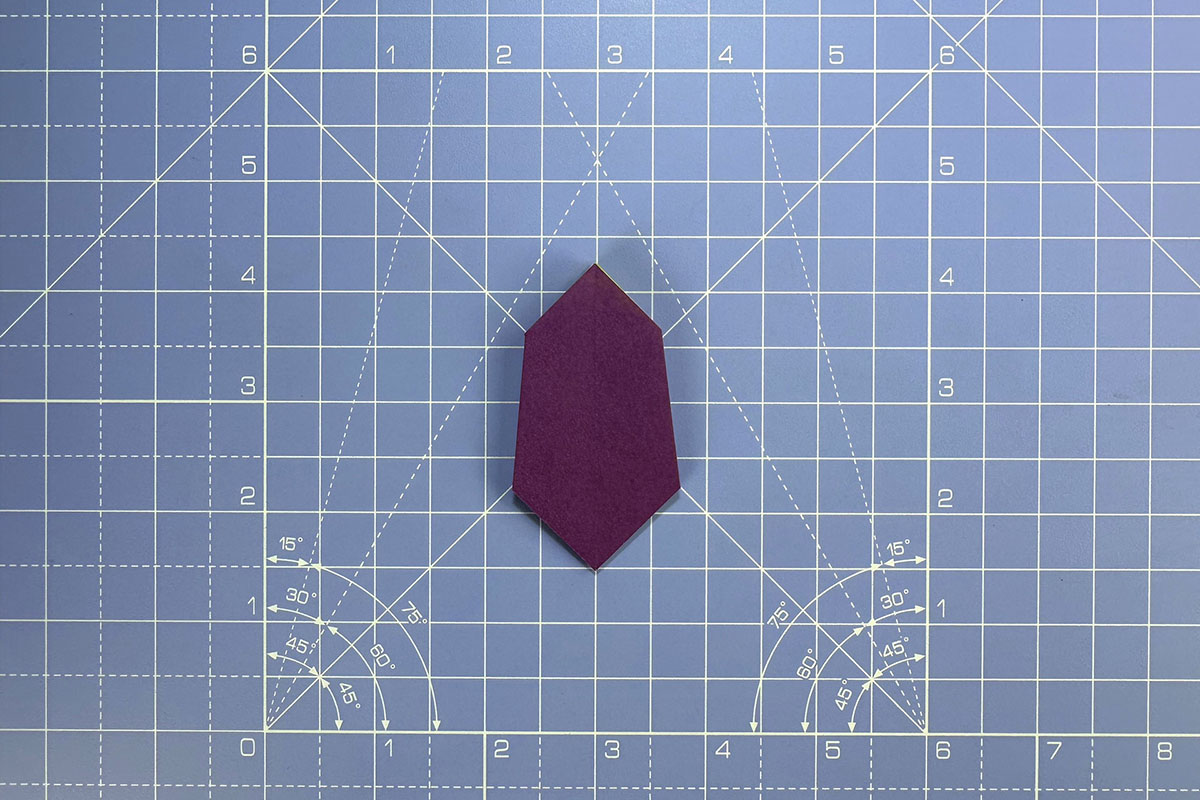
Fold one layer over at the front, and the opposite layer over at the back to hide the folds you just made.
Step 9
Working on the base (closed end) of the flower now, fold the bottom right-hand corner up to create a mini kite shape.
Don’t fold all the way to the centre line; leave a gap approximately the same width as the section you folded up.
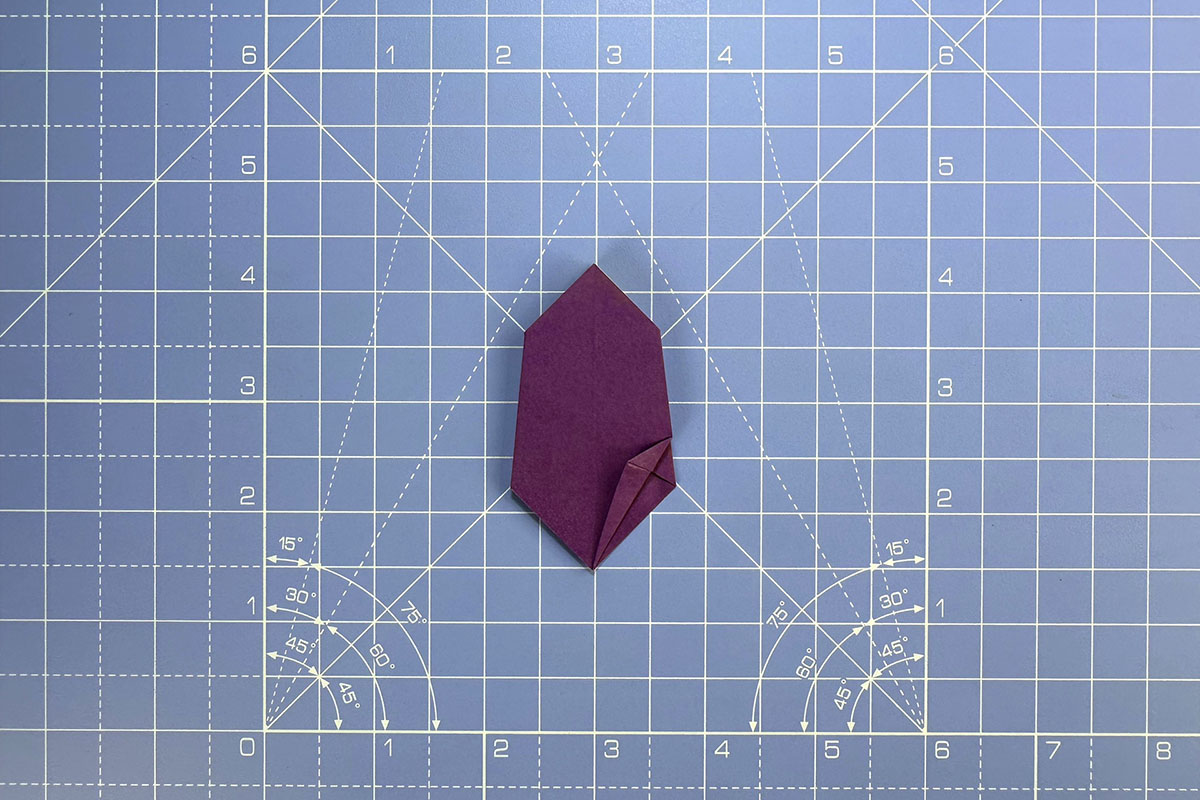
Step 10
Repeat with the bottom left-hand corner.
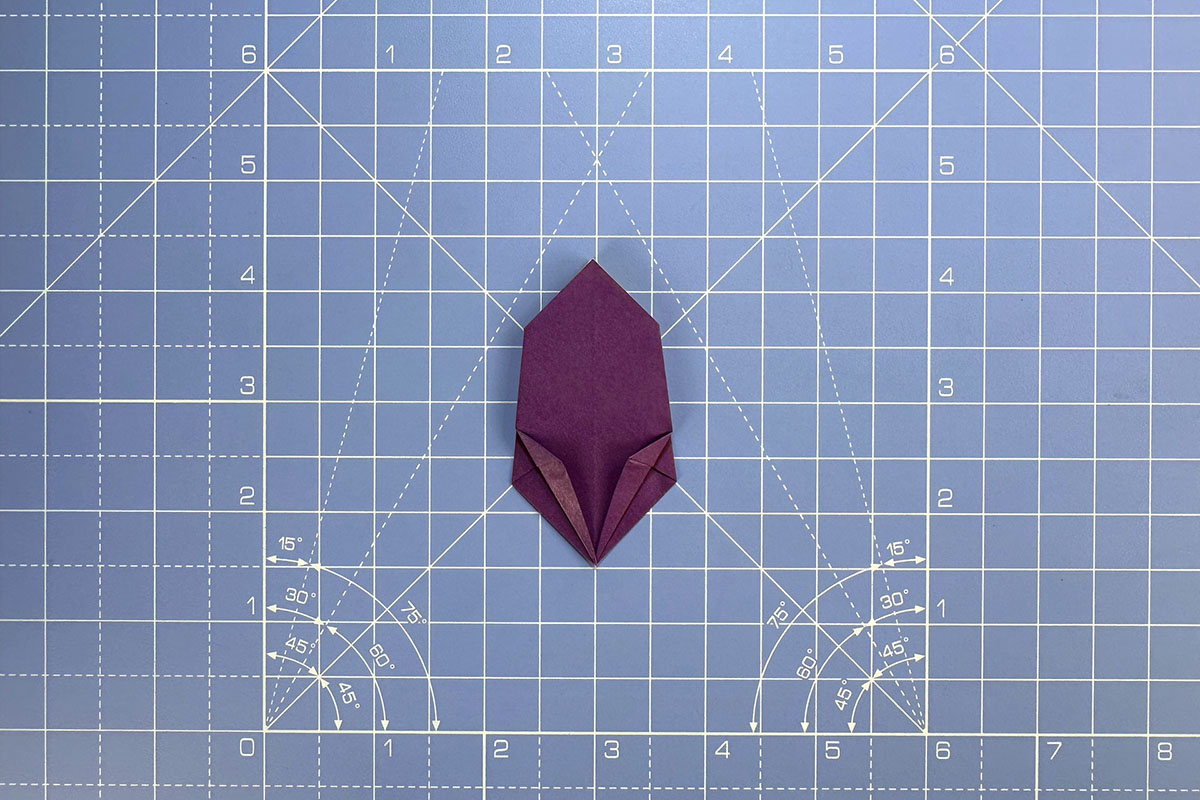
Step 11
Turn the model over and repeat steps 9-10 on the other side.
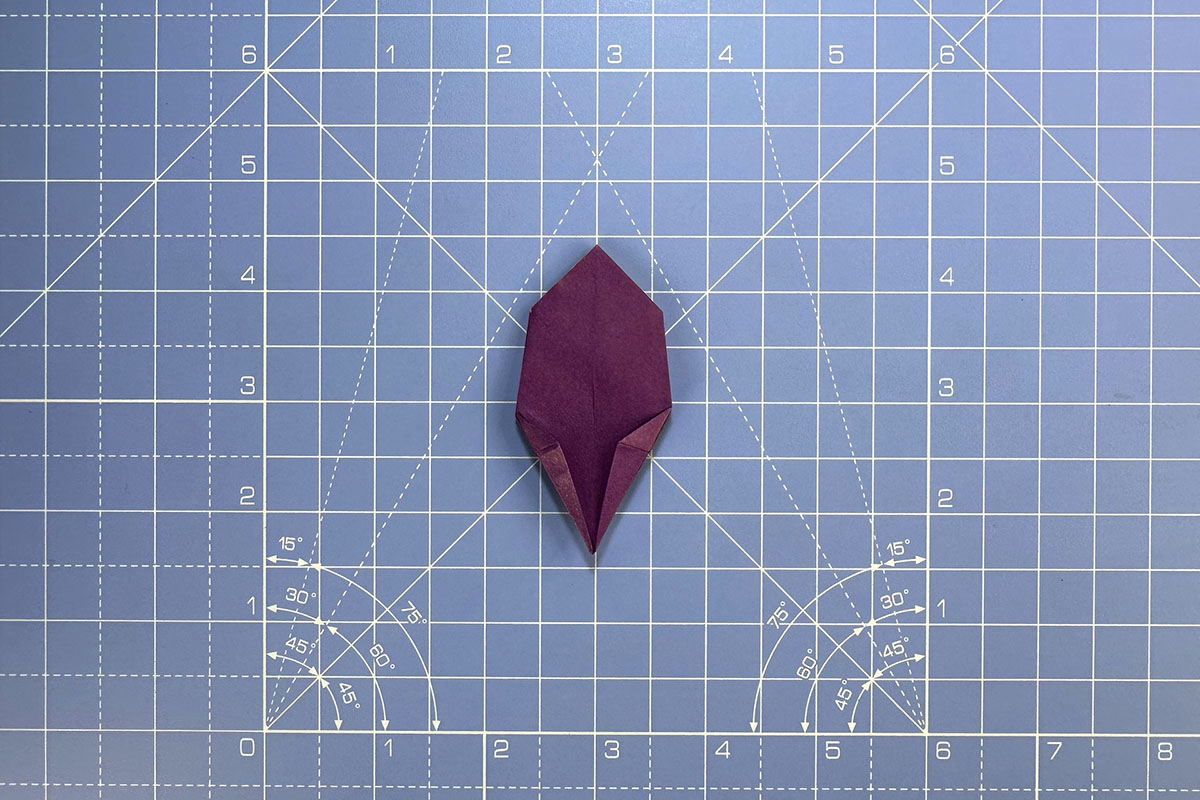
Step 12
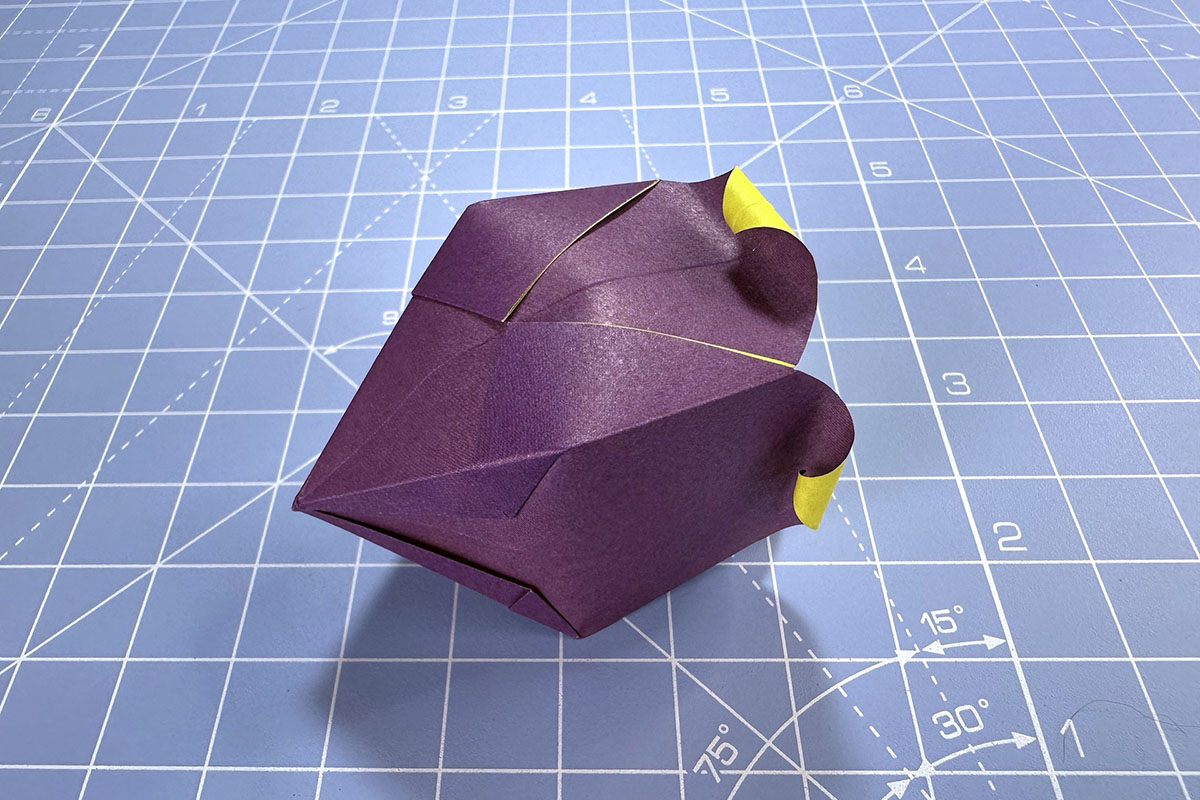
Open the model up by gently wiggling your fingers inside the origami tulip.
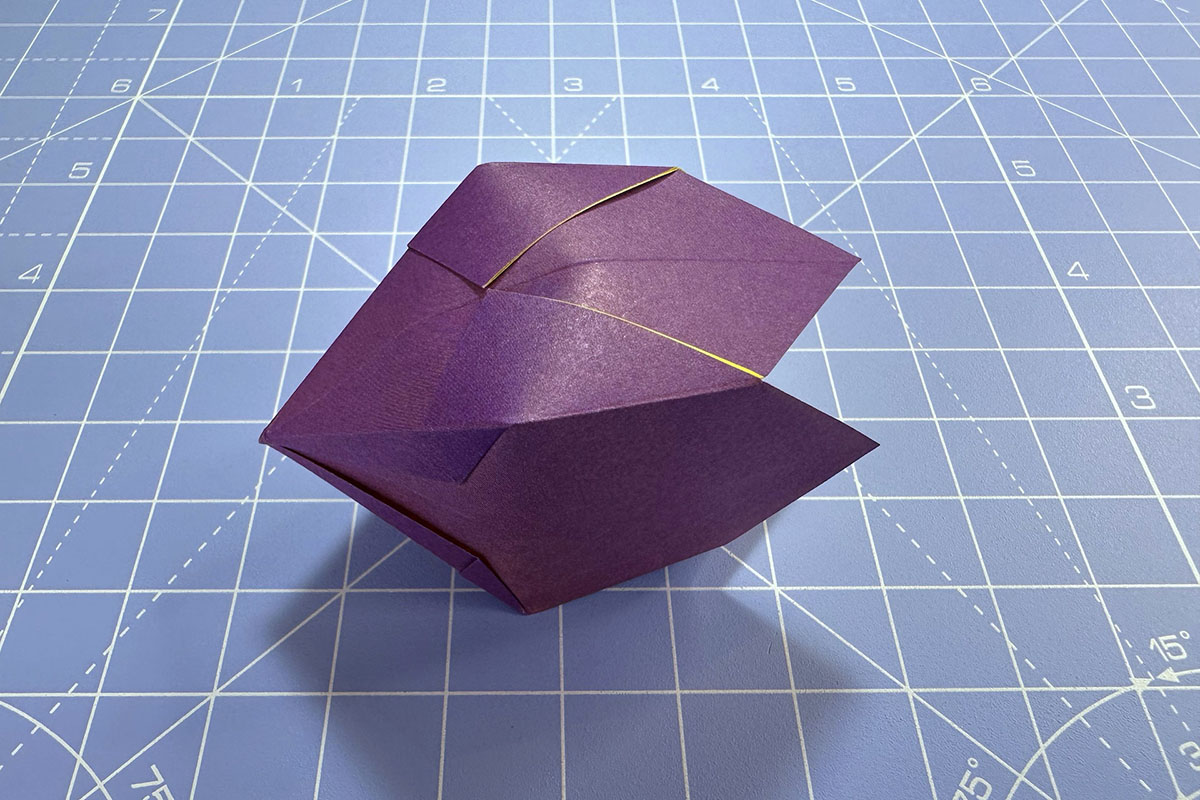
Step 13
Finally, if you wish, curl the edges of your petals outwards for a more realistic look.
That’s the first part of your origami tulip completed!
How to make the origami tulip leaf
Step 1
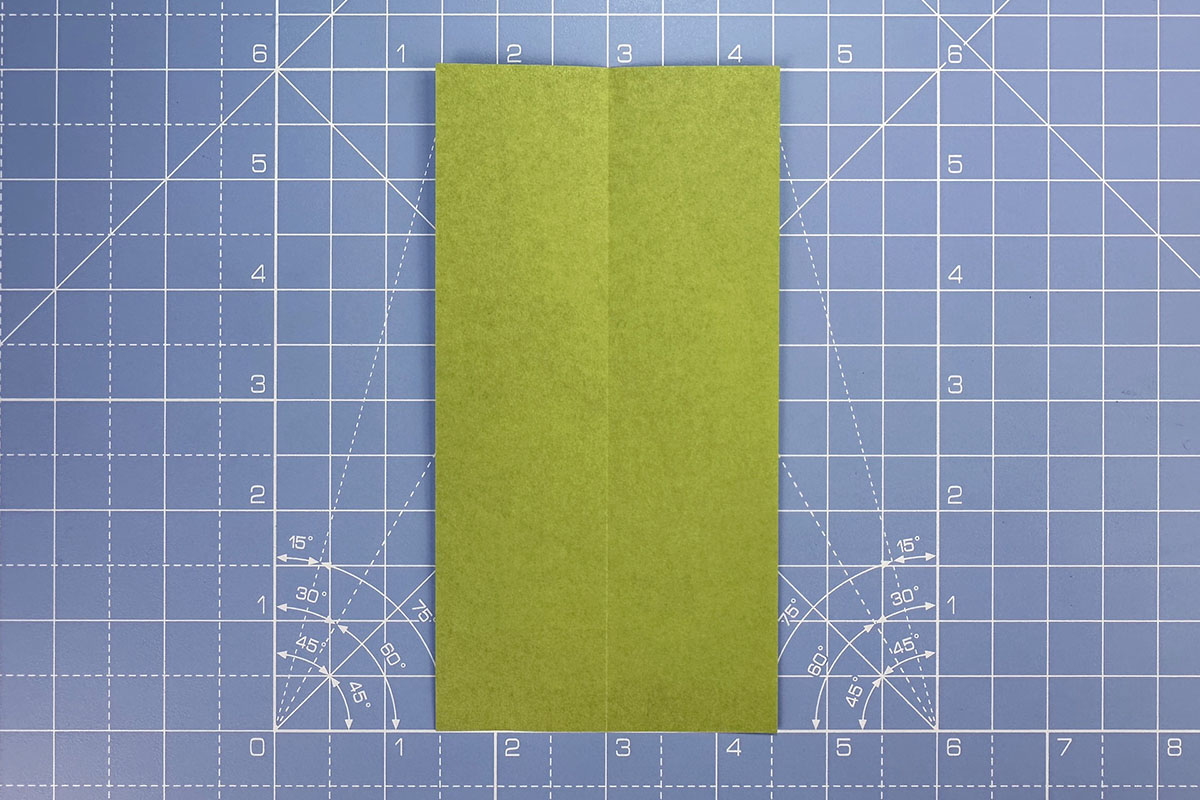
Next, we’ll make the leaf. Cut a piece of paper to 7.5 x 15cm. If you have some origami paper to hand, this is exactly half a standard sheet of 15 x 15cm.
Fold the paper in half longways. Unfold.
Step 2
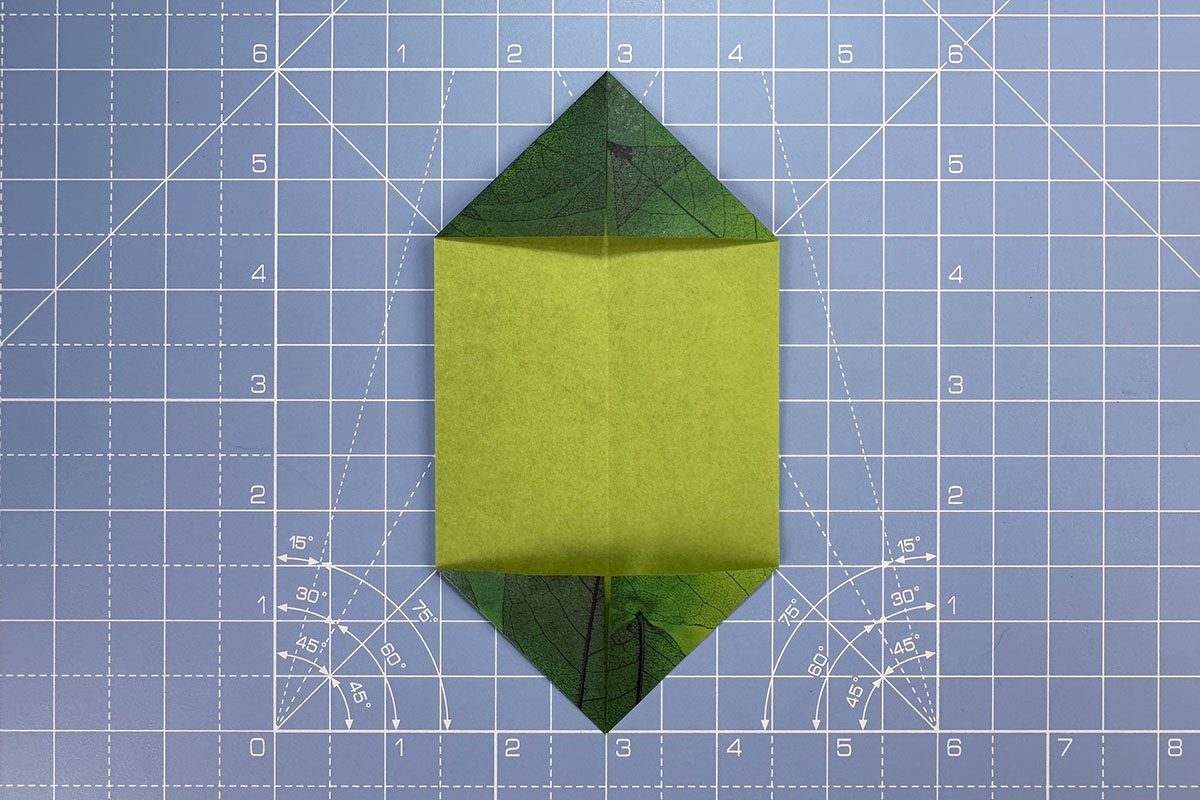
Fold the corners in to meet the centre line, as shown.
Step 3
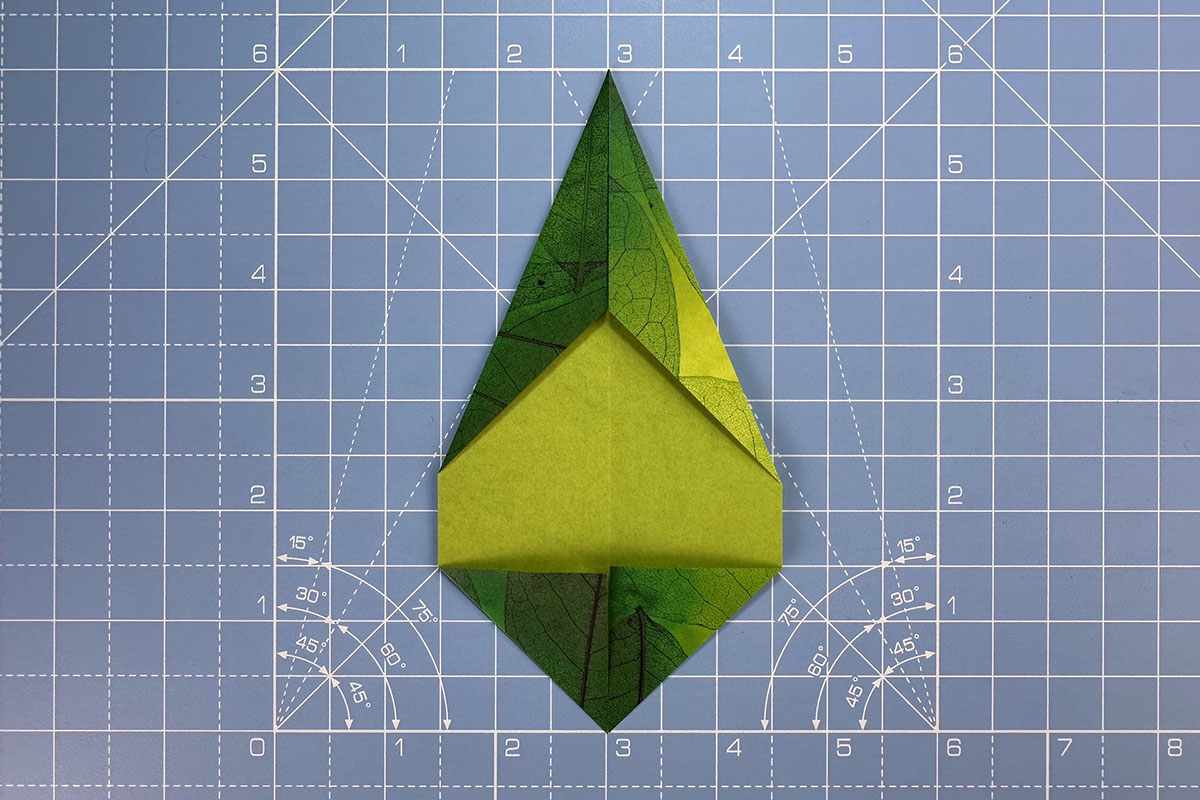
Next, we’re going to narrow the leaf.
Fold the top two diagonal edges inwards to meet the centre line.
Step 4
We’re going to narrow the leaf just a little more, so grab those same top two corners and fold them in to meet the centre line, one more time.
You’ll end up with an elongated diamond shape, where the longer, narrower part forms the top of the leaf.
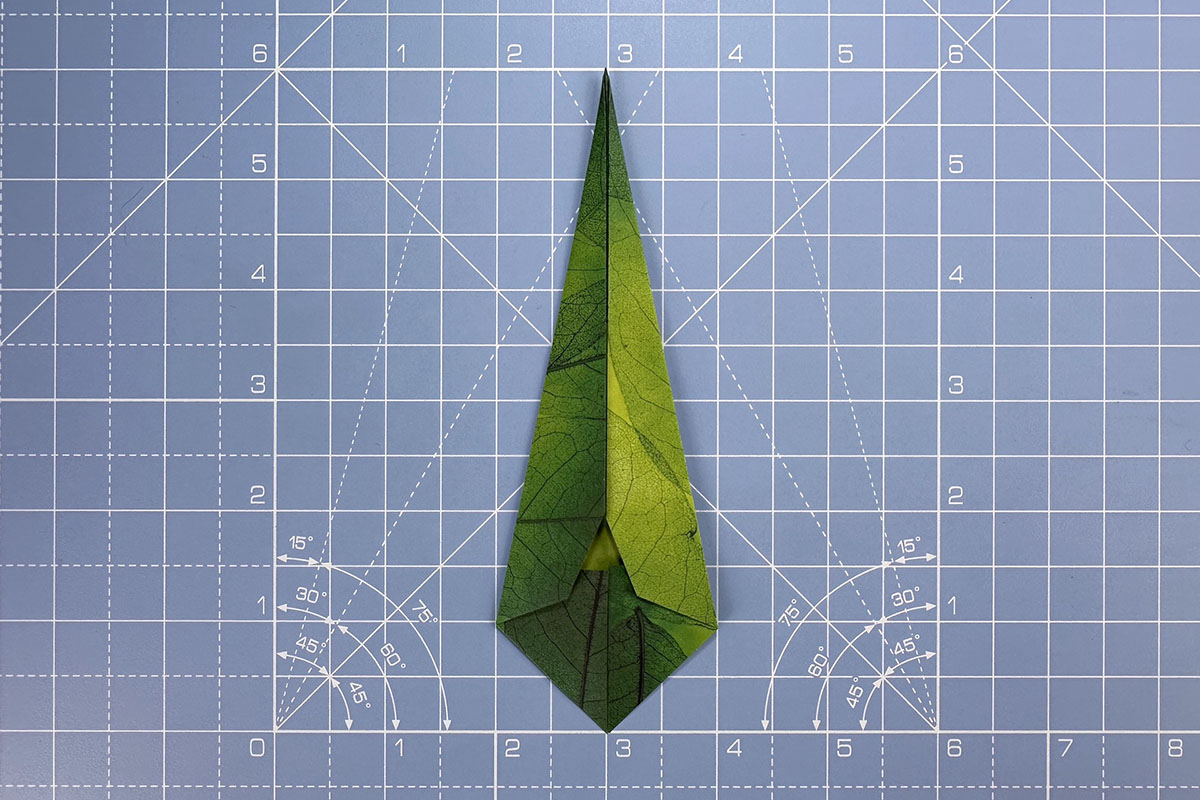
Step 5
Working on the other end now, fold the two bottom edges in to meet the centre line.
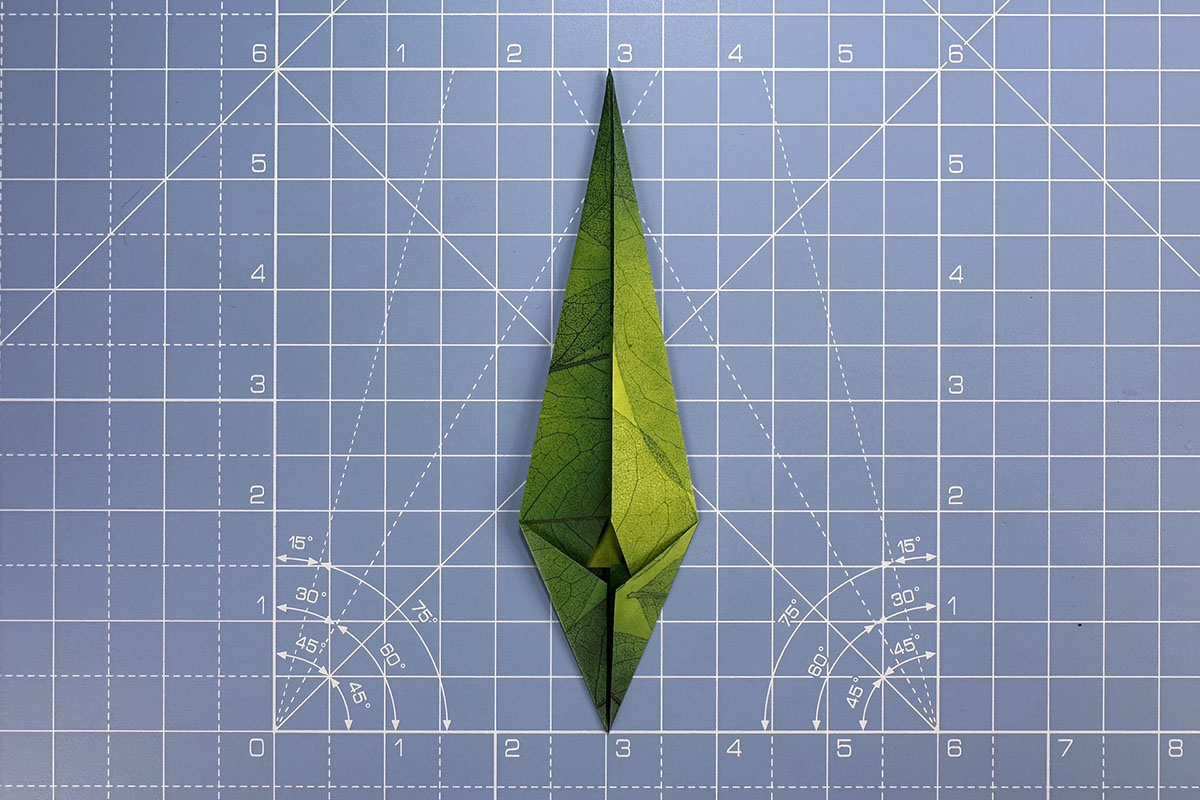
Step 6
Finally, shape the leaf by pinching the short end together, and curling the long end outwards.

How to make the origami tulip stalk
Step 1
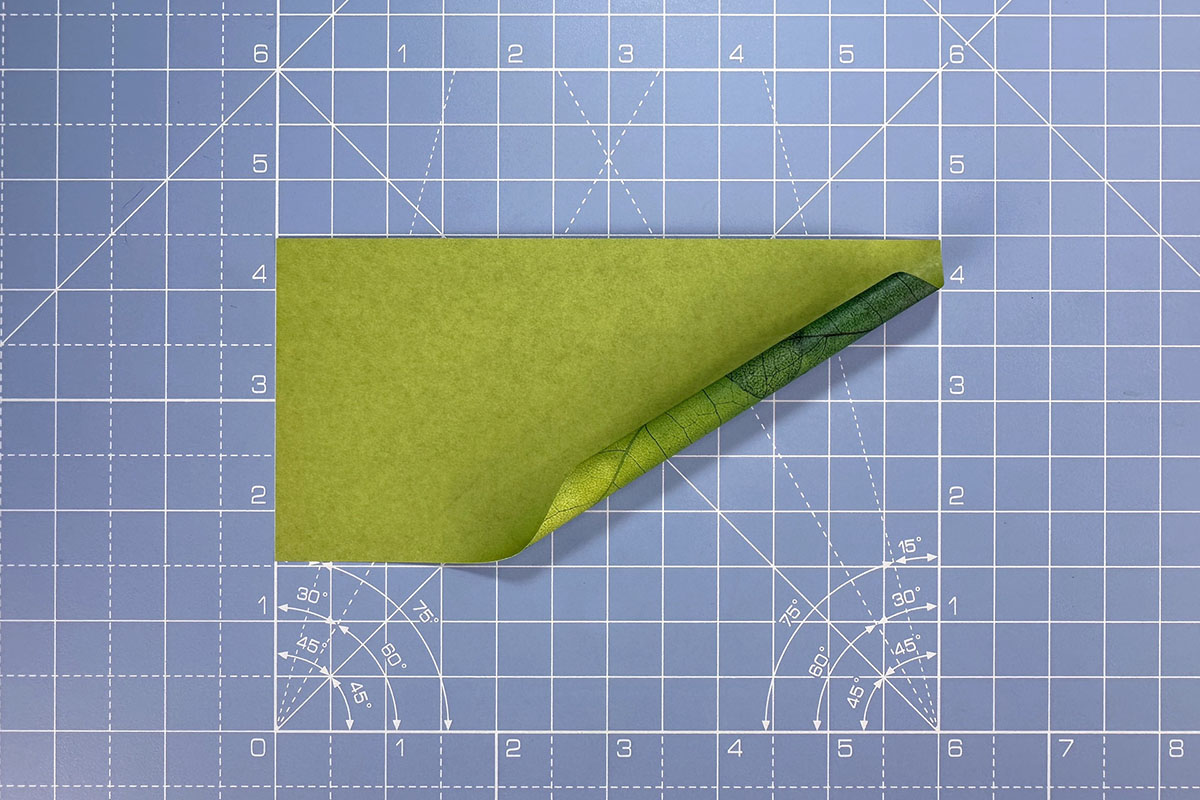
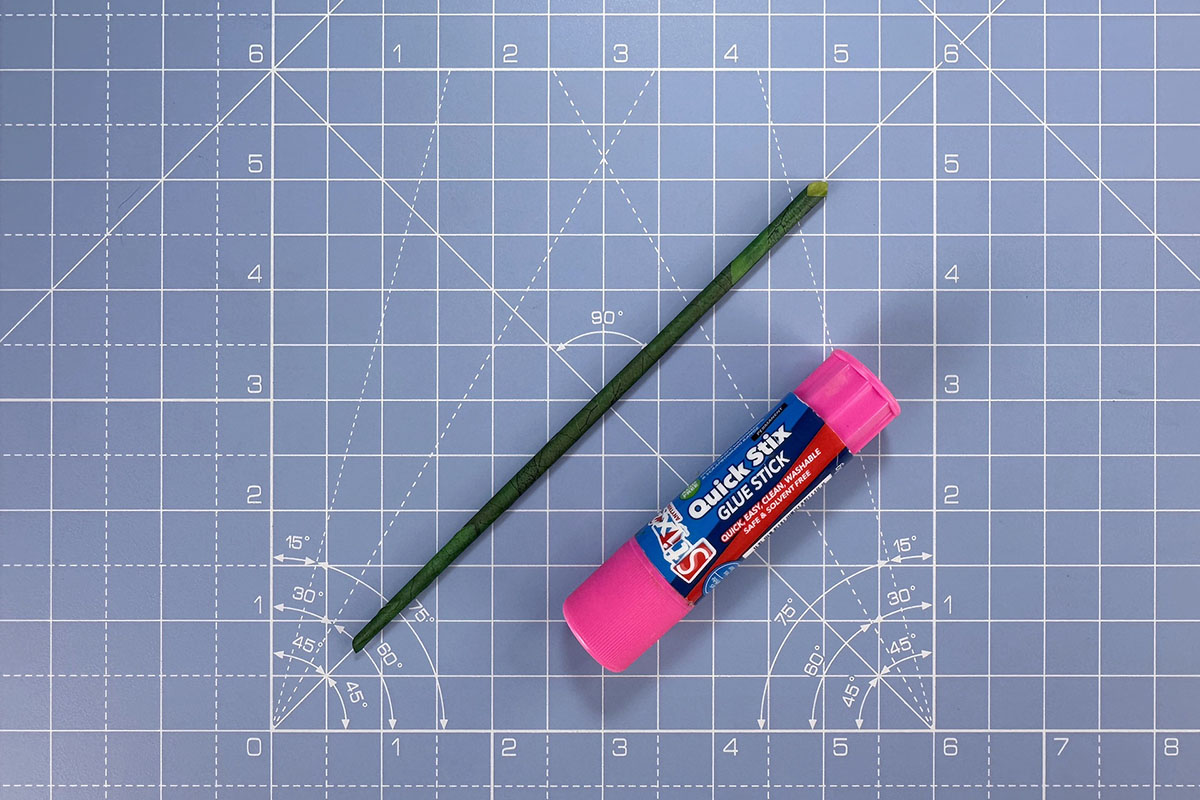
For the stalk, use either a paper drinking straw, or a tightly curled piece of green paper (you could use the other half of the green paper you used for the leaf).
If you’re using a piece of paper, make sure the ends of the paper are secured into place with glue or tape (so that it doesn’t unravel).
How to put the origami tulip together
Step 1
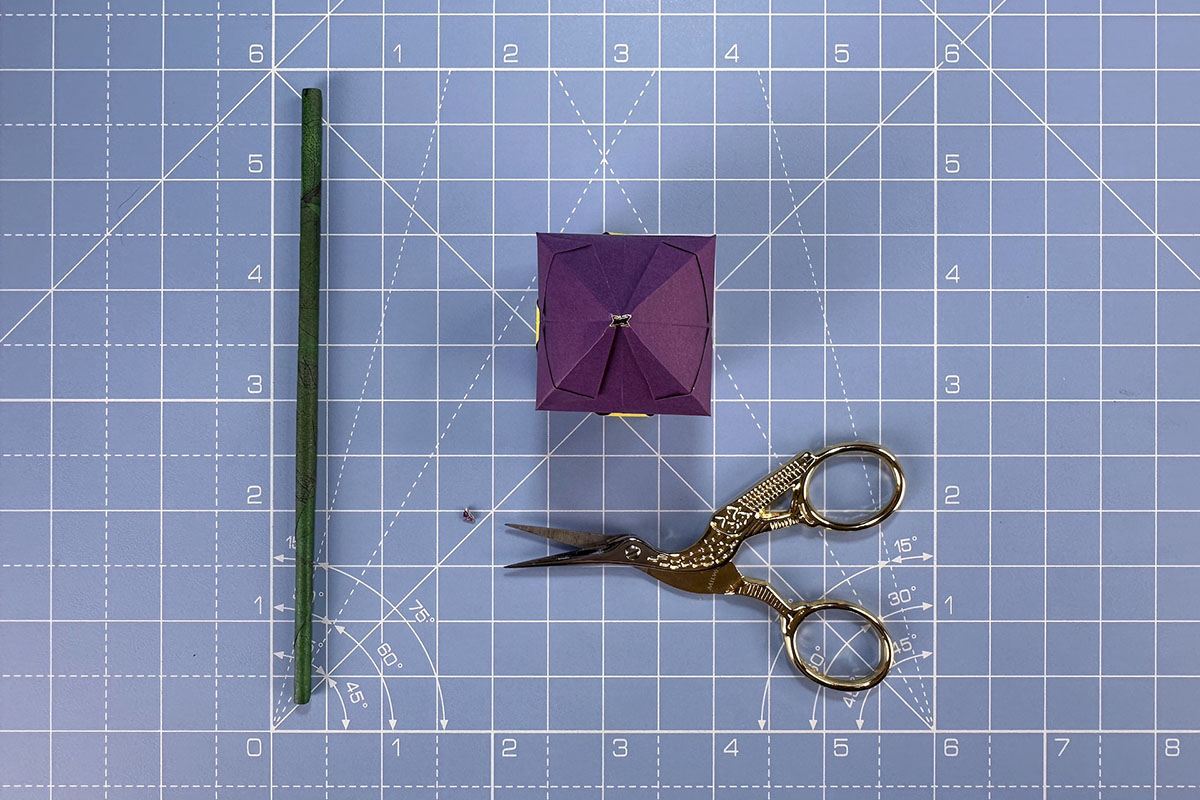
Snip the point at the very base of the origami tulip off, to create a small hole.
Step 2
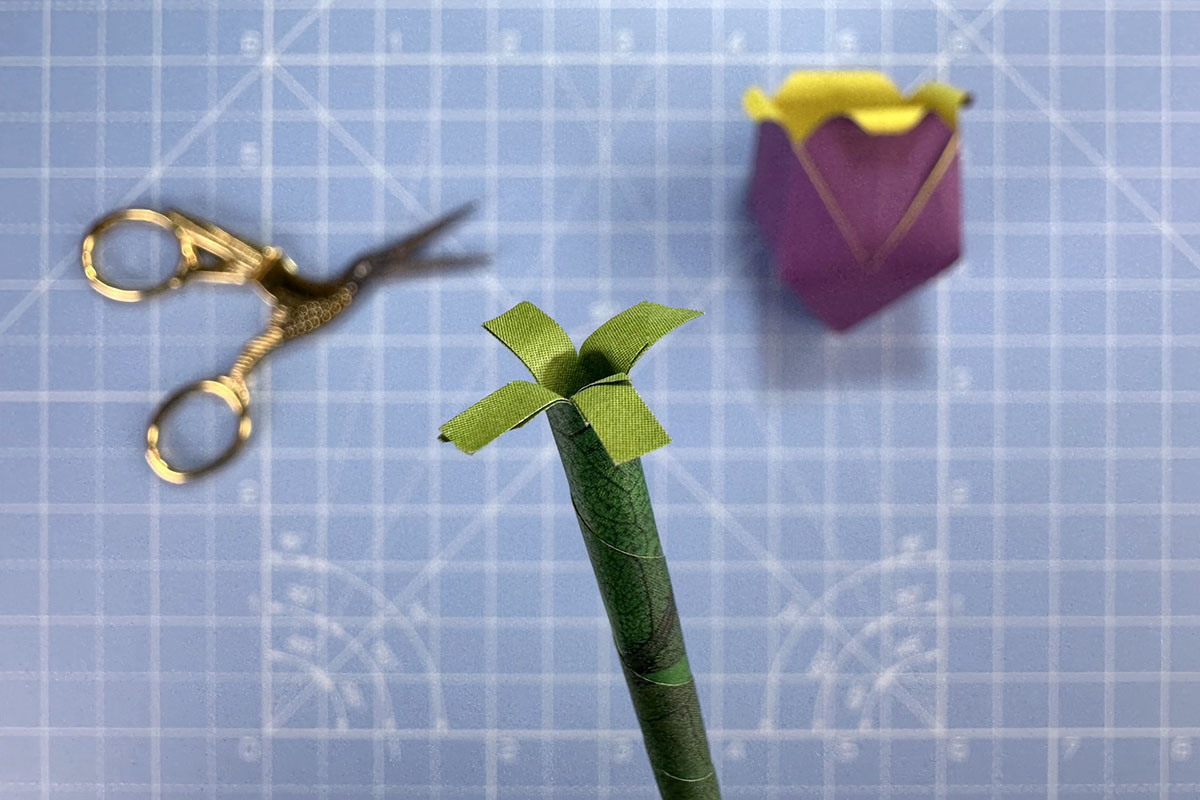
Cut a fringe at the top of the stalk, and fold outwards.
Step 3
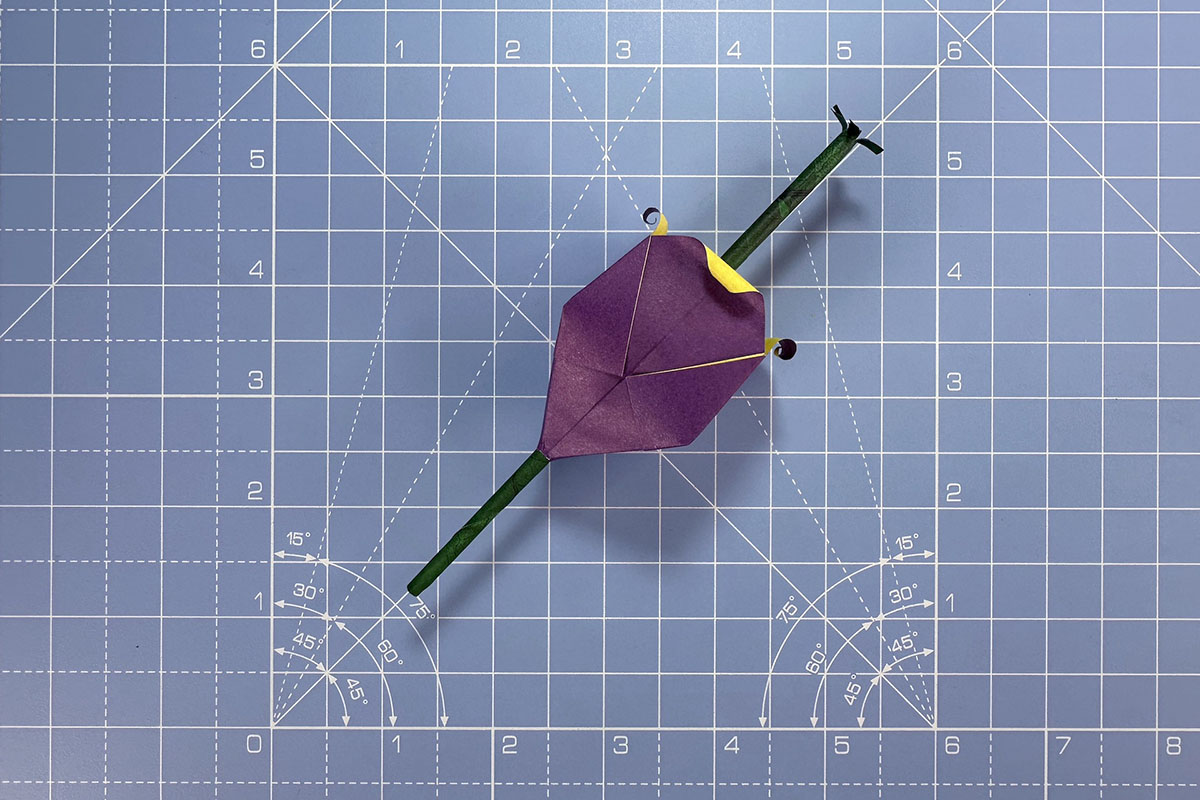
Put glue on the bottom of the fringe, and thread the stalk through the flower. Make sure the glued part of the stalk is in contact with the inside of the flower, so that it stays in place.
Step 4
Finally, glue the leaf onto the stalk.
Congratulations! You’ve completed an origami tulip.
