How to make a magic colour slider card

How to make a magic colour slider card

Conceal a sweet message with this fun, interactive design! Create a slider card with a little tab at the back that, once pulled, will move the top section of the card to reveal a greeting underneath!

Try 6 issues of any craft magazine from just £9.99

Published: September 23, 2019 at 6:47 am

A slider card is a great way of surprising your friends and family with a card that conceals a hidden message or image once pulled! The base card contains a concealed sliding mechanism that when pulled reveals the hidden scene behind.

Here, our designer has used the technique to 'colourise' stamped images, by first stamping the design on an acetate panel and then adding a coloured image behind which is revealed when the tab is pulled. You could add surprise sentiments behind the panel, or extra characters, too!

Check out out handy slider card video, which shows you how to create the sliding mechanism!

Follow the steps below to make this circular slider card.

You can then alter the instructions for your own base card designs!

Shopping list

  • Die-cutting machine
  • Stitched oval nesting dies
  • Grey card
  • Elephant stamp
  • Patterned papers
  • Acetate
  • Black StazOn ink
  • Alcohol markers
  • Satin ribbon
  • Adhesive pearls

Step 1

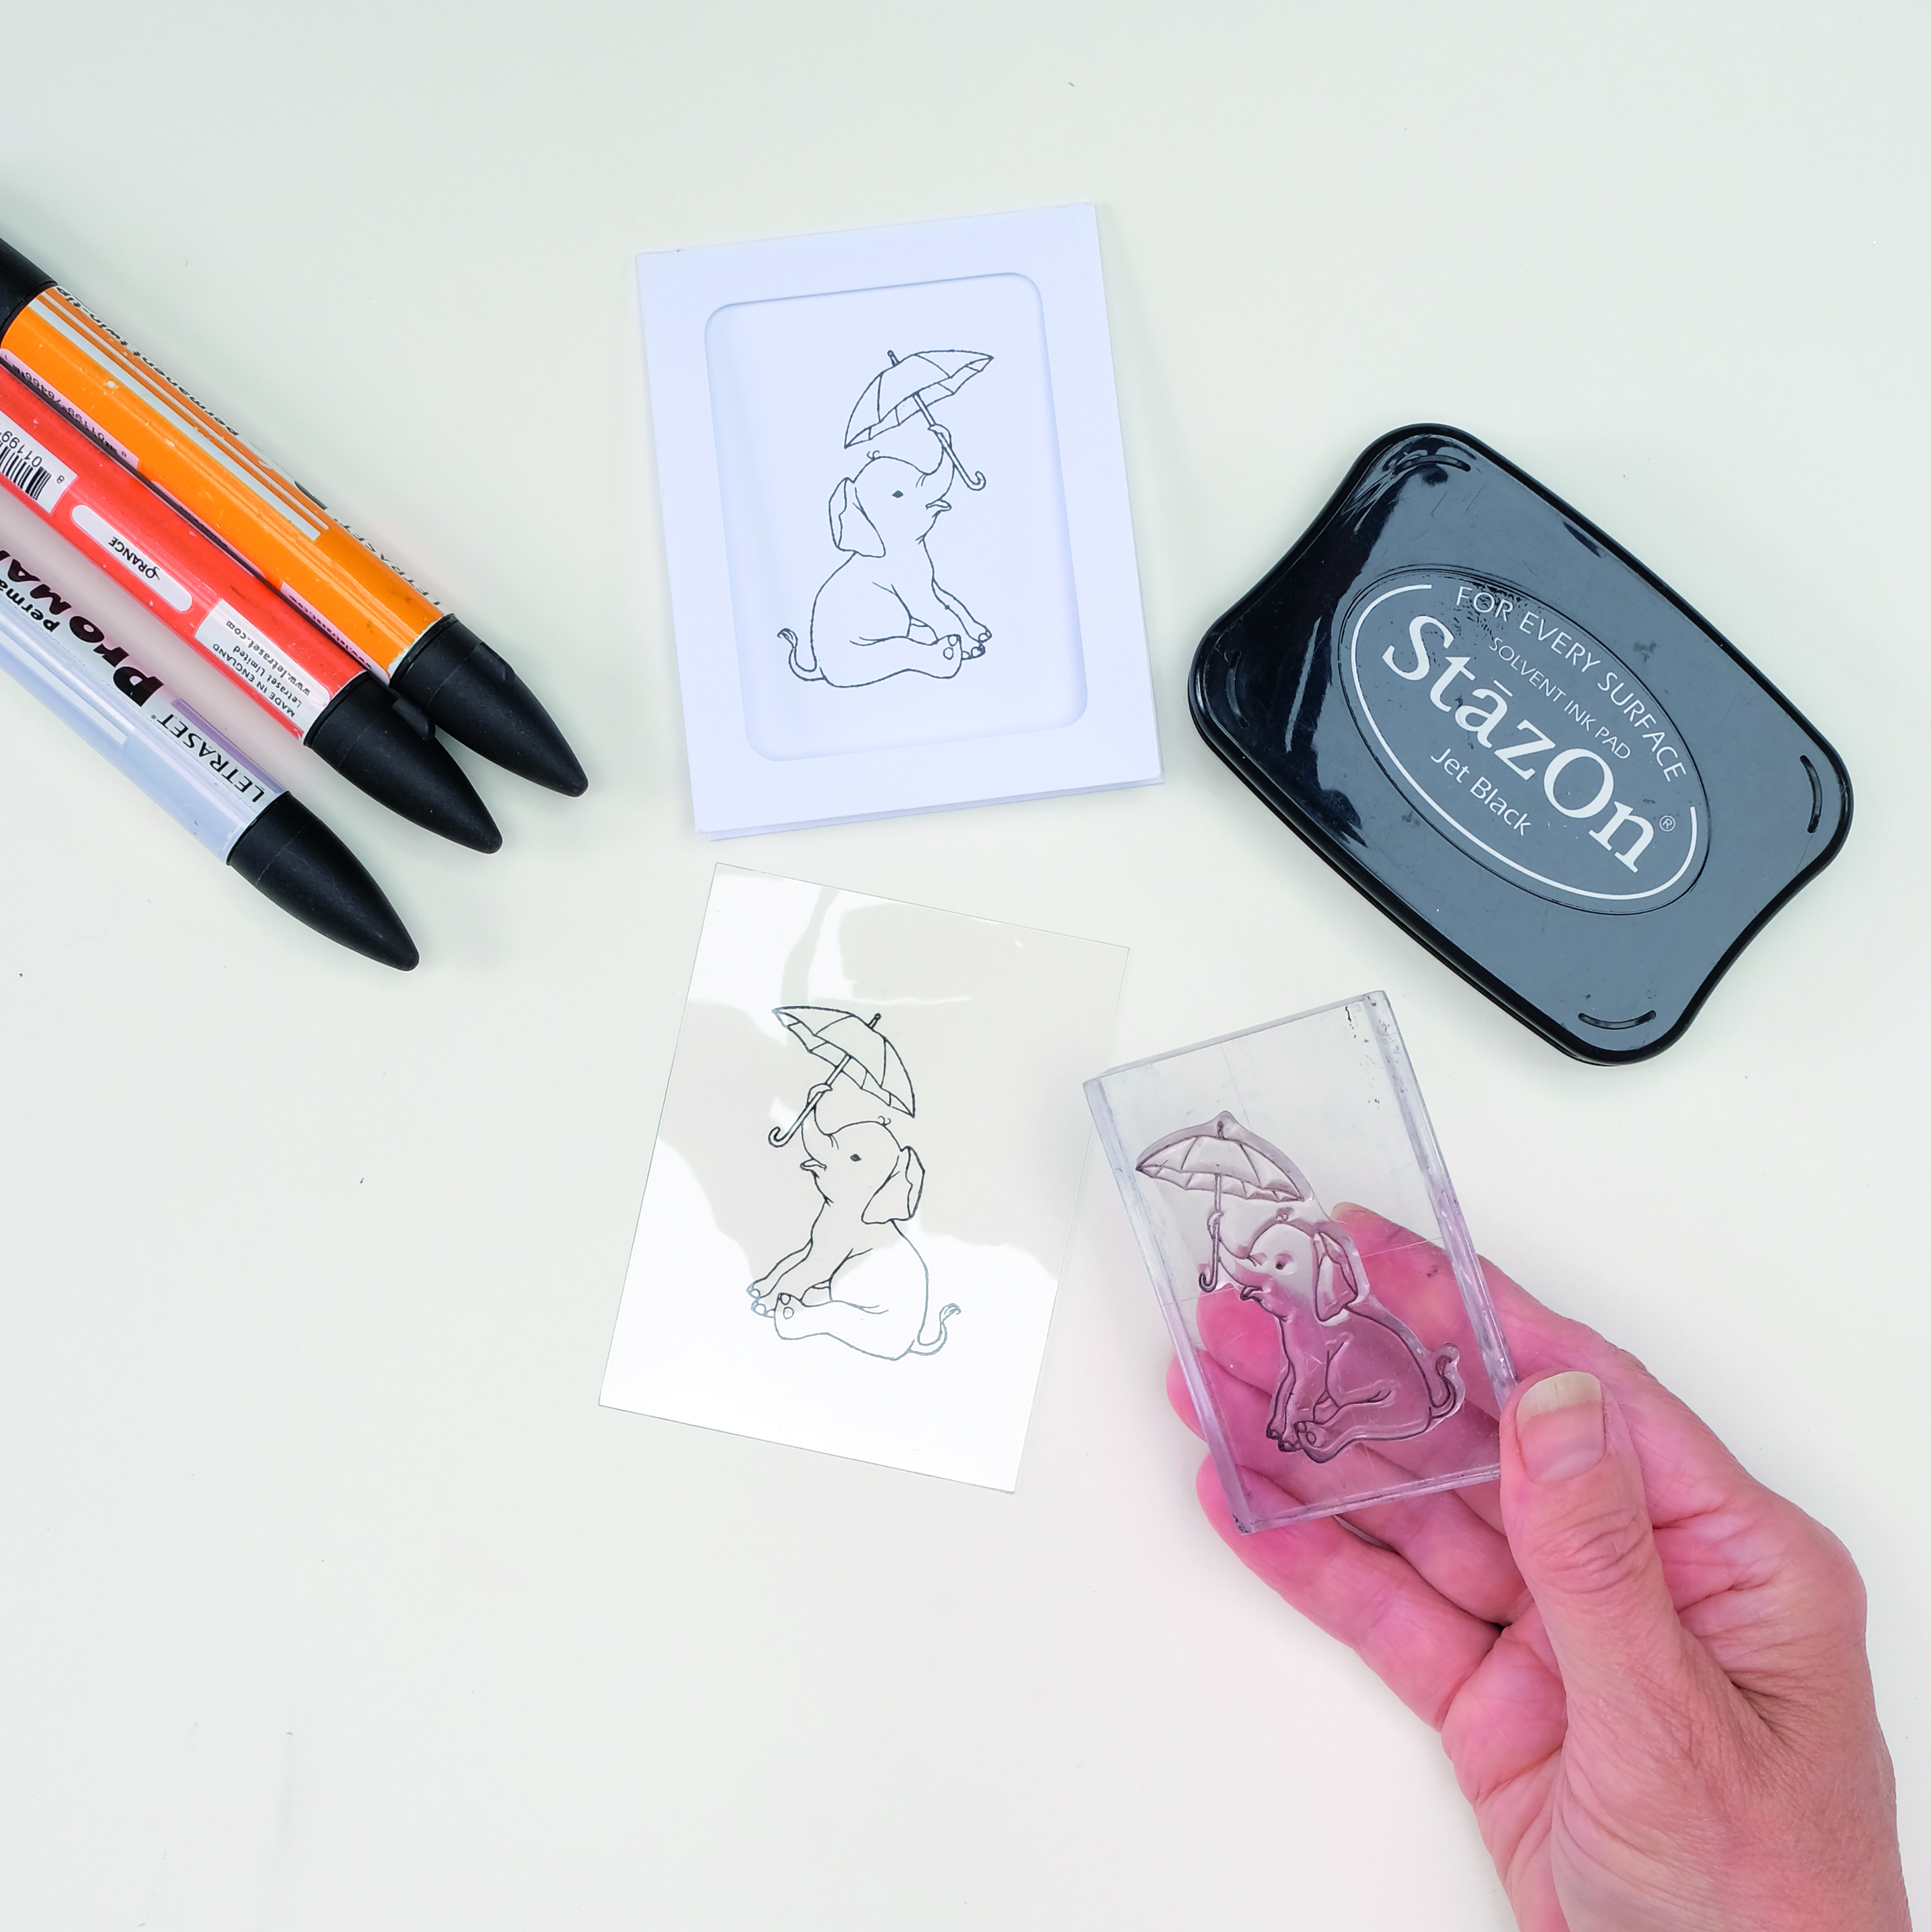
Fold a 28.8×11.6mcm piece of card in half to create a 14.4×11.6cm base. Cut an 11.6×8.4mm aperture in the centre of the card front. Cut a 14.4×11.6cm and a 13.2×9.6cm piece of white card. Cut two 0.8×13.2cm pieces of white card and a 0.8×11.2cm piece of white card. Attach the pieces together to create the pocket, slider and frame. Stamp an elephant in the centre of the pocket then stamp again onto a piece of acetate using StazOn ink. Colour the card image.

How to make a slider card_01

Step 2

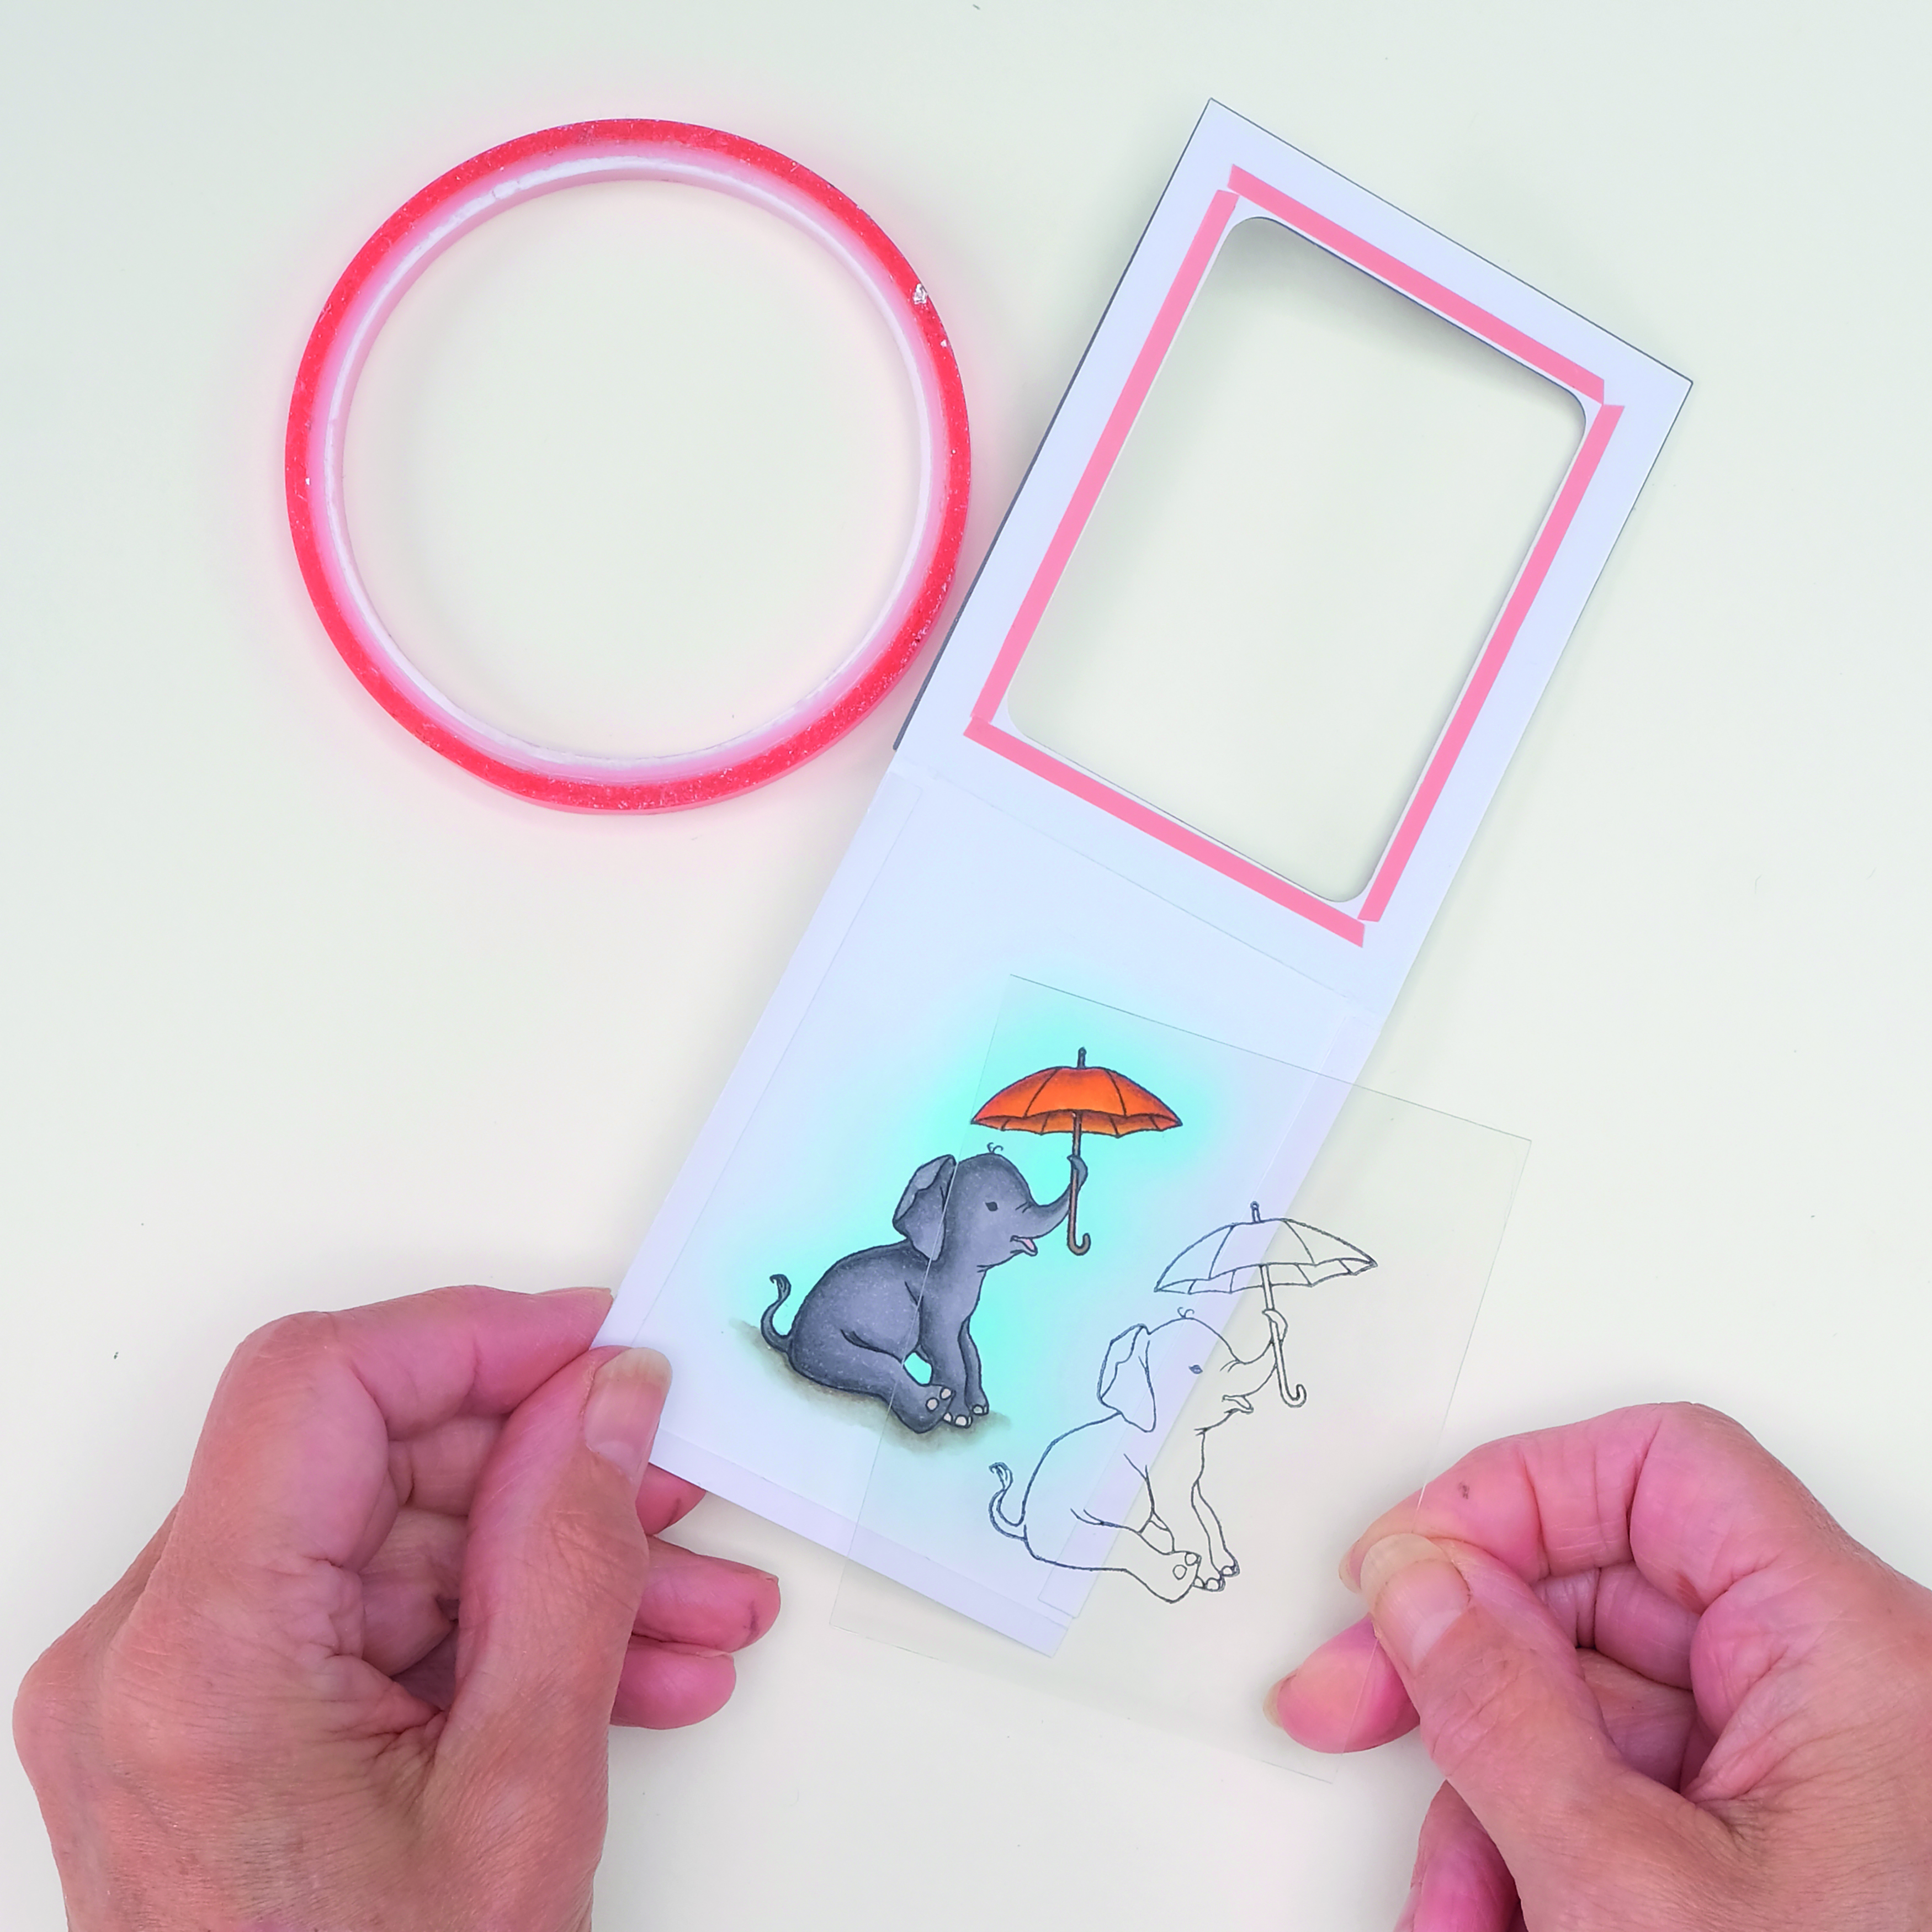
Place thin strips of double-sided tape around the aperture inside the pocket. With the pocket open, lay the acetate image on top of the coloured image, matching the lines exactly. Trim to fit and fold the front flap on top to secure the acetate in place.

How to make a slider card_02

Step 3

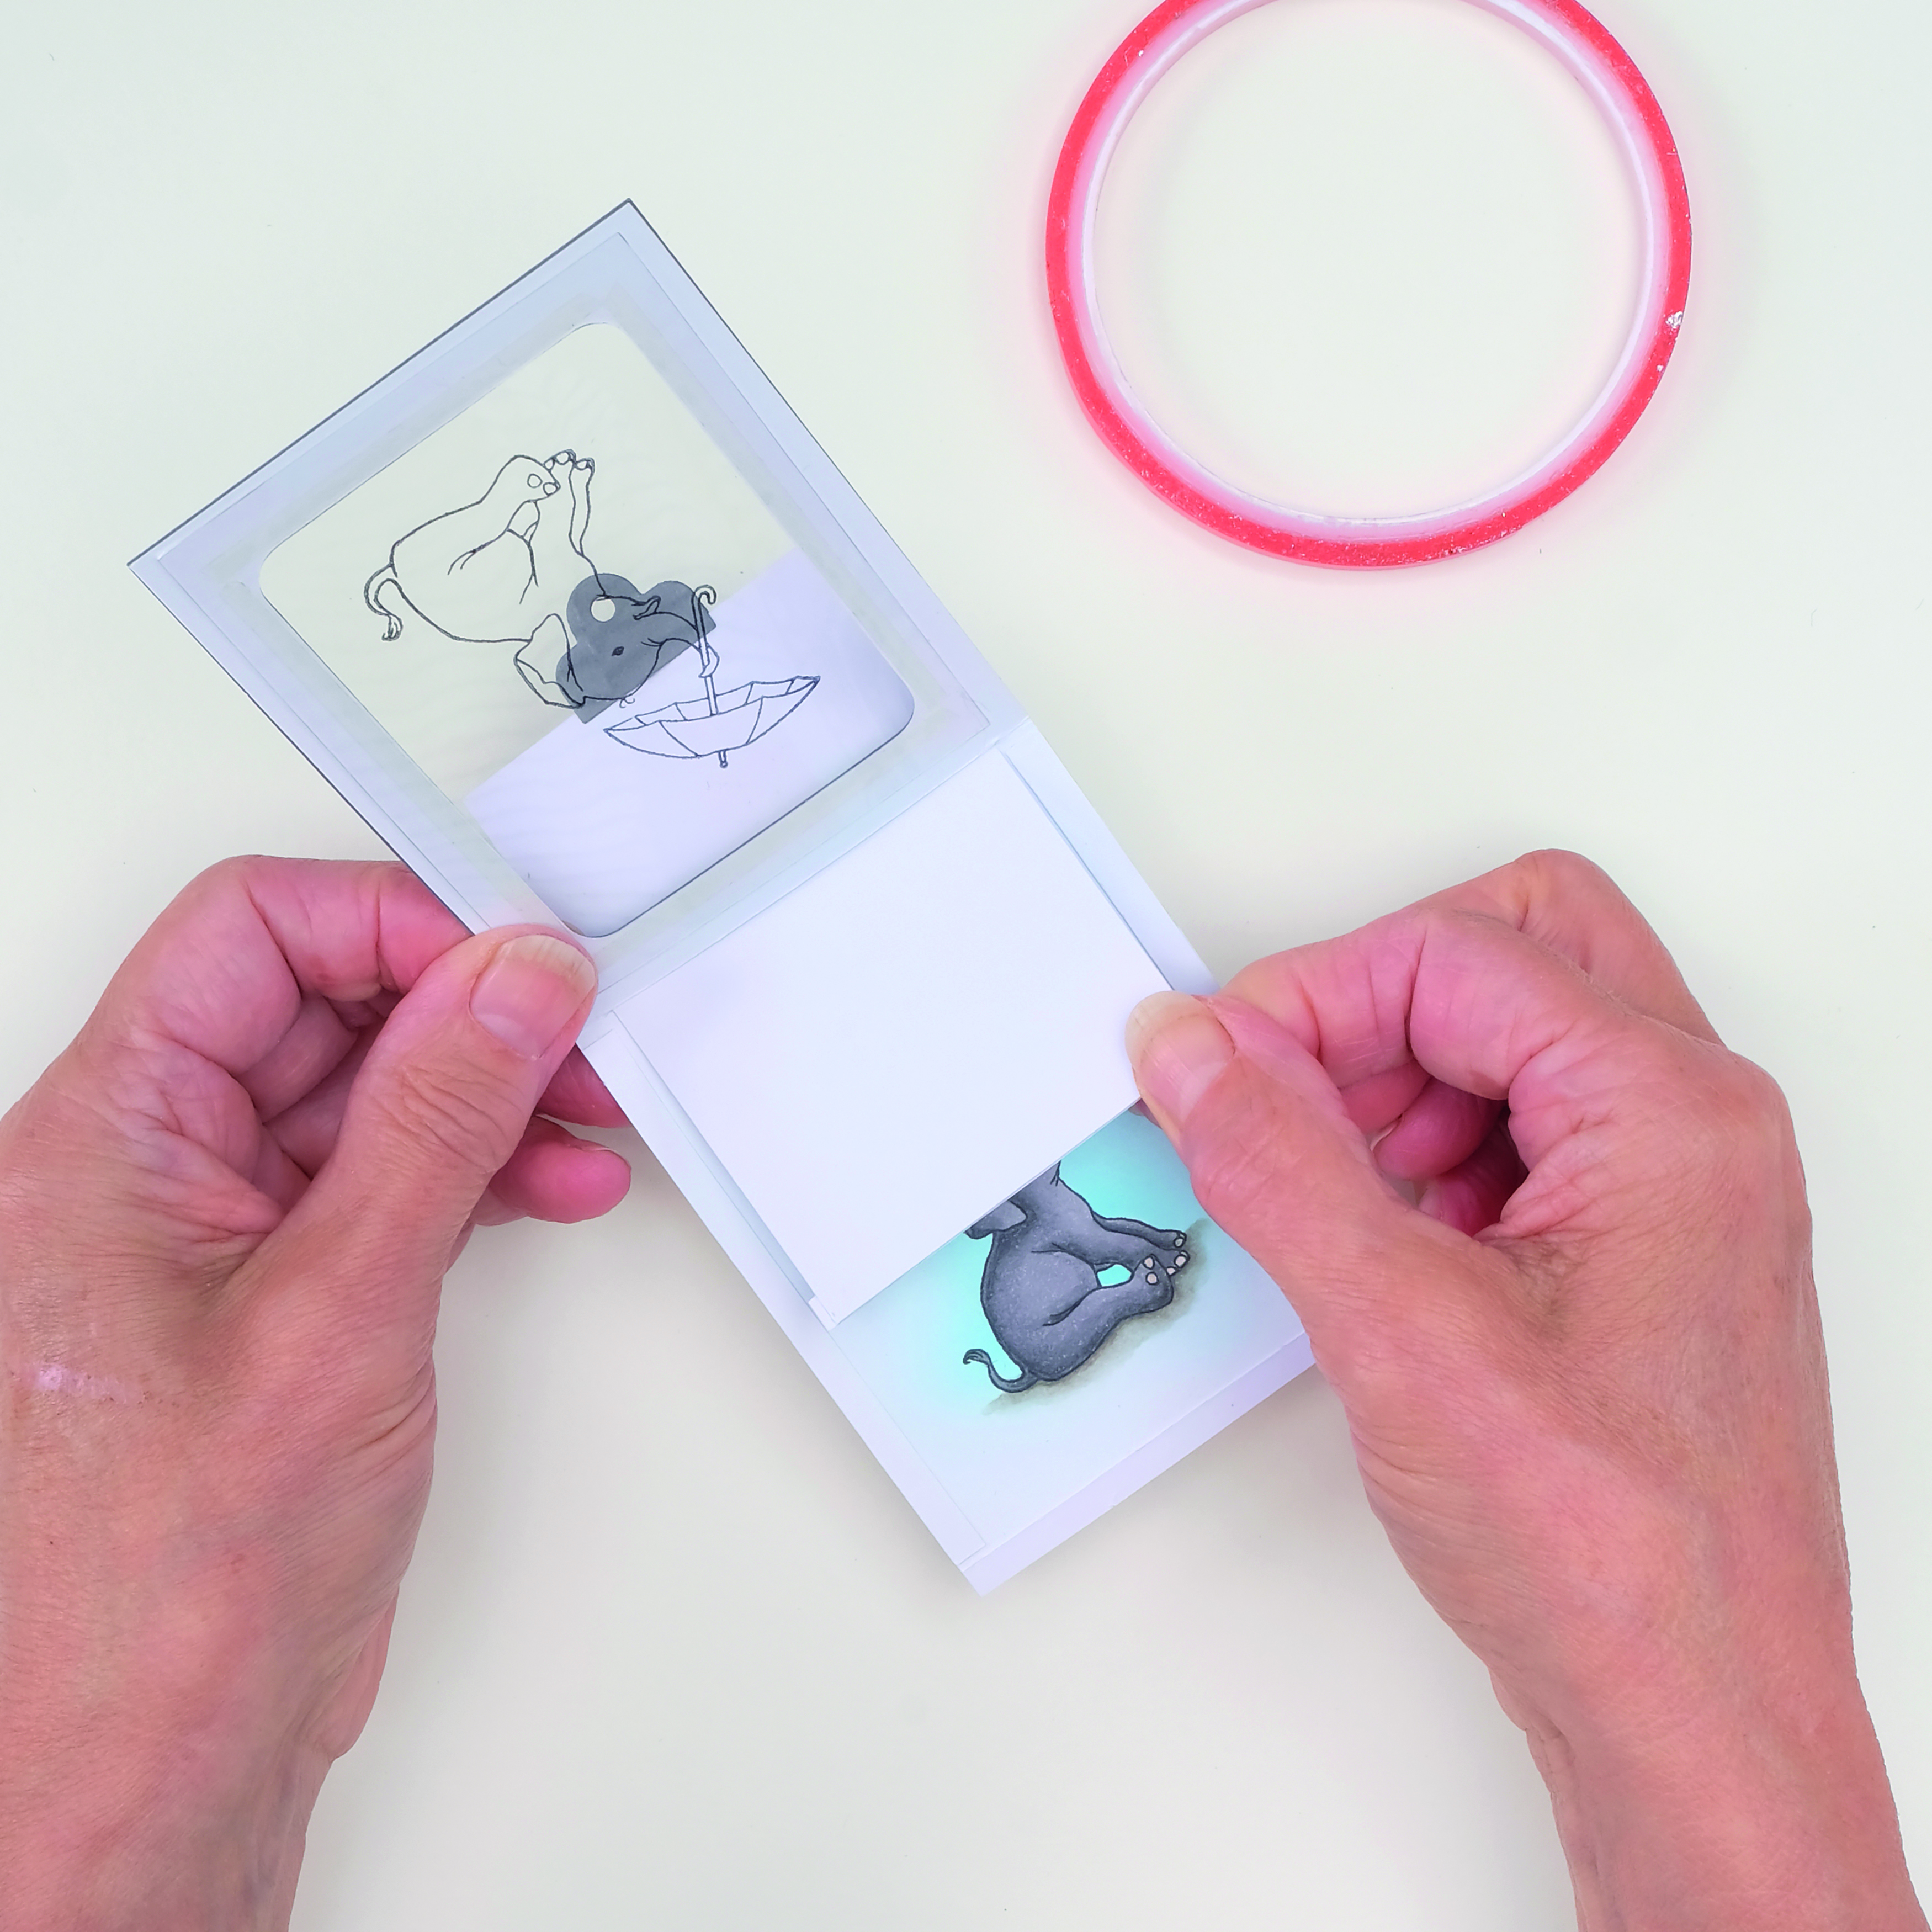
Cut a small tab from grey card, attach to the top of the slider and punch a hole. Put the slider through the opening at the top of the pocket (bottom strip down) and stick the sides and bottom of the pocket together. Add ribbon loop.

How to make a slider card_03

Step 4

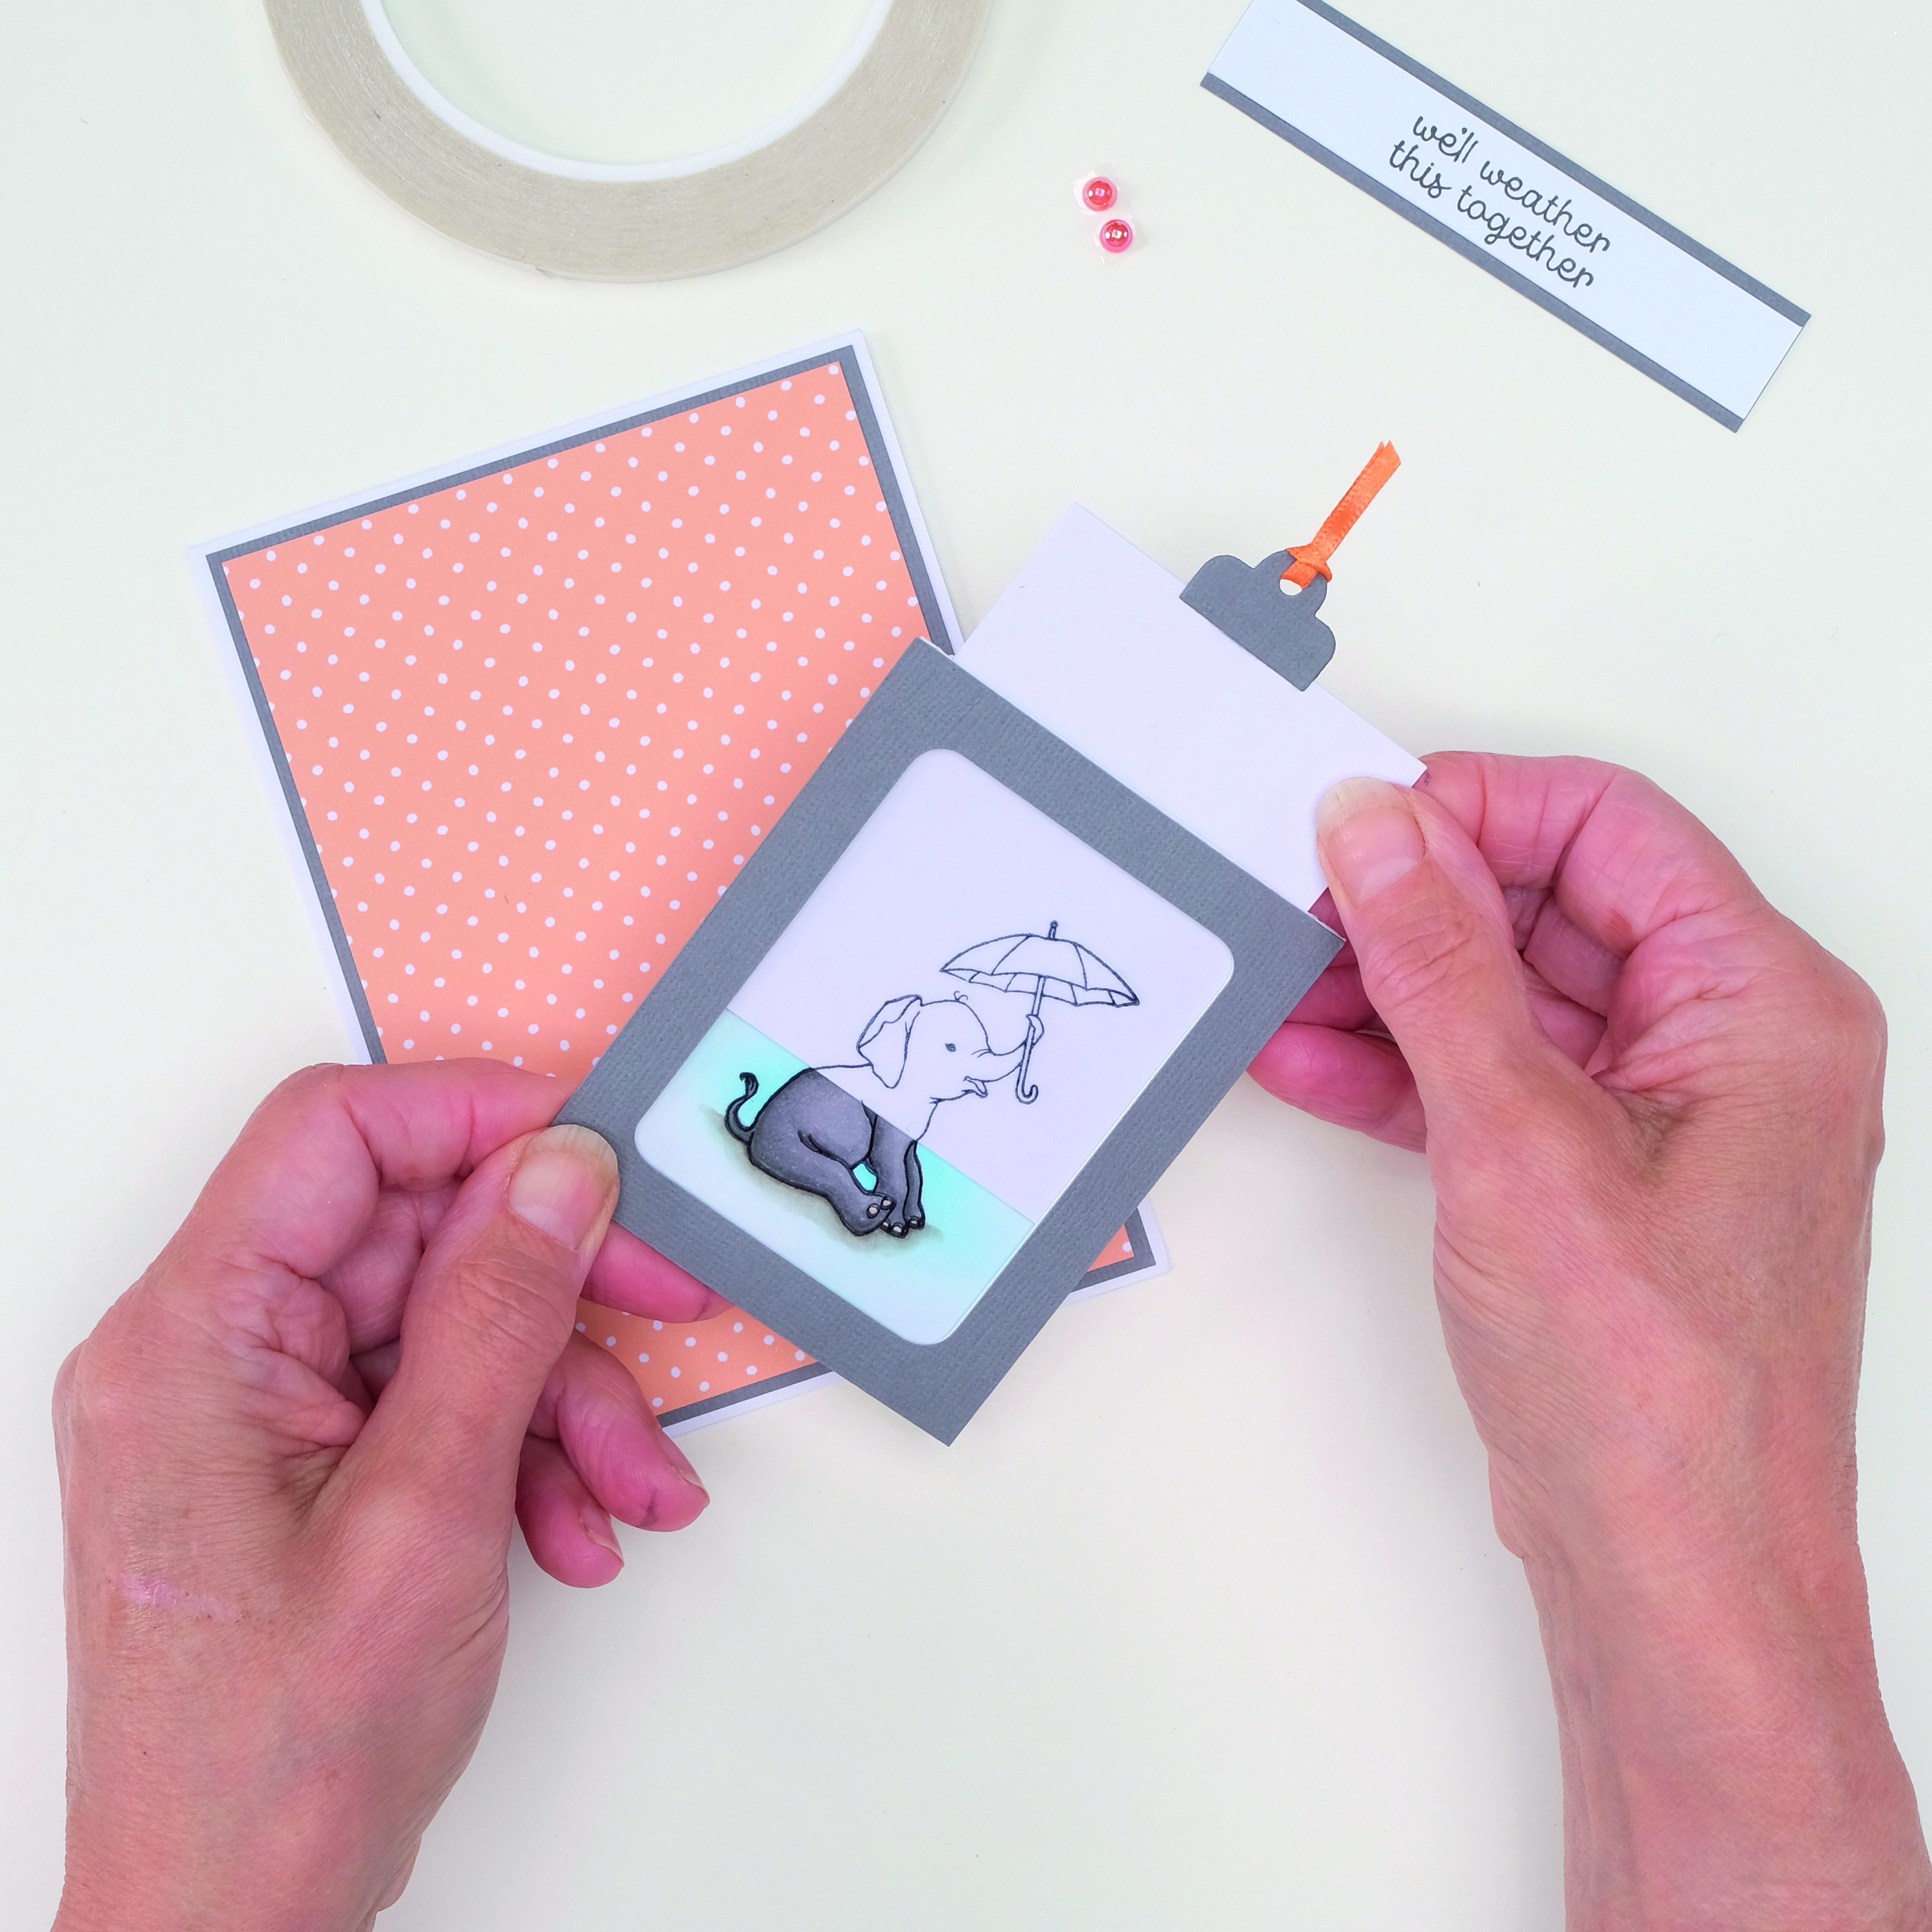
Layer a 95x140mm piece of patterned paper onto grey card. Attach to a 115x148mm white base card. Attach the magic slider pocket. Stamp a sentiment, cut out, layer onto grey card and add to base card. To finish, add orange pearls.

How to make a slider card_04