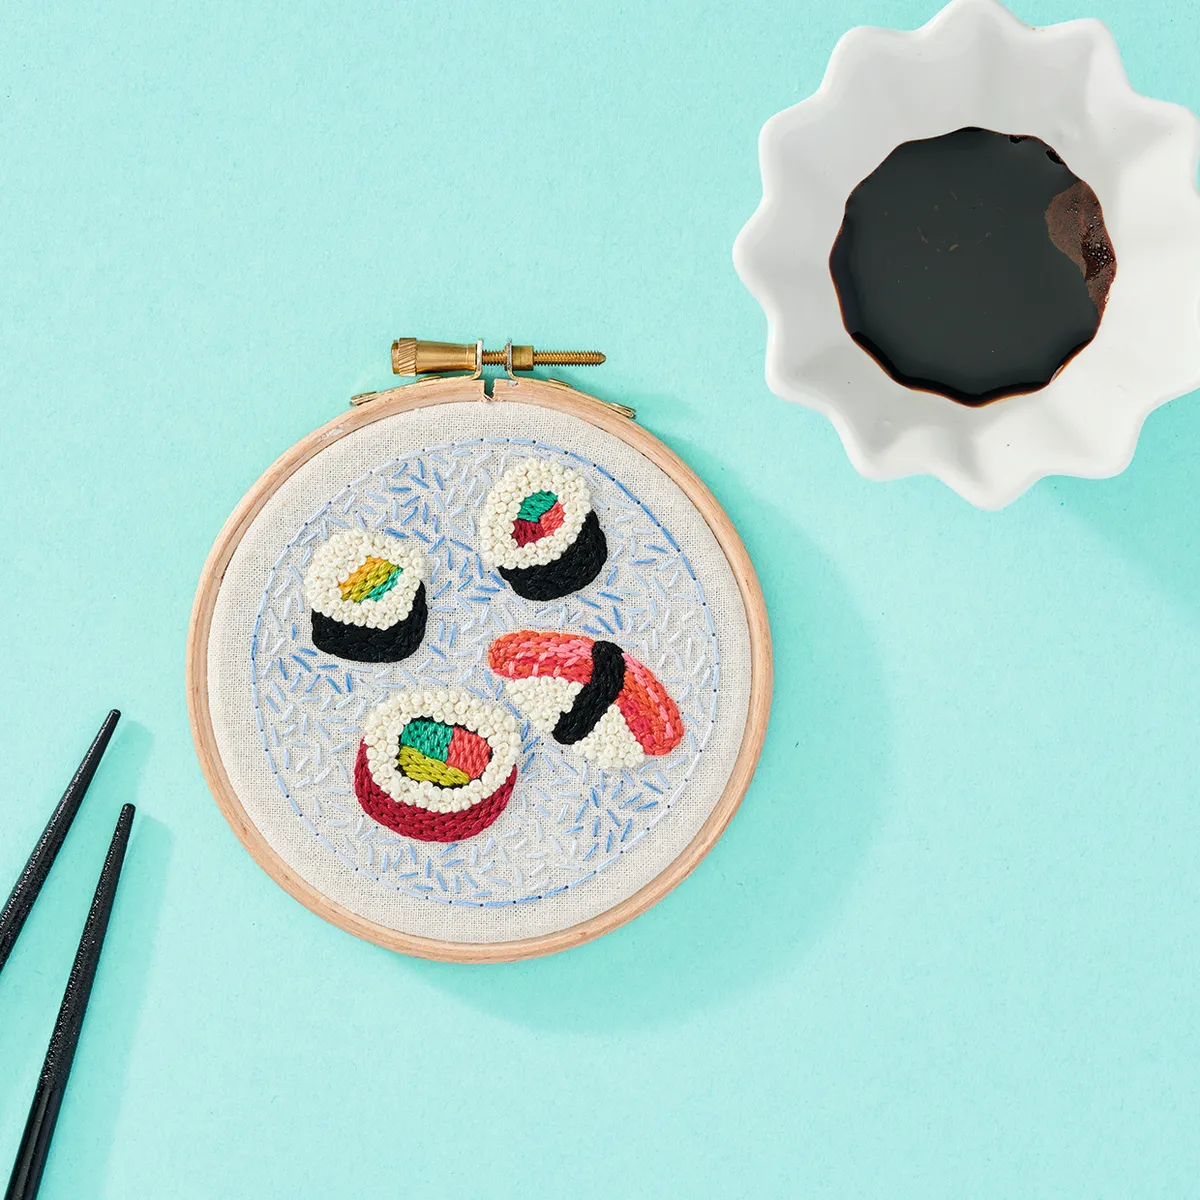
Ah, the joys of food embroidery designs! There is something so appealing about recreating edibles using needle and thread – especially when the design is as realistic as this sushi embroidery hoop. These lovely textures are created using a mix of French knots, Long and short stitch, Seed stitch and Backstitch, which all come together to create a spectacular Japanese embroidery pattern with a difference! Use our sushi embroidery template to transfer the shape you need onto your fabric. To find out how to do this, as well as other essential advice if you are new to needlework, check out our embroidery for beginners article.
This sushi embroidery hoop was originally published in Love Embroidery magazine issue 3
For more cool representations of food in crafts, take a look at our papercraft food cards or our free crochet biscuit pattern or try our how to make Jammy dodgers: The felt version tutorial. If there is a embroidery food you'd love to see a pattern for, leave a comment to tell us what you want to see!
Sushi embroidery materials
Fabric: 30x30cm, calico
Stranded cotton: black, variegated blue, burgundy, light coral, dark coral, cream, light green, medium green, dark green, light pink, medium pink, dark pink, yellow
Embroidery hoop: 10cm diameter
Basic embroidery kit
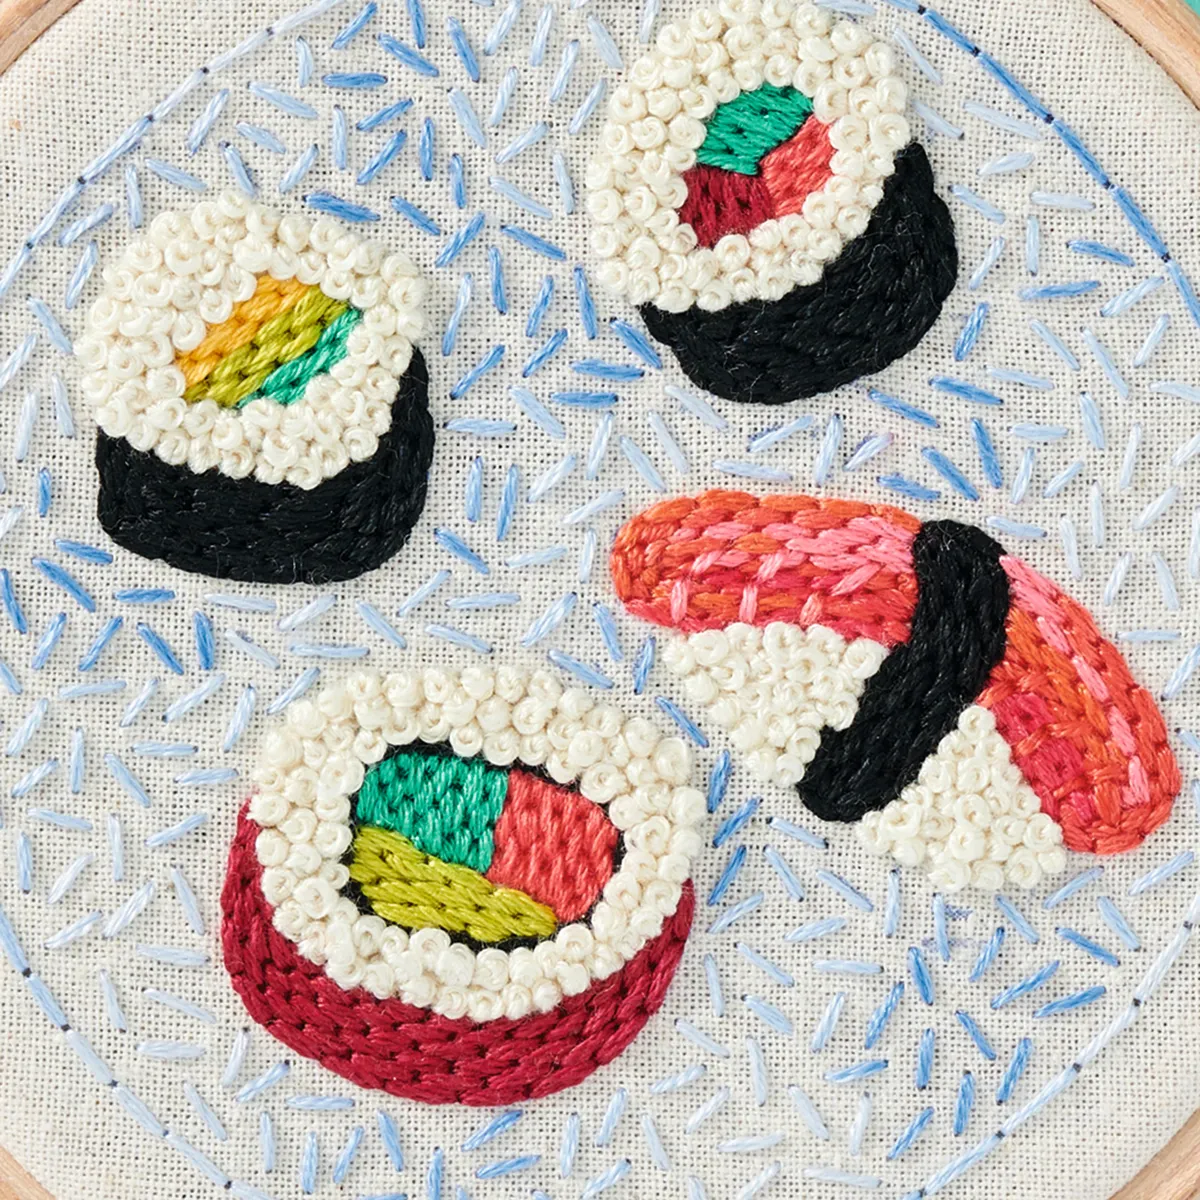
Sushi embroidery stitches
Backstitch Find advice on working this in our How to Backstitch tutorial
French Knots See our How to do French knots post for tips on getting these right
Seed Stitch See our Seed stitch embroidery tutorial for how to work this
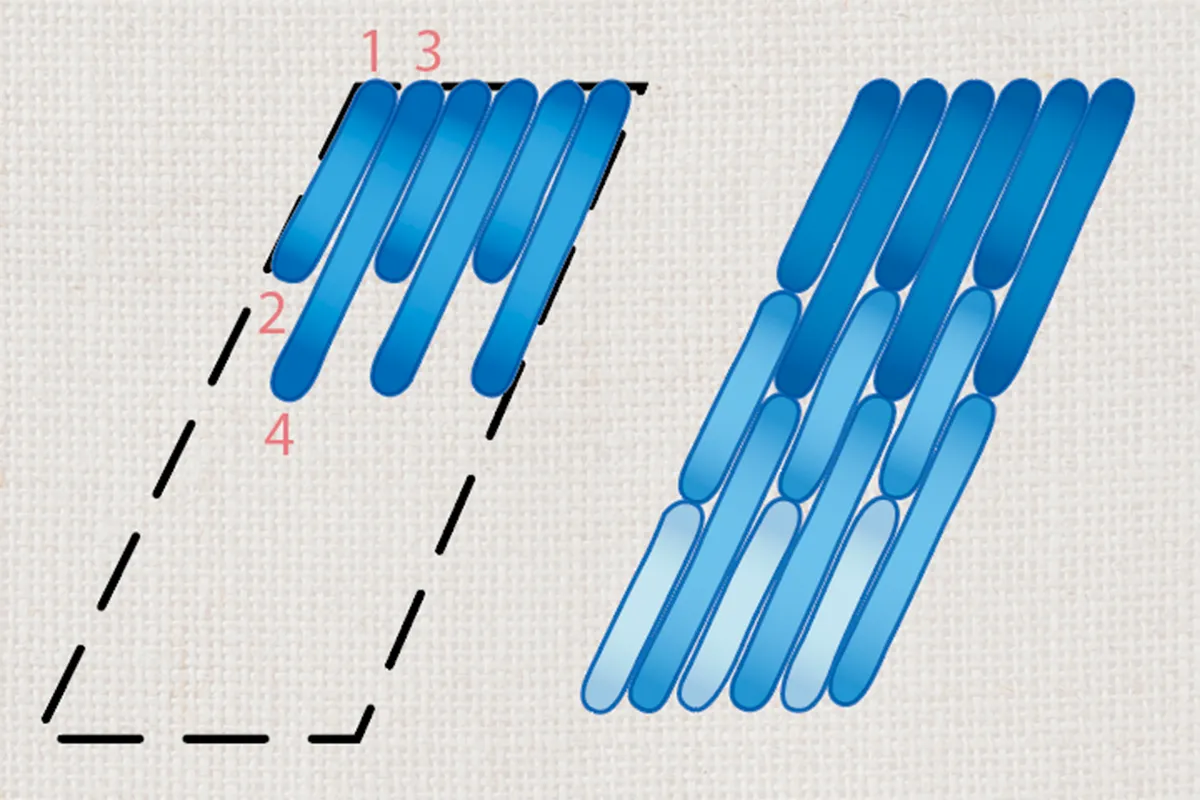
Long and Short Stitch Work alternate long and short stitches for the first row – the short stitches should be half the length of the long stitches. Bring the needle up at 1, down at 2, up at 3, down at 4 and so on. Subsequent rows are worked with the stitches all the same length, equal to the long stitches in the first row.
Step 1
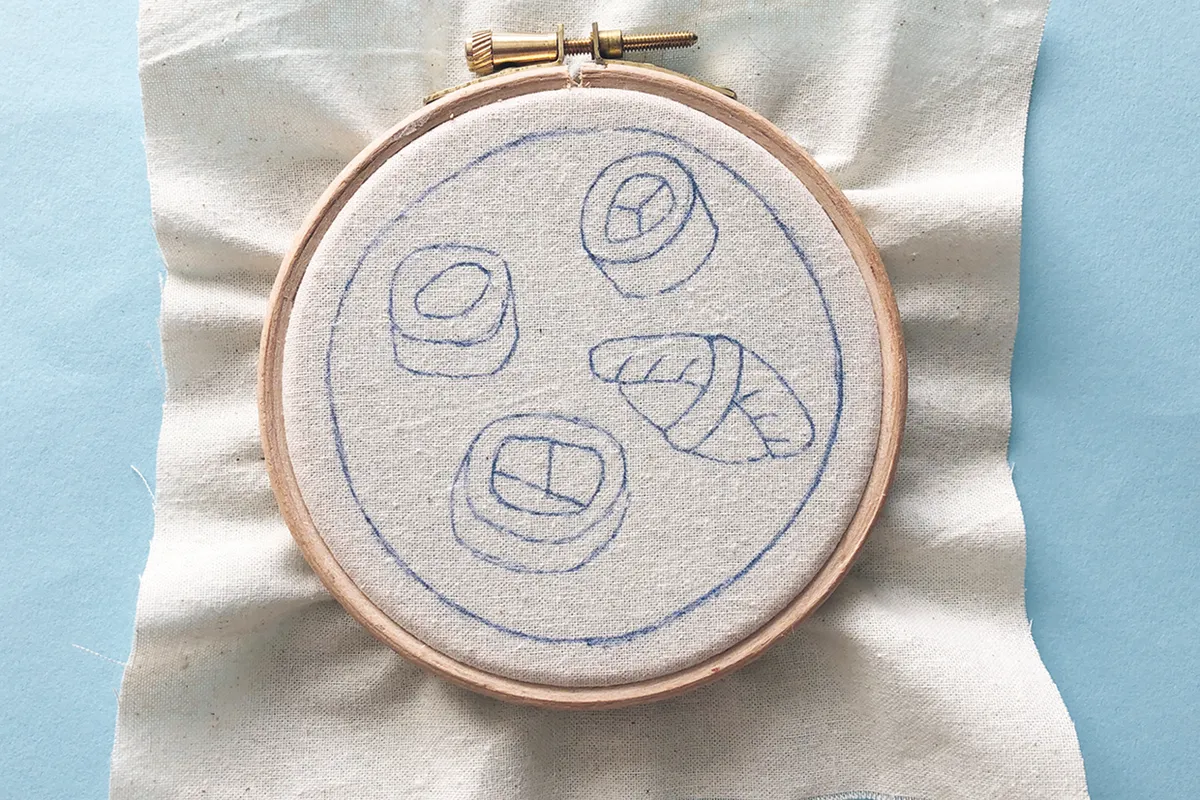
Transfer the design from the sushi embroidery template onto the centre of the fabric using your preferred method. We used a heat-erasable pen. Mount the fabric into a hoop.
Step 2
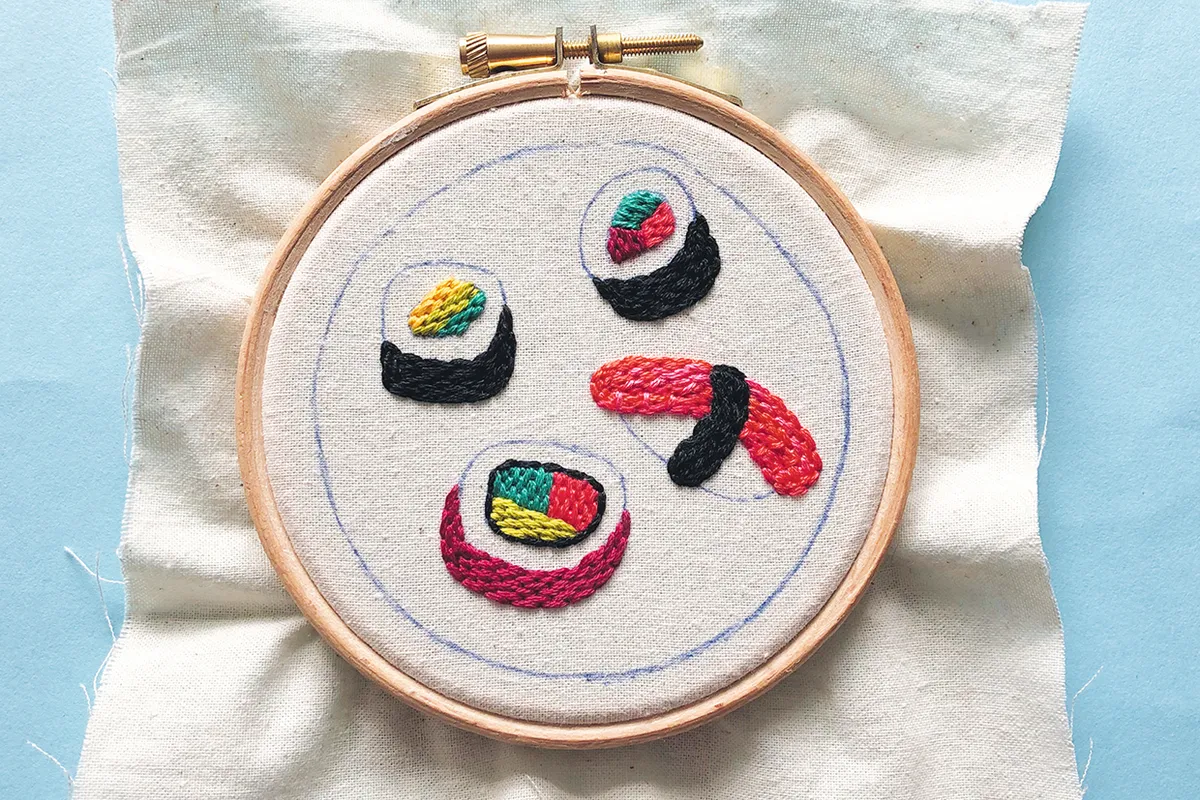
Start by stitching the sushi wraps and fillings in Long and Short Stitch using six strands. Choose colours to recreate your own favourite varieties of sushi. Black, dark pink or coral and dark green make great seaweed wraps, and greens, yellows, pinks and corals can represent a variety of fish or vegetable fillings. Add details like the lines on the salmon slice by working Backstitch on top. Separate the sushi fillings from the rice by adding a line of black or dark green Backstitch.
Step 3
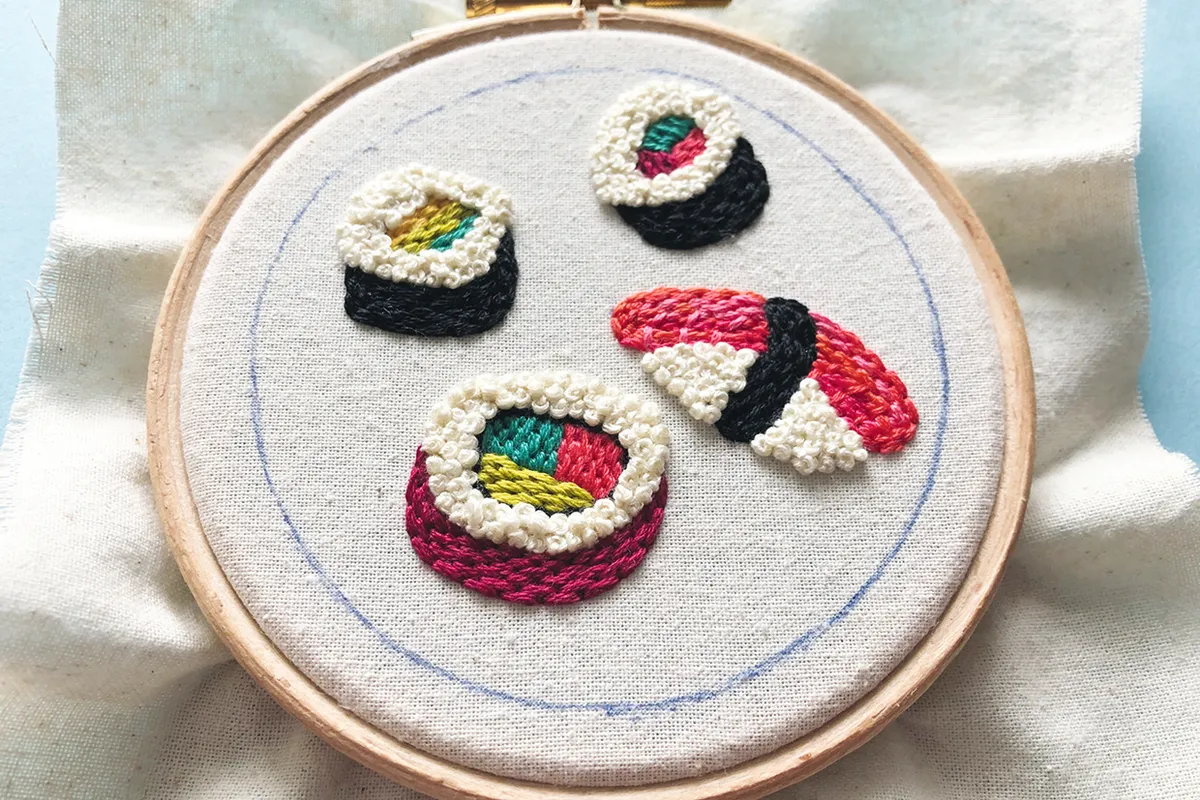
The sushi rice is created using cream French Knots. Use four strands and wrap the thread three or four times. The knots will be nice and chunky, and have a tactile, 3D effect. Start stitching the knots on the outline of the rice sections to try to keep the shape tidy before filling in the space. Don’t worry if you lose a defined line as this will just make your sushi look well-stuffed.
Step 4
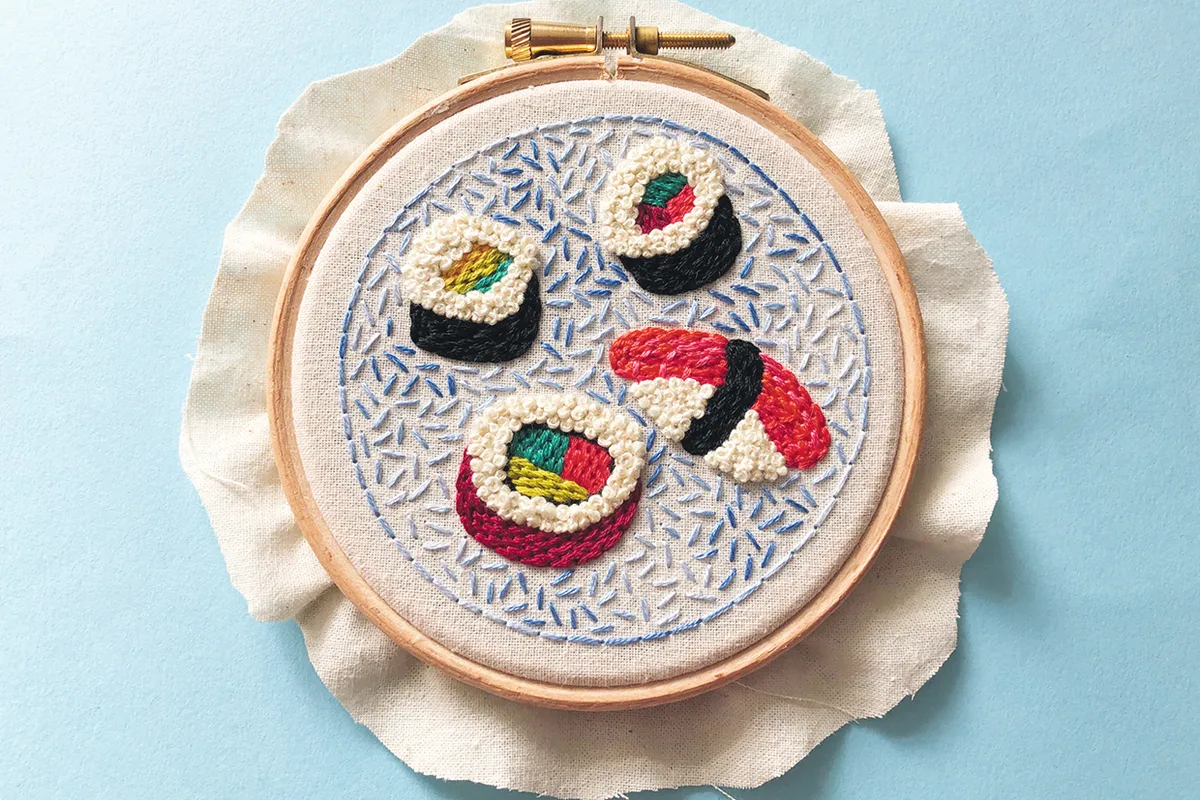
Backstitch around the edge of the plate using three strands. Kirsty used a variegated thread as it creates the effect of stitching with more than one colour. Next fill in the plate around the sushi with Seed Stitch to add depth to the design.
Step 5
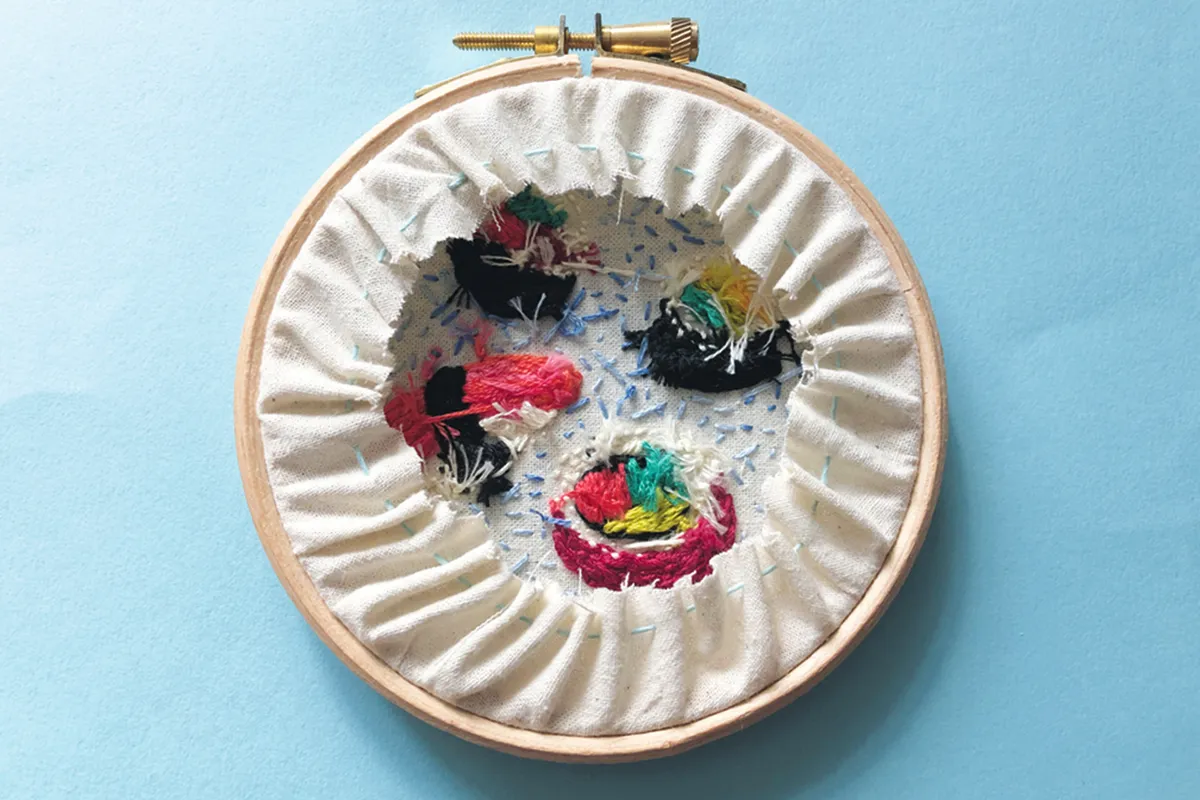
Once your stitching is complete, cut the fabric 5cm bigger than the outer hoop all around. Place the inner hoop onto a piece of felt and cut around it. Mount the fabric back into the hoop then work a running stitch round the edge of the fabric and pull it tightly to gather the fabric. Slip stitch the felt over the back of the gathered fabric to neaten.
Step 6
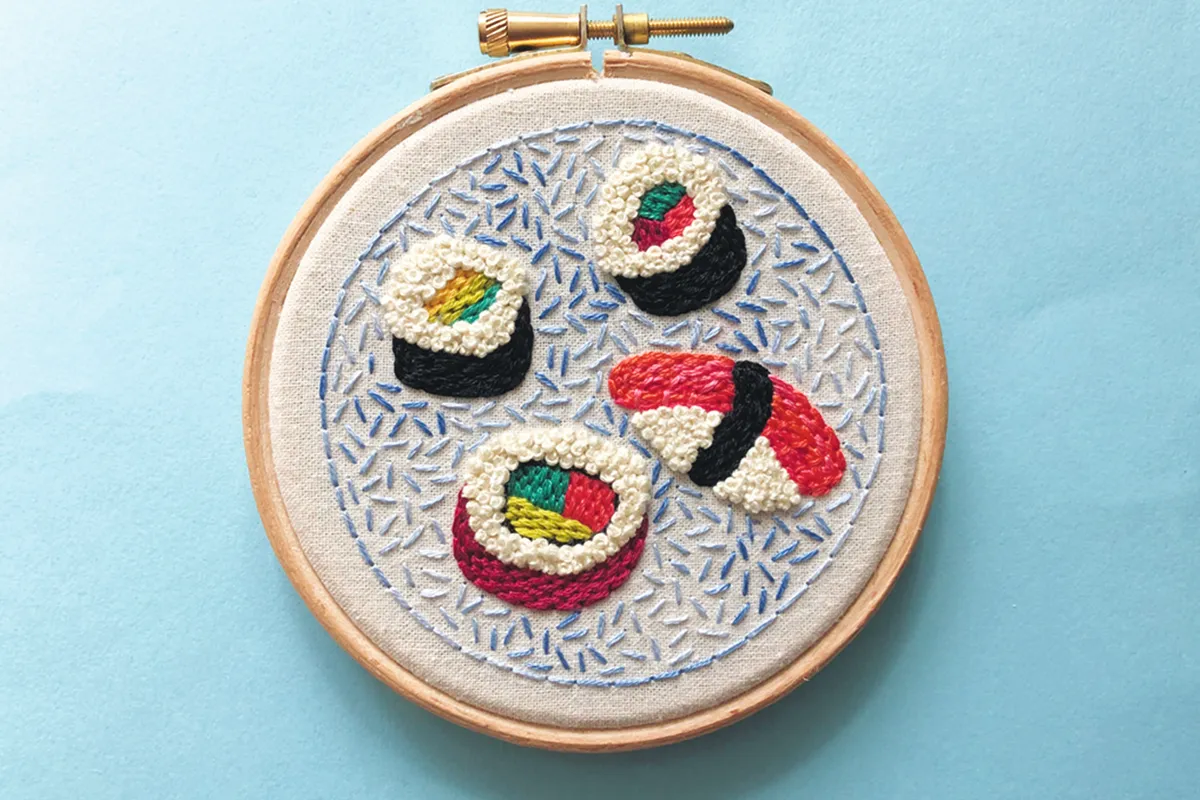
Your hoop is now ready to hang. Framing it using this drawstring backing method allows you to adjust your fabric tension, as it may need adjusting from time to time.
More like the sushi embroidery hoop
If you like the sushi embroidery hoop, we have more brilliant free projects like this right here on Gathered! For more Japanese embroidery patterns, you need to check out our Sashiko patterns and projects for beginners library post! Bring a touch of kawaii cuteness to all your outfits by adding cat embroidery pockets, or try our cats cross stitch patterns for a different feline friend, or make some embroidered shoes. Take a look at our camping embroidery designs or our bee embroidery patterns.
