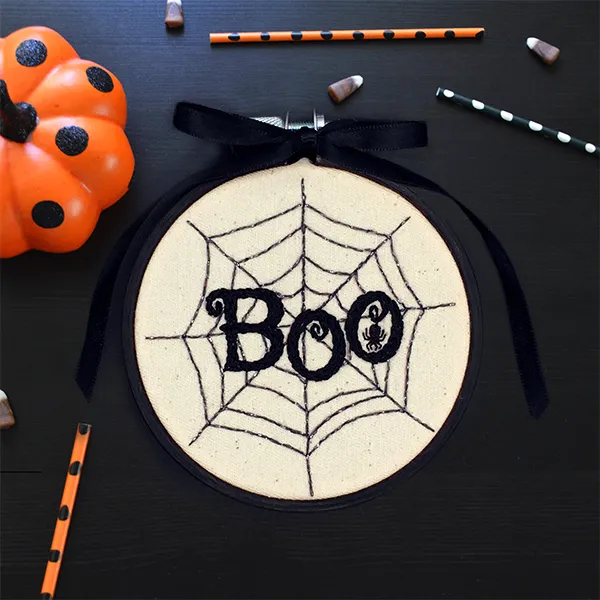
Have a go at this boo-tiful spider web embroidery pattern. Using spine-tinglingly (we know, enough already) sparkly glittery Etoile thread, it’s the perfect quick stitch to get you in the mood for the spooky season.
The very talented Lisa Neal shows you how to make her Halloween embroidery pattern below. Make sure you check out her website for more embroidery patterns, designs, and kits.
Be sure to also check out our collection of Halloween embroidery kits for more spooky stitching.
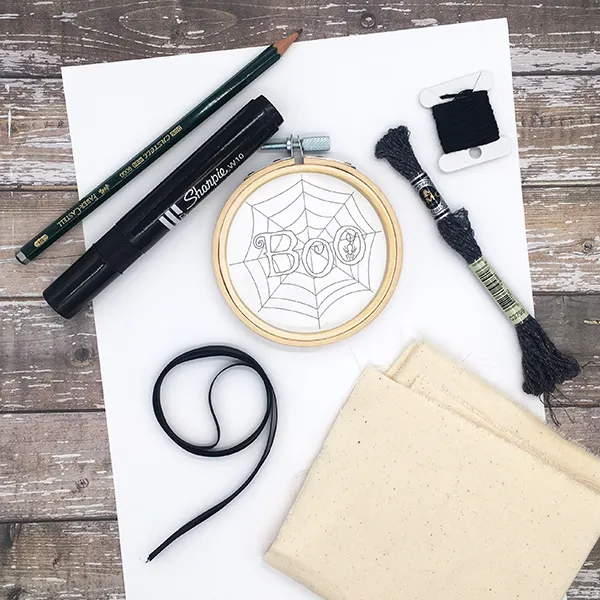
Materials for your spiderweb embroidery pattern

- 8cm (3”) embroidery hoop
- 14cm (5”) square of plain fabric, we used natural calico
- DMC stranded embroidery thread in 301 (black)
- DMC Etoile embroidery thread in C3799 (silver-grey)
- 40cm (16″) black ribbon
- Black permanent marker
- Printed Halloween pattern
- Pencil or embroidery marker
- Needle
- Scissors
- Masking tape
If you need a little help with some of the stitches mentioned in this blog post check out our library of embroidery stitches.
We also have a complete guide on embroidery for beginners, a great way to get started on this therapeutic craft.
How to stitch our spider web embroidery pattern
Step 1

First, transfer the printed pattern onto the fabric. Tape the pattern to a window, then tape the fabric over the top. Use the pencil or embroidery marker to trace the lines of the pattern onto the fabric.
Remember, if you just want the spiderweb embroidery pattern without the Boo wording, you'll need to adjust the template slightly. Use the background spiderweb but do not trace over Boo.
Next, secure the fabric in the hoop. Lay the fabric over the inner hoop and place the outer hoop over the top, then twist the screw to hold the fabric in place.
Step 2

Begin by stitching the outline of the letters. Cut an arm’s length of thread and separate out three of the six strands. Thread the needle with three strands and stitch over the lines using stem stitch, keep the stitches small and tight.
Step 3

Continuing to work with three strands of black thread, fill in each letter using backstitch, working up and down each letter, and filling in all the spaces.
Step 4

Stitch the spider using one strand of black thread. Stitch the legs first using backstitch, then fill in the body with satin stitch.
Step 5

Next, move on to the web. Cut an arm’s length of the sparkly Etoile thread and separate out two of the six strands. Thread the needle with these two strands and work around the web, covering all the pattern lines with a small tight backstitch.
Step 6

Remove the finished stitched from the hoop. Use the permanent pen to colour the outer ring of the hoop black, making sure no wood is left showing. Leave the hoop to dry completely.
Step 7

Once the hoop is dry, put the embroidery back in the hoop, making sure it’s mounted centrally.
Step 8

Trim away the excess fabric in a circle roughly 2cm (3/4″) larger than the hoop.
Step 9

Turn the hoop over. Take a long length of black thread and stitch around the edge of the excess fabric using running stitch, leaving both ends of the thread loose
Step 10

Pull the two ends of the thread tight to gather the excess fabric behind the hoop. Tie the ends together securely.
Finshing your spiderweb embroidery pattern
Finally, loop the black ribbon through the screw at the top of the hoop and tie a bow. Ta-dah! Your spiderweb embroidery hoop is ready for you to hang up in your home.
Stitch creepy crawlies this spooky season
There's nothing better than stitching home decor for the season! This spiderweb embroidery pattern is bound to get you in the mood for Halloween. It would also make a lovely addition to a Boo Basket.
Discover more Halloween crafts with Gathered
Now you've completed your spiderweb embroidery pattern, why not stitch our collection of Halloween embroidery patterns too? There's plenty to choose from.


