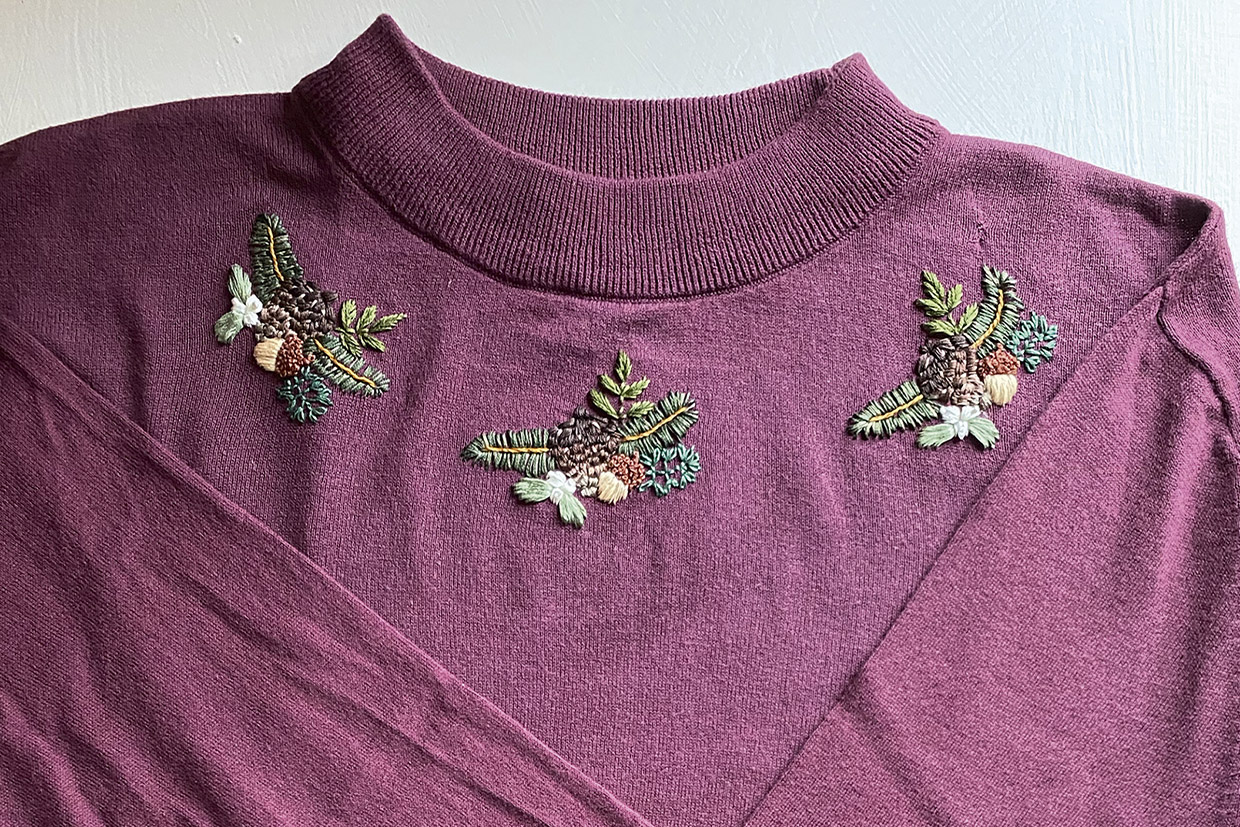
Step 1
Optional step: If your jumper is brand new:
If you’re using a new jumper, wash it following the instructions on the label before you begin stitching. Then, allow it to dry fully and iron if needed.
This is to avoid dye transferring from the jumper onto the threads. It will also prevent shrinkage when you wash it after stitching.
Transferring your design
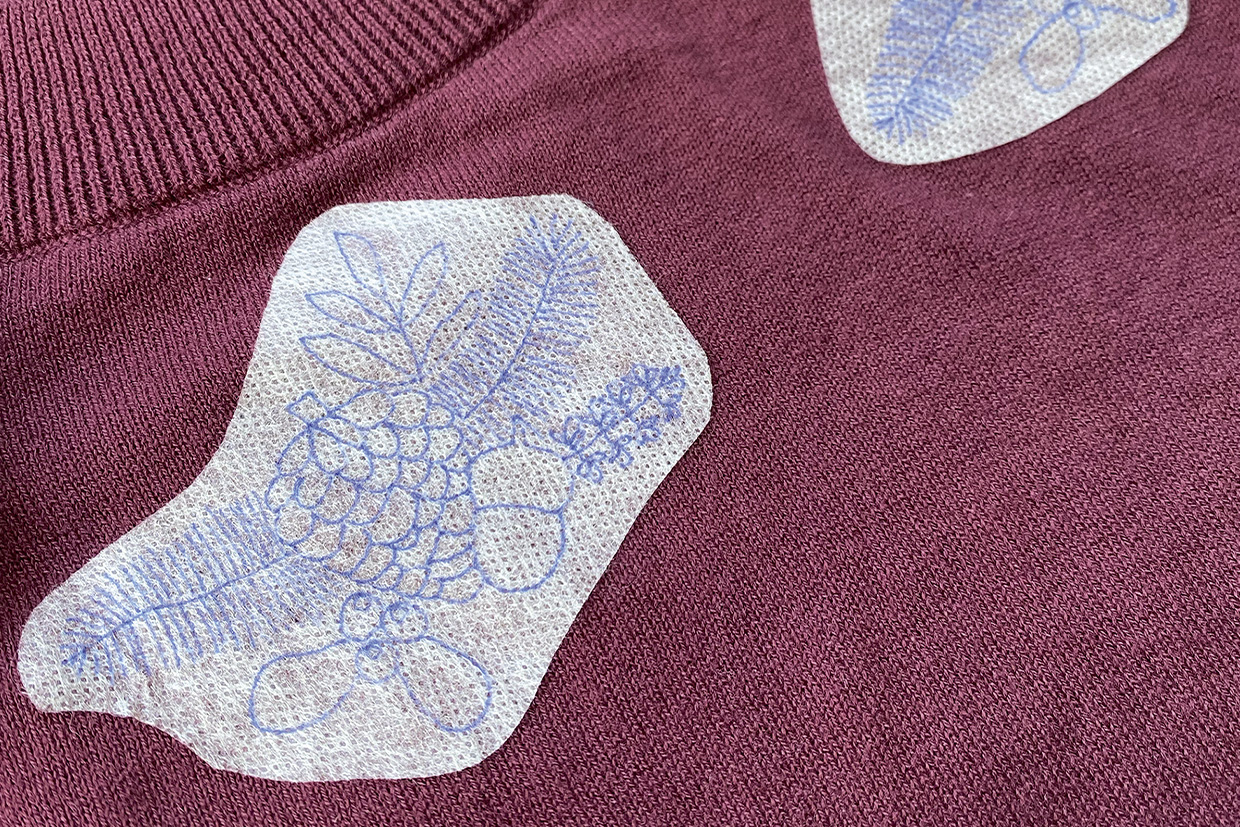
Transfer the design from the template onto your adhesive water-soluble stabiliser. Then cut around the design leaving a 5mm border.
Note: This design is a repeat pattern which we’ve used three times around the neckline.
Arrange the cut-out designs on the jumper before you stick them down. Once you’re happy with your placement, peel off the backing paper and stick each one in position.
Step 2
Mount your designs
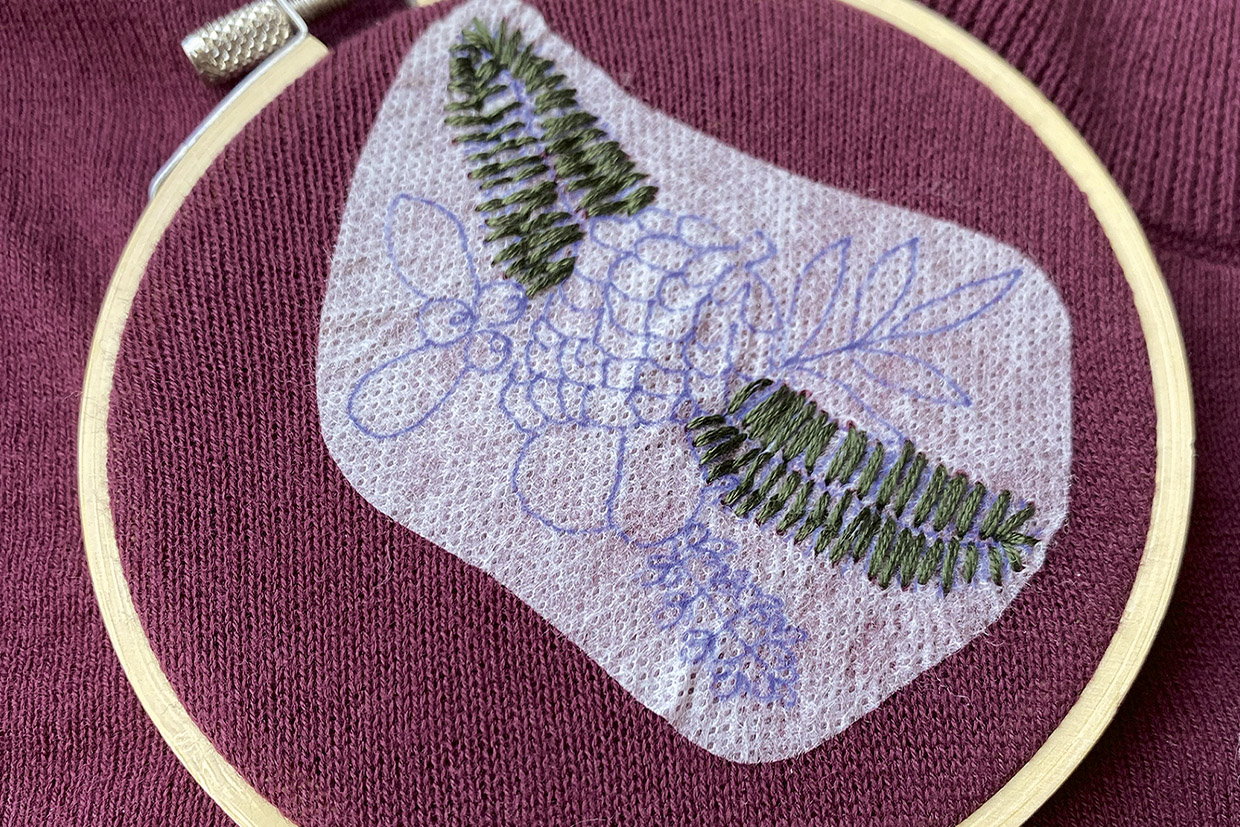
Mount the first of the designs in a hoop. You want the fabric to be taut, but not overstretched. The jumper fabric will be quite stretchy, so just take care not to pull too tightly or you’ll distort it.
Top tips for the embroidered jumper
To avoid hoop burn, take the jumper out of the hoop in between stitching sessions. Try not to pull the jumper fabric too tightly within the hoop.
Be sure to use colourfast thread when working on garments you intend to wash – check the label before stitching.
If you are unsure if your threads are colourfast, test them first by wetting a length of the thread, laying it on scrap white fabric and then allowing it to dry. If the fabric remains white when dry then your threads should be safe to stitch with.
Step 3
Stitching the pine needles
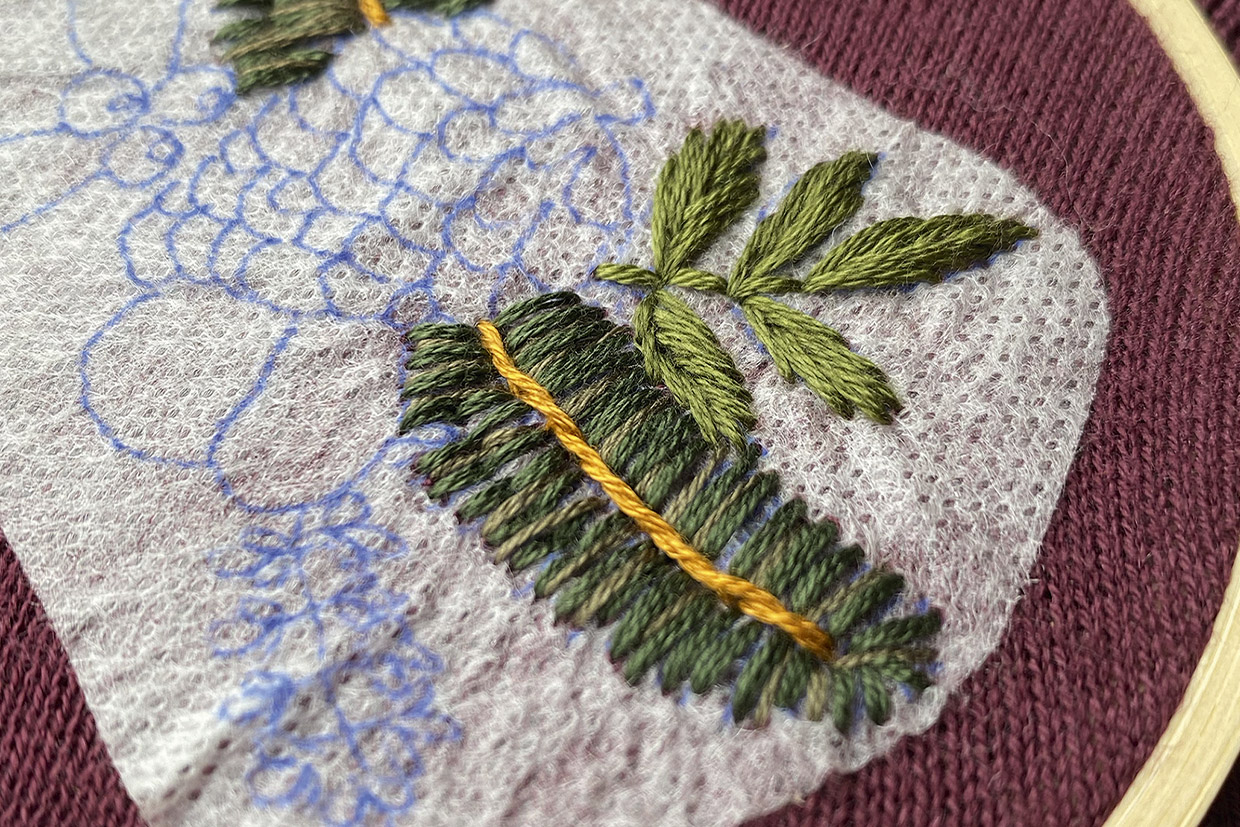
Starting with the pine needles, use three strands of dark green to stitch alternating needles on the design. Use Straight Stitch for the shorter needles and Backstitch for the longer ones.
Tip: Avoid working overly long stitches on garments as the thread will sag and become baggy when the fabric isn’t held under tension.
Next, take two strands of dark beige and embroider lighter pine needles in the gaps between the darker ones. Layer some over the top of the previous stitches to create depth and texture.
Step 4
Working the pine needle stem
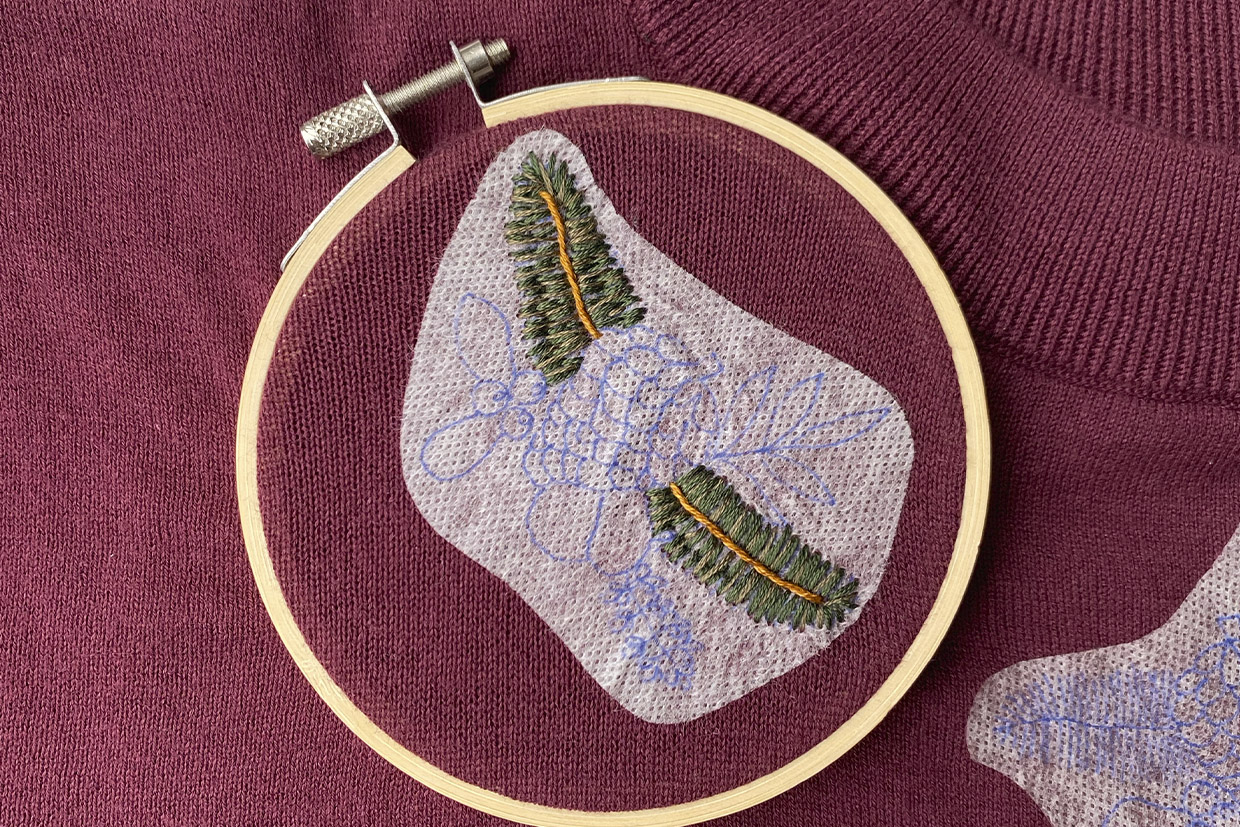
Now, work the pine needle stem in Whipped Backstitch using three strands of caramel. This Whipped Backstitch creates a solid line of stitching with a twisted effect, which looks great for stems and branches.
Step 5
Stitching the leafy sprig
For the large leafy sprig on the top right of the design, work the leaves using Fishbone Stitch in three strands of moss green. For the stem, use three strands of the same colour to work a line of Backstitch.
Step 6
Stitching the smaller looped leaf sprig
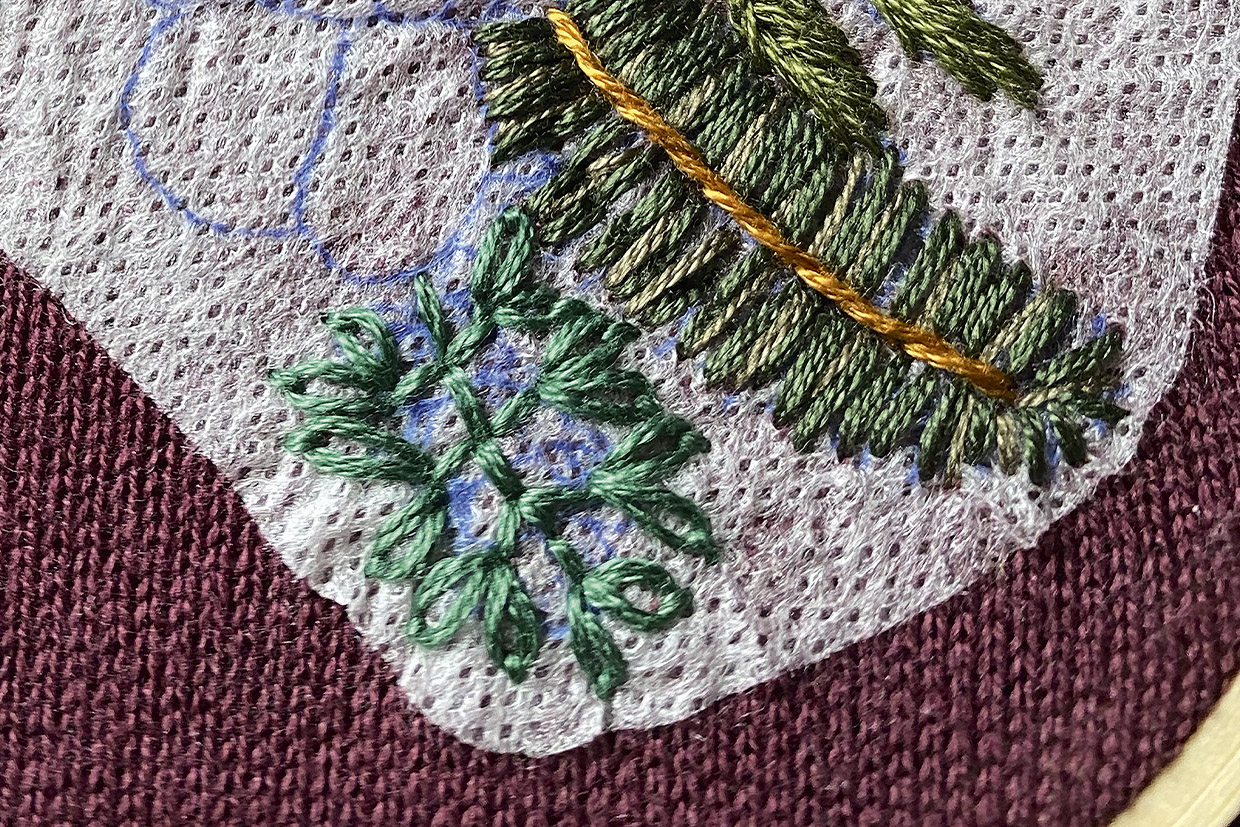
Moving onto the smaller looped-leaf sprig on the bottom right of the design, use three strands of green to work the stems in Backstitch. Then, add looped leaves to the ends of the stems in Lazy Daisy Stitch using three strands of green.
Step 7
Stitch the mistletoe leaves
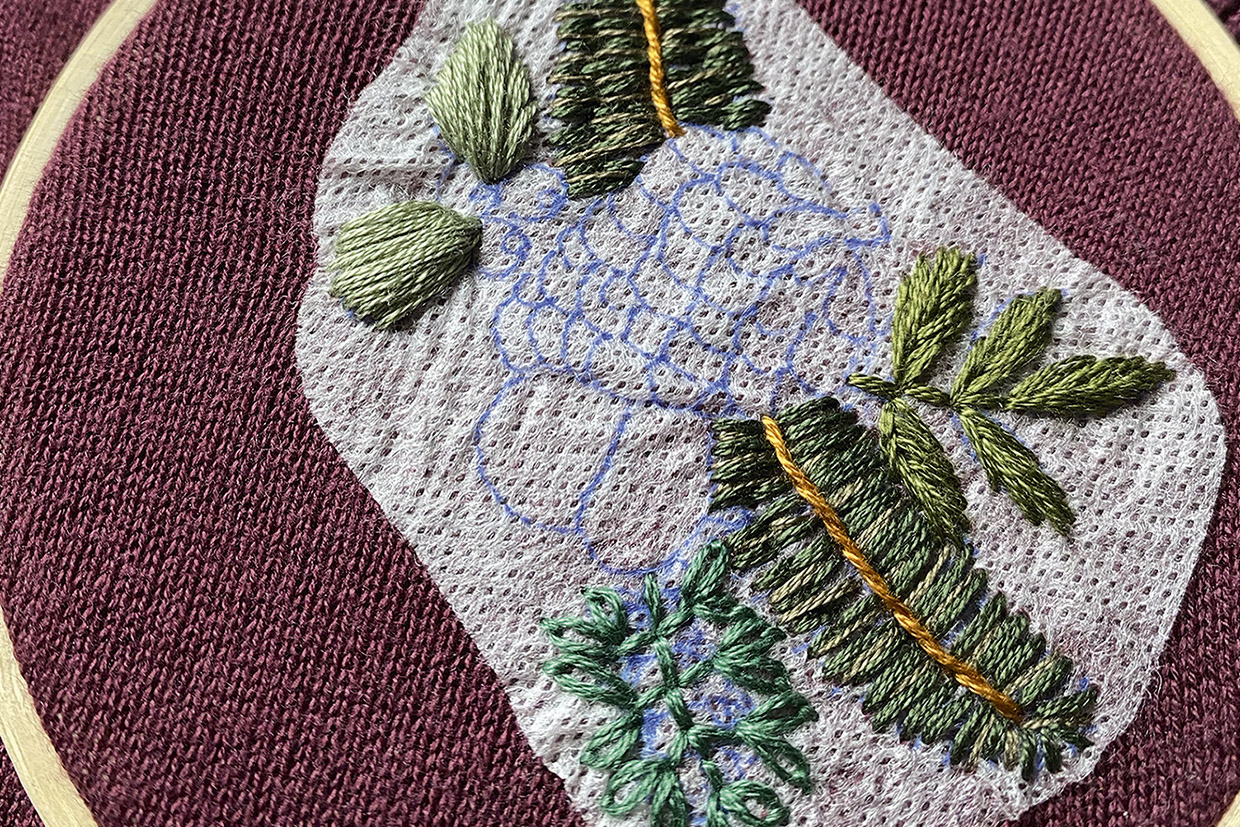
Next, work the mistletoe leaves on the bottom left of the design. Beginning with the leaves, use Satin Stitch in three strands of light grey-green. Focus on keeping an even tension while stitching these leaves to ensure you get a smooth, neat finish.
Step 8
Adding the berries
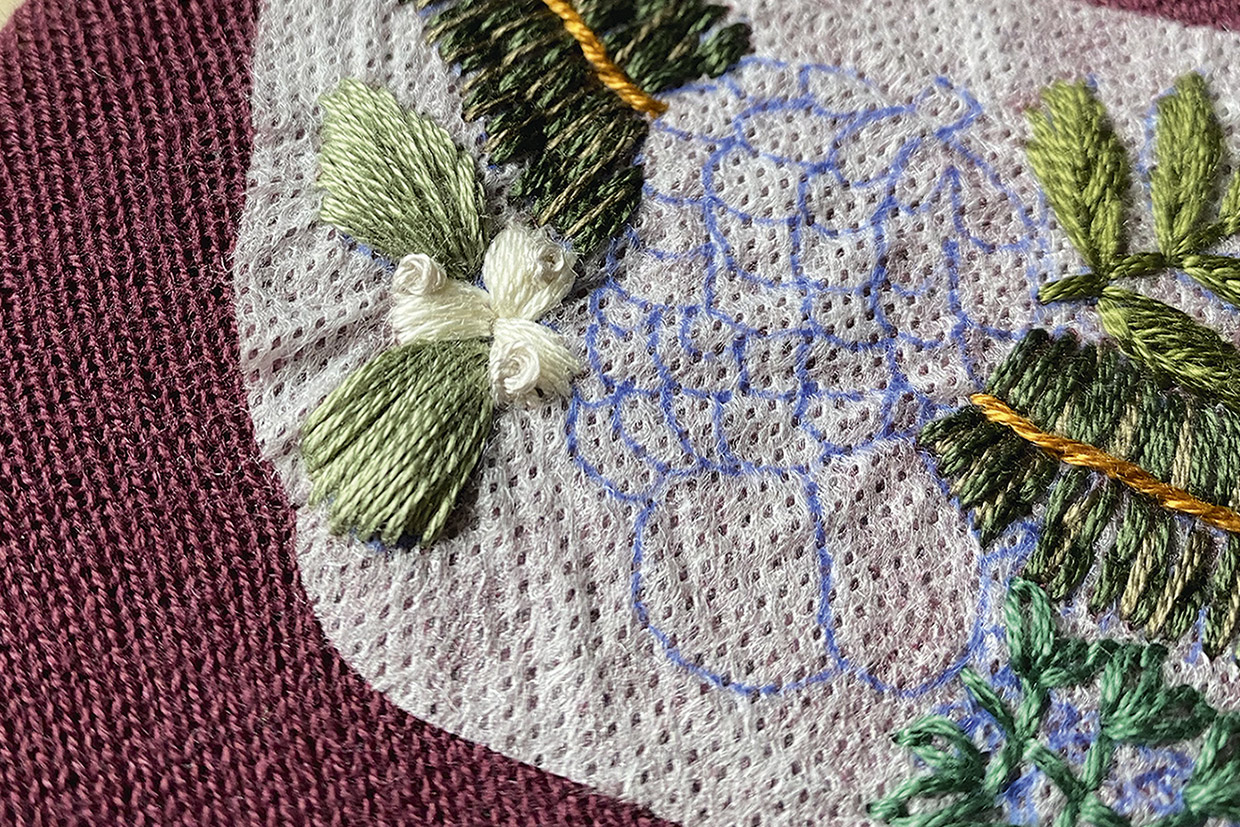
Add the berries to the mistletoe by first filling them with Satin Stitch in three strands of cream and then adding a French Knot highlight in three strands of pale grey.
Tip: When pulling the French Knot through your Satin Stitches, be careful not to disturb them too much or you might create gaps where your fabric will show through.
Step 9
Stitching the acorn stalk
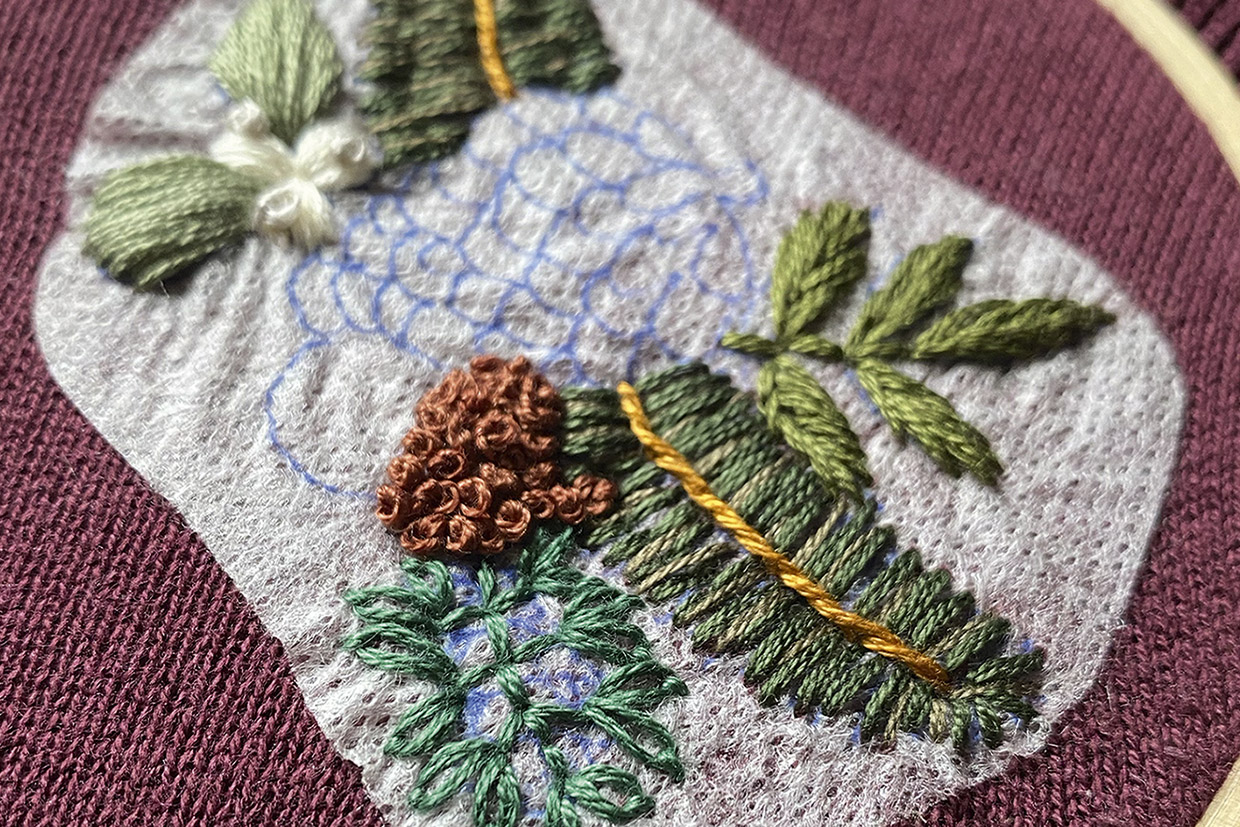
For the cap and stalk of the acorn, use a dense bed of French Knots in four strands of dark terracotta to create its classic bumpy texture. Make sure the knots are very close together so that no fabric is showing through the stitches when you’re done.
Step 10
Satin stitch for the acorn
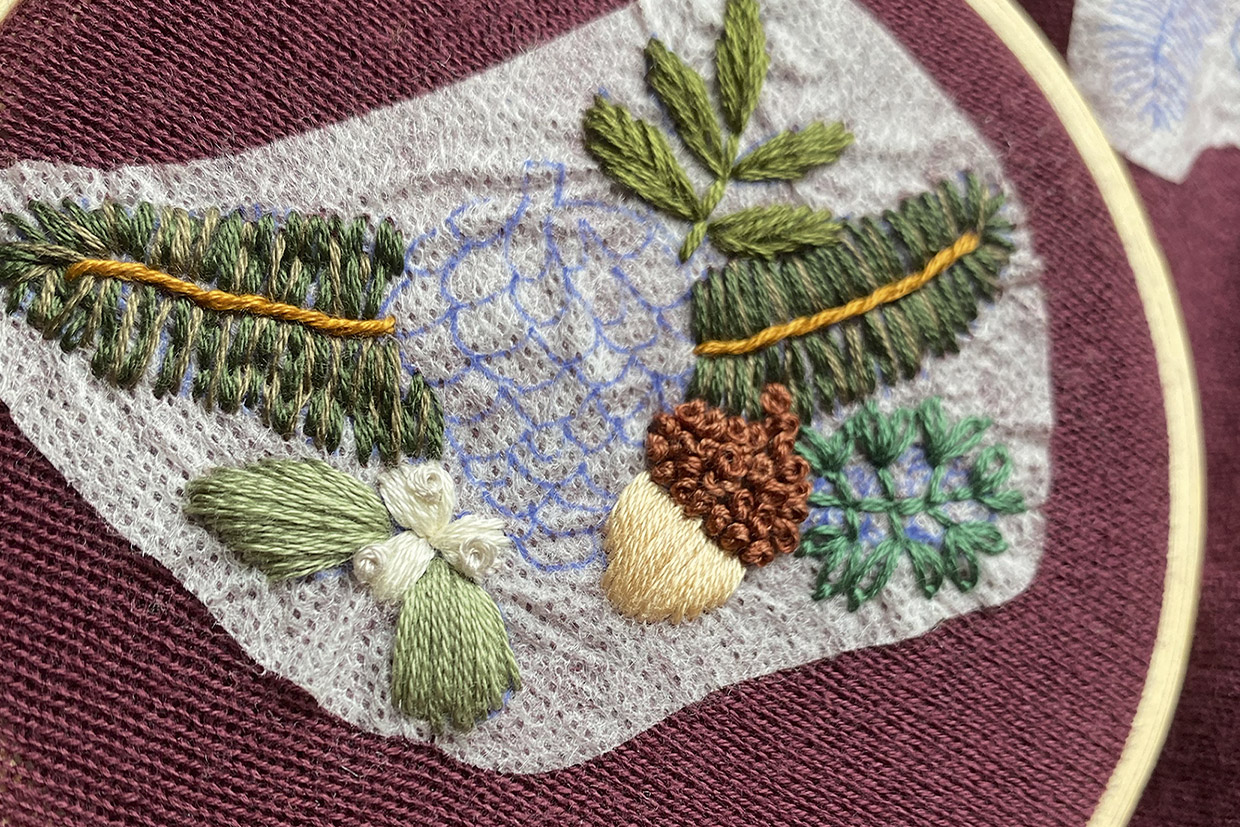
For the bottom half of the acorn, work in Satin Stitch using three stands of tan to create a smooth surface.
Step 11
Stitching the pine cone
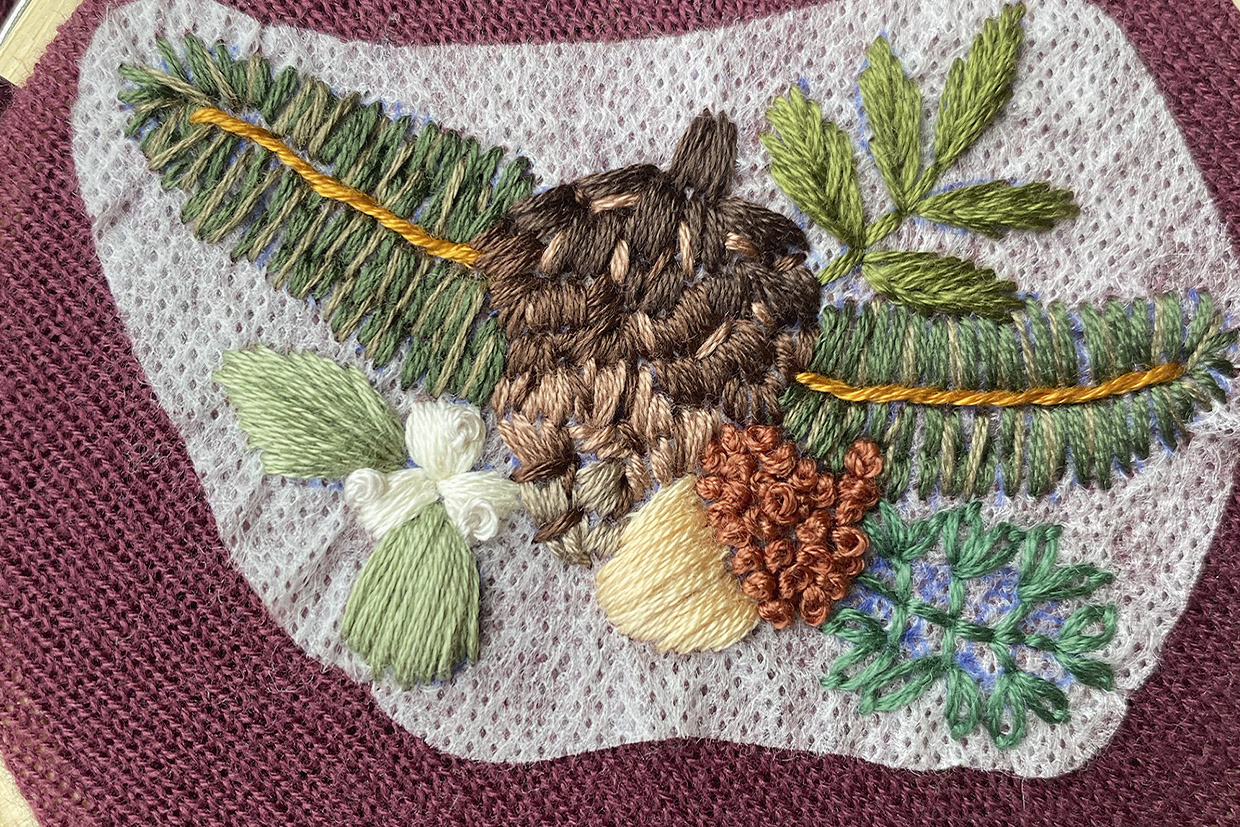
The pinecone is worked in four different browns, with the tones getting lighter as you move down.
Using three strands of each colour, work the scales in Satin Stitch. Work the top three layers of scales in very dark brown, the next three in dark brown, the following two in brown and, finally, the last two in light brown.
Using three strands of brown, add random Straight Stitches to the top half of the pinecone to create highlights.
Then, using three strands of very dark brown, add random Straight Stitches to the bottom half of the pinecone to create shadows.
Step 12
Repeat for the other designs
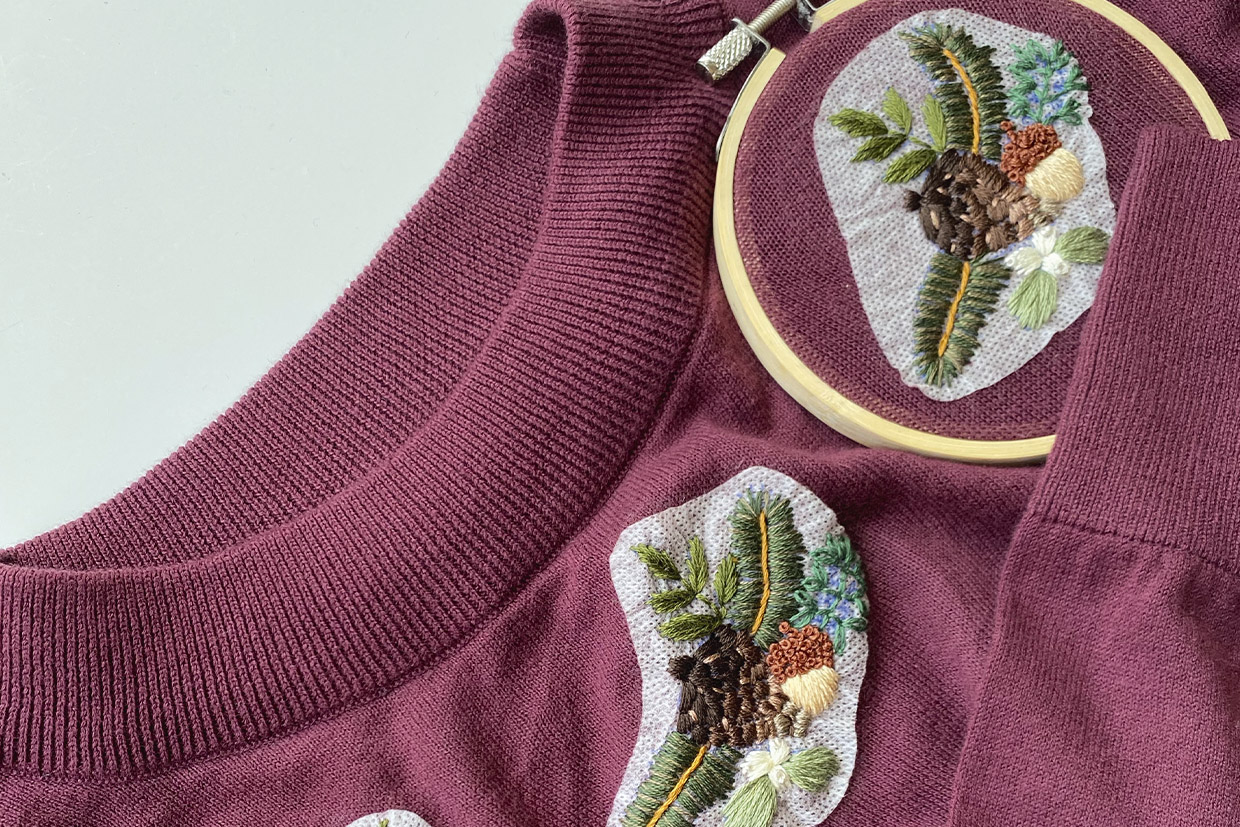
Once you have completed the first design, move your hoop and continue with the second and then third, repeating the process outlined in steps 2-11.
Step 13
Finishing your embroidered jumper
When you’ve finished embroidering, ensure all the threads are secured at the back. Then, immerse the embroidered areas of the jumper in warm water to remove the stabiliser.
Leave the jumper on a flat surface to fully dry.
To prevent the embroidered areas from irritating your skin and to secure the stitches, iron fusible interfacing onto the inside of the jumper( behind the stitched areas).
