Make your own twinkling Christmas banner

Make your own twinkling Christmas banner

Mix machine and hand embroidery and create this beautifully stitched Christmas banner designed by Louisa Burtonshaw.

Try 6 issues of Love Embroidery magazine for just £9.99| SAVE 77%

Published: November 18, 2022 at 10:00 am

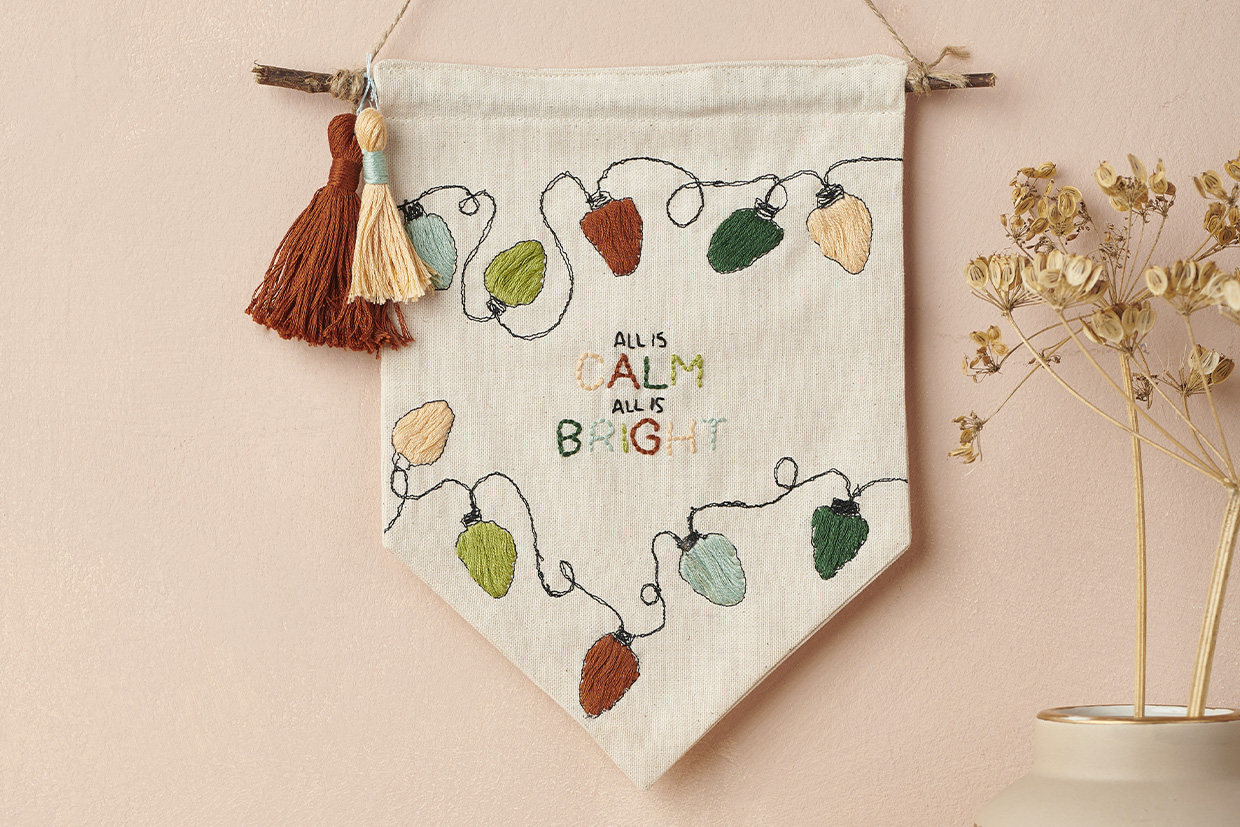
Make your home twinkle and shine with a lovely Christmas banner. You’ll combine machine and hand embroidery to create this rustic-style decoration. The pretty design features a string of retro fairy lights in colourful tones with a sweet sentiment stitched in the centre.

You will need a sewing machine to complete this project unless you’re a seasoned sewer

Following our guide, you’ll create the banner shape and the string of the lights using a sewing machine. You’ll then hand embroider the bulbs and the lettering in the middle of the design. The bulbs use a Satin Stitch to create a block colour, and the lettering uses Backstitch in a variety of colours.

In the next section, we’ll walk you through each stage step-by-step. This Christmas banner designed by Louisa Burtonshaw was originally published in Love Embroidery issue 7.

How to prepare your sewing machine to create the Christmas banner

Prepare your sewing machine by attaching a free motion embroidery or darning foot.

Next, drop the feed dogs – the mechanism that grips and pulls fabric through your sewing machine. Your sewing machine manual should tell you how to do this.

Next, stretch your fabric into a hoop. Do this in reverse to the normal way, with the inner hoop uppermost. Make sure the fabric is really tight in the hoop, this stops the threads from warping and makes the whole process easier.

Start with test fabric to make sure the tension is correct and the bottom thread doesn’t show through.

Top tips for machine embroidery

  • The stitch length is determined by the speed at which you stitch – the faster you go, the shorter your stitches will be.
  • When machine embroidering, try to work in one continuous line. If you do need to stop, make sure you lower the foot so you don’t have jumps in your stitching.
  • Use a 1cm seam allowance for making up.
  • RS = right side(s).

Stitching your rustic Christmas banner

What stitches will I need to complete the Christmas banner?

Keen for more tips and tricks to upgrade your stitching? Check out our embroidery stitch library.

Free template for the Christmas banner

How to make an embroidered Christmas banner step-by-step

You will need:

  • Cotton fabric (35x70cm, natural)
  • Stranded cotton (1 skein each of black, mid-green, dark green, mint, peach and terracotta)
  • Sewing machine
  • Sewing machine thread (black and natural)
  • Embroidery hoop (23cm diameter)
  • Stick (24cm, dowel rod or bamboo)
  • String (for hanging)
  • Basic embroidery kit

Step 1

Cut out the banner shape using the template

Cut the fabric into two 33x33cm pieces. One is for the embroidered banner front and one is for the banner back.

Step 2

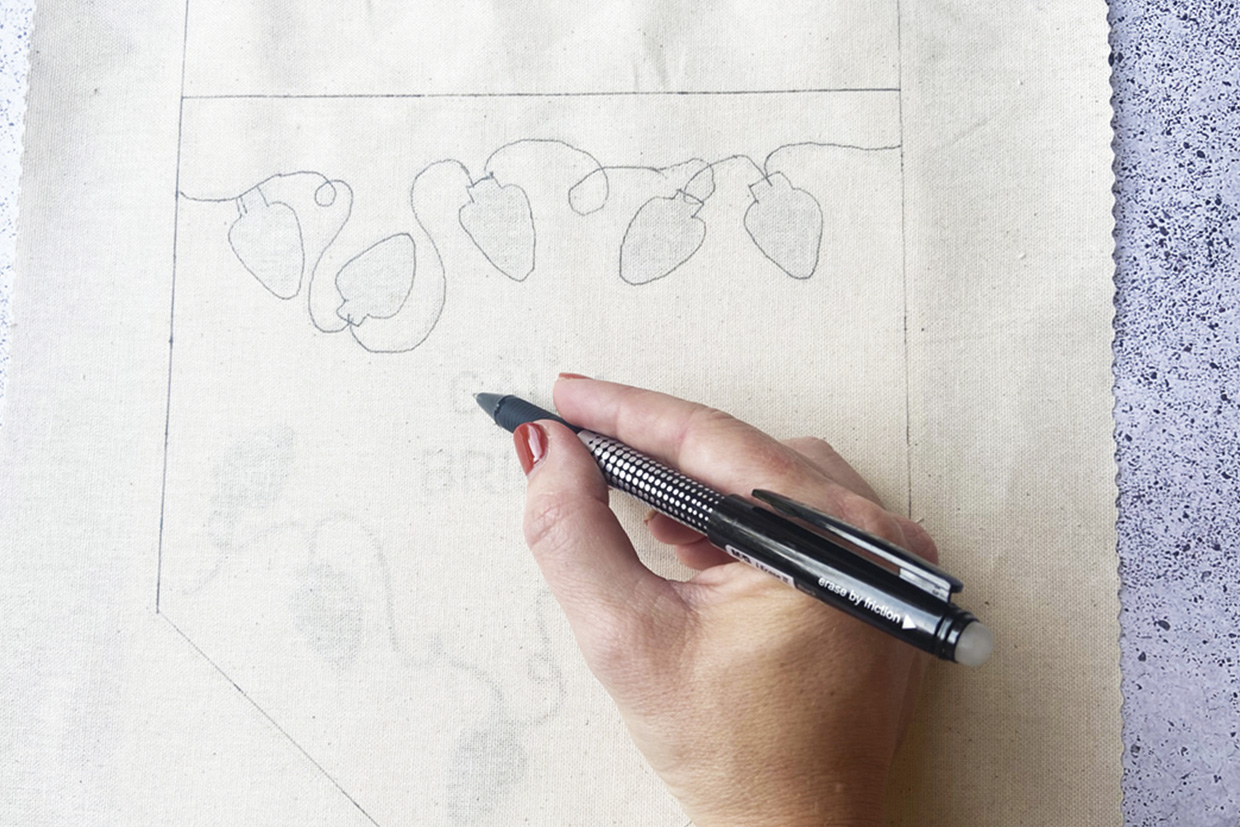
Transfer your banner design to the fabric

Transfer the design, the casing line and the banner outline from the template onto the centre of the RS of the fabric using your preferred method.

Not sure how to transfer your template? Take a look at our embroidery transfer tutorial.

christmas banner – transfer

Step 3

Place your banner design into your embroidery hoop

Place the outer ring of the embroidery hoop onto the table and lay the fabric with the design on top facing upwards. Push the inner ring down on top of the fabric, centring the design.

Pull the fabric to make sure it is as tight as a drum.

Step 4

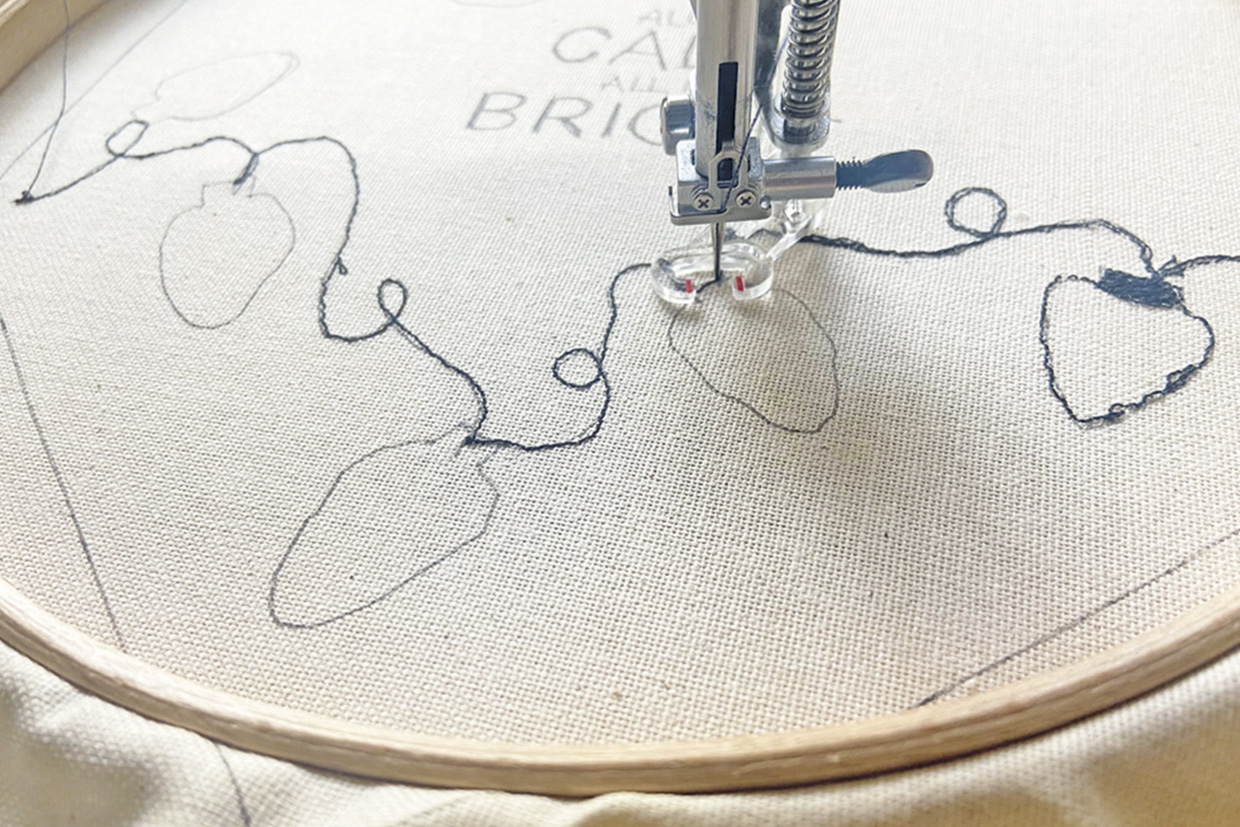
Machine-stitch the fairy light string and bulb outline

Thread the top and bottom bobbin with black thread then machine-stitch the fairy lights string. Start by following the string in one continuous movement from left to right. Then work back over the same line but this time creating the outline of the bulbs too.

christmas banner – stitch

Step 5

Fill the fairy lights with Satin Stitch

Remove your embroidery from the machine.

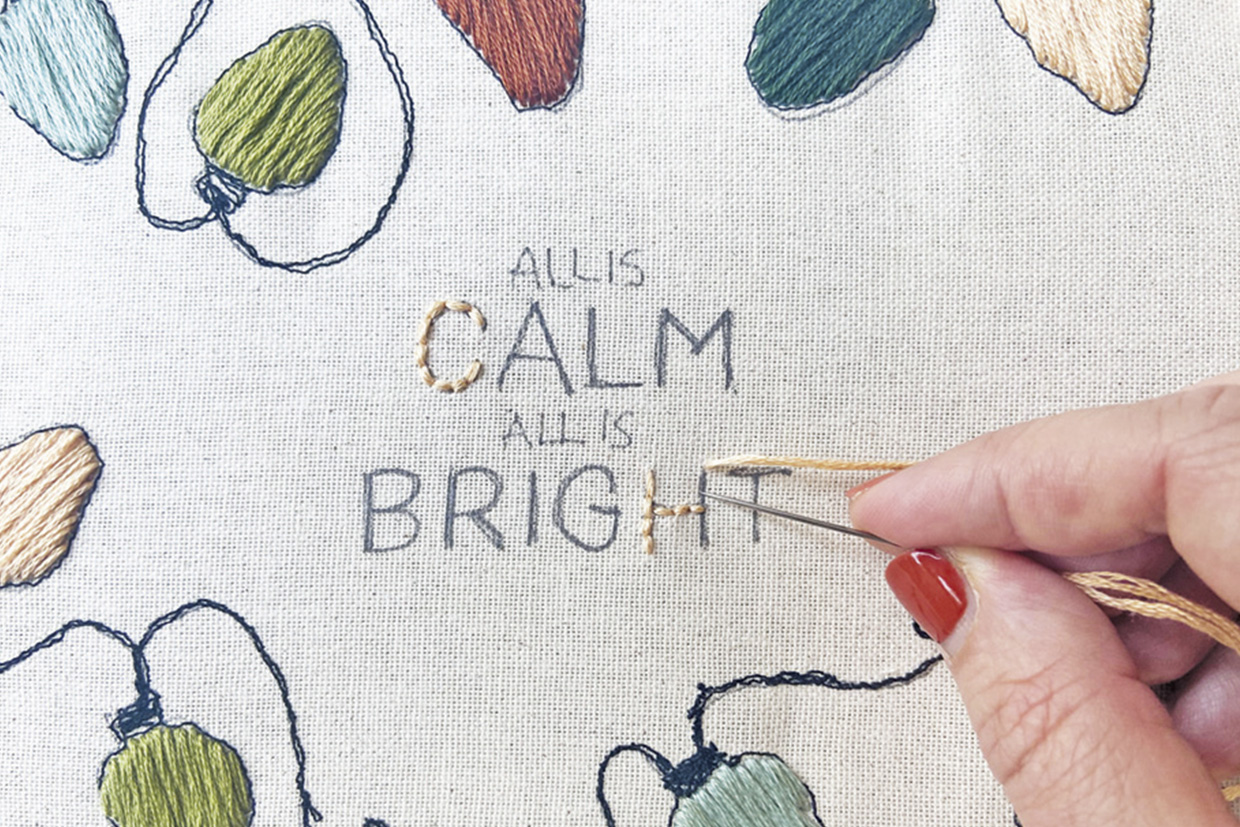
Use all six strands of the stranded cotton to fill in the lights with Satin Stitch and different coloured threads. Work the stitches vertically from the top to the bottom of the lights, making sure they are close together with no gaps.


Step 6

Stitching the banner lettering in Backstitch

Use six strands to work the large lettering of ‘calm’ and ‘bright’ in Backstitch, changing the colour for each letter as you go.

Use two strands of black to work the small words ‘all is’ in Backstitch.

christmas banner – text

Step 7

It’s time to sew your banner

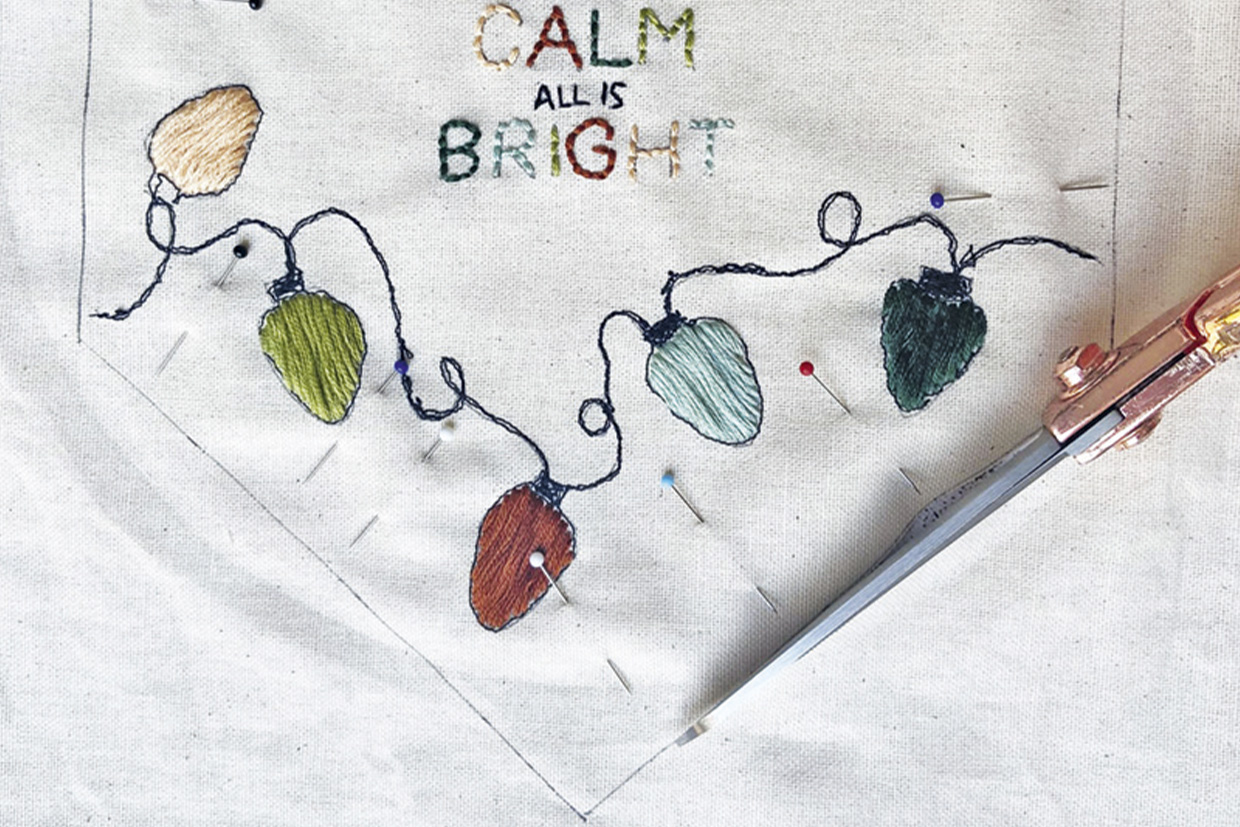
Pin the banner front and back RS together. Cut the backing fabric to the same size and shape as the banner front.

Sew the banner front and back together down the sides and across the bottom edges, leaving the top edges unstitched as well as the gaps between the marked dots. These are for threading the stick through.

Trim the seam allowances of the points and clip the corners. Then, turn the banner RS out and press.

christmas banner – cutting

Step 8

Make the casing for the hanging stick

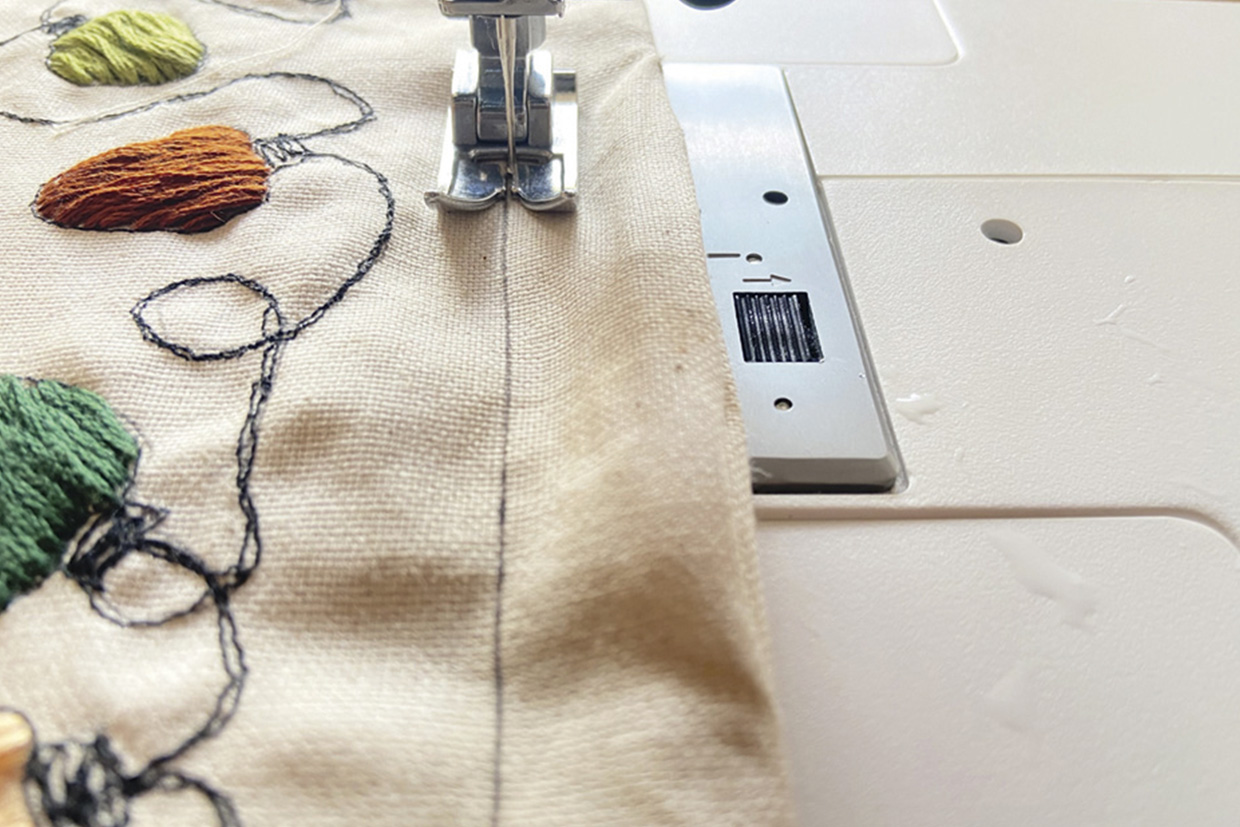
To make a casing for the stick, topstitch along the marked line as shown. Fold the top edge under by 1cm and press. Then, topstitch along the top edge to hold in place. Insert the stick into the casing at the top.

christmas banner – stitching

Step 9

Make your banner tassels

Make a tassel by wrapping peach-stranded cotton around a piece of card. Insert another piece of thread underneath at the top of the card and tie it tightly. Remove from the card and wrap the top of the tassel with mint-stranded cotton and tie. Trim the ends. Repeat to make another tassel using terracotta-stranded cotton.

Cut a piece of string and tie each end to the ends of the stick to make a loop to hang the banner. Tie the tassels at one side to finish.

Need more tassel guidance? Follow our how to make a tassel video tutorial.

christmas banner which reads ‘all is calm and bright'

DIY Christmas banner ideas

Don’t forget you can mix up the elements of the Christmas banner to suit your taste and style! Why not use thread that matches your festive display, or use metallic threads to make it shine?

Make the most of your free motion skills

You’ve created this lovely banner using free motion embroidery to create the string and outline of lights. Put your skills to good use with our free motion machine embroidery appliqué pouch. Decorated with Monstera leaves, it is as modern as it is pretty!