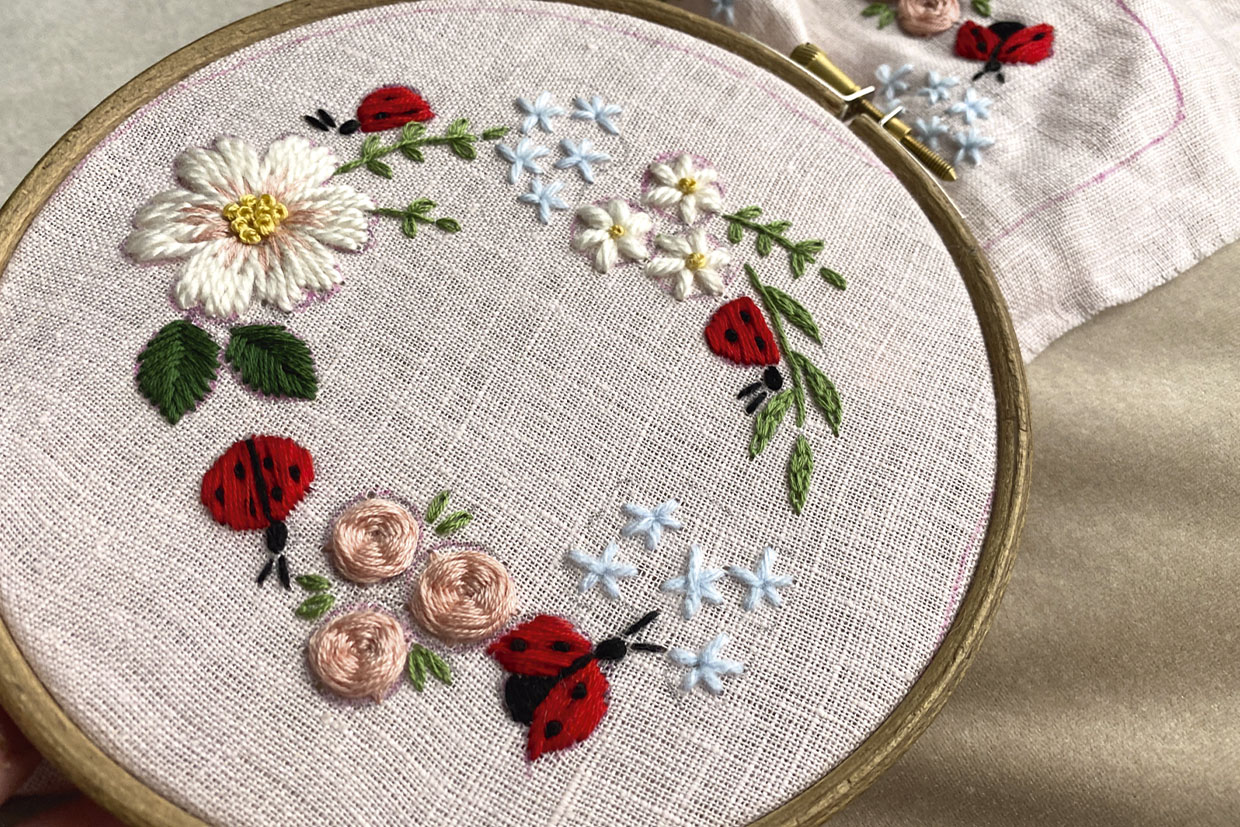
How to embroider a baby bonnet: daisy embroidery pattern

How to embroider a baby bonnet: daisy embroidery pattern

Embroider sweet florals and ladybirds onto a soft linen bonnet to create your own treasured heirloom designed by Jevgenija Medvedeva.

Try 6 issues of Love Embroidery magazine for just £9.99| SAVE 77%

Published: February 11, 2022 at 4:27 pm

This beautiful baby bonnet embroidered with pretty daisies, ladybirds and florals will make a memorable keepsake. Stitched on soft linen this sweet bonnet is breathable, comfortable and of high quality, not to mention so pretty. It would make a special gift for those new arrivals.

Whether you are an expectant parent yourself, or you know someone who is, we're sure you'll find this project very relaxing and therapeutic to take on, after a long day it's lovely to sit down and start stitching.

The baby bonnet daisy embroidery is suitable for beginners but it does use a variety of stitches, be sure to check out our helpful guide to embroidery stitches for beginners, and see our list of individual stitches below. If you are new to embroidery or simply need a little refresh, take a look at our embroidery for beginners guide which contains everything you need to get started on the embroidered wall hanging. Looking for more patterns? Try these amazing embroidery kits and patterns for beginners.

The baby bonnet daisy embroidery pattern was designed by Jevgenija Medvedeva and first appeared in Love Embroidery issue 10. For handmade beautiful baby bonnets visit Jevgenija Medvedeva's Etsy store.

Stitches key for the baby bonnet daisy embroidery pattern

Baby bonnet daisy embroidery pattern materials:

  • Linen baby bonnet of your choice
  • Stranded cotton: 1 skein each of black, dark green, light green, light pink, red and yellow
  • Tapestry wool: 1 skein each of light blue and white
  • Basic embroidery kit

Free baby bonnet daisy embroidery pattern

You’ll also need the free baby bonnet daisy embroidery template.
You will need:

  • Linen bonnet
  • Stranded cotton
  • Tapestry wool
  • Basic embroidery kit

Step 1

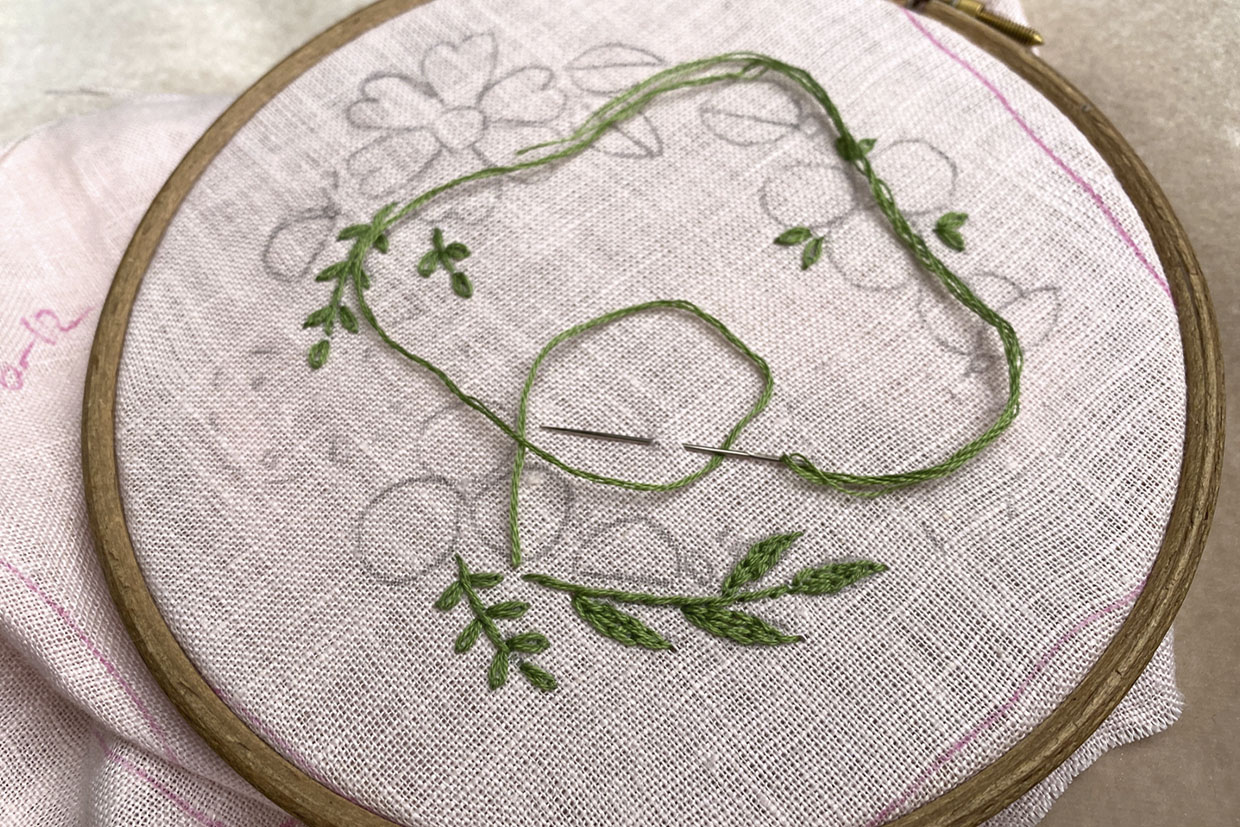
Transfer the design onto both sides of the bonnet using your preferred method – taking care to position it symmetrically. Remember to enlarge or reduce the template to fit the size of the bonnet if you need to. To make stitching the bonnet easier, don’t pull your needle all the way through the side of the bonnet. Instead, work on top of the fabric. Do this by pushing your needle horizontally through to the entry point of your next stitch while finishing your previous one.

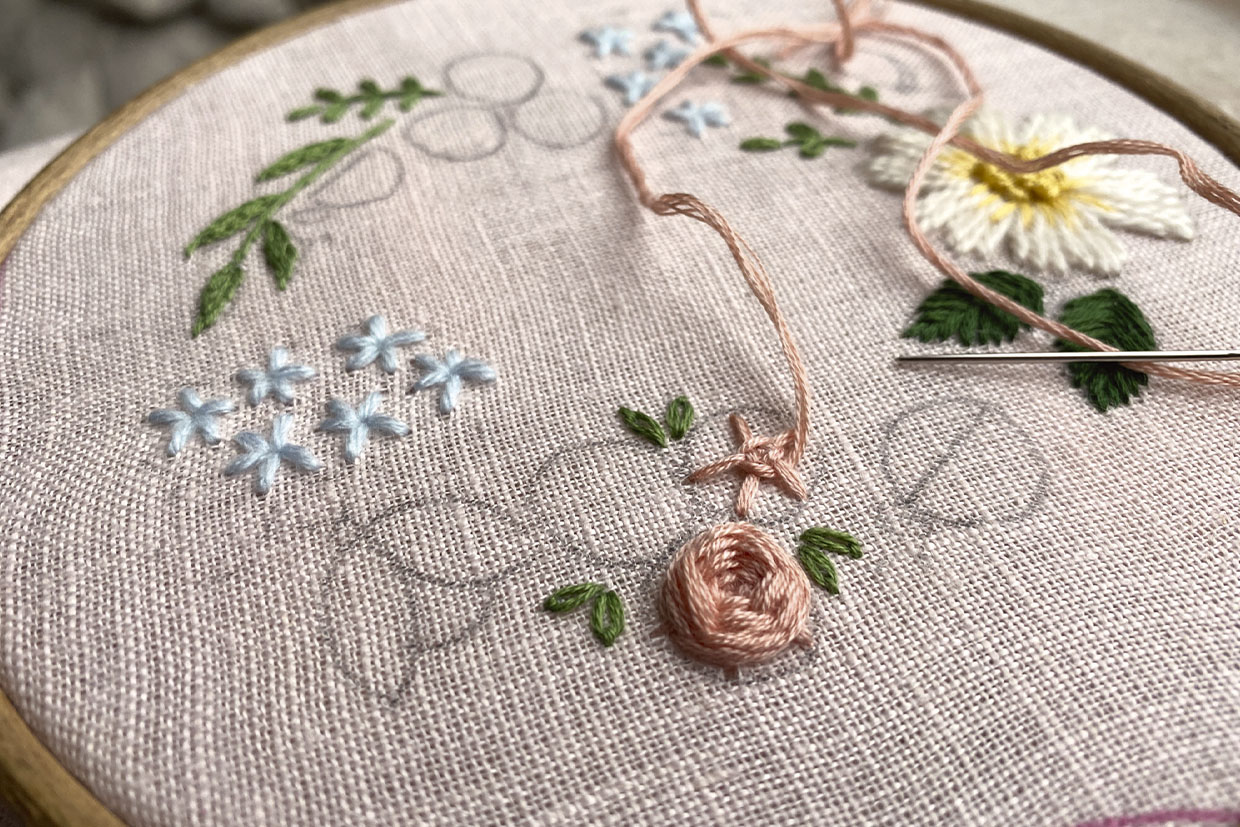
For the leafy sprigs and rose leaves, use three strands of light green to work Lazy Daisy Stitch for the small leaves and Stem Stitch for the stems and to fill the larger leaves. Sew the dark green leaves in Straight Stitch using six strands of dark green, working each side of the leaf in diagonal stitches, from the centre line outwards.   

baby bonnet step 1 baby-bonnet-daisy-embroidery-step2 baby-bonnet-daisy-embroidery-step3 baby-bonnet-daisy-embroidery-step4 baby-bonnet-daisy-embroidery-step5 baby-bonnet-daisy-embroidery-step6

Step 2

Work the small flowers in Straight Stitch using the light blue tapestry wool.

baby bonnet step 2

Step 3

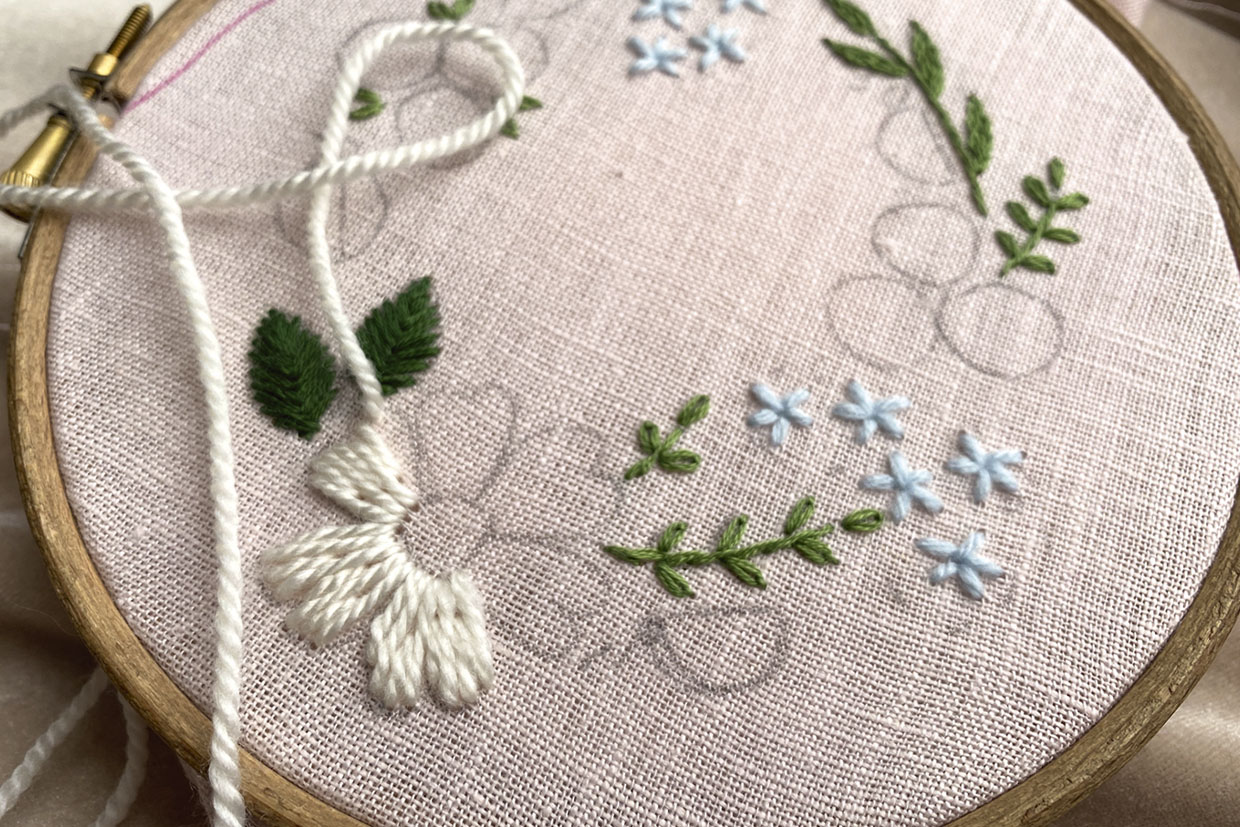
For the large white daisy flower, use Satin Stitch and the white tapestry wool to fill in each of the petals. Next, add a few Straight Stitches in six strands of yellow to the base of each petal. Then, fill the centre of the large daisy with a cluster of French Knots using six strands of yellow.

baby bonnet step 3

Step 4

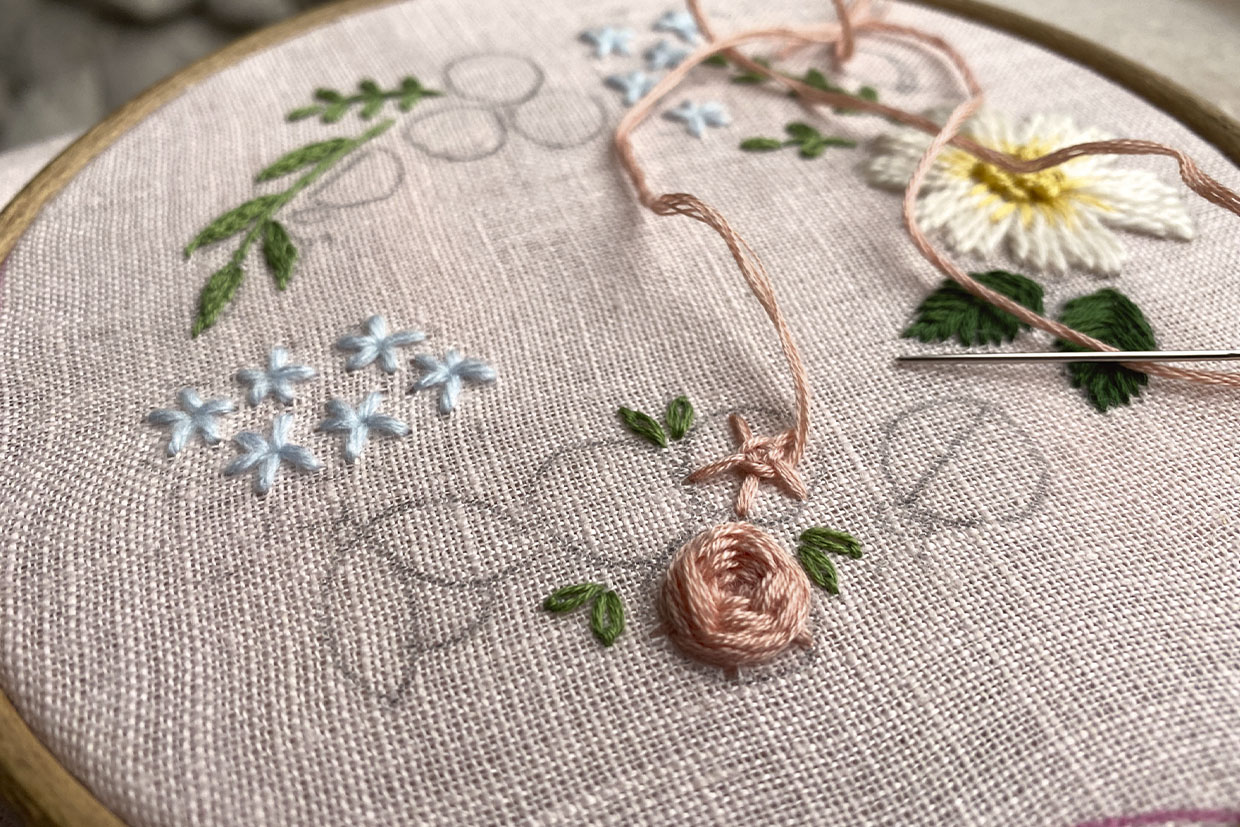
Work the roses as a Woven Wheel Stitch using six strands of light pink.

baby bonnet step 4

Step 5

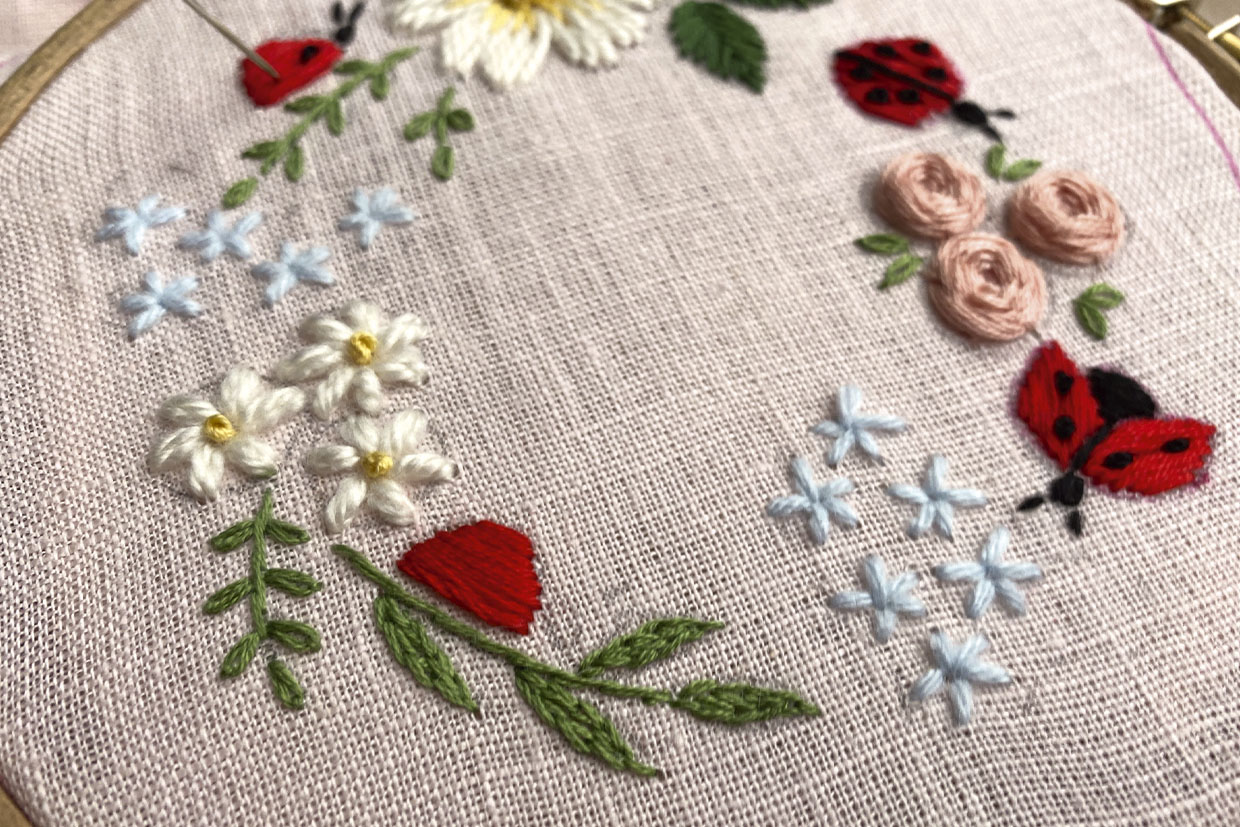
Moving onto the small chamomile flowers, work the petals in Straight Stitch using white tapestry wool. Then, add a French Knot in six strands of yellow to the centre of each flower.

baby bonnet step 5

Step 6

For the ladybirds, work the wings in Satin Stitch using six strands of red and the body in six strands of black. Add French Knots in three strands of black for the head and wing dots. Finish by adding the antennae in Straight Stitch using three strands of black. Now, this adorable bonnet is ready to wear.

For the leafy sprigs and rose leaves, use three strands of light green to work Lazy Daisy Stitch for the small leaves and Stem Stitch for the stems and to fill the larger leaves. Sew the dark green leaves in Straight Stitch using six strands of dark green, working each side of the leaf in diagonal stitches, from the centre line outwards.   

baby bonnet step 6

Similar embroidery projects:

We hope you loved this gorgeous baby bonnet patters. Are you looking for similar projects? Don’t miss these wild flowers. If you can’t get enough of the night sky, take a look at the constellation embroidery or the star embroidery (a favourite with our readers). If you’re a nature lover check out the embroidered wall hanging, the mushroom embroidery pattern or the bee embroidery. Want to relax in the evening, try this beautiful wildflower design. If you’re also looking to delve into machine embroidery or would like to find out more about it take a look at our guide to the best embroidery machine

About the designer: 

Jevgenija Medvedeva

Jevgenija has always been attracted to arts and crafts. After the birth of her children, she was inspired to turn her small-time hobbies of sketching and embroidering into a full-time business creating baby bonnets and custom embroidered clothing.

View website