Free pineapple embroidery design – scallop stitch made easy

Free pineapple embroidery design – scallop stitch made easy

Sew up a journal cover featuring a zingy pineapple embroidery motif with Mollie Johanson’s scallop stitch masterclass

Try 6 issues of Love Embroidery magazine for just £9.99| SAVE 77%

Published: May 17, 2020 at 8:00 am

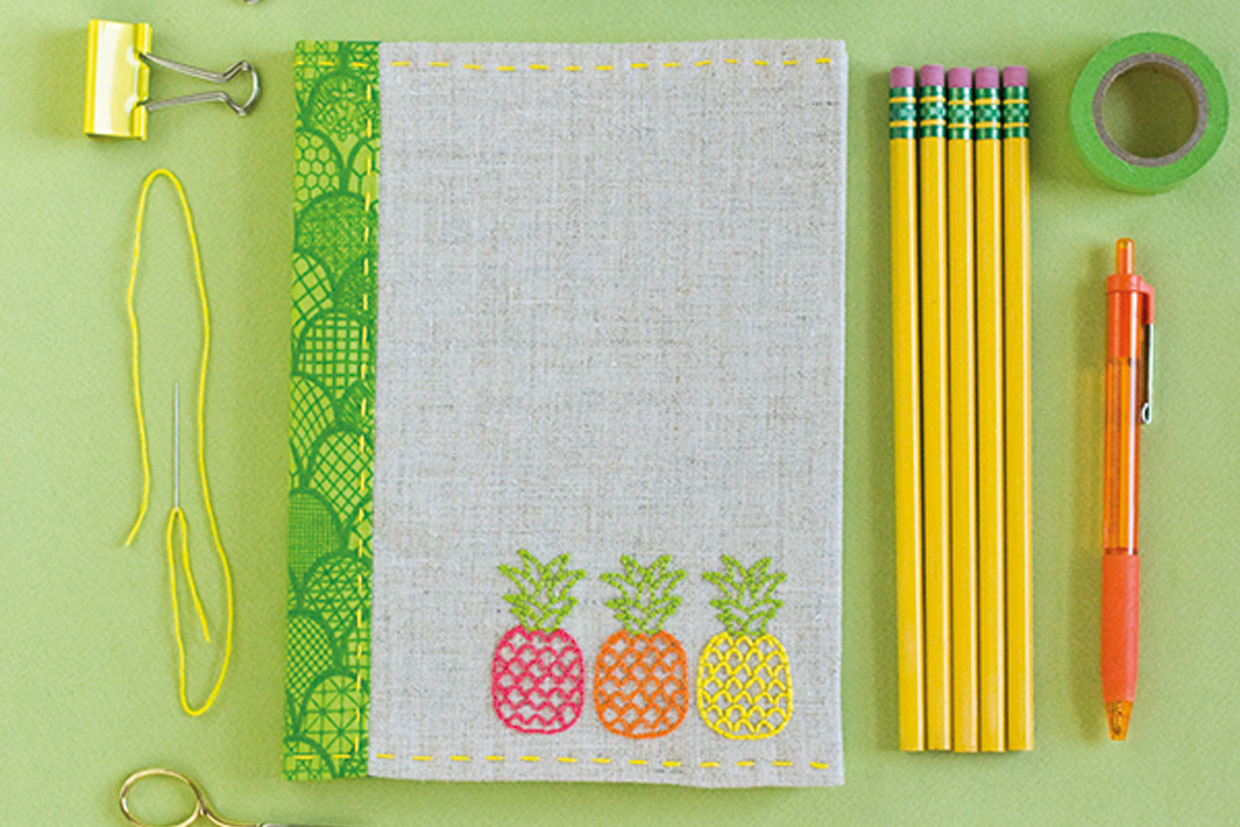
Scallop stitch is the perfect stitch for adding some simple curves to your designs, and this pineapple embroidery pattern gives you a chance to master this fun stitch with some bright colours! Once you've completed your pineapple embroidery, you can transform it into an awesome journal cover with some simple stitching!

You will need

  • Cotton fabric: see step one of the 'making the journal cover' for measurements
  • Stranded cotton: in a selection of bright colours
  • Matching sewing thread
  • Basic sewing kit

Notes

You will need to download and print the free pineapple embroidery pattern template.

Use a 1cm (3/8in) seam allowance.

Tip - trim your fabric with pinking shears before you start stitching to prevent fraying and give a neater edge.

Free Pineapple Embroidery Pattern

You will need:

  • Cotton fabric
  • DMC stranded cotton
  • Basic sewing kit

Step 1

Working a scallop stitch

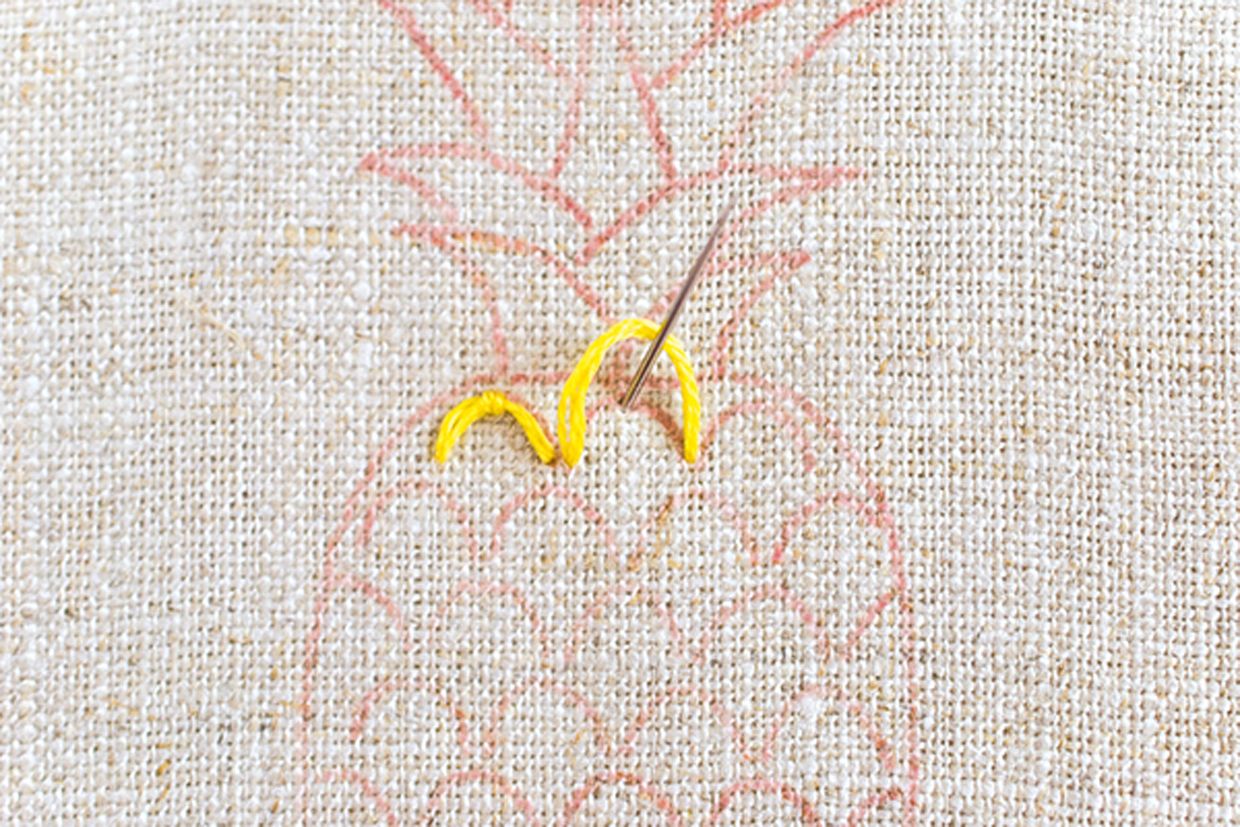
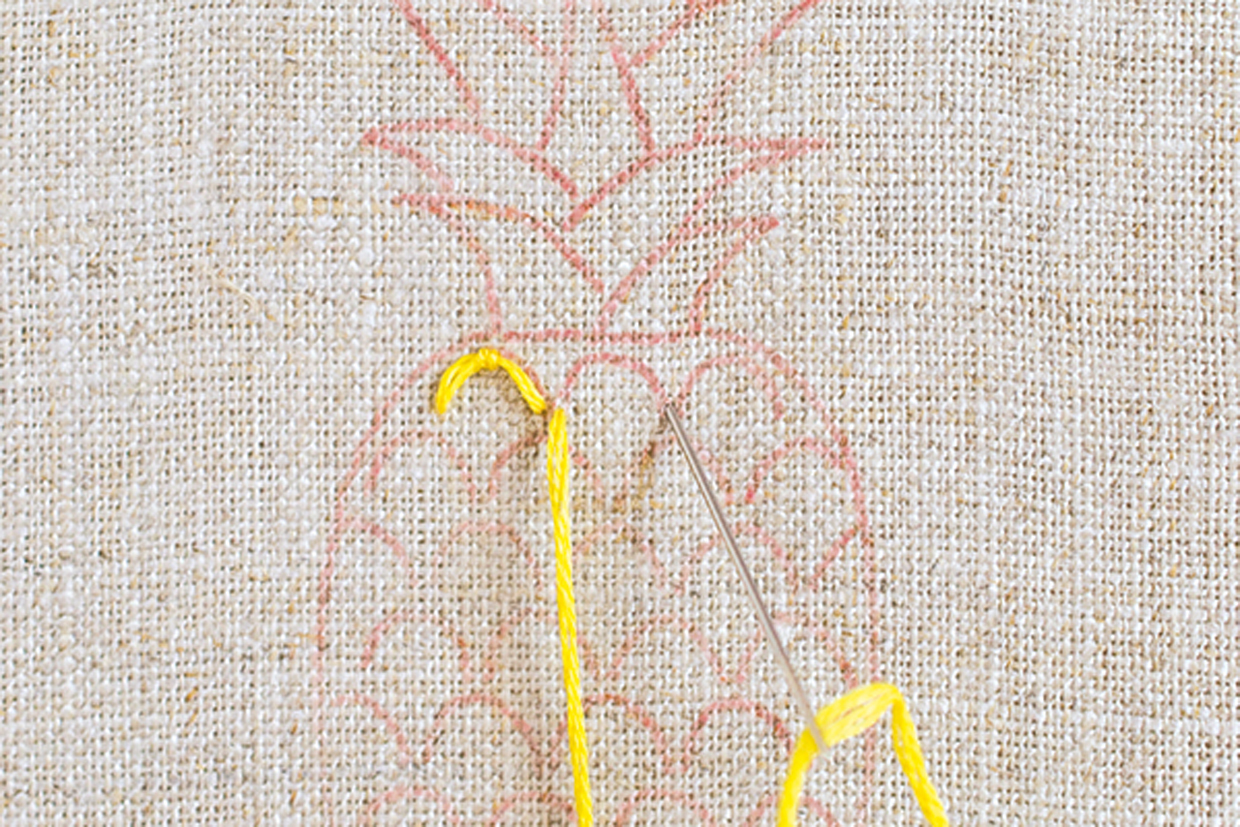
Bring the needle up through the fabric on one side of the scallop. Go back down on the other side of the scallop, leaving a loop of thread on the surface.

How_to_Scallop_Stitch_Pineapple_Embroidery_Step1

Step 2

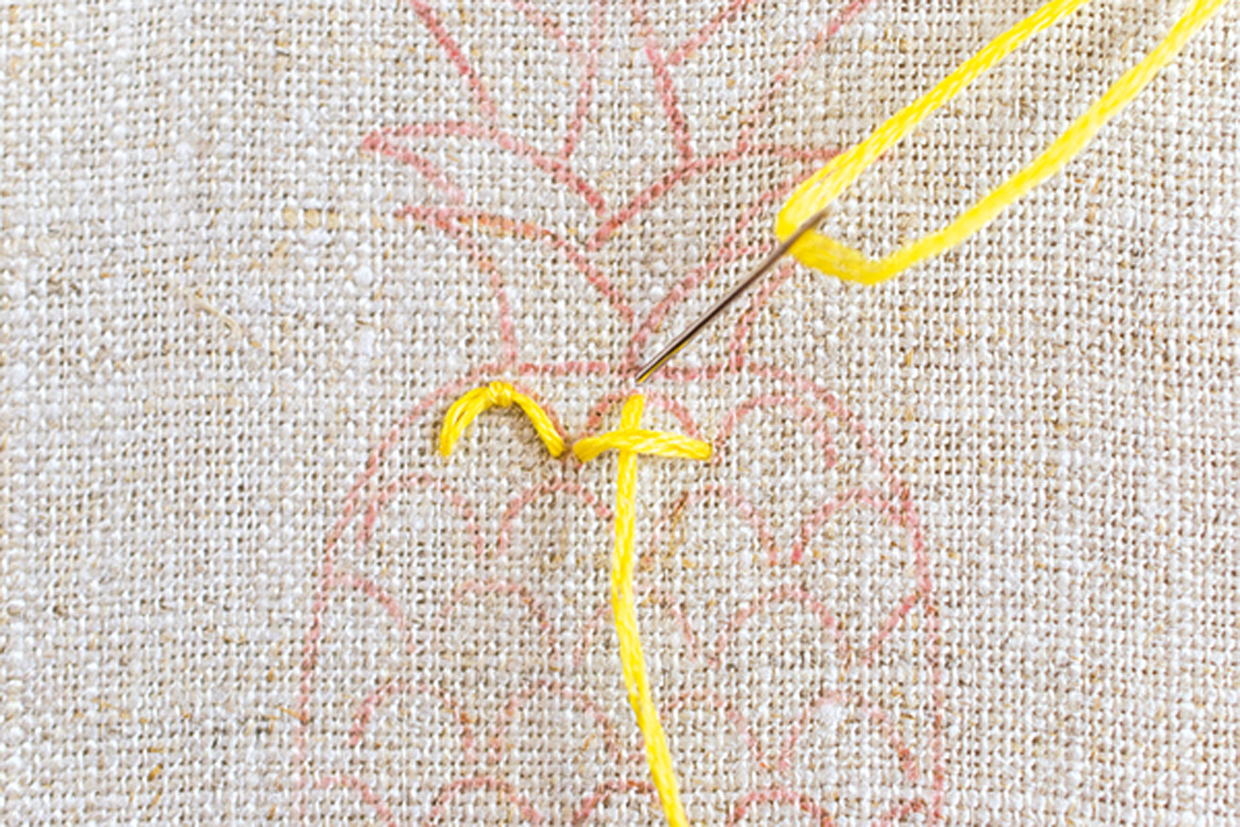
Bring the needle up on the curve of the scallop, catching the loop of thread. If you are working a partial or angled scallop stitch, the point where you bring the needle up will determine the shape and curve of the stitch.

How_to_Scallop_Stitch_Pineapple_Embroidery_Step2

Step 3

Pull the loop of thread taut, but not too tight. Leaving it looser will make a more gentle curve, rather than a point. Go back down through the fabric, tacking the loop of thread in place.

How_to_Scallop_Stitch_Pineapple_Embroidery_Step3

Making the journal cover

How_to_scallop_stitch_pineapple_embroidery

Step one

The cover is made from a solid or pieced fabric rectangle. It should measure the height of your journal + 2.5cm (1in) x the width of your journal cover (x2) + spine thickness + 10cm (4in).

Step two

Trace over the pineapple template then place your cut out journal fabric on top and trace over it as many times as you prefer.

Step three

Stitch the pineapple in scallop stitch then the leaves and pineapple outline in back stitch in a mix of bright colours.

Step four

Turn the short ends under by 1cm (3/8in) to the wrong side (WS) and stitch down to hem.

Step five

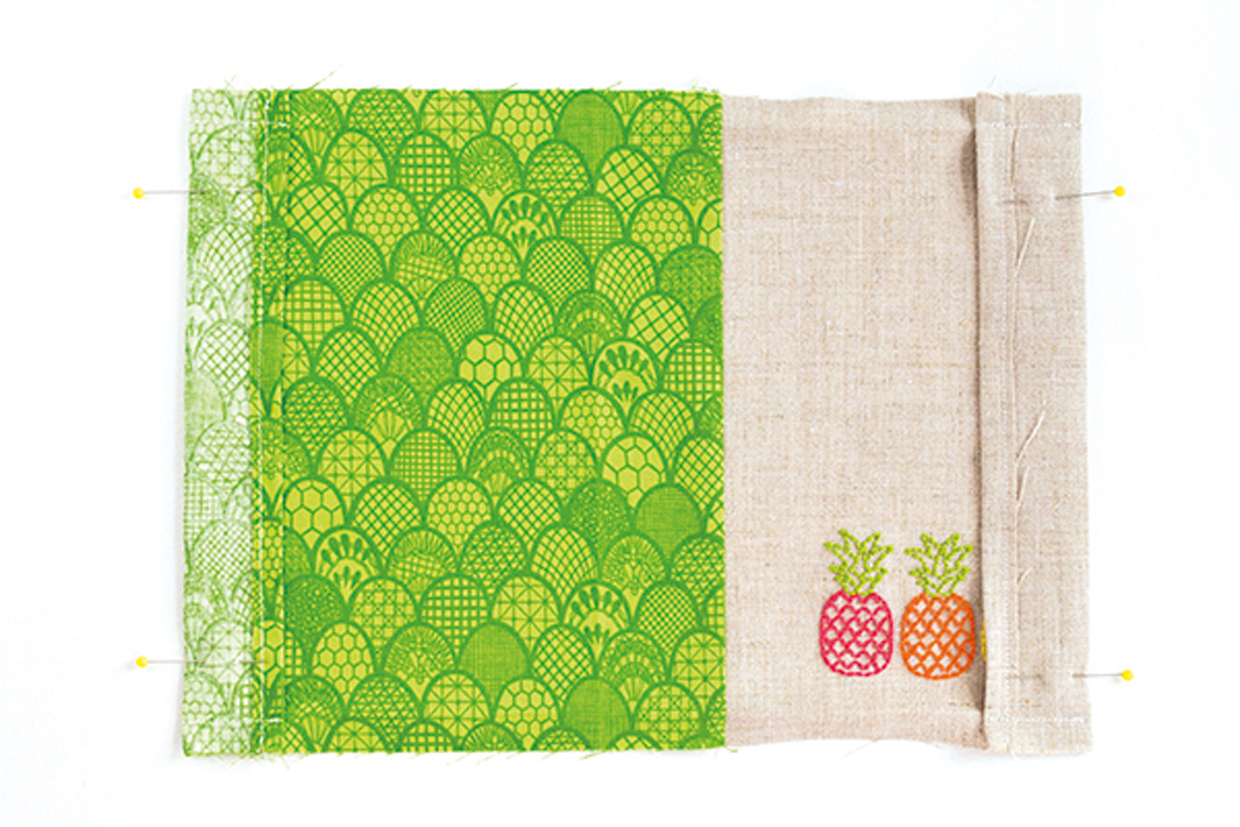
Turn the hemmed short ends over by 4cm (15/8in) so they are right sides (RS) facing with the cover fabric. Check that your journal will fit and adjust this turning if necessary. Sew the top and bottom of each turned-over pocket in place.

How_to_Scallop_Stitch_Pineapple_Embroidery_Step4

Step six

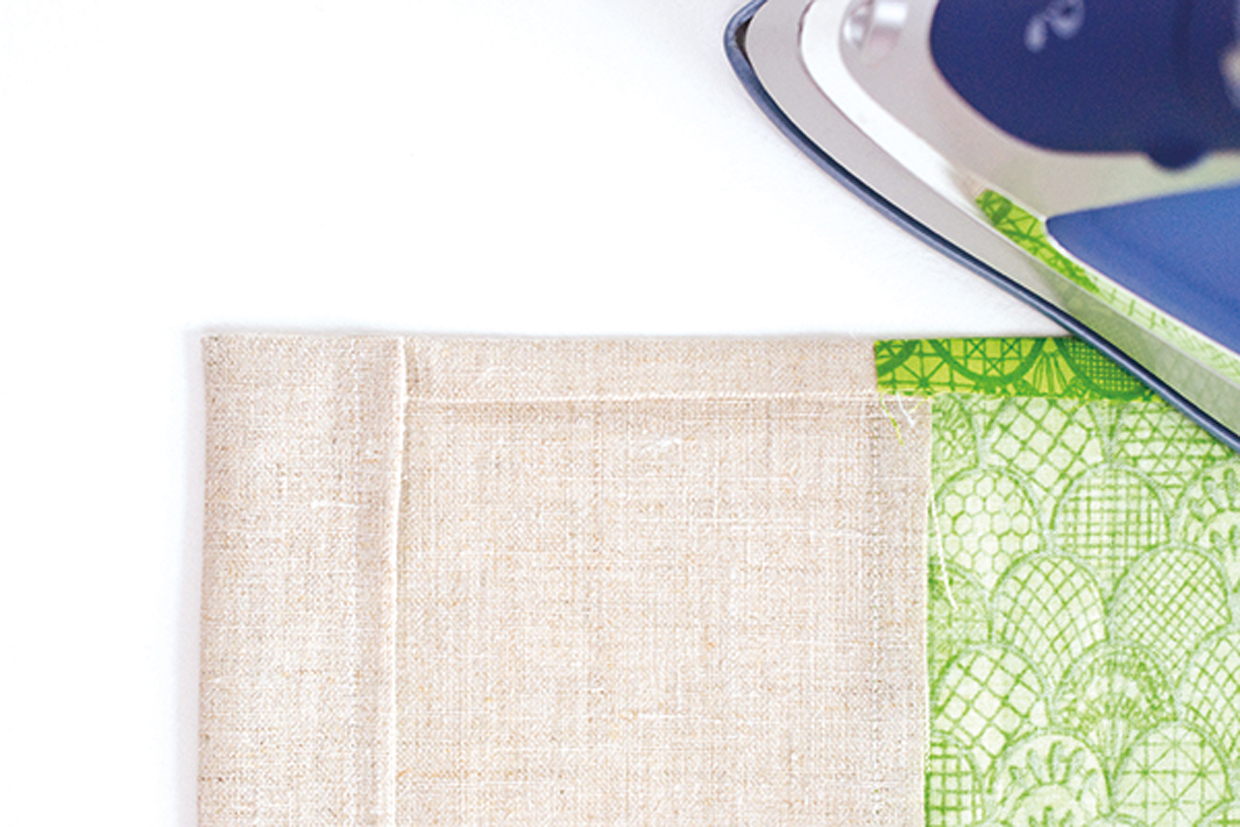
Turn the pockets RS out and press the top and bottom edge of the cover under by 1cm (3/8in) to match the seam allowance.

How_to_Scallop_Stitch_Pineapple_Embroidery_Step5

Step seven

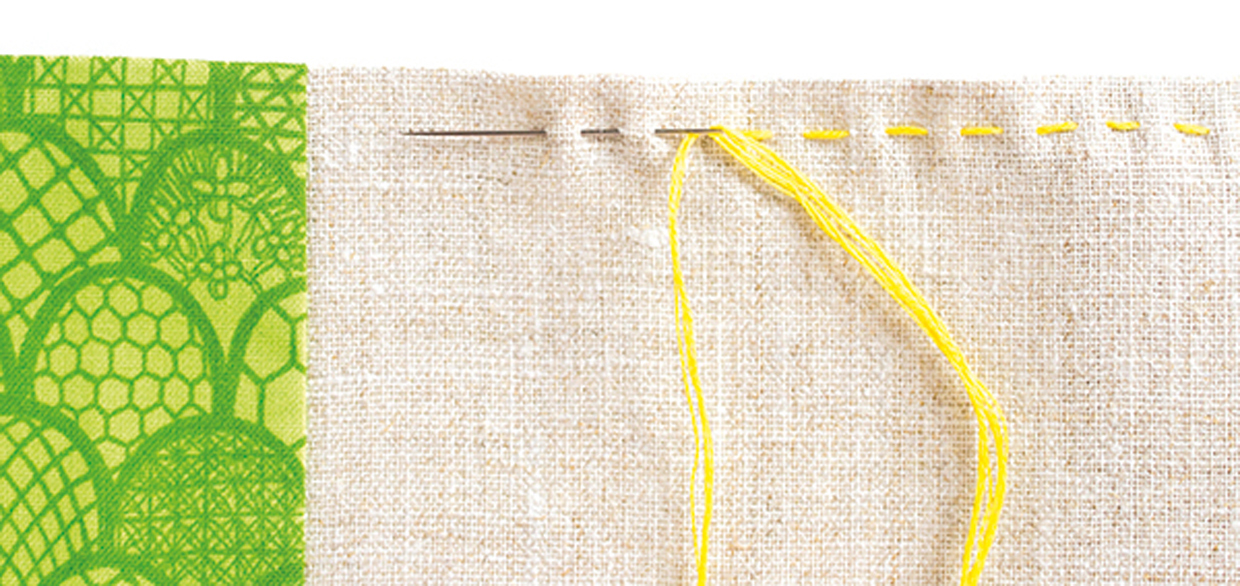
Stitch the top and bottom hem in place by hand with stranded cotton and running stitch. Take care that you only stitch through one layer as you get to the ends where the pockets are.

How_to_Scallop_Stitch_Pineapple_Embroidery_Step6

Step eight

Slide the cover over the journal to finish.