Floral embroidery hoop

Floral embroidery hoop

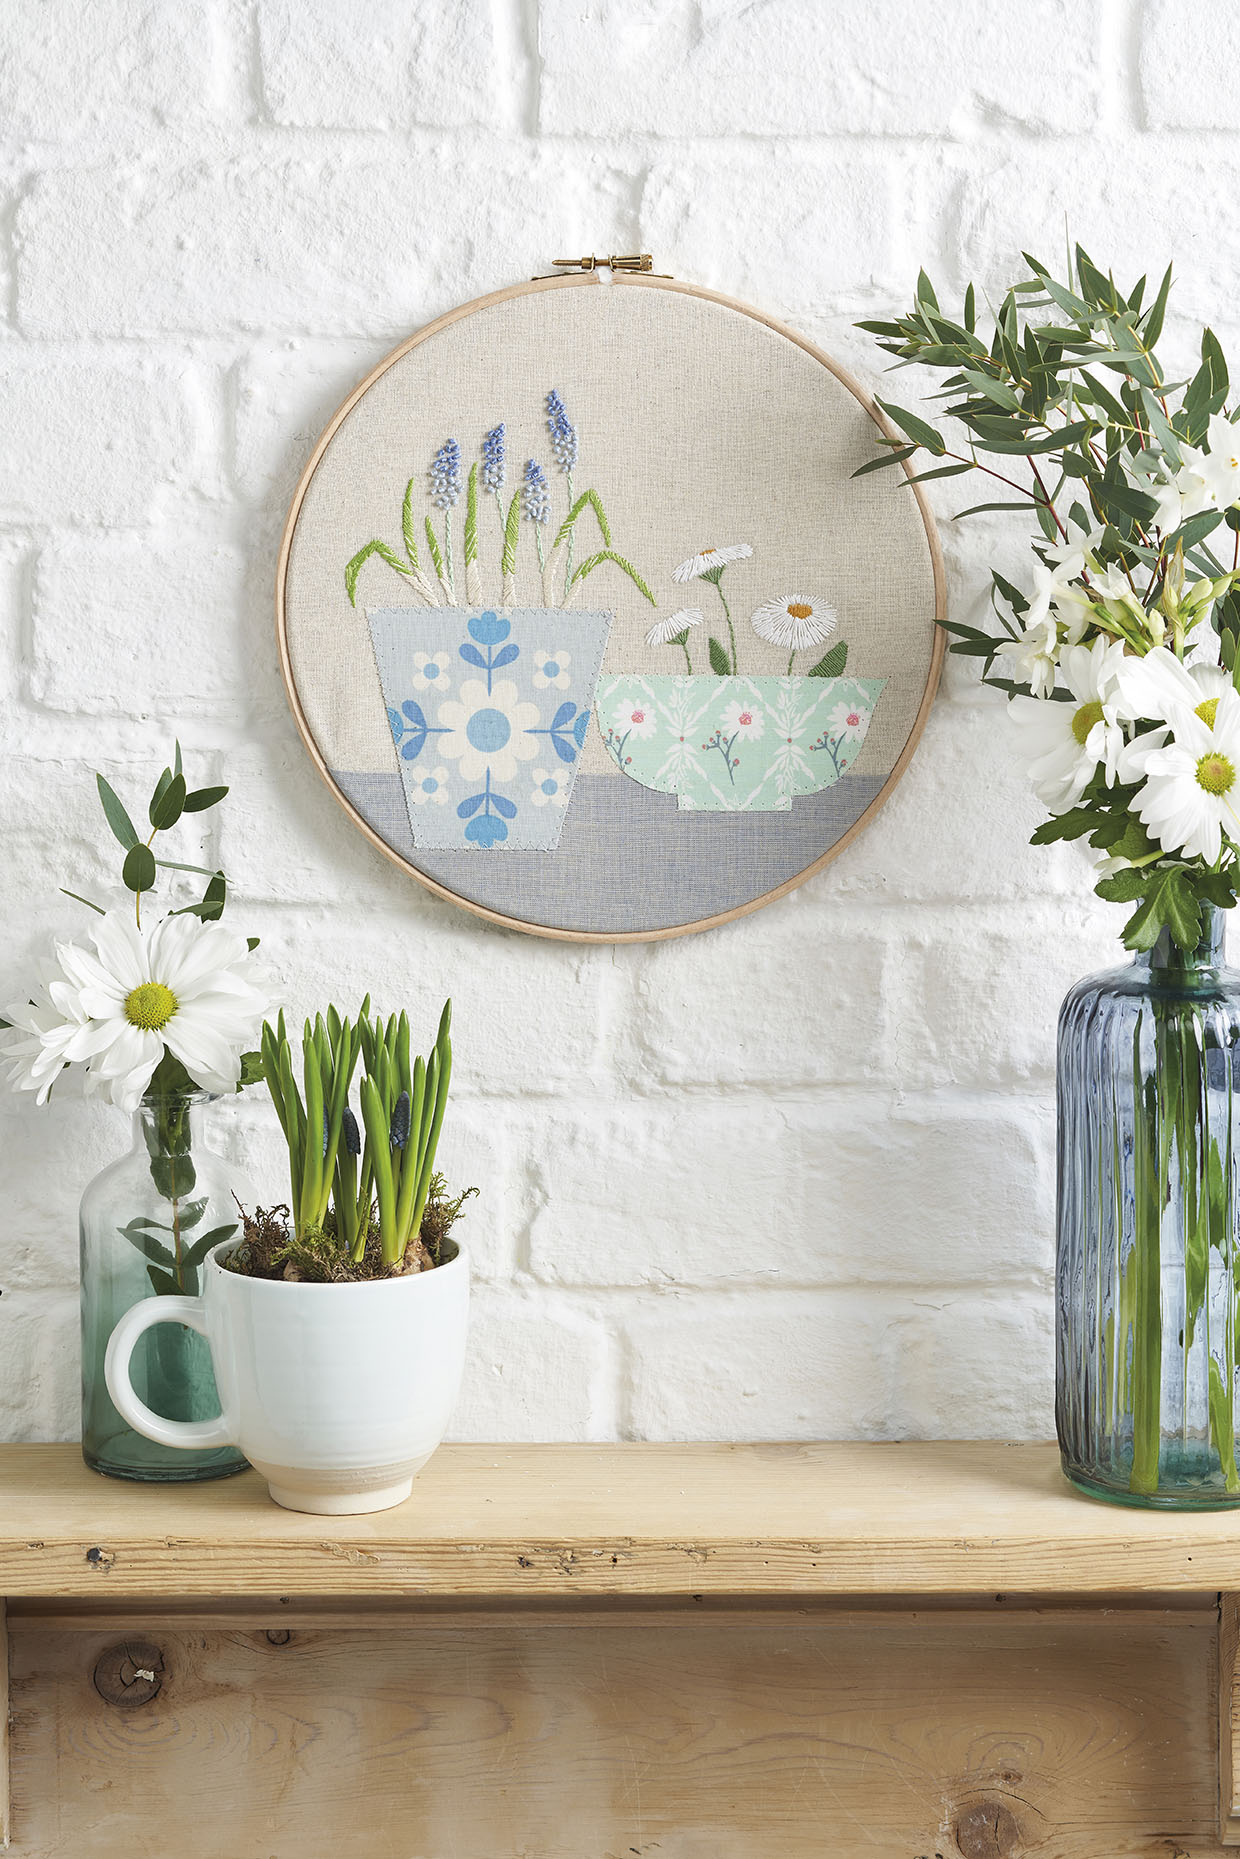
Spring is in the air – and in our sewing room! Stitch Anna Alicia's just-in-bloom floral embroidery hoop design for a keen gardener's wall.

Try 3 issues of Simply Sewing magazine for £10!

Published: February 26, 2021 at 10:32 am

Welcome spring into your home with this pretty floral embroidery hoop designed by Anna Alicia!

It combines basic sewing and embroidery techniques, so this project is very straightforward and suitable for beginners. Your floral embroidery hoop includes a few simple embroidery stitches and it's a great way to practise your technique. Before you start, we'd recommend taking a look at our beginner's guide to embroidery to help you pick up the basic skills you'll need for this project.

Looking for more spring craft ideas? Try making this pretty spring embroidery hoop by Jessie Doughty or have a go at stitching these adorable embroidered Easter eggs. We love this cute felt Easter bunny pattern too. This article was first published in Simply Sewing magazine – the UK best-selling magazine filled with projects for everyone who sews or wants to start.

Read on to learn how to make Anna Alicia's stunning floral embroidery hoop…

Notes

  • Download the floral embroidery hoop templates.
  • We used a cross-weave blue-grey cotton, which has a bit more character than a plain cotton.
  • The floral fabrics are from The Fabric Fox. Unfortunately these particular designs are no longer available, but they do have a great selection of alternatives that you could use.
  • Fat quarter = 45.5x56.8cm (18x22in).
  • Fat eighth = 28x45.5cm (11x18in).
You will need:

  • Unbleached cotton fabric (a fat quarter)
  • Cotton fabric (a fat eighth)
  • Floral cotton fabrics (two different patterns for the pots) (scraps)
  • Iron-on interfacing (scraps)
  • Felt (for backing) (25.5x25.5cm (101/8x101/8in))
  • Wooden embroidery hoop (25cm (10in))
  • Stranded embroidery cottons (white, cream, light green, mid green, mint green, pale mustard, lavender blue, pale lavender blue)
  • Matching thread
  • Basic sewing kit

Cutting out

Step 1

With tailor’s chalk, draw around the templates on the two patterned fabrics and cut them out.

Step 2

Cut the natural colour cotton fabric to 35x35cm (13¾x13¾in). Cut the light blue-grey cotton to 12x35cm (4¾x13¾in).

Preparing the pieces

Step 1

Pin the flower pot shapes to the iron- on interfacing with the shiny/textured side of the interfacing facing the wrong side (WS) of the fabric. Cut around the shapes carefully, then press to fuse to the interfacing.

Step 2

Lay out the main fabric and the strip of blue-grey fabric right sides (RS) facing so that the bottom long edge of the strip is 10.5cm (4¼in) from the bottom edge of the main fabric. Pin along the bottom edge of the fabric strip piece, 1cm (38in) in from the raw edge.

Step 3

Sew in place, then fold the fabric strip down and press the seam open.

Assembling the pots

Step 1

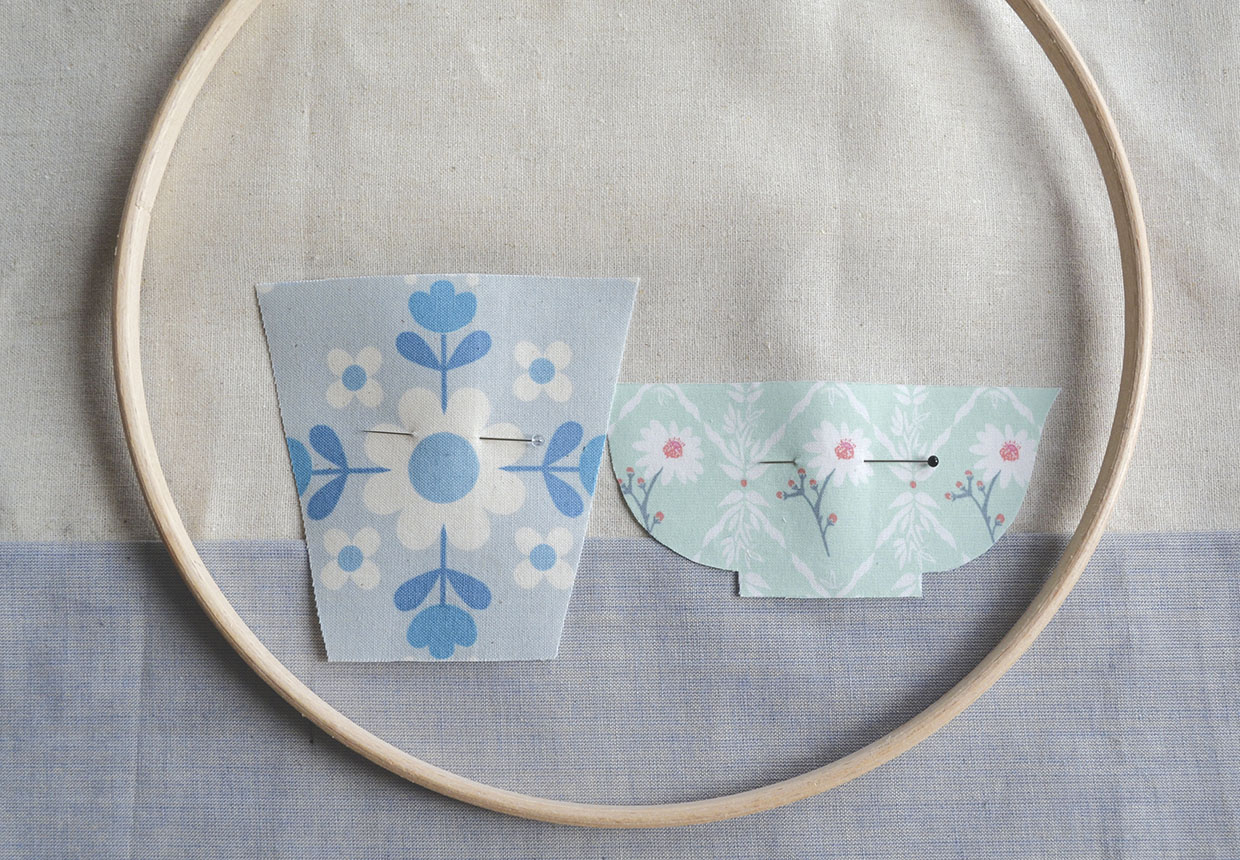
Place the pots as shown in the image, so they overlap the seam between the two fabrics, and pin in place.

Floral embroidery hoop step one

Step 2

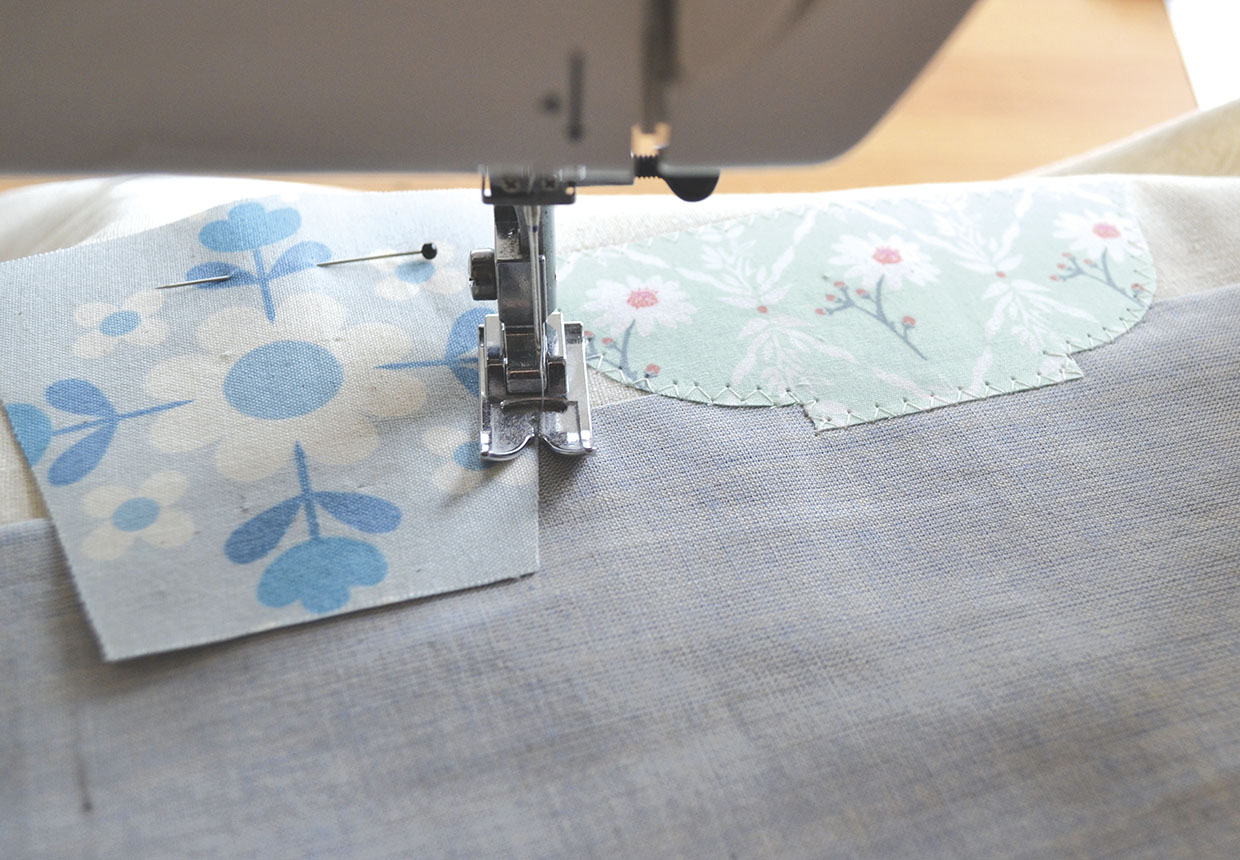
With a medium zigzag stitch, sew around the edges of the pots.

Floral embroidery hoop step two

Step 3

Stretch the fabric over your embroidery ring.

Embroidering the design

Step 1

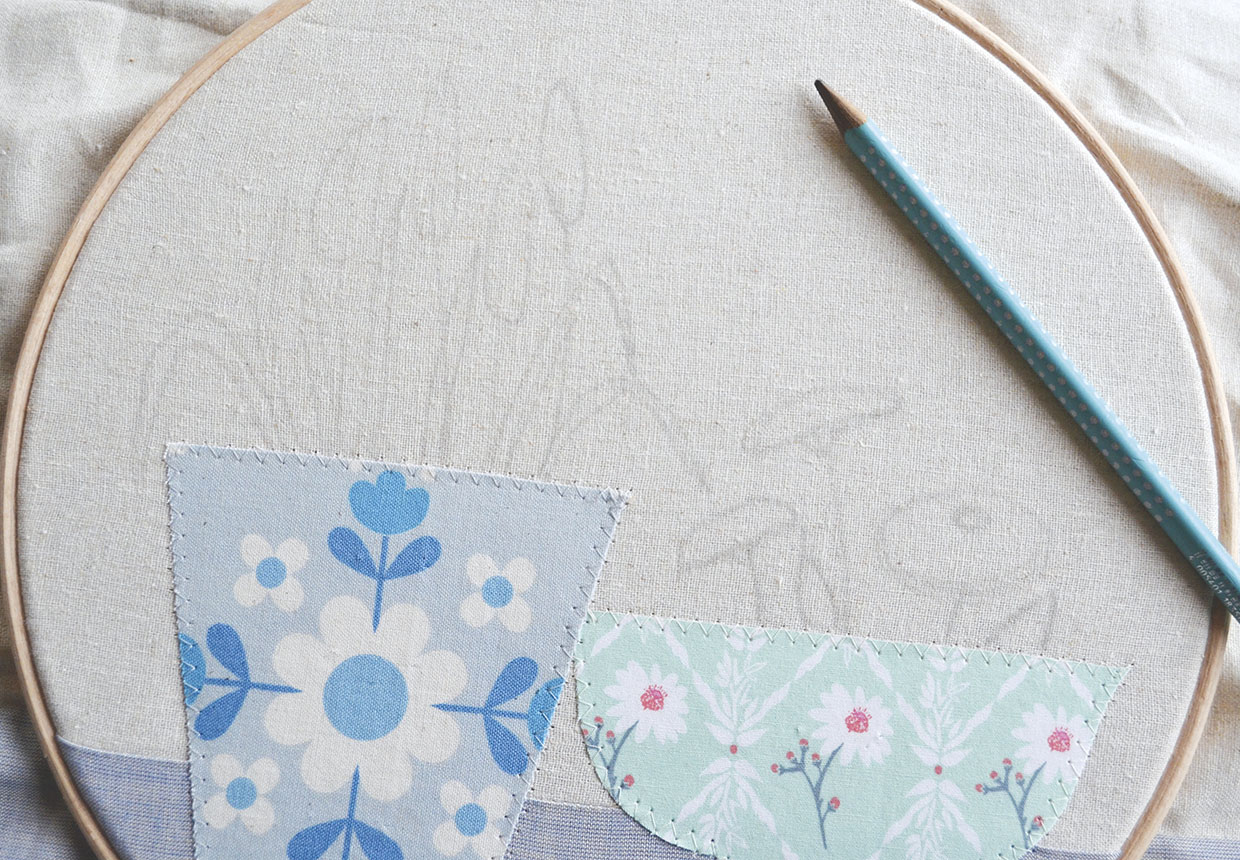
With a pencil, lightly copy out the embroidery diagram provided on the template onto your fabric.

Floral embroidery hoop step three

Step 2

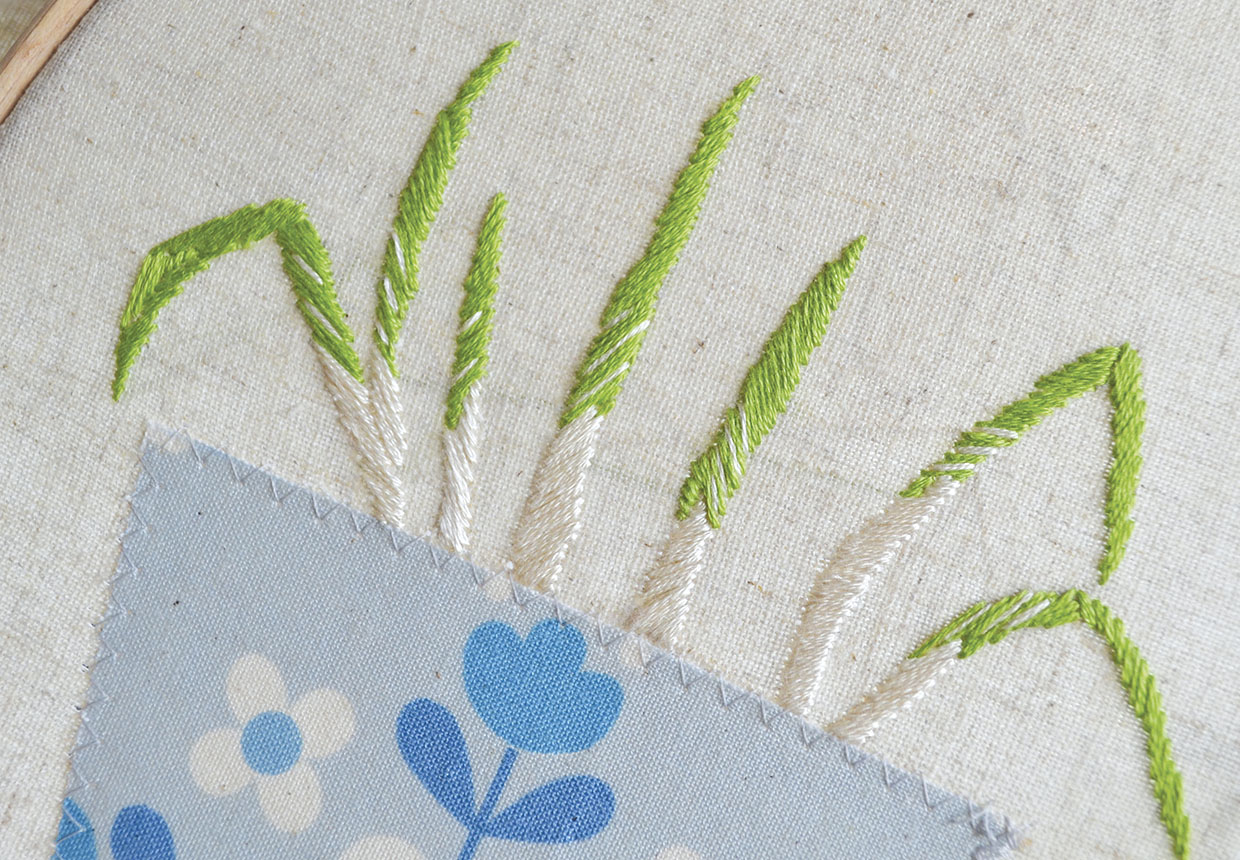
Use a running stitch in mint green for the left pot and mid-green for the right to sew the stems, and satin stitch for the leaves using mainly light green, with cream for the base of each leaf for the left pot and mid-green for the right. We used three strands of embroidery cotton for all of the embroidery.

Floral embroidery hoop step four

Step 3

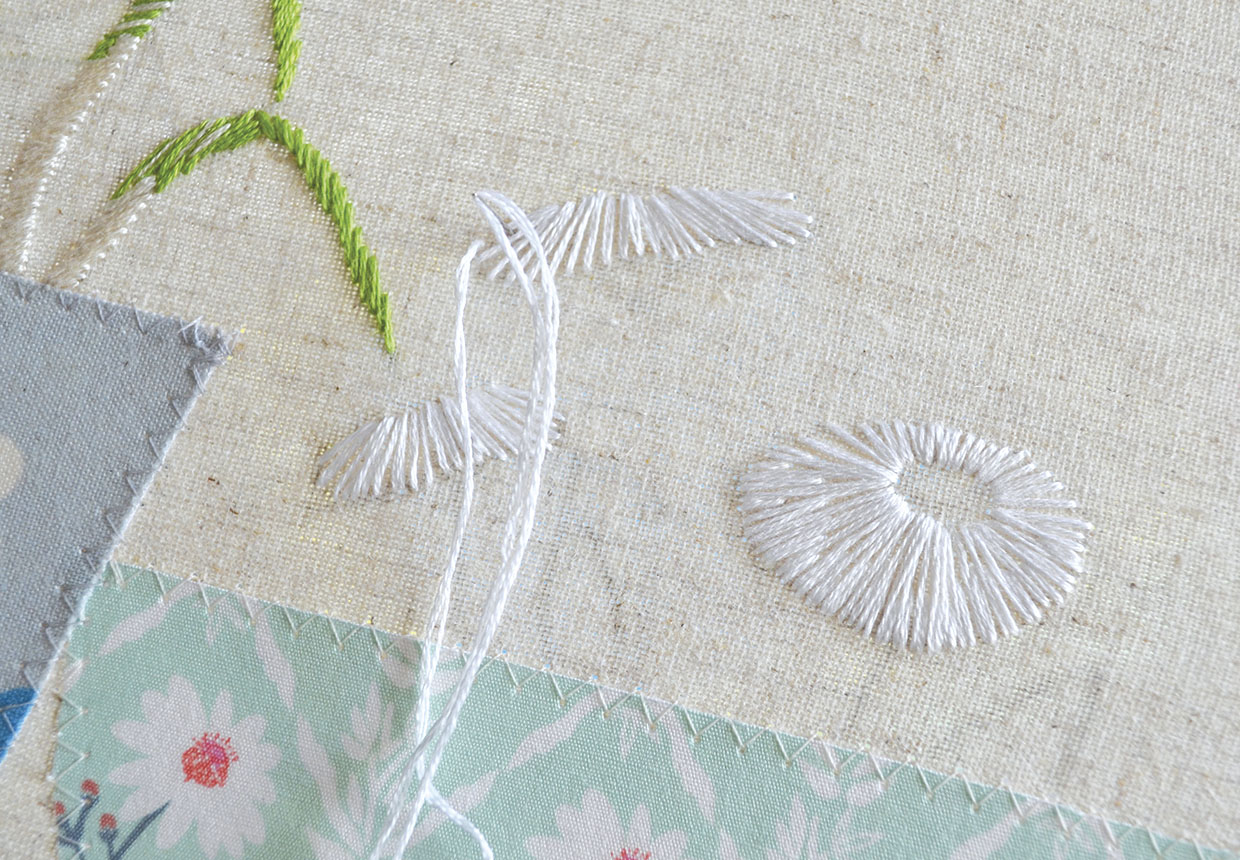
Embroider the flowers on the right in white, using radiating stitches, and finish with straight satin stitches in pale mustard for the flower centres.

Floral embroidery hoop step five

Step 4

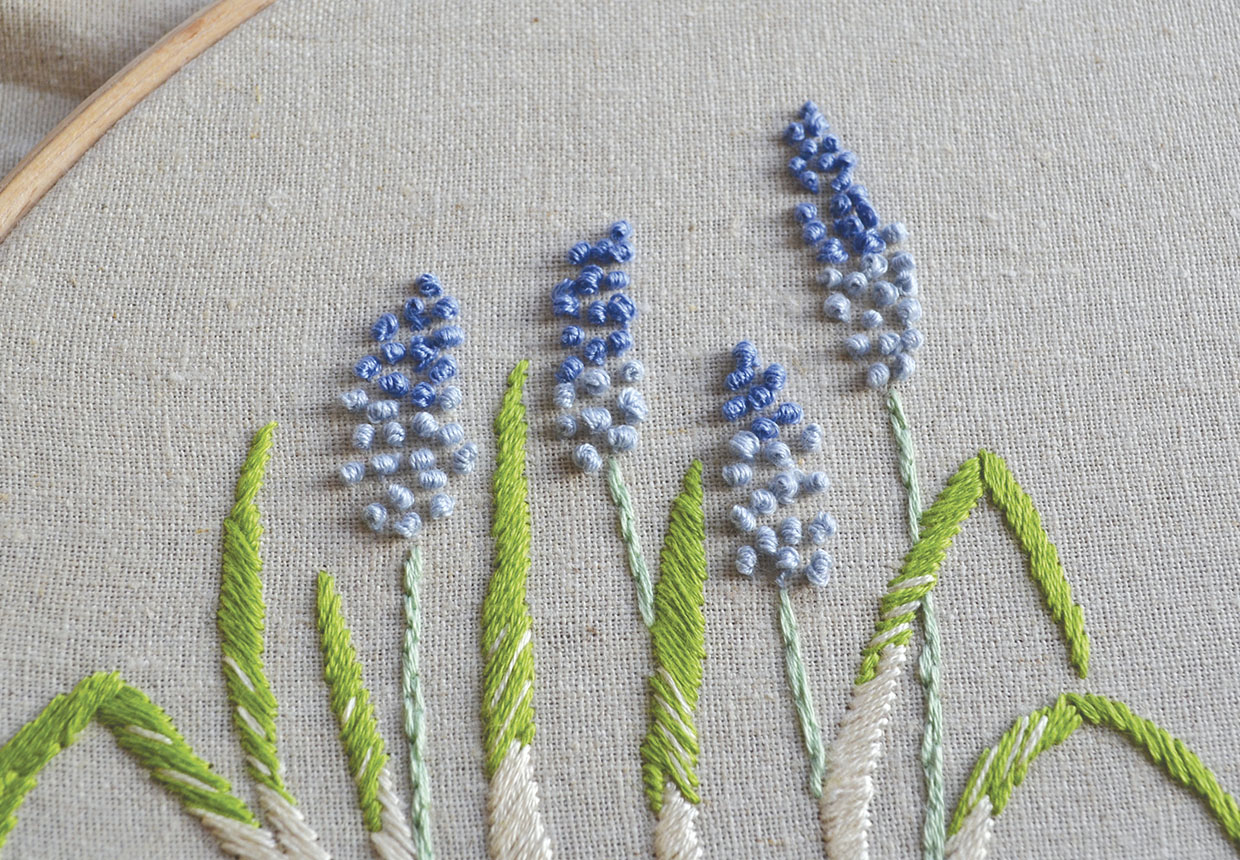
Embroider the grape hyacinth flowers using French knots (we used around six or seven loops for each knot). You can of course alter the number of flowers and their positioning as you wish – the template is a guide for the suggested flower placement.

Floral embroidery hoop step six

Finishing off

Step 1

Trim the excess fabric at the back so there is about 3cm (1¼in) all the way around.

Step 2

Cut the felt into a 25.5cm (1018in) diameter circle (or the diameter of your hoop if different) and pin to the back of the embroidery.

Step 3

Hand-sew the felt to the back of the embroidery, tucking the excess fabric under the felt as you go to neaten.

You’ve finished! Display your beautiful floral embroidery hoop with pride or give it to a green-fingered friend as a present!

Floral embroidery hoop