How to make placemats with embroidery

How to make placemats with embroidery

Learn a new stitch and add a handmade touch to your table with this easy embroidered clouds placemat project by Mollie Johanson.

6 issues of Simply Sewing magazine for £14.99|Save 78%!

Published: May 31, 2020 at 8:00 am

This fab project allows you to learn two fabric techniques in one simple make - how to make placemats and how to do some simple cloud cross stitch! It's the perfect project to give your dining table a crafty new lease of life! Once you've made this project, you can find even more embroidery patterns for free here on Gathered.

You will need

  • Linen fabric: 40x95cm (16x38in)
  • Iron-on heavyweight interfacing: 32x44cm (125/8x173/8in)
  • Binding fabric: 20x52cm (8x21in)
  • Stranded cotton: lavender and white
  • Matching thread
  • Basic sewing kit

Notes

Use a 5mm (1/4in) seam allowance.

You will need to download and print the free cloud cross stitch placemat pattern template.

Free cloud cross stitch placemat pattern

You will need:

  • Linen fabric
  • Iron-on-interfacing
  • Fabric for binding
  • Matching thread
  • DMC stranded cotton
  • Basic sewing kit

Step 1

Working cloud stitch

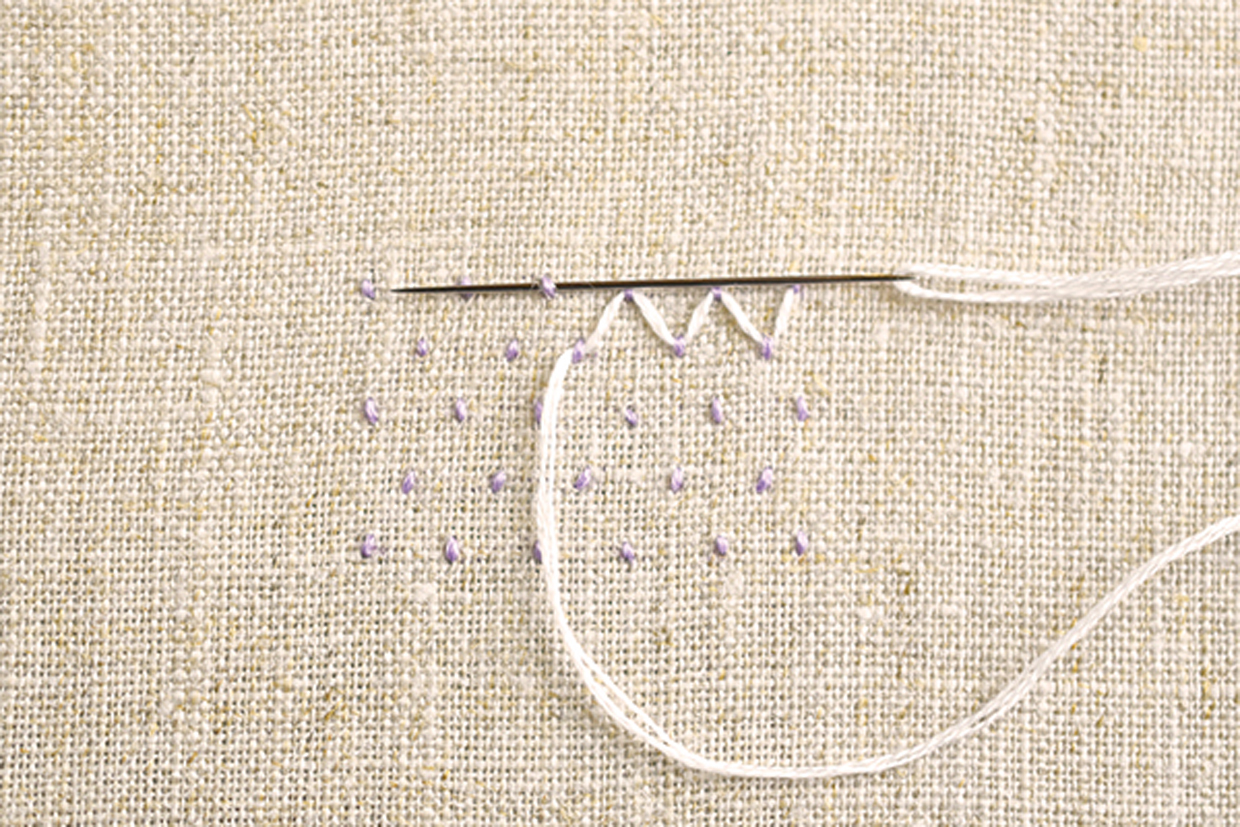
Work several rows of evenly spaced vertical straight stitches, staggering each row.

Step 2

Using different coloured thread, bring your needle up from the back near the area you are stitching. Slide your needle from right to left through the first straight stitch, then through the first straight stitch in the next row.

Step 3

Repeat this, alternating between the rows, then take your needle back down.

Cloud_cross_Stitch_Step01

Step 4

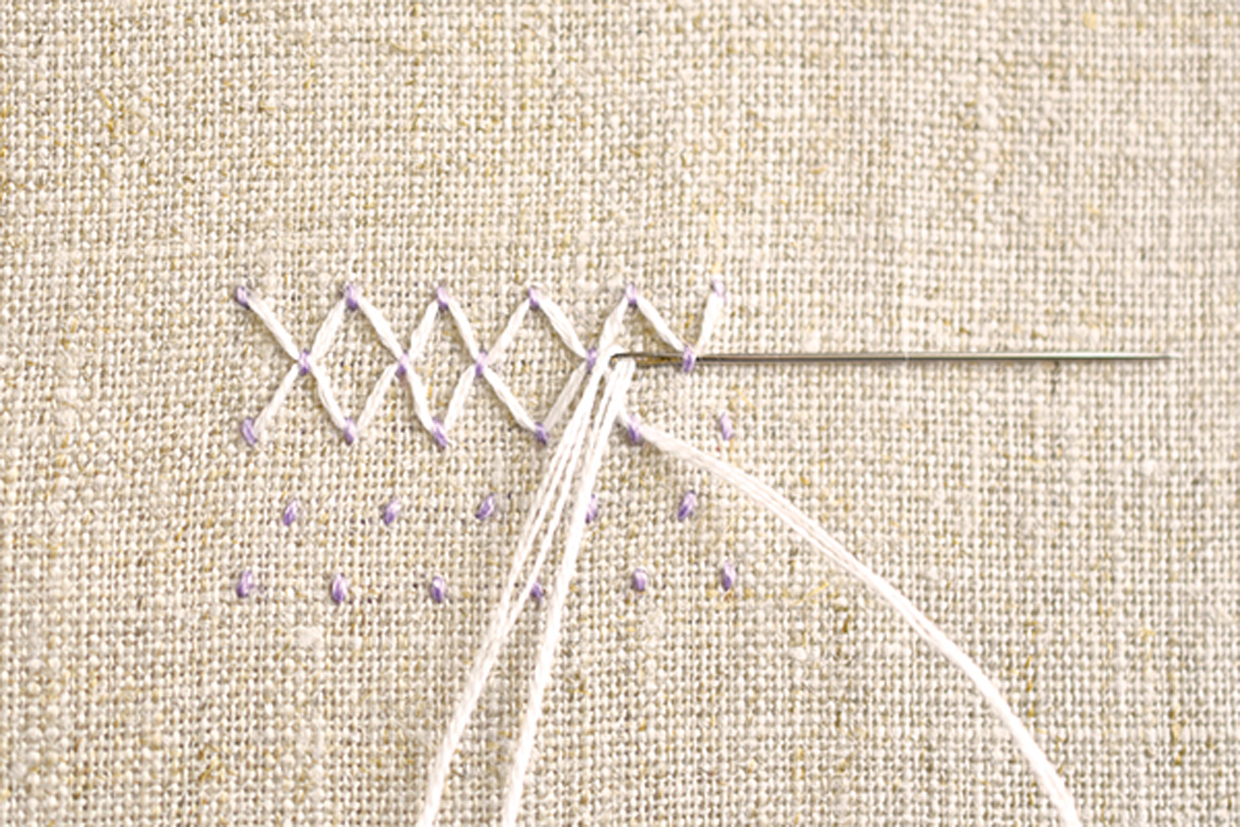
Come up again and slide your needle from left to right through the first straight stitch of the third row, then through the first straight stitch in the row above.

Cloud_cross_Stitch_Step02

Step 5

Repeat this, alternating between the rows. When you’re filling an area, you may need to form partial rows at the edges.

How to make fabric placemats

Cloud_cross_Stitch_Fabric_Placemat

Cutting out

Step one

Cut the linen fabric as follows:

Placemat front: 40x50cm (16x20in).
Placemat back: 32x44cm (125/8×173/8in).

Step two

Cut the binding fabric into four strips, 5x52cm (2x21in) each.

Transferring the design

Step one

Download and print out the free cloud cross stitch placemat pattern

Step two

Place the template underneath the front fabric, positioning it 10cm (4in) from the raw edges at the top left corner of the linen.

Step three

Trace around the clouds outline using an erasable pen.

Embroidering the clouds

Step one

Using three strands of stranded cotton throughout, fill the clouds with cloud stitch. Work the vertical straight stitches using lavender thread and the weaving in white.

Step two

Outline the edges of the clouds in backstitch using lavender thread.

Assembling the placemats

Step one

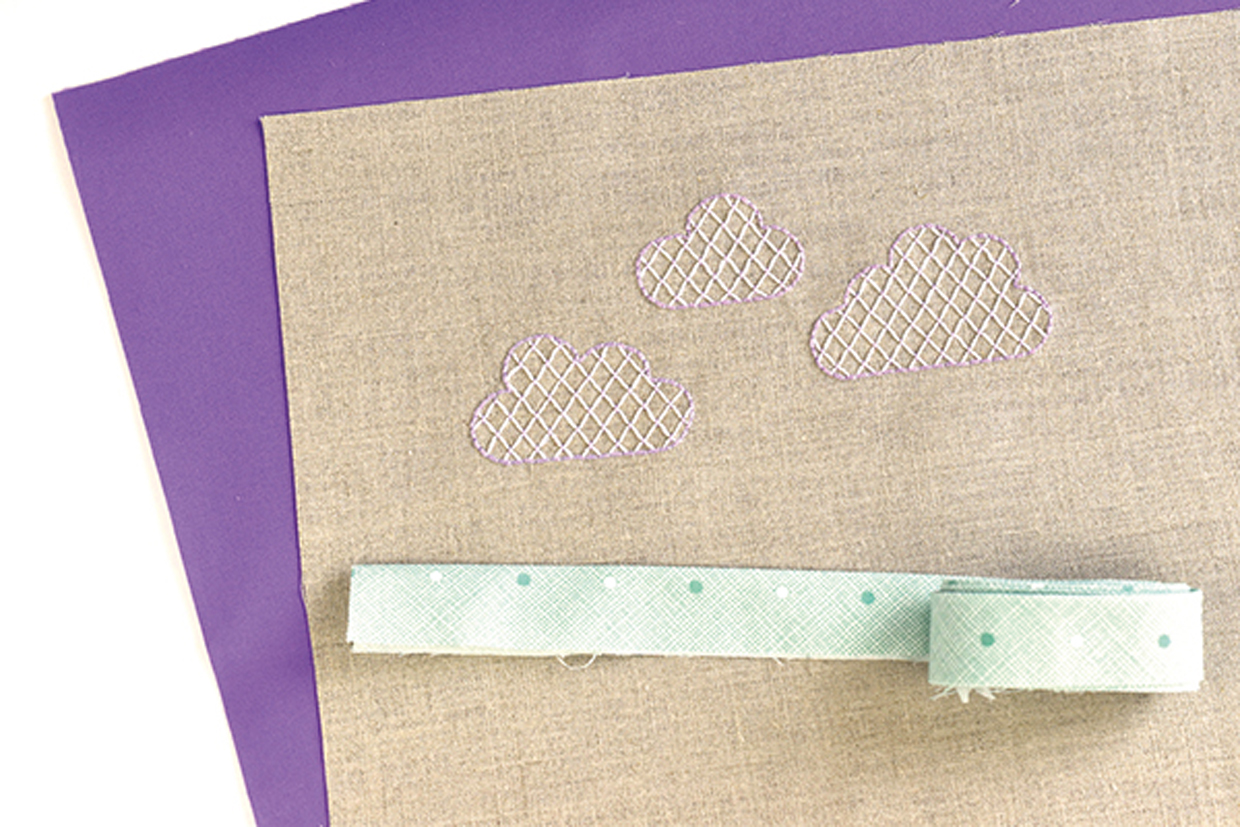
Trim the embroidered front fabric to 32x44cm (125/8×173/8in), with the outer edges of the clouds 3cm (11/4in) from the top and left.
Cloud_cross_Stitch_Step03

Step two

Press the interfacing on the wrong side (WS) of the placemat back fabric. Pin the front and back of the placemat WS together.

Binding the edges

Step one

Join the binding strips right sides (RS) together at the short ends to make a long strip.

Step two

Fold the strip in half lengthways with WS together and press, then turn one short end under by 1cm (3/8in) to the WS.

Step three

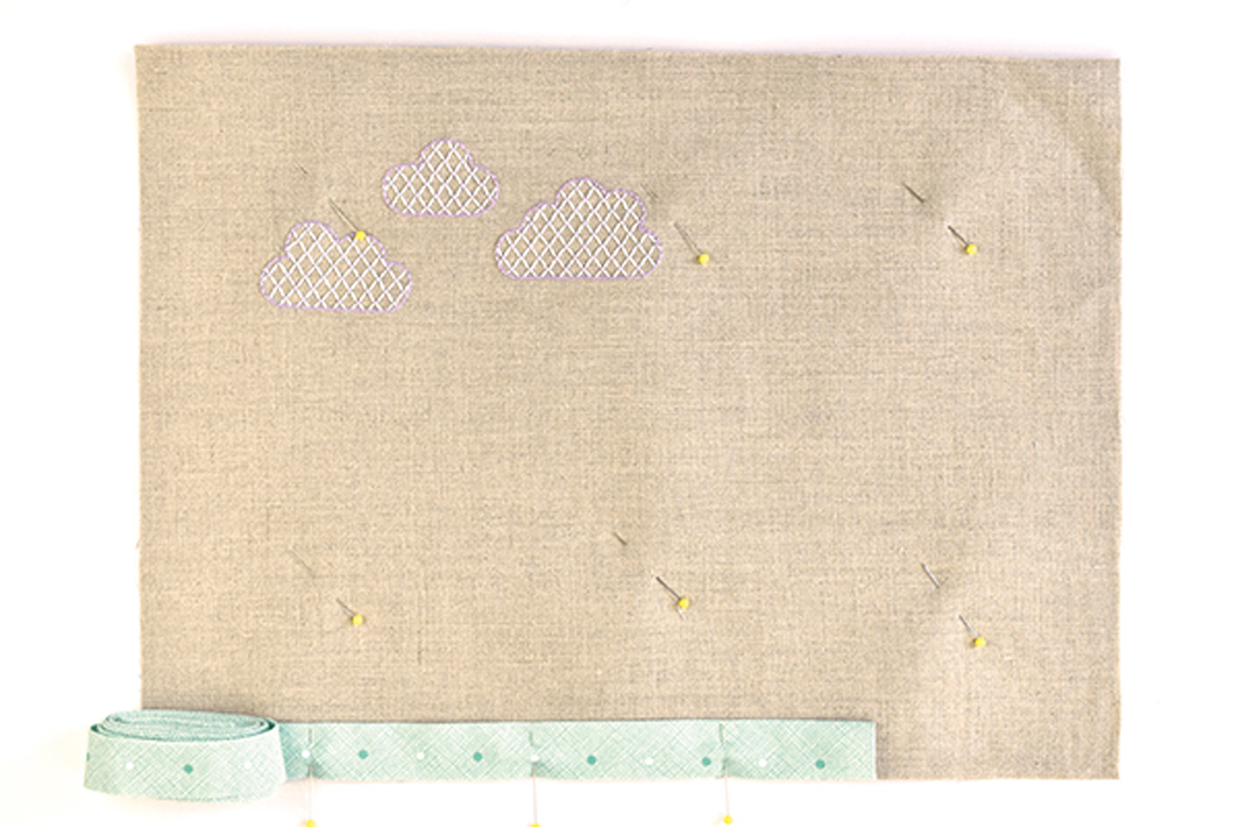
Pin the binding to the front of the lower edge of the placemat.
Cloud_cross_Stitch_Step04

Step four

Sew the binding in place, mitring the corners as you go.
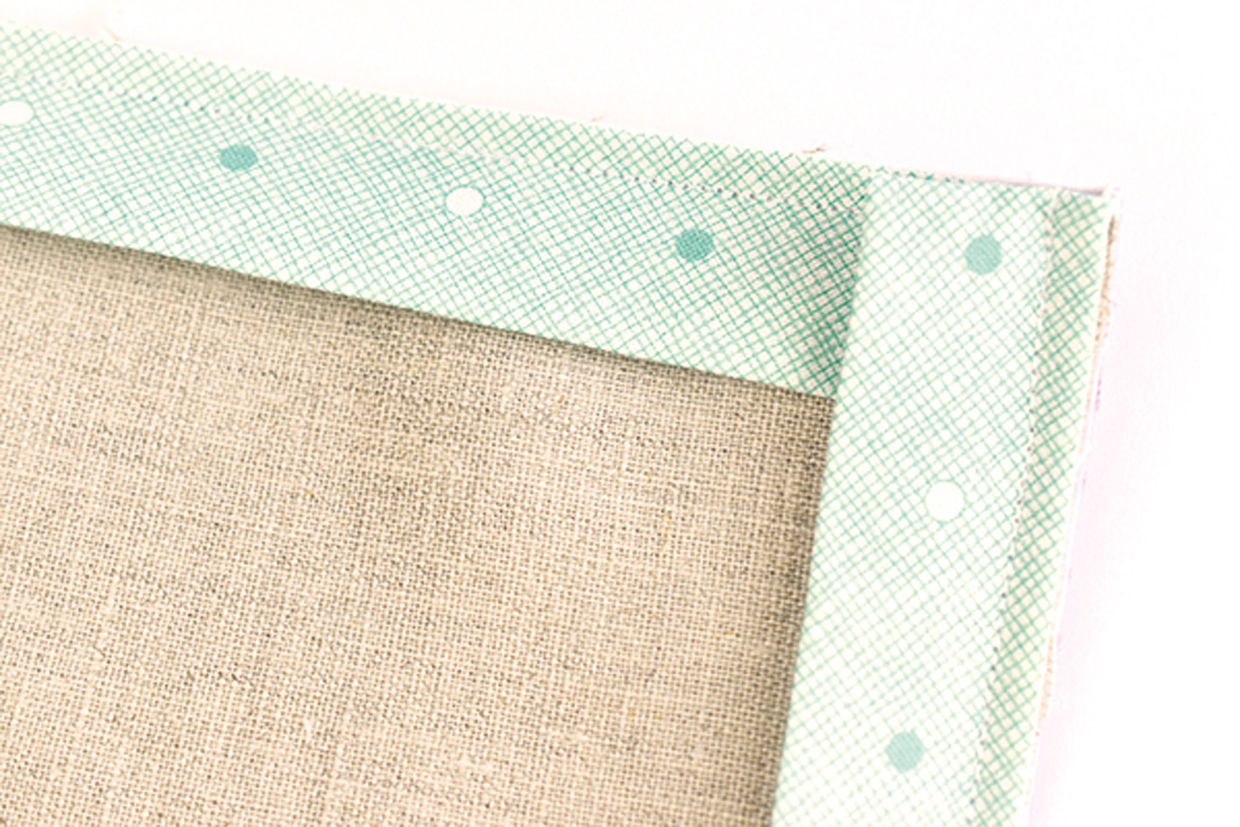
Cloud_cross_Stitch_Step05

Step five

Work a running stitch just inside the edge of the binding to decorate.
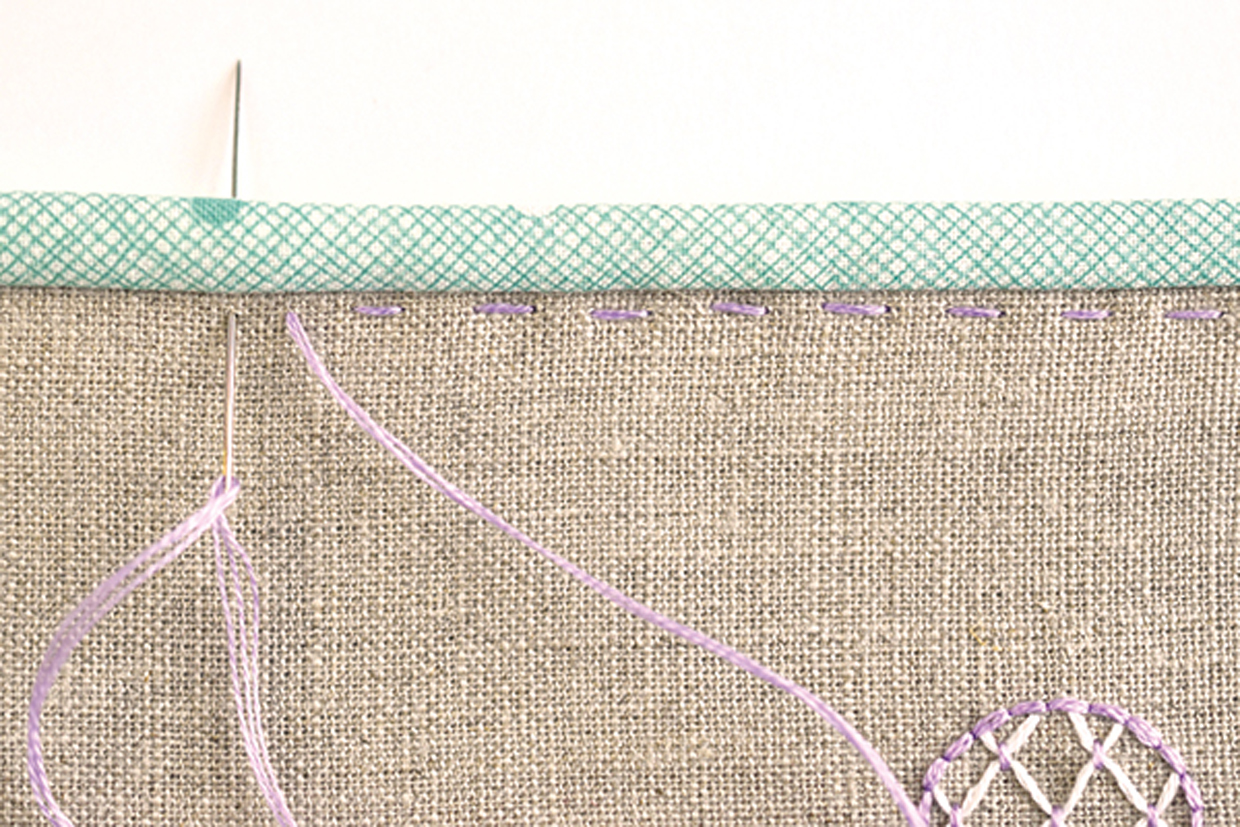
Cloud_cross_Stitch_Step06