How to mount cross stitch in a triple fold card

How to mount cross stitch in a triple fold card

Give this tidiest, most professional look to your cross stitch card - messy backs are hidden in a triple fold card!

Get your PURElite magnifying craft lamp worth £35 when you subscribe to The World of Cross Stitching magazine today!

Published: October 16, 2020 at 2:47 pm

When you have taken the time and trouble to stitch a special cross stitch card design for a friend or relative, you want to make it look as good as you can! Using a triple-fold aperture card gives the most professional finish to your cross stitch card. The central panel of the card has an aperture cut into it, which will frame and display your finished stitching. Having an extra fold means the card has an extra panel, which you fold around behind your design to hide the back of your cross stitching, too!

Take a look at our easy step-by-step guide to make a cross stitch card using a triple aperture cross stitch card mount. Click to find a free cross stitch animal patterns to use in your card. Or browse our free modern cross stitch patterns – we have lots of designs for you to try! How about these gorgeous free cross stitch card patterns, these cute cross stitch patterns for cards or these caterpillar cross stitch patterns.

Step 1

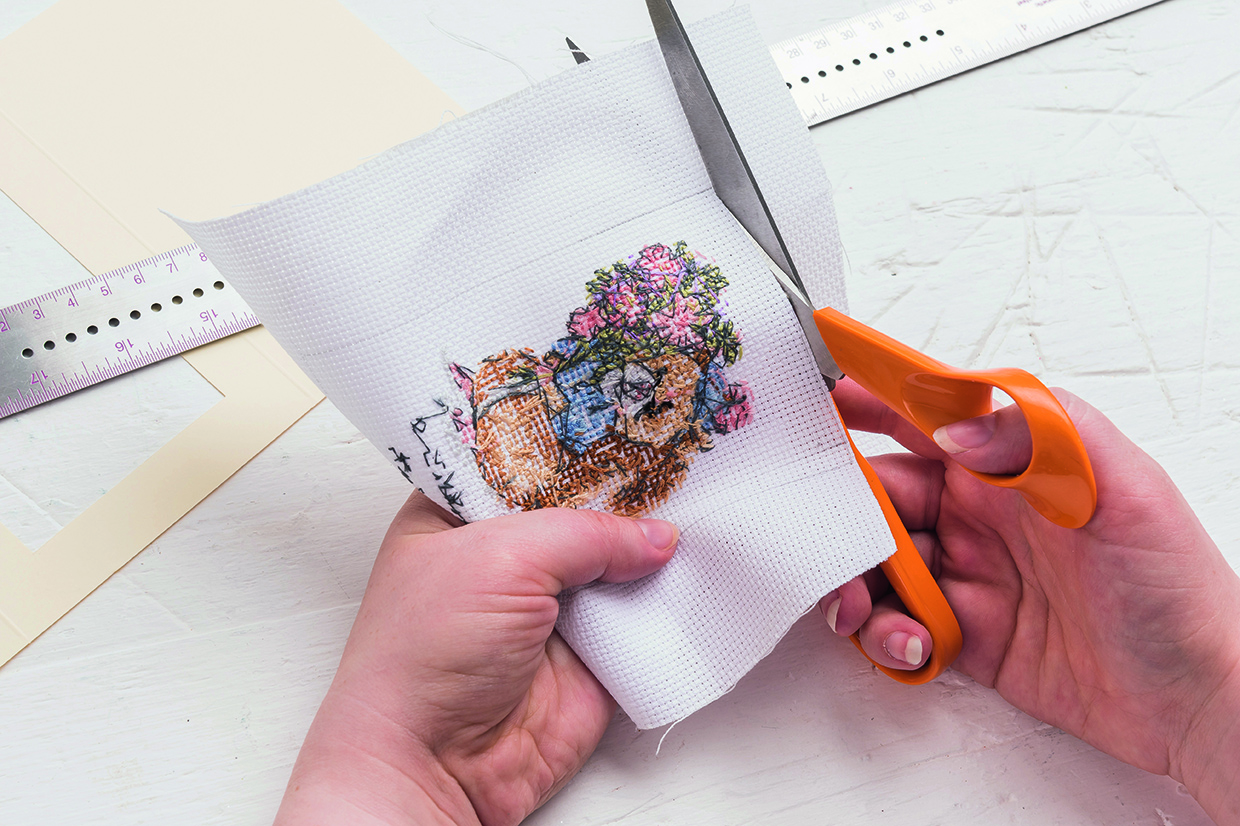
card mounts for cross stitch 1

Measure your card aperture and then cut out your stitching slightly larger than the aperture, with a minimum 1cm (1/2in) border. (If your design is going to be placed off centre into the aperture then bare that in mind before cutting.)

Step 2

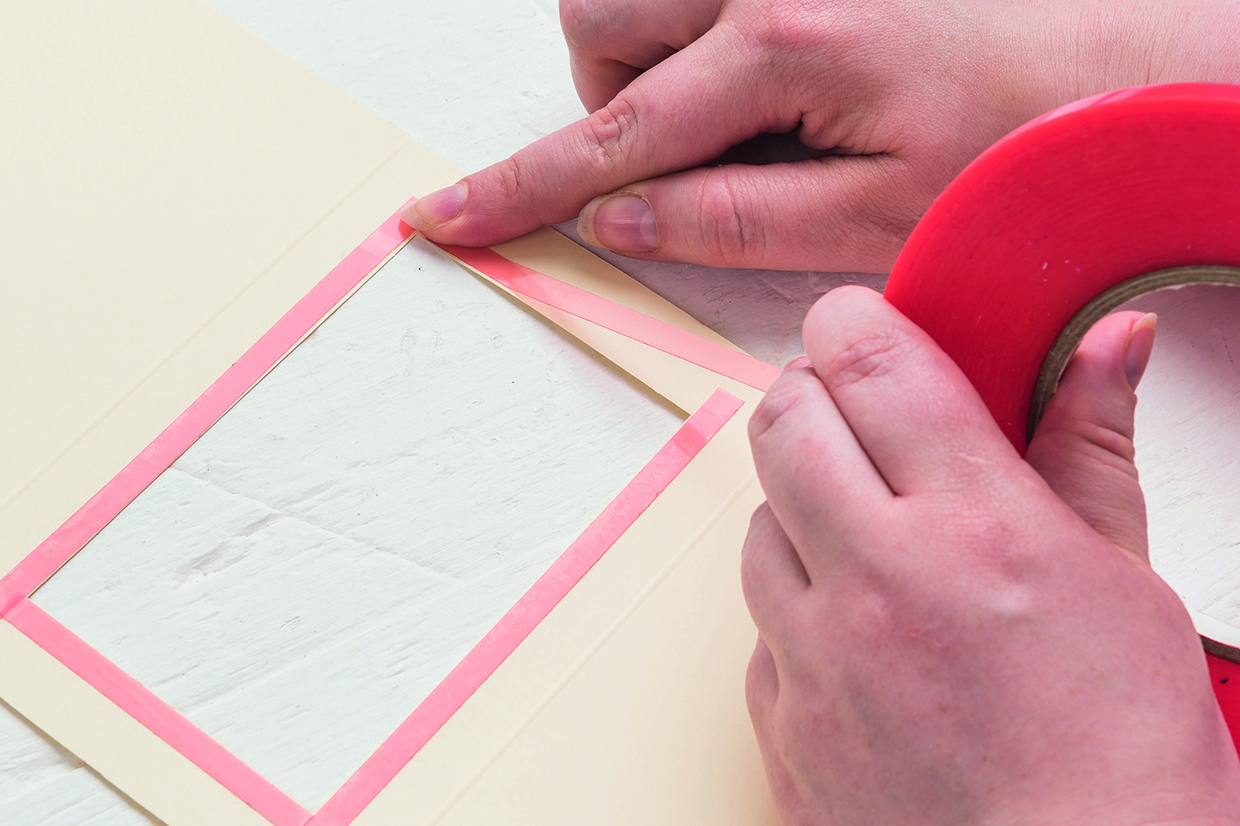
card mounts for cross stitch 2

Stick strips of double-sided tape around the aperture on the reverse side of the card, as close to the edge as possible.

Step 3

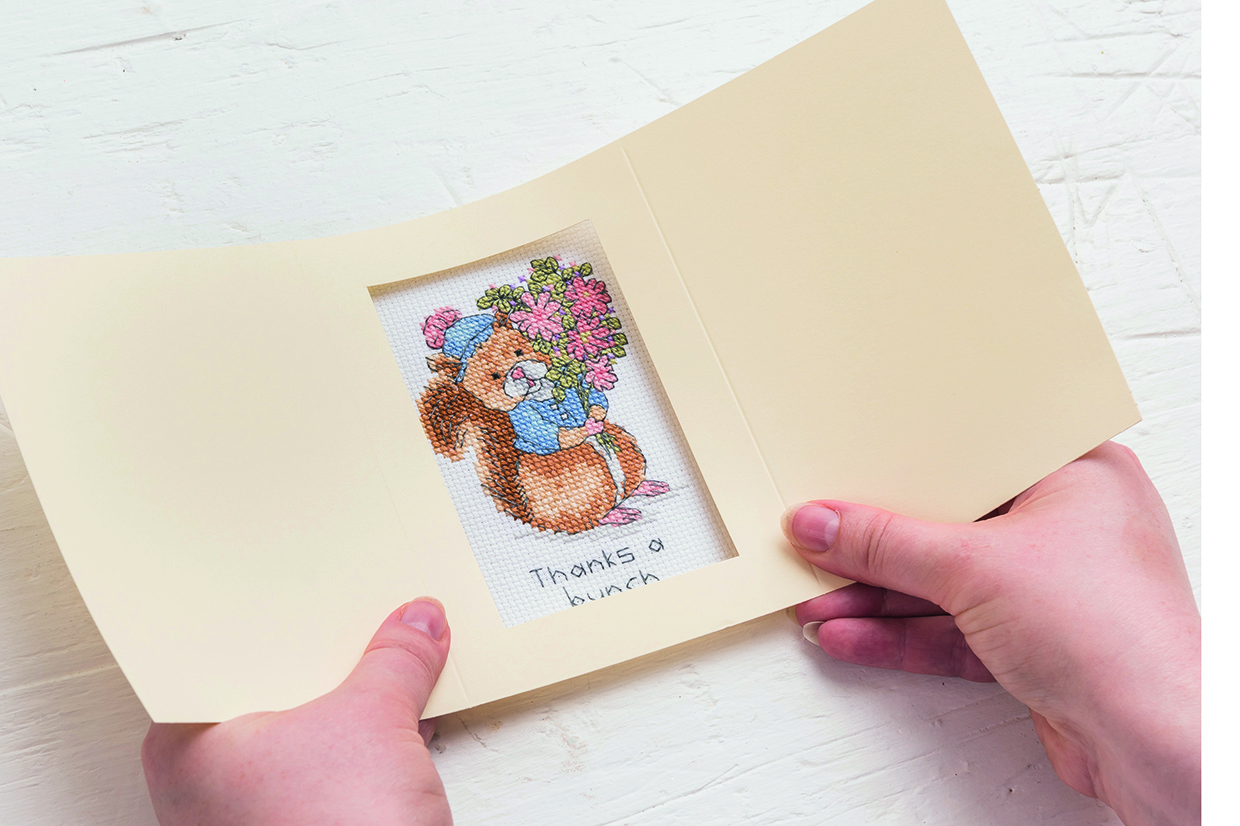
card mount for cross stitch 3

Lay your stitching face-up and position the card above, with the aperture framing the design. Move the card around until you are happy with the way it frames the design and then stick into position.

Step 4

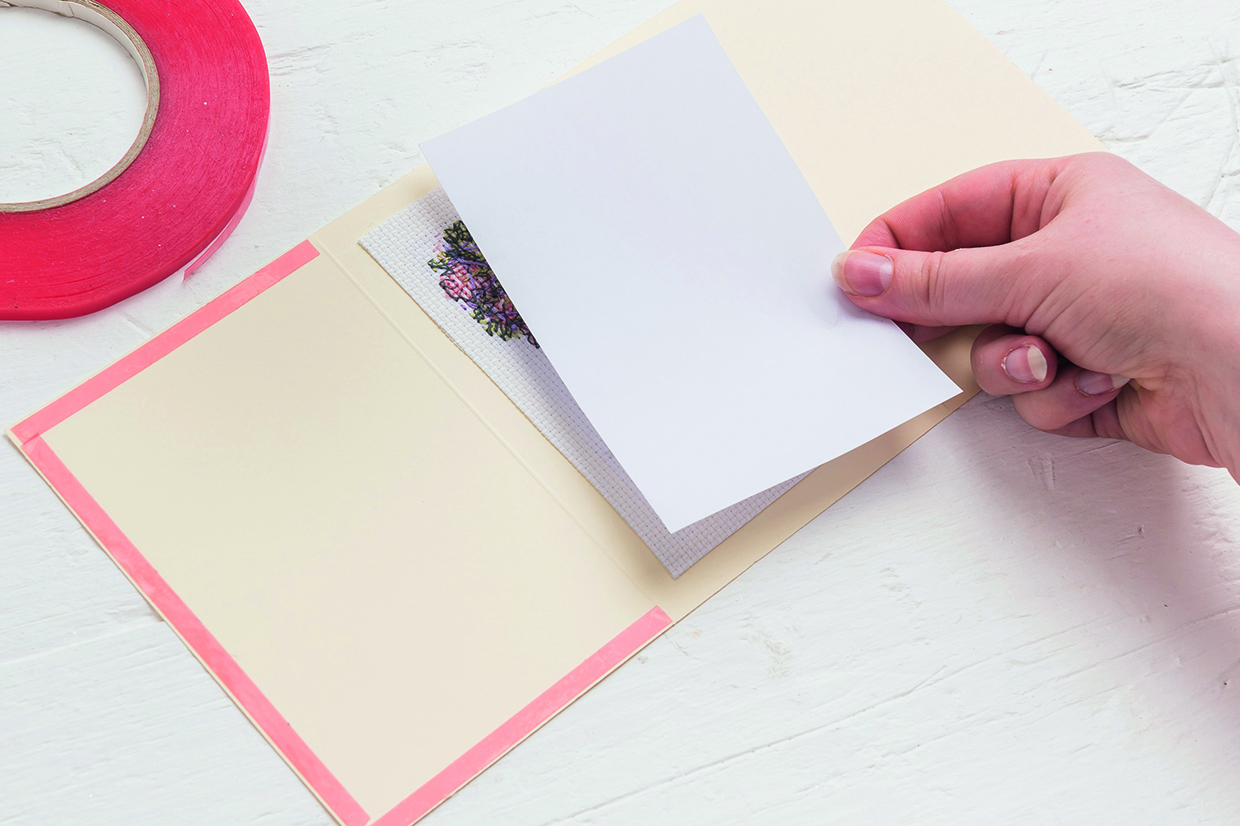
card mount for cross stitch 4

Stick more strips of double-sided tape to the left-hand flap of the card, insert a piece of white paper behind the aida, and then fold over the flap to conceal the back of the stitching.

  • We recommend using super-sticky double-sided tape around the aperture of the card to ensure it doesn’t pop open over time
  • If using coloured aida fabric,  insert a matching paper, instead of white, between the back of the stitching and the card

Try a shaped aperture

Not all apertures need to be rectangular or square! Depending on your design, an oval or shaped aperture may frame it better, as in these celebration cards. Find the charts for these celebration card free cross stitch patterns. Or try a new finish with a fun cross stitch advent Christmas stocking

Want to find out more about cross stitch?

If you are looking for advice on getting started in cross stitching, check out our cross stitch for beginners article or click to find out more about cross stitch thread and cross stitch fabric. If you want to take a look at the free cross stitch patterns we have available for you on Gathered, we have lots of brilliant designs for you! For floral inspirations, try out our lavender cross stitch patterns and our sunflower cross stitch pattern or browse our selection of cross stitch flower patterns. If you are looking for simple designs that are great for beginners try our children’s cross stitch patterns or our  cat cross stitch patterns. For fun cards which are always popular, try our caterpillar cross stitch patterns or for more grown up celebrations, our gorgeous cross stitch cards for all occasions. Don’t miss our special stitch of Durene Jones cross stitch fox pattern either!