How to make a pencil case caravan

How to make a pencil case caravan

These fab caravans are a fun choice for cross stitch for kids – we've got the cross stitch patterns and a tutorial on how to make your pencil case.

Try 6 issues of The World of Cross Stitching magazine for £9.99

Published: November 4, 2022 at 6:01 am

Wouldn’t it be lovely to have your very own caravan painted in the prettiest ice cream shades, hung about with bunting and baskets of blooms? We sadly can’t give you the real thing, but we can give you the next-best alternative – a pair of sweet stitched caravans made up into pencil cases using simple sewing techniques.

The charts for each caravan are worked in whole stitches and backstitch only, making them easy projects for everyone. Once you’ve finished stitching, have fun choosing pretty fabrics, then finish with pom-pom trim and wooden buttons for a folky flourish!

How to make a pencil case caravan: Materials

  • Threads: Stranded cotton as listed in the key
  • Needle: Size 24 tapestry needle
  • Fabric: 14-count white aida measuring 15x15cm (6x6in) for each design
  • Extras: Backing fabric, iron-on interfacing, buttons, zip and pom-pom trim of your choice from your local craft shop

How to make a pencil case caravan: Technical

  • Stitching time: 6-8 hours each
  • Type of stitches: Whole cross stitch, backstitch
  • Level: Beginner
  • Stitch count 50 high x 40 wide
  • Design area 14 HPI (28-count evenweave) – 9x7.5cm (3½x2¾in)
You will need:

  • DMC stranded cotton
  • 14 count aida fabric
  • Patterned fabrics
  • Zip
  • Pom pom trim

Total time:

NaN hrs NaN mins

Cross stitch and sewing time

Step 1

Cut two squares of backing fabric measuring 15x15cm (6x6in), and one rectangle measuring 8x15cm (3¼x6in). Back all pieces with iron-on interfacing. 

Step 2

Pin a zip measuring 20cm (7¾in) along the edge of a fabric square with right sides facing. Sew in place using a zipper foot on the sewing machine.

Step 3

Fold back the fabric and reinforce the zip by stitching over the top edge, but not so close the zip will catch. Repeat steps 2 and 3 to attach the zip to the other fabric square.


Step 4

Attach the pom-pom trim 5cm (2in) from the zip, with the pom-poms facing away from the zip. Stitch both ends of the trim to the fabric, so that the pom-poms drape across, as shown.


Step 5

Tack your stitching and fabric together with right sides facing, and one end of the zip at the top of your stitching. Sew together leaving a one aida block border, then open the zip.


Step 6

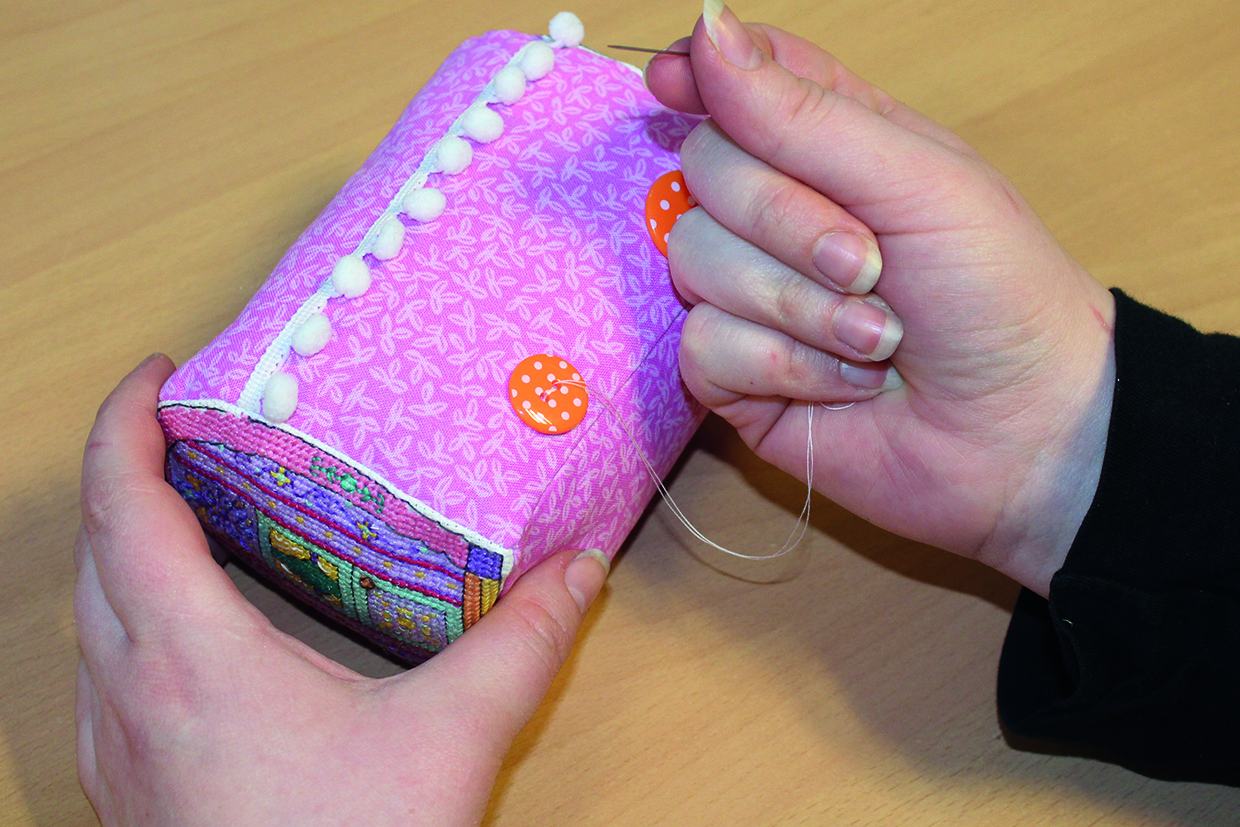
Repeat step 5 for the other end. Pin the remaining fabric to the bottom with right sides facing, leaving the zip open, then sew together. Turn through and attach buttons.

How to make a pencil case steps

How to make a pencil case caravan: Download

There are two cross stitch patterns you can cross stitch to be the front of your caravan. Click to download the How to make a pencil case caravan cross stitch charts. The download is an a4 PDF.

See more of Heather’s craft creations on her Instagram @heathers_handmade_hub

More cross stitch for kids

Looking for more cross stitch patterns for children? How about one of these! If your littles ones like bugs, they’ll love these Caterpillar cross stitch patterns. Or for a special project for children to stitch for Father’s day, try this Gold medal cross stitch pattern. Help them get to grips with cross stitch with theseChildren’s cross stitch patterns featuring cute woodland animals in simple stitches. Het your family school ready these these school kids cross stitch patterns or focus on summer holidays with our British beach huts cross stitch pattern and our Sailing boat cross stitch pattern. For advice and ideas to help teach cross stitch to children, read our 10 top tips to get kids cross stitching article.