How to cross stitch for beginners
Cross stitch is a particular kind of embroidery worked on a gridded fabric where each stitch forms a little X. It's like painting by numbers but with thread!
As you follow a pattern and work each cross stitch in different colours you'll build up amazingly detailed scenes, or create small motifs full of colour and texture.
Because every cross stitch is composed of just two tiny stitches, it's quick and easy to master the basics. Anyone can give it a go, and this beginner's guide will give you the skills and knowledge you need to start cross stitching straight away.
Discover more cross stitch advice:
Cross stitch is such a fun and therapeutic craft to learn, and can be a great mindful activity to help your mental health.
You can pick it up in just a few hours, and the creative possibilities are endless! You can cross stitch designs for greetings cards, gifts, framed decor and more.

Beginners guide to cross stitch - contents:
- What materials and tools do I need to cross stitch?
- How to follow a cross stitch chart or pattern
- How to separate cross stitch thread strands
- How to cross stitch - Making your first stitch
- Give cross stitch a try with this simple pattern
- Essentials tips for starting cross stitch
- Cross stitch patterns for beginners
What materials and tools do I need to cross stitch?
Cross stitch is generally done with a tapestry needle which has a blunt tip and large eye. For fabric, beginner stitchers start off using aida – a block-weave fabric, which is divided into squares by a grid of holes, making it an ideal fabric for beginners. Each cross stitch is worked over one square. There are different sizes but most patterns will used 14-count aida.
Or you may prefer evenweave, which is also woven in a grid but in a finer count. Each cross stitch is usually worked over two threads of the fabric. There are different sizes but most patterns will used 28-count evenweave as an equivalent to 14-aida.
Finally, embroidery thread (or floss). This is usually six-stranded and you'll have to separate out two or three lengths for your projects. See 'How to separate cross stitch threads' below.
How to follow a cross stitch chart or pattern
Cross stitch charts are made up of coloured squares containing symbols that represent squares to be stitched on the fabric and what colour it should be. A tiny symbol denotes a fractional stitch in the corner of the square in which it’s to be worked.
The centres of most charts are marked with arrows on the edge of each side. To find the corresponding centre of your fabric, fold it in half horizontally and then vertically – the point where the creases cross marks the centre. Start stitching here to ensure the design is positioned in the middle of the fabric.
A chart will usually be accompanied by a key, which tells you what colour to stitch each square with.


You'll find more in-depth help on following cross stitch charts and patterns in our article - How to use a cross stitch pattern
How to separate cross stitch thread strands
While embroidery thread or floss comes in lengths of six strands, you don't use all six in cross stitch. You will usually need to separate out your threads for cross stitch, as certain stitches require a specific number of threads – usually two, or three if using dark fabric.
It can sometimes become a bit of a chore if you don’t use the right technique (hello knots!). Help avoid those tangles by watching our quick video to show how to separate your threads in a quick and easy way.
How to separate threads video tutorial
- Step 1 – Take a cutting of thread
- Step 2 – Hold it gently between your index finger and thumb
- Step 3 – Pull and single thread away from the other 5
- Step 4 – Pull the thread forwards gently away from you
Top tip: keep your hand relaxed and don’t pull the thread hard!
How to cross stitch - Making your first stitch
We'll now show you the basics of your first cross stitch, and you can then go on to put it into practice with a free pattern. You'll also find our expert tips further down this article too!
You will need:
- Stranded cotton
- 14-count Aida fabric
- Tapestry needle
Step 1
Start by threading one of your cross stitch needles with two strands of cross stitch thread and knot the opposite end.
Take your needle down through the aida, a short distance from where you want to start stitching then back up where you first stitch will start, leaving the knot on the surface.
We’ll snip this off later once the thread is secure. Starting your cross stitch like this is called the waste knot method.

Step 2
You can now stitch towards your starting knot, following our free chevrons cross stitch pattern chart as a guide for your stitches.
Each symbol on the chart represents one cross stitch on the fabric.
Work the first part of the stitch by making a diagonal stitch. This should sit from the bottom left to top right over a single aida block.

Step 3
To complete this cross stitch, make a second diagonal stitch, this time working it from bottom right to top left, crossing over your previous stitch.
The different coloured chart symbols represent different colours of stranded cotton – you can choose whichever colours you prefer for this simple design.

Step 4
Continue working towards your starting knot – your stitches will secure your starting thread on the reverse of your work.
Once you reach the knot, snip it off.
To finish your thread, simply pass it through the reverse of your stitches a few times so it’s secure then cut off the end.

Give cross stitch a try with this simple pattern
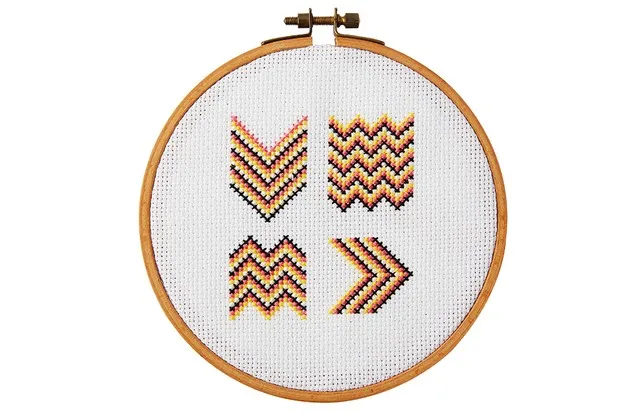
Learn how to start starting with this fun chevron design. The beauty of this design is that you can use any colours you want and you won't have to rethread your needle too often.
To stitch the design above, download our free chevrons pattern.
We are stitching on 14-count aida, which is the most common open weave fabric for cross stitch and a great choice for beginners. It is stiff and easy to handle, with clearly defined holes in the fabric. For other kinds of fabric, check out our cross stitch fabrics guide.
You usually use two strands of cotton for stitching on 14-count aida. If you are using a different fabric count, found out how many strands you should use in our how many strands of thread for cross stitch article.
Embroidery cotton comes in six-stranded skeins – split it into individual strands and put two together before you thread the needle.

Need some more advice? Find out how to use an embroidery hoop and get started with your stitching.
Essentials tips for starting cross stitch
Step 1 – Choose your project
Make sure you choose the right level for you – if you’ve never tried cross stitch before, it’s a good idea to start with kits or charts that are marked for beginners.
Absolute beginners should choose a design without fractional stitches – look for a pattern that’s made up of whole stitches, with a bit of backstitch detail, and that isn’t too large, so you can try it out and see results quickly.
For any terms you are not sure about, check out our cross stitch glossary
Step 2 – Gather your materials
Cross stitch kits come with all the fabric, needles and thread you’ll need to sew the design inside. If you have a cross stitch pattern only as opposed to a cross stitch kit, you’ll need to buy the materials you need.
As a beginner, you should buy the recommended cross stitch fabric and the cross stitch thread listed in the key, but click these links to find out more about these and gain the confidence to adapt designs to different sizes and colours!
Before you start to stitch, sort out the threads into different shades and note which symbol they match on the chart. Many cross stitchers use a thread sorter for this, and pre-cut some lengths of each one to save time later on.

If you’re stitching from a counted cross stitch chart then you’ll also need to buy cross stitch fabric, cross stitch thread and cross stitch needles. The chart should say which fabrics the design is intended for.
We recommend starting with aida fabric – it’s more beginner-friendly than evenweave or linen fabric. You can try those later! You’ll also see a list of the threads you need in the pattern's key.
Step 3 – Find the centre of the chart
We recommend always starting from the middle of the design. This is usually marked in some form (for example with arrows, a ‘0’ or triangles) around the edges of a chart.
Look for this symbol on the key for the colour of thread you need, plus the number of strands. Thread your needle with the required strands this colour.
Step 4 – Find the centre of your fabric
Fold your fabric in half horizontally then open it out and fold it vertically – the point where the two creases cross points to the centre. This is the point where you should start cross stitching, starting from the middle of your cross stitch pattern. This ensures the design sits centrally on your fabric.
Step 5 – Get stitching!
You’ve now got all of the essentials on how to cross stitch and it’s time to make your first project! Follow our step by step guide to how to cross stitch above to start stitching.
You can also use the loop method to secure your thread to the fabric before starting – this only works when using a single strand of thread doubled over in the needle, creating a loop at one end.
Make the first arm of your cross stitch as above, but leaving the looped end of thread hanging loose at the back of the fabric. Then pass the needle through the loop before completing the top arm.
To finish a thread, leave a thread tail of a minimum of 4cm (2in) on the back of the fabric, and catch it under a few nearby stitches to secure it, then trim all loose ends with embroidery scissors.
We recommend finishing all the cross stitch in your design before you work the backstitch or add any French knots – see our video guide on How to do French knots.

Find the right supplies with our cross stitch needle size guide.
Cross stitch patterns for beginners
When you are just starting out with cross stitch for beginners, it’s best to choose cross stitch patterns for beginners that use whole cross stitch and some backstitch for detail and definition.
Try not to tackle cross stitch design with lots of fractional cross stitches or French knots. Below are some free cross stitch patterns for beginners you will find right here on Gathered.
Free lamb cross stitch pattern

Here’s a sweet spring design stitched entirely in whole cross stitch. Work the pattern to build up the shape and practice your counting.
- Download your Free lamb cross stitch pattern
Children’s cross stitch patterns

Not just for kids! These sweet woodland characters use while cross stitch with just a little backstitch.
- Try these children’s cross stitch patterns
Cat cross stitch patterns

Who could resist stitching one of these beautiful kitties! If you're a fan of feline's, you'll find plenty of cute cats to cross stitch.
- Check out our range of cat cross stitch patterns
Summer cross stitch patterns

Worked in whole cross stitch and backstitch. these simple summery motifs are great for beginners.
- Which of our Summer cross stitch patterns will you make?

Find more beginner patterns in our roundup of easy cross stitch patterns.
Challenge yourself to new cross stitch projects
Cross stitch chevrons onto white linen fabric using your new skills for a modern graphic look! Cross stitch may be thought of as quite a traditional technique, but that doesn’t mean it can’t be used in a modern way.
Find a cool cross stitch kit
If you enjoy contemporary cross stitch, take a look at our best modern cross stitch kits article.