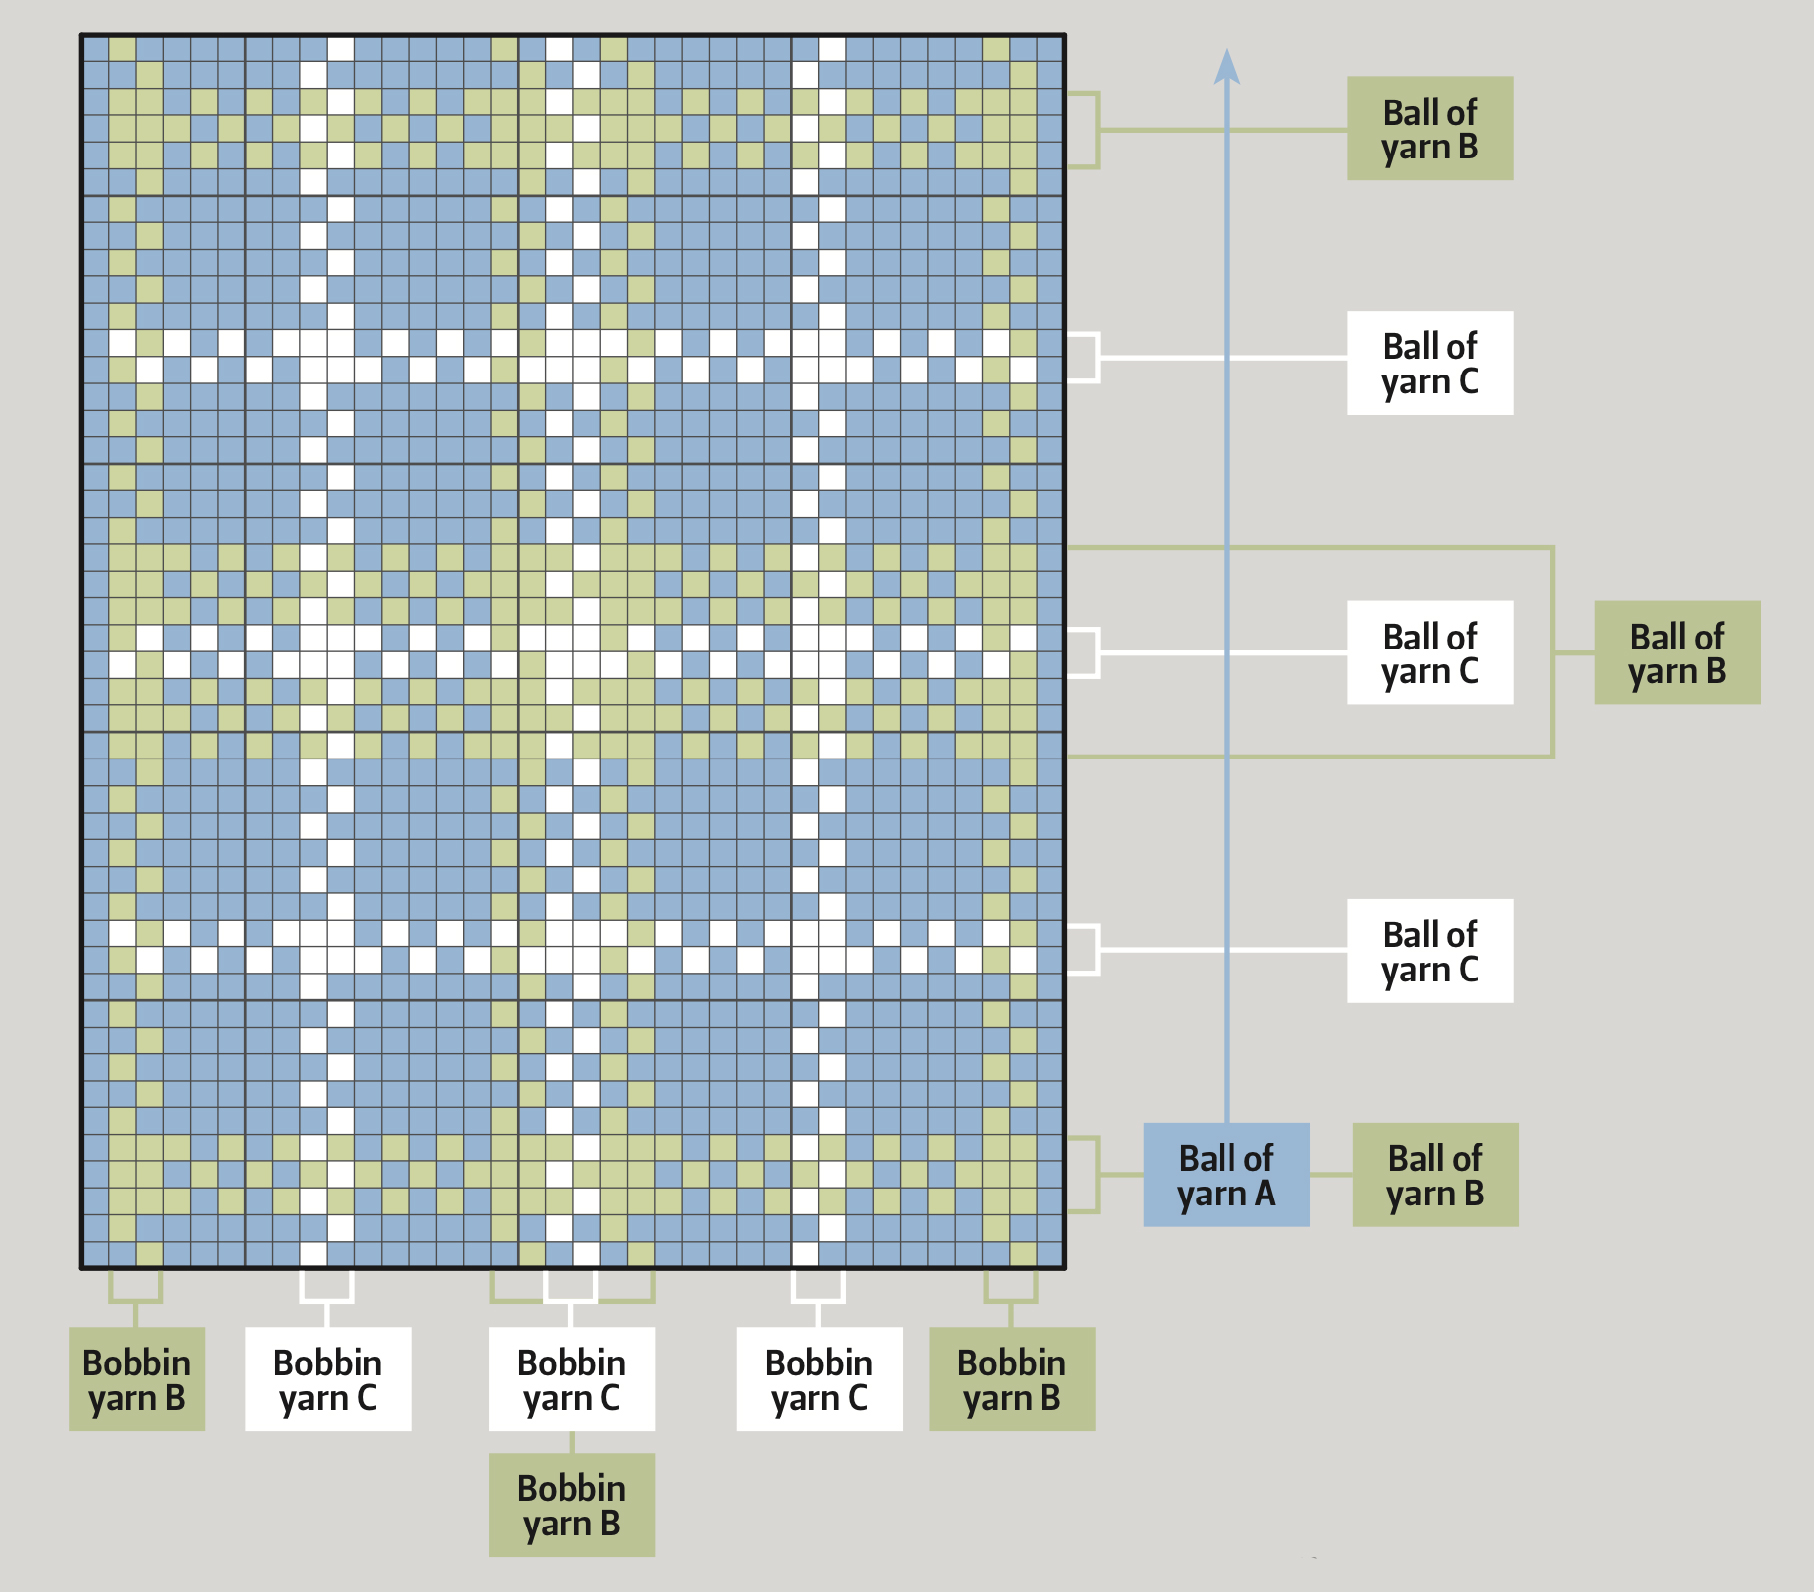
Mention intarsia to many knitters and you are likely to be greeted with a groan. Certainly it is a technique which needs a bit of practice and benefits from a little know-how, so here are our essential tips to set you on the path to really neat intarsia. We've used the tartan from the ‘Balmoral’ cardigan in issue 58 of The Knitter as an example.
Simple steps to neat intarsia
Don’t get yourself in a twist when knitting intarsia! Follow Judy Furlong’s quick guide to producing perfect colourwork.

You will need:
- Yarn
- Knitting needles
- Tapestry needle
- Ruler
Step 1
Choosing a yarn
Yarns which allow the stitches to mesh well together – wool, cashmere, camel and, to a lesser extent, alpaca – are generally much more forgiving than crisp yarns such as cotton, linen and silk. Pick a design which does not have too many twists and turns requiring only a few stitches here and there; blocks of colour or continuous lines are much easier to work.
Step 2
Check tension
It is worth checking your tension over an intarsia swatch, rather than assuming it is the same as for stocking stitch. In theory, it shouldn’t alter the tension, but in practice it often does. If your knitted piece is too narrow and it has to be stretched to meet the correct measurements, the gaps between the stitches will show – stretching out a tight tension will be less successful than easing in a loose one.
Step 3
Plan ahead
Study the design to see how few bobbins you can use to minimise the number of ends to sew in, and plan exactly how the design will be worked. For example, in the pocket for Balmoral, only three bobbins of each contrast are required, none in Yarn A. The tartan is knitted with a combination of stranded knitting (where the contrast is a horizontal line the full width of the chart) and intarsia (where the lines are vertical). If you are working a chart with circles or U shapes it’s advisable to leave a long tail so that both ends can be used, one for each side of the arc/ circle.
Step 4
Prepare yarns
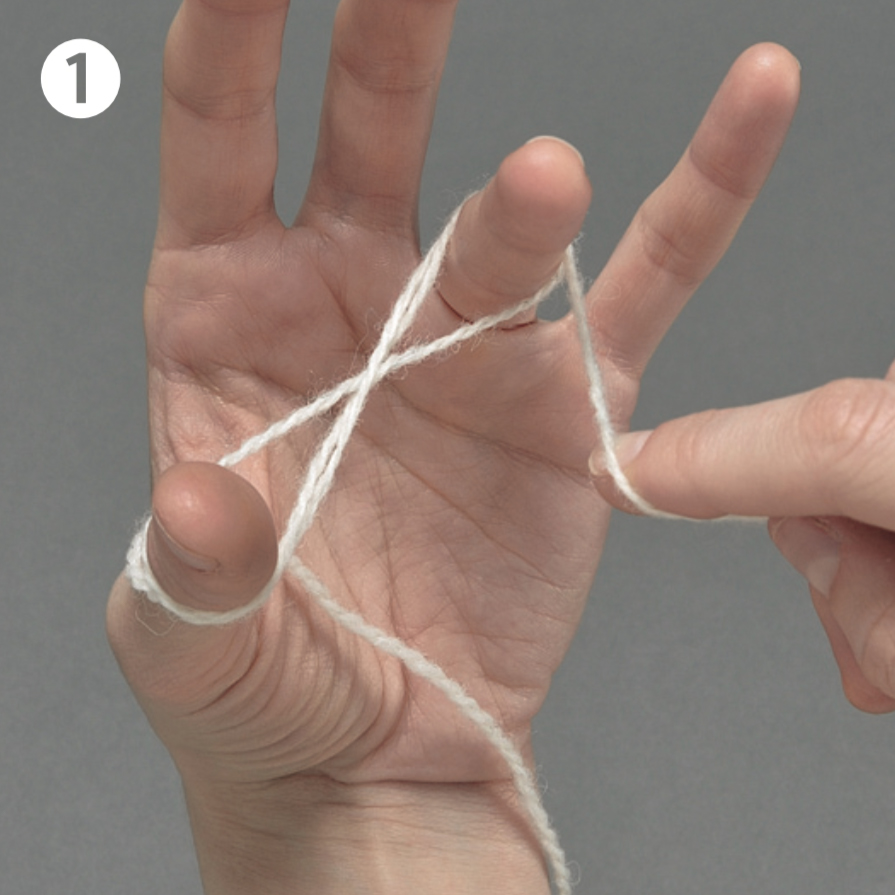
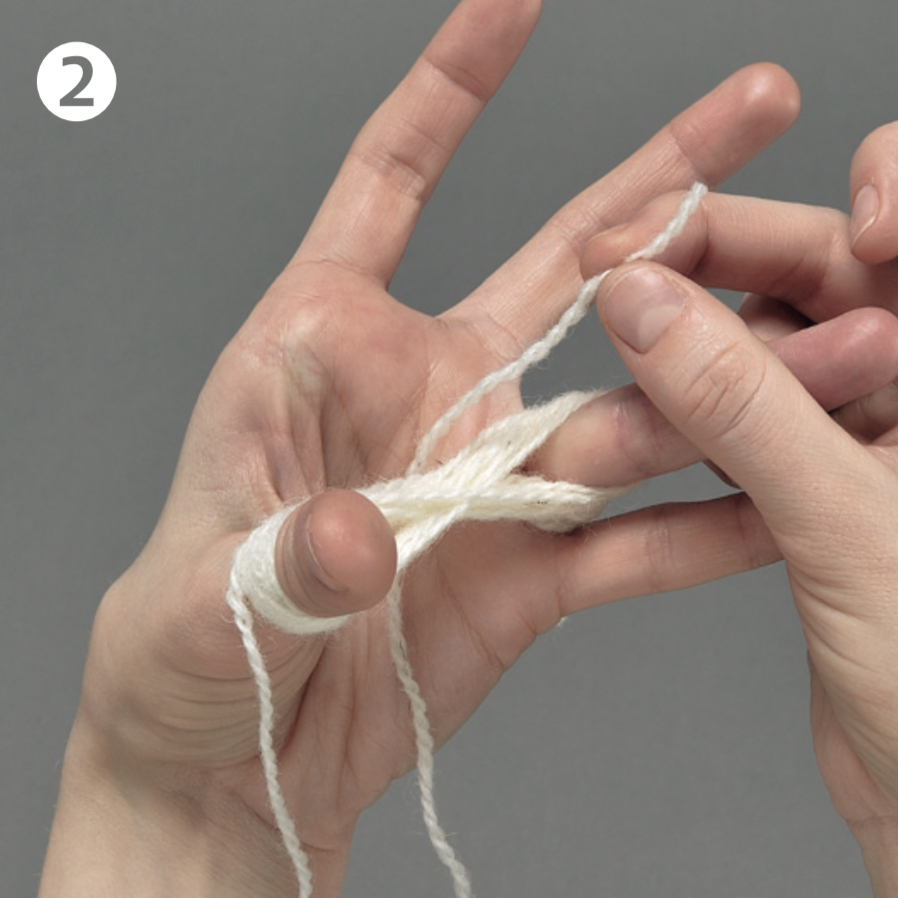
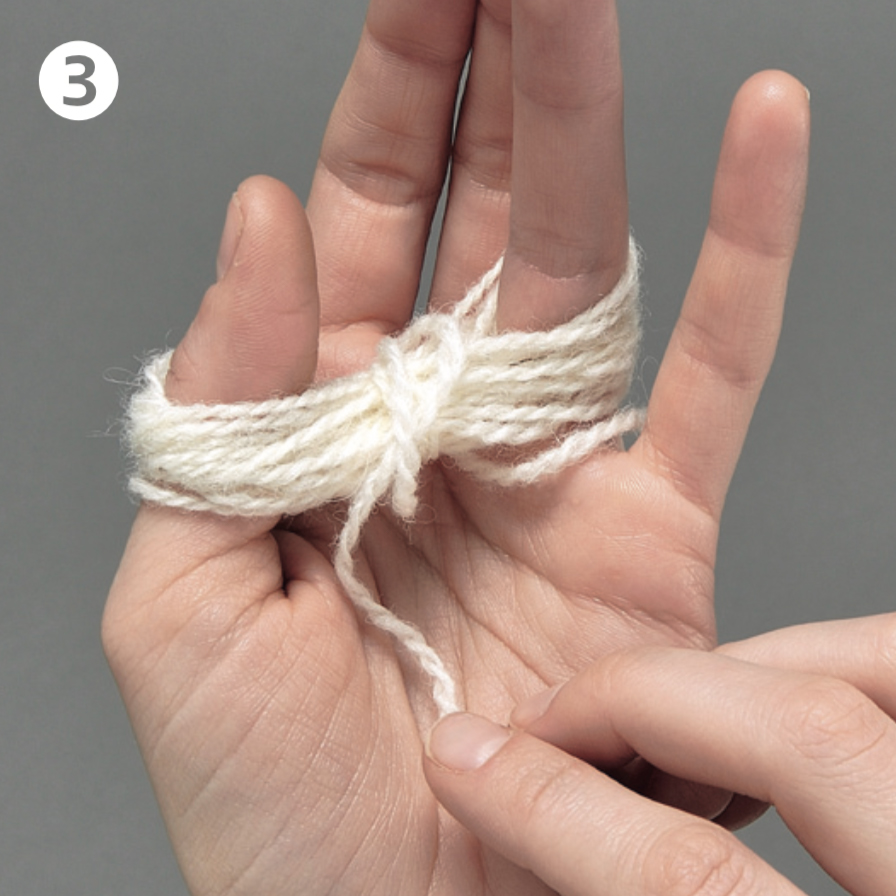
Once you have determined your requirements, wind bobbins or make butterflies (shown here, but there are also online tutorials for this, for example at http://bit.ly/intarsiaguide). Err on the side of too much, rather than too little, yarn to avoid unnecessary joins. Each stitch takes about three times its width in yarn.
Step 5
Twist yarns at joins
When changing yarns, always pick up the new yarn from underneath the previous one and gently pull up to tighten its last stitch. When combining stranded and intarsia knitting, the floats can be ‘trapped’ when the next yarn is used.
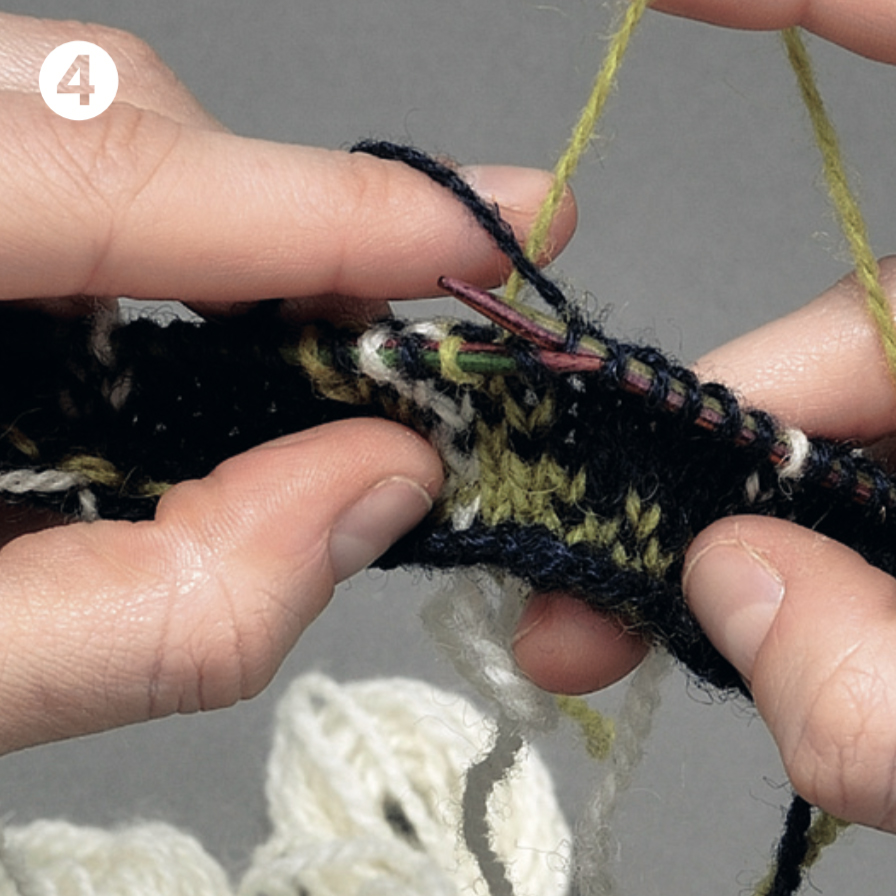
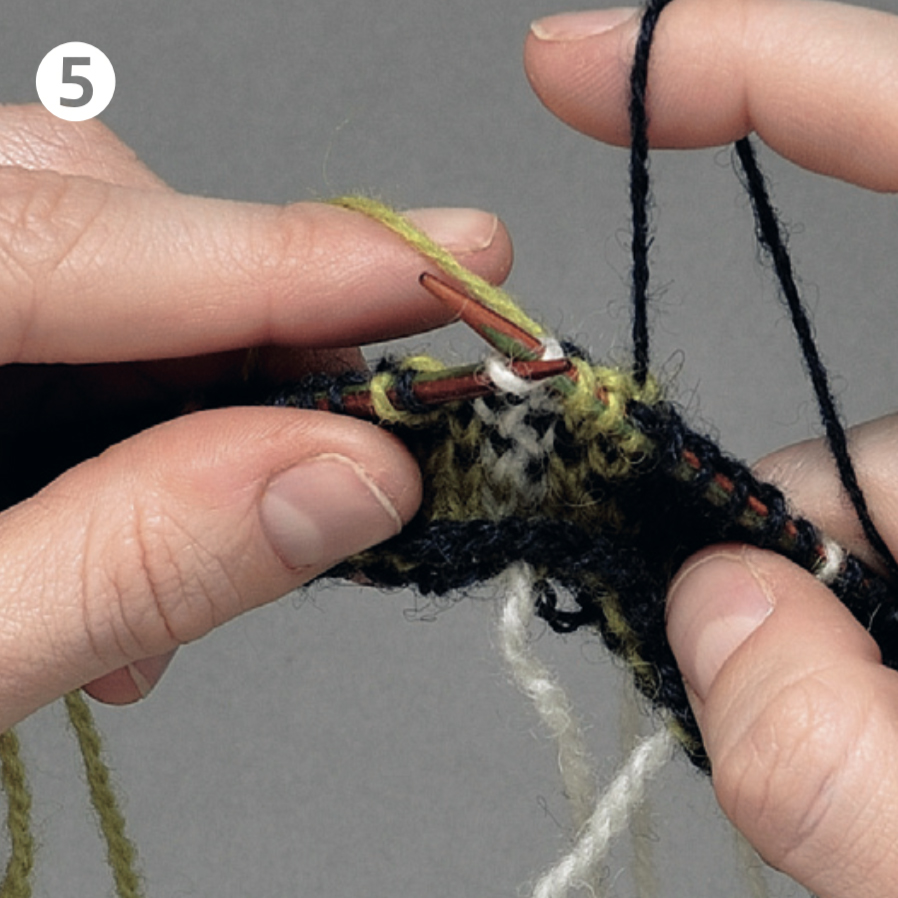
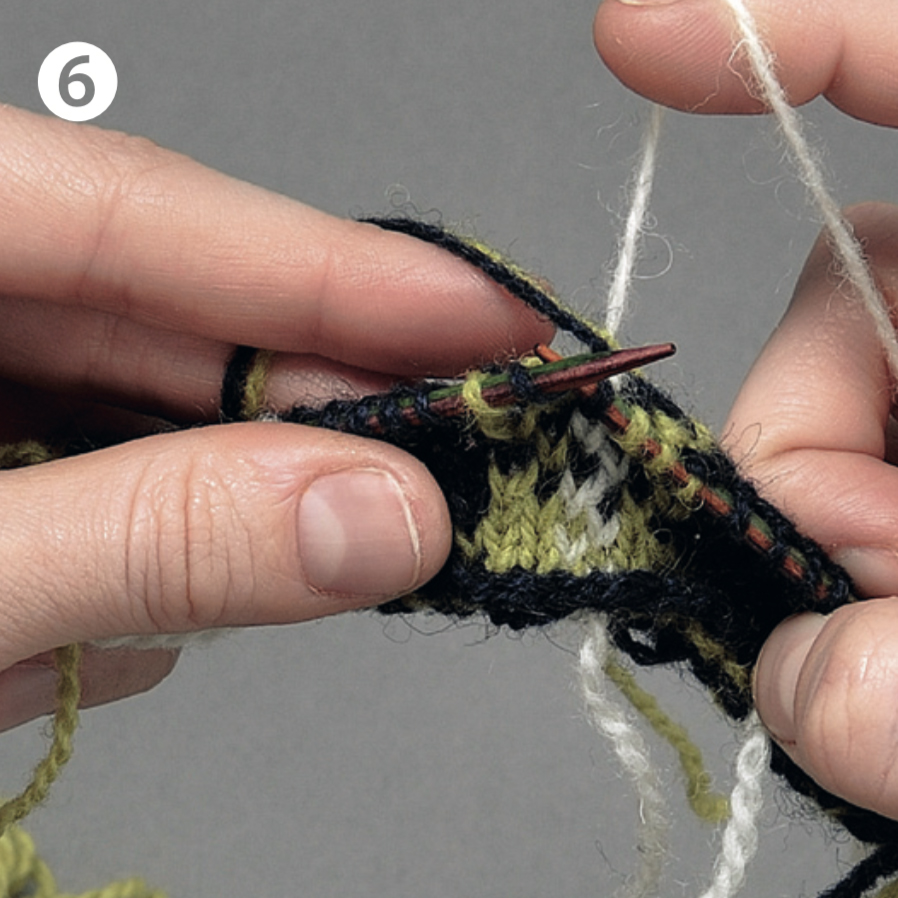
Step 6
Keep tension even
Try to keep an even tension. Be especially careful not to tighten a long float (yarn carried at the back over a number of stitches). Keep checking by smoothing out your knitting to make sure it will lie flat.
Step 7
Keep tidy
If you have many yarns, the bobbins can get twisted and tangled up. Reduce this risk by rewinding a bobbin to sit close to the knitting when you have finished with it for that row – how close is personal preference but don’t wind it so tight that it distorts your knitting. For butterflies, just pull out as little as possible.
Step 8
Be consistent
Since the Balmoral design is a combination of stranded knitting and intarsia, to get a really good result, and with any other alternating pattern in stranded knitting (as in Rows 3 to 5), be consistent with the way the yarns are carried, otherwise the checkered effect will be distorted.
Step 9
Neaten up
Before blocking, neaten the sts. On the WS, pull up the loose strands then check the RS and straighten sts. Work on both sides until the knitting looks as uniform as possible. Blocking will help to mesh the sts and even the piece out.
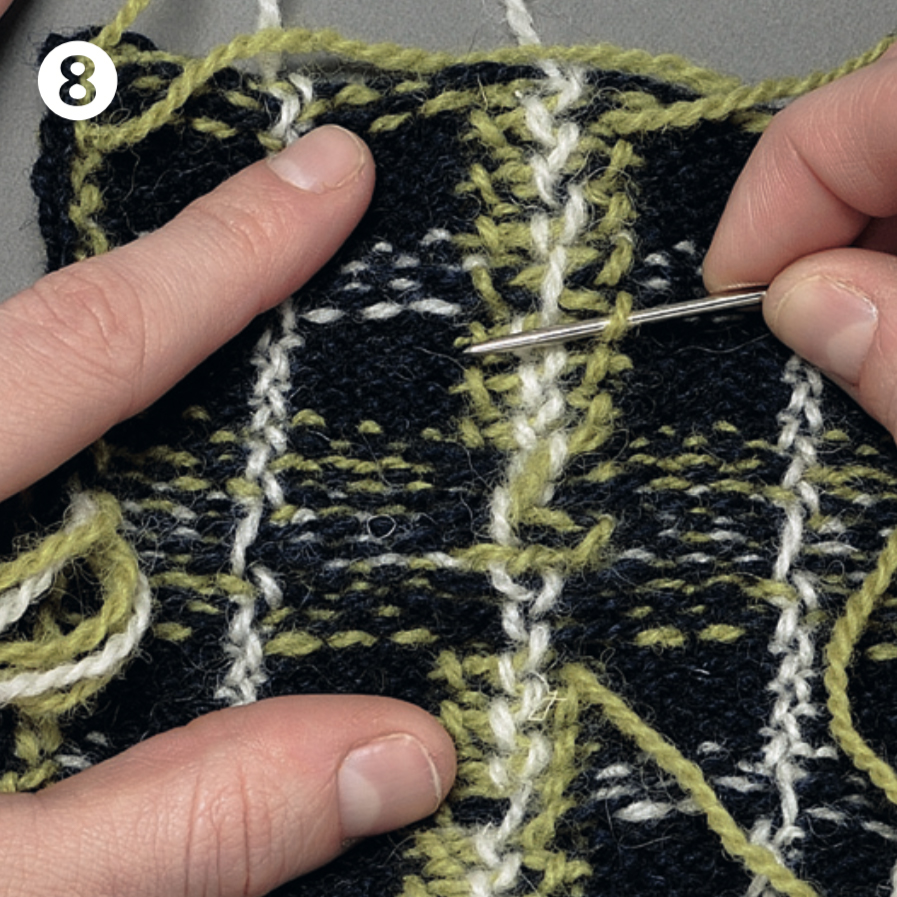
Step 10
What to do with the ends
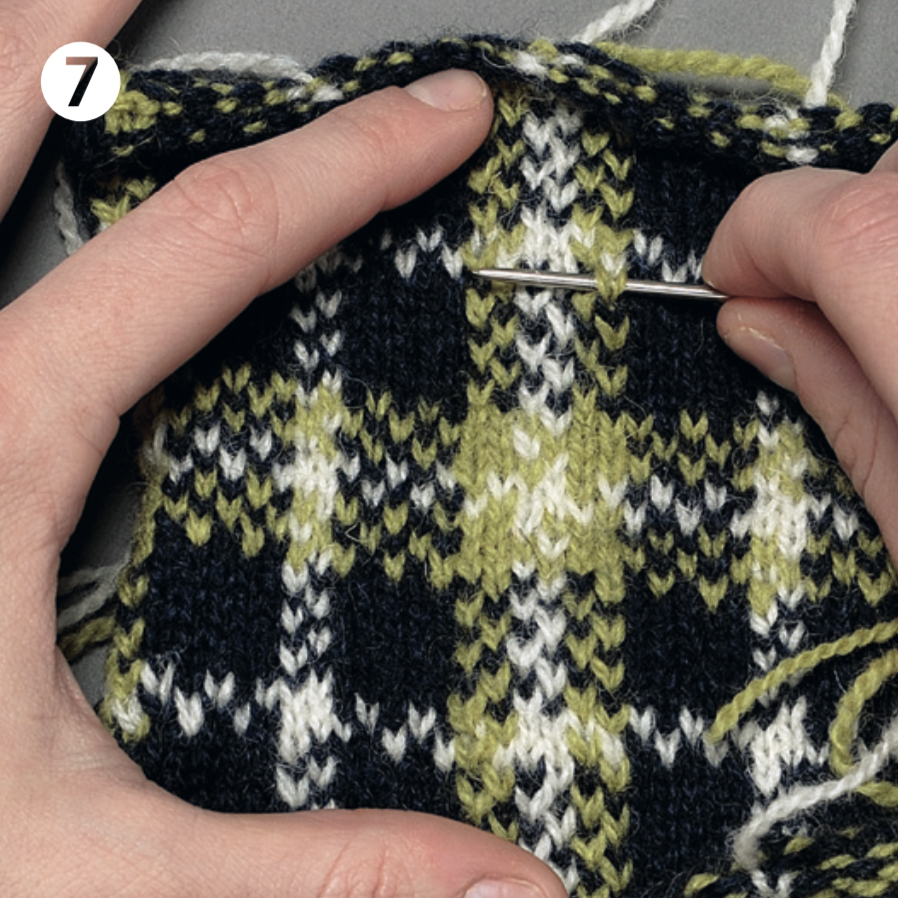
On the WS, with the end threaded in a wool needle, gently pull to tighten the last stitch. Weave into the loops at the yarn change, being careful not to weave in too many ends in one area. Feel the area to make sure you have not made it lumpy or knotted. If so, pull out the yarn and sew in elsewhere. These ends can be used to catch down and stabilise floats or baggy loops.
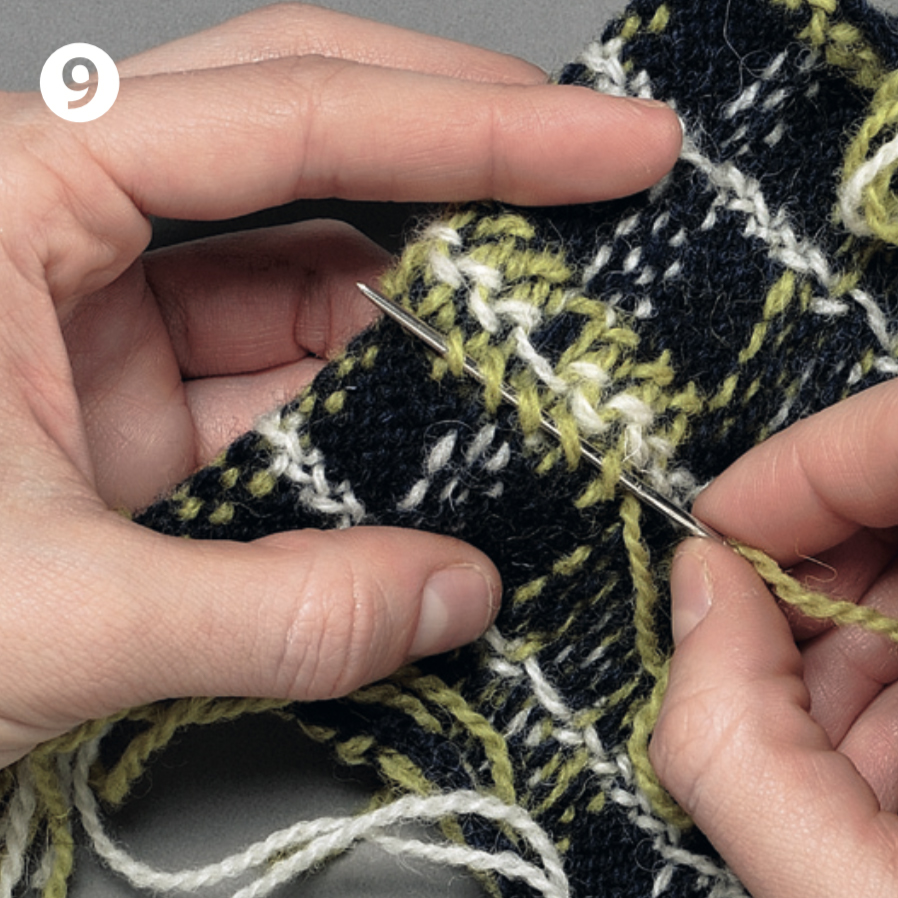
One last thing…
If you spot a mistake all is not lost: just duplicate stitch over the top of the offending stitch with the correct yarn.

