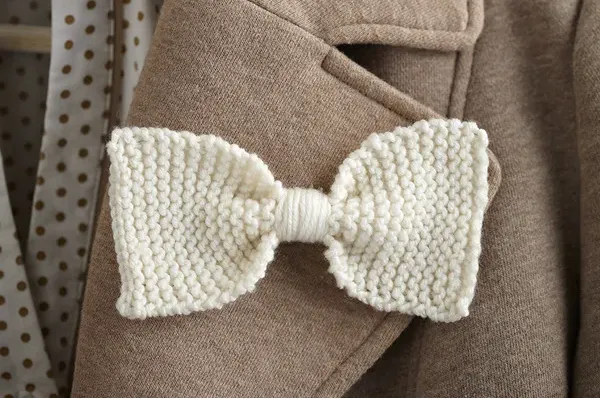
Knitting really is easy when you know how, and this guide to how to knit for beginners will help you learn the basics, with clear instructions for all the main techniques.
What is knitting?
Knitting is a fun and simple way to create cosy fabrics for all sorts of items. It involves using two needles and a ball of yarn to create individual stitches, which together make up the knitted fabric.
You can knit everything from clothes and toys to home decor and accessories. Check out our knitting patterns for beginners and beyond to see just some of the possibilities!
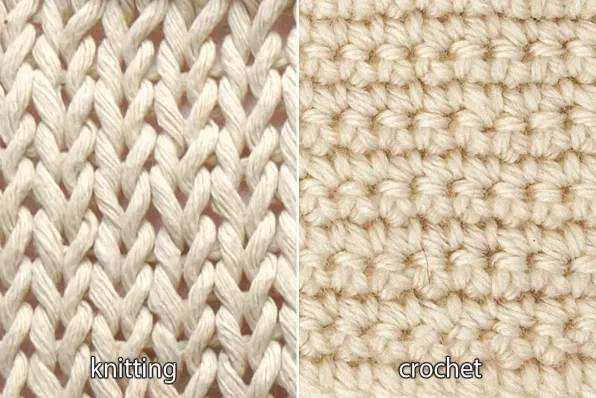
Knitting is different to crochet, which uses a single hook and creates knot-like stitches rather than interlocking ones. Find out more about each craft in knitting vs crochet.
How to start knitting
All you need to learn to knit is a quiet place, where you won’t be disturbed, and about an hour. You’ll also need a pair of needles and some yarn.
Anything you can get your hands on should be fine, although when you're learning how to knit, we recommend you use a smooth wool or acrylic yarn, either double knitting (DK) weight with a pair of 4mm needles, or aran weight with a pair of 5mm needles.
You can take a look at our recommendations for the best knitting needles, too.
The important thing to remember is that every knitter is different, and what works well for one might not suit another.
There are also many styles of knitting, with different ways of holding the needles and working with the yarn to create knitted fabric.
We’ll show you the most commonly used methods, but you should do whatever feels most natural for you.
Just experiment until you find a comfortable way of performing each technique, and don’t worry if your preferred way is slightly different from ours, as long as the result is the same.
All the instructions in our how to knit for beginners guide are for right-handed knitters.
Some left-handed knitters will knit right-handedly, but if you’d like to knit left-handed, you’ll need to reverse our instructions (switching all ‘rights’ for ‘lefts’ and vice versa).
You might find it helps to place the screen in front of a mirror and then you can copy the reflection of the images.
Our how to start knitting guide will show you:
- How to start knitting
- How to pick up a dropped stitch
- Types of knitting stitches
- Types of knitting wool
- Knitting essentials for beginners
- Knitting patterns for beginners
- Knitting abbreviations
If you want to jump straight to a particular area of our how to start knitting guide rather than scrolling through the entire thing, you can skip to the section that interests you most by clicking the links in the list above!
Are you ready? Then let's learn how to knit!
How to knit for beginners step by step
We’re going to show you how to knit in the order you’ll use each technique, from cast-on to the knit stitch to cast-off.
However, some people find the best way to learn is to ask someone else to cast on, then learn the knit stitch and how to cast off, then go back to learn how to cast on.
We recommend a visit to a knitting group if you have any trouble, as someone will help you get started. Many yarn shops hold sessions – it’s well worth asking, so take a look at our best yarn shops guide for your nearest.
There’s no right or wrong method, so do whatever works best for you. Good luck!
1. How to hold knitting needles
Pen Method
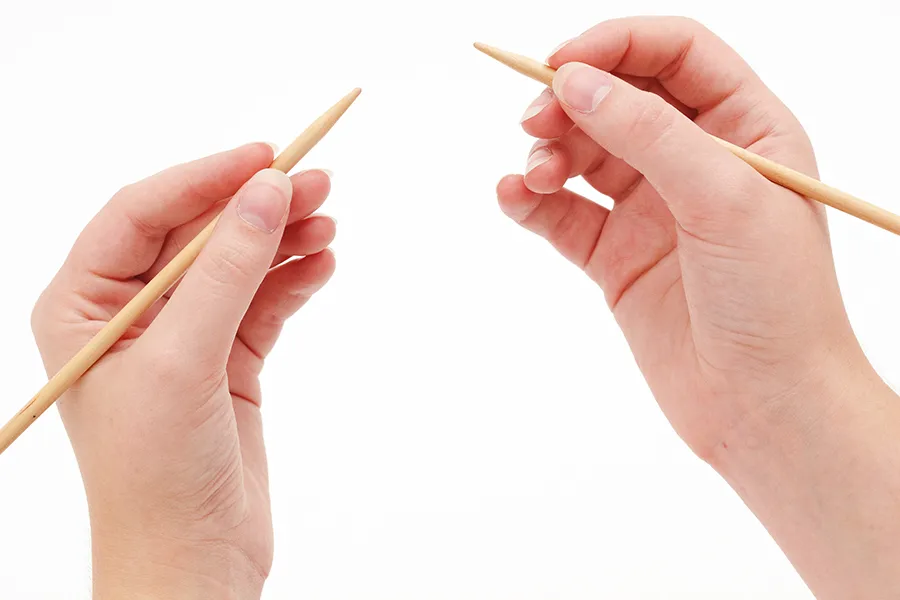
Grab a pair of knitting needles and practise holding them, one in each hand. One of the most popular ways to hold a pair of needles is the pen method.
Hold the left needle approx 5cm from the point, as if you’re about to sharpen it like a pencil. In your right hand, hold the right needle as if you’re about to write with it like a pencil.
Knife Method
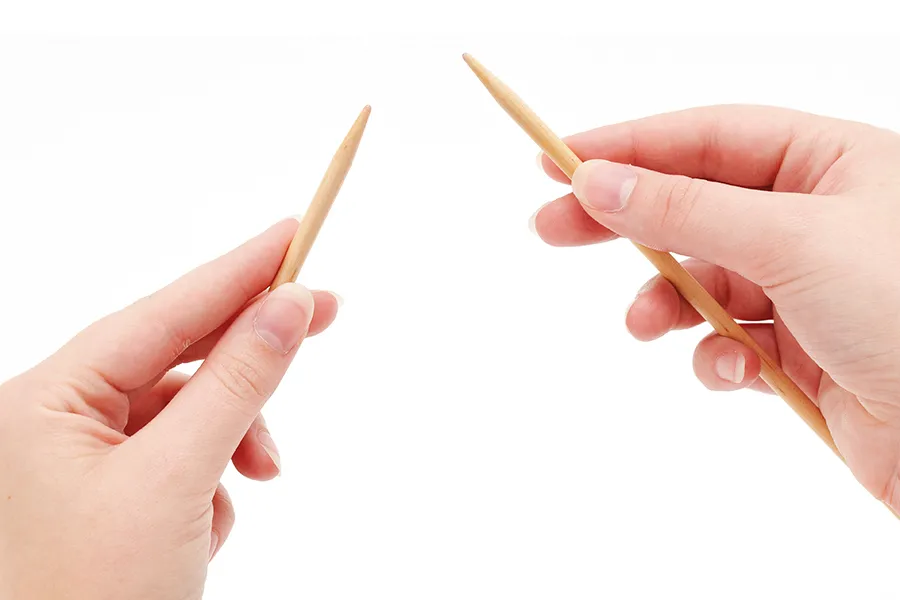
Alternatively, try holding the right needle like you would hold a knife.
Place your index finger further down the needle, away from the thumb. If this doesn’t work for you either, just find a way that does! It may also change as you knit.
Some knitters hold their needles like reins, while others even place one of the needles under their arm! However you hold the needles, try not to hold them too tight.
2. How to hold yarn
Hold the yarn
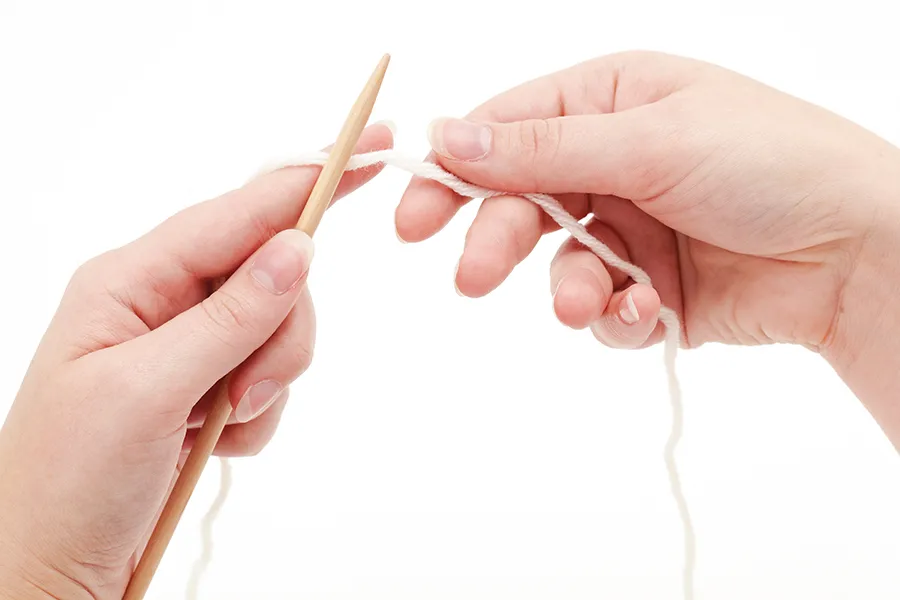
When you first start knitting, you’ll probably hold the yarn by grasping it with all your fingers or resting it in the palm of your right hand. You’ll probably take your right hand off the right needle to move the yarn around the needle.
This is called ‘throwing’ your yarn and it’s fine to do this when you’re starting out, although you might find it leads to a tight and uneven tension in your stitches.
Weave the yarn
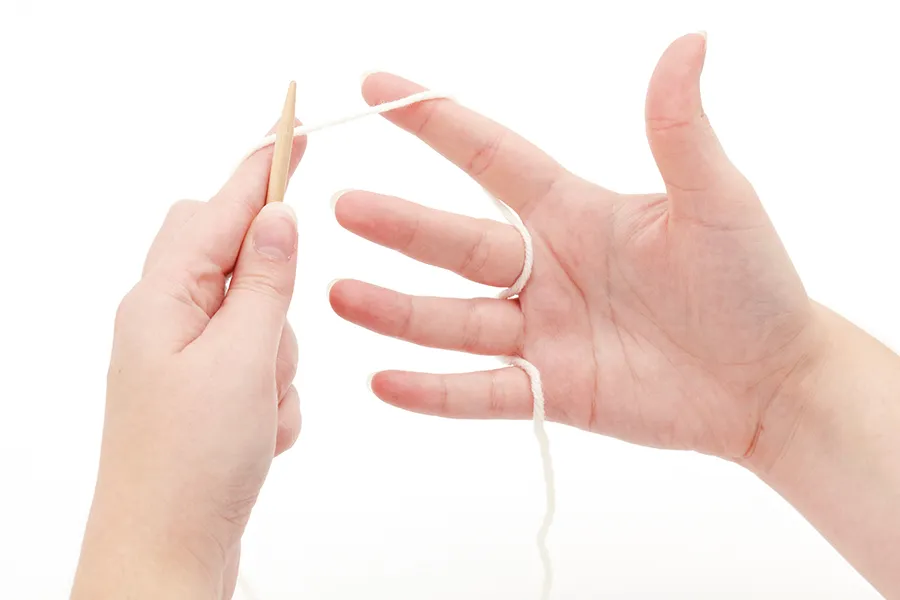
Once you feel a bit more confident working the knit stitch, try weaving the yarn around your fingers.
If you’re doing a lot of knitting, this method will help your fabric grow faster and more easily.
Most knitters prefer to hold the yarn in this way, using the tip of the index finger to guide the yarn around the needle, without taking your right hand off the needle at all.
Weave the yarn in and out of your fingers in a way that you find comfortable – some knitters wrap it around their little finger, too.
3. How to make a slipknot
Knitting is essentially a series of loops pulled through one another to create a fabric. So getting that first loop right is very important!
The loop you'll use to start your knitting project is called a slipknot and it's super-simple to make.
Read our walkthrough on how to make a slipknot for knitting to help you get to grips with this and master the best practice.
4. How to cast on
Once you've got your initial loop you're ready to create the first row of stitches – this is called the cast on row.
There are numerous different cast-on methods, each with different qualities. Some, such as the cable cast-on, are used when you need a strong, firm edge. Others, such as the German twisted cast-on, are much more stretchy, making them ideal for cuffs and other places where a springier edge is needed.
In our guide to how to cast on knitting, we show you one of the most popular cast-on methods, called knitting-on, which is perfect when you're a beginner.
You can also explore some other techniques and when you might want to use them, once you've learned how to start knitting and are ready to expand your skills.
5. How to do a knit stitch
The basic knit stitch is the foundation of all your knitting and the most important stitch you'll learn. The good news is that it's easy! Follow our tutorial on how to do a knit stitch to find out how it's done.
Practice makes perfect, and it's worth spending a while getting to grips with this stitch when discovering how to start knitting before moving on to anything else.
Once you've learnt the basic knit stitch, try knitting a pattern based on this stitch (such as our garter stitch cowl) to improve your confidence. Find out all you need to know about garter stitch in our guide.
If you want to see a video showing how to work garter stitch, you can watch one on our YouTube Channel!
Ready for the next step? Learn how to purl in knitting and you'll be able to create stocking stitch too!
6. How to cast off
You've cast on and knitted some stitches, and now you're ready to stop – but how?
To finish your knitting you need to cast off (also called binding off in the US). Casting off gives your fabric a tidy edge and prevents it from unravelling.
As with casting on there are many techniques you can use, from stretchy methods such as the sewn cast-off to smart, decorative versions including the tubular and i-cord cast-offs.
Our how to cast off knitting guide shows you the simplest technique, which is also the one you'll use most.
For a how to cast off knitting video, just click the link to watch one on our YouTube Channel.
How to start knitting: pick up a dropped stitch
So you've lost a stitch somewhere – there's no need to worry! All you need is a crochet hook and a little bit of know-how…
Even if they’ve been knitting for years, every knitter makes mistakes and has to ‘rip back’ or undo their knitting sometimes (also known in the knitter's glossary as ‘frogging’ – ‘rip it’, geddit?).
Knowing how to pick up a dropped stitch will make it much less scary when you do make an error. Here's our guide to how it's done:
What is a dropped stitch and how do I prevent it?
Dropping a stitch happens when a stitch slips off your needle as you’re knitting, leaving you with a loop that should be on a needle but isn’t.
If it’s not picked up quickly, you’ll soon notice a hole.
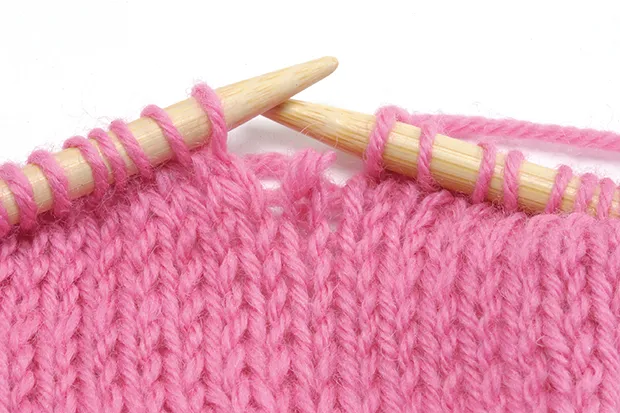
Don’t panic, though – dropped stitches are not difficult to fix! A dropped stitch is easier to rescue when it occurs a row or two down from where you are, so pick it up again as soon as you can rather than letting it ladder.
As soon as you spot an error, make a note of how many rows back it is. That way, after you’ve repaired the mistake, you’ll find it easier to continue knitting from the pattern again.
The best thing you can do to help prevent dropped stitches is to look at your knitted fabric frequently.
Check that you’ve got the right number of stitches on your needle according to your pattern. If you count them every couple of rows or so, you’ll soon notice if a stitch has disappeared.
Keep a couple of different sizes of crochet hook in your knitting kit, so you’re always prepared in case of disaster! Cheap, basic metal or plastic ones will work very well.
How to pick up a dropped knit stitch
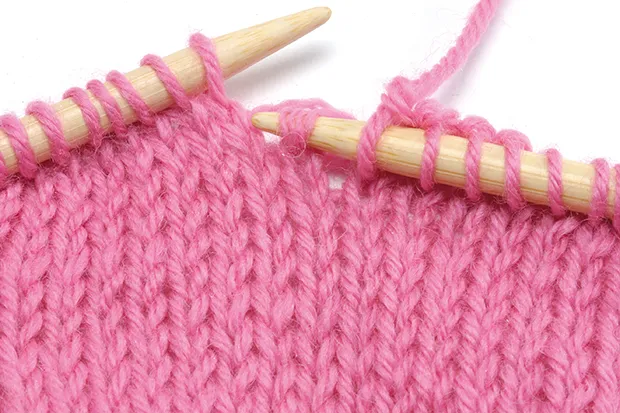
If you’ve dropped a knit stitch, simply follow our step-by-step guide and the photos below to put things right.
Step 1
Insert your right-hand needle from front to back into the loop to stop it unravelling any further down. Now you’ve got the stitch on your needle.
Step 2
Next, pick up the loose strand of yarn above it. Slip the point of the right needle under the loose strand of yarn. The strand should sit behind the stitch.

Step 3
Insert the left-hand needle through the stitch. Lift the stitch over the strand and off the needle. You will have remade the dropped stitch.
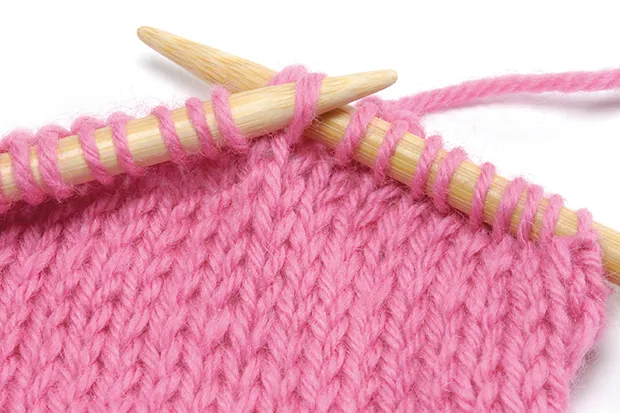
Step 4
It’s on the wrong needle, so put the point of the left-hand needle through the front of the stitch and slip it on to the left-hand needle so it faces the right way.
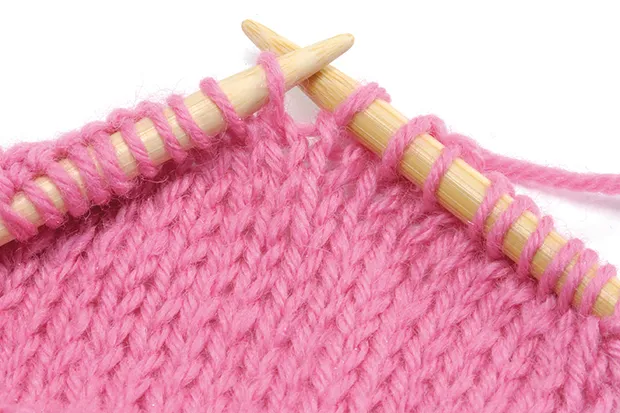
How to pick up a dropped purl stitch
Step 1
Insert your right-hand needle from back to front into the loop to stop it unravelling any further down. Now you’ve got the stitch on your needle.
Step 2
Pick up the loose strand of yarn by slipping the point of the right needle, from back to front, under the loose strand of yarn. The strand should sit in front of the stitch.
Step 3
Insert the left-hand needle through the back of the stitch, then lift the stitch over the strand and off the needle. You will now have remade the purl stitch.
Step 4
It’s on the wrong needle, so put the point of the left-hand needle through the front of the stitch and slip it on to the left-hand needle.
How to pick up a dropped stitch several rows down
To put this right, you’ll need a crochet hook or two. Use a small one (try 3mm) for fine yarns, and a large one (5½mm) for thicker yarns.
Always work from the knit side of your work, whether you’ve dropped a knit or a purl stitch.
Step 1
Knit up to the last stitch before the ‘ladder’. Look down the ladder to find the loop of the stitch.
Insert the crochet hook from front to back through the loop of the dropped stitch. Use a hook smaller than your needles.
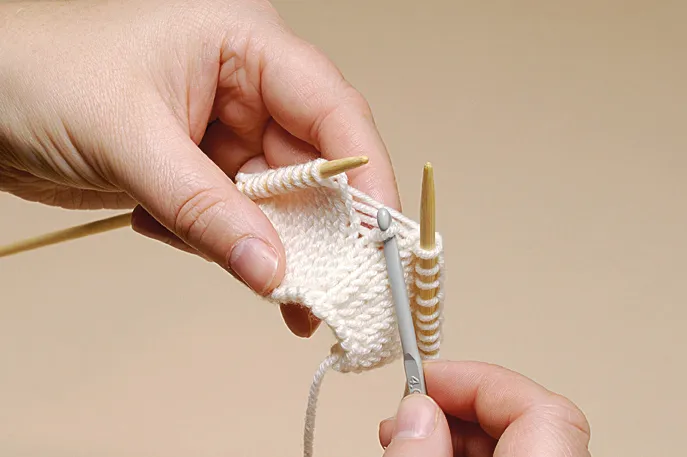
Step 2
With the hook pointing up, insert it under the first ladder rung. These horizontal rungs correspond to the places where the vertical loops of your knitting usually are.
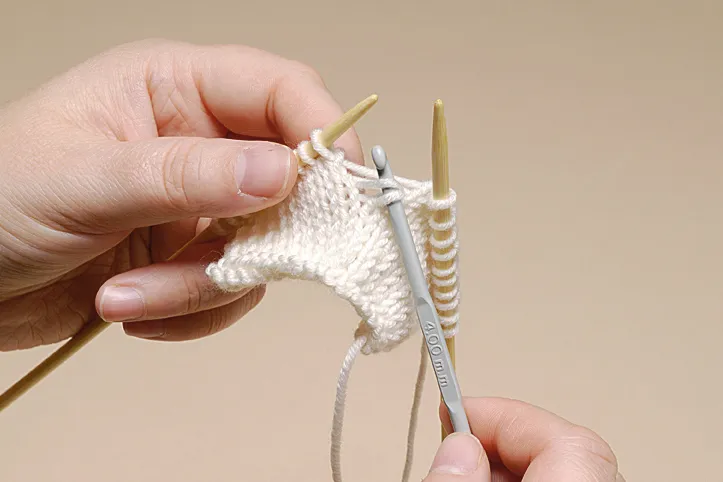
Step 3
Pull the ladder rung through the loose stitch. Repeat until you’ve taken the stitch all the way back up. The further down your stitch was, the tighter the rungs will be, but try to get them through.
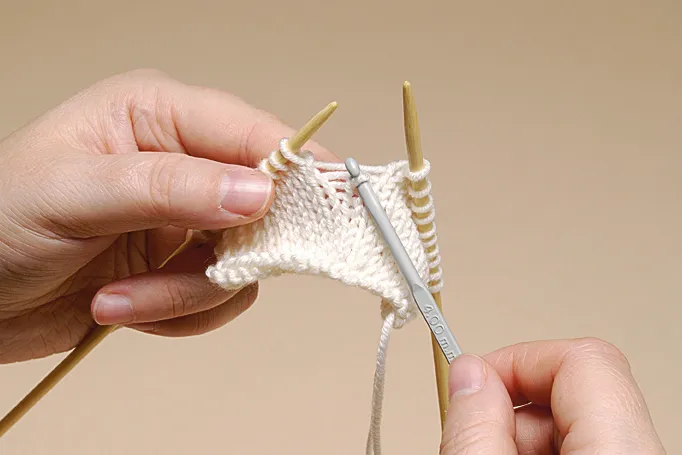
Step 4
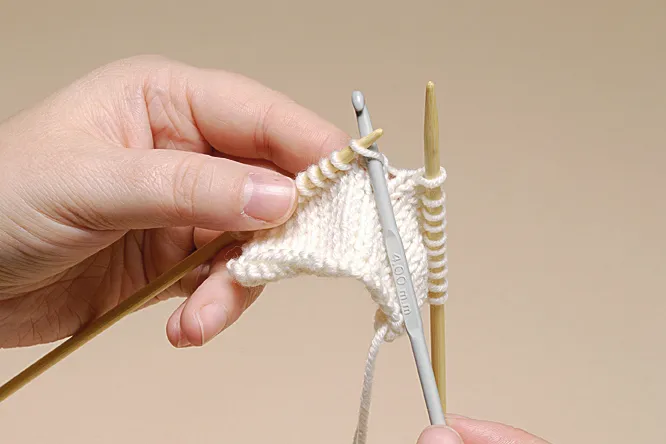
Now transfer the stitch from the crochet hook to your left-hand needle, without twisting it. Finish the row and you’re done!
Don’t worry if the knitting looks a bit odd, the tension will work itself out.
Types of knitting stitches
There are five main types of knitting stitches that you'll encounter. Knit and purl are the most important two, so it is okay to focus on those when you're learning how to start knitting.
1. Knit and purl stitches
The knit stitch and purl stitch form the foundation of all knitted fabrics, and you'll be amazed how many different patterns you can create using just these stitches.
You'll use them to make the two most popular stitch patterns, garter stitch and stocking stitch, rib stitch for the stretchy cuffs and hems of garments, and to add decorative textures to your projects with stitch patterns such as moss stitch.
2. Increase and decrease stitches
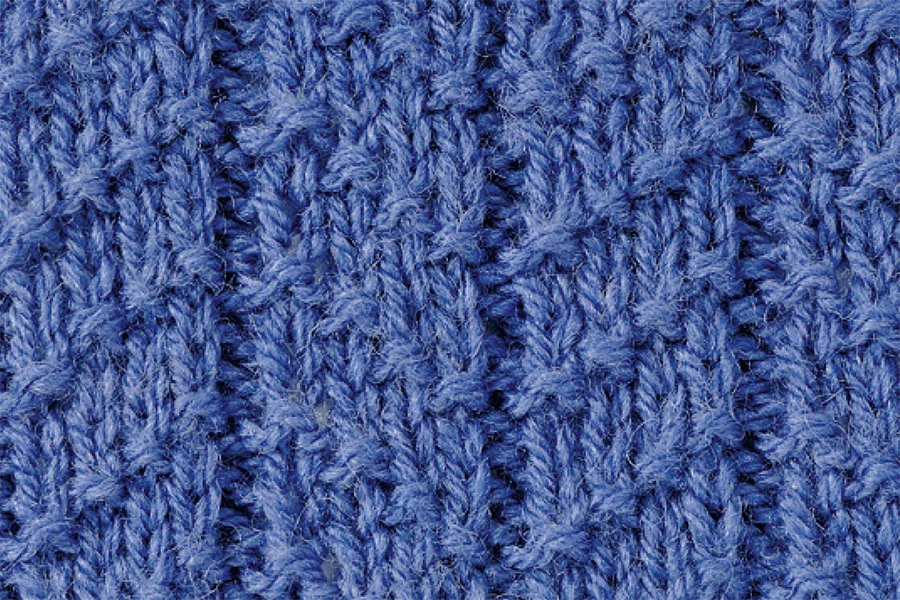
If you want to learn how to knit anything other than a plain rectangle, you'll need these stitches.
Learning how to increase in knitting and how to decrease in knitting allows you to change the number of stitches on your needle to make a piece of fabric wider or narrower.
These stitches are also used to create the pretty stitch patterns used in lace knitting.
The basic increase and decrease stitches every beginner needs to know are k2tog (knit two together – a right-leaning decrease), ssk (slip, slip knit – a left-leaning decrease) and yo (yarn over – the basic increase).
There are lots more variations that you'll come across, including double and even triple decreases, but for now these three simple stitches are all you need to take your knitting to the next level!
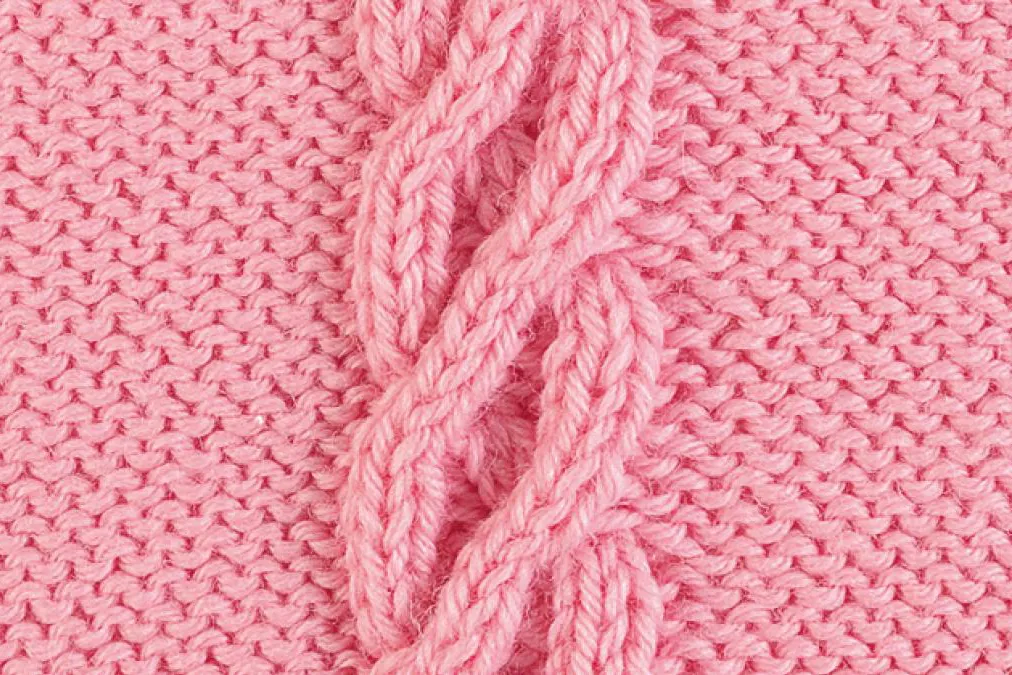
3. Cable stitches
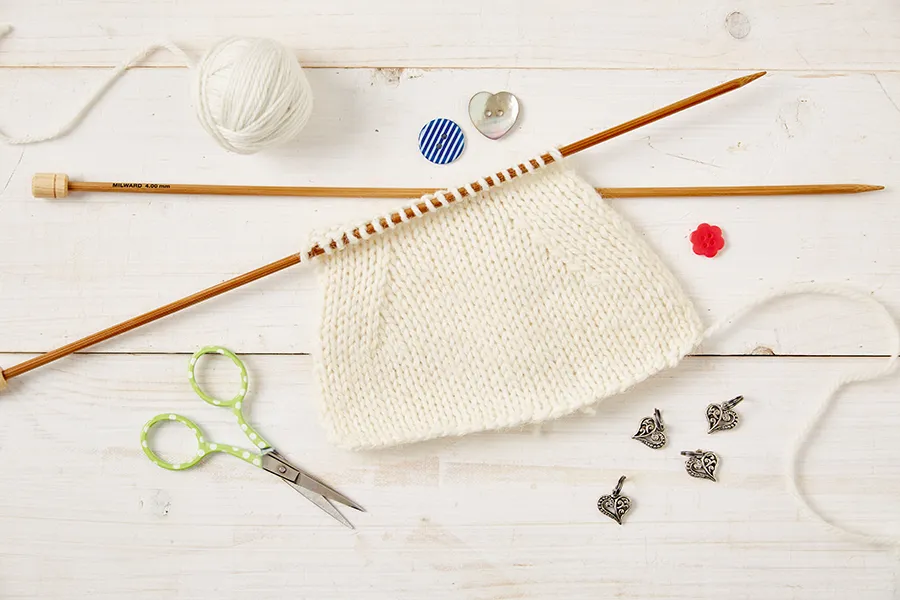
You've probably seen the beautiful woven cables of traditional gansey sweaters and wondered how they're made. They may look incredibly complex, but cables really are easy when you know how – we promise!
A cable is simply a change in the order that the stitches are worked. You put a small number of stitches onto a cable needle and hold them in front of or behind the knitted fabric ready to be worked later.
Using this simple principle you can create all kinds of stunning, intricate designs. Find out more in our how to cable knit guide.
4. Decorative stitches
The next category of knitting stitches is decorative stitches. This includes all sorts of creative stitches that you'll use to add some extra flair to your knits.
There's loop stitches, for adding a fluffy look, raised stitches such as bobbles, nupps and puffs to provide texture, duplicate stitches for adding small motifs and fixing colourwork mistakes, and many more.
Not all of the decorative stitches you'll encounter are knitted. Many knitters also make forays into other crafts, and embellish their projects with embroidery, crochet or even cross stitch. So if you have other skills, why not use them in your knitting?

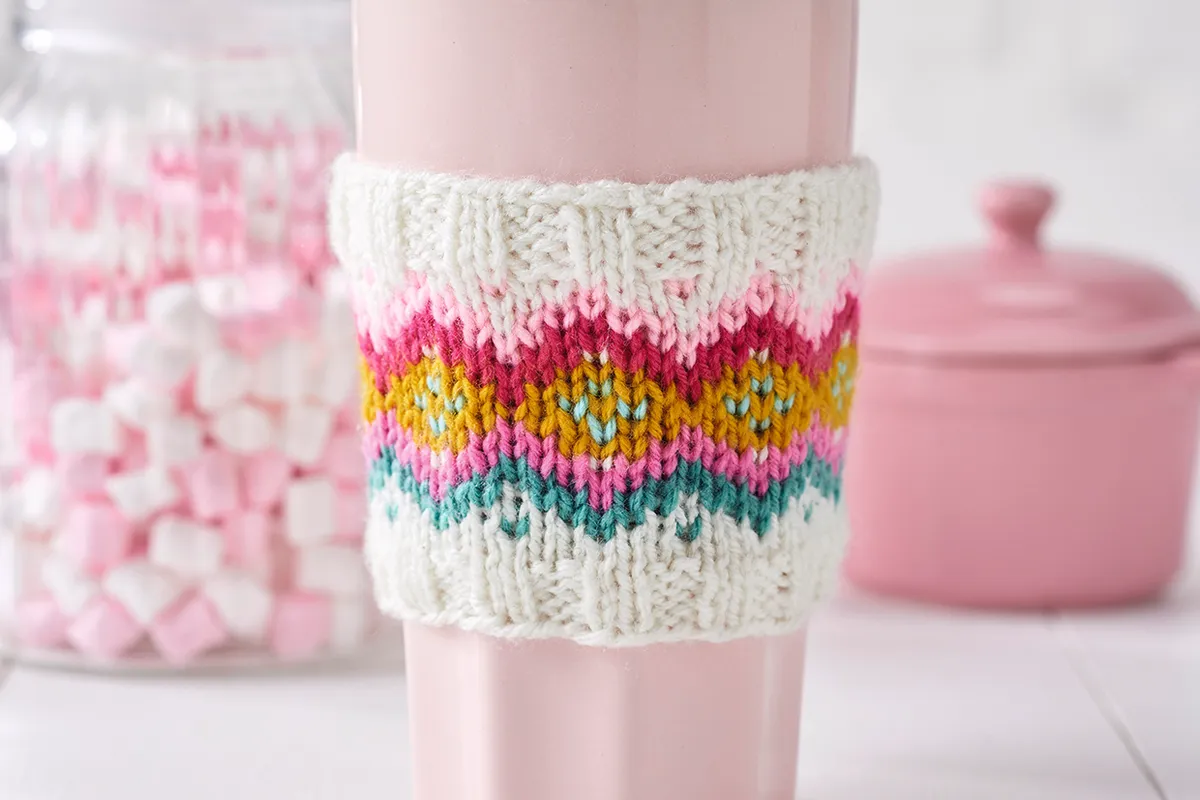
5. Colourwork
It's not technically a stitch, but we couldn't complete this section without mentioning colourwork!
Colourwork is the term used to describe any knitting project that involves more than one colour of yarn.
The first colourwork method you'll learn is stripes – simply changing yarn at the end of a row. Another technique that's great for beginners is slipped stitches. These can be used to create two-colour patterns that look elaborate but are easy to work.
Once you've mastered these you'll be ready to try the two big colourwork techniques: Fair Isle and intarsia. Fair Isle knitting is used for small blocks of colour and typically involves switching back and forth between two shades on each row.
Intarsia knitting is used for bigger blocks of colour – think 'picture' knits, such as children's garments with characters on them, bold 1980s-style motifs, and so on.
Both techniques tend to be worked in stocking stitch, but require special ways of holding your yarn and changing colours to ensure your fabric looks even and you don't get in a tangle.
Types of knitting wool
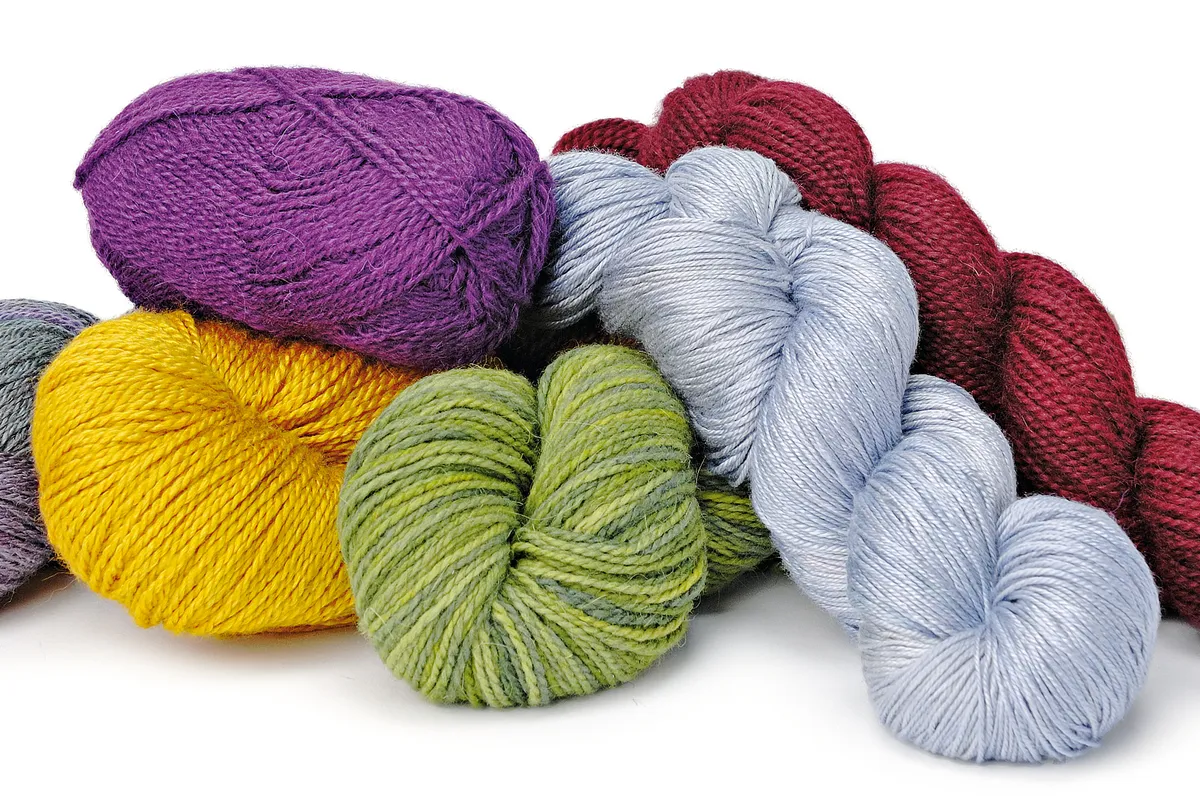
All knitting wool is yarn but not all yarn is wool! For knitters the term 'wool' refers specifically to the fibre from a sheep. The term 'yarn' refers to any fibre used for knitting, including wool.
Yarns are categorised by weight, but this doesn't mean how much they weigh on a set of scales – instead it refers to the thickness of the fibre.
We recommend that beginners start with DK yarn, as it's a medium thickness and easy to handle. Choose a thin yarn such as lace or a thick yarn such as super chunky and you may find it harder to work with.
For more on this topic, take a look at our yarn weight conversion chart and beginner's guide.
Two fibres that are ideal when you're learning how to start knitting are wool and acrylic yarn. These are both smooth and hard-wearing, so they can stand being ripped back and reknitted, and they're good value for money too.
Go for balls of yarn rather than hanks, otherwise you'll have to wind your yarn into a ball before you can knit with it, which can be time-consuming.
Beginner knitters are best avoiding cotton yarn, linen yarn or hemp yarn, because they don't have much natural stretch (although they're great for crocheters!), as well as novelty yarns such as tinsel and eyelash yarn, which make it hard to see your stitches.
Best yarns for learning how to start knitting
Here are some suggestions for first yarns to try as you learn to knit:
1. Hayfield Bonus DK
100% acrylic, DK. This popular yarn is great value and ideal for practising your stitches.
Buy it now from LoveCrafts.
2. Cascade 220 Superwash
100% wool, DK. This high-quality pure-wool yarn comes in more than 100 different colours.
Buy it now from LoveCrafts.
3. Debbie Bliss Baby Cashmerino
55% wool, 33% acrylic, 12% cashmere, DK. Treat yourself to a luxurious cashmere blend. It's a joy to work with!
Buy it now from LoveCrafts.
4. King Cole Merino Blend DK
100% wool, DK. A fantastic budget option. It also comes in 4ply, aran and chunky weights.
Buy it now from The Knitting Network.
5. Stylecraft Special DK
100% acrylic, DK. A perennial favourite amongst knitters, you can't go wrong with Special DK!
Buy it now from The Knitting Network.
6. Caron Simply Soft
100% acrylic, worsted weight. This versatile yarn comes in a huge range of colours.
Buy it now from Wool Warehouse.
7. Rowan Handknit Cotton
100% cotton, DK. A light cotton yarn perfect for warm-weather knitting.
Buy it now from LoveCrafts.
Knitting essentials for beginners
There are only three things you need to learn how to start knitting for beginners: needles, yarn and a pair of scissors.
However, as you progress there are a few other tools you'll want to keep in your knitting bag - take a look at our pick of the best knitting bags and organisers.
Look out for knitting toolkits that include all the accessories you need in one handy carry case, or buy them individually when you require them.
1. Tape measure
Measure your tension and more. A clear straight ruler is also handy.
Buy Prym Mini Spring Tape Measure tape measure from John Lewis
2. Tapestry needle
You'll need one of these to sew up pieces of knitting. A regular sewing needle won't do the job!
Buy KnitPro wool needle set from Amazon
3. Stitch holder
Useful for making garments where you may need to set stitches aside to work later.
Buy Korbond stitch holder set from The Works
4. Needle gauge
Want to know what size that unidentified needle is? A gauge will tell you.
Buy Milward knitting needle gauge from Wool Warehouse
5. Stitch markers
Keep your place in more complex patterns using these handy clip-on markers.
Buy Clover locking stitch markers from eBay
6. Crochet hook
Yes, every knitter needs one of these! Use it to pick up dropped stitches and more.
Buy Pony Easy Grip crochet hook from Amazon
As you advance your knitting skills you may also need a yarn winder and swift (for turning hanks of yarn into knittable balls), tools for blocking (see how to block knitting projects), and wool wash to keep your finished knits in tip-top shape.
That's not to mention all the beautiful knitting needles there are to choose from, including super-sharp lace needles, luxury wooden needles, interchangeables and more! Check out our best knitting needles round-up and how to choose the right knitting needles before you buy!
Knitting patterns for beginners
We have some great patterns to get you started as you learn to knit! Find more first project ideas in our beginner knitting patterns collection, but first take a look at our top knitting for beginners patterns.
1. Garter stitch cowl
Get to grips with the knit stitch and make yourself a cosy neckwarmer from our garter stitch cowl pattern.
It uses chunky yarn and big needles so it's easy to see your stitches – and you'll be finished before you know it!

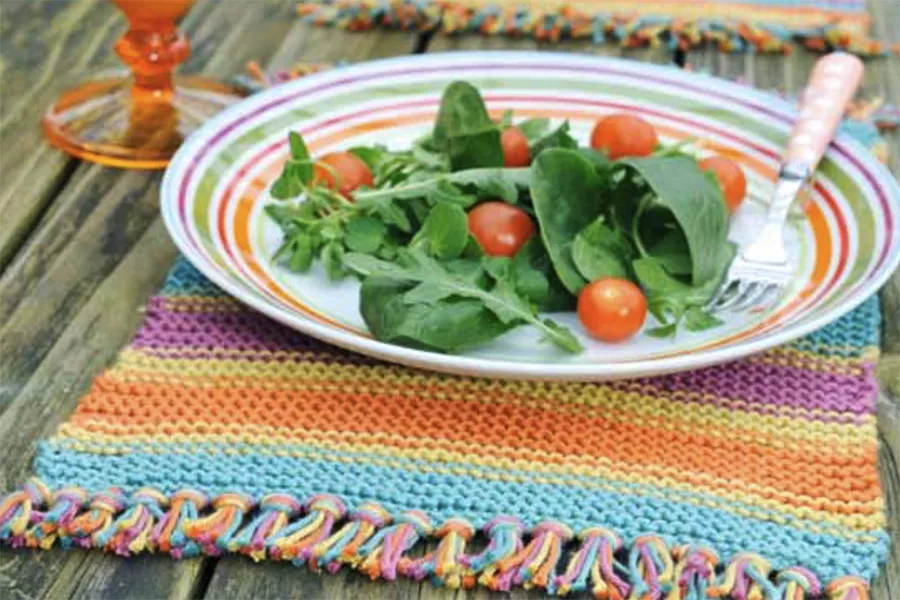
2. Stripy placemat
Have a go at simple stripes with this knitted placemat pattern and add some colour to your dinner table.
It's worked entirely in garter stitch, which means you can focus on getting those colour changes just right.
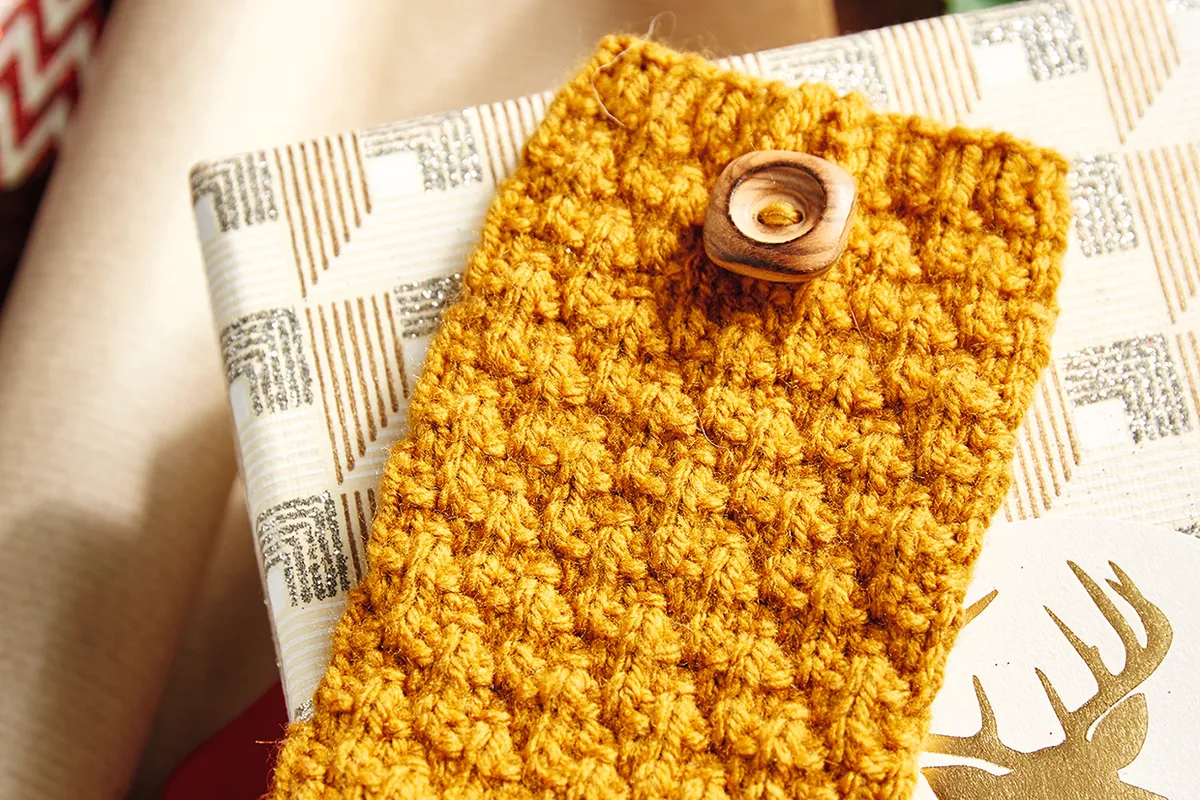
3. Textured phone cover
Protect your mobile from bumps and scratches with our quick-knit phone cover. The beautiful stitch pattern is created using only knits and purls – easy peasy!
You'll also try sewing up seams and adding a button.
Plus our top three knitting books for beginners:
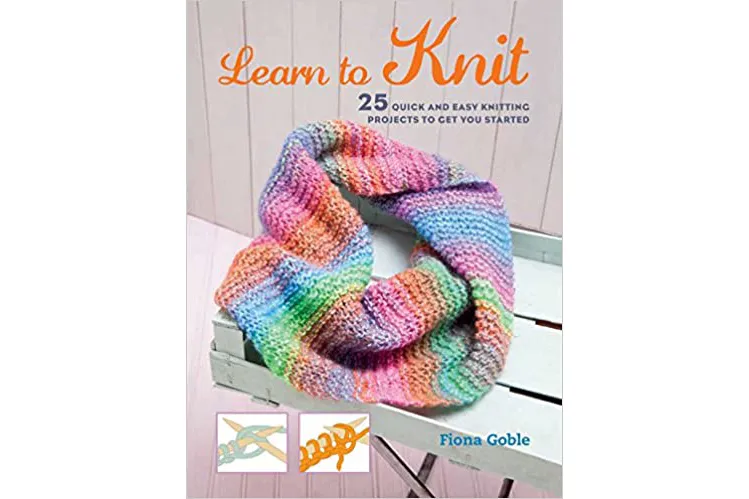
1. Learn to Knit by Fiona Goble
Discover how to start knitting with the help of the 25 easy projects in this beginner-friendly book by Fiona Goble.
Master the basic techniques and make yourself a variety of hats, scarves and more.
Buy it now from Amazon.
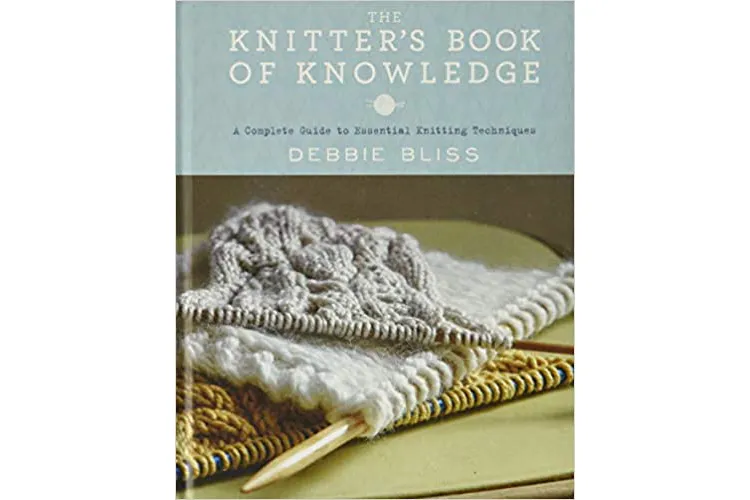
2. The Knitter's Book of Knowledge by Debbie Bliss
Every knitter needs a good reference book in their collection! Find everything you need to know about knitting, from absolute basics to expert techniques, in this guide by knitting legend Debbie Bliss.
Buy it now from Amazon.
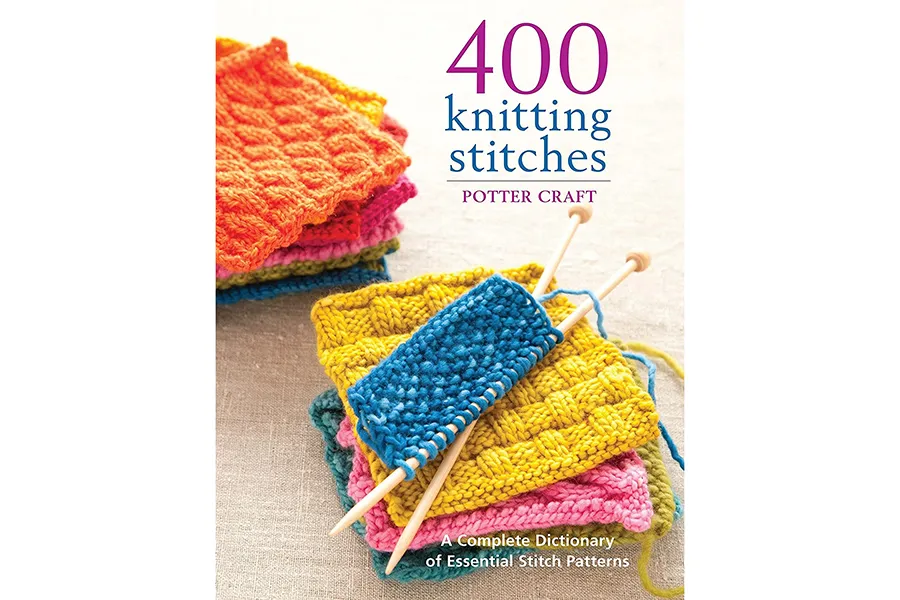
3. 400 Knitting Stitches by Potter Craft
Dive into the wonderful world of knitting stitches with this comprehensive collection from Potter Craft.
A full-colour stitch dictionary is a must for any knitter – use it for inspiration, practice and creating your own unique designs!
Buy it now from Amazon.
How to start knitting from patterns
Every publication presents its knitting patterns slightly differently, but there are a few key elements you'll spot again and again.
1. Materials list
This tells you what you need to finish the project (yarn, needles and other supplies), and lists stockists who sell the products mentioned.
2. Tension
Find out how many stitches and rows will create a 10x10cm square using the yarn and needles given in the pattern.
Make sure your own tension matches this figure (by knitting a test tension square and changing to bigger or smaller needles if necessary) or you could run into trouble!
3. Abbreviations
Most patterns refer to a set of standard knitting abbreviations printed elsewhere, like the knitting abbreviations list we use here on Gathered, then include any special or unusual abbreviations in this section.
4. Diagram/schematic
This shows you the shapes and sizes of the knitted pieces you're creating. It's particularly handy when you want to see how the pieces fit together and how big they should be after blocking.
5. Size guide
If you're making a garment you need to know which size to choose, and the size guide will give you all the information you need.
Many patterns also use colour coding to help you tell the different sizes apart.
6. Charts
Colourwork, cable and lace patterns will often include charts because many knitters find these easier to follow than written patterns, especially for more complex designs.
Learning how to read charts in knitting patterns is well worth the effort!
7. How-tos
If the pattern includes something that requires a little more knowledge, such as a tricky stitch or special technique, you might see a how-to or step-by-step instructions to guide you through.
8. Pattern instructions
This is the most important bit – the pattern itself! Make sure you read it through before you begin, so there aren't any surprises later on.
Understanding knitting abbreviations
Knitting patterns use abbreviations to help keep them brief and concise, but they're easier to decode than you might think at first glance.
Below are some of the most common terms you'll encounter and what they mean. Take a look at our complete guide to knitting abbreviations for the rest.
Knitting patterns can look like they're written in another language, but with our help you'll soon become fluent!
K knit (the basic knit stitch)
P purl (the basic purl stitch)
st stitch
g st garter stitch (knit every row)
st st stocking stitch (alternate between knit and purl rows)
k2tog knit the next two stitches together (1 stitch decreased)
ssk slip 2 stitches one at a time, knit 2 slipped stitches together (1 stitch decreased)
yo yarn over (1 stitch increased)
How to knit for beginners with Gathered
We hope that this knitting for beginners guide has inspired you to pick up some needles and yarn and cast on your first project.
Knitting is a wonderful hobby and there's always something new to learn, with so many different techniques to master and stitches to try.
But the basic skills are really simple, and you can create your first piece of knitted fabric in just an hour or so.
Once you've got to grips with the basics then your knitting adventure can really begin…
Discover how to master garter stitch
Every new knitter needs to start here, with the first and easiest stitch you'll learn!
Discover how to 'read' your knitting, create practice projects, and improve your confidence with our guide to garter stitch for beginners. You'll find all the guidance and advice you need to progress to the next stage with Gathered.
