How to weave in yarn ends
All products were chosen independently by our editorial team. This review contains affiliate links and we may receive a commission for purchases made. Please read our affiliates FAQ page to find out more.

How to weave in yarn ends

Follow Faye Perriam-Reed's guide to creating a flawless finish on every knitting project by learning how to weave in yarn ends neatly

Try 3 issues of The Knitter magazine for just £7!

Published: May 9, 2023 at 2:02 pm

How to weave in ends in knitting is a topic that's often overlooked by knitting technique books, and a process that some people come to dread. But after all your knitting efforts, it’s worth taking the time to finish your work properly.

In this tutorial we'll show you 7 different ways to weave in your ends, depending on what stitches your project uses. We'll also suggest some tips for reducing the number of ends you produce in the first place.

All you need is a tapestry needle and some good light (use a daylight lamp if necessary). Are you ready? Let's begin!


How to weave in ends in knitting

After casting off, if you’ve left a tail end before you cut the yarn, you’ll have ends at both your cast on and cast off corners. These will look rather straggly unless you do something with them. To create a neat finish, patterns will instruct that you ‘weave in ends’.

This is very simple and just requires using a large-eyed needle with a blunt tip, like these Prym yarn needles.

There are no strict rules about how to weave in these ends – they just need to be secure, and invisible from the front. It’s a good idea to weave the yarn tail in different directions to prevent it from working its way out over time.

As you progress to more complex knitted patterns, you might find you have yarn tail ends in other places, such as halfway up a back piece for a garment.

Here you can weave yarn ends through the backs of stitches on the wrong side of your work. Using a large-eyed needle, weave the yarn in and out of the wavy bumps, first going in one direction for about 5cm, and then back in the other direction. Make sure they lie flat and that the yarn isn’t visible from the front.

In this tutorial we've put together some of the more common techniques you can use to weave in ends in knitting. Whether you're working on stocking stitch, garter stitch or rib stitch, with our help you're sure to find a method of weaving in ends that works for you.

Top tips for weaving in ends in knitting

  1. Always leave yarn ends of around 15-20cm for best results.
  2. If you’re working a garment with few ends, weave them in once the garment is sewn up – you’ll have more options for where to hide them (including in the seams).
  3. If you’re working intarsia, weave the ends in before all the pieces are sewn together after the first block.
  4. If you’re stuck with really short yarn ends, try using a crochet hook, a blunt needle backwards or threading the needle after you have already inserted it into the fabric.
  5. Stretch the fabric a little before trimming any yarn end, to make sure it isn’t woven too tightly.

How to weave in ends step by step

You will need:

  • Knitting needles
  • Yarn

Step 1

Weave in ends knitting step 1

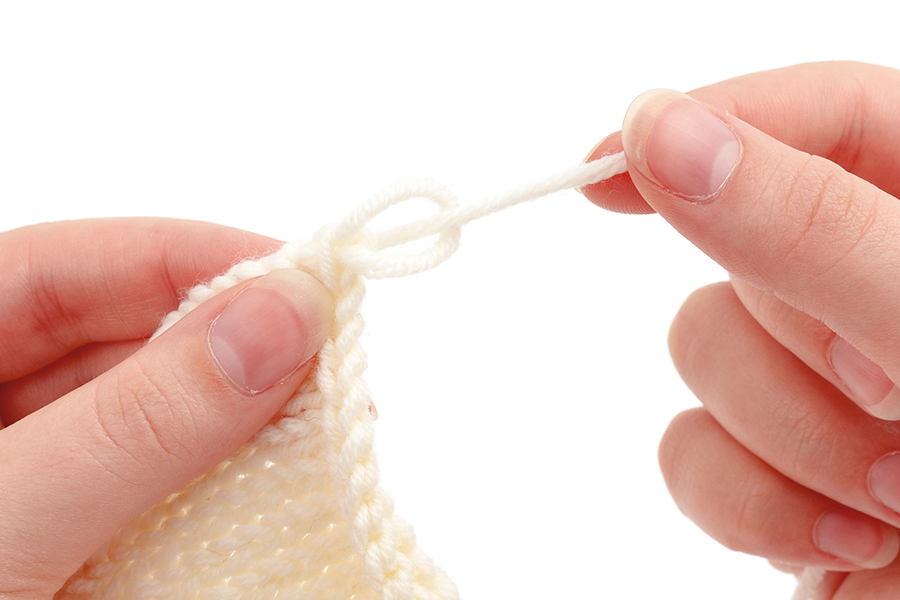
After casting off your final row of stitches, fasten off the final stitch by passing the tail end of yarn through the loop of the last stitch. Pull the yarn end to tighten it up and form a neat edge to the knitted fabric.

Step 2

Weave in ends knitting step 2

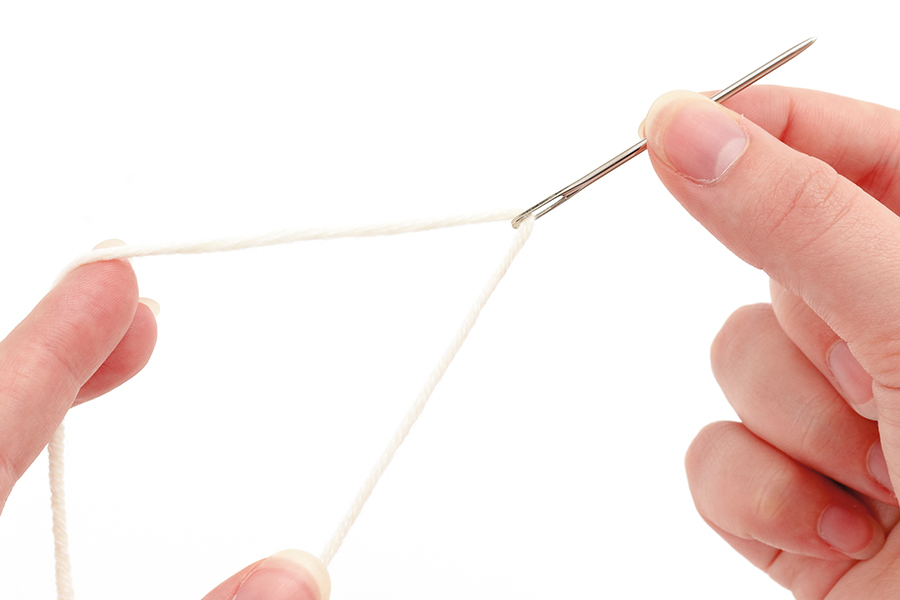
At the cast-on or cast-off corners, thread the tail end of yarn onto a large-eyed needle with a blunt tip. You’ll sometimes see this type of needle called a tapestry or a darning needle, depending on the size and manufacture.

Step 3

Weave in ends knitting step 3

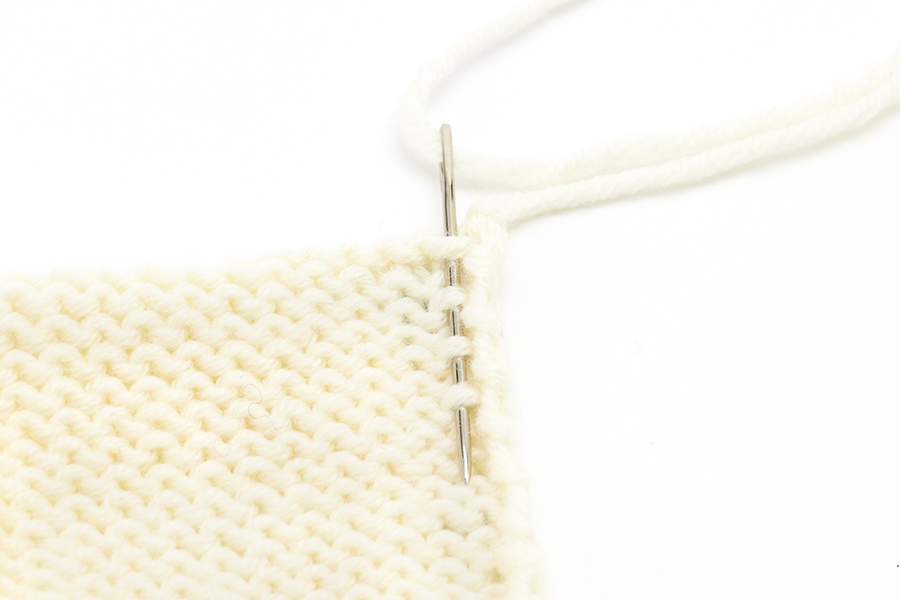
Weave the tapestry needle in and out of the stitches down the side of the knitted fabric, away from the corner. Pull the yarn tail taut but not too tight. Make sure the yarn is not visible from the right side of the fabric.

Step 4

Weave in ends knitting step 4

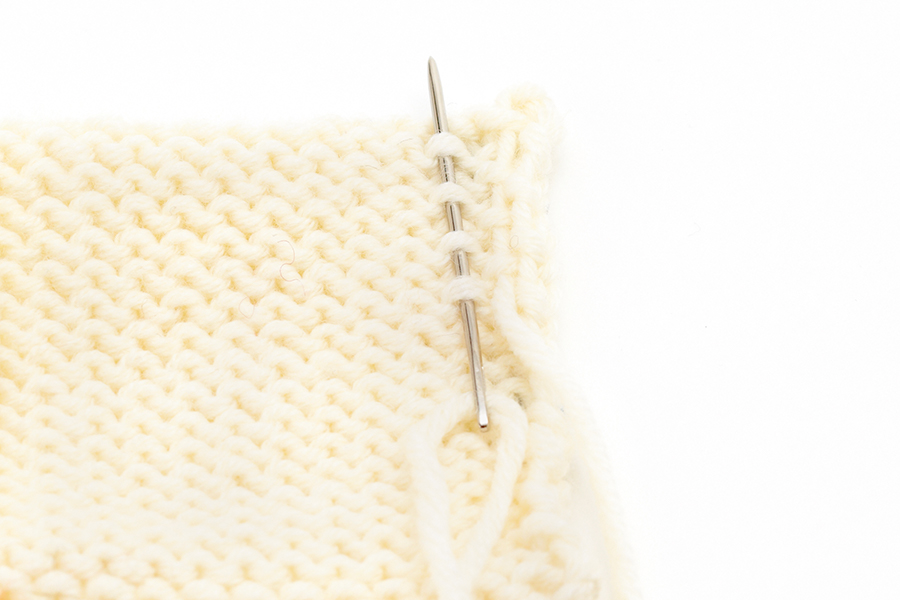
Turn the needle around and weave it in and out of the backs of the stitches in the other direction. Repeat until you’re sure the yarn won’t unravel. Cut off any excess yarn, near the fabric edge.


How to weave in ends in knitting: other techniques

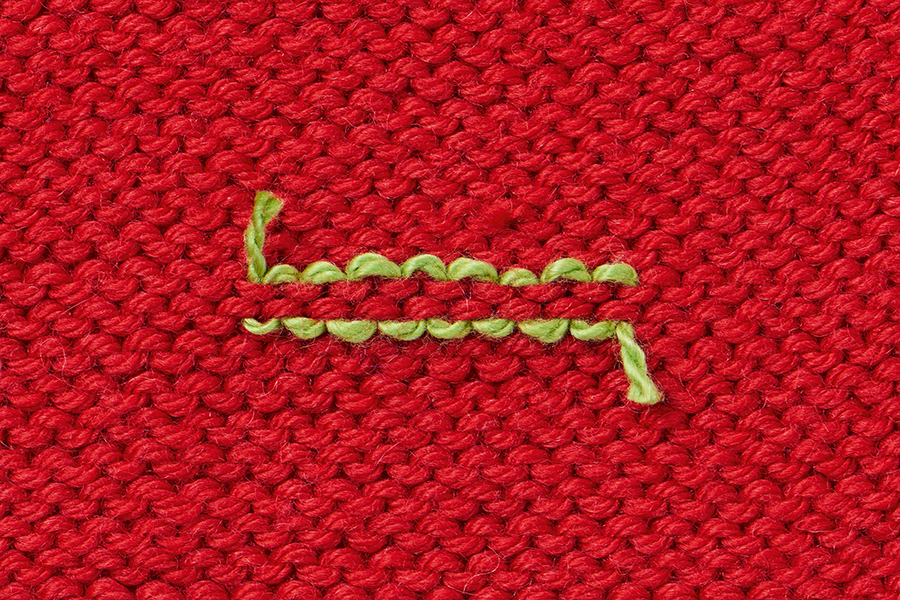
1. Weave in ends along a path

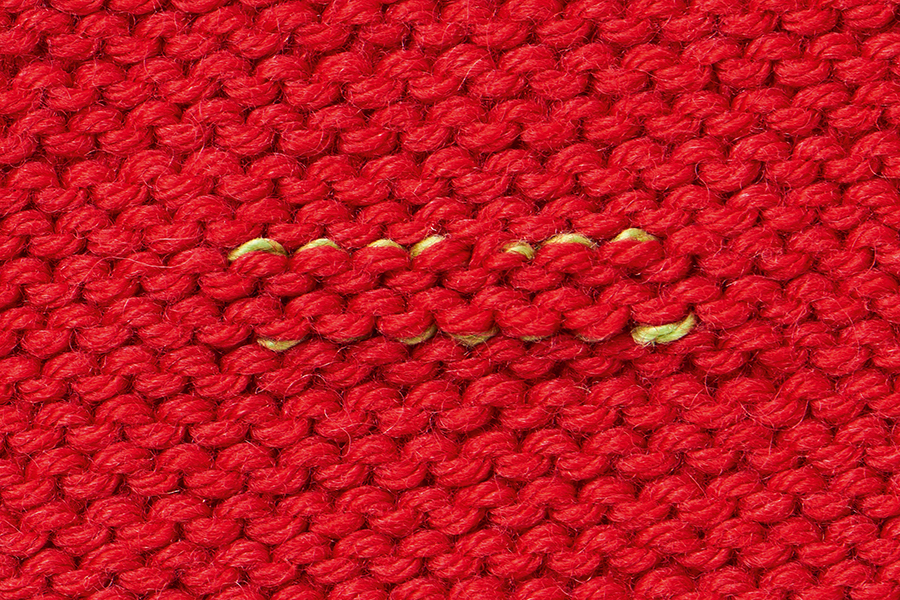
Perhaps the most common method used for stocking stitch or garter stitch fabric is to weave a path with your yarn tail through the purl bumps on the reverse side of the work.

The threads in these photographs are going from right to left. When you come to the end of the yarn, reverse direction and cross back through the strand you’ve woven in, sewing through the strand itself for extra security.

How to weave in ends knitting path

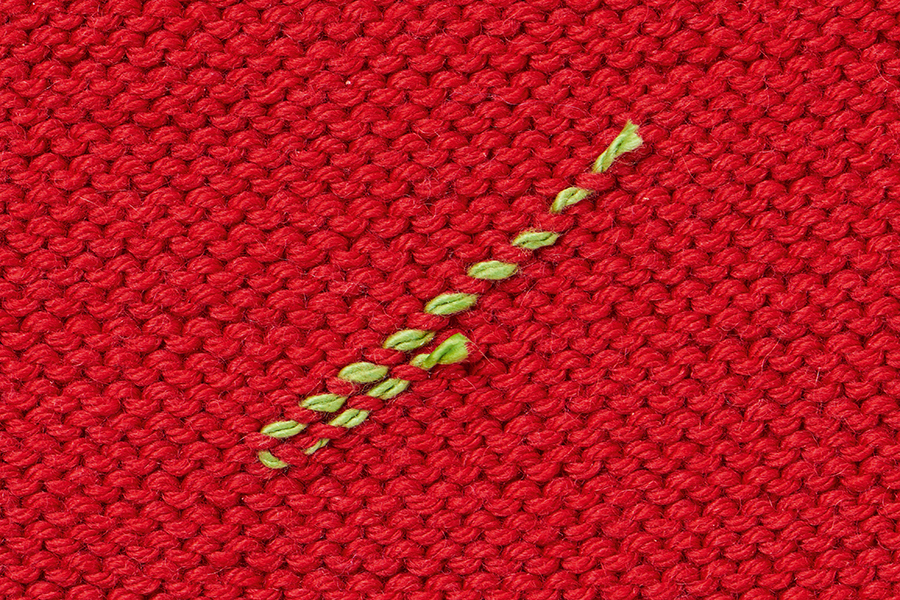
2. Weave in ends diagonally

Occasionally you’ll find your thread will need to be woven diagonally – perhaps if you are working shapes in intarsia knitting, or if there are a lot of ends in one area and you need to distribute them to avoid any lumpiness in your fabric. Again, reverse the direction when you reach the end to make a hook shape.

How to weave in ends knitting diagonal

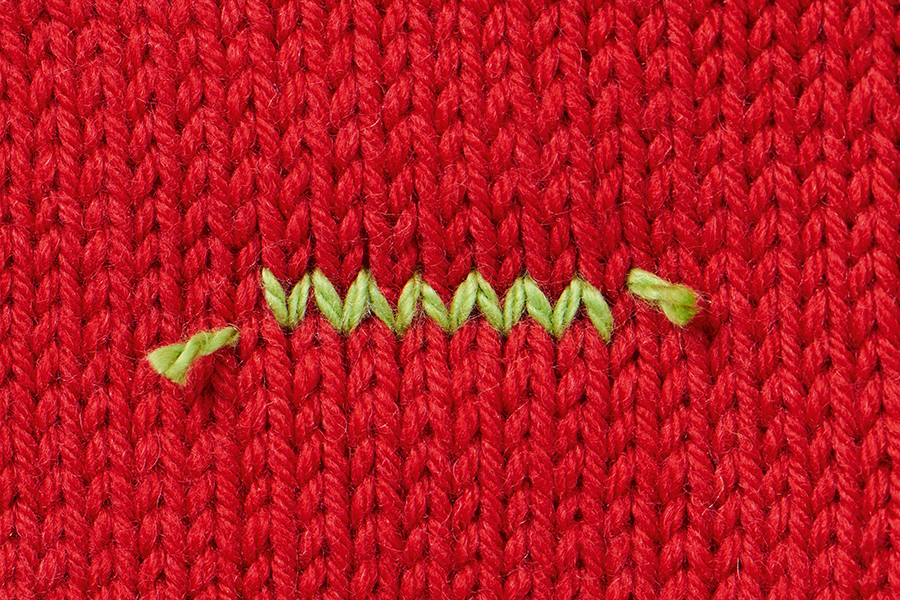
3. Weave in ends using duplicate stitch

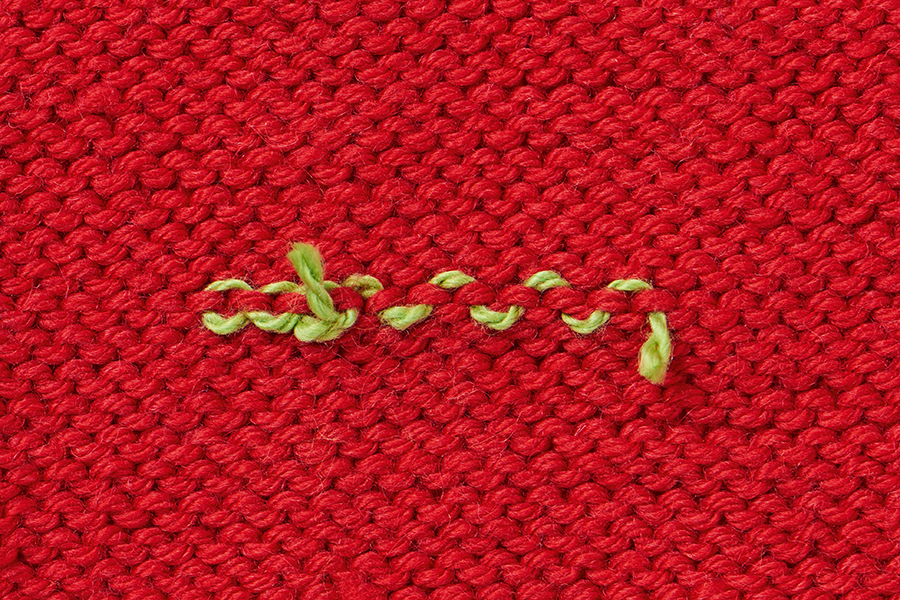
Using duplicate stitch (also known as Swiss darning) is a great option and the woven-in ends will be quite invisible from the right side of the work, as shown below. With a blunt needle threaded with your yarn end, follow the path the yarn takes across the row, trying to match the tension.

You’ll need to work in pairs of purl bumps – up through one diagonally to the left, then through the one above it diagonally to the right. Then follow back down – go into the next purl bump in the row, then back into the first bump. Pull the fabric gently if the path to follow is unclear.

How to weave in ends duplicate stitch 1


How to weave in ends duplicate stitch 2

Smooth it out

Now you know how to weave in yarn ends, learn how to block knitting projects to finish your knits like a pro.

4. Weave in ends on reverse stocking stitch

When you’re weaving in ends on reverse stocking stitch the same principle applies for duplicate stitch, and again doesn’t show too much on the right side. We have shown contrasting yarns here so the stitches show up.

On the wrong side, follow the path of the yarn across the row, this time going in under the two strands at the bottom of each knit stitch and then the inverted ‘V’ of the two stitches on the row below.

How to weave in ends reverse stocking stitch 2


How to weave in ends reverse stocking stitch 1

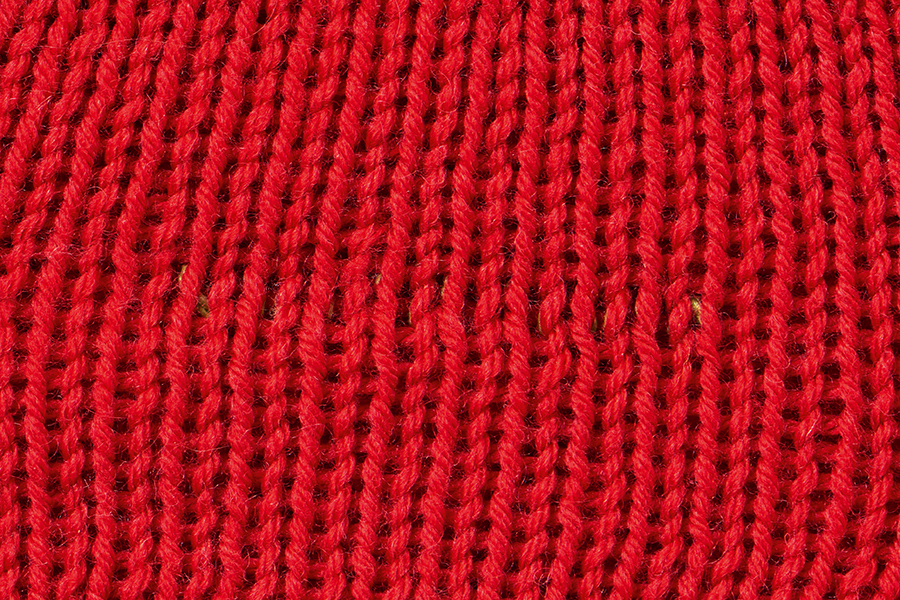
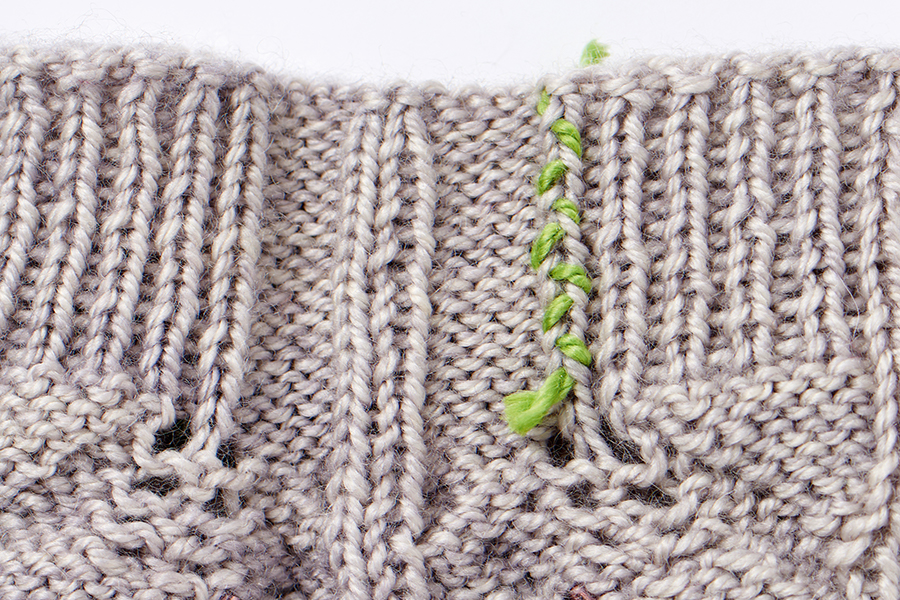
5. Weave in ends in ribbing

When weaving in yarns through a section of ribbing, wiggle the yarn in through the column of stitches vertically, so as not to affect the way the rib stretches. Using both sides of the column will help to distribute bulk, but depending on the pattern you may wish to use just one side, as with the next method.How to weave in ends rib stitch

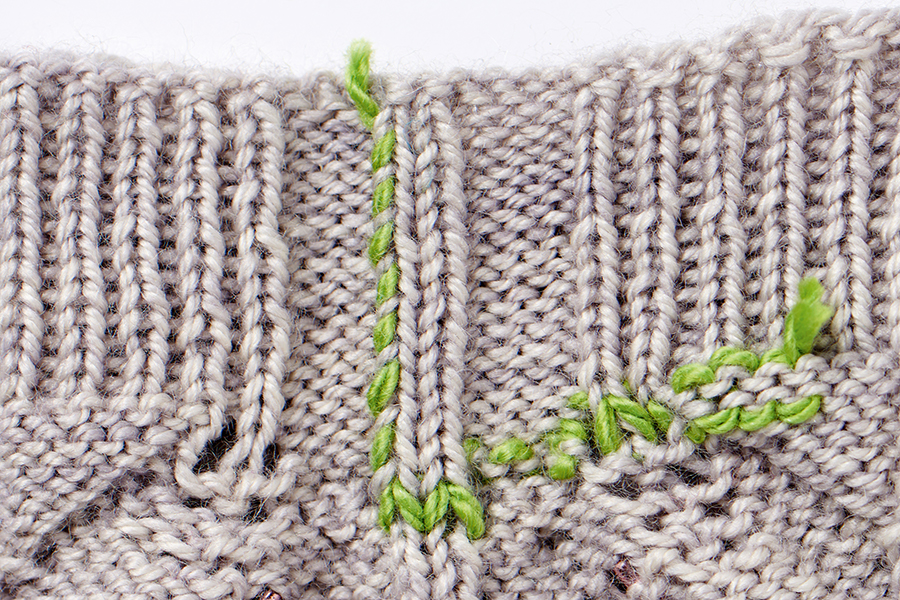
6. Weave in ends across a variety of stitches

Here the yarn has been woven in just using the left column of stitches and then duplicate stitched around the lace and reverse stocking stitch on the wrong side of the ribbed sock cuff.

How to weave in ends rib stitch 2


How to avoid weaving in ends

Now you know the different methods you can use to weave in ends in knitting, you should find the process a little easier – but it can still be time-consuming (and frankly tedious!) if you have a lot of ends to weave in.

For this reason, you might want to try reducing the number of ends you have, and there are a couple of techniques you can use for this.

1. Knitting with your cast on tail

When you cast on knitting you’re left with a tail of yarn where you made your first stitch. Instead of weaving this in later, simply pick it up with your working yarn and knit with both strands for the first 10 stitches (or the whole first row if you prefer). Cut off the rest of the yarn tail and ta-da! It’s all woven in with barely any effort.

This technique can have an impact on the springiness of the cast on, so avoid using it on cuffs or hems where stretch is important.

2. Splicing your yarn

Try splicing your yarn when you join in a new ball, instead of leaving a tail that needs weaving in. Splicing is particularly helpful in lace knitting, where the ends are a little harder to hide.

There are two popular splicing methods: the felted ends technique, in which you wet the ends of the old and new yarns and use friction to felt them together, and the Russian join, which involves splitting the yarn and then twisting the plies back together.

We have step-by-step guides to both these techniques, plus the handy twined knitting join, in our tutorial on how to join in yarn in knitting.


How to weave in ends in knitting

Weaving in ends is the perfect way to complete your work in process and give it a neat and tidy finish. After all, if you’ve spent hours working on a project then you want it to look its best!

When you’ve finished knitting, you’ll be left with a tail where you’ve cast on and another where you cast off. It’s easy to weave these into your work using a yarn needle and no one will ever know that they were there.

If you’ve made a more elaborate pattern, you may be left with loose ends in the middle of your knitting, but these are also easily concealed when you know how.

There are a few different techniques to try, including ones for stocking stitch, garter stitch and rib stitch. Try them out and find which one works best for you.

How to finish a knitting project

Finishing a knitting project the right way will make your work look much more professional, so it’s worth taking the time to learn techniques such as blocking, seaming and other finishing touches.

Discover how to finish a knitting project with Gathered.