From Instagram influencers to high street shoppers, haute couture models to the mums on the school run, everyone's wearing Fair Isle. And it's easier than you think to make this stylish knitwear yourself.
For basic Fair Isle knitting, all you need to know is how to do a knit stitch and how to change between different yarns. Even confident beginners can take on this technique. Its versatility means it appears in new incarnations every season and is rarely out of fashion.
With a bit of practice you'll be able to add eye-catching, colourful designs to anything you want, upgrading your wardrobe with a splash of colour and style!
Get ready to find out the difference between regular colourwork and Fair Isle, and learn how it's done, with expert guidance from designer Jo Allport. Here's an overview of what to expect in Gathered’s complete guide to Fair Isle knitting:
- What is Fair Isle knitting?
- What is the difference between Fair Isle and intarsia knitting?
- How to knit Fair Isle with designer Jo Allport
- Fair Isle knitting step by step
- How to read Fair Isle knitting charts
- What tools do you need for Fair Isle knitting?
- Best yarns for Fair Isle knitting
- Easy Fair Isle knitting patterns
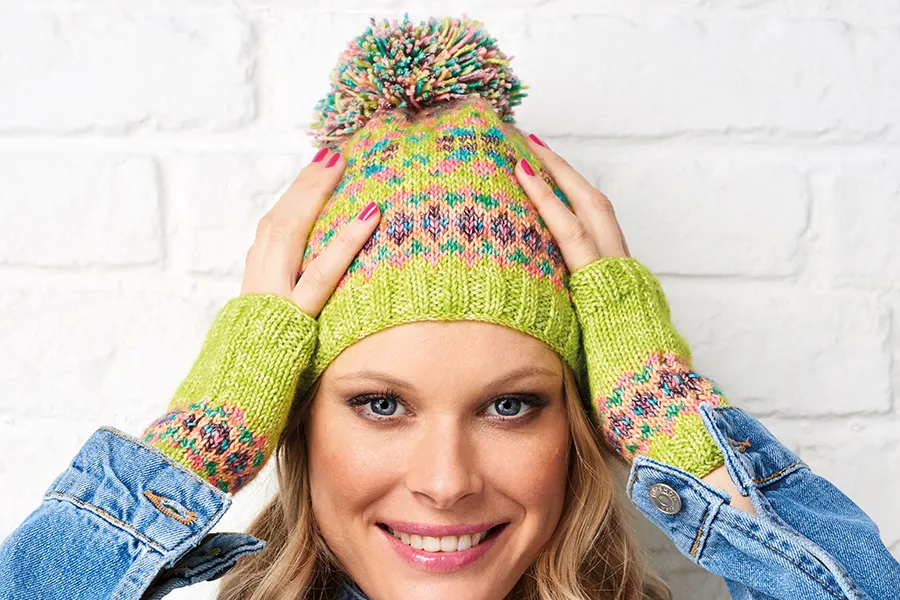
What is Fair Isle knitting?
Fair Isle knitting is a specific type of stranded colourwork that originated on the Scottish Shetland Island of the same name. Its distinctive patterns can be traced back to the mid nineteenth century, and are thought to have been influenced by similar traditions in countries such as Norway and Finland.
Colourwork and Fair Isle knitting
No explanation of Fair Isle would be complete without talking a little bit about colourwork. In knitting, 'colourwork' refers to any project that uses more than one colour of yarn. Stripes are the most basic kind of colourwork to create, because you only use one colour of yarn per row.
As with most techniques, working with two yarns (as in Fair Isle) requires practice.
Jo Allport, Knitwear Designer, Jo Allport Designs
As well as changing yarns at the start of a row to create stripes, you can also change colours within a row to create smaller motifs.
Stranded colourwork
When you swap back and forth between colours on the same row, you hold the unused yarn at the back of the knitting until you're ready to work with it again. This leaves small strands or 'floats' of yarn on the reverse side – hence the term 'stranded colourwork'.
While Fair Isle patterns can be remarkably complex, their underlying rules are pretty simple: Fair Isle is knitted in stocking stitch, and uses only two colours on each row.
Common features of Fair Isle knitting
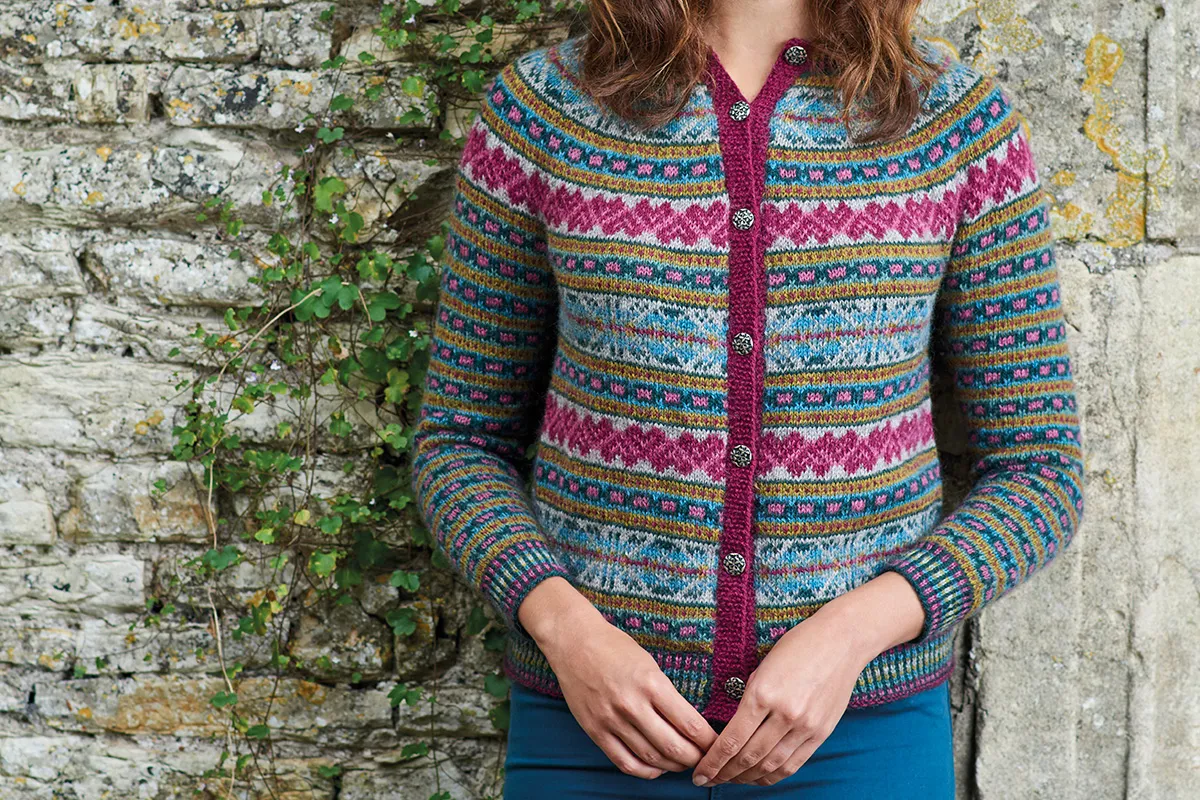
Features often seen in Fair Isle knitting include corrugated ribbing (which uses different colours for the knit and purl stitches), and motifs including crosses and stars.
Larger motifs are often striped with rows of 'peerie' patterns – narrow horizontal bands featuring small designs such as flowers, hearts and zigzags.
You'll also see small 'seeding' patterns, used to fill in blank areas, plus tessellated designs, and colour graduations using 'waves and peaks'.
These elements combine to make the characteristic patterns of Fair Isle.
While these days, it’s not uncommon to see stranded colourwork of any kind referred to as Fair Isle, that’s technically not right. Fair Isle has a beautiful, unmistakable style all of its own.
Step back in time
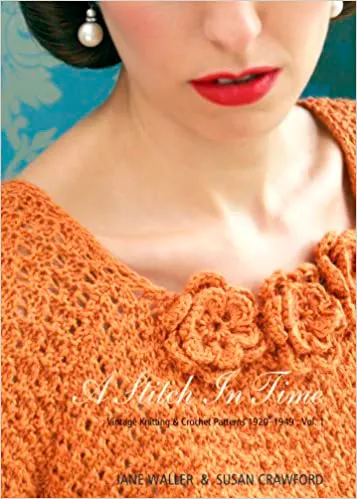
Recreate the Fair Isle of the roaring twenties with A Stitch in Time, Susan Crawford's collection of vintage knitting patterns.
What is the difference between Fair Isle and intarsia knitting?
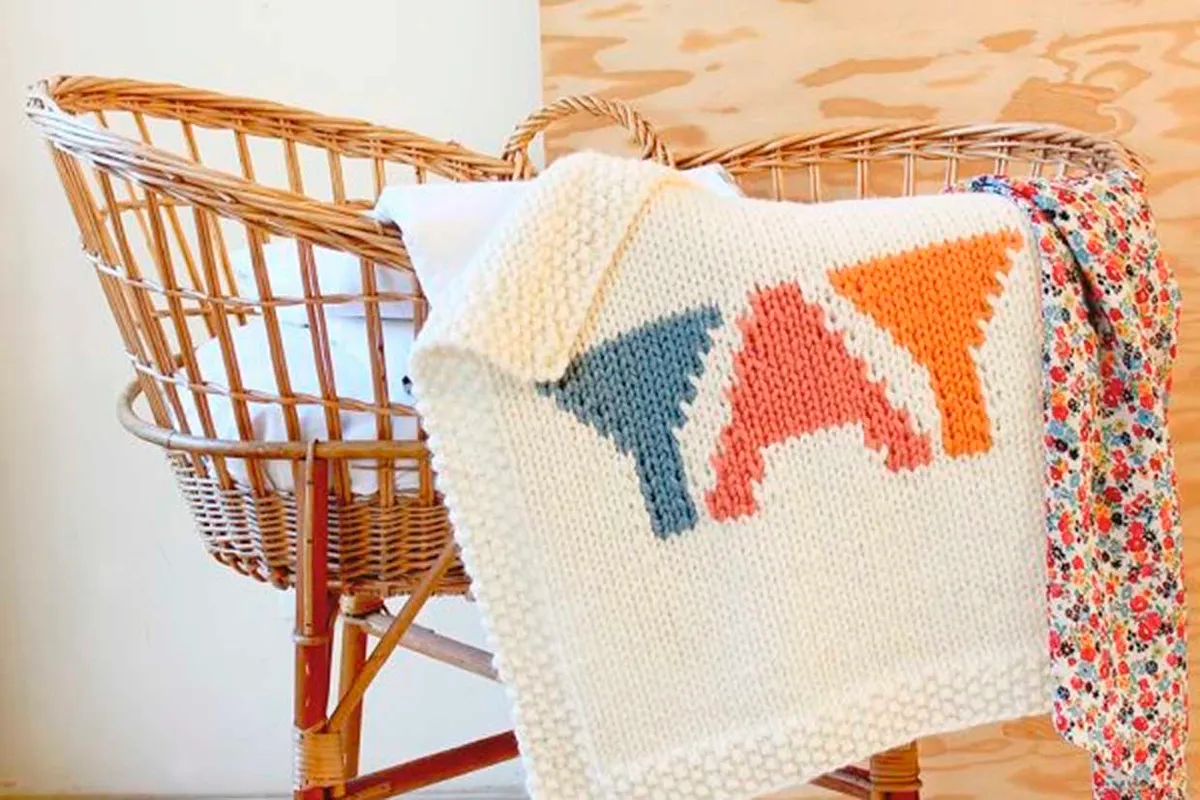
Intarsia is also known as 'picture knitting', because it's often used to create images in your knitting, rather than abstract patterns. If you have an ugly Christmas sweater at the back of your wardrobe, there's a good chance it uses intarsia!
For intarsia, the unused yarn is not stranded across the back of the work. Instead you switch between small bobbins of each colour, twisting the yarns together at the colour changes to prevent holes from forming.
When to use intarsia
Intarsia is useful when you have a large block of colour to knit, and stranding the unused yarn across it would leave a big messy loop.
In most stranded colourwork patterns, you won't strand the yarn over more than about five stitches at a time – any more than this and you're better using intarsia, or your work will get untidy.
Intarsia is also handy when you don't want to create a double-thickness fabric, or are making lighter clothes for spring or autumn. With intarsia the finished knitting is only one strand thick (unlike Fair Isle, where the floats create an extra layer).
Using both techniques
The two techniques can even be used side-by-side in the same pattern. Some designs switch between Fair Isle for smaller motifs and intarsia for bigger ones. The instructions should make it clear which one to use when.
Want to have a go at making your own picture knits? Check out our beginner's guide to intarsia knitting.
How to knit Fair Isle with designer Jo Allport
For this section we'll turn to designer and colourwork expert Jo Allport, who'll help guide you through the basics. The main skill to master in Fair Isle is holding your yarn…
"As with most techniques," says Jo, "working with two yarns (as in Fair Isle) requires practice. There are several ways of holding the yarn; the easiest is to hold the working yarn and drop the unused yarn, changing yarns as you need to change colours.
"The second way is to hold both yarns in one hand, usually the hand that you normally hold the yarn in. You can either wrap each individual yarn around different fingers, or both around one finger.
"The third way requires the most skill and uses a combination of Continental knitting and English knitting techniques – hold one yarn in your left hand (English style) and the other yarn in your right hand (Continental style). This method is by far the most efficient, but requires practice."
We go into more detail about these different ways of holding your yarn in how to catch Fair Isle floats, but for beginners we recommend starting with the first technique: dropping the unused yarn each time you change colours.
Start Fair Isle knitting
Ready? Let's get colourful!
Work up to the row where your Fair Isle pattern begins. Now attach a second colour of yarn to your project by tying the two yarns together at the start of a row.

Begin following your Fair Isle pattern, switching between the two yarns as instructed.
When swapping yarns, remember to twist the two together, leaving the unused yarn at the back of the work while you knit stitches in the other colour.
When you come to pick this yarn back up, twist it with the working yarn again, making sure there's a little give in the 'float' at the back.
Tension and Fair Isle knitting
Tension is really important when knitting Fair Isle, and it takes time to get it right. Don't worry if your knitting looks too tight or too baggy at first – it will get neater as you practise.
"When working with two yarns, spread your knitting out to stop the strands becoming tight across the back of your work," says Jo. "If this happens, the fabric puckers and the knitting becomes ‘inelastic’.
"Conversely, if the threads (or floats) are too loose across the back of the knitting the stitches take up the loose yarn and become too big. For the perfect tension, spread the stitches out frequently as you knit along the row."
Fair Isle knitting step by step
These images show what happens to the yarn that is carried over to create the floats on the wrong side of the work.
Step 1
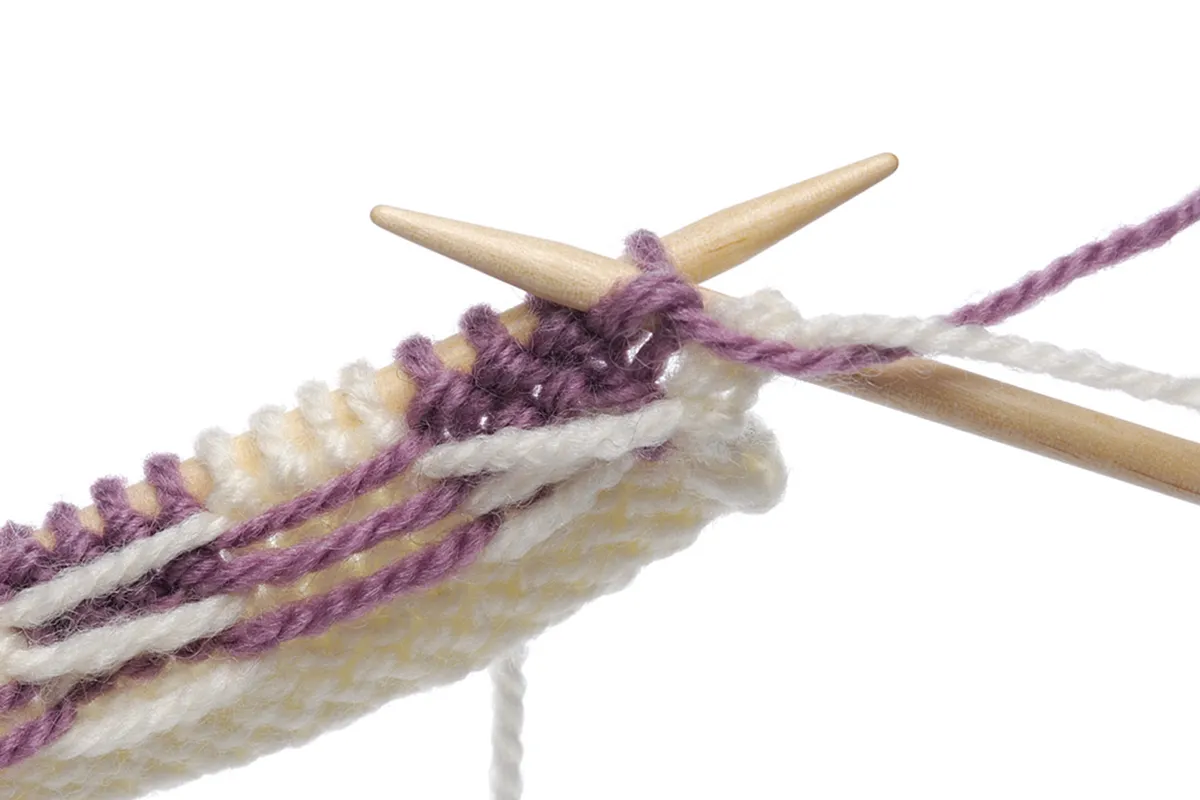
Work a stitch in the first colour as usual. To change colour, twist the two yarns together before working the next stitch.
Step 2
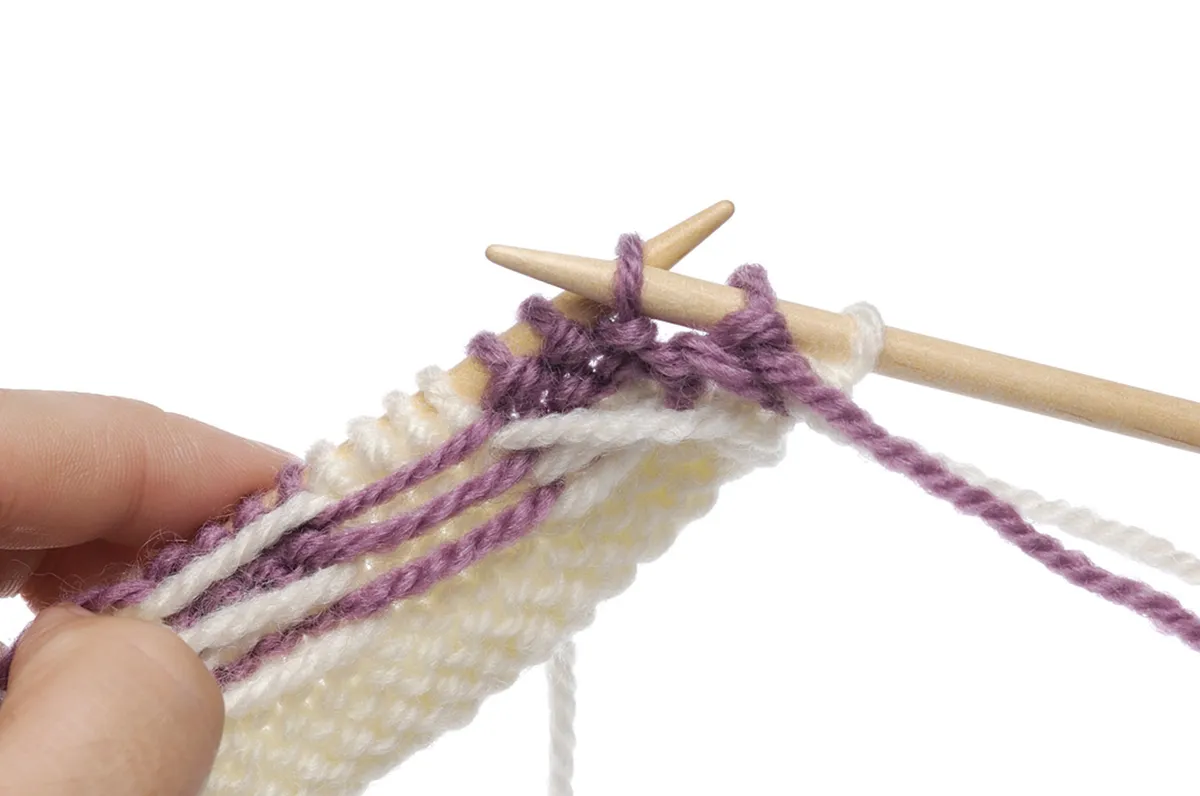
Work the next stitch in the new colour as normal. When working alternating stitches of two colours, try to keep an even tension and do not pull the yarn too tight.
Step 3
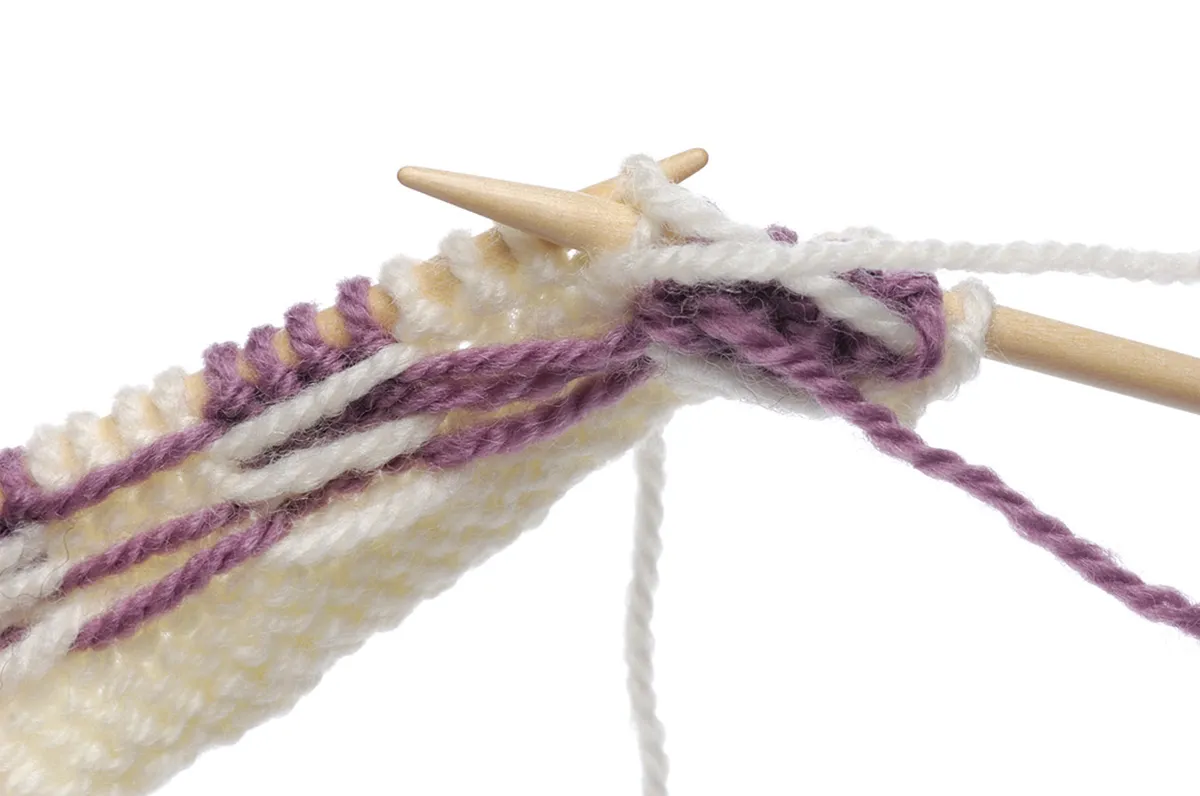
Change back to the original colour. Don’t forget to twist the two yarns together before you work the stitch.
Step 4
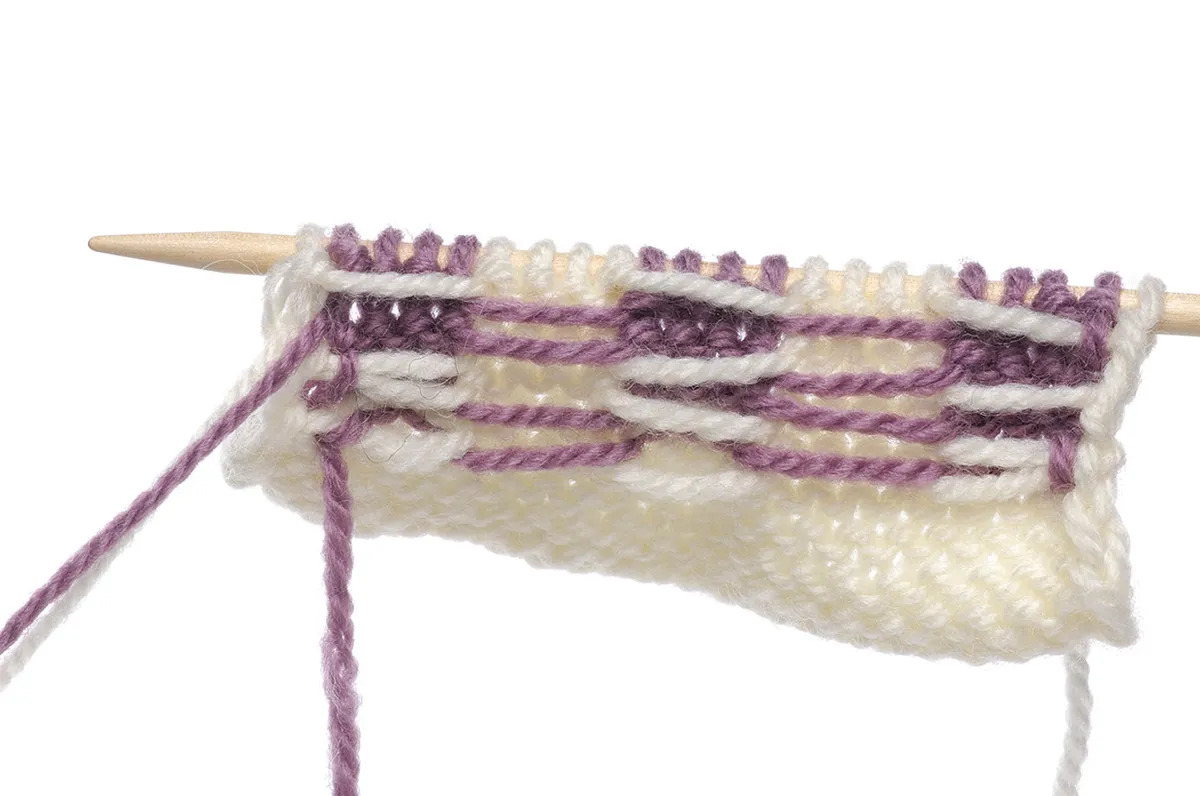
A completed row shows the yarn ‘floats’ carried across the back of the work. If the floats of one colour always stay above the other colour, your work will look more even.
Working Fair Isle flat and in the round
"You can work Fair Isle flat, as shown here, or in the round," explains Jo. "If you’re working it flat, the regular colour changes can mean there are a lot of ends to sew in. However, with care, the yarns can sometimes be carried up the side of the work until they are needed in the pattern.
"If you’ve never knitted Fair Isle before, you may prefer to knit it flat until your hands are more used to the technique. Once you’re familiar with it, it can be easier to work in the round.
"This is because you will always have the ‘right’ side of the work facing you, and all rounds are worked in knit stitch, helping you knit faster and with better tension. The yarns won’t twist at the back of the work, and you’ll also have far less sewing up to do."
Many Fair Isle garments are steeked, which means they're knitted in the round and then cut open to create holes for the arms or neck. Feeling up for a challenge? Give it a go with our steeking tutorial.
Explore traditional techniques
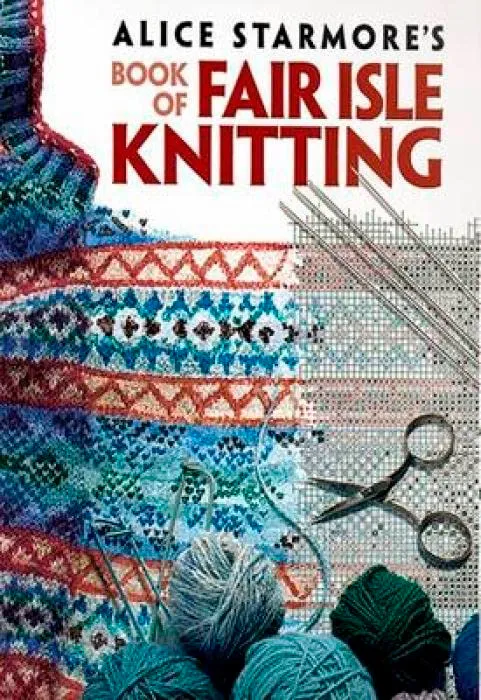
Discover the rich history of Fair Isle through the ages in Alice Starmore's Book of Fair Isle Knitting.
How to read Fair Isle knitting charts
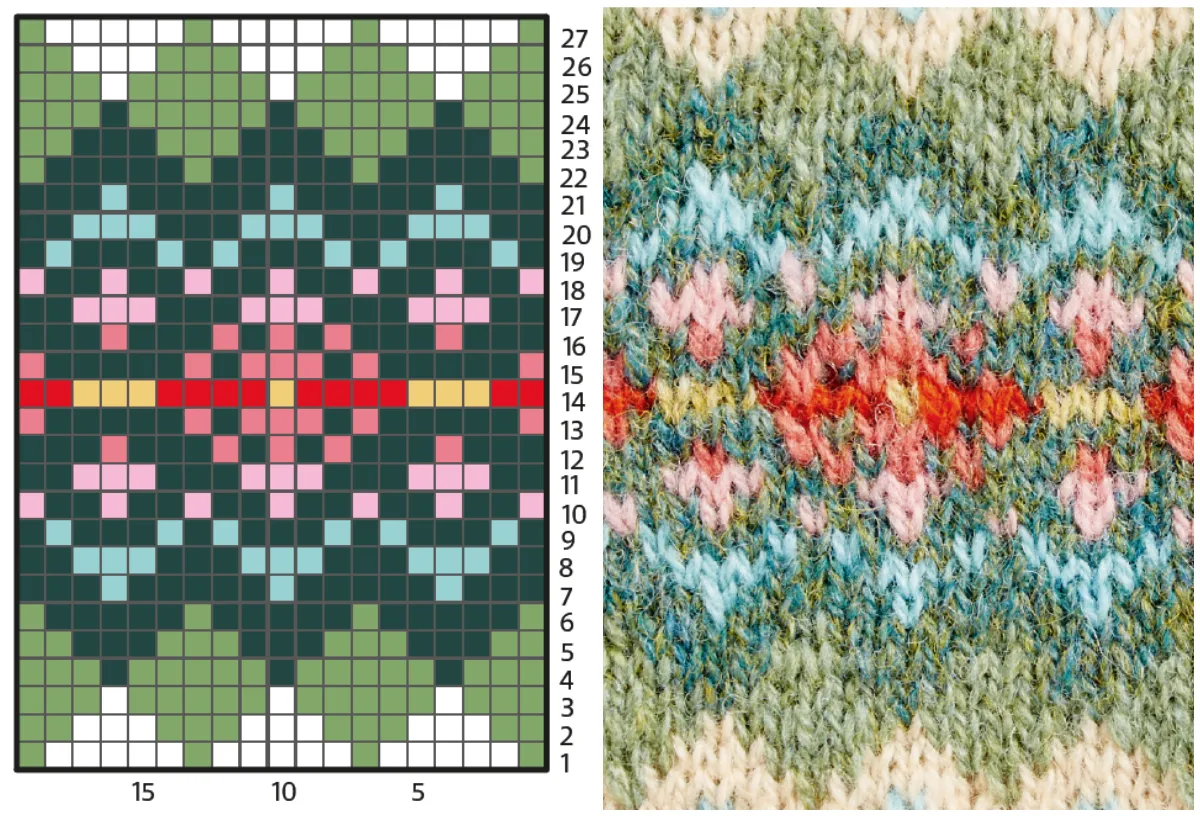
Many colourwork patterns are charted rather than written out, because it's much easier to display the pattern as a picture than it would be to write as words.
In Fair Isle and intarsia knitting charts, each coloured square represents a stitch. Each time the colour on the chart changes, you need to switch to the corresponding coloured yarn.
Working flat and in the round
Before you start following the chart, check whether the numbers up the side are written on both sides or one side only.
If they're on both sides then the pattern is worked flat. Start in the bottom right-hand corner and work all the stitches on the first row, right to left. Now turn your knitting so the wrong side is facing you and work back across the chart, from left to right.
If the numbers are on the right side of the chart only, the pattern is worked in the round. You'll work every row from right to left, again starting in the bottom right-hand corner.
See our tutorial on how to read charts in knitting patterns for an in-depth guide to working from charts.
Crochet with colour
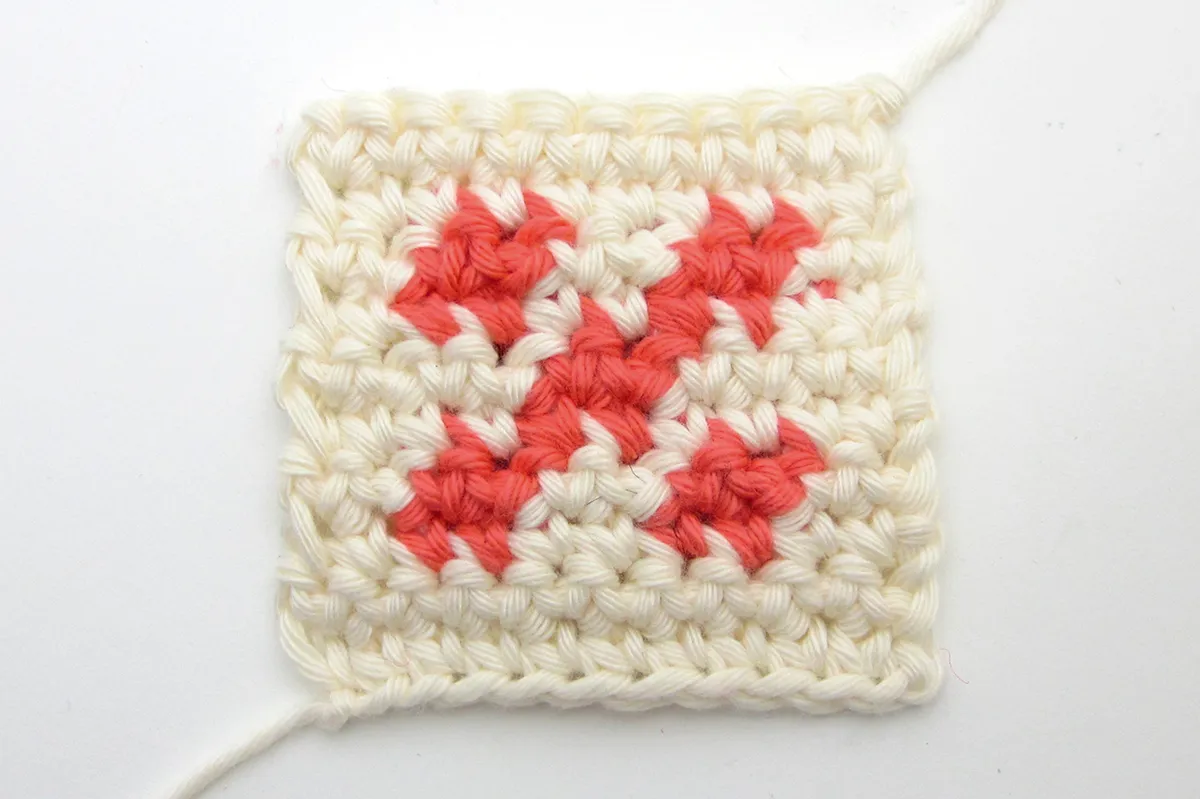
Did you know you can crochet Fair Isle too? Get hooking with Gathered's how to do crochet colourwork tutorial.
What tools do you need for Fair Isle knitting?
To get started with Fair Isle knitting, all you want are your favourite needles and two different colours of yarn. To go beyond the basics, though, there are a few tools you should have on your wishlist. Here's our top five…
1. Straight knitting needles
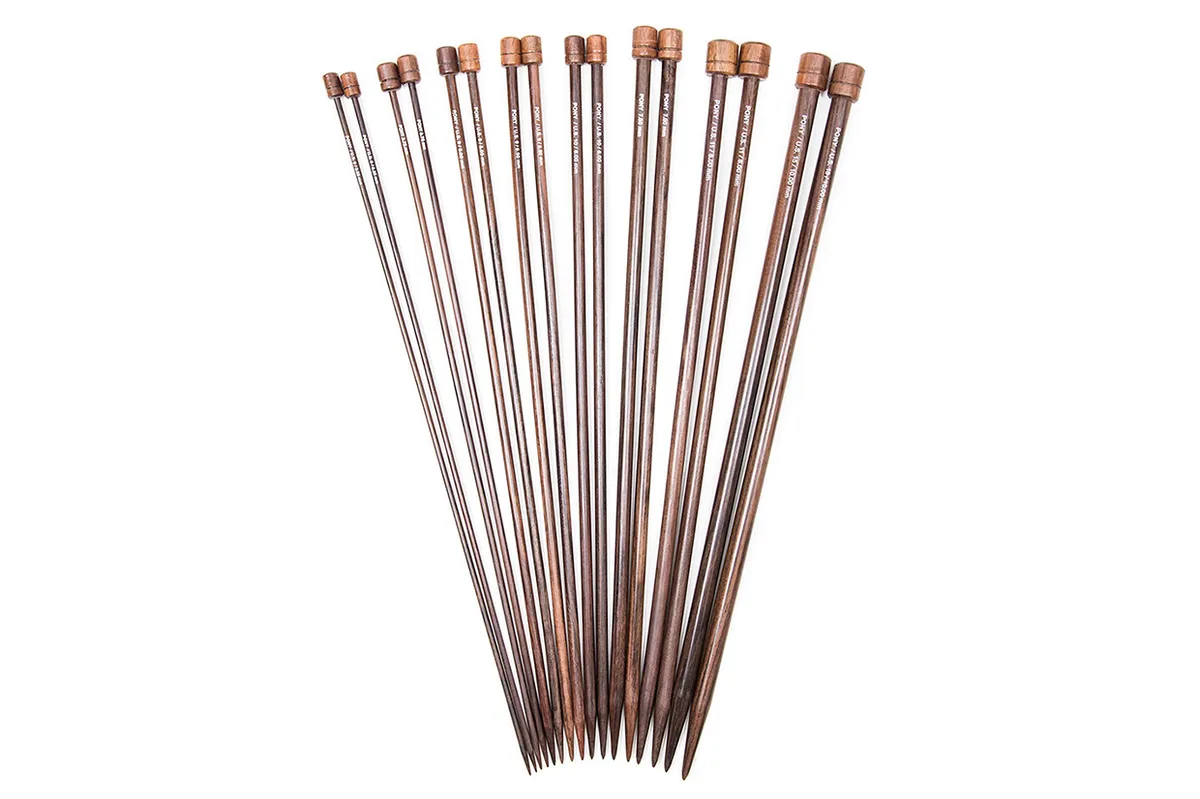
We recommend using wooden needles for Fair Isle knitting because they're not as slippery as metal ones, so you're less likely to drop any stitches. Try these beautiful Rosewood Single Point Needles from Pony.
Buy Pony Rosewood Single Point Needles from LoveCrafts.
2. Circular knitting needles
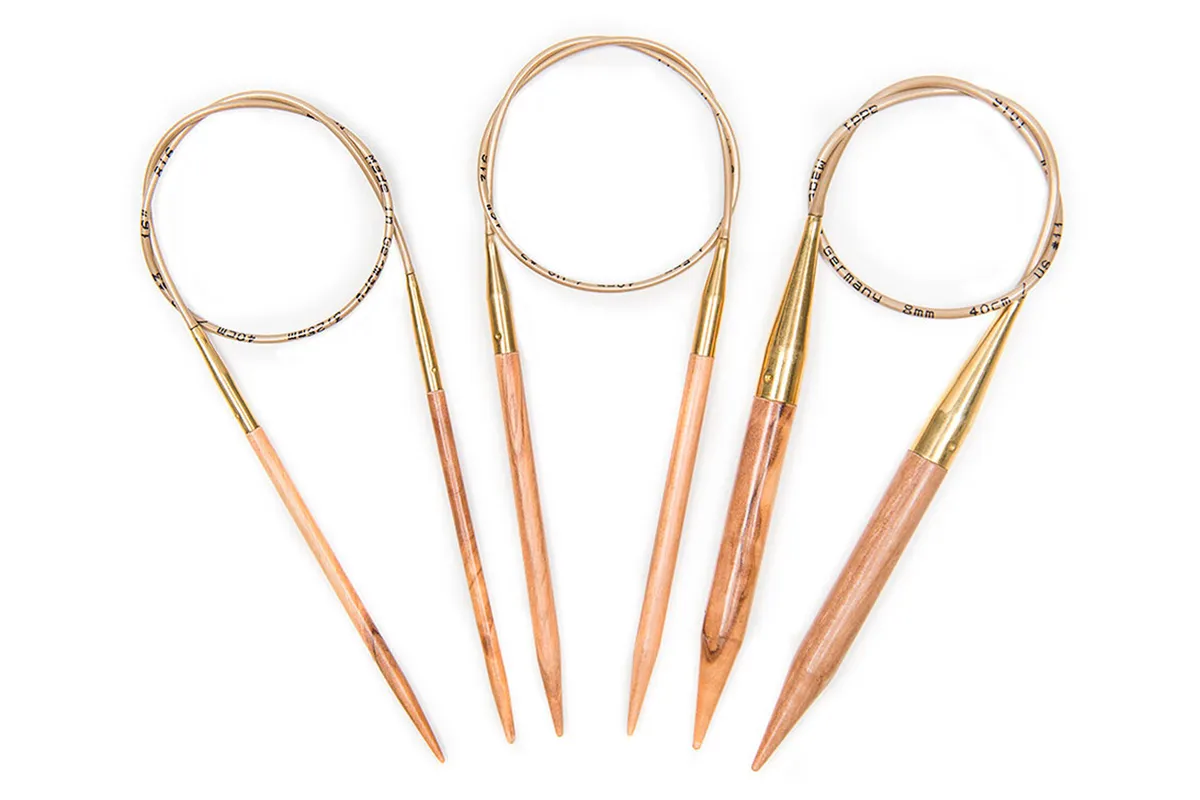
If you'll be knitting Fair Isle in the round you need a set of circular needles (or DPNs, but watch out for 'ladders' at the joins!). These Addi Olivewood needles have plenty of grip and a flexible, tangle-free cable.
Buy Addi Olivewood Circular Needles from LoveCrafts.
3. Chart keeper
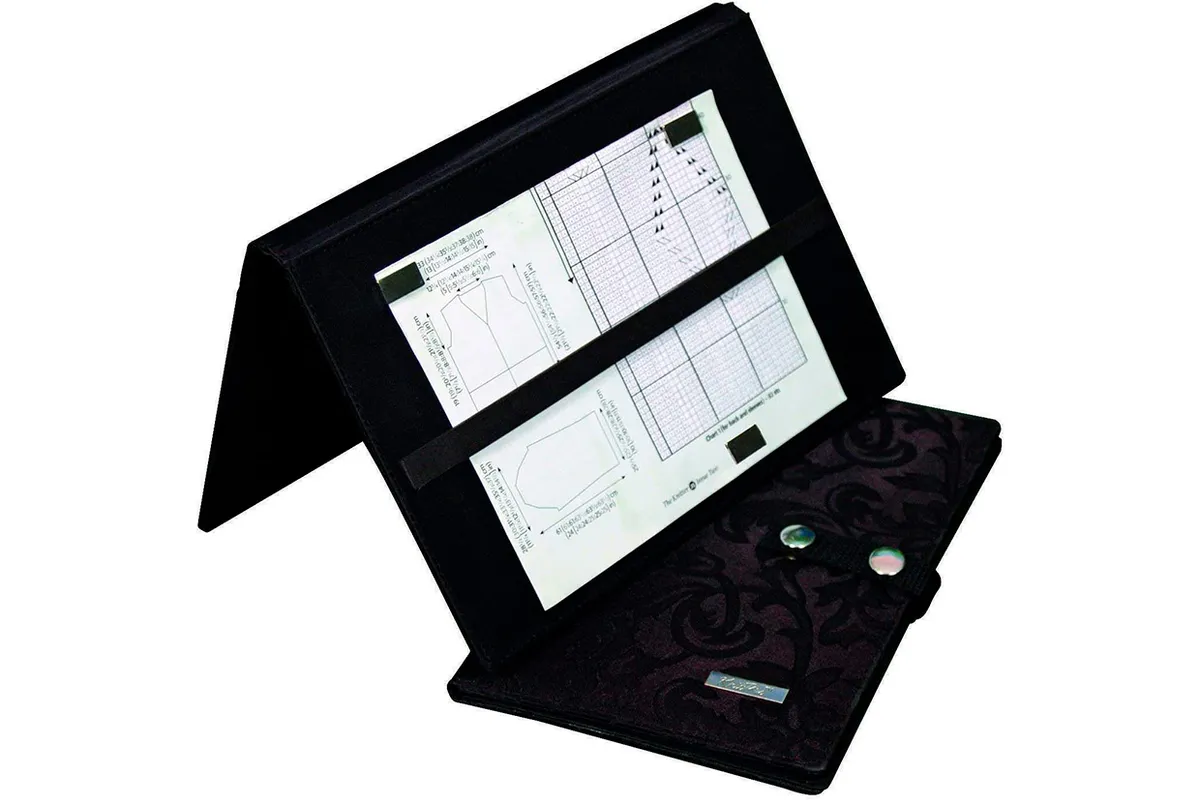
A chart keeper is a handy tool that helps you keep your place in your pattern by moving a magnetic strip up and down to highlight your current row. It's a must for anyone working big or complex Fair Isle motifs.
Buy the KnitPro Magma Knitting Chart Keeper from Amazon.
4. Stitch markers
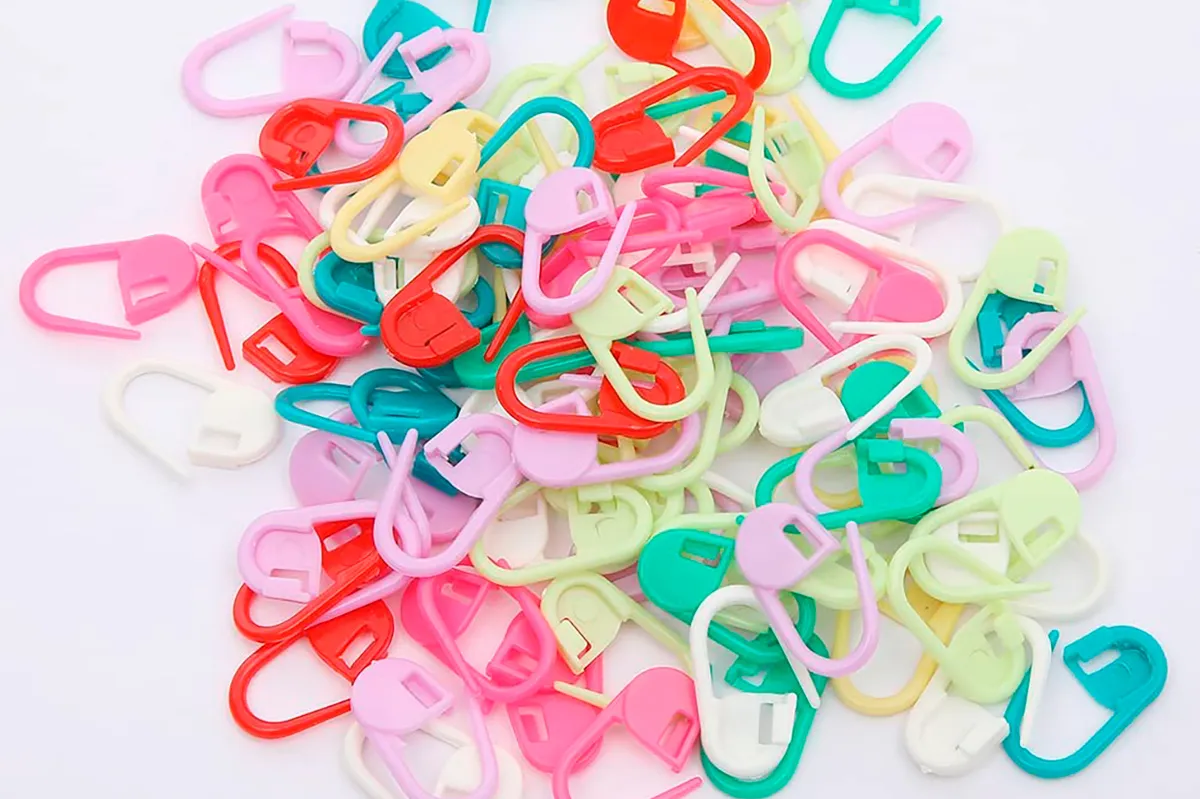
Mark up pattern repeats, areas of shaping and more with a set of multi-coloured stitch markers, like these ones from The Quilted Bear. Go for locking or clip-in markers so there's no chance of knitting them into your work.
Buy The Quilted Bear Locking Stitch Markers from Amazon.
5. Colour wheel
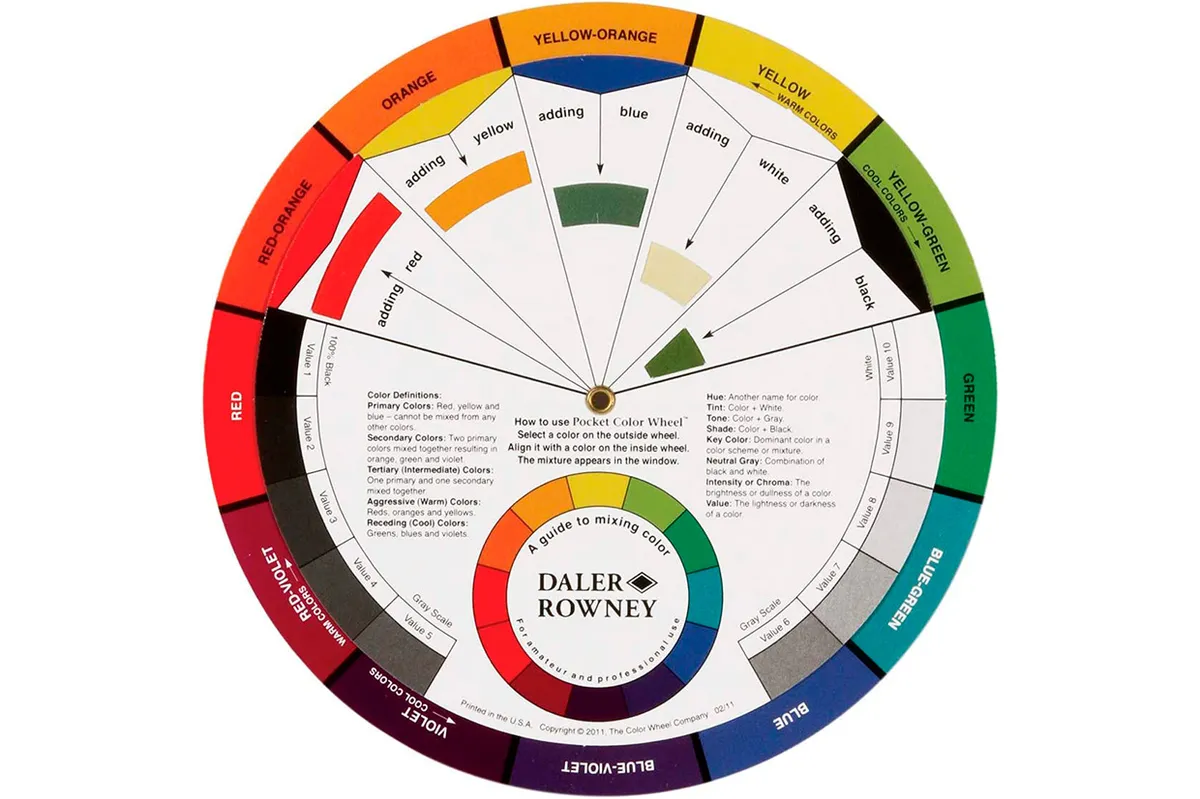
Give your Fair Isle knitting the wow factor with the help of colour theory! Don't know your tetrads from your triads? Simply turn the dial on the Daler-Rowney Artists' Colour Mixing Wheel to find the perfect combo for every project.
Buy the Daler-Rowney Artists' Colour Mixing Wheel from Amazon.
Best yarns for Fair Isle knitting
You can knit Fair Isle using any yarn you like, but for traditional colourwork you need wool – ideally Shetland wool!
Not only is it easy to work with, as it's not slippery on the needles, but it also has a lovely halo that helps to catch and conceal the floats on the back of the fabric.
Give these pure wool yarns a try:
1. Jamieson of Shetland Spindrift
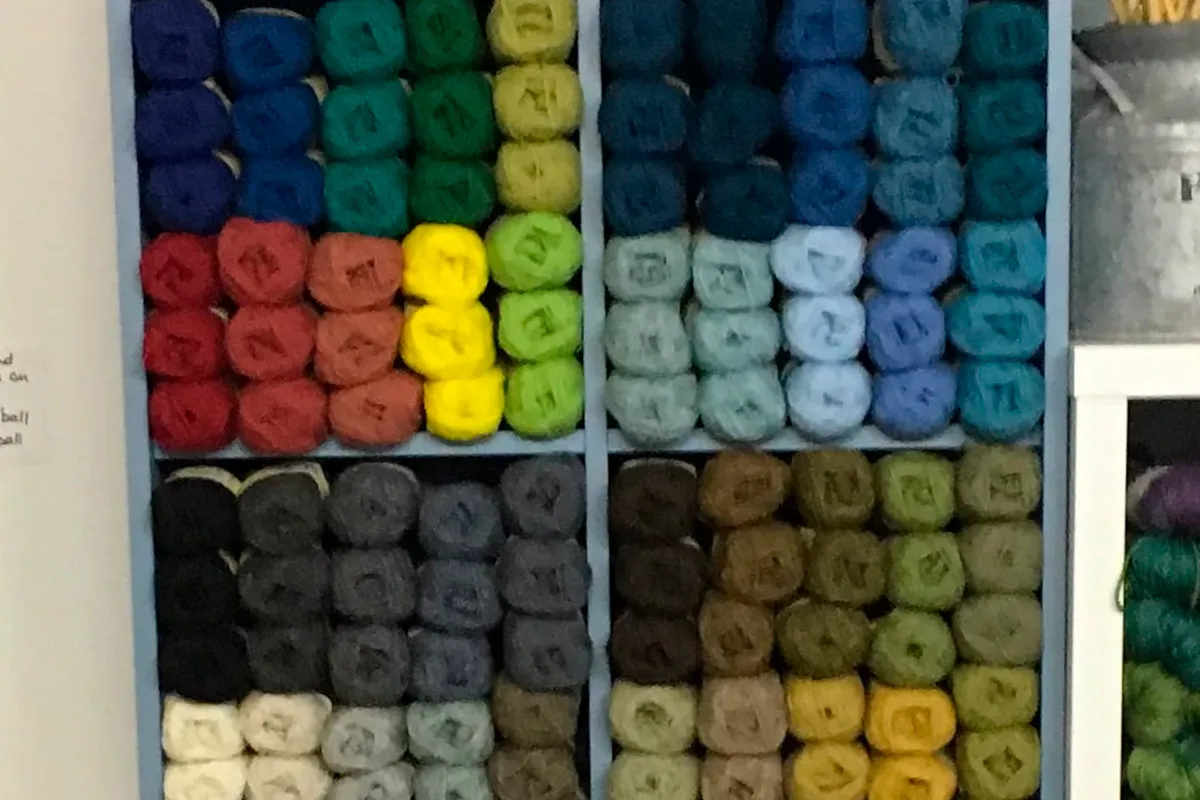
Grown, spun and dyed on Shetland, Spindrift is the quintessential Fair Isle yarn. It comes in an almost overwhelming array of colours – so you may spend as much time picking your palette as you do knitting!
Buy Jamieson of Shetland Spindrift from Etsy.
2. Colours From Shetland Jumper Weight yarn
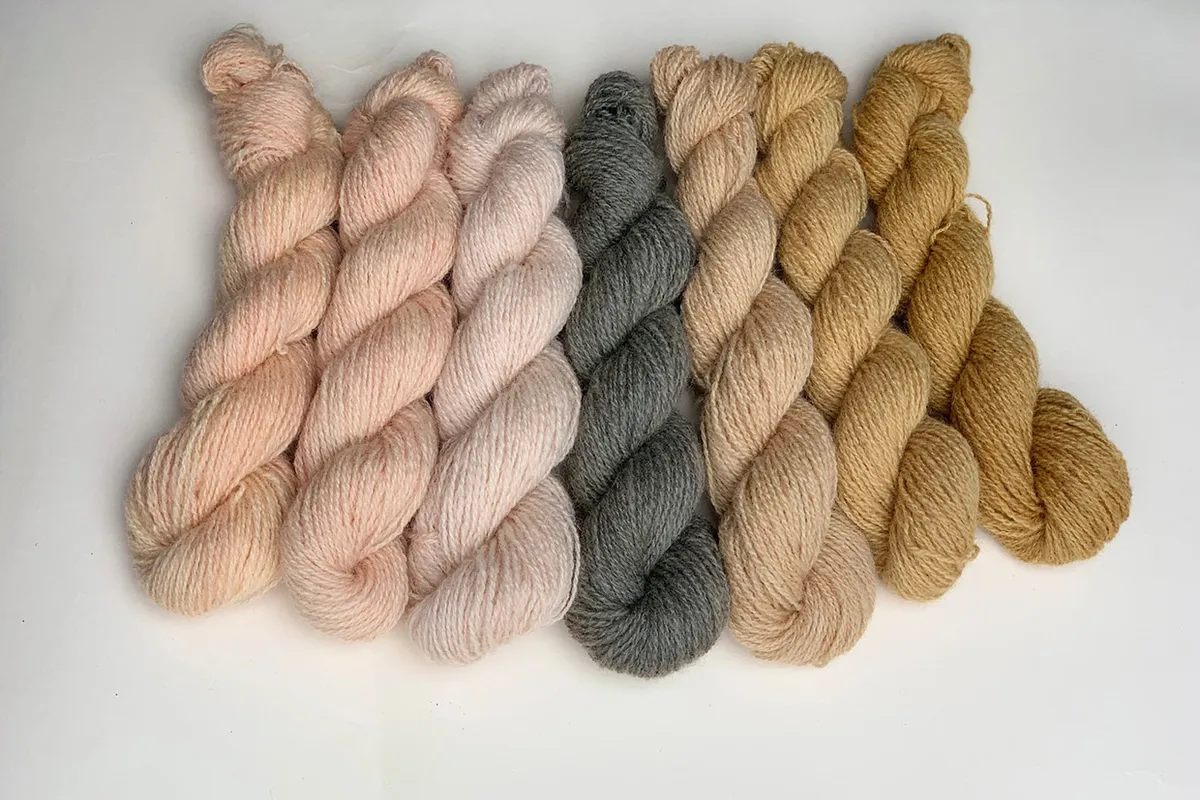
Gorgeous Shetland wool naturally dyed using plants grown on the Islands – what more could you ask for? Choose from sweet pinks dyed with rhubarb, lush greens from heather or earthy browns from willow leaves.
Buy Colours From Shetland Jumper Weight from Etsy.
3. West Yorkshire Spinners The Croft
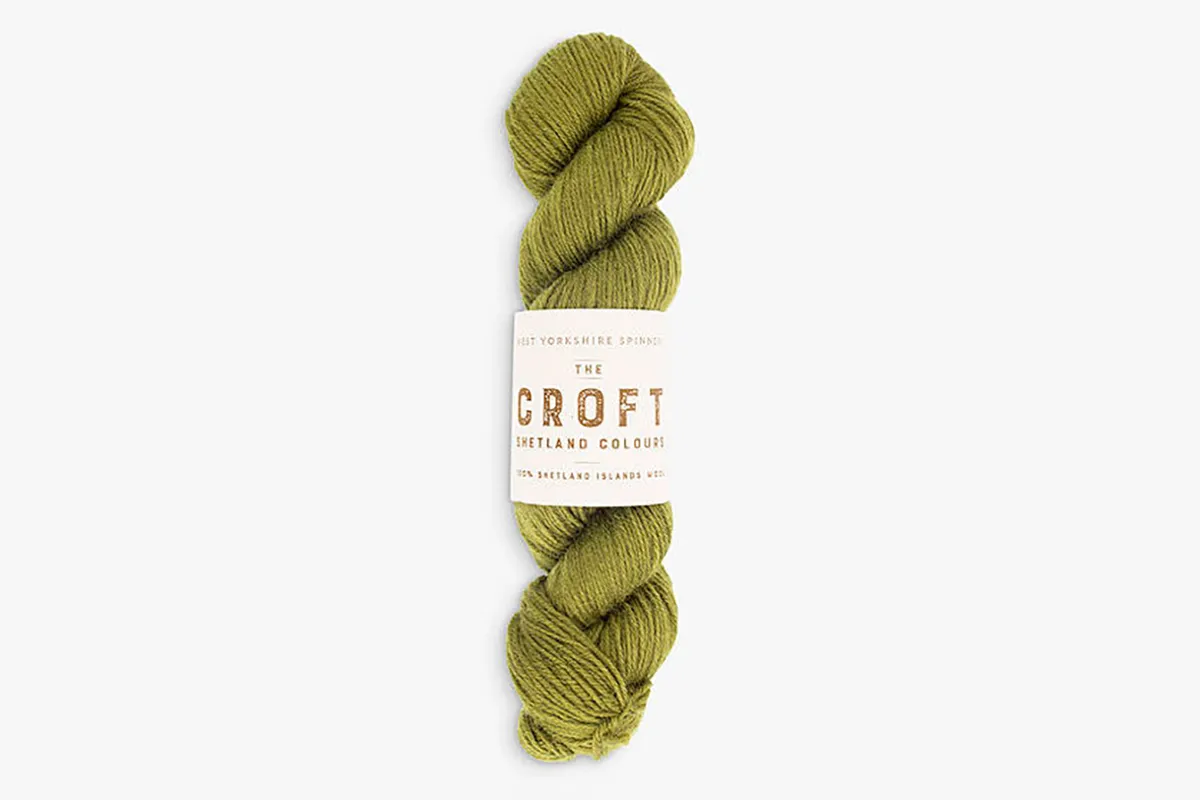
With a choice of solid shades and complementary tweeds inspired by the landscapes of the Scottish isles, The Croft is ideal for modern takes on classic colourwork. It's made from 100% Shetland wool and comes in both DK and aran weights.
Buy West Yorkshire Spinners The Croft from John Lewis.
4. Blacker Yarns Shetland 4ply
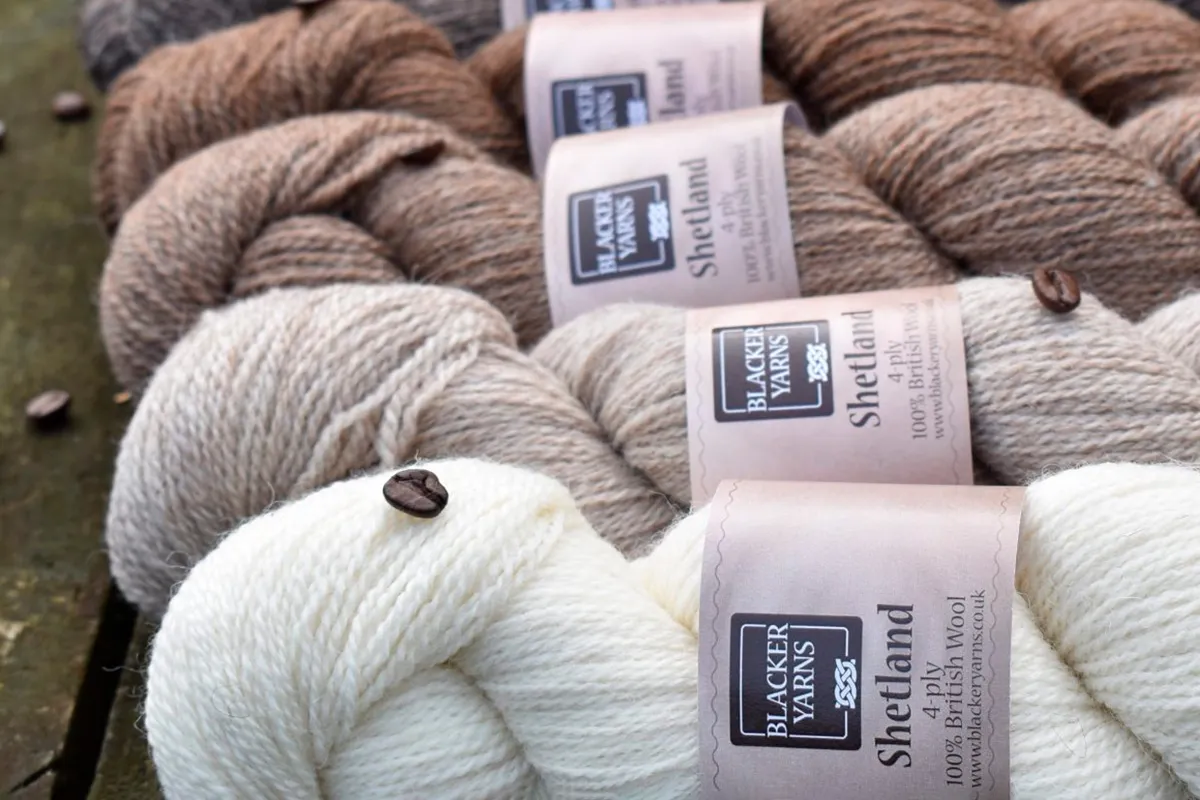
Celebrate the natural colours of Shetland fleece with this 100% wool yarn from Blacker. Ranging in colour from white to cream, fawn, mid-brown, grey and near-black, this tonal collection is perfect for creating subtle, vintage-inspired designs.
Buy Blacker Yarns Shetland 4ply from Blacker Yarns.
5. King Cole Merino Blend DK
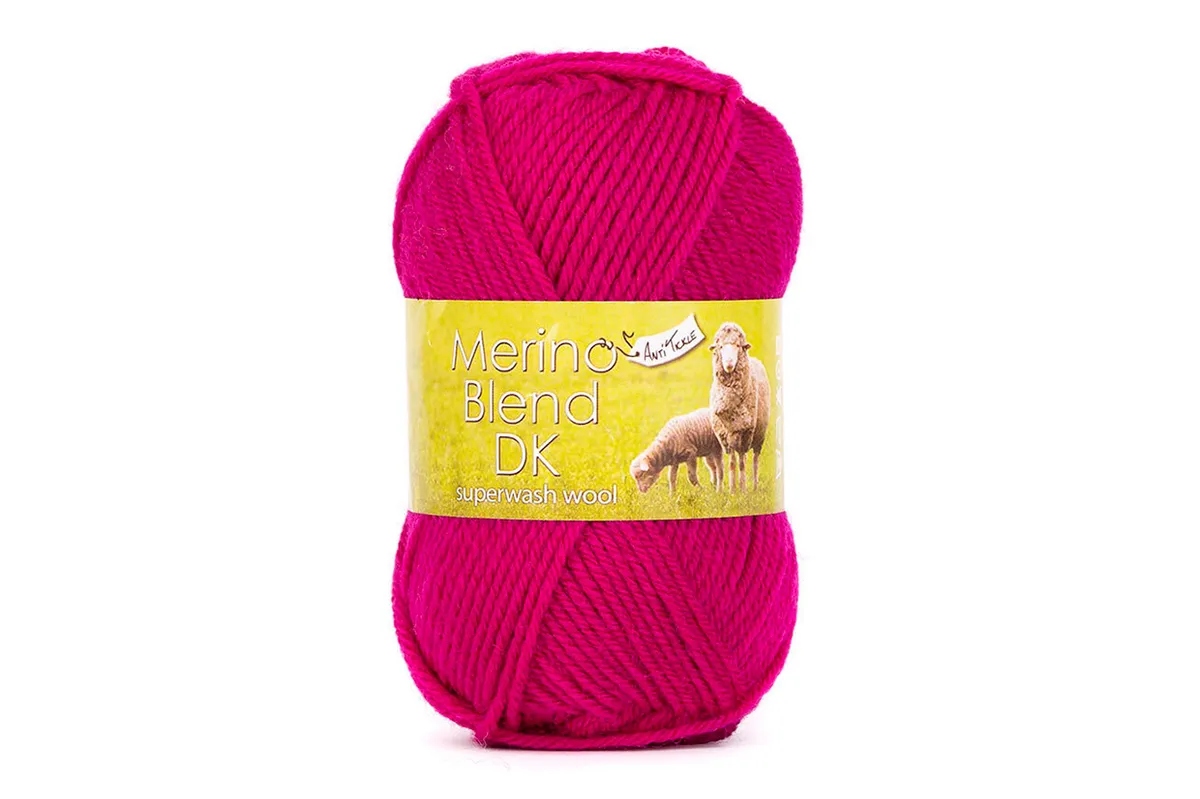
For a squishy pure wool yarn that's budget-friendly and easy to wash, look no further than King Cole. With 4ply, DK, aran and chunky weights available in a wide range of colours, there's a Merino Blend for every project.
Buy King Cole Merino Blend DK from LoveCrafts.
Easy Fair Isle knitting patterns
When you're choosing a beginner Fair Isle knitting pattern, look for something that uses just one or two small motifs and doesn't have much shaping. You want to concentrate on the colourwork, not counting stitches!
We have three free patterns to get you started right here on Gathered, and check out our favourite Fair Isle knitting patterns for lots more…
1. Give yourself a (mug) hug
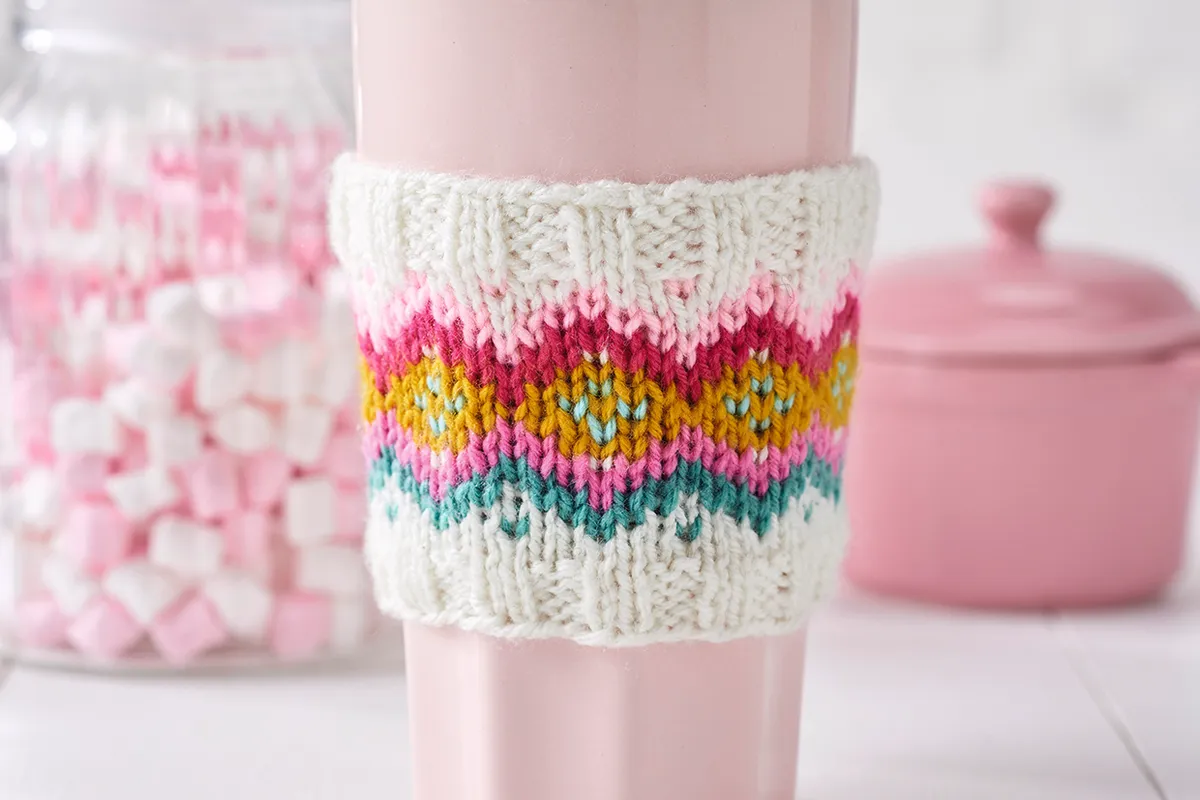
With its small size and bold, charted motif, this mug hug from Kirstie McLeod is the ideal first Fair Isle pattern – and it's a great stashbuster too. Choose your favourite shades of DK yarn and give it a try today.
Cast on the free Fair Isle mug hug knitting pattern.
2. Get festive and cast on a bauble
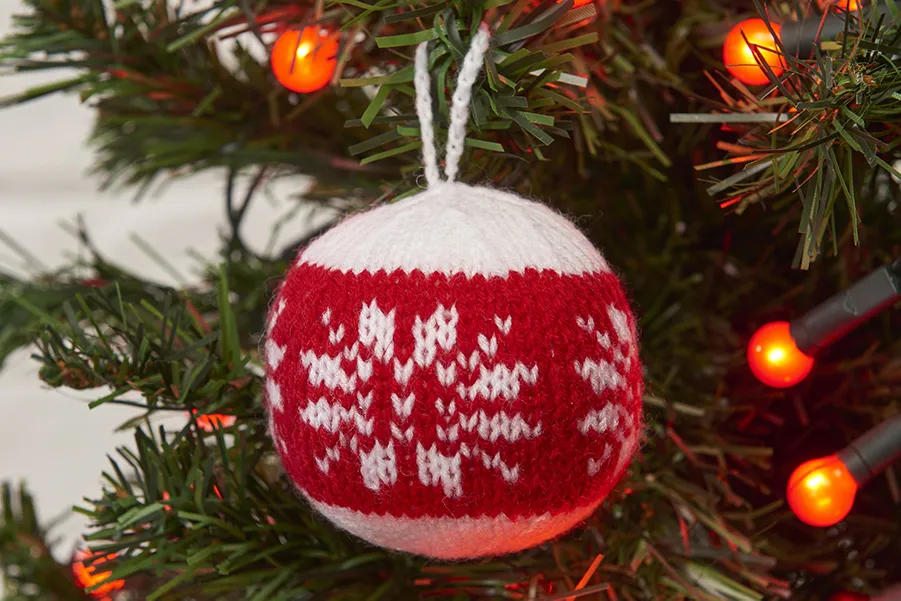
Kirstie's done it again! Her gorgeous knitted bauble design features a Norwegian star – a popular motif in Fair Isle knitting that's well worth mastering. Easy, portable and quick to knit, this project ticks all the beginner boxes.
Cast on the free Fair Isle bauble knitting pattern.
3. Cosy up with a cushion
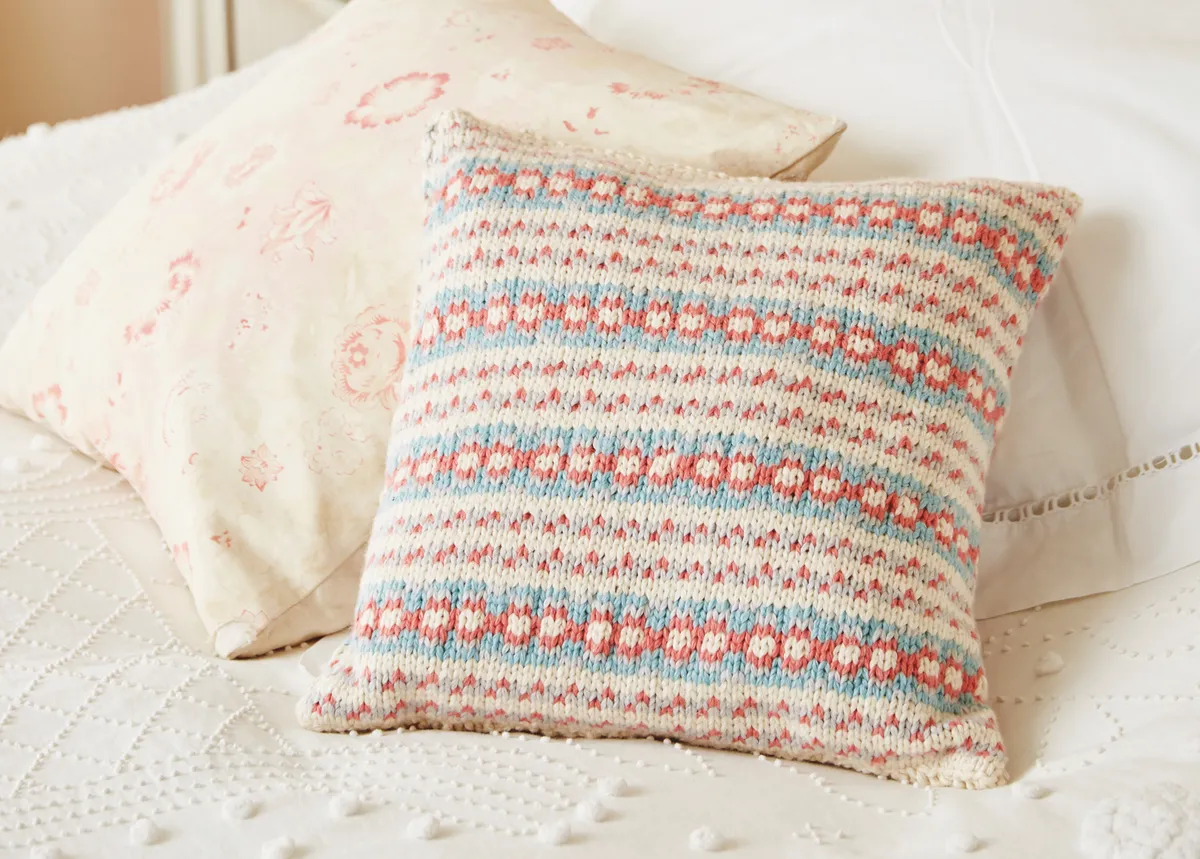
A full-size Fair Isle project for a beginner? Yes! Don't be put off by its size – Monica Russel's cushion cover is well within the grasp of an adventurous colourwork newbie. It uses just two small charts, repeated to form an all-over pattern.
Cast on the free Fair Isle cushion cover knitting pattern.
Creative colourwork is the key to timeless Fair Isle knitting
Knowing how to work Fair Isle gives you so many options for playing with colour in your projects. Why knit monotone when you can craft a rainbow?
Whether you're making a quick mug hug or an adult-sized Shetland jumper, the fundamental skills are the same. Once you've mastered them you'll be amazed what you can create!
Knit flawless Fair Isle with Gathered
Now you've learned the basics, boost your stranded knitting skills and get great results every time with Gathered's Fair Isle knitting tips.


