Start by knitting the back of the Christmas jumper
Step 1
The back of the jumper is plain, so it knits up quickly in stocking stitch. You’ll start at the bottom and add some shaping at the top for the armholes, which is where you’ll attach the sleeves later.
Where the pattern instructs you to ‘inc’ and ‘dec’ you can use the increase and decrease stitches of your choice – Gathered’s how to increase a stitch in knitting and how to decrease in knitting guides include a range for you to try.
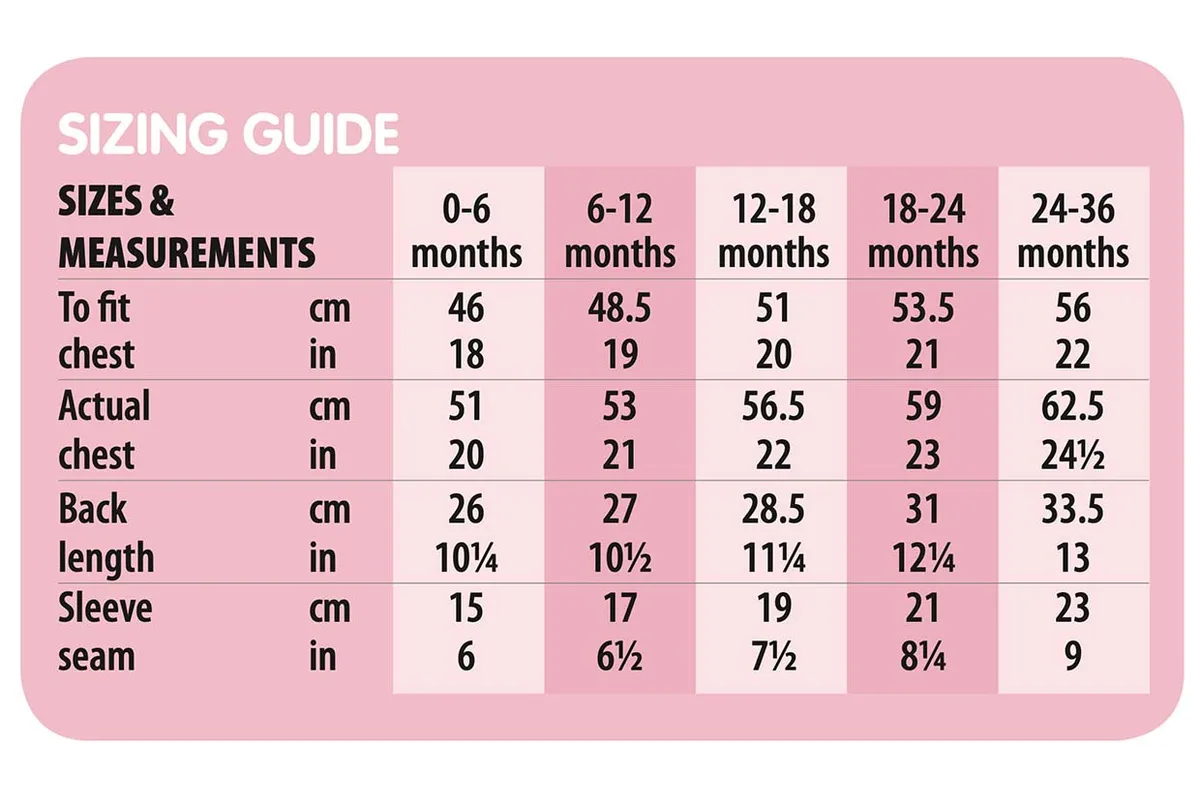
Using 3.25mm needles and main colour (MC), cast on 53 (55: 59: 61: 65) sts and work in garter stitch (every row knit) for 8 rows, AND increase (inc) 4 sts evenly across last row worked. [57 (59: 63: 65: 69) sts]
Change to 4mm needles and work in stocking stitch (st st) until work measures 15 (16: 17: 19: 21)cm or 6 (6¼: 6¾: 7½: 8¼)in, ending with a wrong side (WS) row.
Step 2
Shape armhole
Cast off 2 sts at beginning of next two rows. [53 (55: 59: 61: 65) sts]
Decrease (dec) 1 st at each end of next 2 rows, then dec 1 st at each end of following 2 (2: 3: 3: 4) alternate (alt) rows. [45 (47: 49: 51: 53) sts]
Now continue in st st until work measures 9.5 (10: 10.5: 11: 11.5)cm or 3¾ (4: 4¼: 4½: 4¾)in from beginning (beg) of armhole shaping. (End with WS row).
Work in garter stitch for 8 rows.
Cast off loosely purlwise.
Work your chosen motif on the front of the Christmas jumper
Step 1
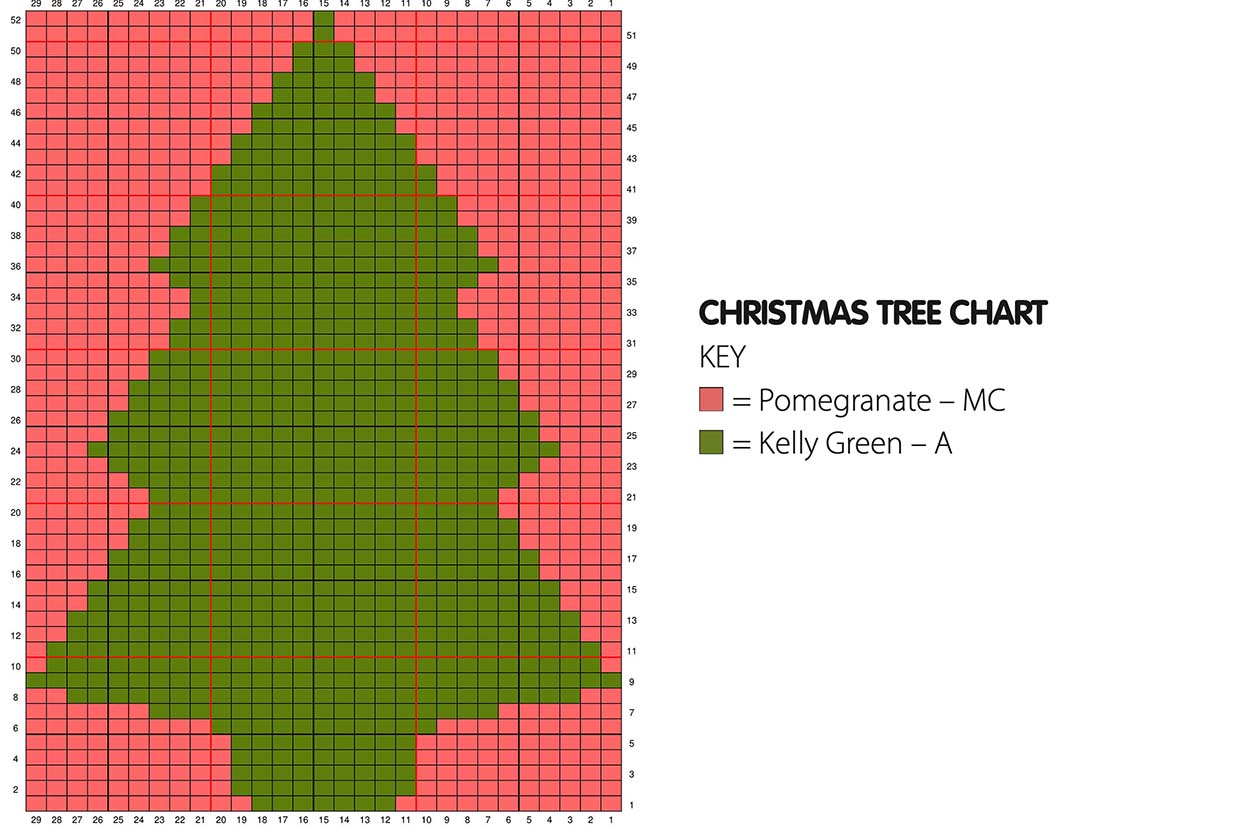
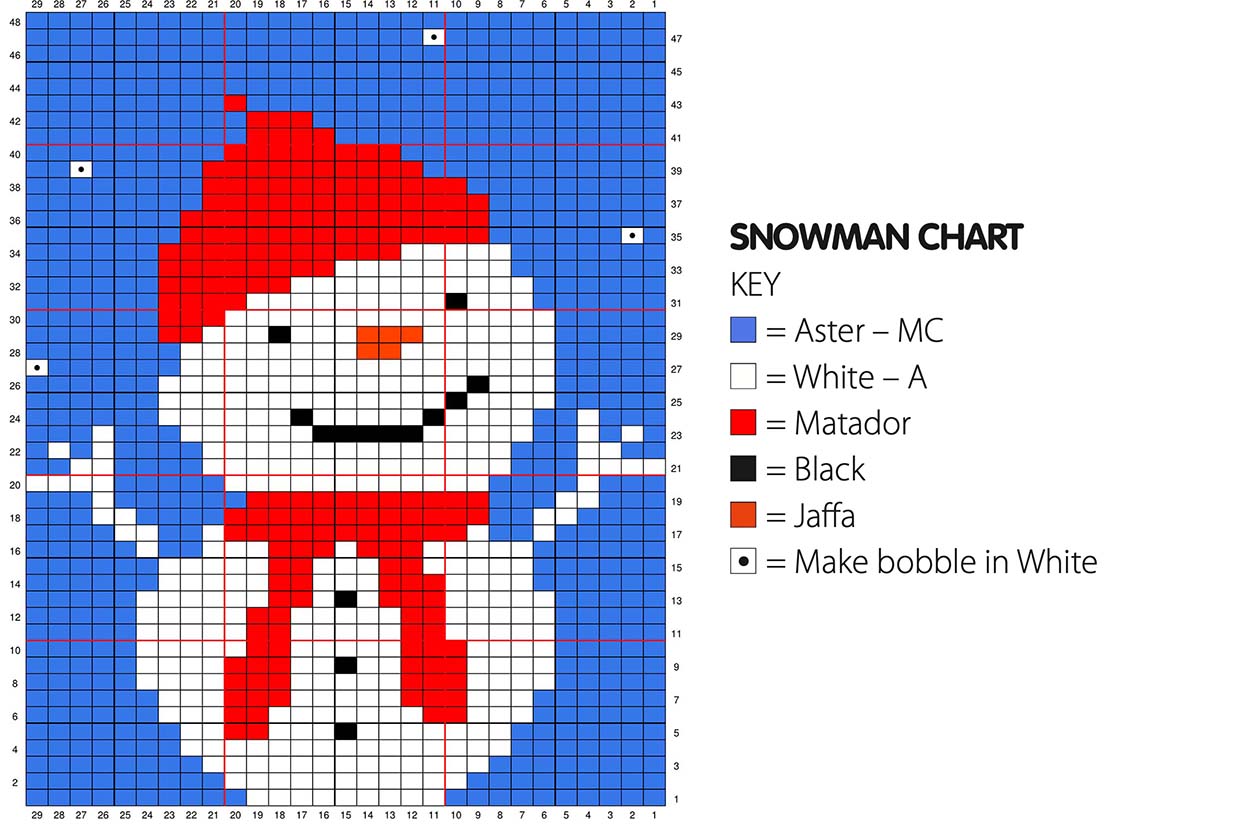
You’ll start the front of the jumper as you did the back – but then it quickly becomes very different! This step is where you add the picture to the front of your knit, by working from the colourwork chart for the Christmas Tree or Snowman. You can see them below or download PDF versions of these charts here: Christmas Tree Chart and Snowman Chart.
Use the intarsia knitting technique and follow our simple steps to neat intarsia to get the best results.
Work as given for the Back until 0 (2: 4: 8: 12) rows of st st have been worked.
Step 2
Now work colour pattern from the chart as follows:
Christmas tree:
Pattern row 1 (RS) K25 (26: 28: 29: 31) MC, K7 A, K25 (26: 28: 29: 31) MC.
Snowman:
Pattern row 1 (RS) K24 (25: 27: 28: 30) MC, K9 A, K24 (25: 27: 28: 30) MC.
Cont to work from the chart in position as given, and following pattern as given for the back.
Step 3
When chart ends, cont in MC until work measures 5.5 (5.5: 6.5: 7: 7.5)cm or 2 (2: 2½: 2¾: 3)in from beg of armhole shaping. [45 (47: 49: 51: 53) sts] (End with WS row.)
Shape the neck of your Christmas jumper
Step 1
Here, you’ll carry on knitting the front of the jumper, adding the shaping for the neck to help give the finished garment a good fit. Note that you’ll work one side of the neck first, and then rejoin the yarn to work the other side.
Next row Knit across first 21 (21: 22: 23: 23) sts, cast off centre 3 (5: 5: 5: 7) sts, knit to end.
Turn and work on this last group of 21 (21: 22: 23: 23) sts only as follows:
Next row (WS) Purl to last 2 sts, p2tog.
Next row Cast off 2 sts, knit to end.
Rep the last 2 rows once more. [15 (15: 16: 17: 17) sts]
Now cont in st st and dec 1 st at neck edge only of next 2 (2: 2: 3: 3) rows, then dec 1 st at neck edge of foll 2 alt rows. [11 (11: 12: 12: 12) sts]
Cont in st st until work measures 9.5 (10: 10.5: 11: 11.5)cm or 3¾ (4: 4¼: 4½: 4¾)in from beg of armhole shaping. (End with WS row at neck edge).
Work 4 rows in garter stitch.
Next row (WS) (Start at armhole edge) K5, yarn over (yo), k2tog, k remaining (rem) 4 (4: 5: 5: 5) sts.
Work 3 rows in garter stitch.
Cast off purlwise.
Step 2
Using 4mm needles, rejoin yarn to rem sts at neck edge, with WS facing, and work on these 21 (21: 22: 23: 23) sts as follows:
Next row (WS) Cast off 2 sts, purl to end.
Next row (RS) Knit to last 2 sts, k2tog.
Rep the last 2 rows once more. [15 (15: 16: 17: 17) sts]
Now cont in st st and dec 1 st at neck edge only of next 2 (2: 2: 3: 3) rows, then dec 1 st at neck edge of foll 2 alt rows. [11 (11: 12: 12: 12) sts]
Now cont in st st until work measures 9.5 (10: 10.5: 11: 11.5)cm or 3¾ (4: 4¼: 4½: 4¾)in from beg of armhole shaping. (End with WS row at armhole edge.)
Work 4 rows in garter stitch.
Next row (WS) (Start at neck edge) K4 (4: 5: 5: 5) sts, yo, k2tog, k rem 5 sts.
Work 3 rows in garter stitch.
Cast off purlwise.
Work the sleeves of the Christmas jumper
Step 1
The jumper's sleeves are worked separately and then sewn on to the body at the end. Follow these instructions twice to make both sleeves.
Using 3.25mm needles and MC, cast on 33 (37: 37: 39: 39) sts and work in garter stitch (every row knit) for 8 rows, AND inc 4 sts evenly across last row worked. [37 (41: 41: 43: 43) sts]
Change to 4mm needles and MC and work in st st AND inc 1 st at each end of next and every foll 6th row, until there are 43 (47: 51: 55: 59) sts.
Now cont without shaping until work measures 15 (17: 19: 21: 23)cm or 6 (6¾: 7½: 8¼: 9)in.
End with WS row.
Step 2
Shape top of sleeve
Cast off 2 sts at beg of next two rows. [39 (43: 47: 51: 55) sts]
Dec 1 st at each end of next 2 rows, then dec 1 st at each end of foll 4 (4: 5: 5: 6) alt rows. [27 (31: 33: 37: 39) sts]
Work 4 (4: 2: 2: 2) rows without shaping.
Dec 1 st at each end of next 3 rows. [21 (25: 27: 31: 33) sts]
Cast off 7 (8: 9: 10: 11) sts at beg of next 2 rows.
Cast off rem 7 (9: 9: 11: 11) sts.
Create the front neckband and buttonholes
Step 1
Garter stitch is perfect for the neckline, hem and cuffs of these jumpers, as it doesn't curl. However, it’s not quite as stretchy as rib stitch.
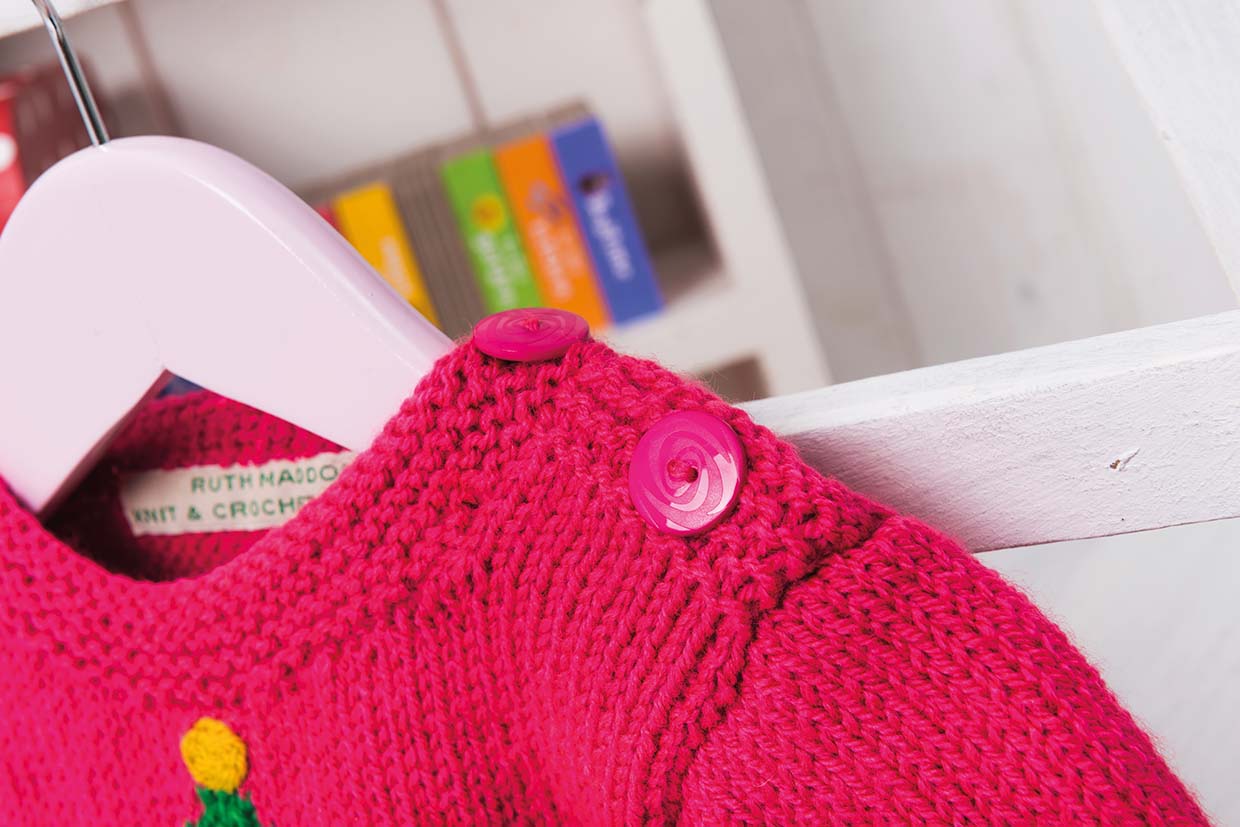
To make sure the jumpers are easy to get on over baby’s head, Ruth has added two buttons on each shoulder, making the neck opening much wider. You'll attach these later – here, you're creating the neckband and adding the buttonholes.
Using 4mm needles and MC and working from the right side (RS) of work, pick up 42 (46: 50: 54: 58) sts evenly around front neckline.
Step 2
Work as follows:
Work 3 rows in garter stitch.
Next row K3, yo k2tog, k to last 5 sts, k2tog, yo, k to end.
Work 1 row in garter stitch.
Next row K0 (2: 1: 0: 2), *k3, k2tog, k2 (2: 3: 4: 4); rep from * to last 0 (2: 1: 0: 2) sts, k to end. [36 (40: 44: 48: 52) sts]
Now work 1 row in garter stitch.
Cast off purlwise.
Add the finishing touches to your Christmas jumper
Step 1
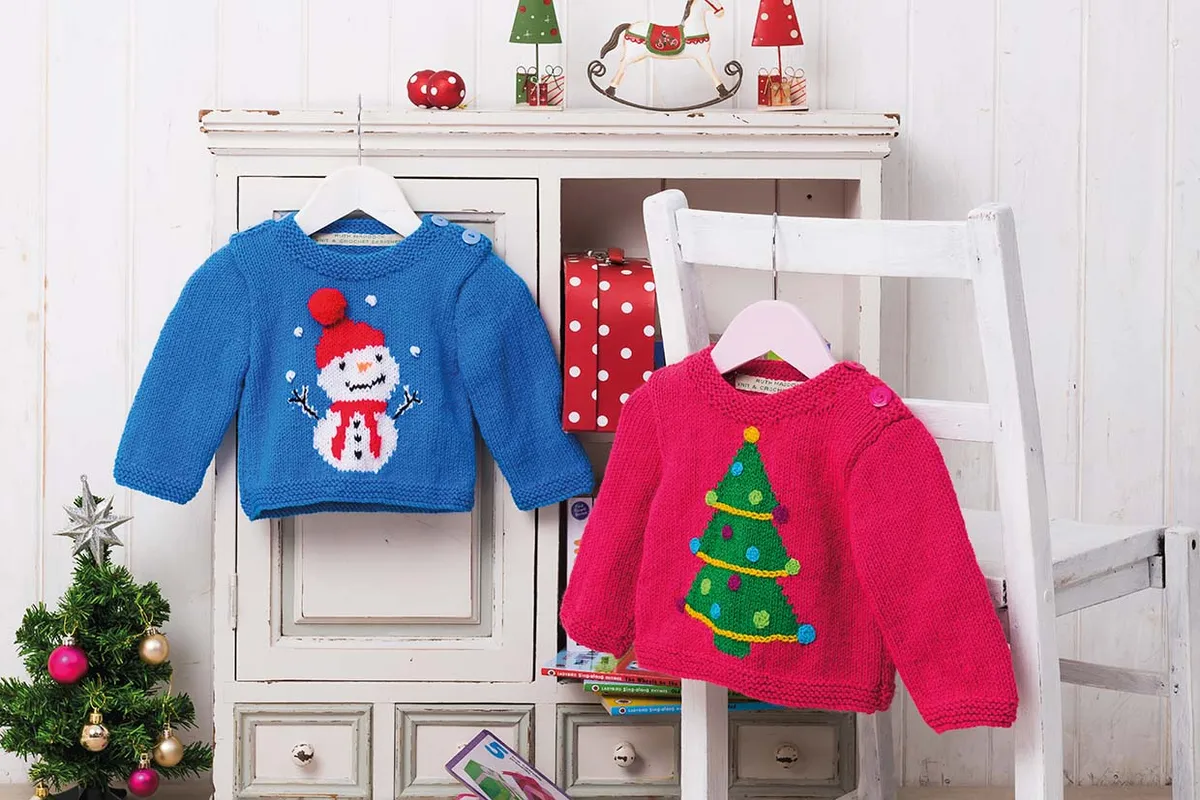
It's the little details that make these Christmas jumper knitting patterns stand out, so take the time to add some baubles to the tree or give the snowman a jaunty pompom for their hat.
Before you start sewing the pieces together, take a look at our guide on how to finish a knitting project, which is full of tips to help you get a flawless result.
Now sew in all the ends on the back of the motif.
Step 2
Christmas tree
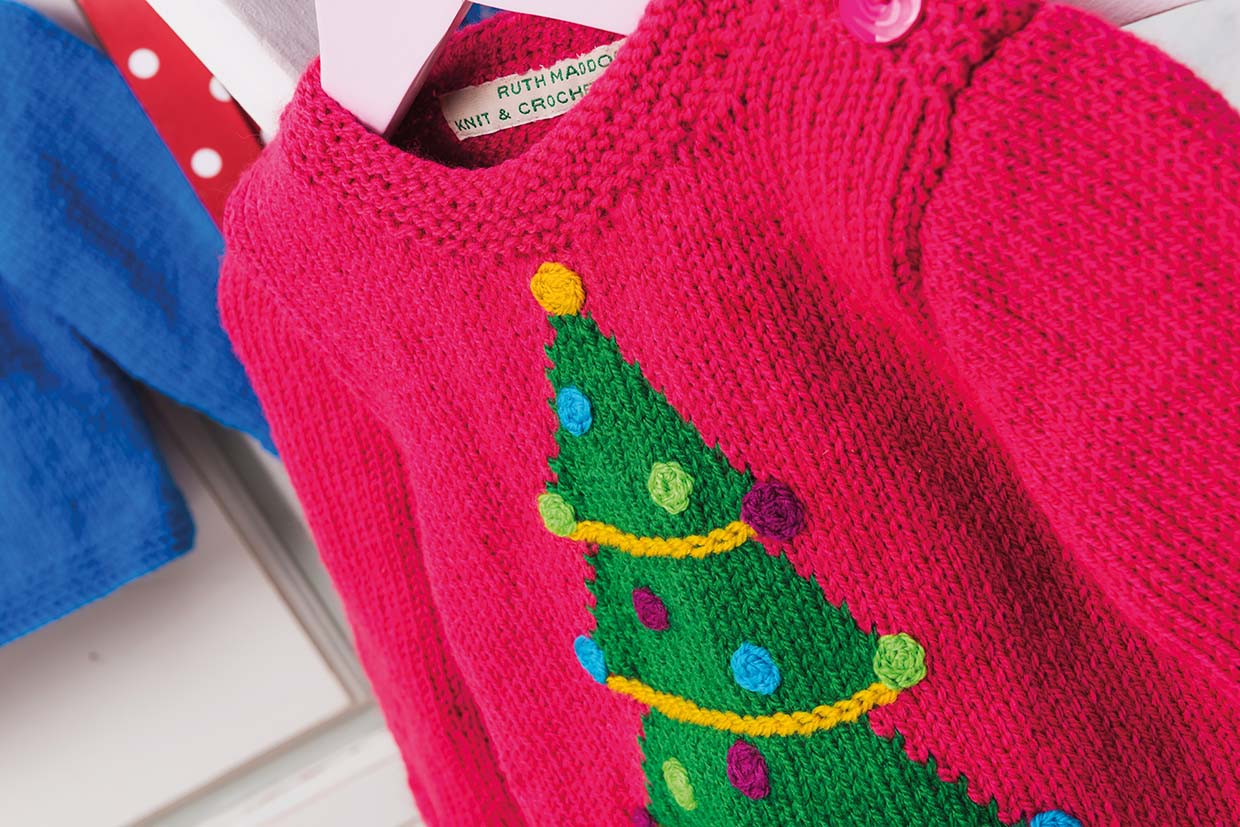
Using photo as a guide, with Mustard make 3 garlands using crochet chain stitch. Using Turquoise, Grass Green and Boysenberry, make baubles by working a spiral of chain stitches.
Snowman
Make a small pom pom approx 3.5cm/1½in diameter with Matador yarn (trim to correct size if necessary), following our how to make pom poms tutorial. Using photo as a guide, with Black and small backstitches, sew arms and fingers over the white stitches.
Step 3
Press pieces according to ball band instructions. (Do not press acrylic yarns but dampen with cold water and leave to dry.)
Place front so that garter stitch section at shoulder front lays on top of the garter stitch for back. Loosely sew these garter stitch rows together at armhole edge only.
Mark the centre point of these rows and place the centre point of the top of the sleeve to this point. With right sides together, pin the sleeve into the armholes and sew into place using small backstitches.
Sew the underarm seam from wrist to hem. Sew buttons into place to correspond with buttonholes. Sew in all ends, to finish.
