How to make a yarn fringe

How to make a yarn fringe

When it comes to finishing touches on your knitting and crochet projects, nothing quite beats a stylish crochet fringe!

6 issues of Simply Crochet magazine for £14.99|Save 72%

Published: March 21, 2022 at 3:18 pm

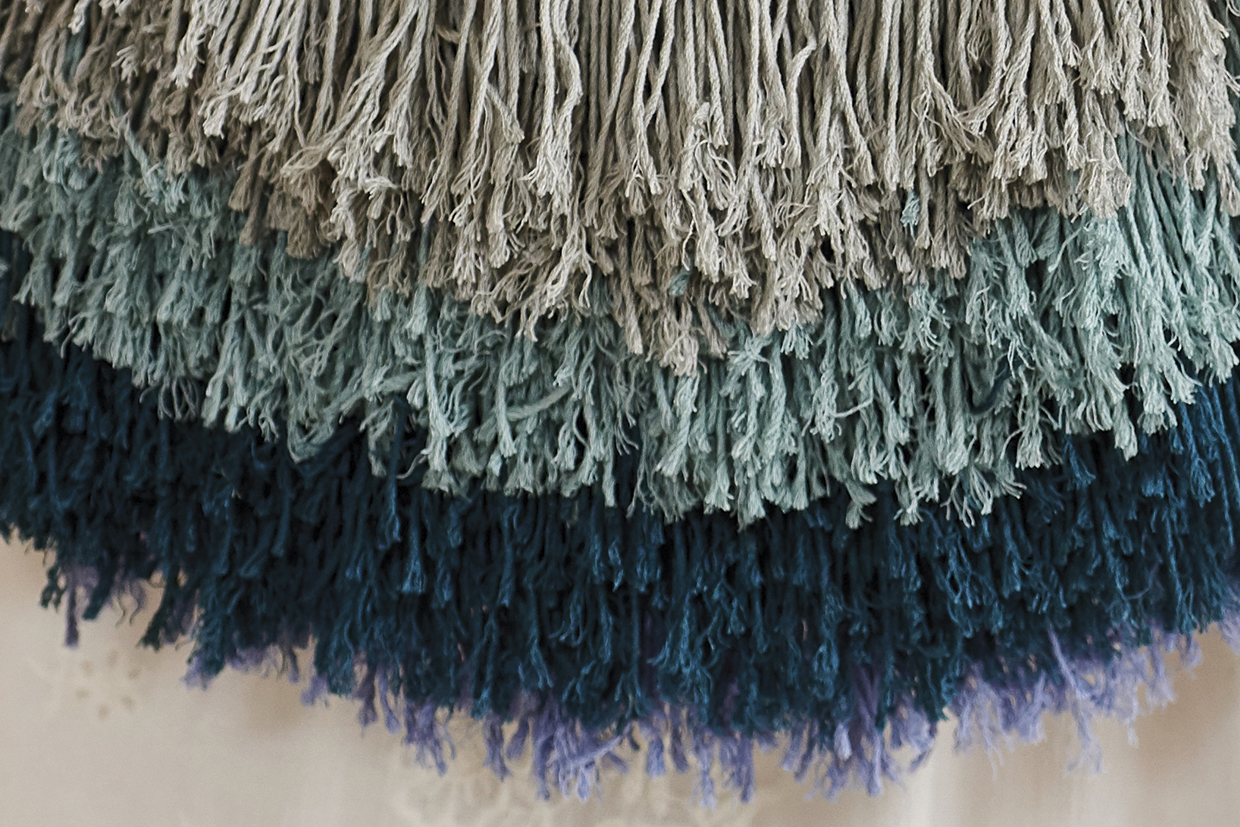
We love a fluffy yarn fringe! Whether you're wondering how to add a fringe to a crochet scarf, fancy hooking up a crochet fringe top, or want to create the ultimate edge for your blankets, a crochet fringe is a simple and easy was to perfectly finish those projects. You can make your crochet fringe as long or as short as you want (although it's always best to go longer than you think and trim it down), although it's best to keep your fringe no shorter than an inch long just to ensure it stays in place. You can always space out your crochet fringe however you like too - long fringes look great when spaced out evenly on garments, while shorter fringes work really well when bunched up to create a full fringe. We'll show you quite how easy it is to create a crochet fringe, as well as showing you an extra technique which will allow you to layer your crochet fringe to create a fabulously full fluffy fabric!

This same process can be used for attaching tassels to your crochet fabric too! You can find a handy picture tutorial for making tassels in our DIY tassel earrings pattern.

How to crochet a fringe

You will need:

  • Any yarn (cut into even lengths)
  • Crochet hook

Step 1

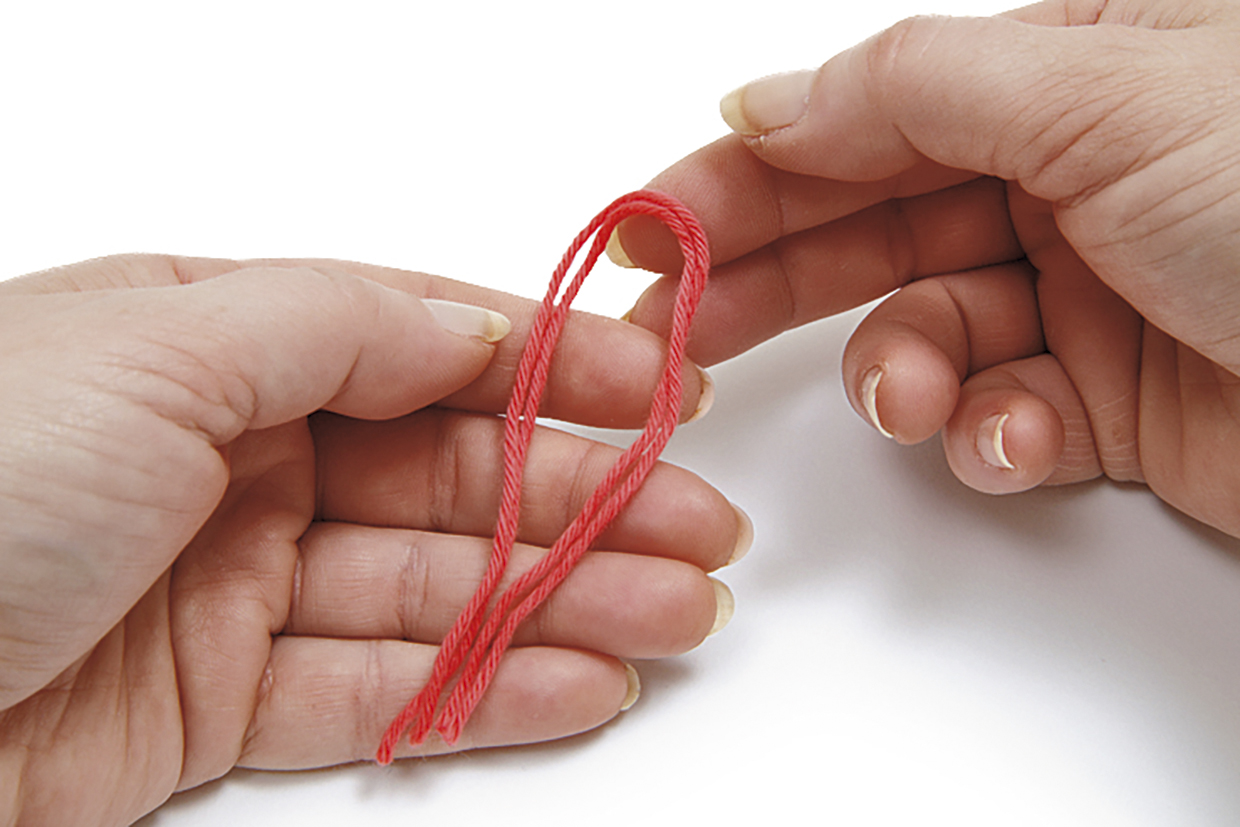
If you are following a pattern, it will most likely tell what size and how many lengths of yarn you will need. In this example, we will cut two pieces of yarn, twice as long as you want the fringe to be (for this example we’ve used two 20cm lengths of yarn). Fold both lengths of yarn in half together.

How to add a crochet fringe step 01

Step 2

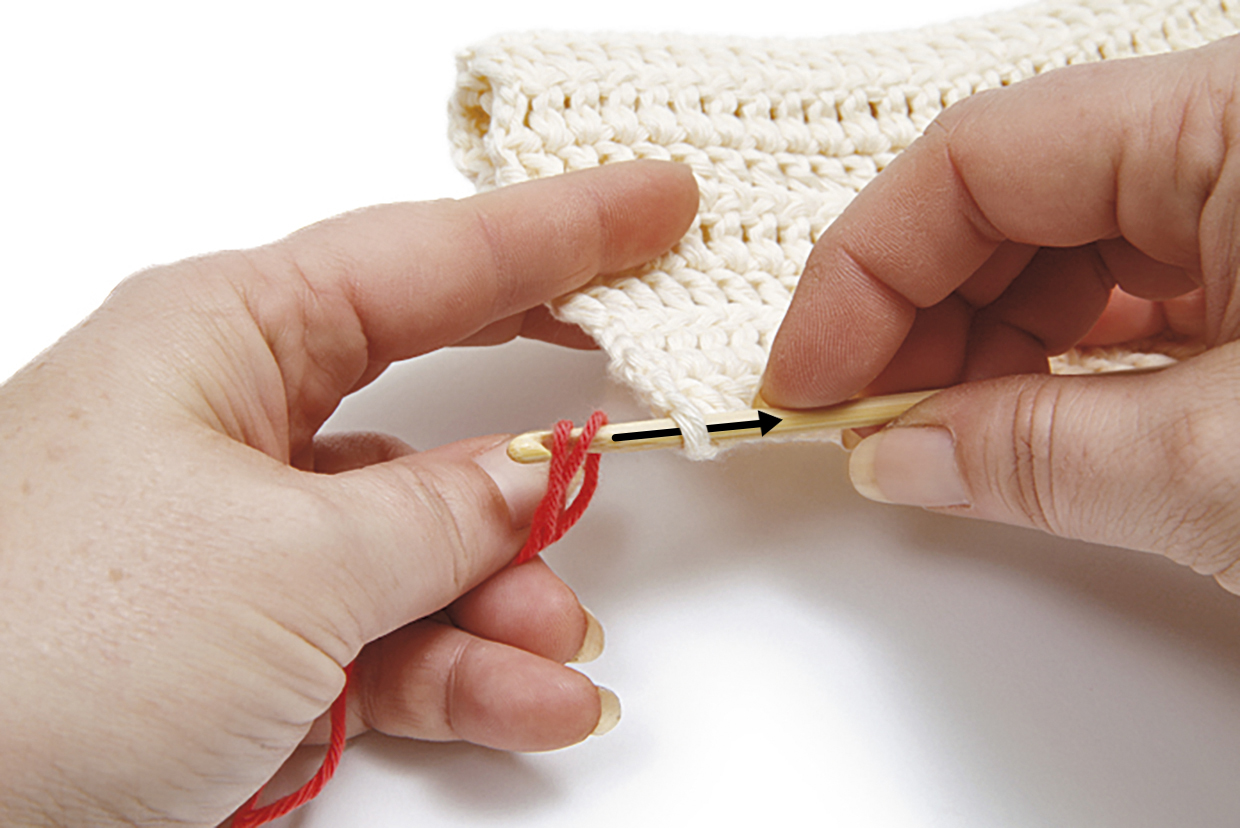
Insert your hook through the edge of the fabric, where you want the first piece of fringing to be placed. Loop the yarn lengths over the hook and pull back through the fabric.

How to add a crochet fringe step 02b

Step 3

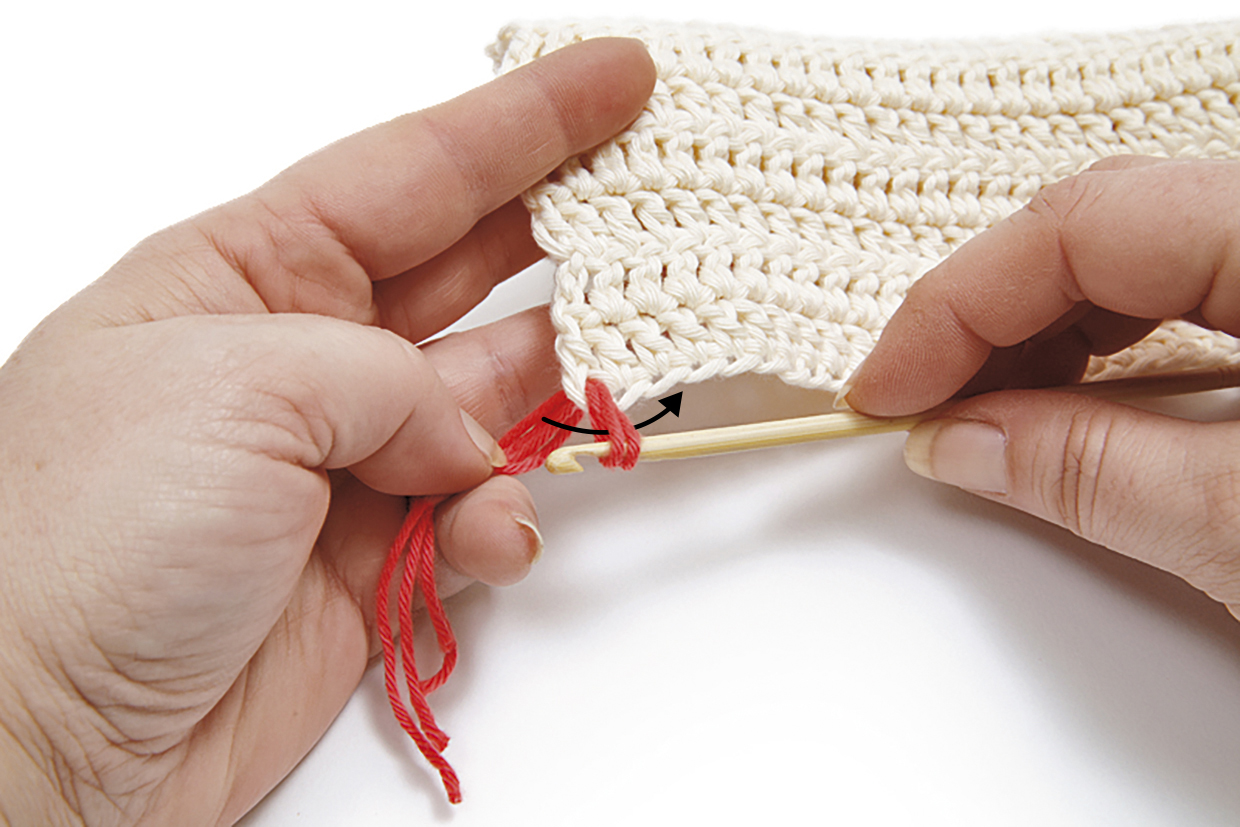
Pull the yarn lengths that you just brought through the fabric out a bit to make a small loop next to the fabric. Pass the ends of the yarn lengths through this loop and pull tight to secure.

You don’t technically have to use a crochet hook for this bit if you’re struggling to catch all 4 of the strands with your hook, you can just manually pull them through with your fingers – just make sure you pull all the strands through evenly and that you tighten them together.

How to add a crochet fringe step 03b

Step 4

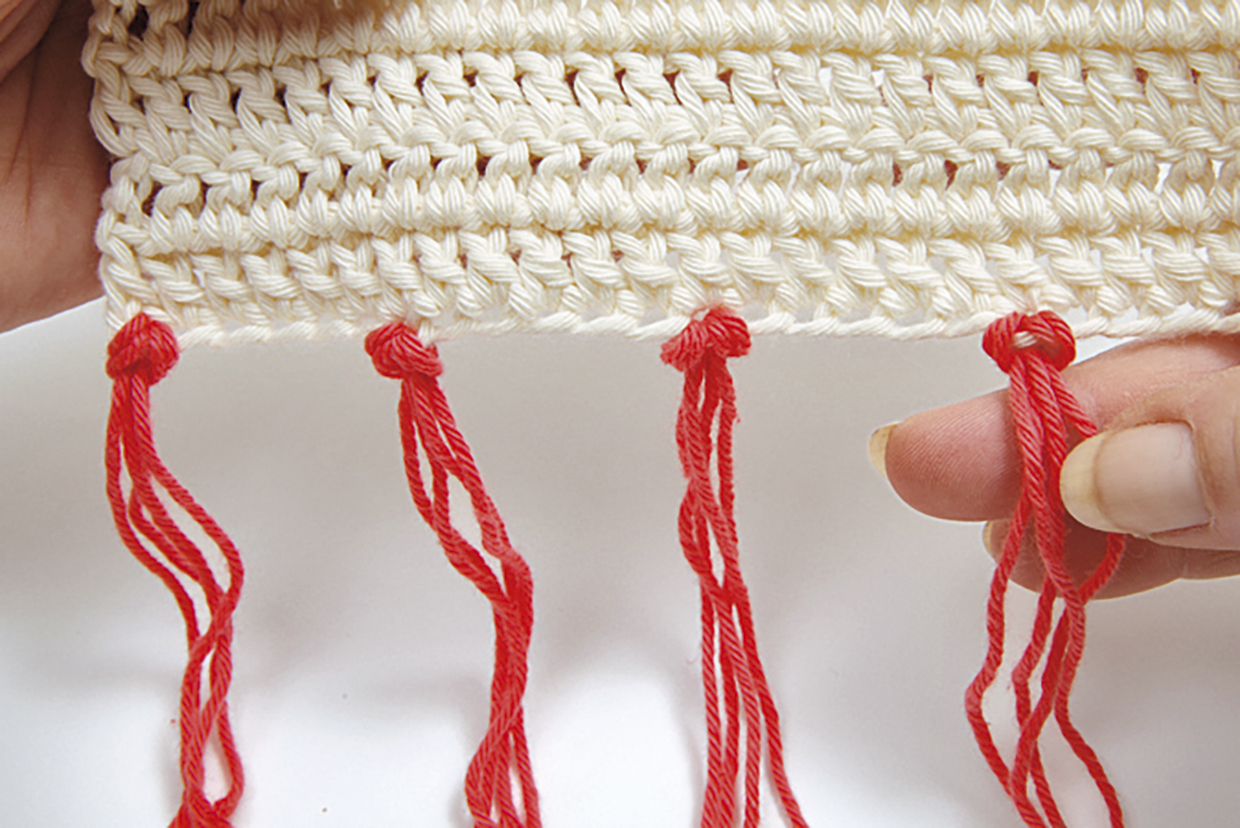
Repeat from step 1 along the edge of your fabric, as close together or far apart as you wish. Use a matching or contrasting yarn colour. Trim any uneven lengths of yarn to create a neat finish.

How to add a crochet fringe step 04

And that’s all there is to making a crochet fringe – we said it was simple didn’t we! You might be a little wary about how secure that fringe will be, but in our experience as long as you’ve tightened the fringe properly in the last step then they shouldn’t come undone. For slippery yarns like mercerised cotton you could tie your fringe in an extra knot to make it extra secure, although this can often make the fringe lean in one direction/not drape quite so naturally.

If you’re adding a crochet fringe to the start or end of your project, then it should be relatively obvious where to add your fringe (you can just place them through your stitches). But there is another clever way of adding a crochet fringe to any row of your crochet fabric, which also means you can also layer your fringes over one another like in this awesome bag pattern from issue 87 of Simply Crochet.
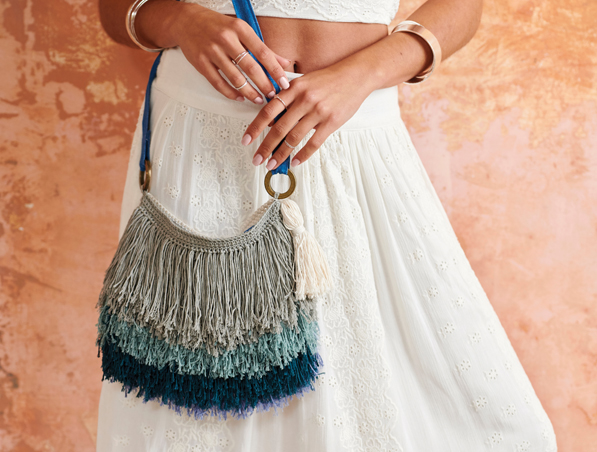
Simply_Crochet_issue_87_fringed_bag

How to make a layered crochet fringe.

Step 1

The key to this technique is working regular rows of stitches into the back loop only, which will leave an unworked loop on the front side of your work. You can space this out as often as you like – for example working in the back loop on every other row). Then you can add your crochet fringe using the same basic technique as above – fold your lengths of yarn in half, insert your hook through the unworked front loop on your fabric and catch your folded yarn with your hook…
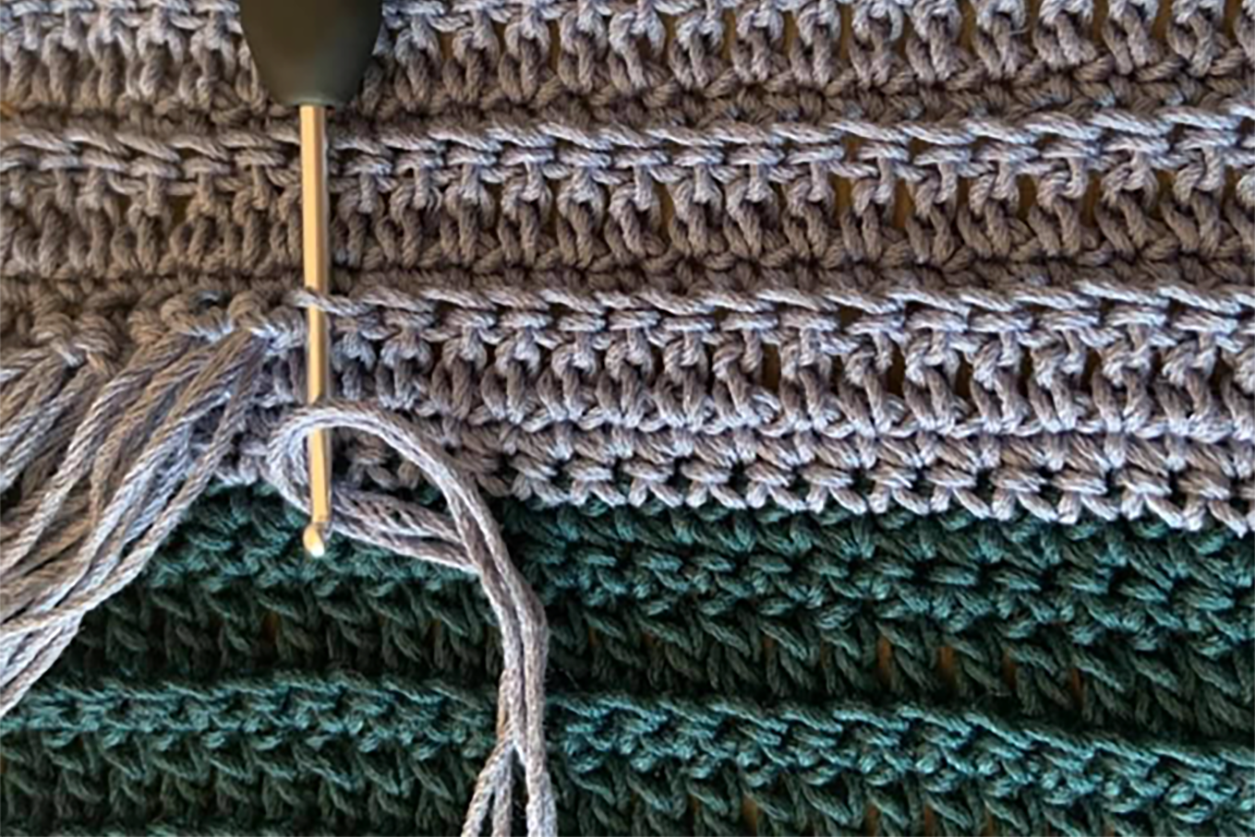
fringed_bag_tutorial_01

Step 2

…Pull the loop through the stitch…
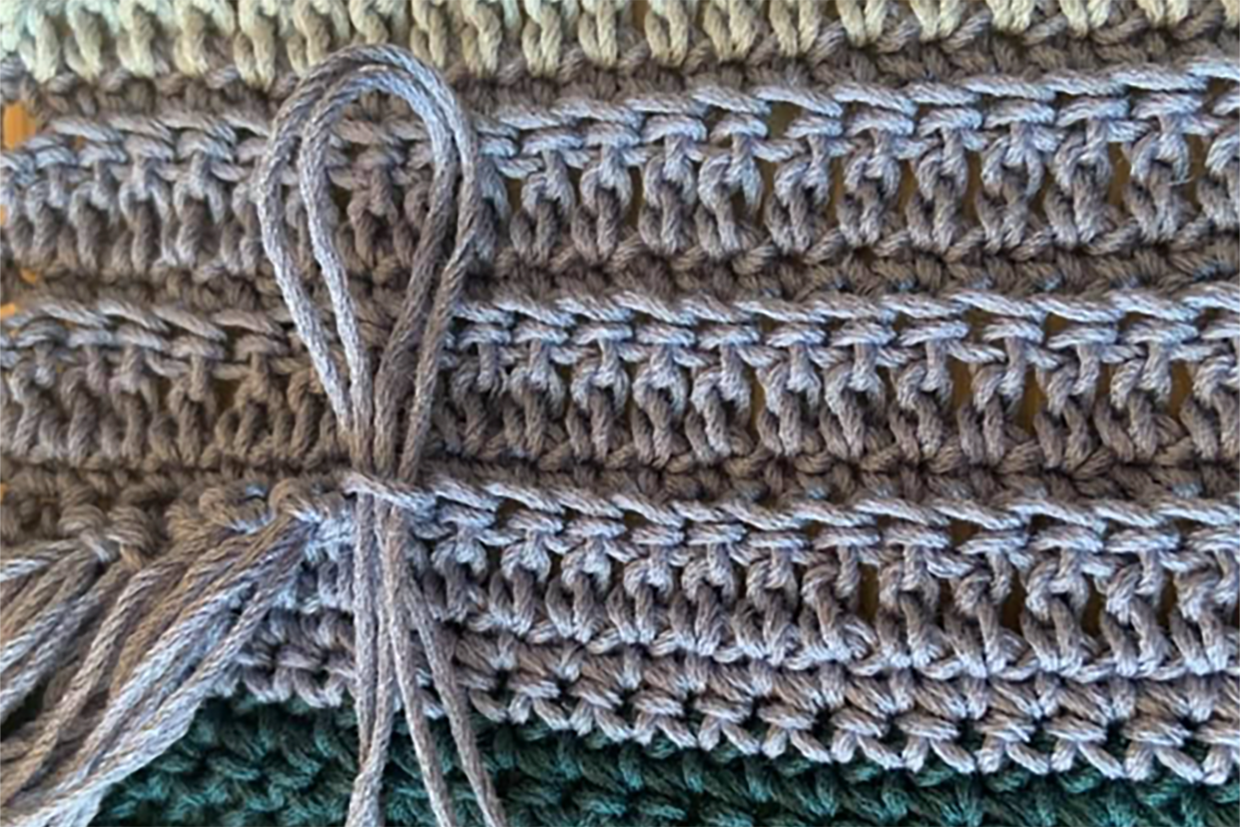
fringed_bag_tutorial_02

Step 3

…Then pull the four ends of your fringe through the loop and tighten to secure. It’s important to consider the direction when creating your fringe in this way – if you want your fringe to hang downwards naturally it is better to insert your hook from above going downwards, if you insert your hook from the bottom going up through the stitch then your tassel will be angled upwards.
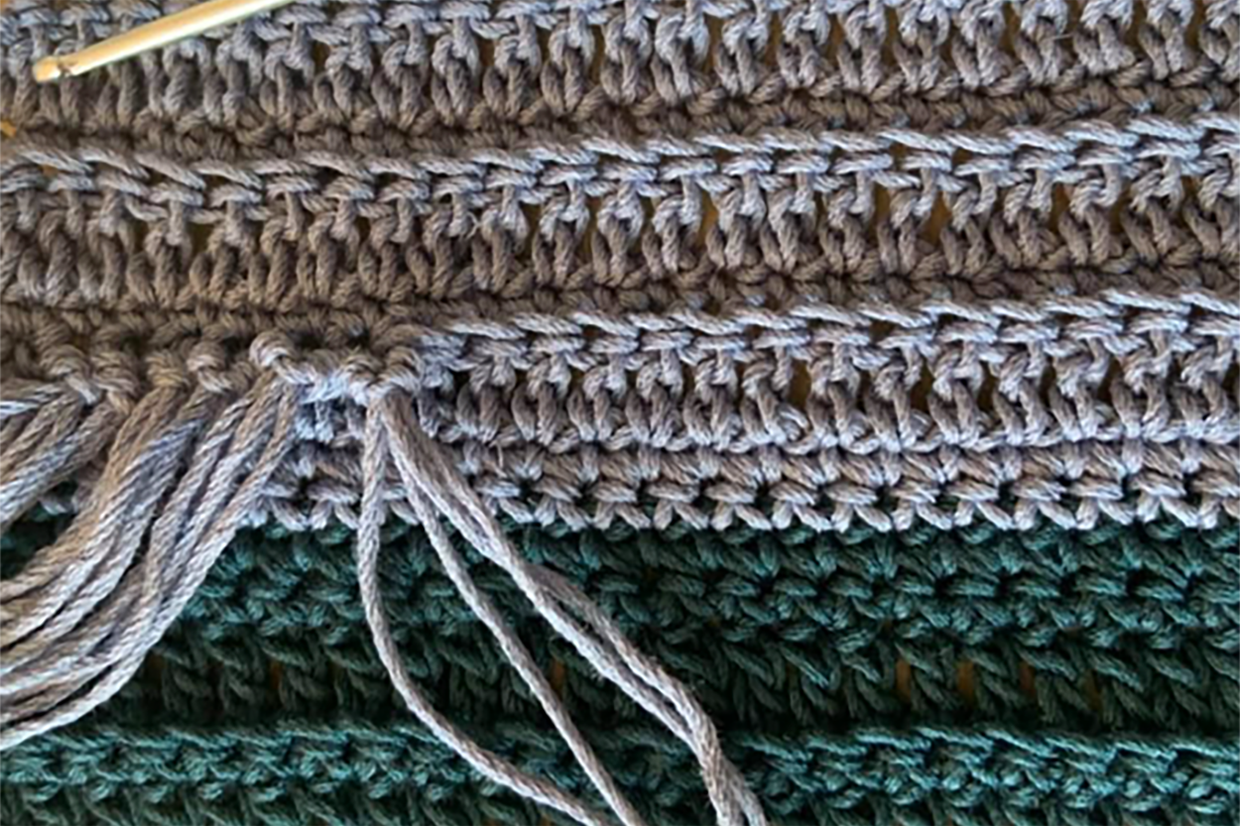
fringed_bag_tutorial_03

The if you wanted to create a layered fringe effect, you would just repeat this process on the next row (or next set of unworked front loops on your fabric). It is best to plan your fringe in advance and work from the bottom of your fabrics upwards.
How to make a yarn fringe

We hope you’ve found this how to make a crochet fringe tutorial useful. If you enjoyed this tutorial, we think you might also enjoy our how to make pompoms tutorial or our how to add embroidery on crochet tutorial, or alternatively check out our how to make i-cords tutorial or our how to crochet with sequins tutorial.