How to make a slipknot

How to make a slipknot

Start knitting and crochet by making one simple loop. Here's our step-by-step guide on how to make a slipknot – it's easy when you know how!

6 issues of Simply Knitting magazine for £14.99|Save 72%

Published: July 7, 2021 at 8:00 am

How to make a slipknot is the first thing you'll need to learn to start your journey into crochet or knitting - it's how you attach the yarn to your crochet hook or knitting needle! There's a few different ways of how to make a slip knot, and if you already know how to tie a slip knot then you're halfway there - it's all the same basic slip knot regardless of whether you're making it for crochet or knitting!

When you create slipknots for casting on in knitting or to get started with crochet, make sure you leave a fairly long tail of yarn at the end, at least 10cm in length. This way, you can be sure it won’t unravel and it will be easier to weave into your ends once you've finished.

Remember, while you’ll need to pull it firmly, don’t make your slipknot too tight once it’s on the needle or hook. It needs to be able to move along, and if your slipknot is a bit looser it will make things easier when you come to doing your first row. When you first learn how to tie a slip knit it's worth practicing it a few times to get the hang of it - before you know it making a slip knot will become second nature!

It's also worth noting that both knitting and crochet patterns will rarely ever tell you to make a slip knot at the start of a pattern - it's taken for granted, as you will need to know how to tie a slip knot to start any crochet or knitting project.

In the step-by-step picture guides below you'll find methods for how to make a slipknot for crochet and how to make a slipknot for knitting, but you can also check out our video slip knot tutorial below which shows you two different ways of how to tie a slip knot with your hands (which will work for both knitting and crochet).

If you're completely new to crochet, you can find loads of helpful information and resources in our crochet guide for beginners, and for knitting newbies, take a look at our complete guide to knitting for beginners for everything you need to get started.

You will need:

  • Yarn
  • A knitting needle
  • Crochet hook

How to make a slipknot for crochet

Step 1

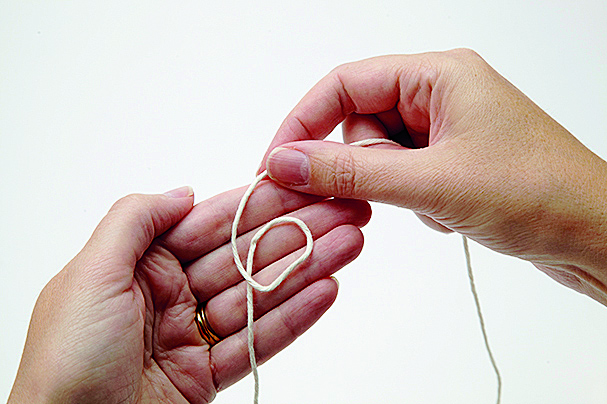
To make a crochet slip knot, hold the tail of the ball of yarn in your left hand and drape the yarn clockwise over the top of it to form a loose, circular loop.

How_to_make_a_slipknot_step1 – slip knot crochet – slip knot how to

Step 2

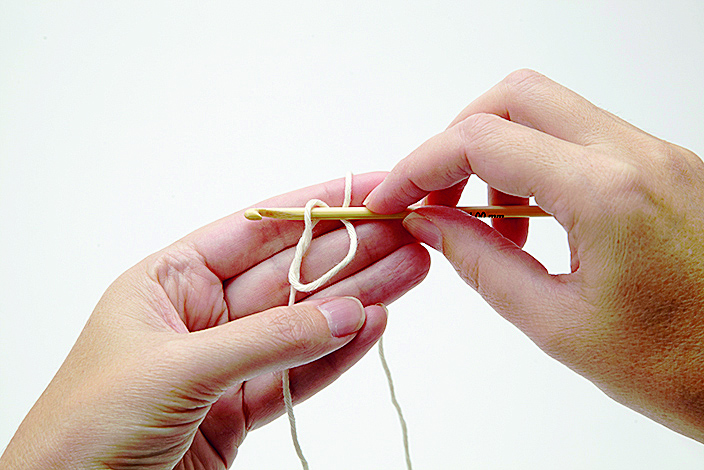
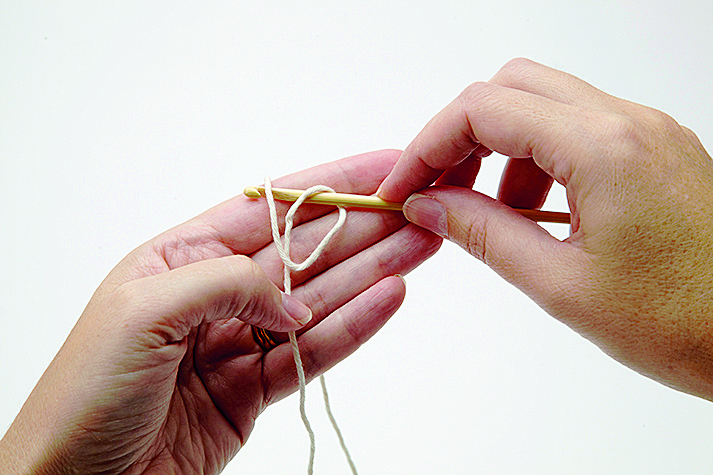
Hold the loop between left thumb and forefinger, then insert the crochet hook through the centre of the loop from front to back.

How_to_make_a_slipknot_step2- slip knot crochet – slip knot how to

Step 3

Catch the ball end of the yarn with the hook and pull it back through the centre of the loop, taking the yarn through with it.

How_to_make_a_slipknot_step3- slip knot crochet – slip knot how to

Step 4

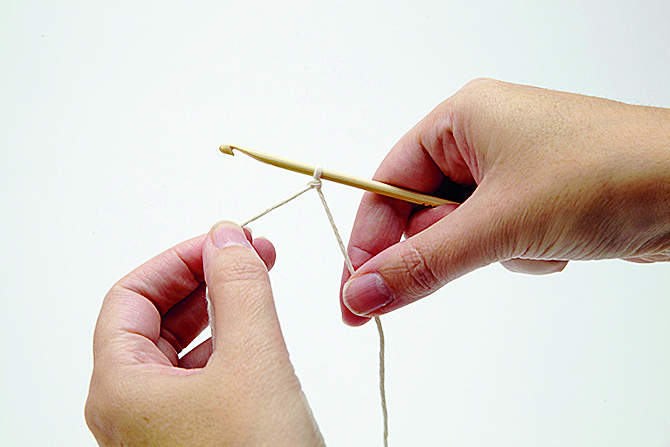
Pull both ends of the yarn to tighten the knot, then pull just the ball end to tighten the loop so it’s close to the hook, but not touching it.

How_to_make_a_slipknot_step4 – slip knot crochet – slip knot how to

Now that you know how to make a slipknot for crochet, you’re ready to get started on your first crochet stitches. Next you’ll want to learn how to hold your hook & yarn and how to chain stitch and count your stitches, then you can move on to how to double crochet!

How to make a slipknot for knitting

Step 1

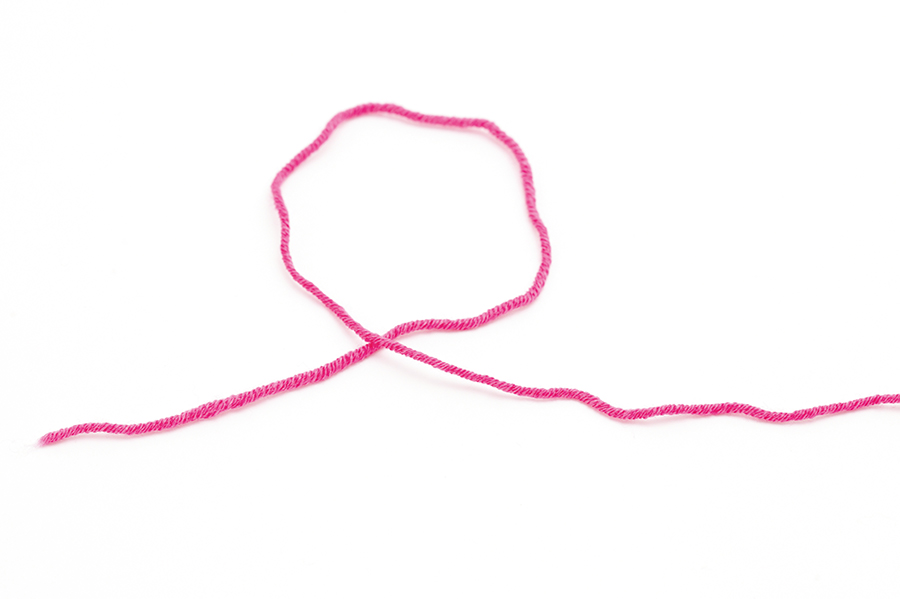
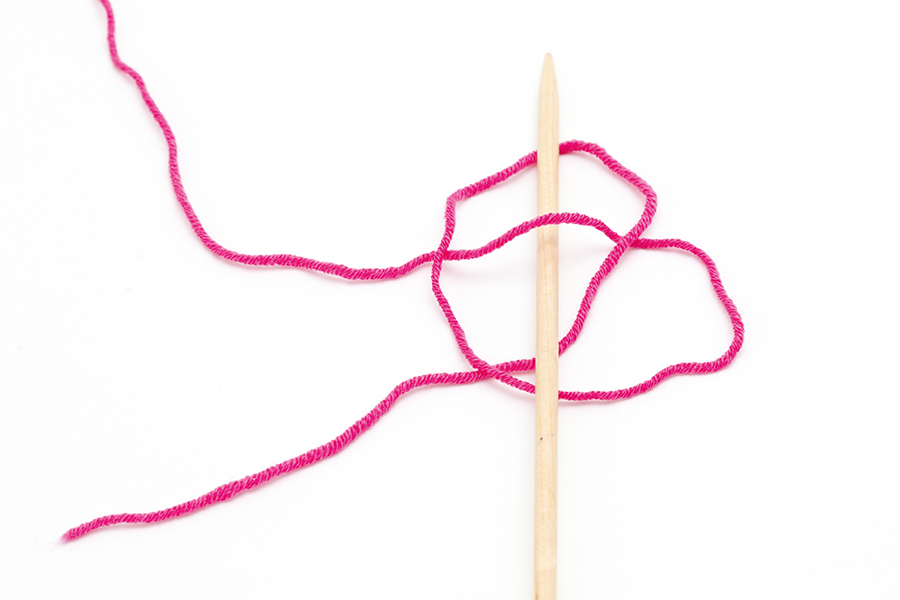
To make a slipknot for knitting, start by making a loop – Take your yarn and make a loop as shown here, with the tail end of yarn on the left, and the ball end on the right. Make sure the ball end of yarn is on top of the tail end.

How to make a slipknot for knitting step 1 – slip knot knitting – slip knot how to

Step 2

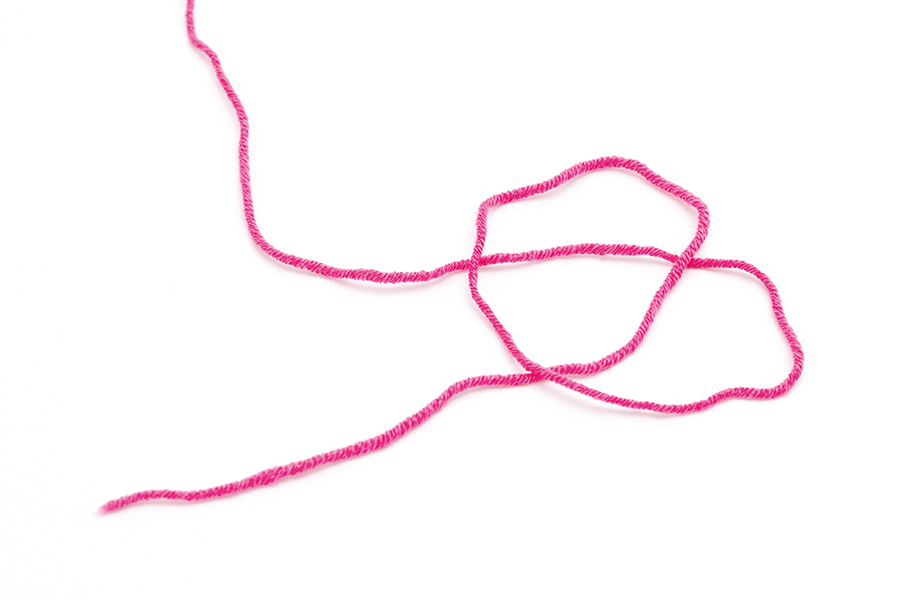
Now bring the ball end of yarn around from the right, lift the loop slightly and run the ball end of yarn underneath the loop, forming a straight line, as shown above.

How to make a slipknot for knitting step 2 – slip knot knitting – slip knot how to

Step 3

Insert your needle. Take your knitting needle and place it under the straight line you just formed, but over the top of the needle, as shown here.

How to make a slipknot for knitting step 3 – slip knot knitting – slip knot how to

Step 4

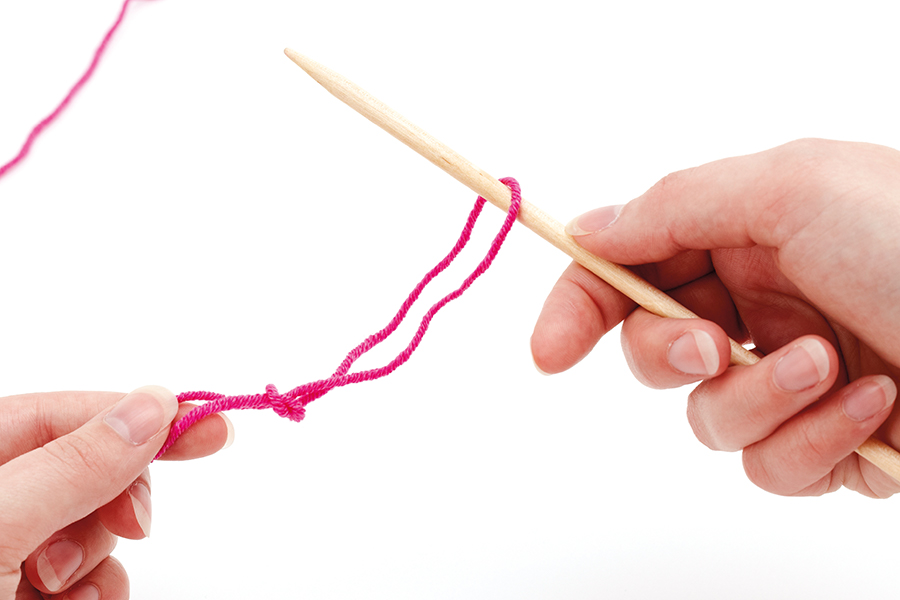
Then just tighten the slipknot. Hold on to the tail end and the ball end together. In the other hand, pull the needle away to form the slipknot. Pull on the ball end until the slipknot comfortably holds the needle.

How to make a slipknot for knitting step 4 – slip knot knitting – slip knot how to

Now that you know how to make a slipknot for knitting, you’re ready to move on to how to cast on knitting and then learn how to do a knit stitch. Don’t forget to take a look at our complete guide to knitting for beginners for everything you need to get started.
Once you’ve learnt the basics, make sure you check out our beginner knitting patterns and beginner crochet patterns, and if you need any help with following patterns you can find tons of helpful tutorials in our how to knit and how to crochet sections.