How to surface crochet

How to surface crochet

Use surface crochet to embellish your crochet fabrics with an extra layer of colour, texture or pattern

6 issues of Simply Crochet magazine for £14.99|Save 72%

Published: January 25, 2022 at 9:00 am

Surface crochet is exactly what it sounds like – it’s a way of creating a crochet pattern on the surface of your crochet fabrics. You can use it to create motifs, such as flowers on a bag, or lettering, such as a name on a baby blanket. It’s sometimes described by crocheters as being a bit like doodling with your yarn and hook!

Surface crochet involves making lines of slip stitches on the front of an existing piece. Double crochet fabric works best and you’ll need to get used to holding the yarn at the back of the fabric. You can use surface crochet to add definition and outlines or simply to build up extra colour effects. And your lines don’t have to be straight – they can be wavy or form circles and outlined motifs.

We’ll show you just how to work this handy surface crochet technique! Once you've mastered how to surface crochet, why not also take a look at our how to add embroidery on crochet tutorial and really get your finishing techniques looking perfect!

How to surface crochet

You will need:

  • Any yarn
  • Crochet hook
  • Yarn needle

Starting your surface crochet

Step 1

First, you need a piece of crochet fabric to practise with. Surface crochet works best on a piece of double crochet fabric, which is dense and the stitches form a natural grid of holes for you to work into. Then you need to attach your yarn to the back of the fabric – you can do this with a knot or a slipknot and weave in the tail end afterwards. Make sure you attach the yarn at the point where you want to begin your surface crochet design.

Try this method to attach the yarn: make a slipknot and place it on your hook. Insert the hook into part of a stitch on the reverse of the fabric…
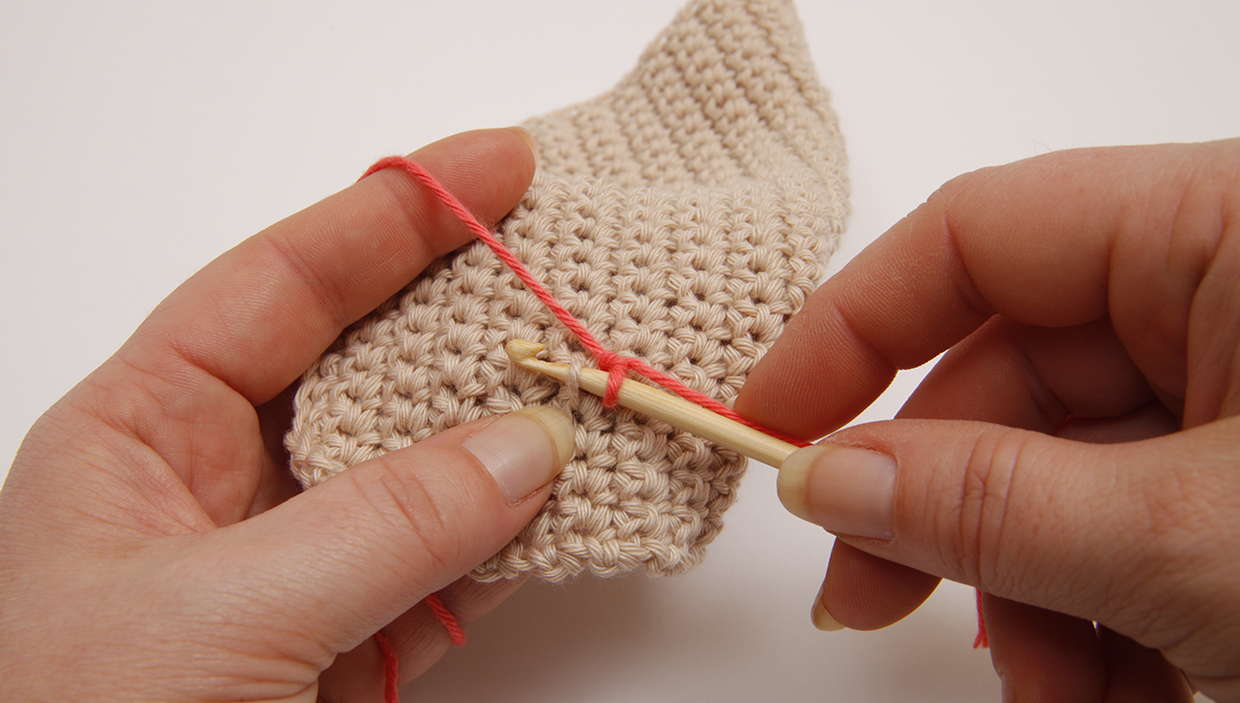
How to surface crochet – getting started 01

Step 2

…Yrh and pull the yarn through the stitch and the slipknot.
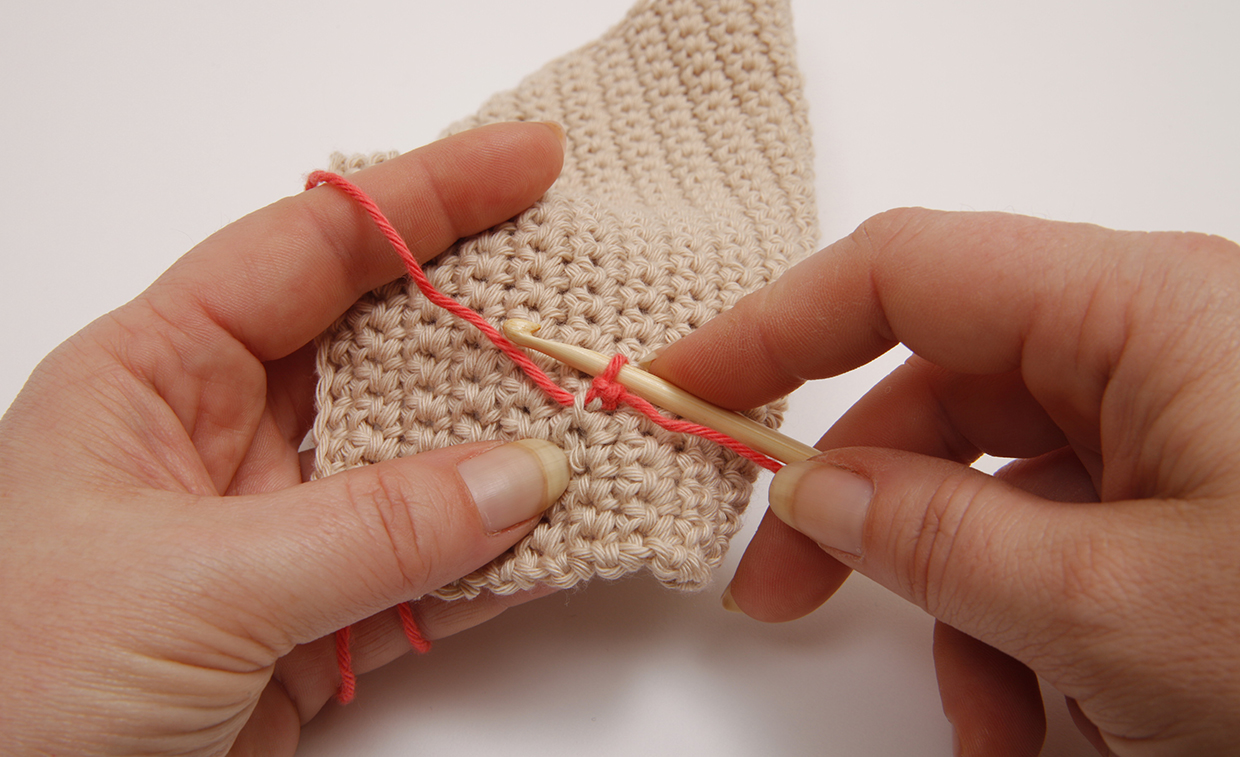
How to surface crochet – getting started 02

Tighten the slipknot. You will have attached the yarn to the reverse of your fabric.

Alternatively, if you’re knotting the yarn, make sure you create a working loop for your hook on the back of the work.

How to surface crochet lines

Step 1

Once the yarn is attached, you can remove the hook from the working loop at the back, bring the hook to the front of the fabric and insert it where you want to work your first surface crochet stitch. Use the hook to pull the working loop through to the front of the fabric.
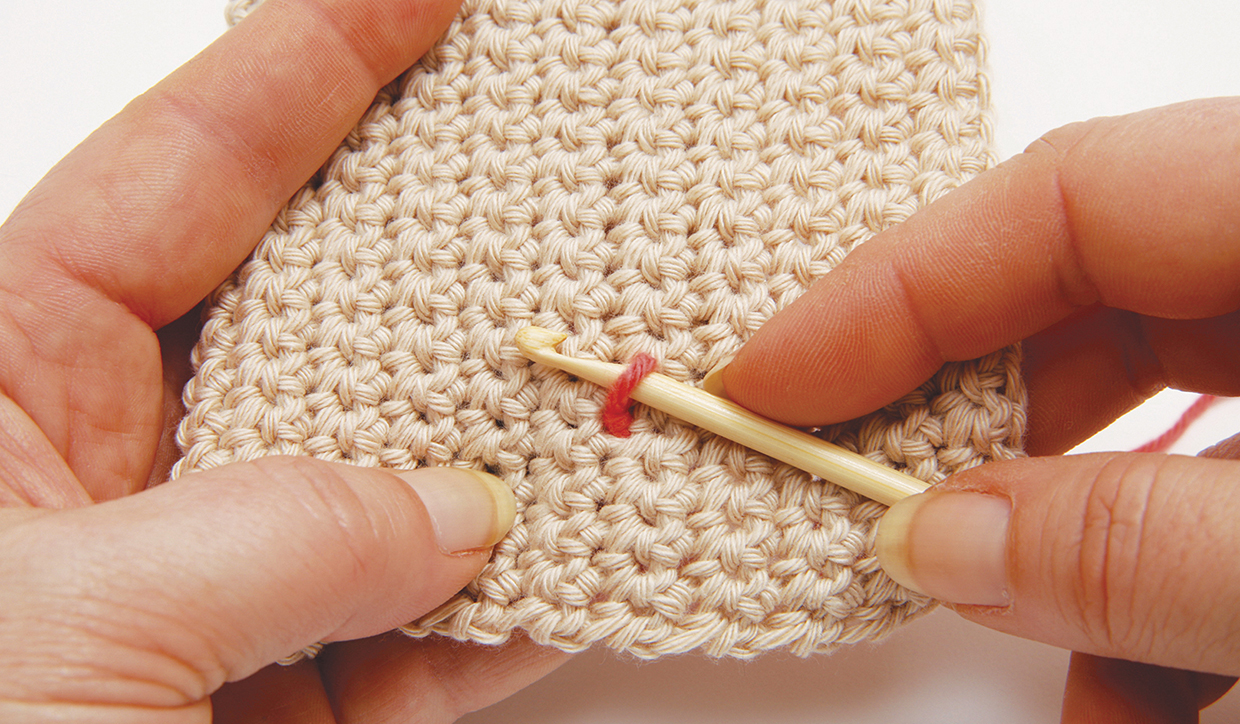
How to surface crochet – lines 01

Step 2

Now you can start making slip stitches on the fabric. To do this, *insert the hook into the next hole in your fabric, from front to back, and work yrh. Pull a loop of yarn through to the front of your fabric (2 loops on hook).
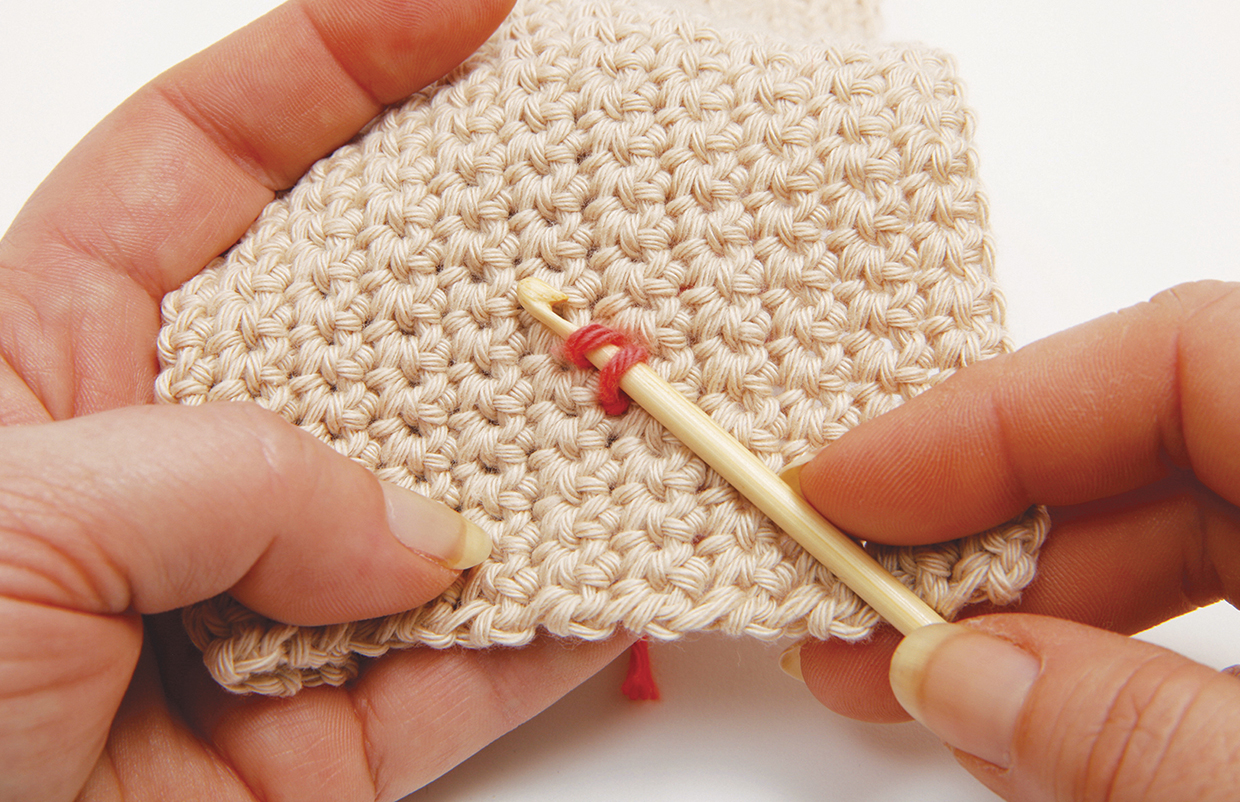
How to surface crochet – lines 02

Step 3

Draw the new loop through the first loop (first slip stitch formed) . Make sure this first surface crochet slip stitch lies neat and flat against the surface of the fabric. 
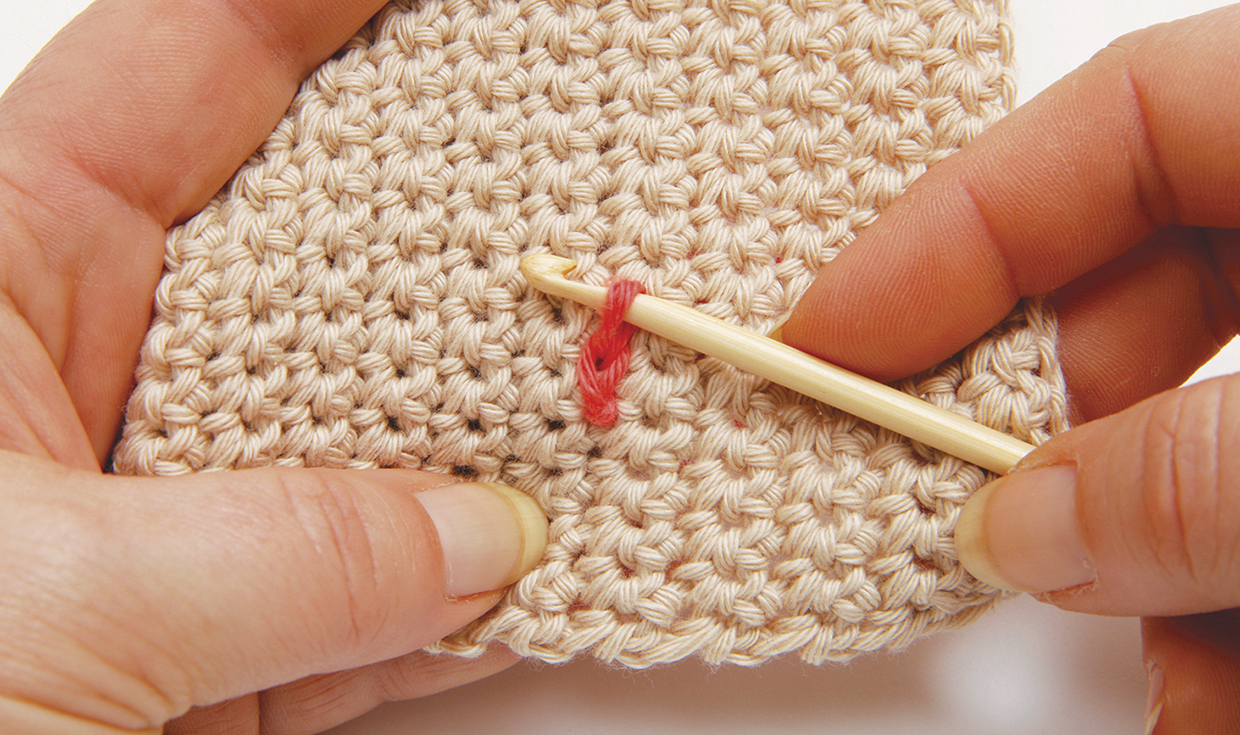
How to surface crochet – lines 03

Step 4

Repeat from * to create more slip stitches in a line.
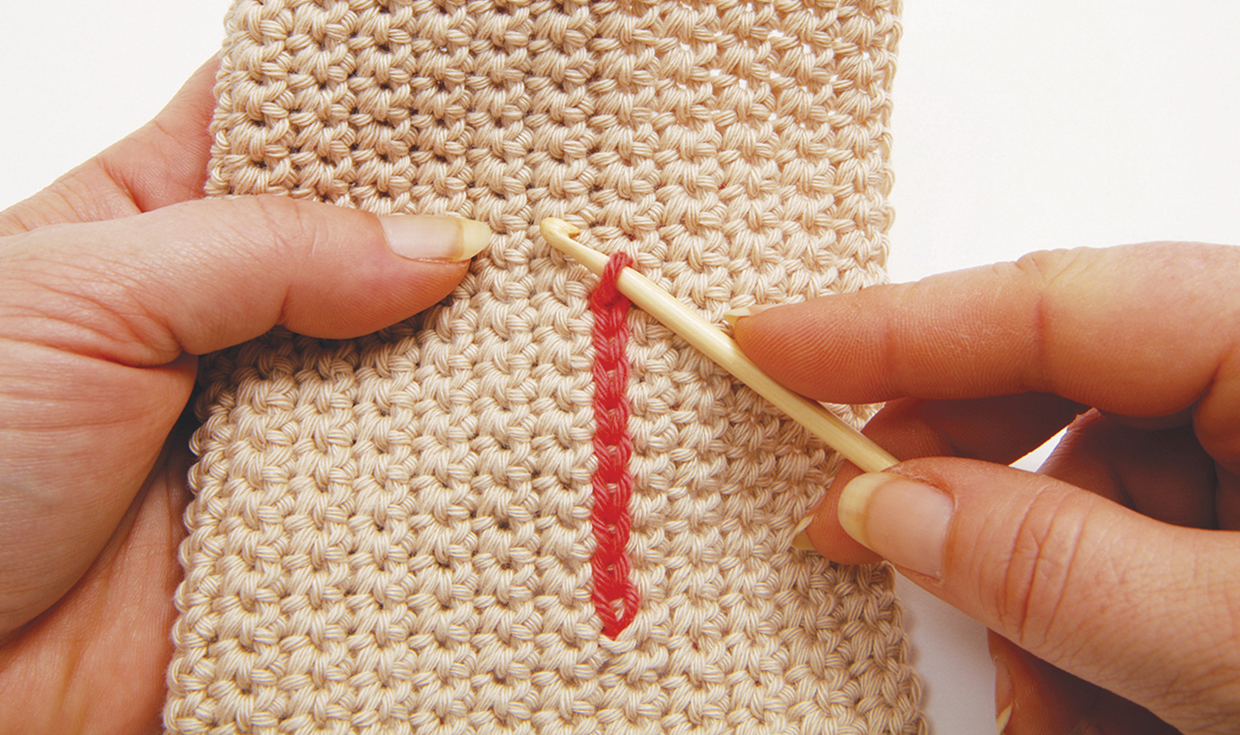
How to surface crochet – lines 04

Step 5

When you’ve finished your line, cut your yarn at the back of your fabric, leaving a tail around 15cm long. Thread the tail onto a tapestry needle and bring the needle and yarn up to the front of the fabric, at the point where you want your last stitch to end. Pass the needle and yarn through the final loop and remove the hook.
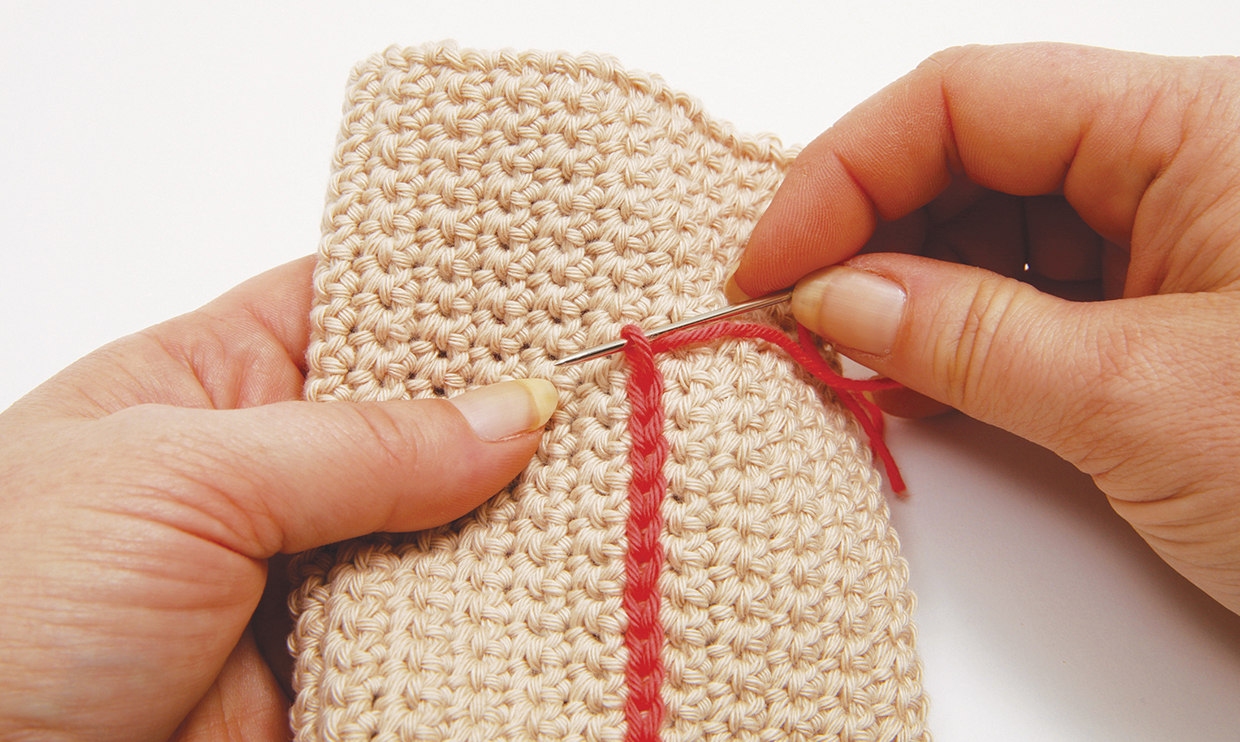
How to surface crochet – lines 05

Step 6

Then insert the needle back down into the fabric to take the yarn back down at the same point as it came out. This forms a small loop that will hold your final slip stitch in place.
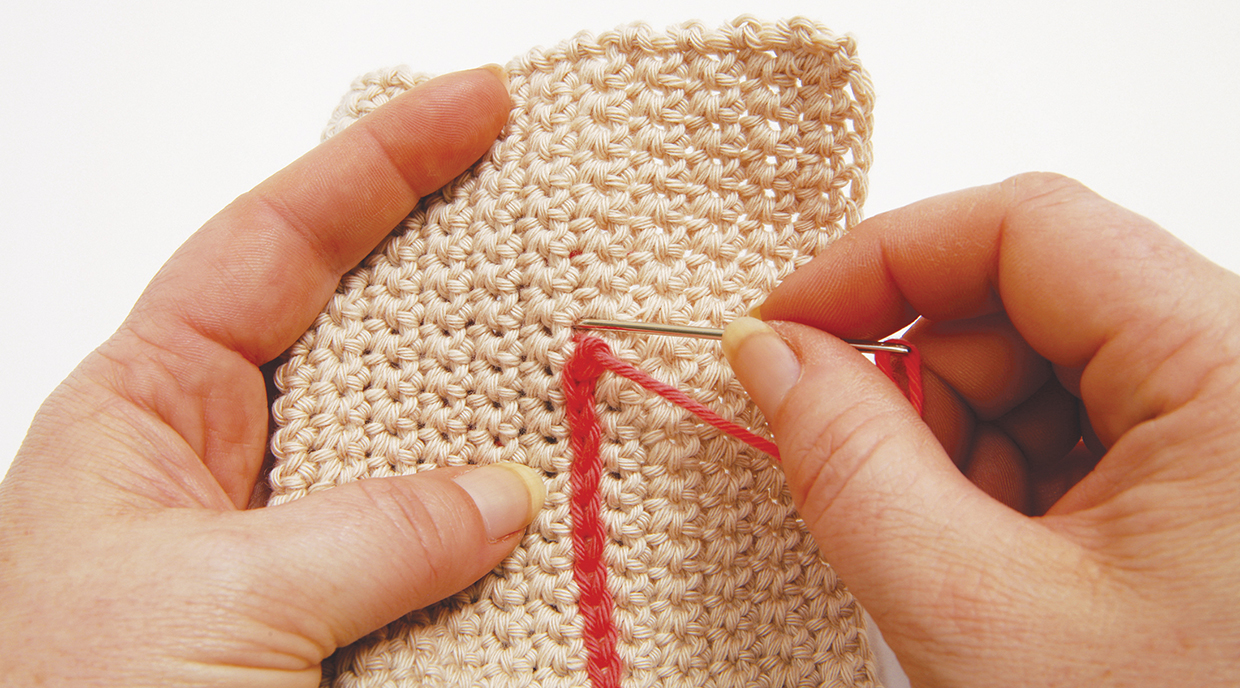
How to surface crochet – lines 06

Step 7

Pull gently on the yarn to make sure the final loop lies flat . Securely and neatly weave in this tail end, and the starting tail, on the back of your fabric.
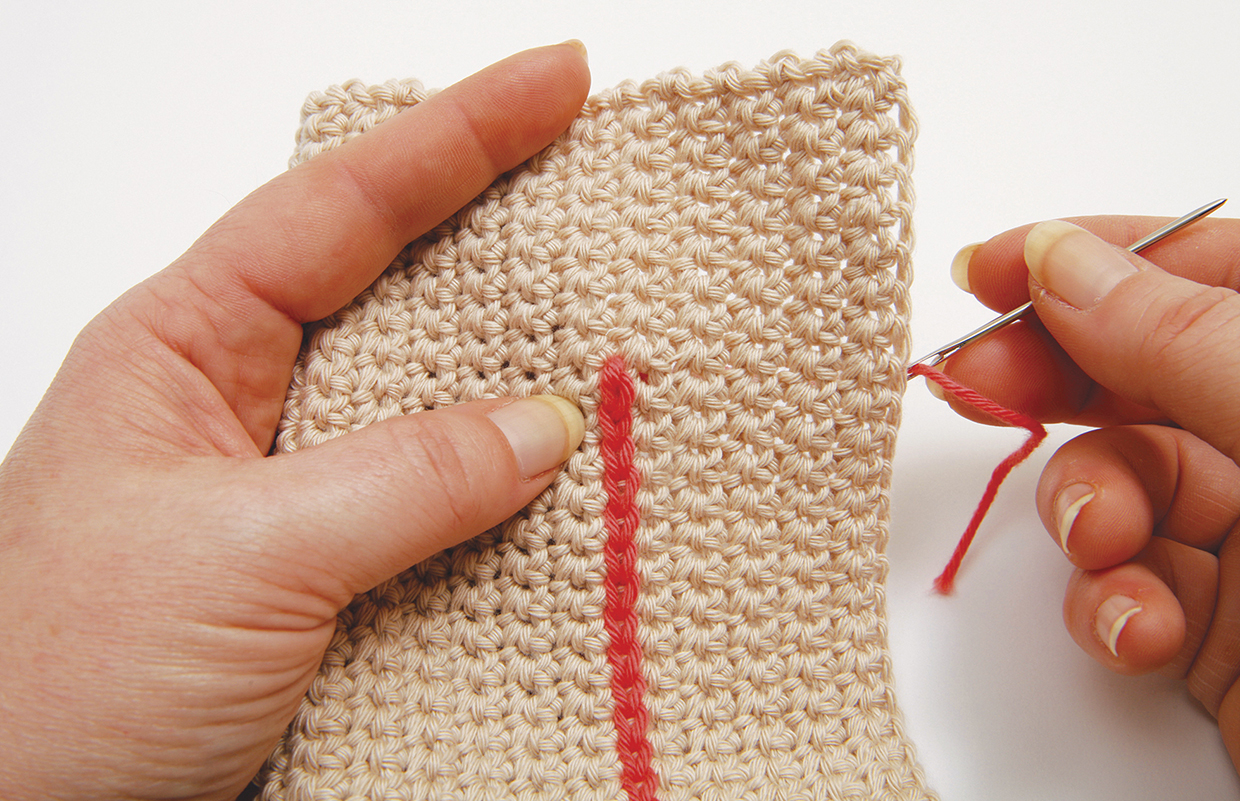
How to surface crochet - lines 07

How to surface crochet circles

Step 1

If you’re working a circle or any outlined design that ends in the same place as it begins, the technique is the same, but you’ll need to finish off your line in a different way to create a neater look.

So start off your line in the same way as before...
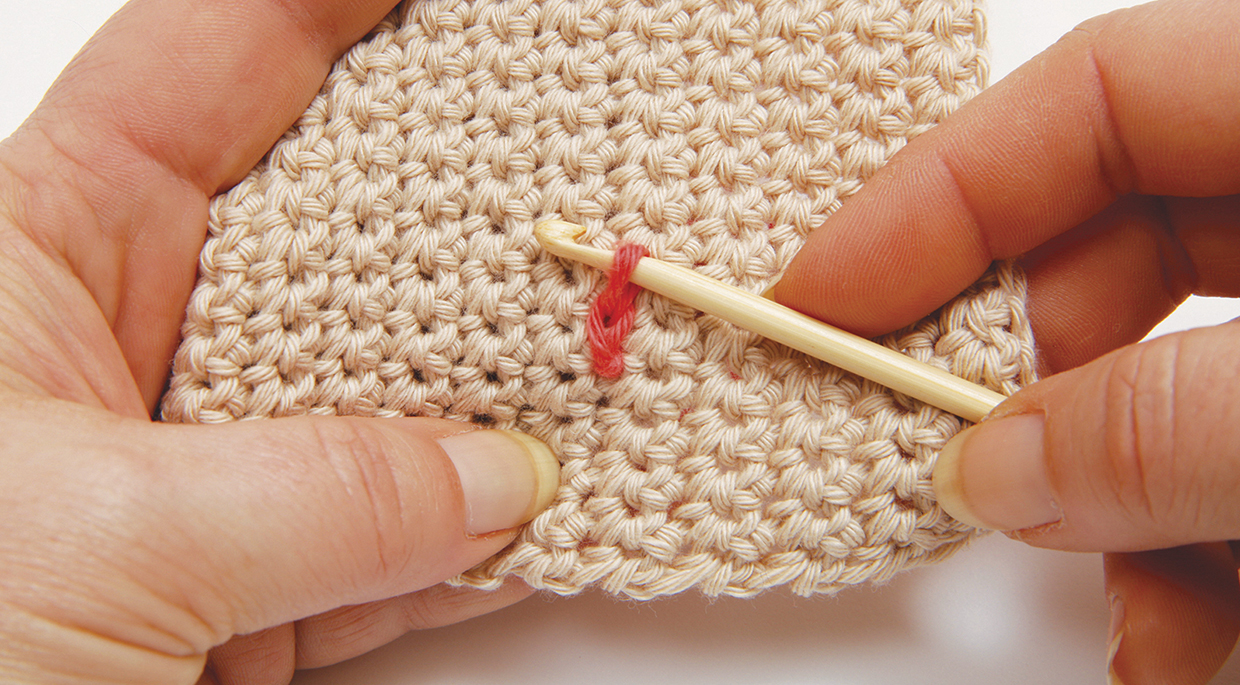
How to surface crochet - circles 01

Step 2

...then work your stitches diagonally, horizontally and vertically to create your design.

Work your design up until the penultimate stitch (the one before the last stitch). Cut the yarn, leaving a tail around 15cm long. Thread the tail onto a tapestry needle and bring the needle up to the front of the fabric at the point where you want your last stitch to start. Pass the needle and yarn through the penultimate loop and remove it from the hook as you do so.

Now insert the needle underneath the first stitch of the design, from right to left...
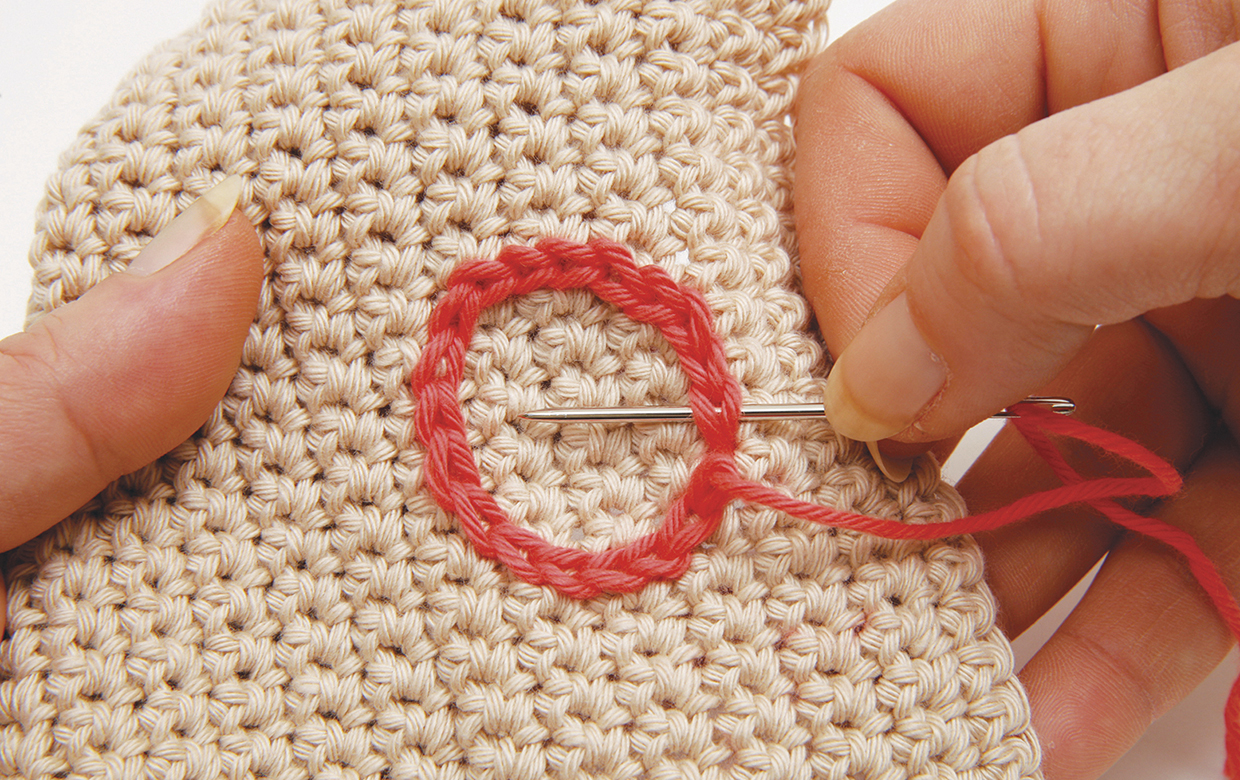
How to surface crochet - circles 02

Step 3

...Then push the needle back into the penultimate loop and into the fabric at the same point as the yarn came out.
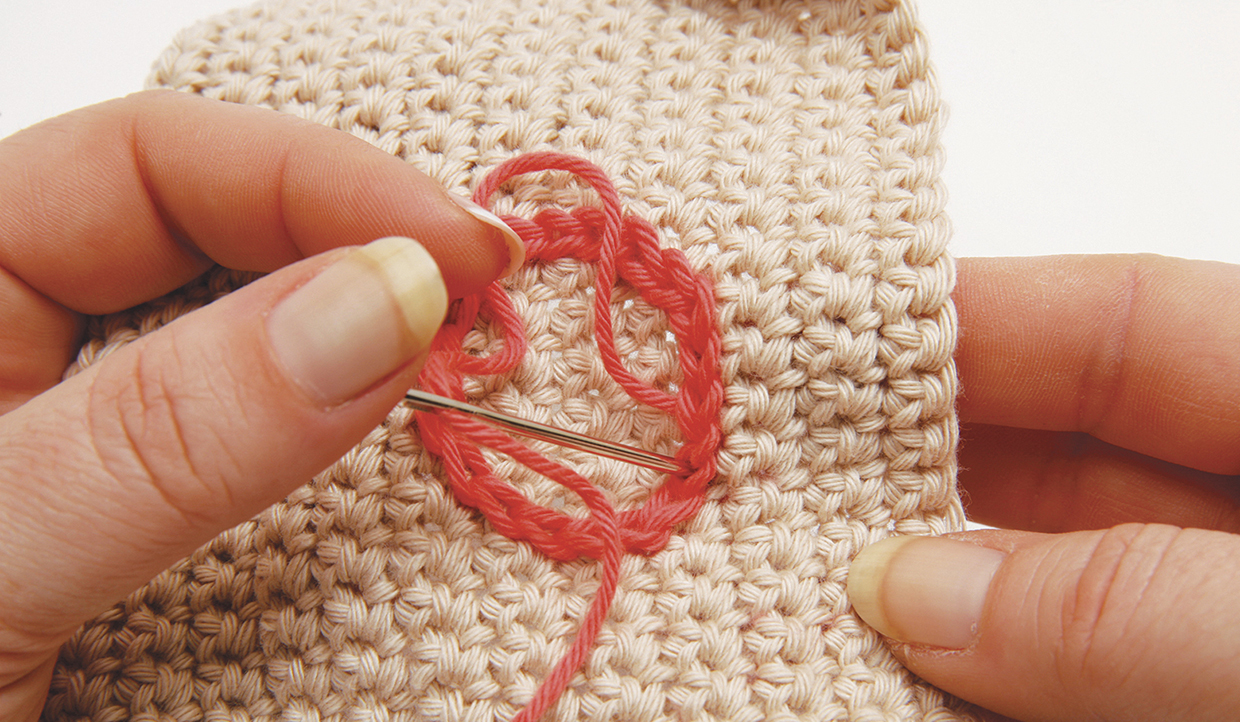
How to surface crochet - circles 03

Step 4

Pull gently to make sure the final loop lies neat and flat.
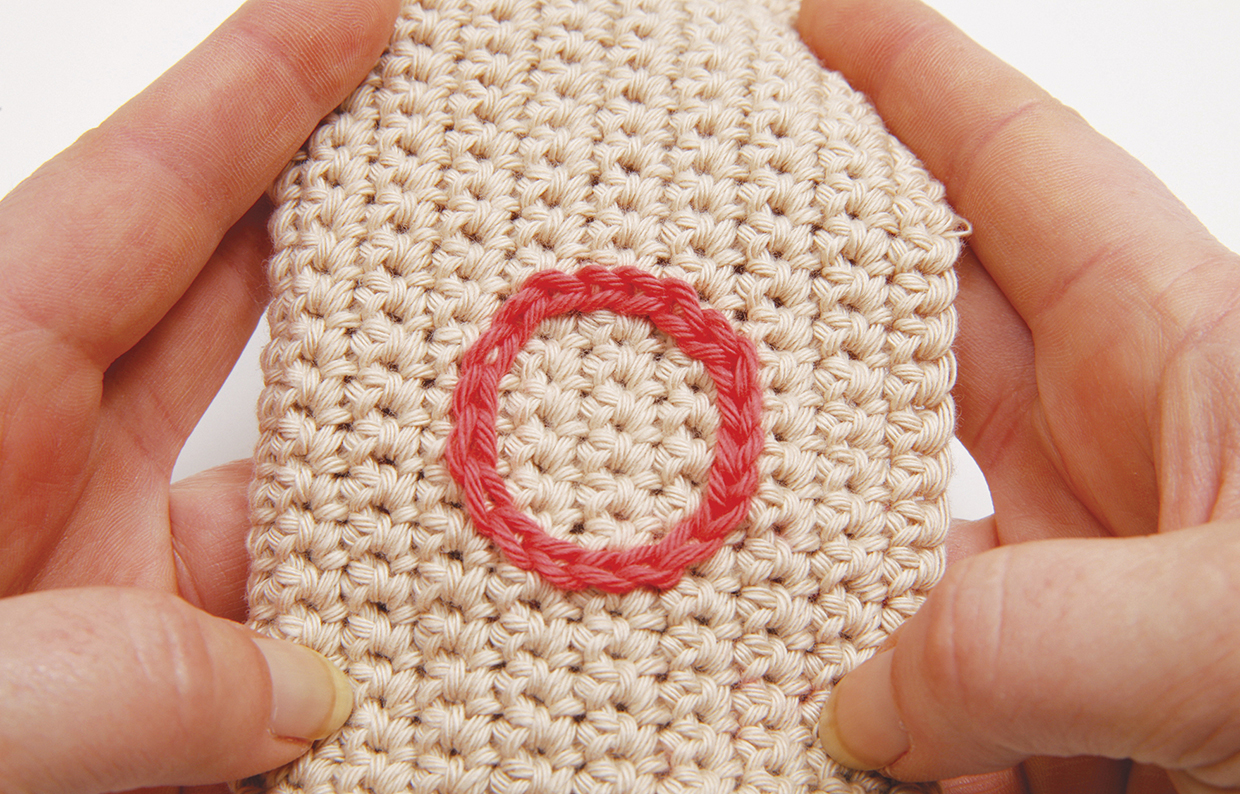
How to surface crochet - circles 04

Securely and neatly weave in this tail end, and the starting tail, on the back of the fabric. You’ll be left with a circle or other design that has no obvious start or end point. Magic!

Here’s some essential know-how you need for success with your surface crochet!

Doodling with your yarn is fun, but there are a few things you need to remember! When you’re working surface crochet slip stitches, you always keep the yarn at the back of the fabric. This can seem a little odd because you won’t be able to see your yarn wrapping around the hook – you’ll need to feel your way with your fingers.

It’s also important to keep your tension fairly loose so that your slip stitches don’t pull on the base fabric and distort it. The stitches should sit neatly on the surface of the fabric.

When you insert the hook to make the stitches, you will usually insert it into the gap between double crochet stitches. The benefit of using a double crochet fabric is that each stitch acts as a guide for spacing out your surface crochet stitches evenly. Occasionally, you might need to work a surface crochet stitch into the centre of the dc stitch itself. If you need to do this, try inserting a tapestry needle into the stitch first to form a guide hole – this will make it easier to insert your hook.

Once you’re confident working surface slip stitch motifs or lettering on double crochet fabrics, you can try working them on other fabrics, such as treble crochet.

When creating surface crochet patterns, you can follow a specific design or work on a freeform basis, starting and stopping wherever you like to create shapes as you go. If you’re following a design, it can help to trace it onto a piece of paper, then cut it out and place it over your crochet fabric to give you a guide as to where to place your surface crochet stitches. If you want to, you could use a water-soluble pen to mark out the lines of your design and then slip stitch over them.

We hope you’ve enjoyed this ‘How to do embroidery on crochet’ tutorial. Don’t forget, if you need any help with your crochet stitches you can always check out our crochet for beginners guide. And if you’re looking to treat yourself, check out our list of the best crochet hooks and the best crochet kits for beginners.