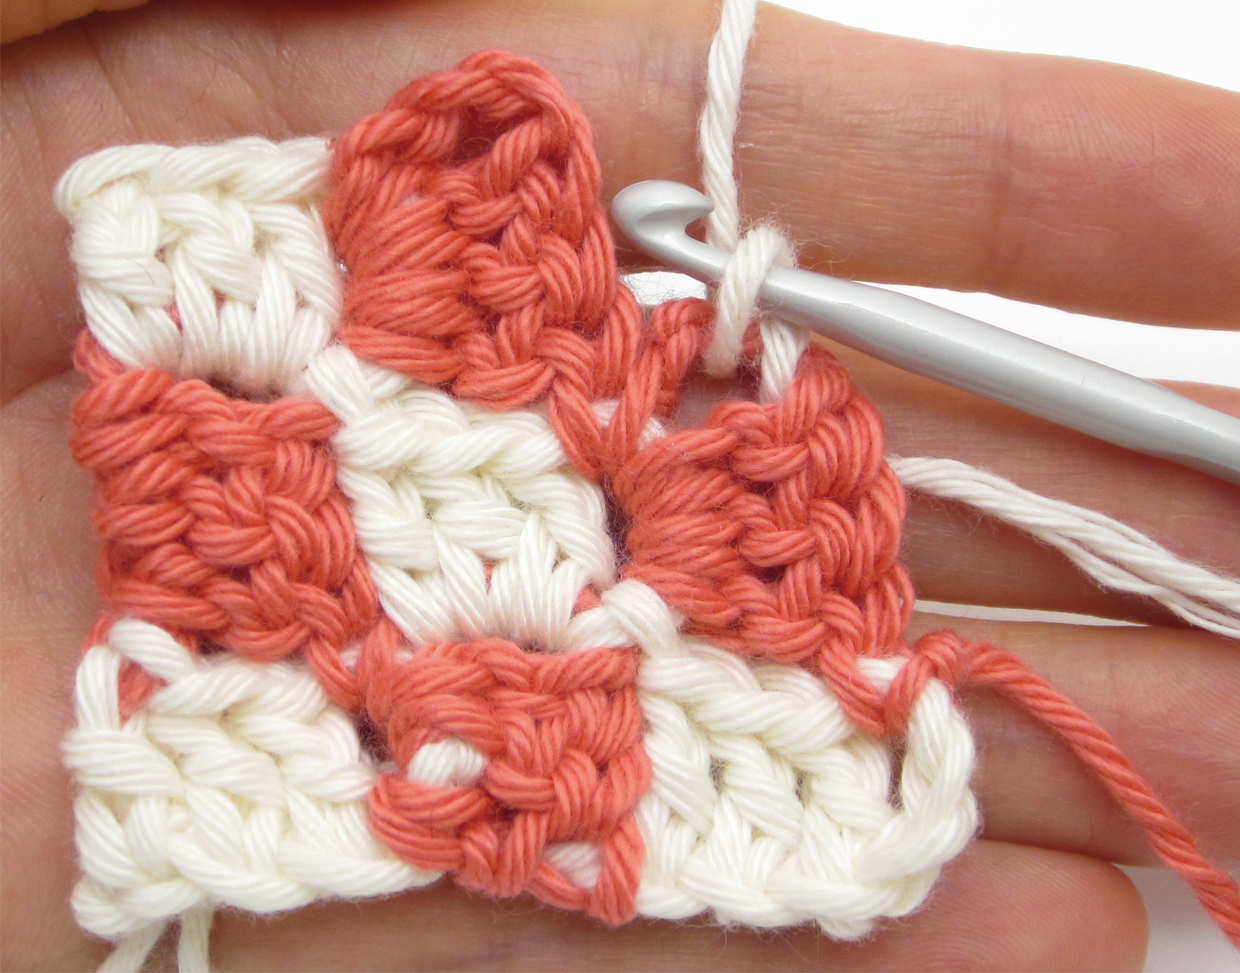
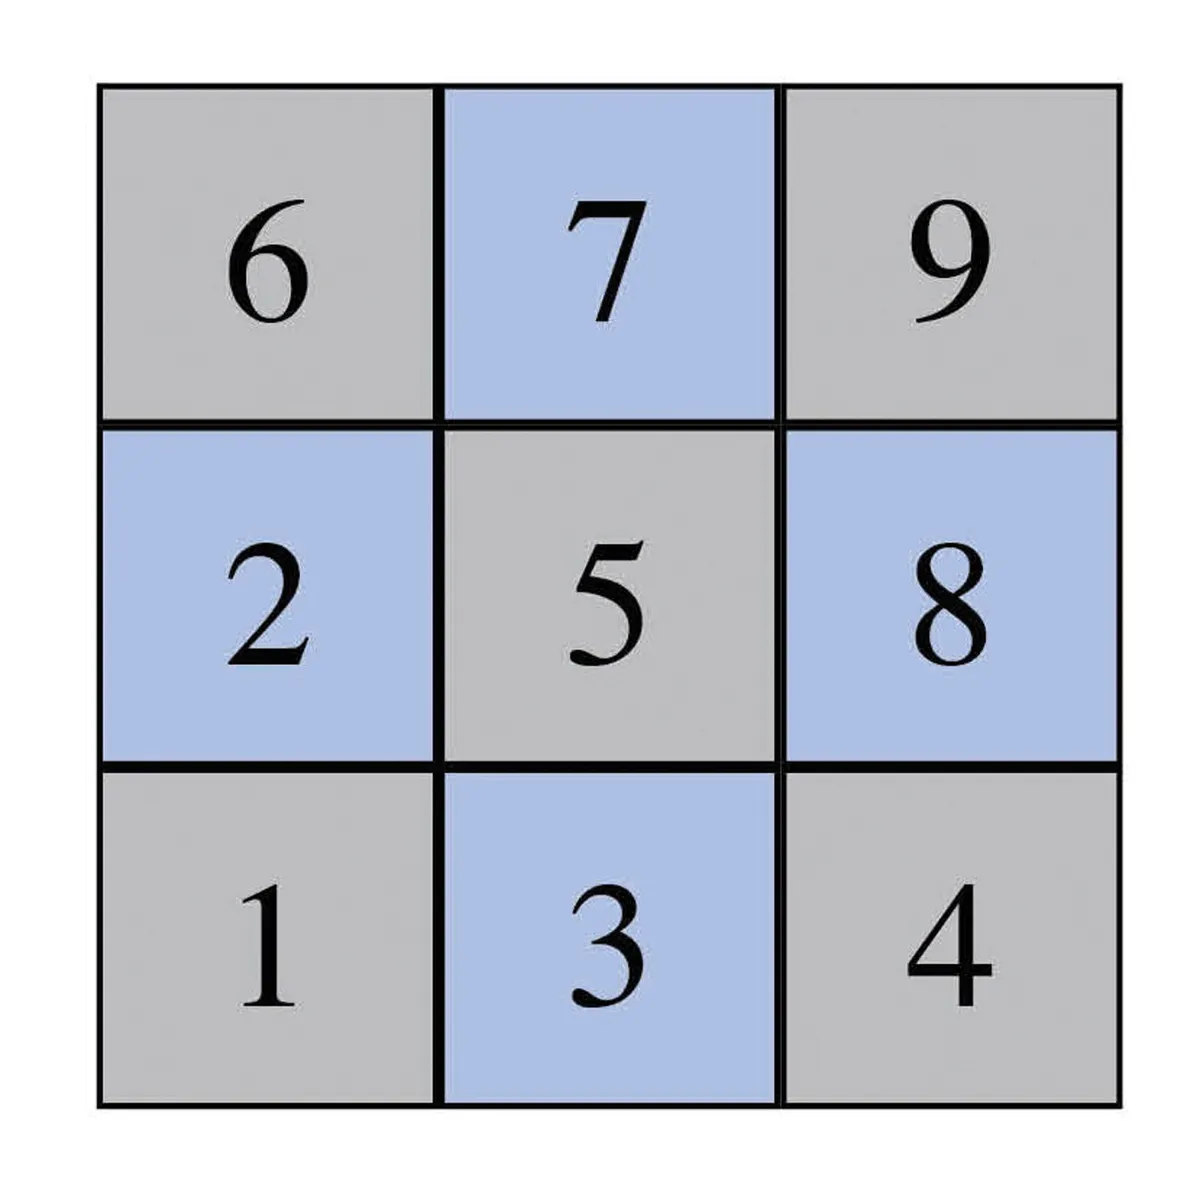
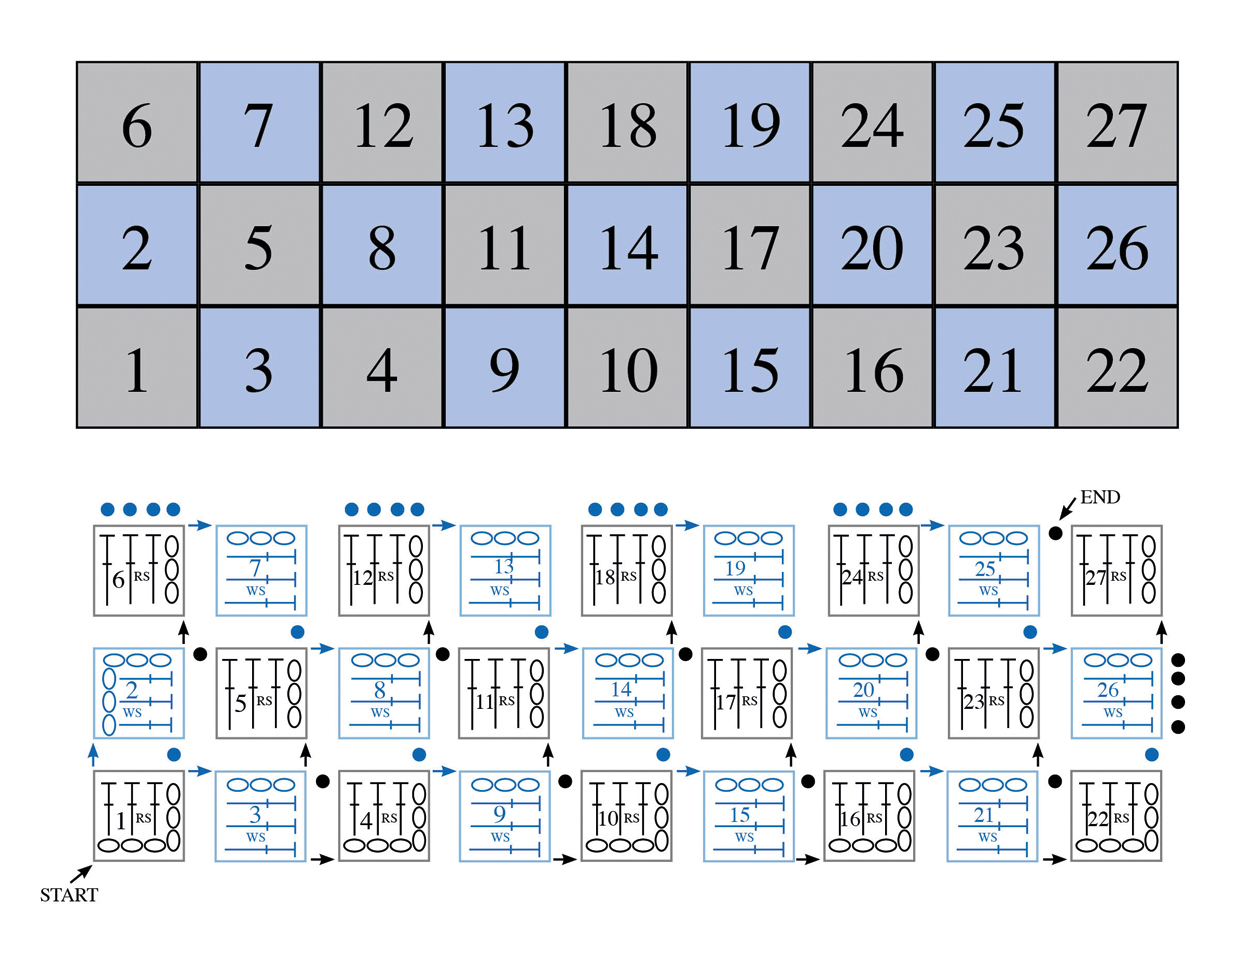
How to start corner to corner crochet
Step 1
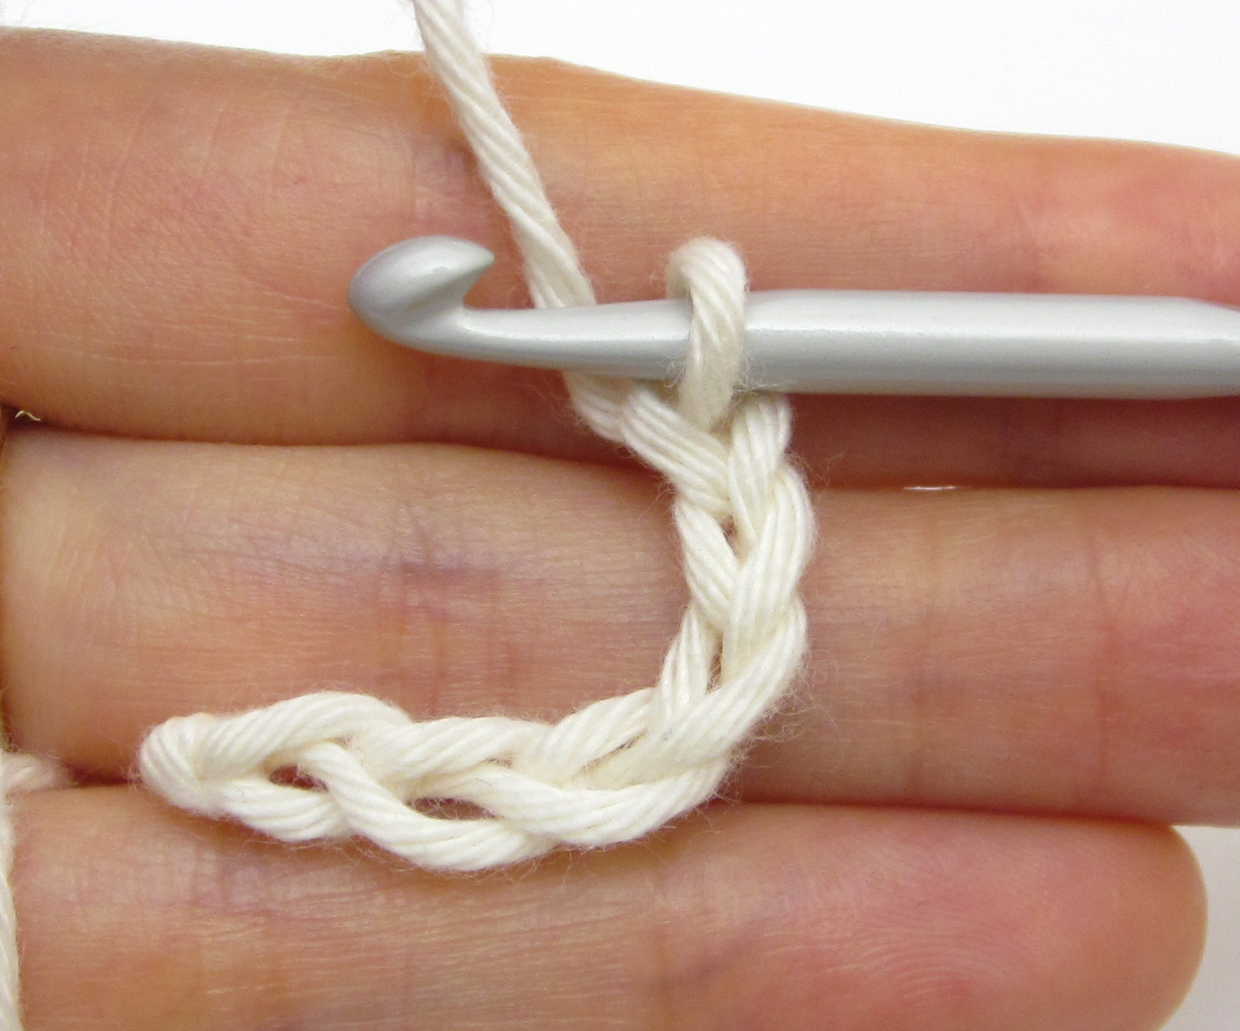
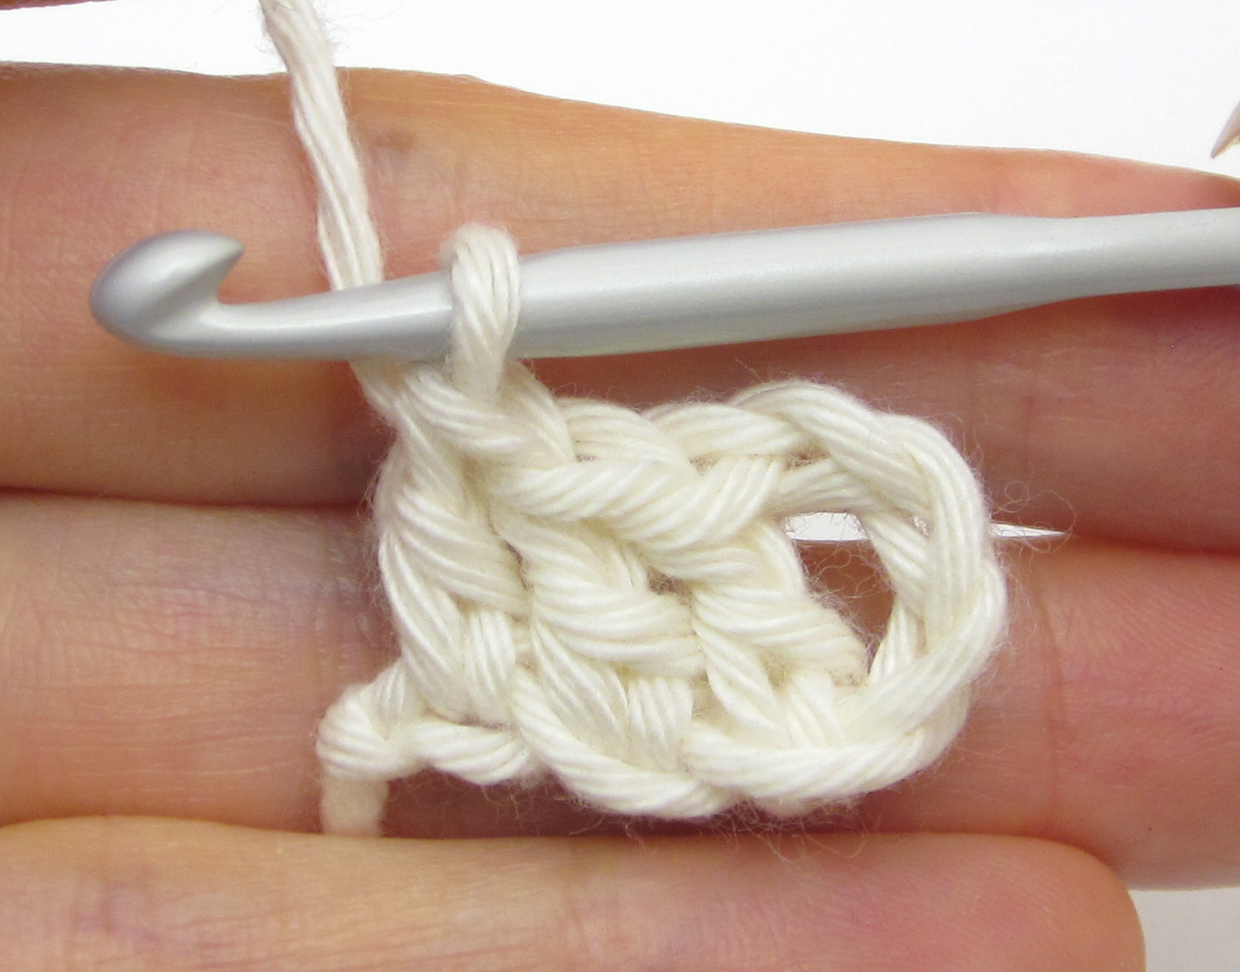
To start making the first square, chain 6.
(This is for if you are making trebles, which is the most common stitch for C2C crochet – but you can just add an extra chain for dtr stitches, or subtract one for htr, or two for dc, then adjust Step 2 according to which stitch you’ve chosen to work with).
Step 2
Skip the first 3 chains and treble into the 4th chain from the hook, then treble into the next 2 chains. This completes the first of your c2c squares, and it will appear in the bottom left-hand corner.
Step 3
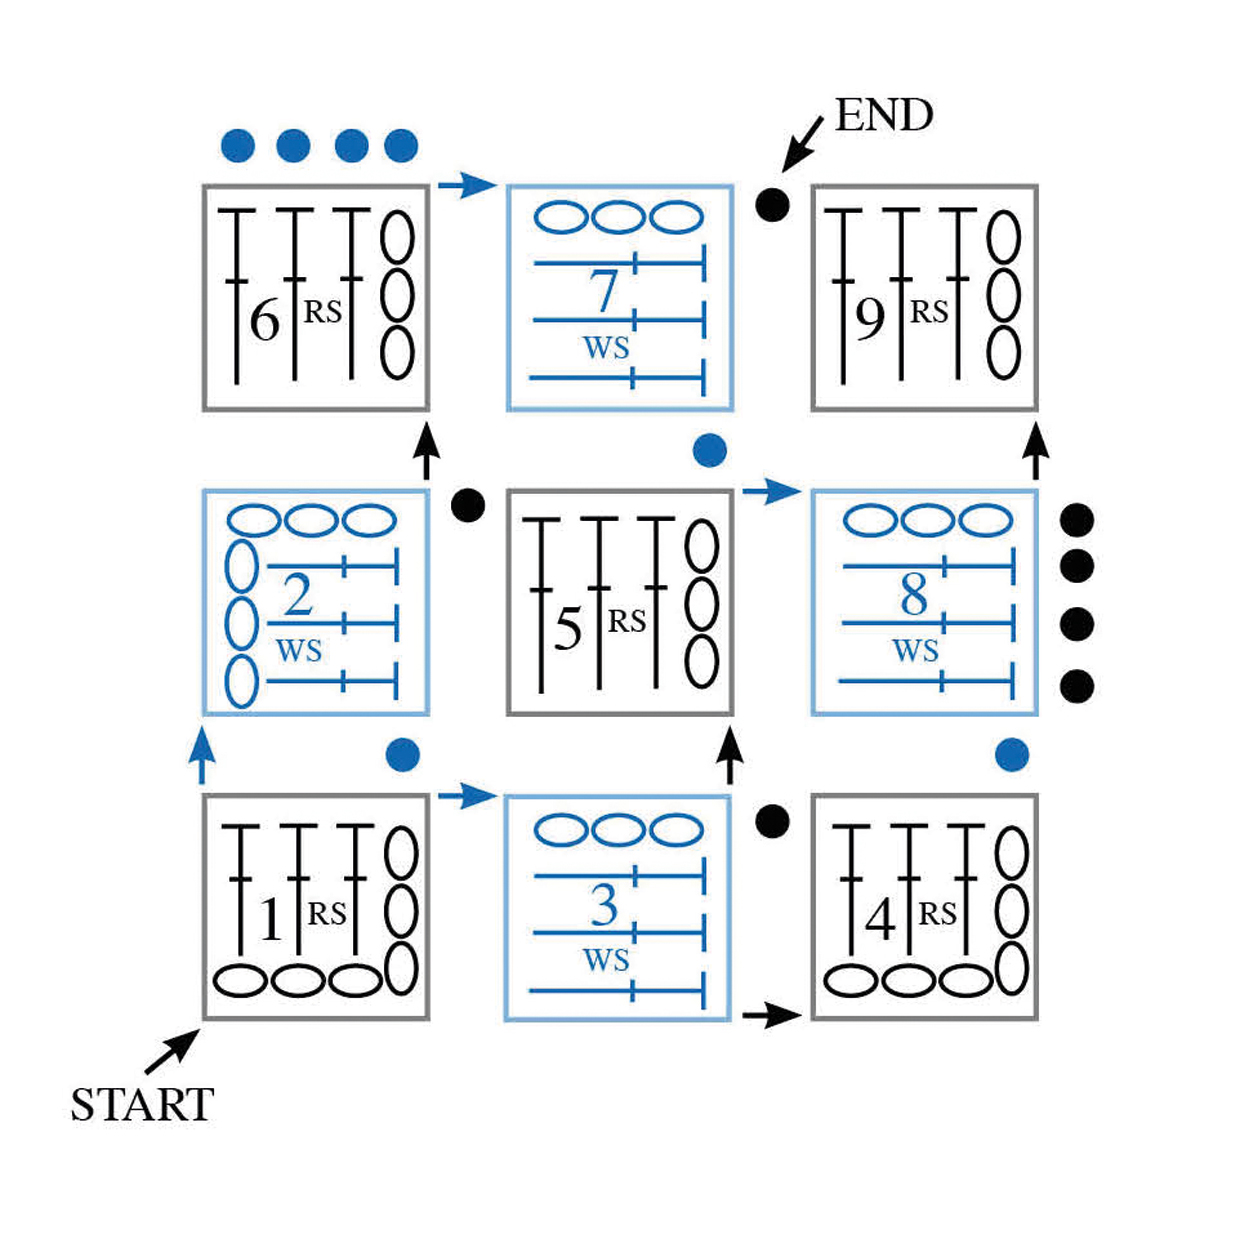
To help you follow what we’re doing, here’s a stitch diagram of the 9-square C2C crochet piece that we’re going to make. It might look complicated, but it will make sense if you follow it along with the written instructions.
How to increase in corner to corner crochet (C2C increase)
Step 1
Here’s how to make an ‘increase row’ of squares
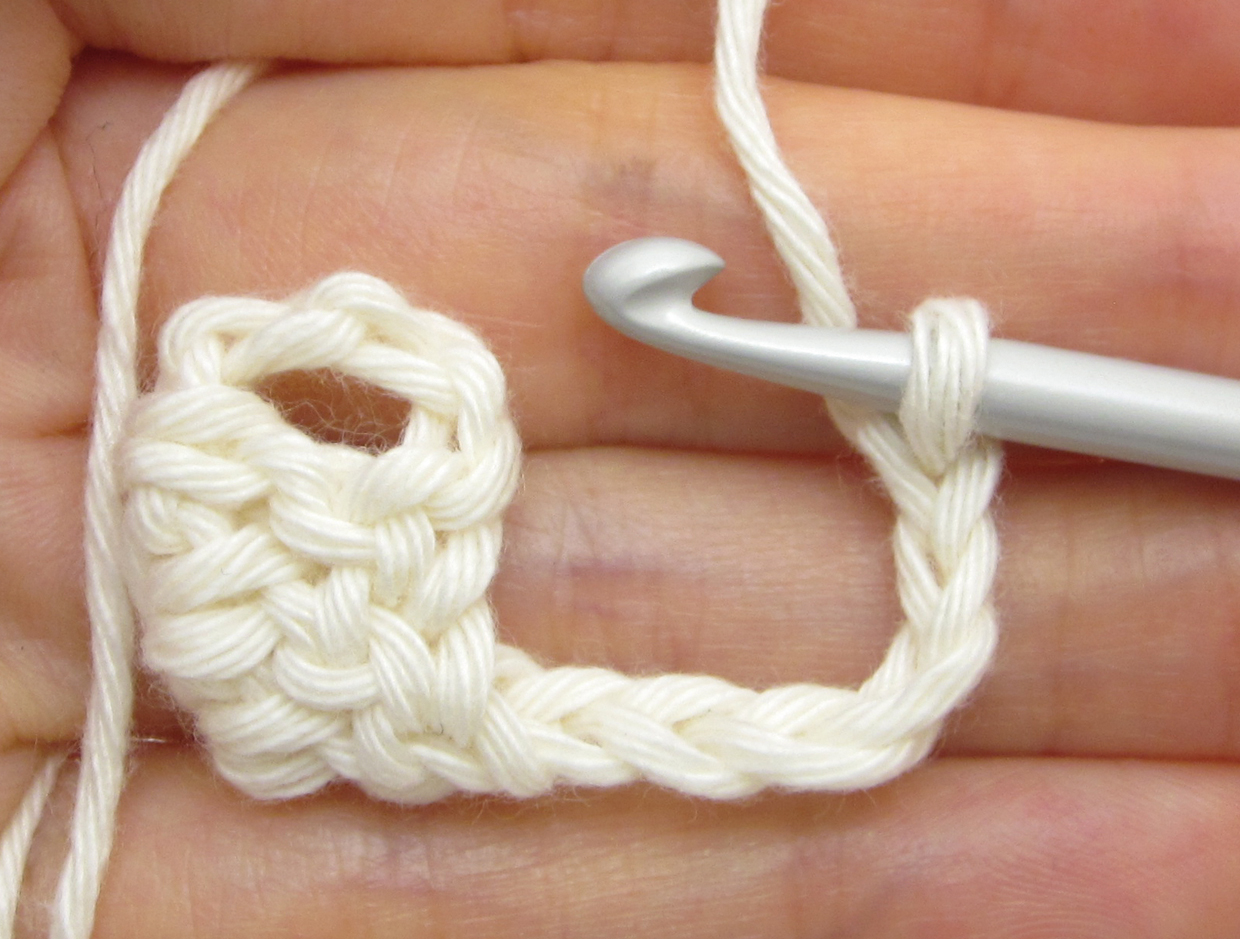
To make your piece bigger, you need to increase the number of C2C crochet squares, so the next diagonal row of our piece has 2 squares. To start any new row, you need to turn your fabric, then rotate it 90 degrees clockwise, so that the working loop is in the bottom-right of the fabric. On our practice piece, the wrong side will now be facing.
To work an increase at the start of a row, ch6 (if working trebles).
Step 2
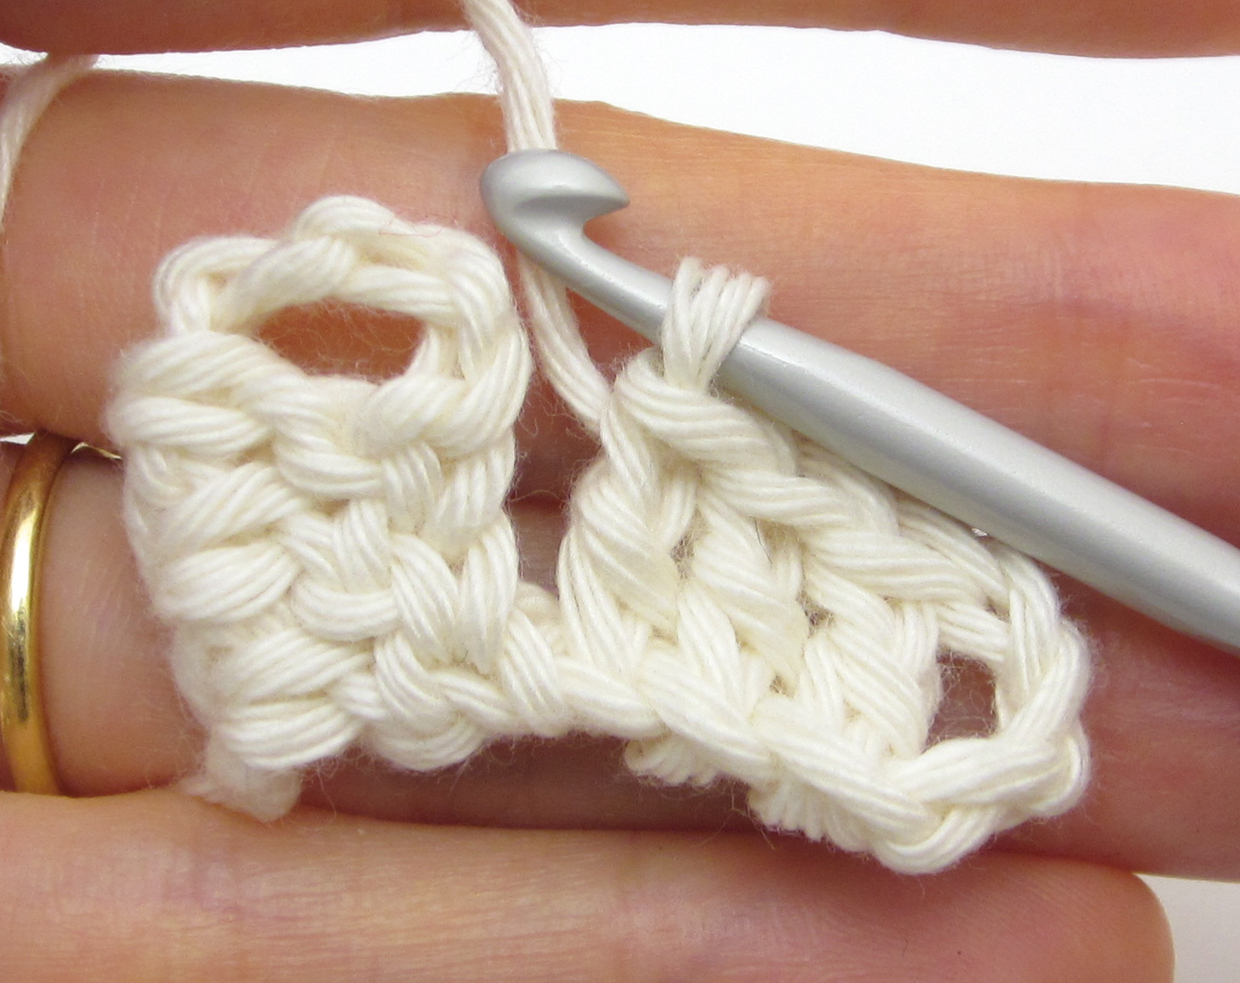
As before, skip 3 chains and treble into the 4th chain and the next 2 chains.
Step 3
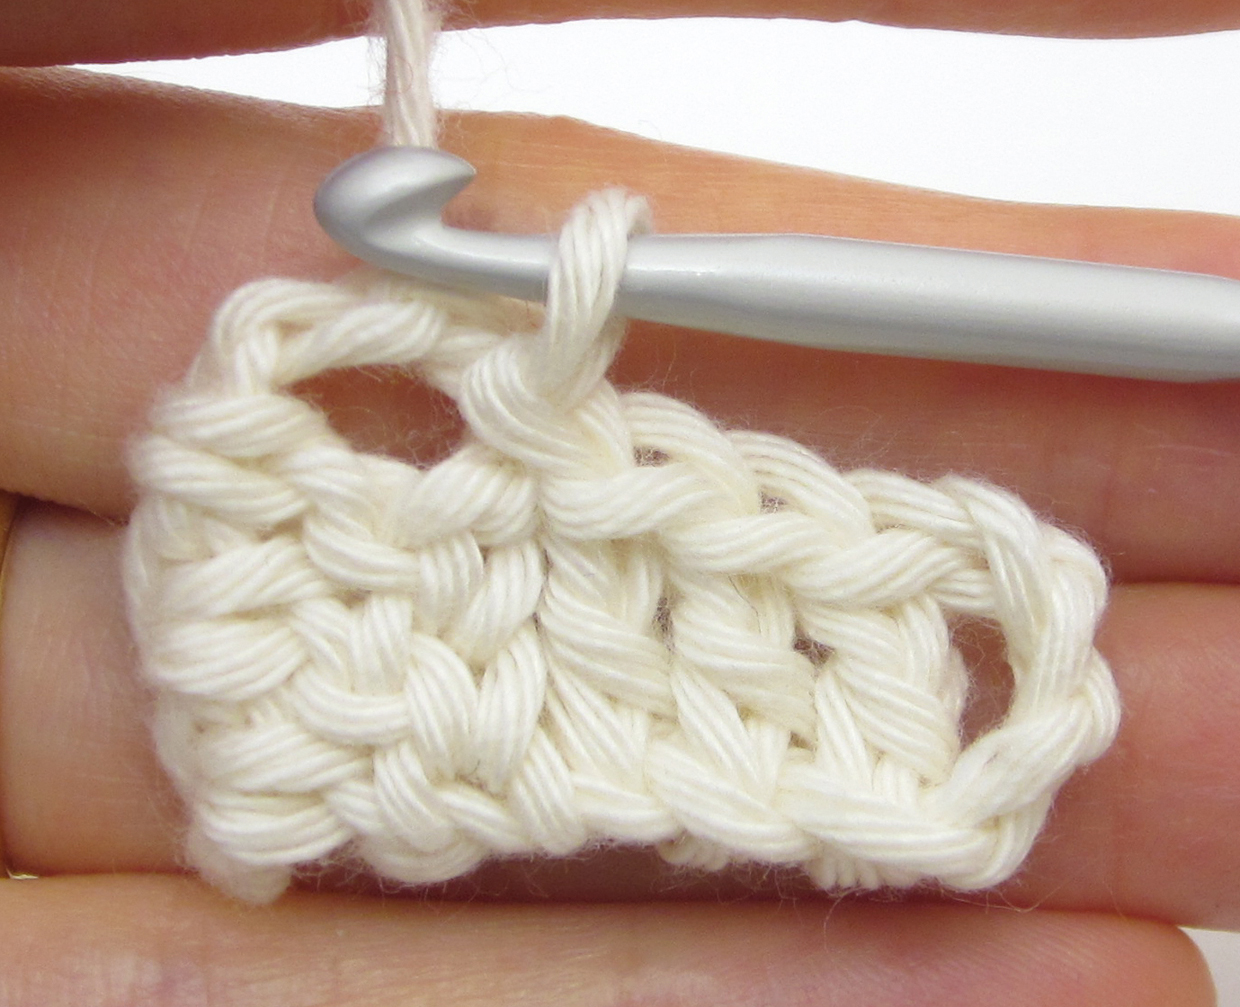
To secure the square and get the working loop in the right place for making the next square, work a slip stitch into the top-right of the adjacent square: insert the hook into the 3-ch space of the adjacent square, yrh and pull through the sp and the loop on the hook. This completes the square (Square 2 in our example).
Step 4
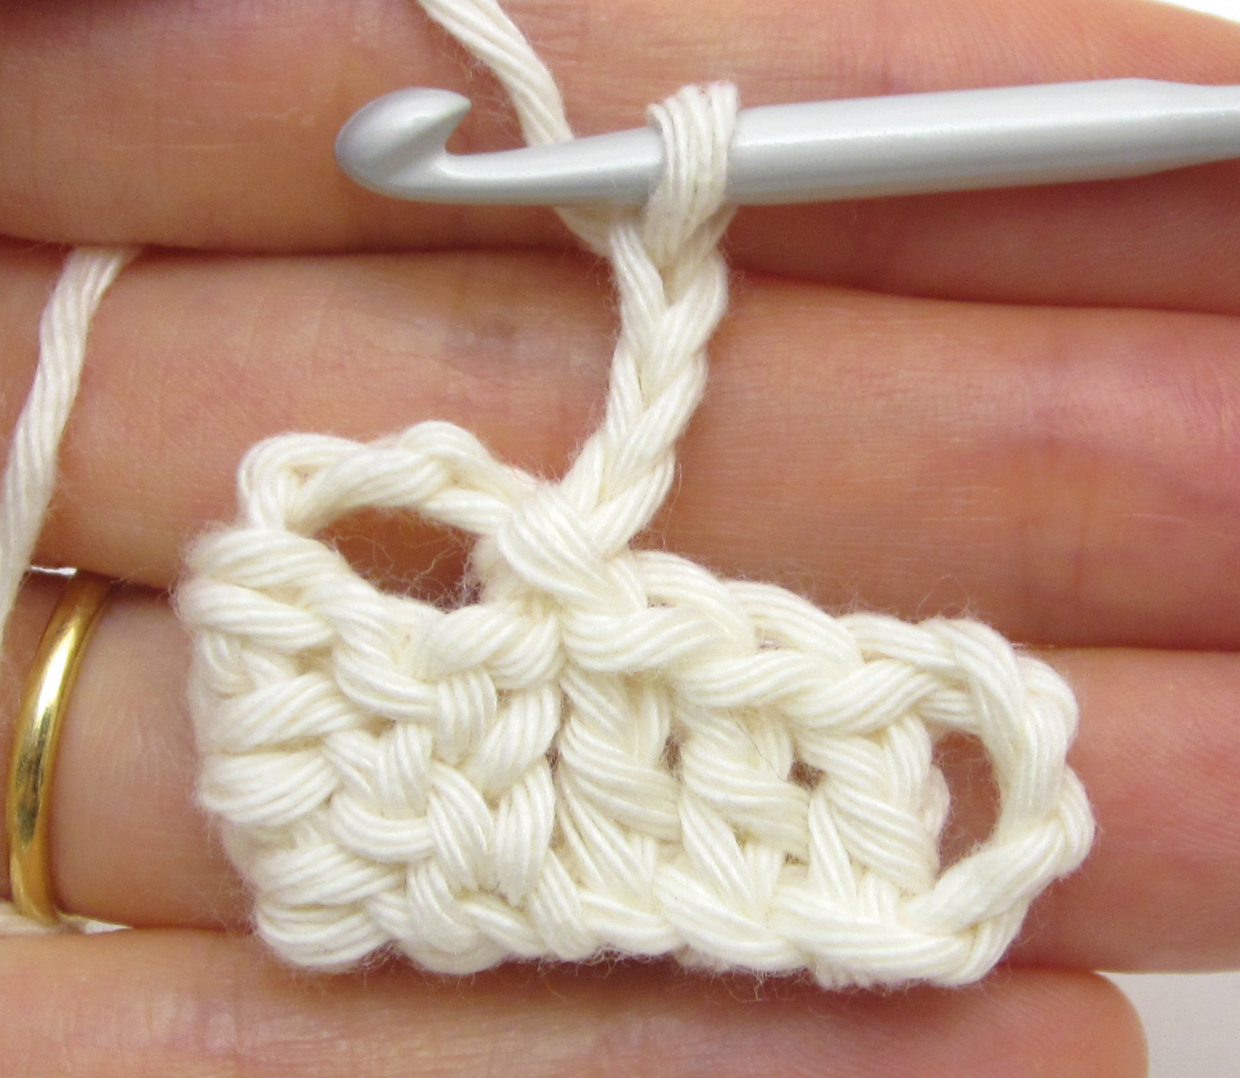
To start the next square, ch3.
Step 5
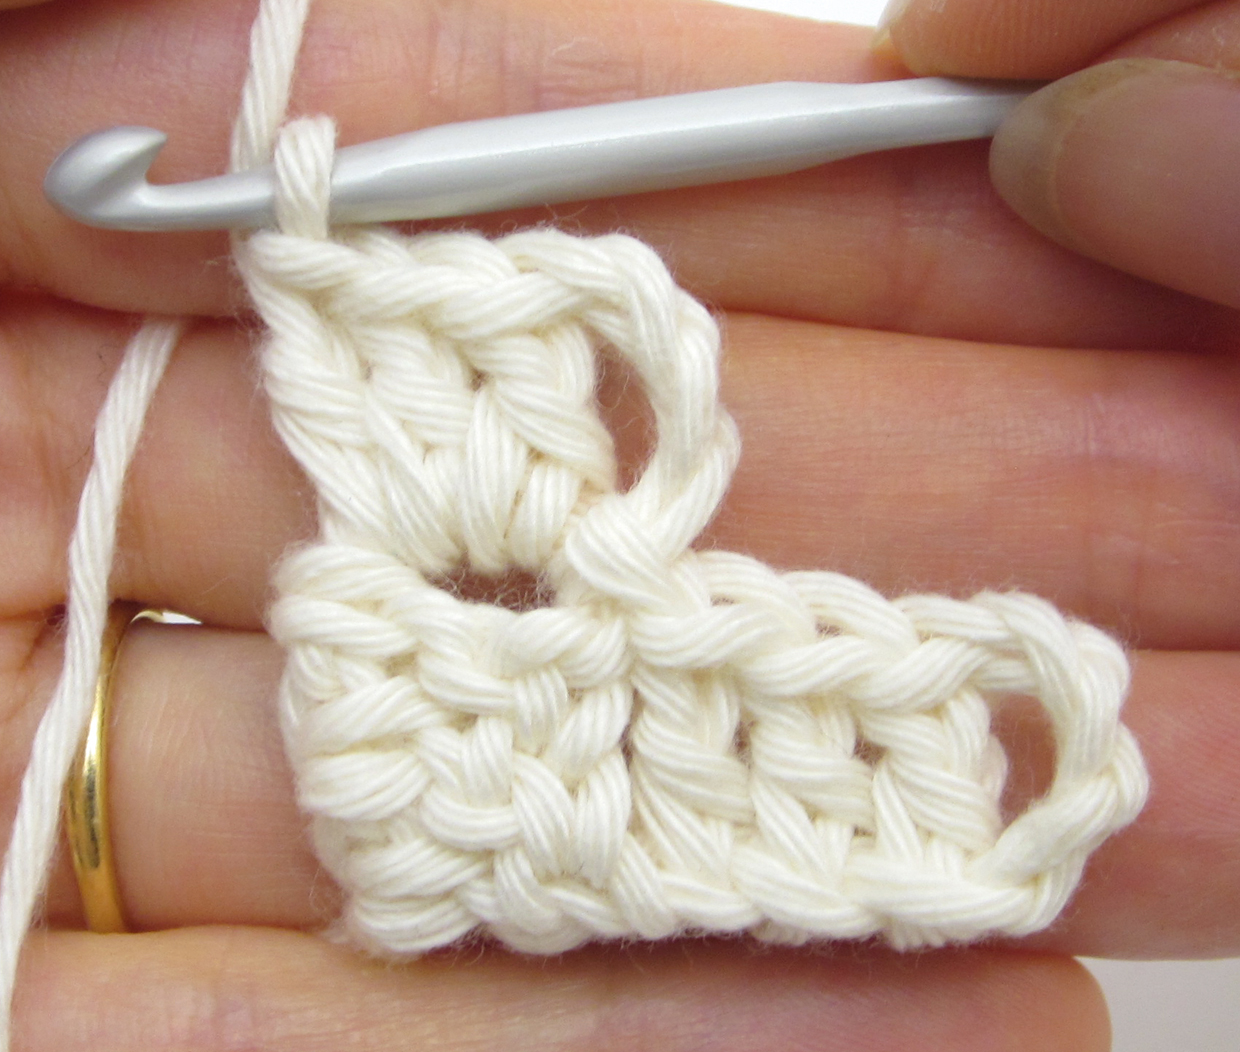
Work 3 trebles into the 3-ch space of the square below. If there was an adjacent square, you’d slip stitch to it in the same way as Step 3 – if not, this square counts as an increase at the end of the row.
Step 6
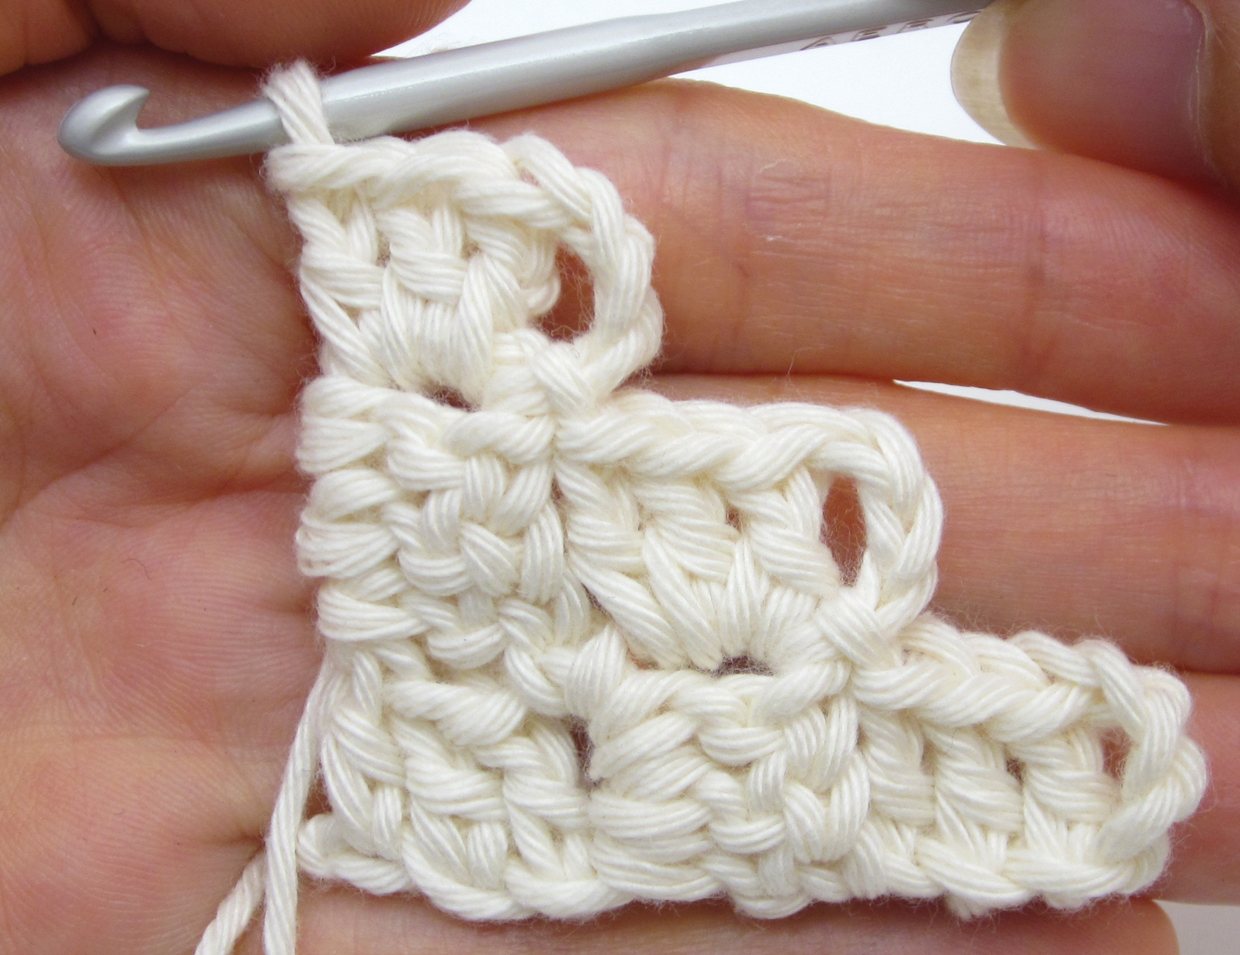
To make another increase row in your C2C crochet fabric, follow the same process for the next diagonal row (Squares 4, 5 and 6 in our example). To do this, turn and rotate the fabric as usual, repeat Steps 1-3 to increase one square at the start of the row (Square 4), then repeat Steps 4-5 (making sure you slip stitch to the adjacent square) to make a plain square (Square 5), then repeat Steps 4-5 to increase one square at the end of the row (Square 6). If you want to make your fabric larger, just work more increase rows by repeating Step 6 and working as many plain squares in the middle of the row as you need to. Continue until your piece is as large as you want it to be across the width and/or height (more on this later).
How to change colour in C2C crochet
Step 1
If you wanted to work any of these c2c crochet squares in a different colour, the process is very simple. You need to work the final yrh of the final stitch on the previous square in the new yarn colour. This rule applies to all squares whether they are in the middle of a row or at the end of a row.
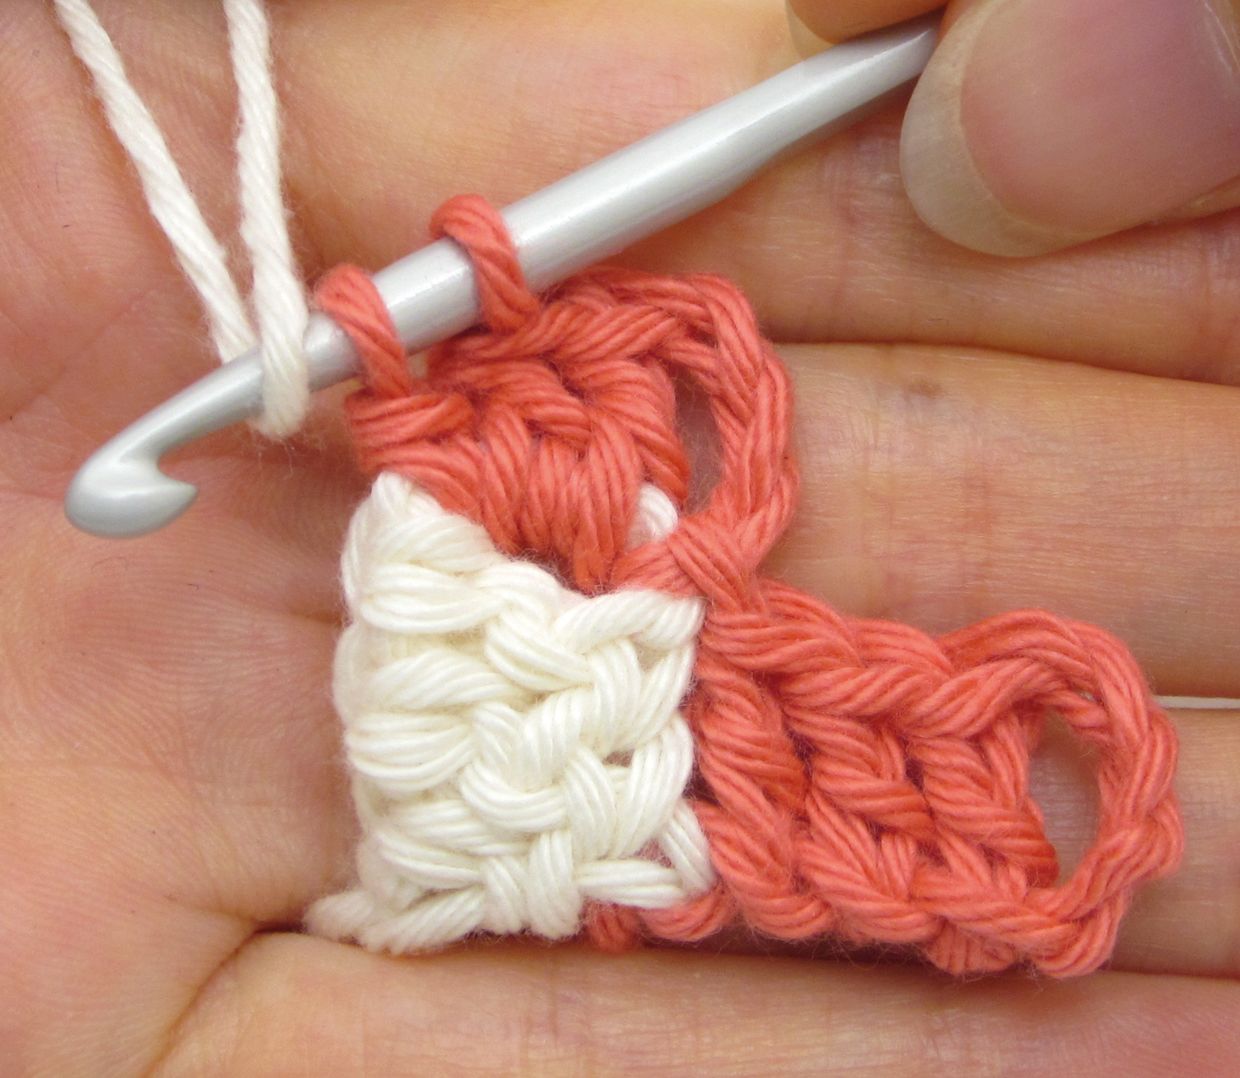
Step 2
Then you’ll have a loop of the new colour on the hook, ready to work the next square in the new colour
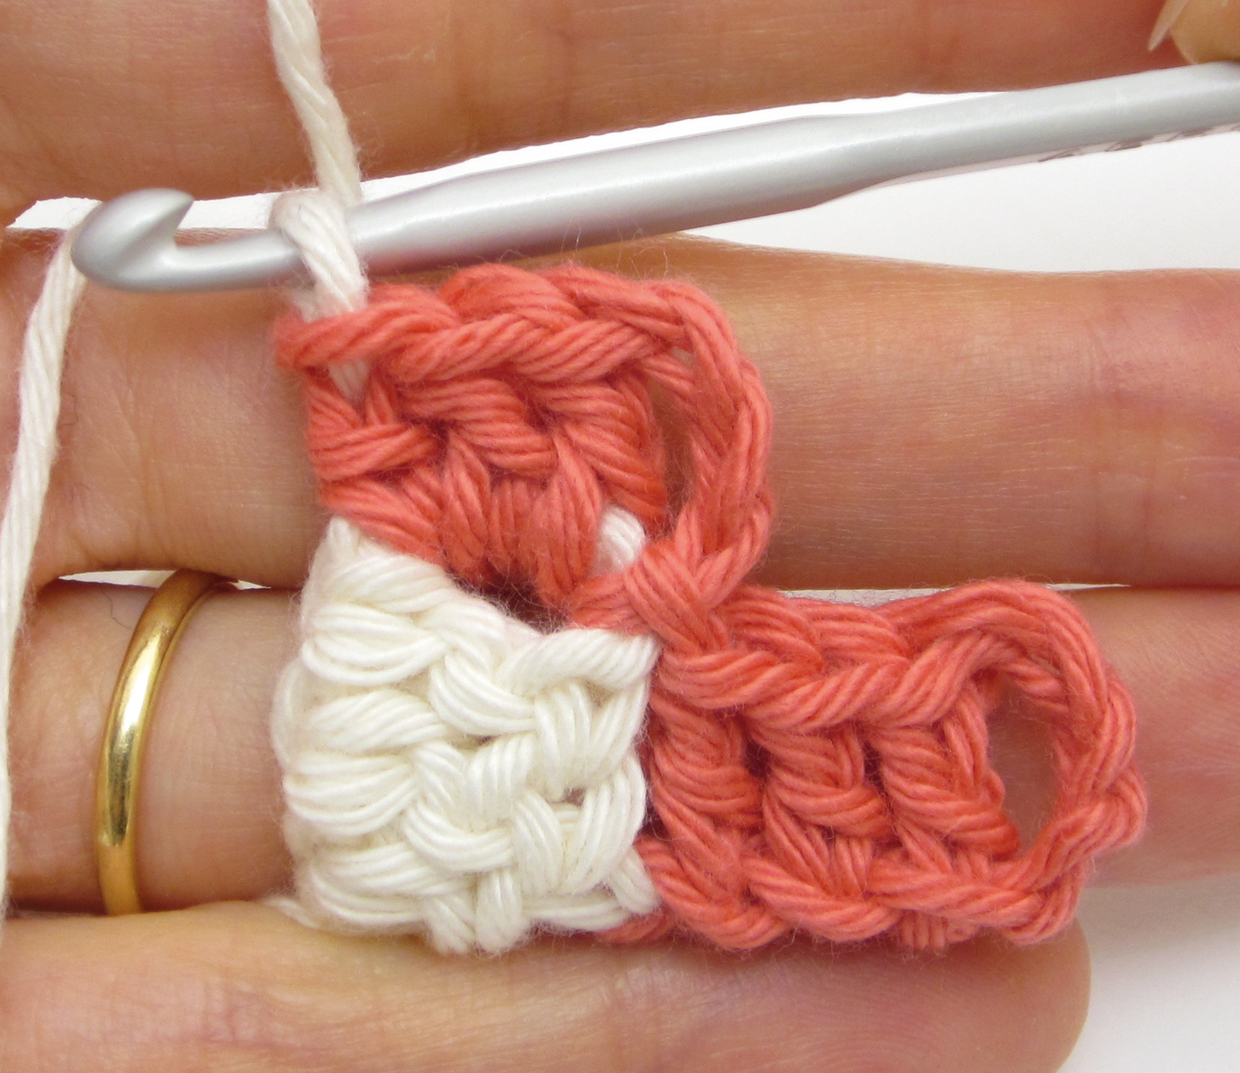
Step 3
If you are changing colour in the middle of a row, you can also work the joining slip stitch in the new colour.
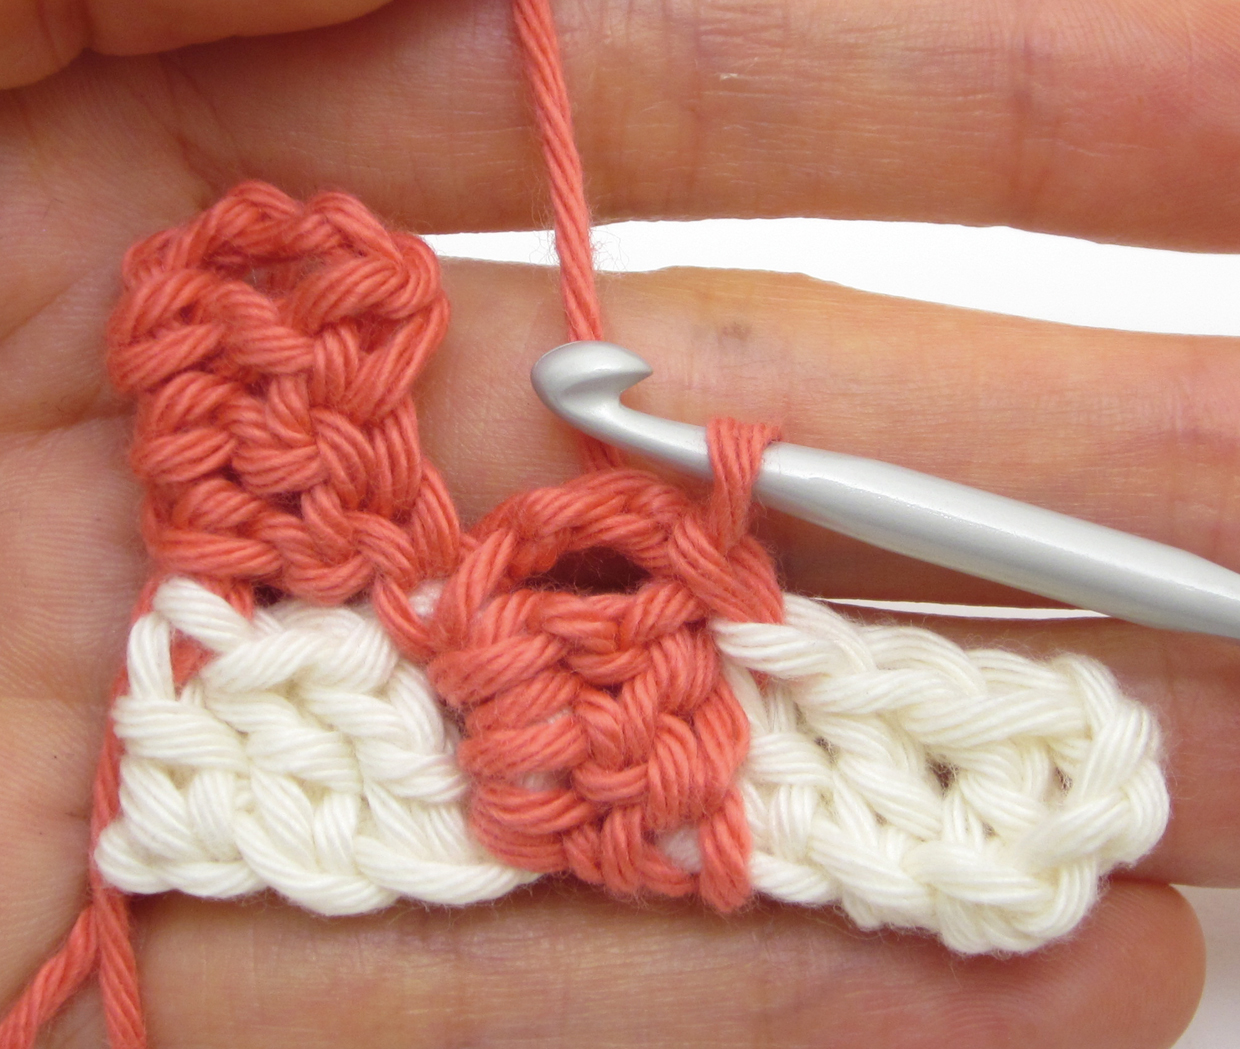
If you're following a corner to corner crochet pattern that requires a lot of colour changes, you will be provided with a colour chart that shows you which colour each C2C square is to be made in.
How to decrease in corner to corner crochet (C2C decrease)
Step 1
Here’s how to make a ‘decrease row’ of squares
Once your C2C crochet fabric is the desired size (in width or height), you’ll need to begin decreasing the number of squares in each row by using some simple slip stitches. To work a decrease row (which might be called a C2C decrease), turn and rotate the fabric as usual so the working loop is in the bottom-right corner.
To C2C decrease at the start of a row, work 4 slip stitches up the side of the last square you worked. To do this, insert the hook into the nearest treble of the previous square, yrh, pull through the stitch and the loop on the hook. Repeat to work a slip stitch into each treble, then into the 3-ch space. The working loop will now be in the bottom-right corner of the next square you want to work (Square 7 in our practice piece).
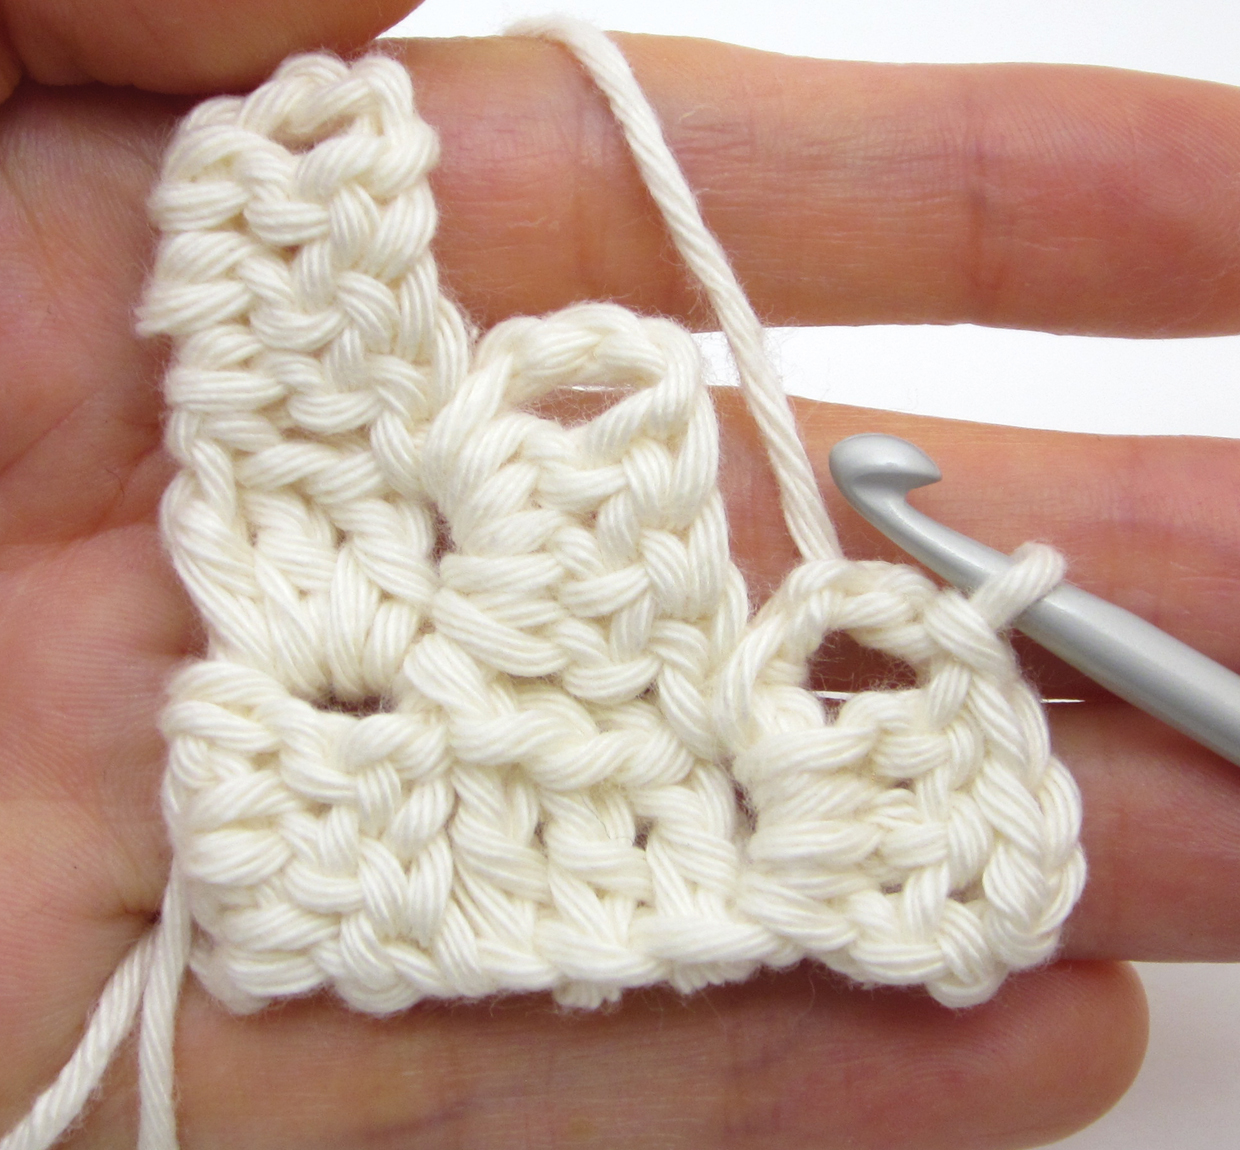
Step 2
Continue the fabric by making a plain square as before, starting with ch3.
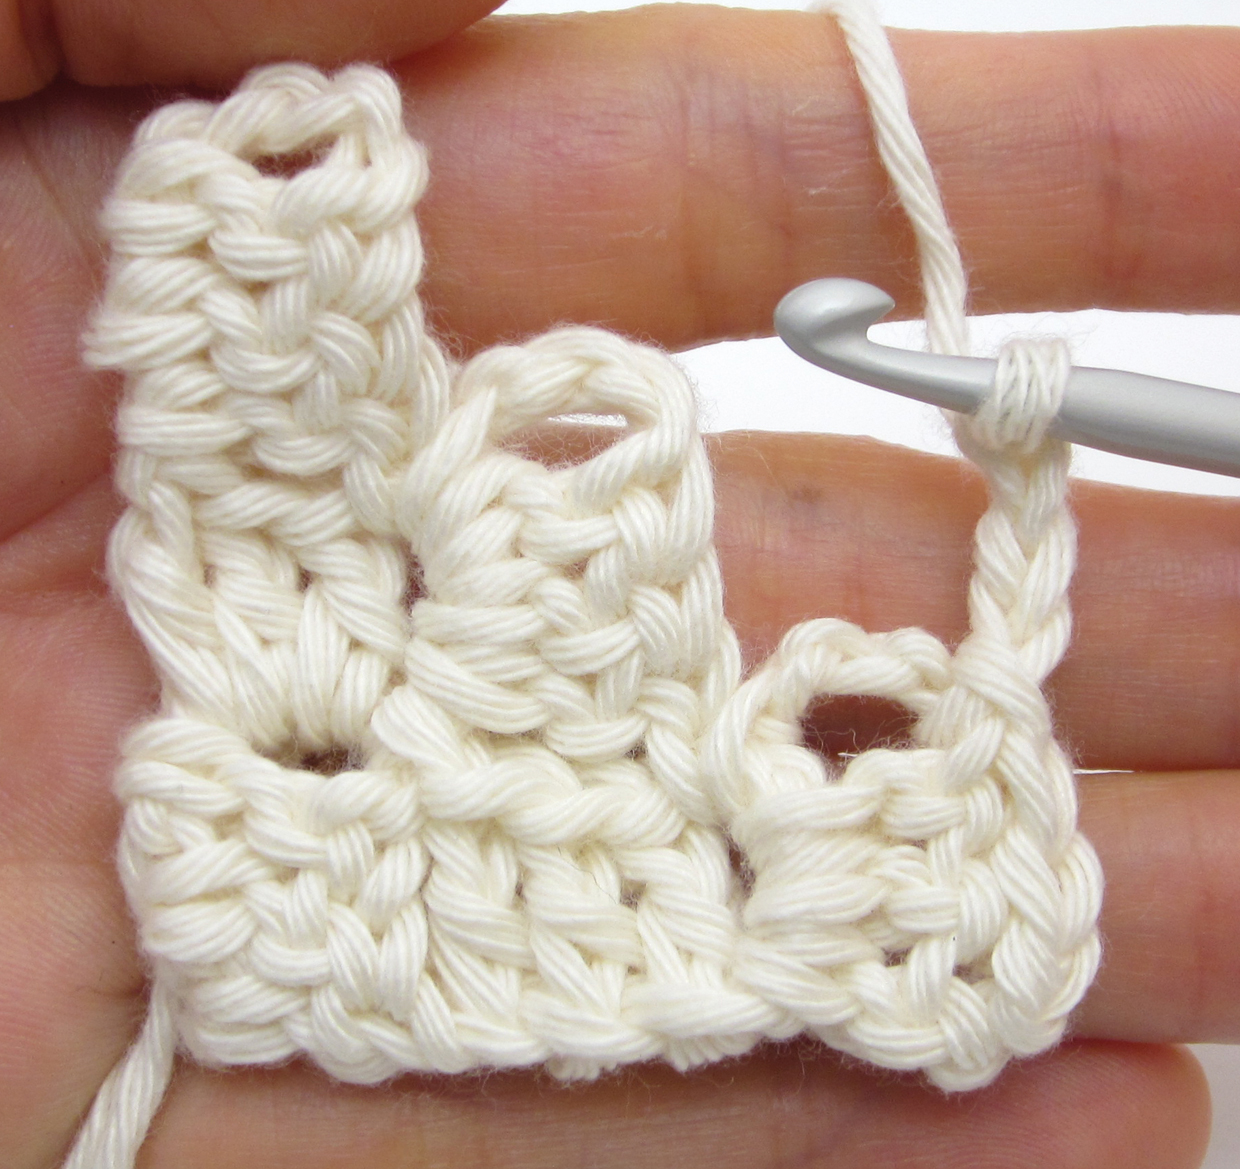
Step 3
Work 3tr into the 3-ch space below and ss to the top-right of the adjacent square (Square 7 is complete).
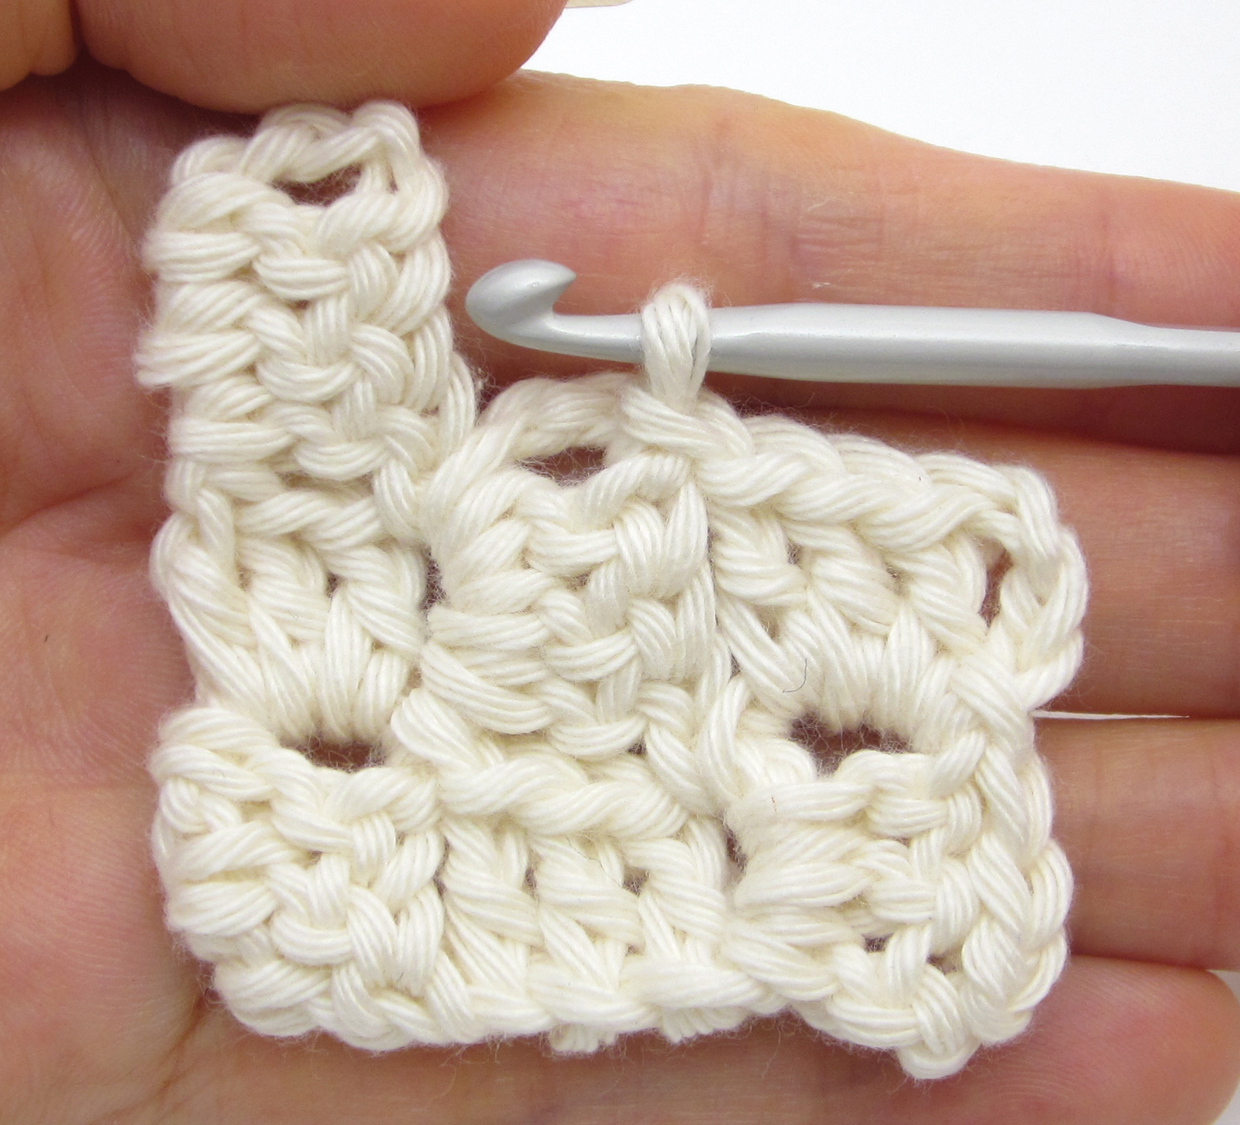
Step 4
Work more plain squares as needed, repeating Steps 2-3. To decrease at the end of the row, just stop after you’ve slip stitched to the last adjacent square.
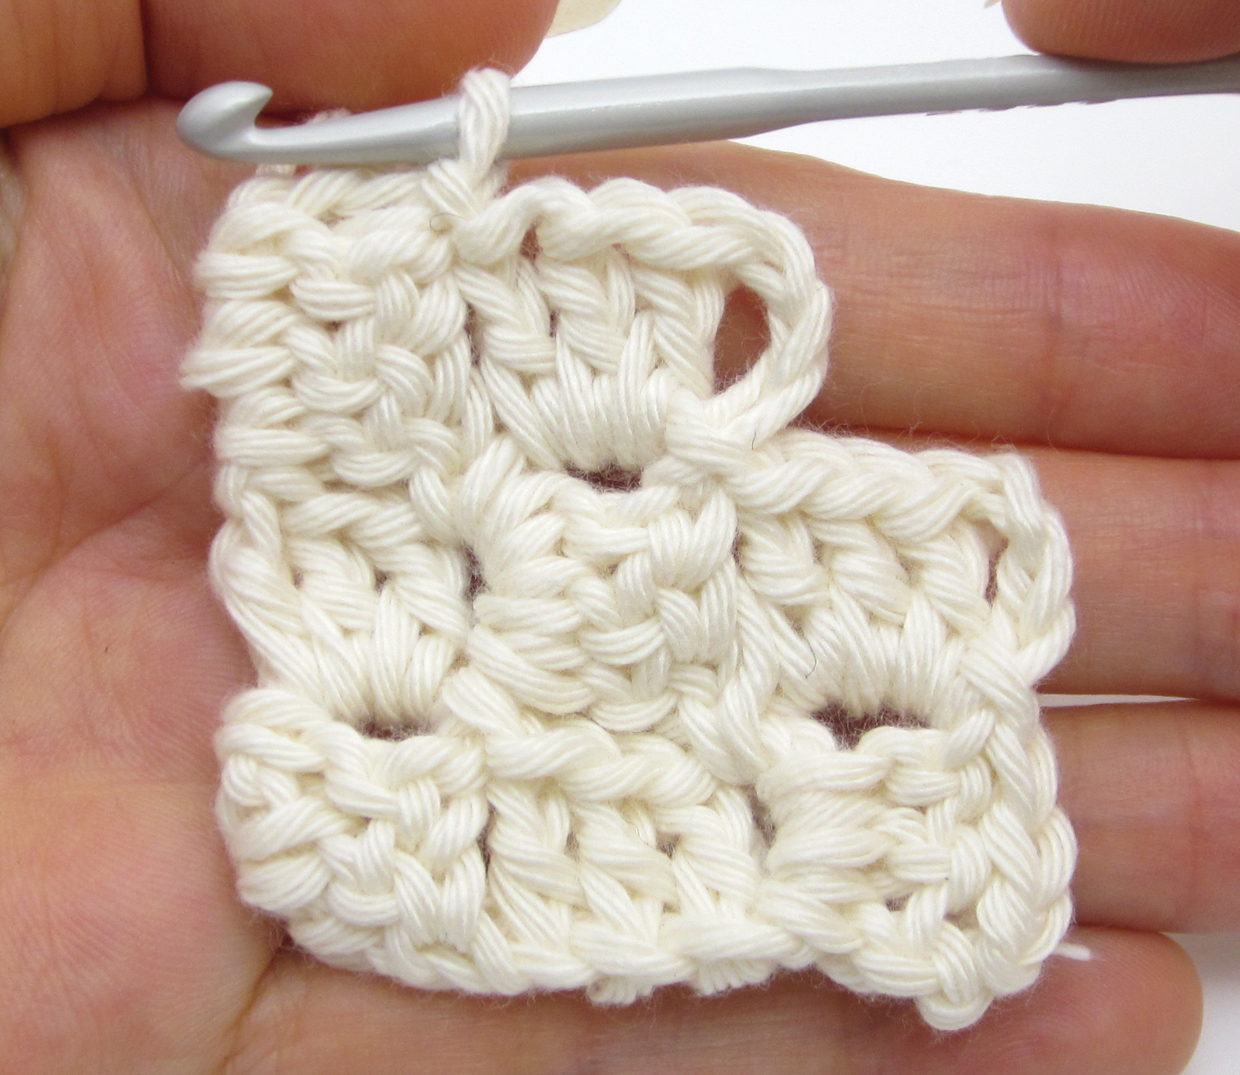
Step 5
To work the next decrease row, turn and rotate the fabric as usual, then repeat Steps 1-4. In our example, you’ll need to slip stitch up the side of Square 8, then work Square 9. This completes our practice piece.
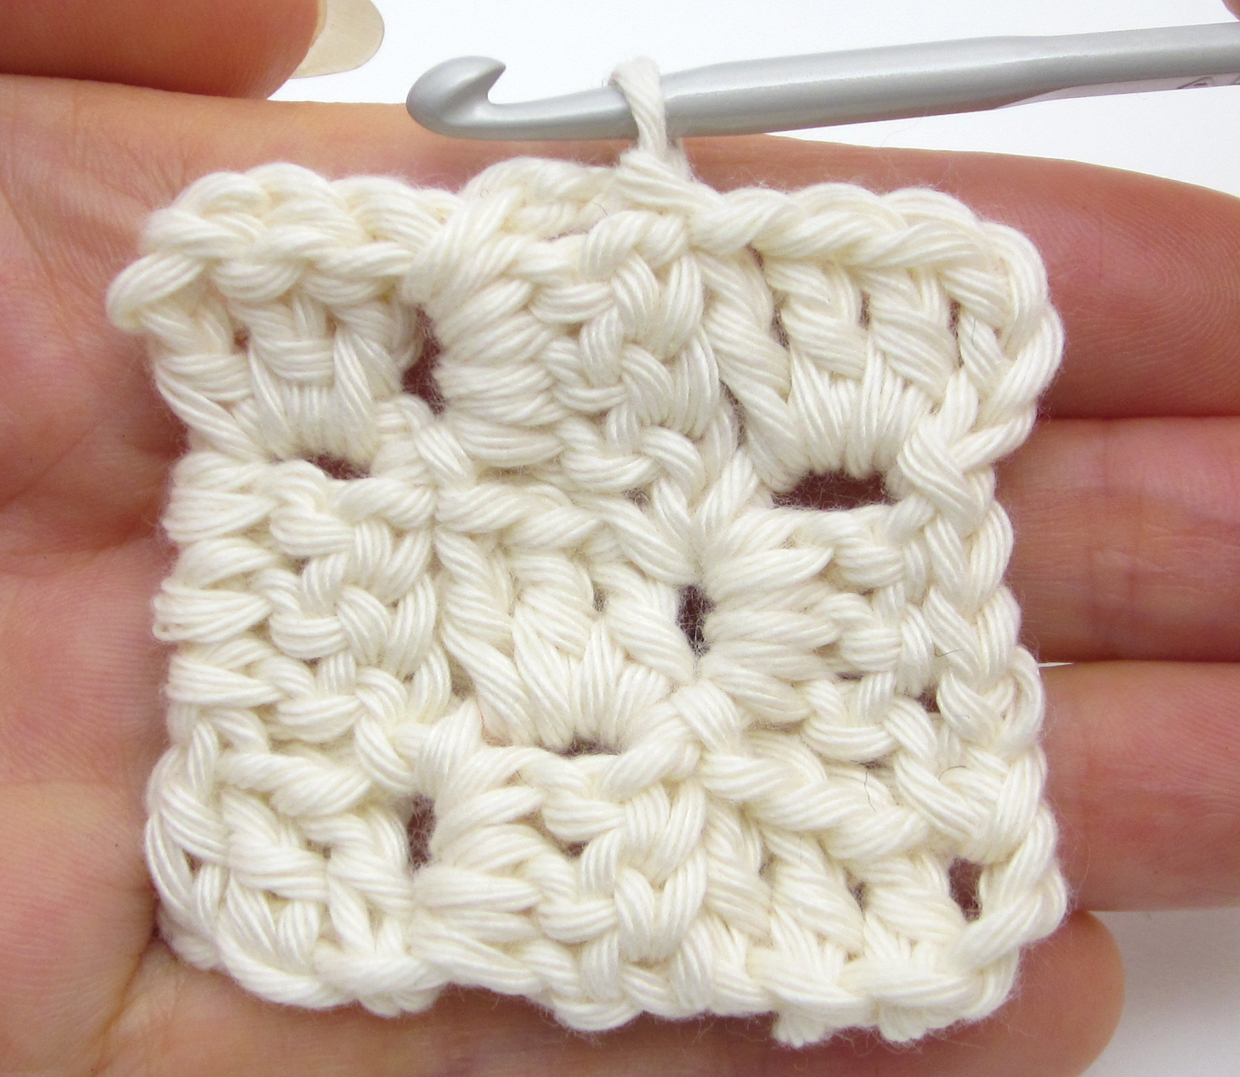
Step 6
To work any of these squares in a different colour, the process is the same as before, with the one exception being at the start of a decrease row. Here, you can simply fasten off the old yarn and join the new yarn in the bottom-right corner of the next square you want to work, so you don’t need to slip stitch up the side of the previous square as described in the previous steps.
