How to work in the htr 3rd loop?
Another nifty method is to use half treble stitches, working them into the third loop of the half treble on the row below.
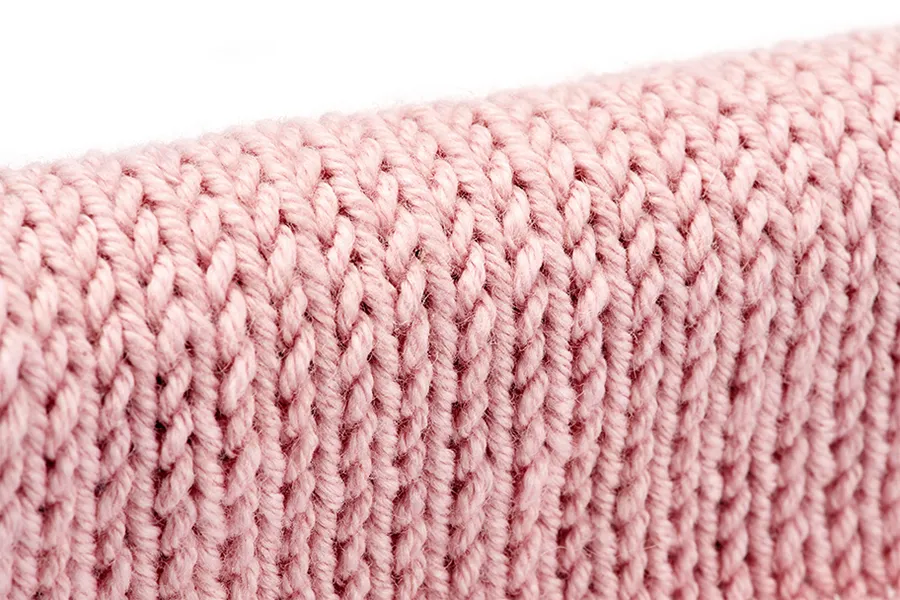
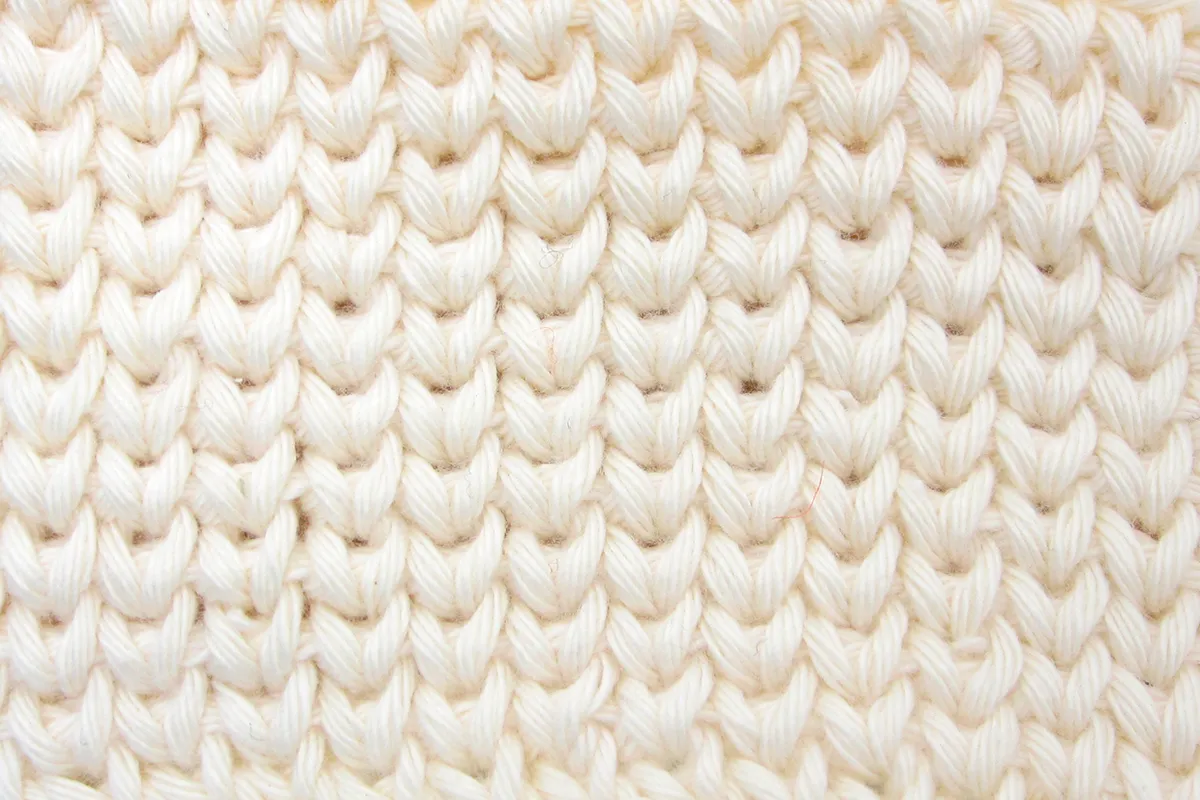
The result creates ‘v’ shapes that run horizontally across the fabric, which can be handy for edgings, although it only works in the round (in rows the ‘v’ shapes run in different directions).
With lighter weight yarns (such as DK, shown here), there’s a gap between the rows of ‘v’ shapes, which creates more of a knitted ‘rib’ look.
With chunkier yarns and a larger hook, the gap disappears and the ‘v’ shapes sit right next to each other, just like stocking stitch.
Either way, the fabric has a good amount of stretch and bounces back well.
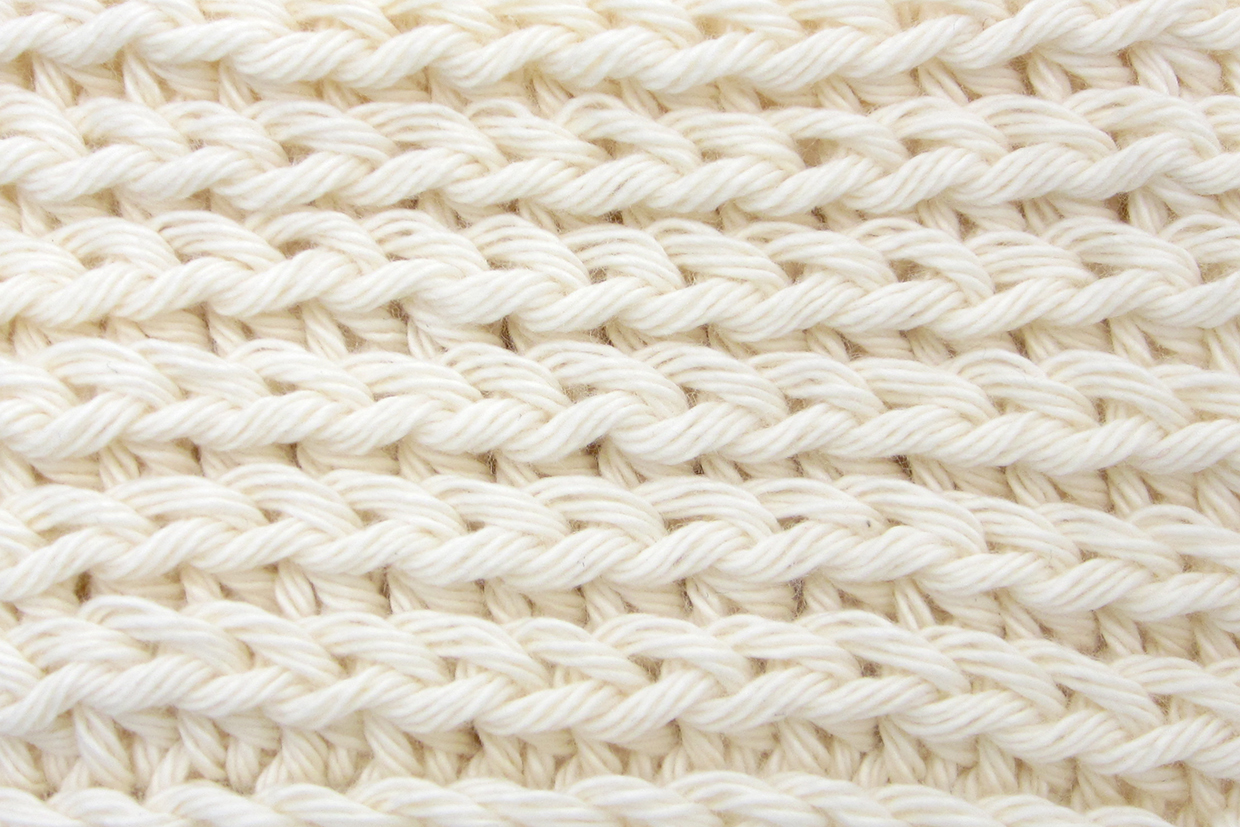
To practise this fabric in rounds, use any yarn and hook – we used a DK cotton yarn and a larger 5mm hook to make the ‘v’ shapes sit closer.
To start, make a foundation round of 30 htr. To do this, ch30 and slip stitch to the first chain, being careful not to twist it.
Now ch2 (counts as first htr throughout) and htr in each ch around, slip stitch to top of beg ch-2.
To work the next round and each subsequent round, start with the usual ch2 t-ch for htr. Now work a htr in the 3rd loop of each stitch as follows:
Step 1
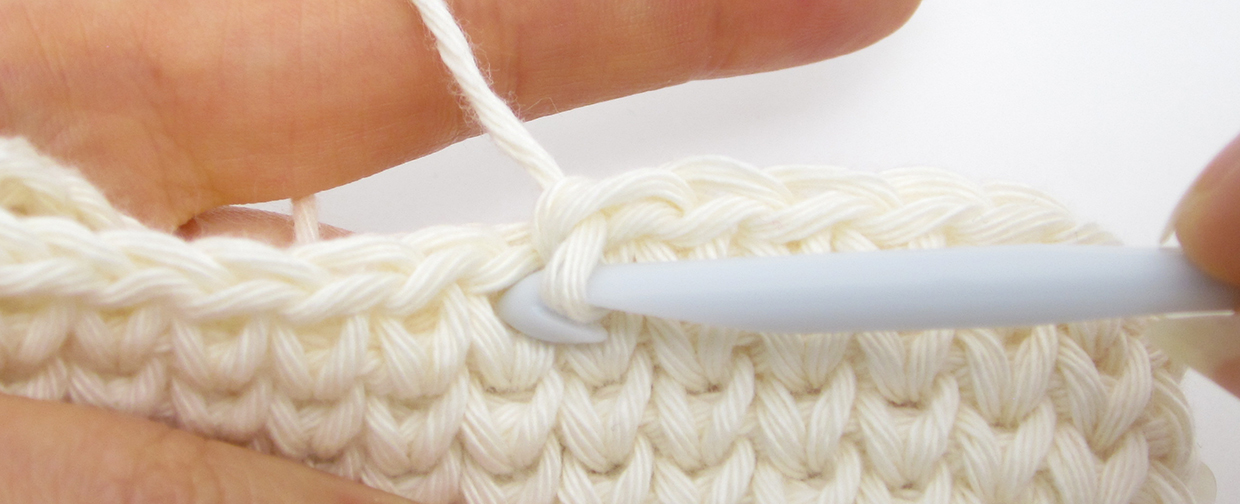
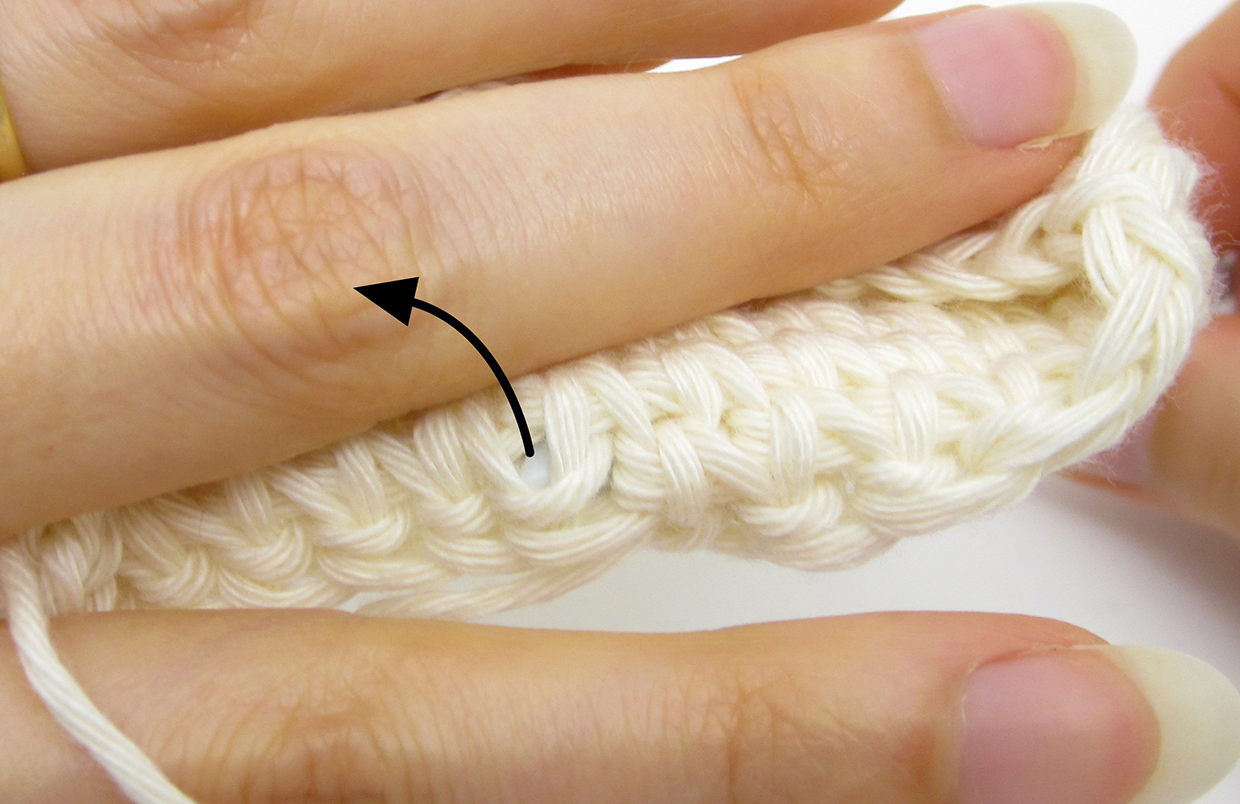
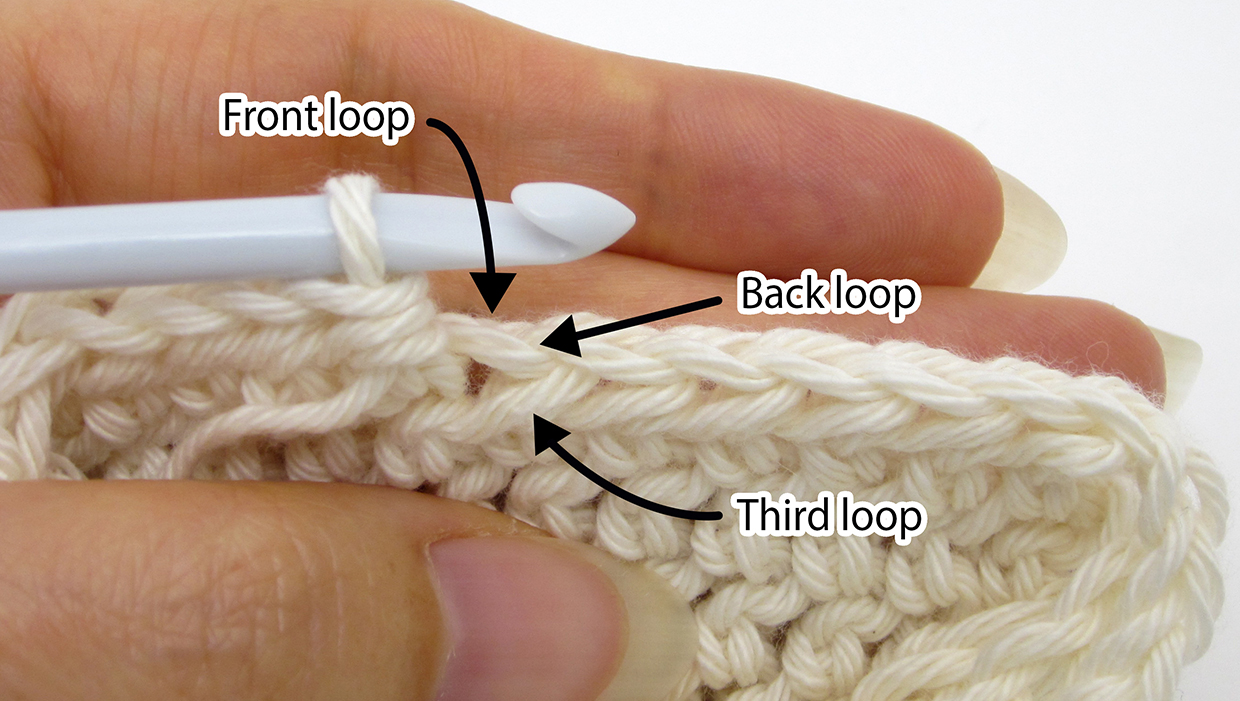
Locate the 3rd loop of the next stitch below. Turn the work so you can see the back of the fabric.
Locate the top two loops of the next stitch – these are the front and back loops. Just below the back loop is another horizontal strand of yarn – this is the 3rd loop.
Step 2
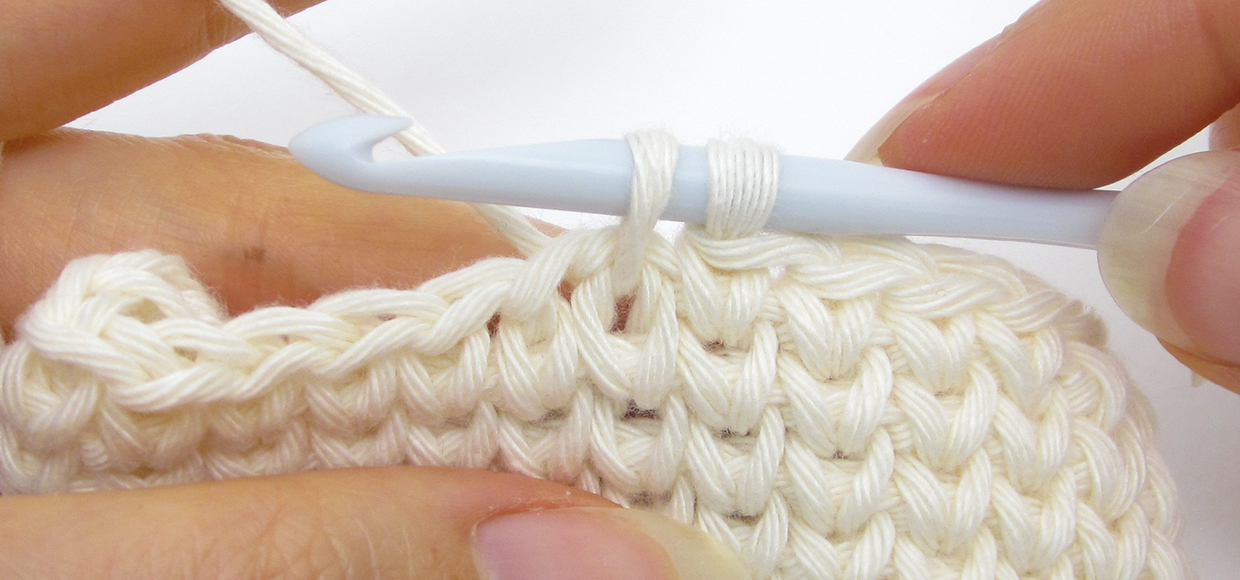
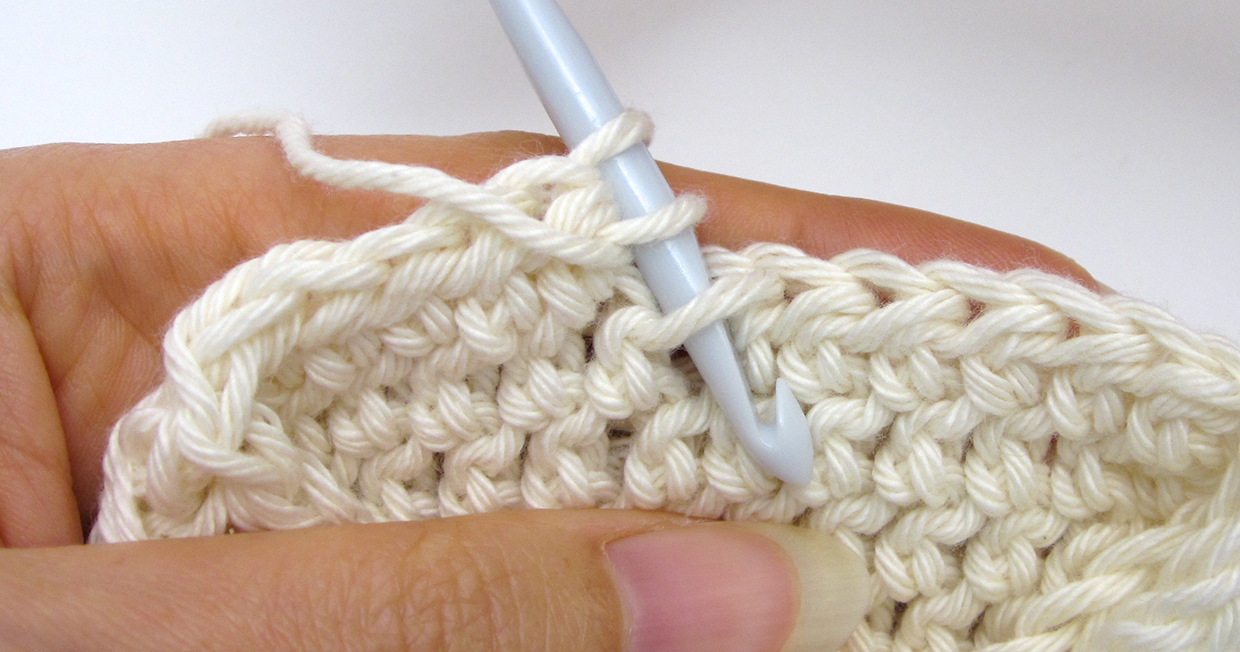
Start the htr stitch as usual with a yrh. Insert the hook into the 3rd loop of the next stitch below – the 3rd loop sits slightly behind the stitch, at the back of the work. From the back of the work, your hook should be inserted like this.
Step 3
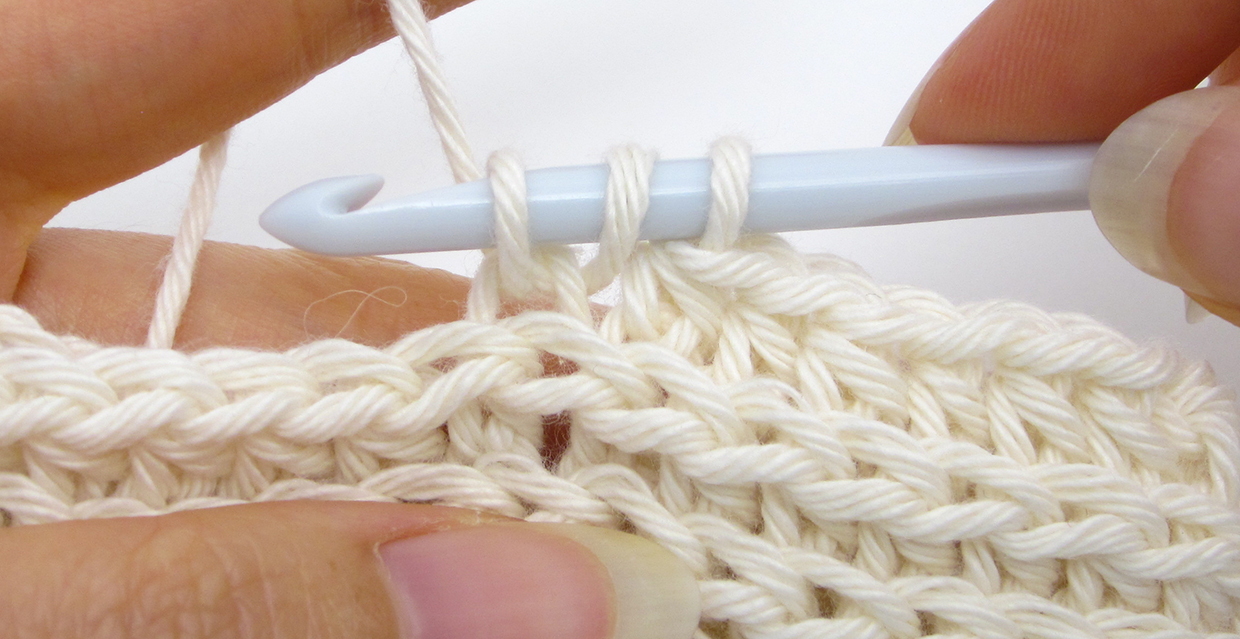
Complete the htr as usual by working yrh and pull up a loop.
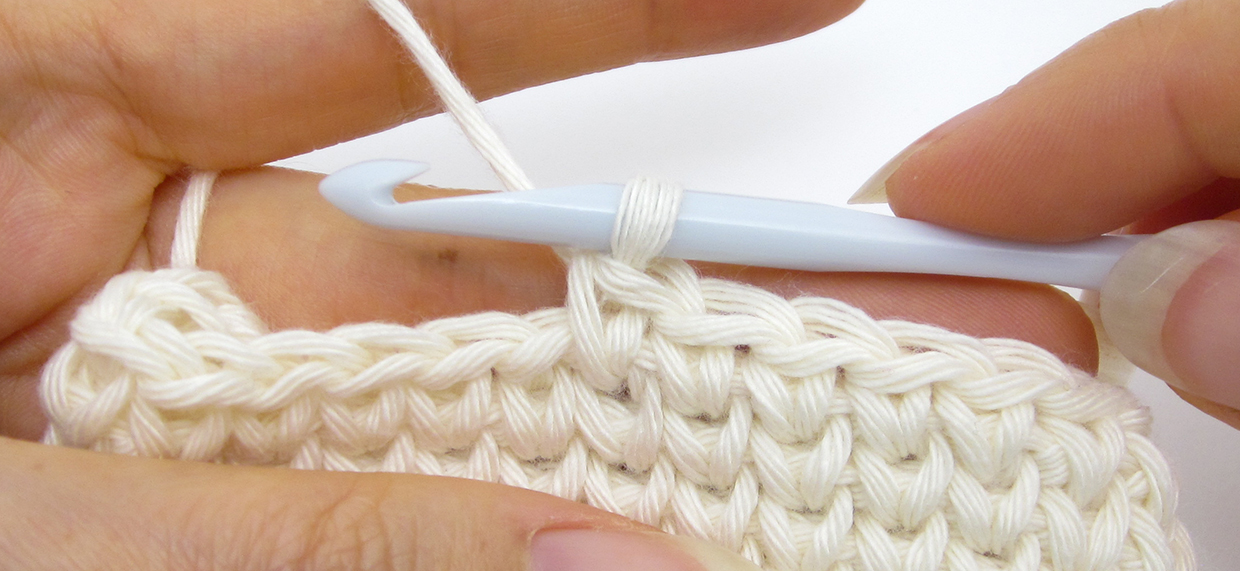
Step 4
Yrh and pull through all 3 loops on the hook to complete the htr in the 3rd loop. Repeat Steps 1-4 to work a htr in the 3rd loop of each stitch around. Slip stitch to the top of the beginning ch-2, as with standard htr.
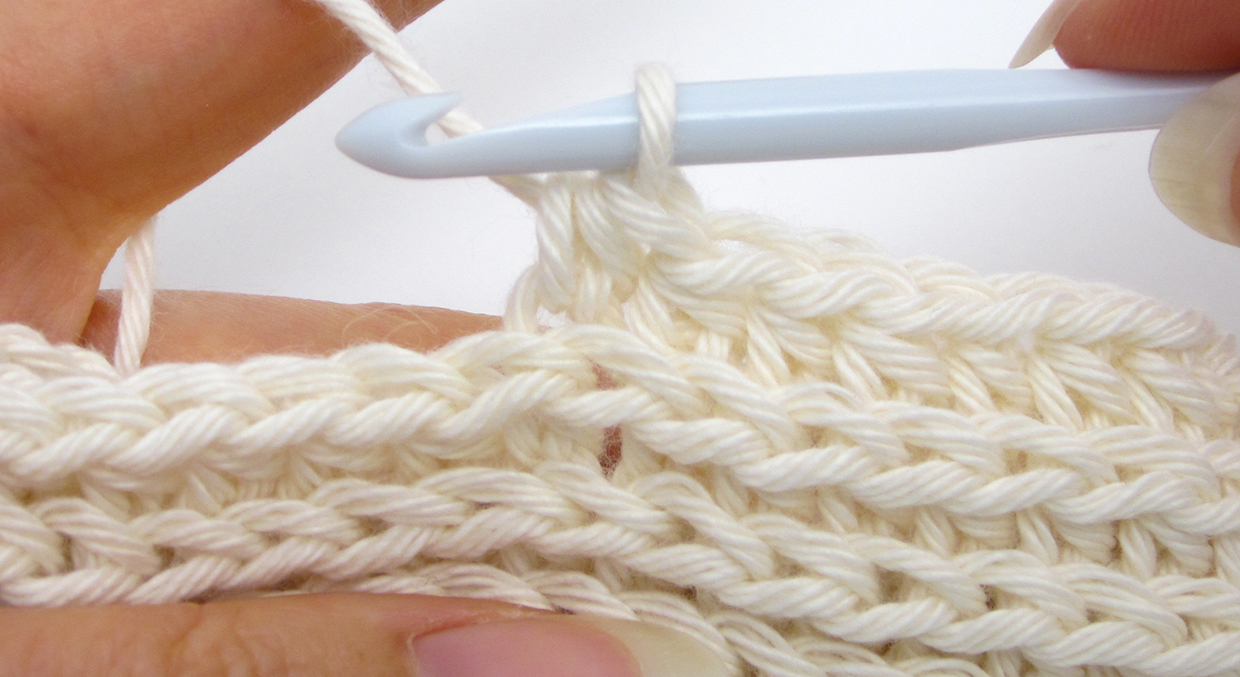
Continue by repeating this round. Turn the fabric on its side and you’ll see that with this yarn and hook, the fabric looks very similar to a knitted ‘rib’ stitch or stocking stitch, and it’s got a lovely stretch.
How to make a crochet puff knit fabric
If you’re a fan of chunky knitted fabrics, then you’ll probably like the puff stitch technique. With this one, you hook puff stitches to create the ‘v’ shapes of stocking stitch.
The result is a thick, chunky fabric that has a lovely drape. This method works in rows or rounds, with any yarn, so it’s flexible for all sorts of projects, but especially blankets.
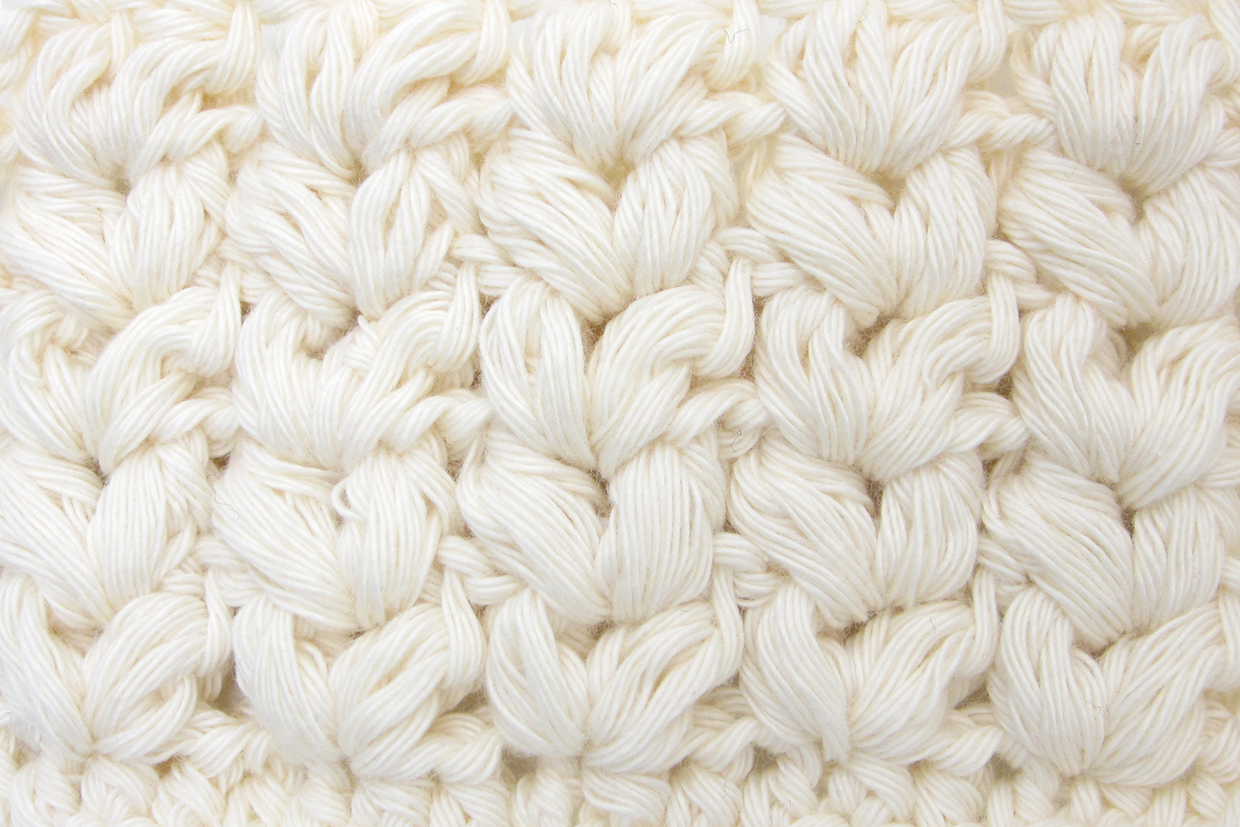
For this technique, it will help if you already know how to make chains, half trebles and puff stitches. Puff knit shapes are made up of two puff stitches worked into the same stitch or space.
This fabric effect works equally well in either rows or rounds, but here we’ll be showing you how to work it in rows. To practise, you can use any yarn with an appropriate size of hook – we used a DK cotton yarn and a 4mm hook.
For your practice piece, start by making a row of dc or htr stitches that’s a multiple of 3 plus 1. We made 16 htr stitches. To do this, ch17, htr in the 3rd ch from the hook (skipped ch-2 counts as first htr) and in each chain to the end, turn.
To work the first row of puff knit shapes, start with a ch3 t-ch (counts as first stitch) and skip the next stitch.
Step 1
Now start a puff stitch: yrh and insert hook in next stitch. (On the second row, you’ll insert the hook into the space between puff stitches, as shown.)
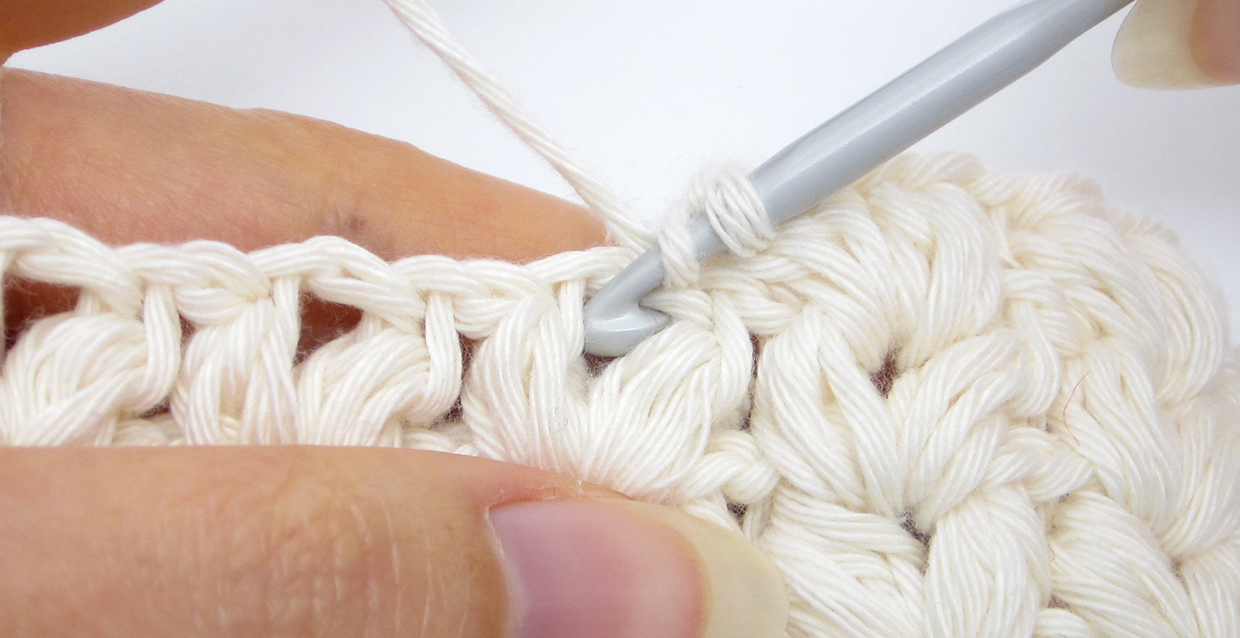
Step 2
Now yrh and pull up a loop, bringing it to the height of the ch3 t-ch so you have a fairly long strand.
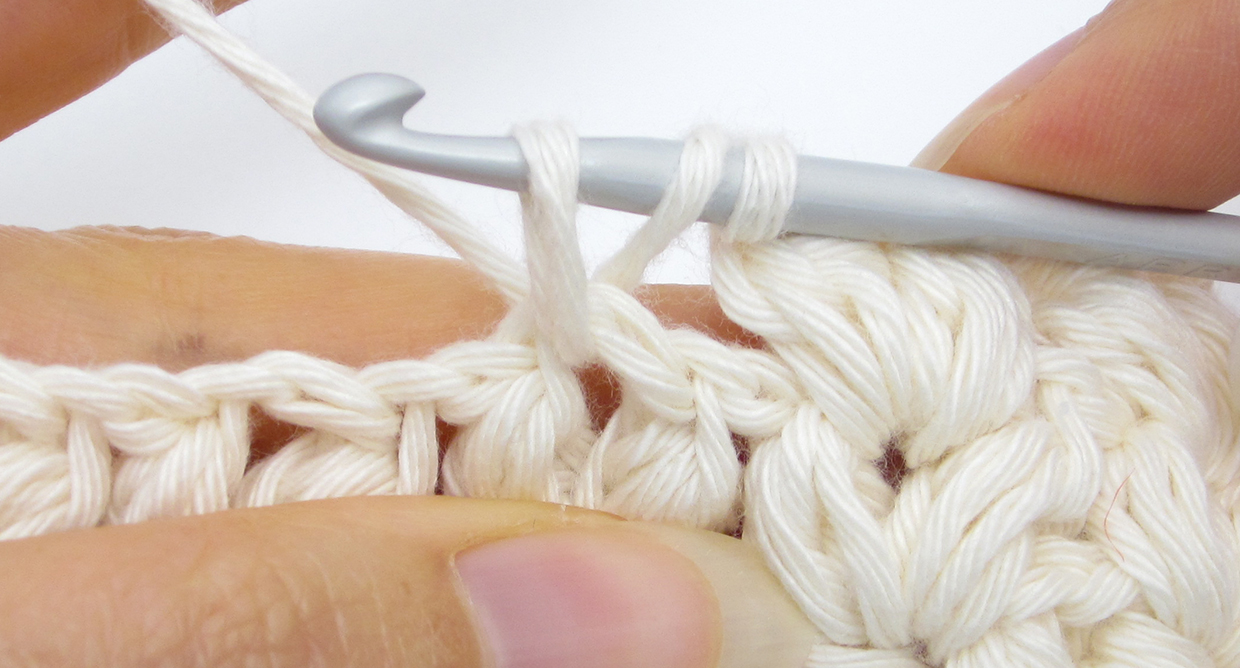
Step 3
Yrh and reinsert the hook in the same place, yrh and pull up a loop, elongating it as before.
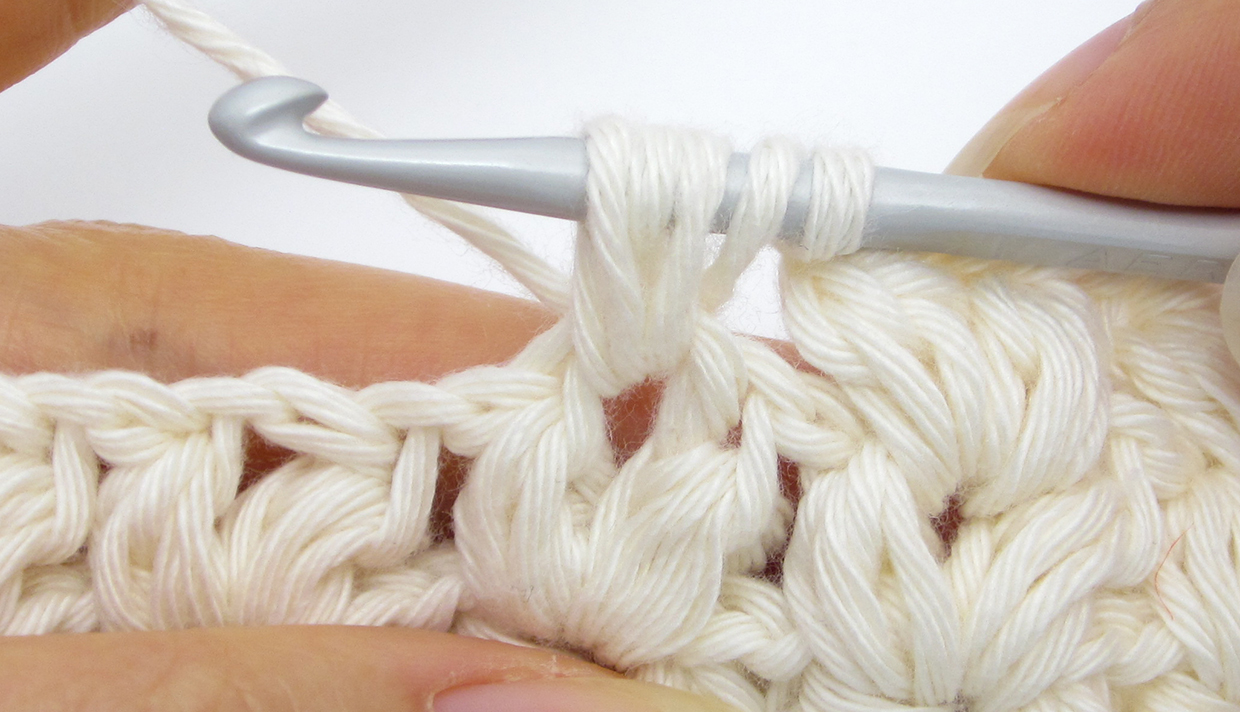
Step 4
Repeat Step 3 – you’ll have 7 loops on the hook.
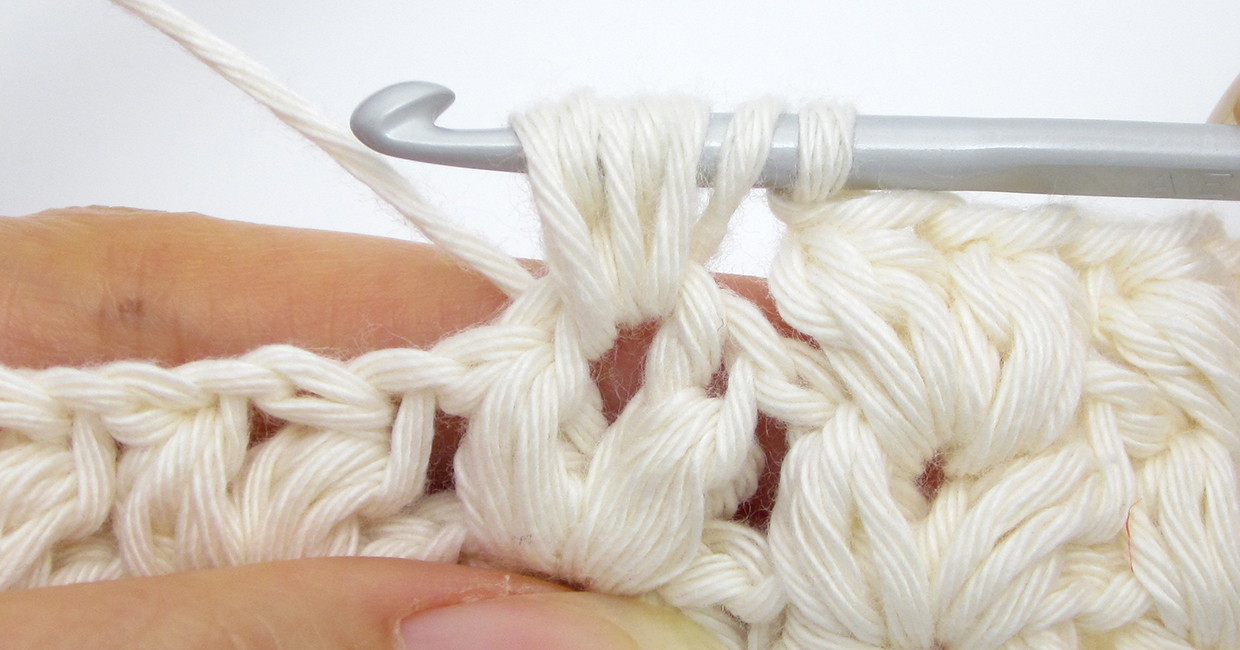
Step 5
Yrh and gently pull through all 7 loops.
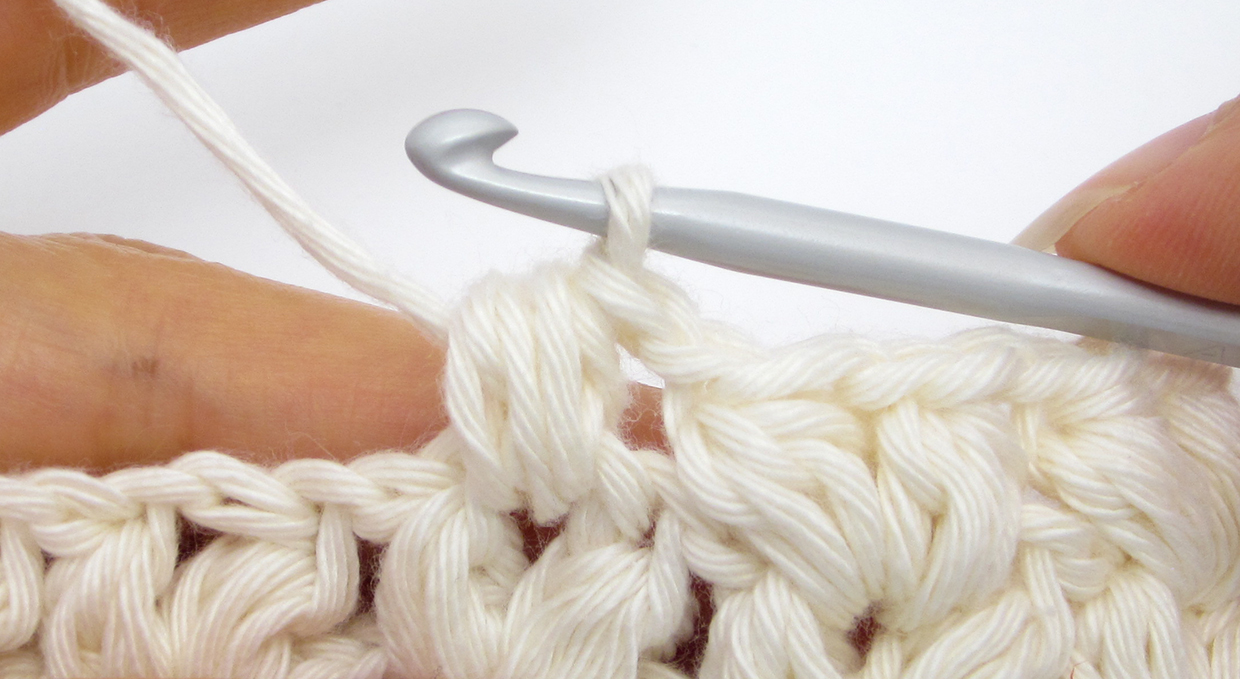
Step 6
Ch1 to complete your puff stitch – this is the first of a pair of puff stitches that make up the knit puff shape.
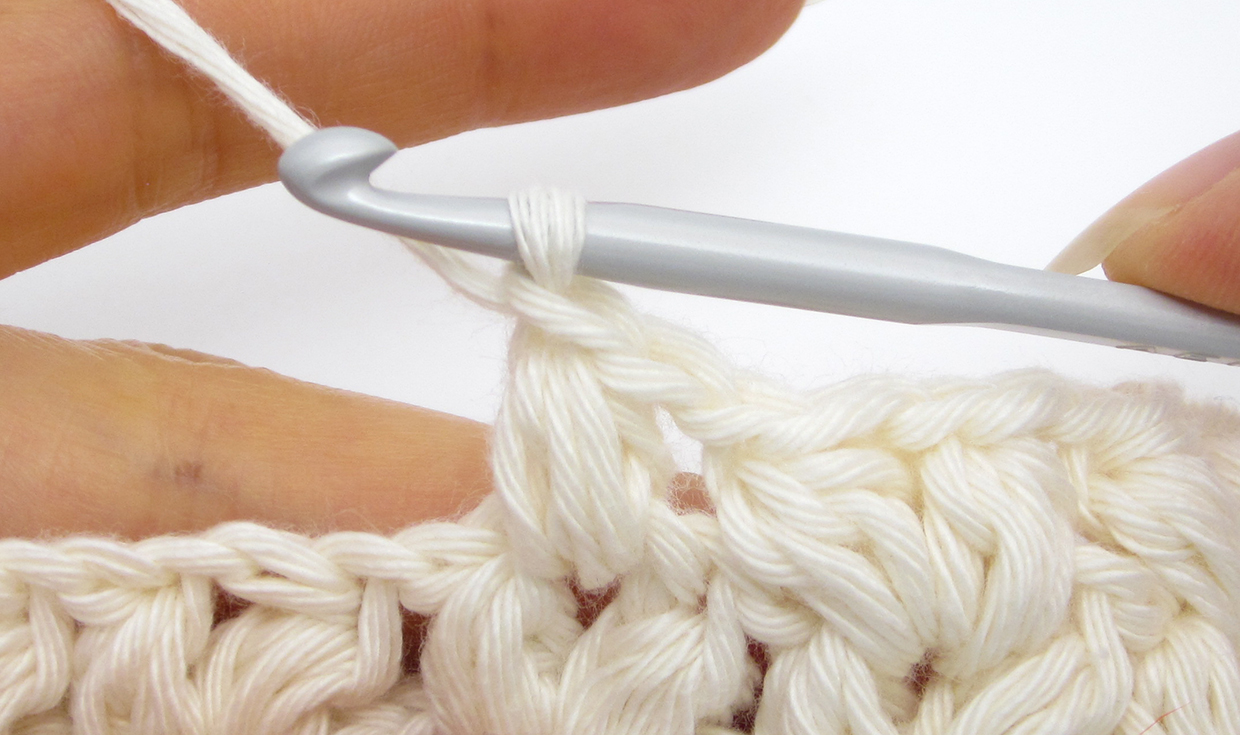
Step 7
Repeat Steps 1-6 to work a second puff stitch in the same place. You will now have a finished one knit puff shape, which is made up of two puff stitches.
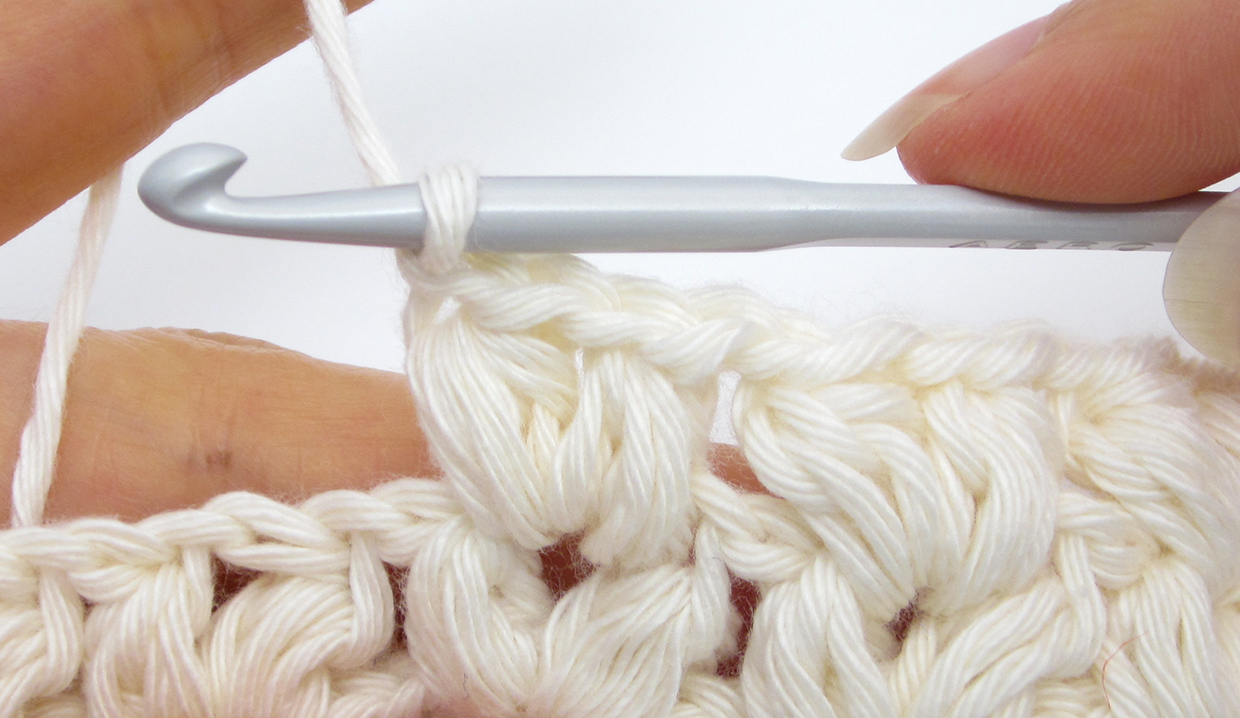
Step 8
To continue the first row, skip 2 stitches and repeat Steps 1-7 in the next stitch. Continue this process across the row until 2 stitches remain. Skip 1 stitch and treble in the last stitch, which will be the top of the turning chain on the row below.
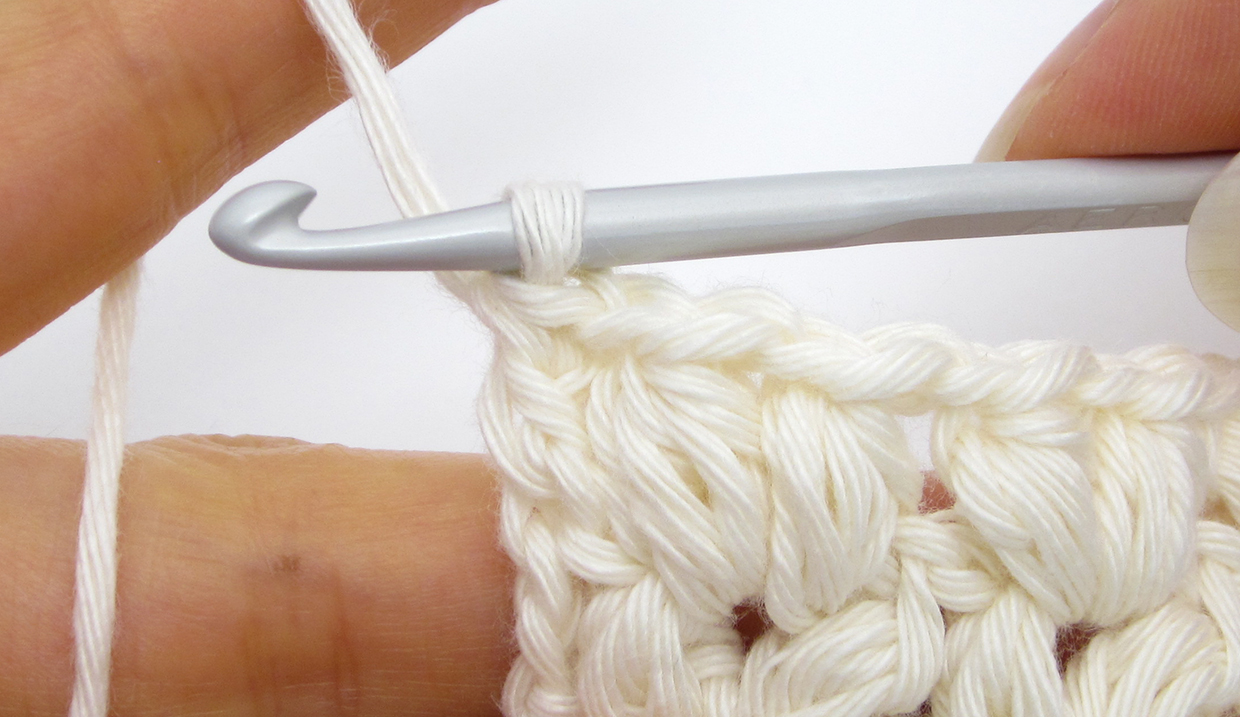
Step 9
To work the next row and all subsequent rows, ch3 (counts as first st) and work one knit puff shape into each knit puff shape, inserting the hook between the pair of puff stitches, as shown in Step 1. Treble in the last stitch (top of the t-ch).
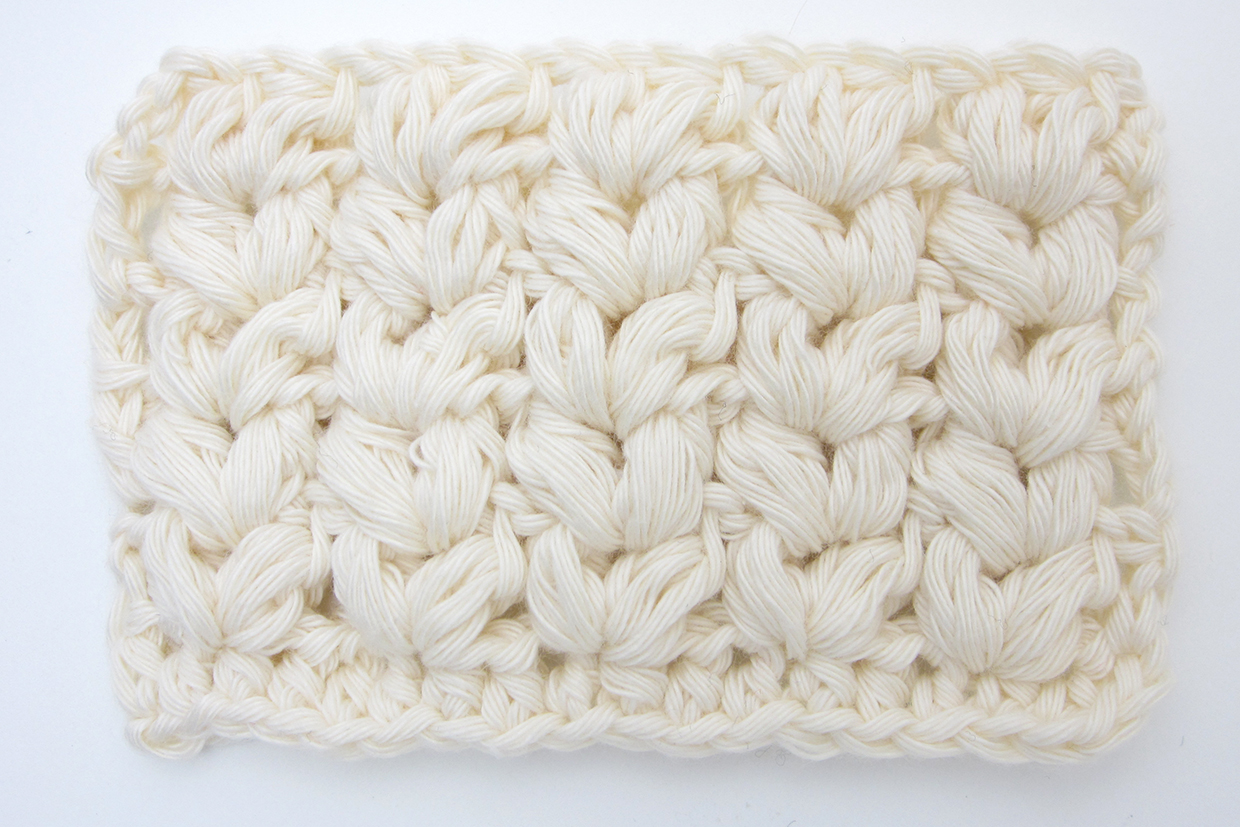
Repeat Step 9 until the fabric is the length desired, adding a final row of dc or htr if you wish.
You’ll see that this thick fabric has a lovely chunky quality, but a surprisingly good drape, making it ideal for blankets. You can use it in rows or rounds with any yarn weight.
Stick with those tricky stitches
The crochet knit stitches create fantastic fabrics, but they can prove to be quite difficult the first time you attempt them. Inserting your hook into new places and positions can be particularly confusing, so if you're struggling try inserting a yarn needle first to help you identify more clearly where you want to insert your hook. As always though, keep at it - practice makes perfect!
Become a crochet stitch expert
Go well beyond the basics and expand your stitch repertoire with our complete library of crochet stitches on Gathered.
