How to crochet crab stitch

How to crochet crab stitch

Need to put your crochet in reverse? Find out how with our crab stitch crochet tutorial!

6 issues of Simply Crochet magazine for £14.99|Save 72%

Published: August 10, 2021 at 8:00 am

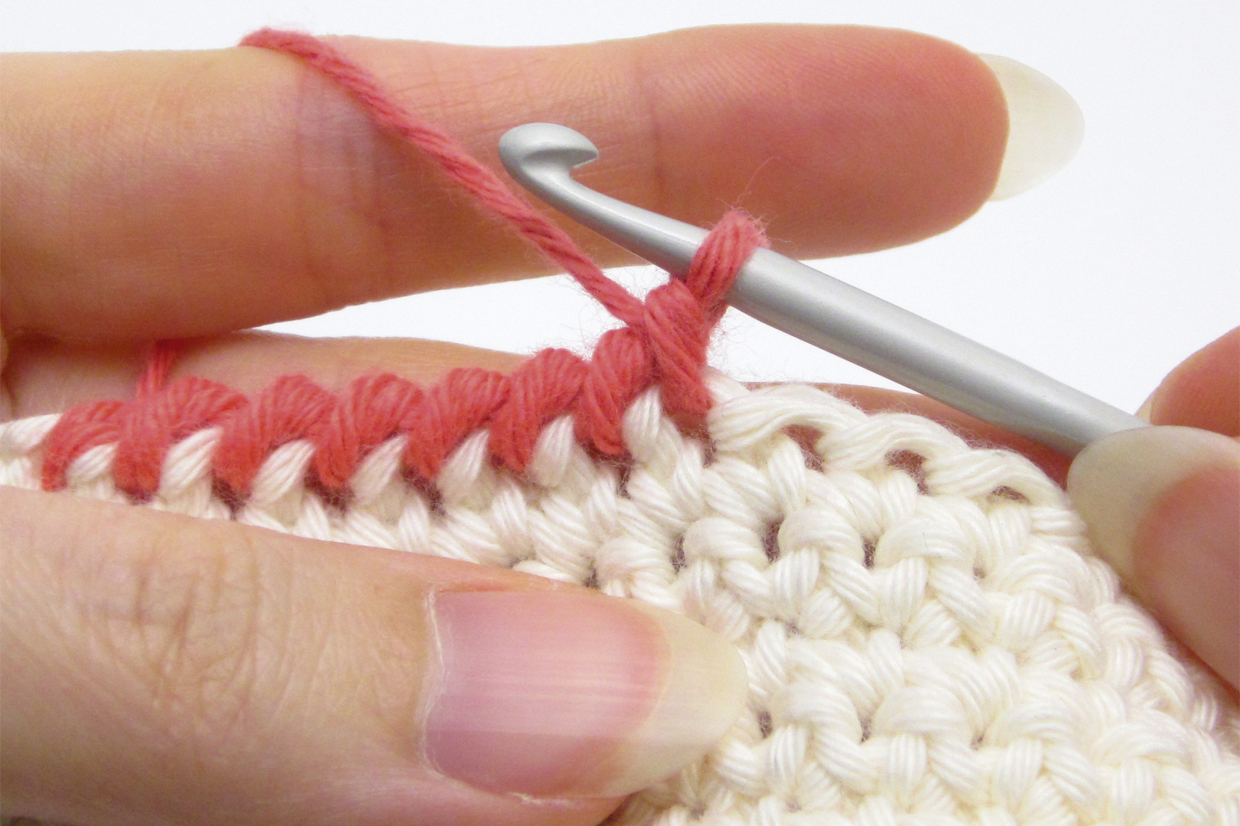
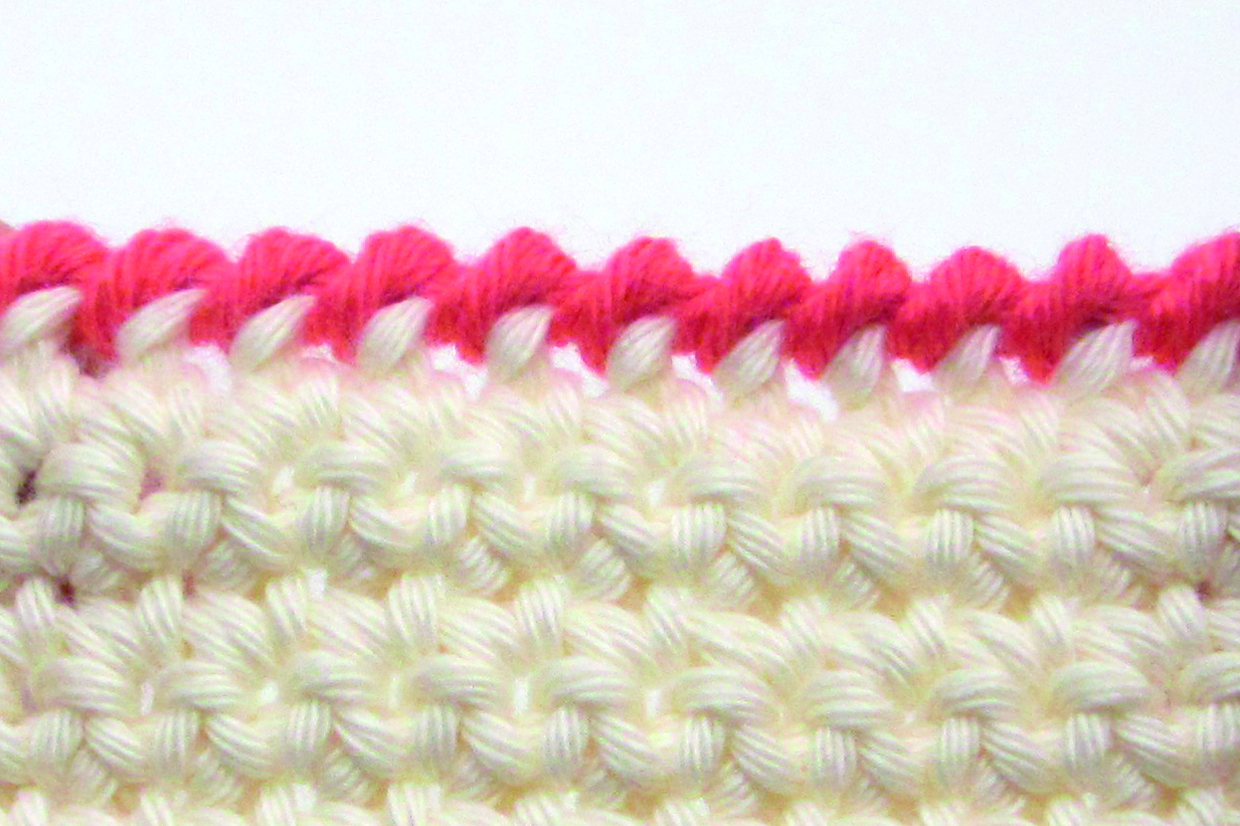
Crab stitch (which is also called reverse double crochet) is a simple edging that you can work with any number of stitches – it creates a diagonal zigzag effect. Crab stitches are just like normal dc stitches but worked in the opposite direction to usual - hence the alternative name of reverse double crochet. It's called crab stitch crochet as a reference to the way crabs can walk sideways (fun fact, most crabs can actually walk forwards and backwards, but the way their joints are positioned it's much faster for them to walk sideways)

We'll now show you how to crochet crab stitch, it will seem a bit tricky at first but keep practicing and we're sure you'll crack it! Please note that here at Gathered we use UK crochet terminology, so for those of you who use US terminology this would be called a reverse single crochet. You can find more information of all abbreviations we use and how to convert them into US terms in our abbreviations and conversions guide.

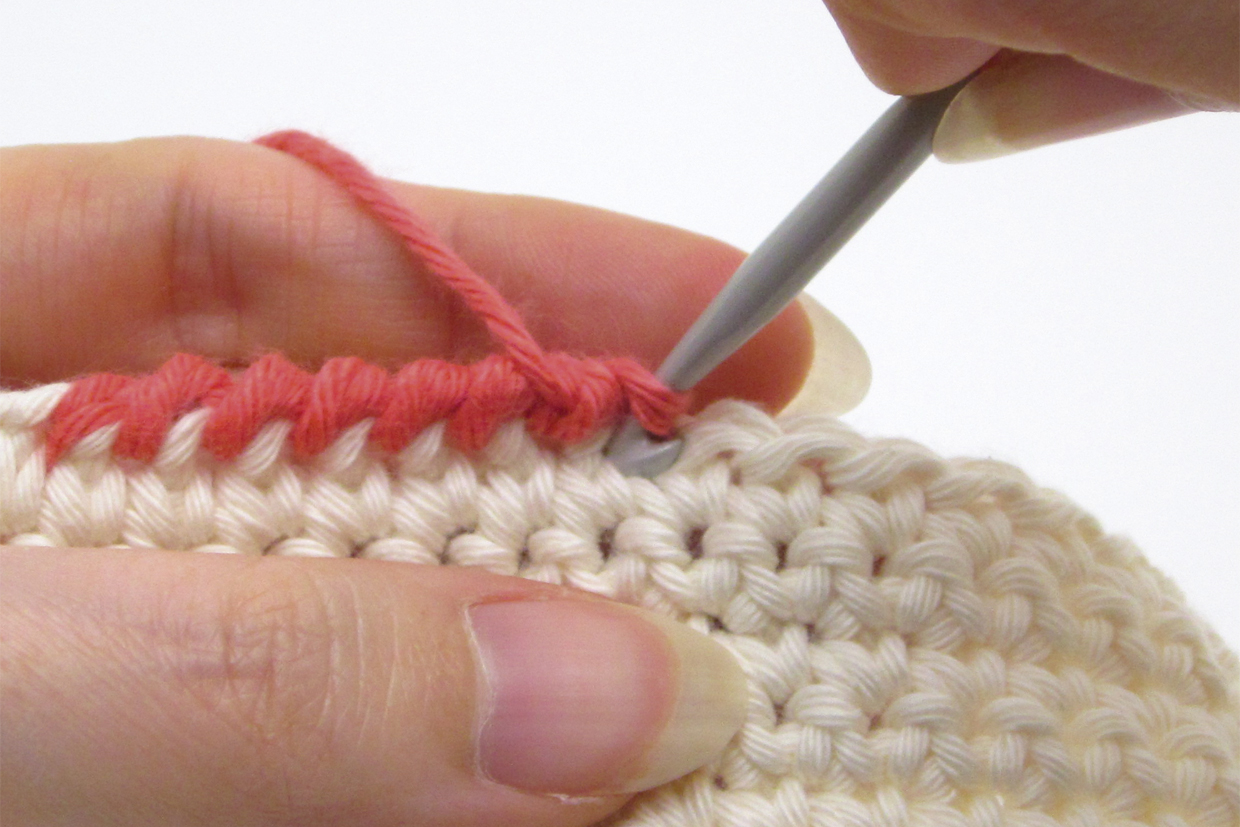
To follow this crab stitch crochet tutorial, start with a few rows of regular double crochet stitch, then at the end of a row DON'T TURN. Work from left to right as described below if you’re right-handed – if you’re left-handed, work from right to left instead and reverse the other directions. To start, work ch1 (the turning chain), but then don’t work into the st at base of chain (the first dc st). Instead, work as follows:

You will need:

  • Any yarn
  • Crochet hook

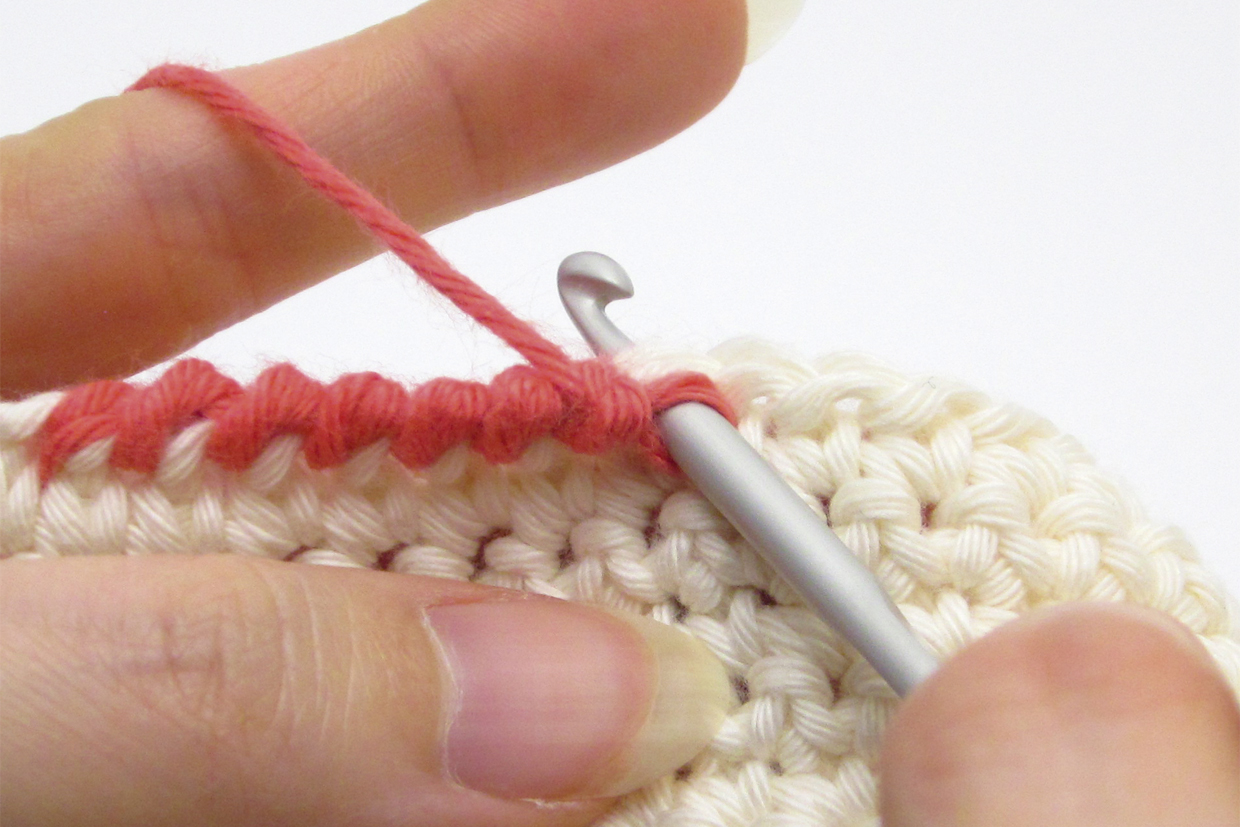
Step 1

To work your first crochet crab stitch, you need to insert your hook into the next stitch to the right. To do this, rotate your hook anti-clockwise so it’s pointing downwards, then insert into the stitch.

How to crochet crab stitch step 01

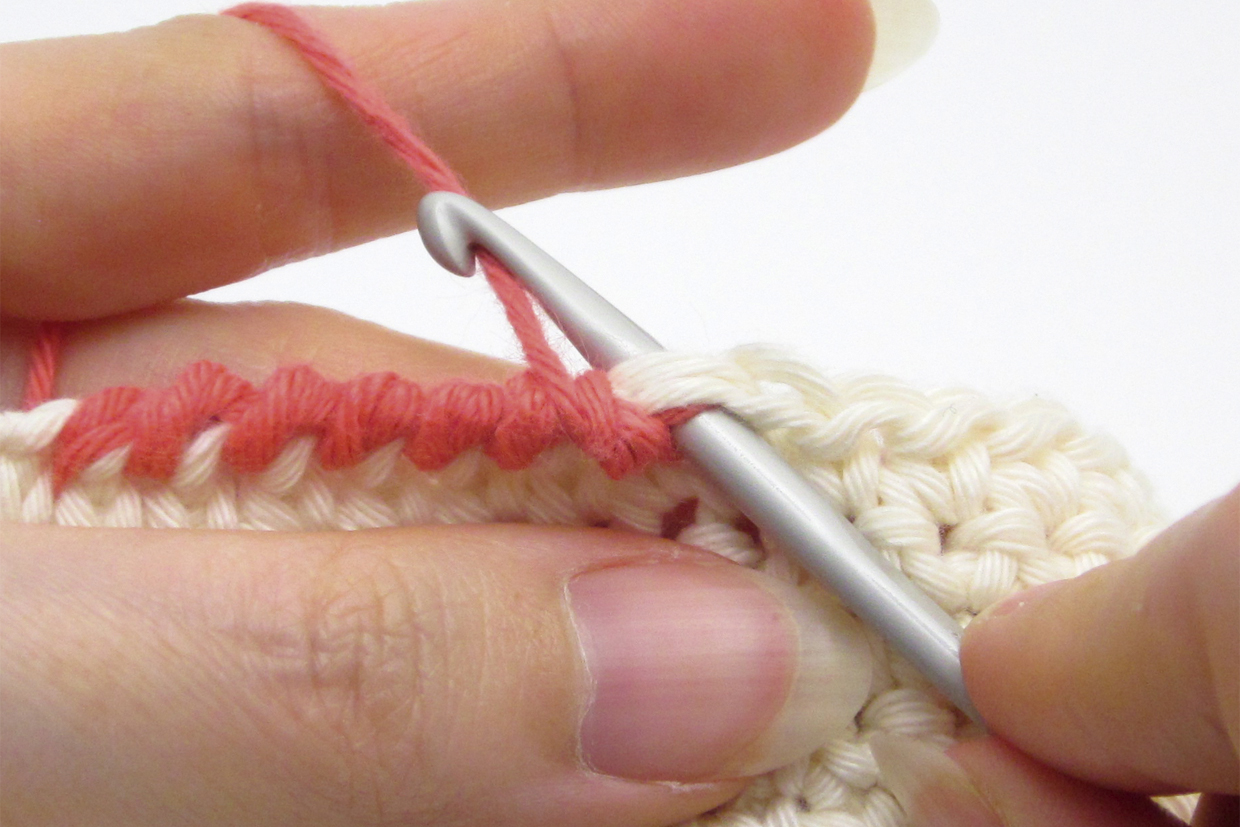
Step 2

Your work should look like this.

How to crochet crab stitch step 02

Step 3

Now work yrh…

How to crochet crab stitch step 03

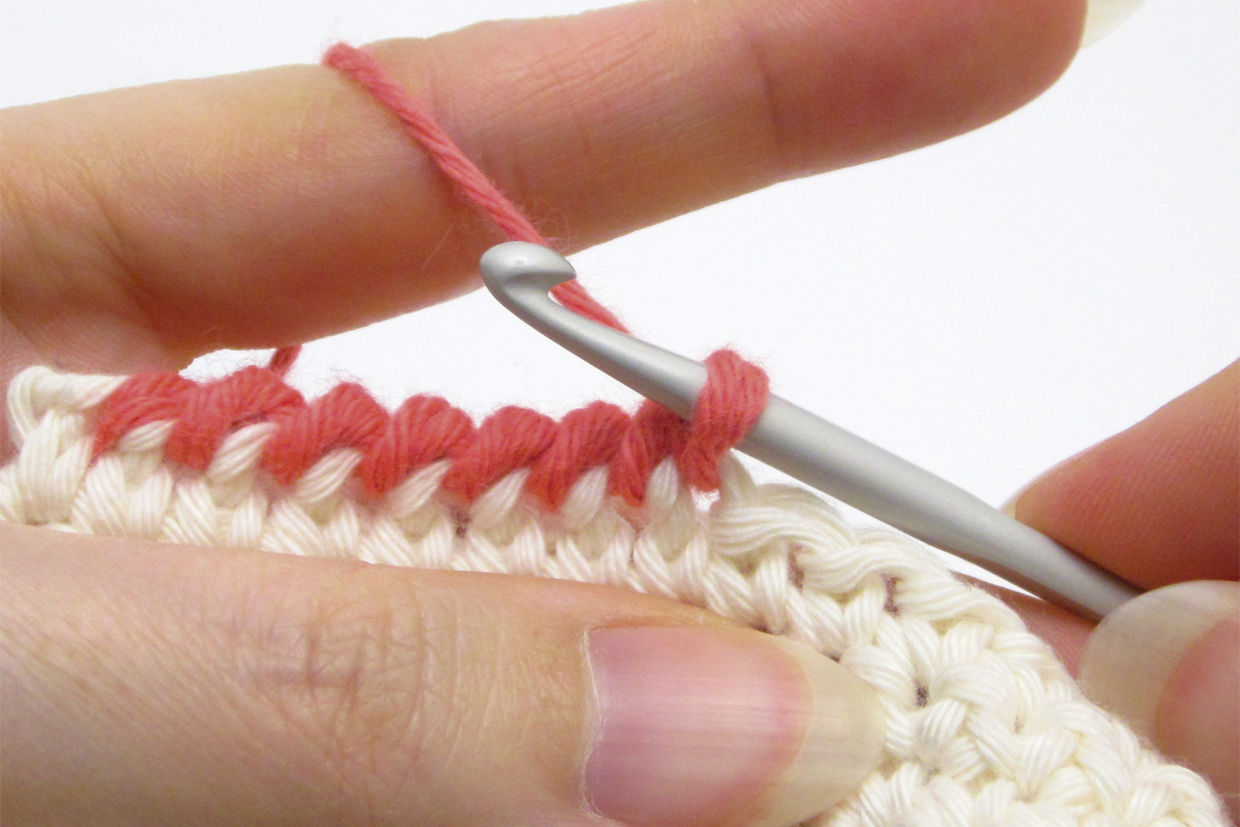
Step 4

…and pull a loop through the stitch. Make sure you keep the two loops on the hook at the right-hand side.

How to crochet crab stitch step 04

Step 5

Now you can finish the stitch as you would with a normal dc, by working yrh and pull through both loops on the hook.

How to crochet crab stitch step 05

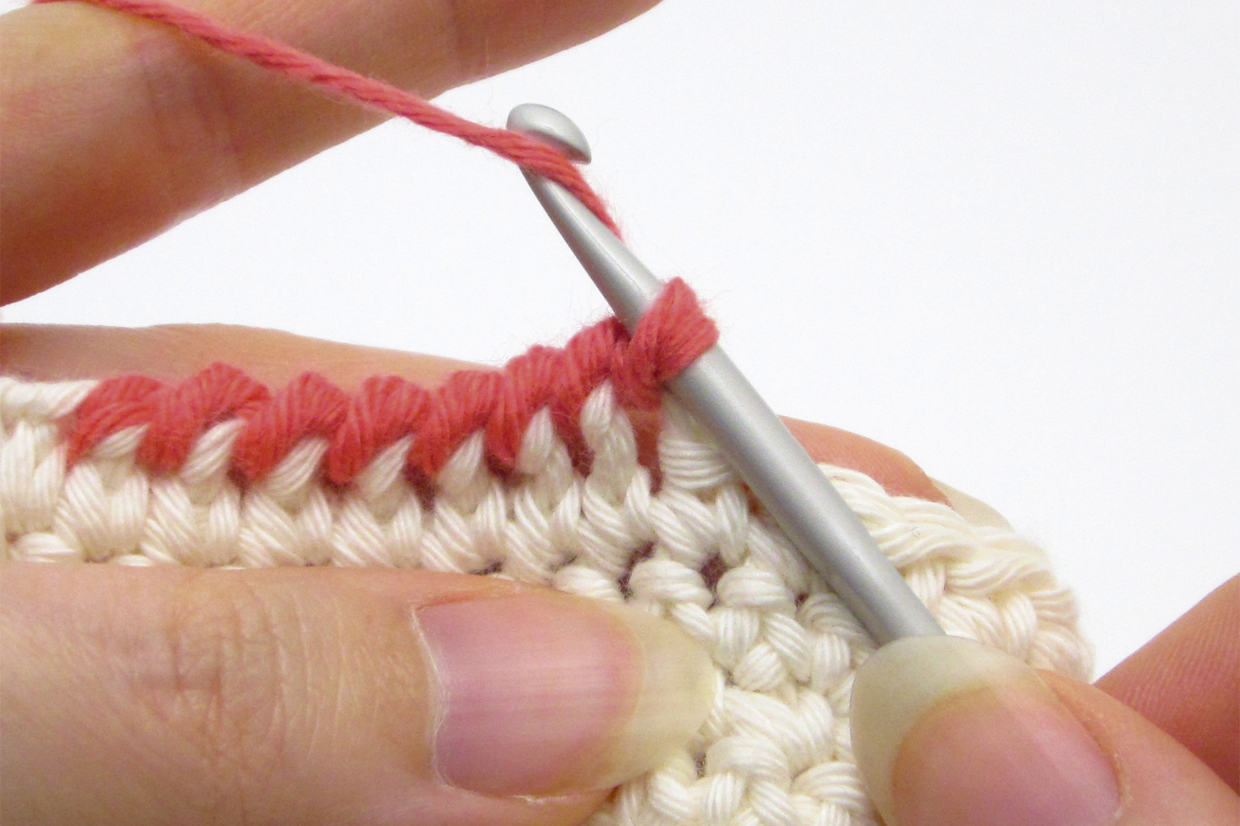
Step 6

Your finished crab stitch should look like this.

How to crochet crab stitch step 06

Step 7

Repeat Steps 1-6 to make more crab stitches along your edge.

How to crochet crab stitch step 07

And that’s all there is to it – it may seem a bit tricky to start off with, but as well as making a nice edging stitch it’s also a really useful technique to know, as it can be used in particularly technical designs to help with positioning. It’s another classic stitch that is helped by keeping your tension loose when you first try it, as the yarn can cross over itself making it really hard to pull your yarn through. Always make sure you keep the previous crab stitches to the left of the stitch you’re working (if you’re right handed, and vice versa).

If you enjoyed this crab stitch crochet tutorial, then make sure you check out these too!

We hope you’ve enjoyed this crab stitch crochet tutorial, don’t forget if you need any help with your crochet stitches you can always check out our crochet for beginners guide. And if you’re looking to treat yourself, check out our list of the best crochet hooks and the best crochet kits for beginners.