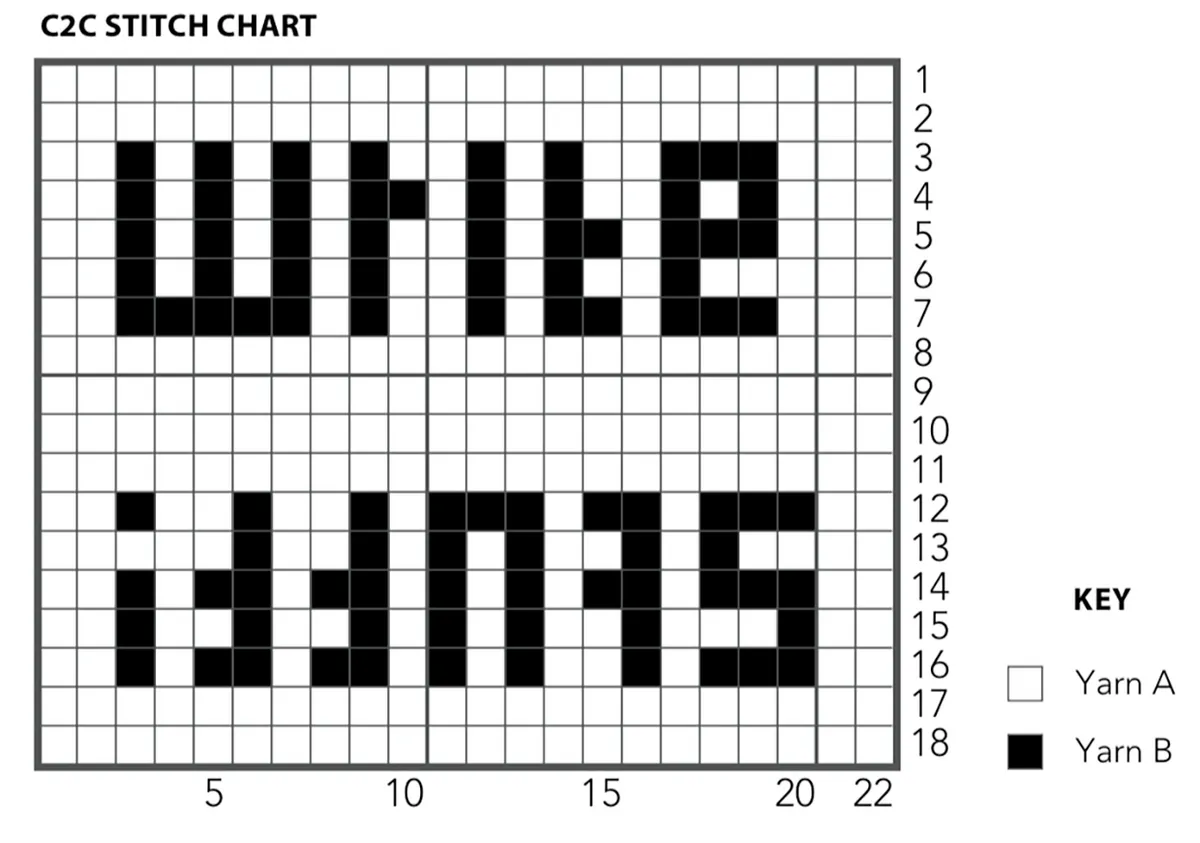
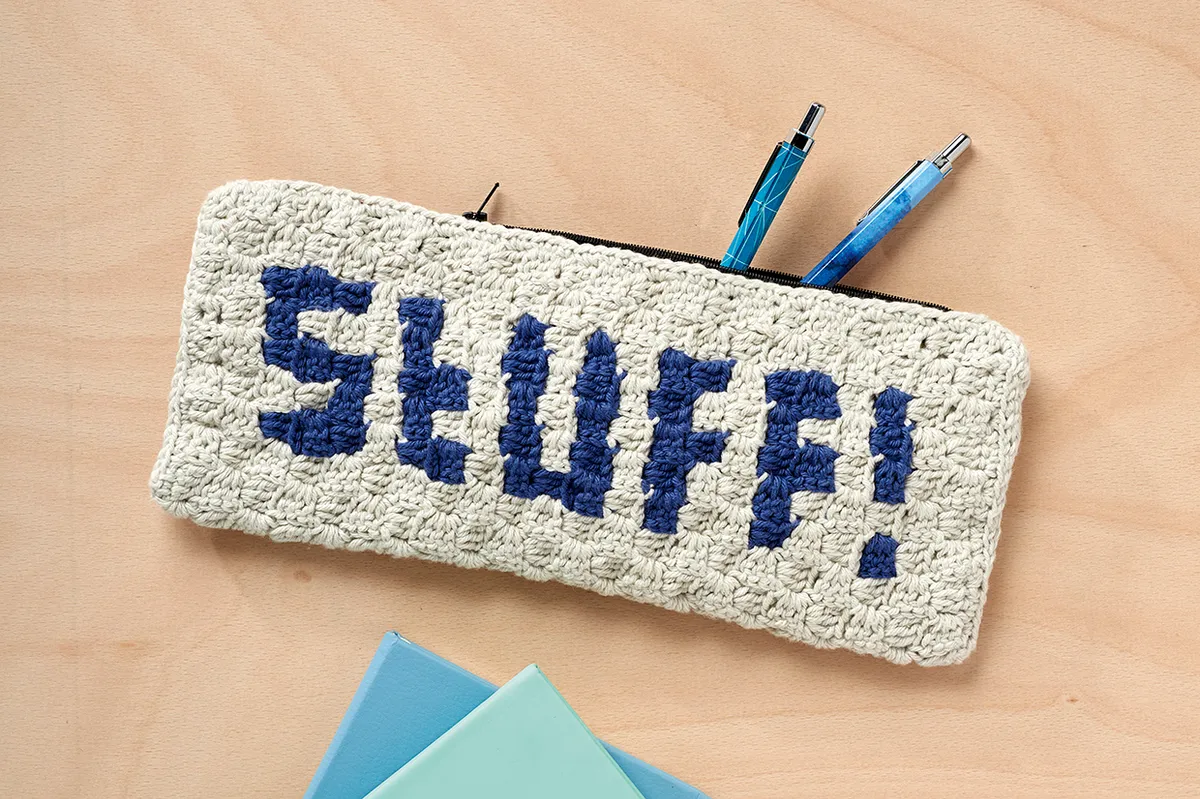
This free crochet pencil case pattern by Rosina Northcott is ideal for brightening up a busy desk, whether you keep your pens and pencils or crochet hooks inside. You can follow the chart to create the 'Write Stuff' design, but as this free pencil case crochet pattern is made in corner-to-corner (C2C) crochet it's easy to get creative, just grab some squared paper and make your own design - why not try customising it with a name or your own message! It also features some simple lining and a zip to keep your hooks and pencils secure in the case, but even if you don't have a sewing machine you can easily sew these in by hand!
If you're new to C2C crochet, check our our How to do corner-to-corner crochet tutorial.
You will need
Debbie Bliss Cotton DK (100% cotton, 50g/84m)
- 2 balls of Yarn A Silver Birch (083)
- 1 ball of Yarn B Navy (018)
Lining fabric, 32 x 28cm (12½x11in) (or at least 1.25cm (½in) bigger all round than the crochet piece)
Sewing needle and thread
Tension
9x9 blocks to measure 12 x 12cm (4¾ x 4¾in)
Measurements
Approximately 31 x 13cm (12¼ x 5in)
Abbreviations
You can find a full list of all abbreviations we use in our abbreviations and conversions guide. This free crochet pencil case pattern is written in UK terminology but you can easily convert it to US terms using the guide.
Notes
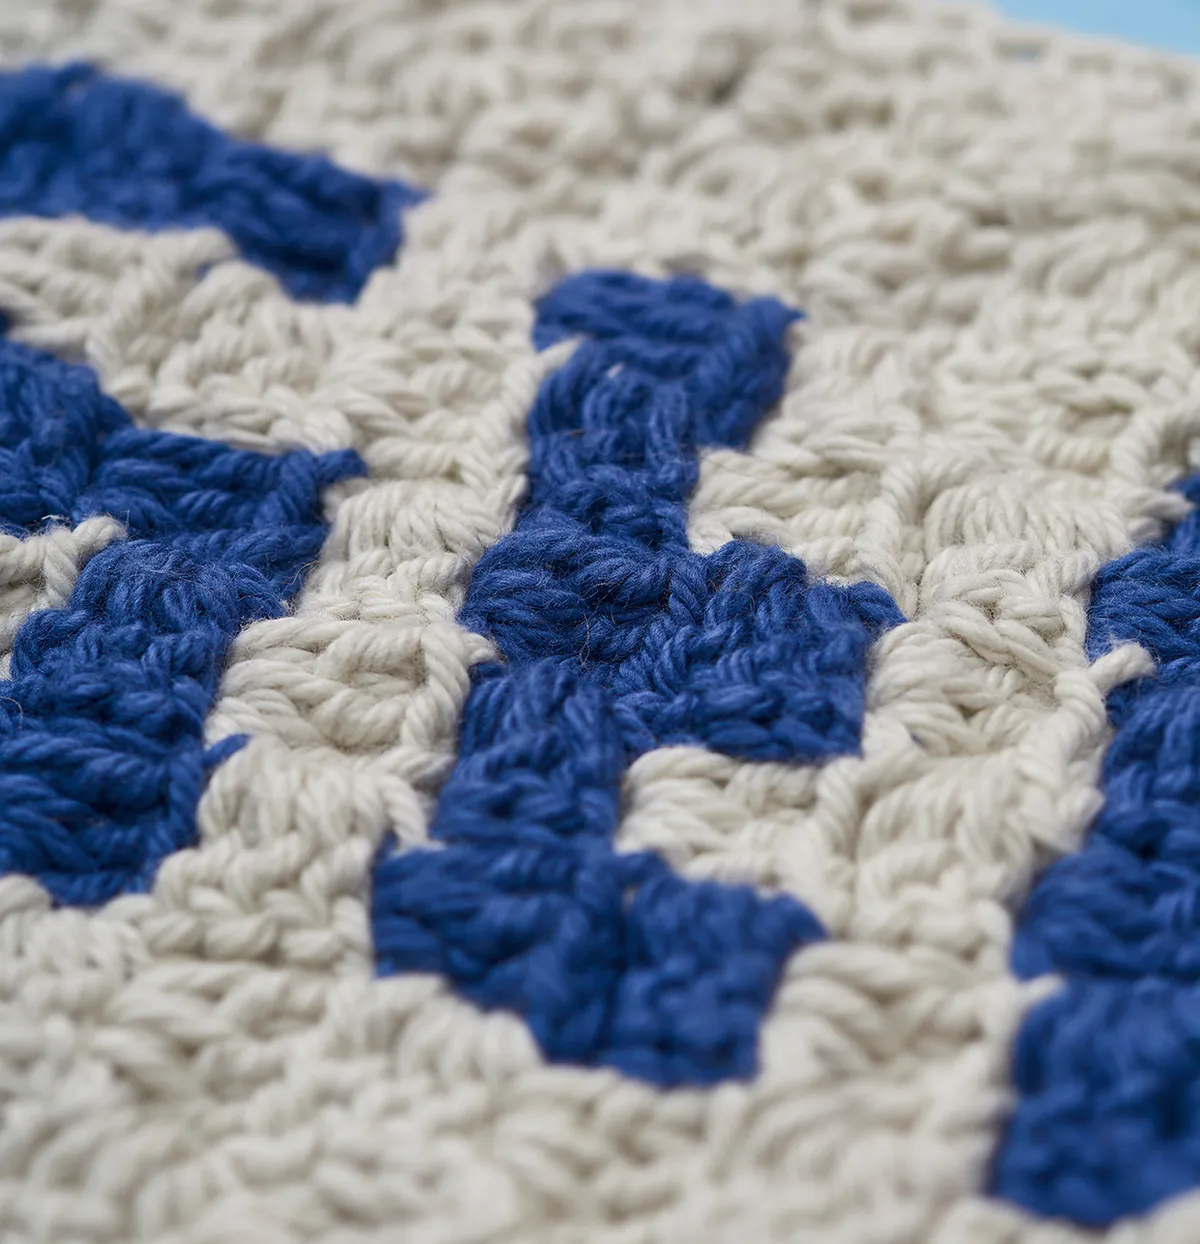
Carry yarn not in use on WS of work. Double-check that you’ve placed it on WS after each colour change. Change colour after a block has been made: use the slip stitch in the pattern to pull through the next colour to begin next block. This pattern is worked using a ‘corner-to- corner’ (C2C) construction in blocks of (ch3, 3tr) in same sp. Each ‘row’ is made up of a diagonal row of blocks, starting with 1 block in the top left corner, increasing to 2 blocks in the next row, 3 blocks in the next, and so on. When the straight edge of the left-hand side reaches the width required, the construction changes slightly to work 1 fewer block on each row at the bottom edge of the blanket while continuing to increase 1 block per row along the top edge until the top edge is the required length. You then work 1 fewer block on each row, working back towards the bottom right corner. You will need to both turn and rotate the work at the beginning of each new row of blocks.
Free crochet pencil case pattern
Using Yarn A, ch6.
Row 1 (RS) Tr in fourth ch from hook, tr in each of next 2 ch (1 block made), turn. [1 C2C block]
Row 2 Ch6, tr in fourth ch from hook, tr in each of next 2 ch (1 block made), skip 3 tr of next block to left of hook and ss into sp before ch-3, (the 2 blocks are now touching, with the first block of Row 2 sitting on top of the block from Row 1), (ch3, 3tr) in same sp (2nd block made), turn. [2 C2C blocks]
Row 3 Ch6, tr in fourth ch from hook, tr in each of next 2 ch (1 block made), *skip 3 tr of next block to left of hook and ss into sp before ch-3 (the first block of Row 3 is now sitting on top of the last block from Row 2), (ch3, 3tr) in same sp; rep from * once more (3rd block made), turn. [3 C2C blocks]
Row 4-18 Rep Row 3, changing colour to Yarn B as per chart (see notes). [18 C2C blocks]
Straight rows
Row 19 Ss in each of next 3 tr and ss into sp before ch-3, *(ch3, 3tr) in same space, skip 3 tr of next block and ss into sp before ch-3; rep from * to end and work (ch3, 3tr) in last block, turn. [18 C2C blocks maintained]
Row 20 As Row 3, but ending with ss into the last ch-3 sp (i.e. do not make the last block), turn.
Rows 21-22 Rep Rows 19-20.
Decrease rows
Row 23 Ss in each of next 3 tr and ss into sp before ch-3, *(ch3, 3tr) in same sp, skip 3 tr of next block and ss into sp before ch-3; rep from * to last block, skip 3 tr of last block and ss into space before ch-3 (do not make another block), turn. [17 C2C blocks]
Repeat Row 23 until 1 block remains.
Looking for more fab pencil case patterns? Why not get crafty and try some of these!
Edging
Crochet all around the edge of the piece with dc, working 2dc in the horizontal trebles and 1dc in each of the 3 vertical stitches of each block.
Fasten off and weave in ends.
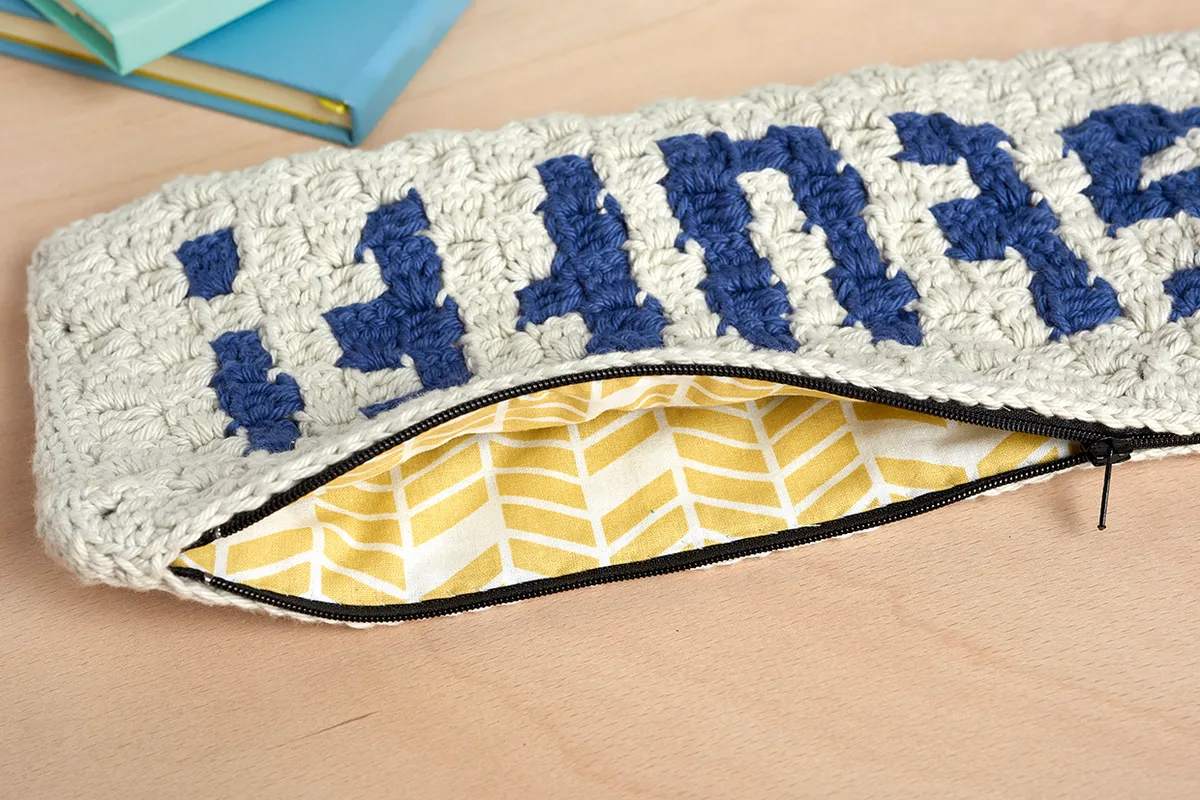
To finish
Fold piece in half with WS together. With Yarn A, sew the two short sides together through the inner loops of the edging dc stitches and at each end of the open edge, continue to sew around the corner, 2cm (¾in) across the top of the purse, leaving the remaining seam open. With the zip open and RS up, pin the zip to the top of the purse edges. Using a needle and thread, hand stitch the zip to the purse (use a thread to match the yarn so stitches are not visible).
Fold the fabric lining in half, RS together. Machine stitch (or hand stitch) down both sides with a 1.25cm (½in) seam allowance. Press the side seams and press down a 1.25cm (½in) seam around the top. Tuck the lining inside the purse, pin and neatly hand stitch to the inside of the zip, leaving a small space between the fabric and the zip teeth.
We hope you've enjoyed this free pencil case crochet pattern, don't forget if you need any help with your crochet stitches you can always check out our crochet for beginners guide. And if you're looking for some new hooks to keep in your new case, check out our list of the best crochet hooks.
