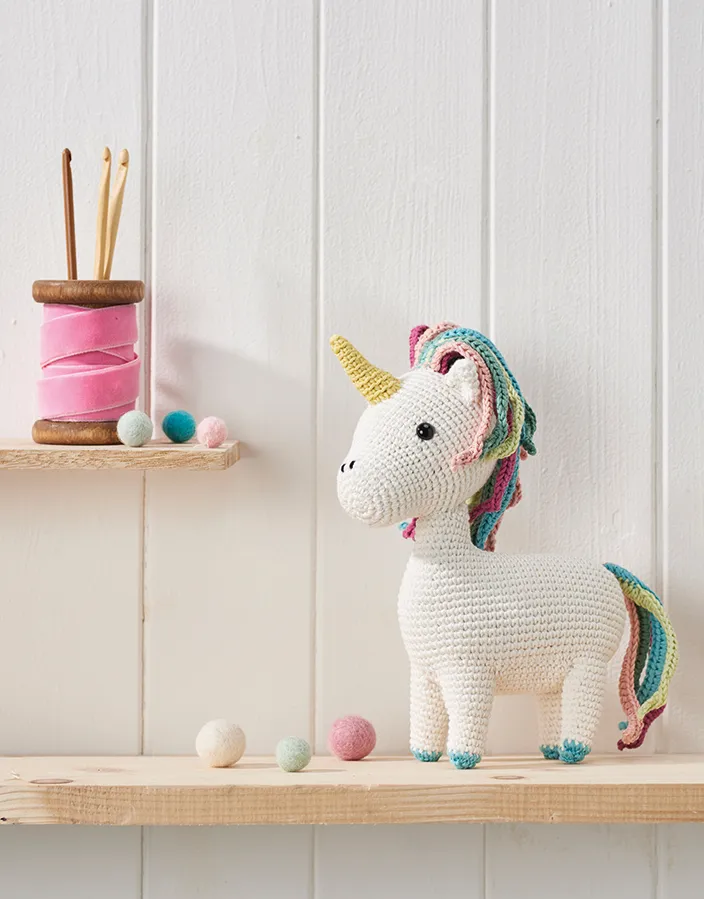
If Team Mollie were recruiting an animal mascot, this amigurumi unicorn would be pretty high on our list of contenders. With rainbow hair and golden horn, Ilaria Caliri’s little pony looks like it’s stepped straight from the pages of a fairy tale. Hook one up today and win the heart of a little ‘un – or fulfil your own childhood dreams. Amigurumi is the cutest craft on the block but don't worry if you've never done it before. We have a how to crochet amigurumi tutorial alongside a crochet guide for beginners. If you enjoy making this project then make sure you see our amigurumi crochet animals round up which includes everything from our free amigurumi rabbit pattern to our free amigurumi cat pattern.
Instructions
This pattern is worked using the amigurumi method. Work in a continuous spiral without closing off the round with a ss. Use a stitch marker in the first stitch of each round, moving it up as you work. The body and legs are worked in one piece, starting from the neck. The head, ears, tail and horn are then made separately and sewn onto the main parts. This pattern uses concise crochet – for example, 6dc means work 1dc in each of the next 6 sts.
Materials
- DMC Natura Just Cotton, 100% cotton, 50g/155m per ball, two balls in Ivory (N02) (Yarn A) and one ball each in Aquamarina (N25) (Yarn B), Golden Lemon (N43) (Yarn C), Lobelia (N82) (Yarn D), Amaranto (N33) (Yarn E), Jade (N20) (Yarn F), Light green (N12) (Yarn G)
- 2.5mm (UK 12, US C/2) crochet hook (discover all the best crochet hooks here on Gathered)
- Two black safety eyes, 1cm (3/8") diameter
- Black embroidery thread
- Yarn needle
- Stitch markers
- Soft toy stuffing
Tension Tension is not important – just make sure the stitches are dense enough so the stuffing doesn’t show through Abbreviations You can find a full list of all abbreviations we use in our abbreviations and conversions guide. The free unicorn crochet pattern are written in UK terminology but you can easily convert it to US terms using the guide.
Finished size Approx. 22cm (8.") tall and 15cm (6") long
Your free amigurumi unicorn pattern
Body
Leave a long piece of thread before starting the chain – the body starts at the neck, so this will be used to attach the head later. Using Yarn A, ch7 Row 1 miss the first ch, 2dc in next st, 4dc, 2dc in next st, turn [8 sts] Row 2 ch1, 2dc in next st, 6dc, 2dc in next st, ch8 [10 sts and 8 ch] Ss into the first st of Row 2 to join in round Rounds 1-3 1dc in each st around [18 sts] Round 4 6dc, ch19 (this is the spine of the unicorn), 2dc in 2nd ch from hook, 1dc in each of the next 17 ch, 1dc in next 18 sts of the neck (remove the stitch marker if you are using it), continue working on the opposite side of the spine ch, 18dc, place a stitch marker, this is the end of the round [55 sts]
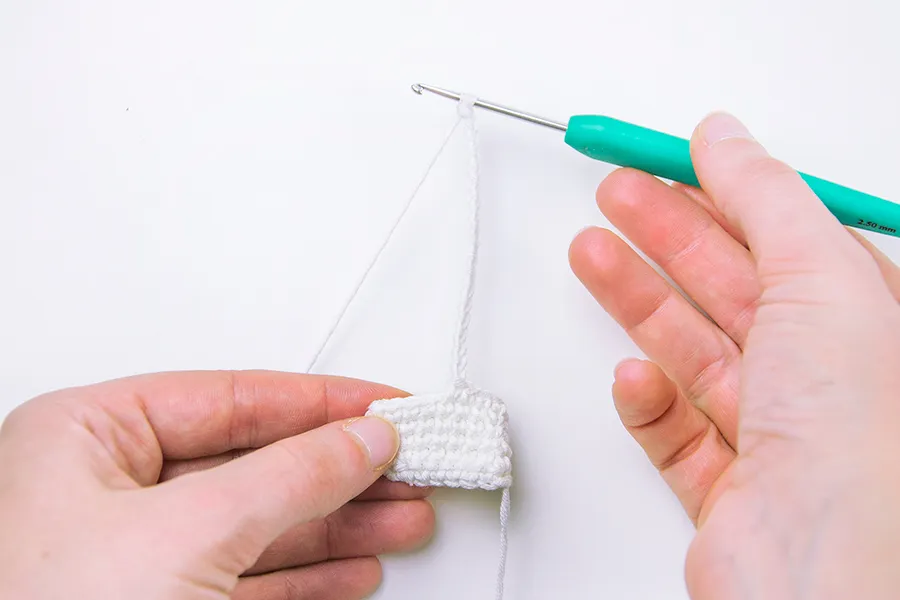
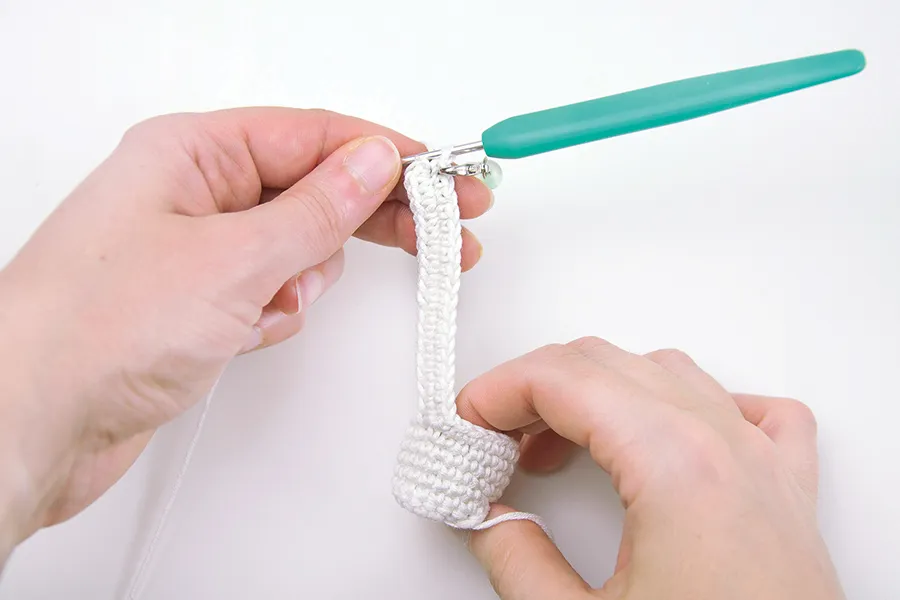
Round 5 2dc in each of next 2 sts, 52dc, 2dc in next st [58 sts] Round 6 (1dc, 2dc in next st) 2 times, 24dc, 2dc in next st, 3dc, 2dc in next st, 24dc, 2dc in next st [63 sts] Round 7 (2dc, 2dc in next st) 2 times, 56dc, 2dc in last st [66 sts] Round 8 (3dc, 2dc in next st) 2 times, 24dc, 2dc in next st, 5dc, 2dc in next st, 26dc, 2dc in next st [71 sts] Round 9 (4dc, 2dc in next st) 2 times, 61dc [73 sts] Round 10 36dc, 2dc in next st, 7dc, 2dc in next st, 28dc [75 sts] Rounds 11-19 1dc in each st around [75 sts] Round 20 (4dc, dc2tog) 2 times, 23dc, dc2tog, 11dc, dc2tog, 23dc, dc2tog [70 sts] Round 21 1dc in each st around [70 sts] 4dc (this should take you to the middle of the back, if not adjust your sts now by more or less dc), 3dc, place a stitch marker into the last dc and continue with Leg 1.
Leg 1
Round 1 9dc, ch9, ss into the 1st dc of the leg (the 1st dc after the stitch marker) to join in a round [9 sts and 9 ch]
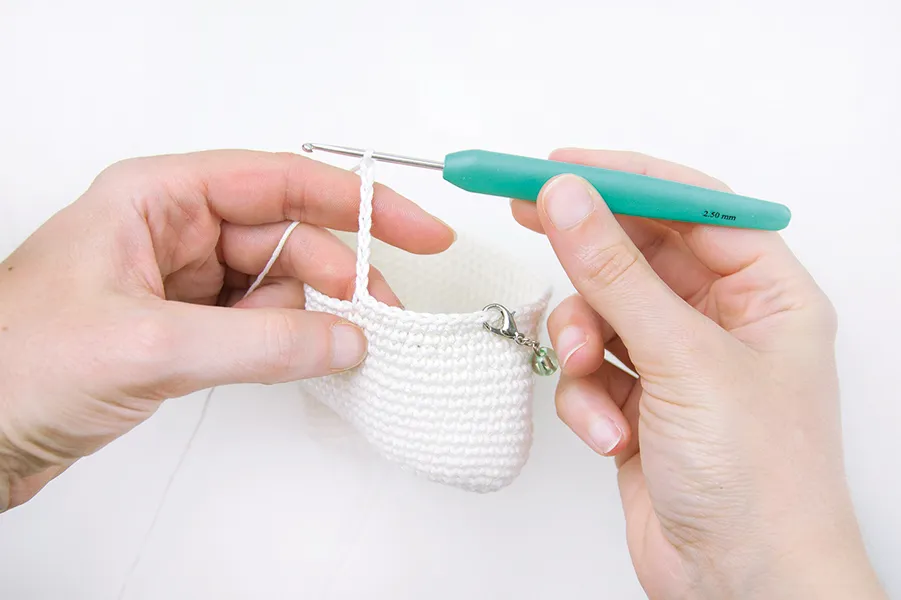
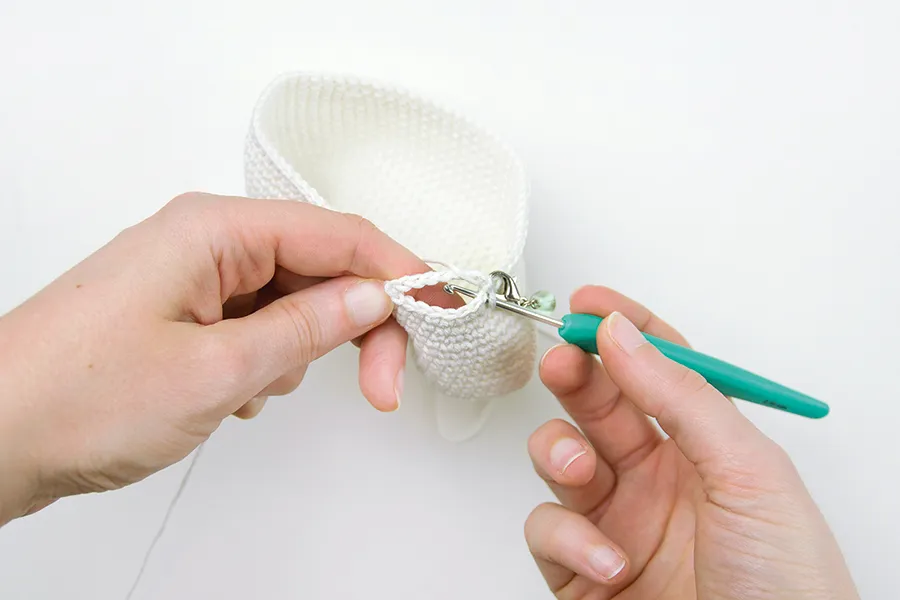
Round 2 1dc in each st around [18 sts]
Round 3 1dc in each st around [18 sts]
Round 4 (dc2tog, 7dc) 2 times [16 sts]
Rounds 5-6 1dc in each st around [16 sts]
Round 7 (dc2tog, 6dc) 2 times [14 sts]
Rounds 8-9 1dc in each st around [14 sts]
Round 10 (dc2tog, 5dc) 2 times [12 sts]
Rounds 11-12 1dc in each st around [12 sts]
Change to Yarn B
Round 13 1dc in each st around [12 sts]
Round 14 (dc2tog) 6 times [6 sts]
Fasten off. Use a tapestry needle to thread the yarn into each front loop of the last round. Pull to close the hole, and weave in any loose ends. Stuff the leg from the open side.
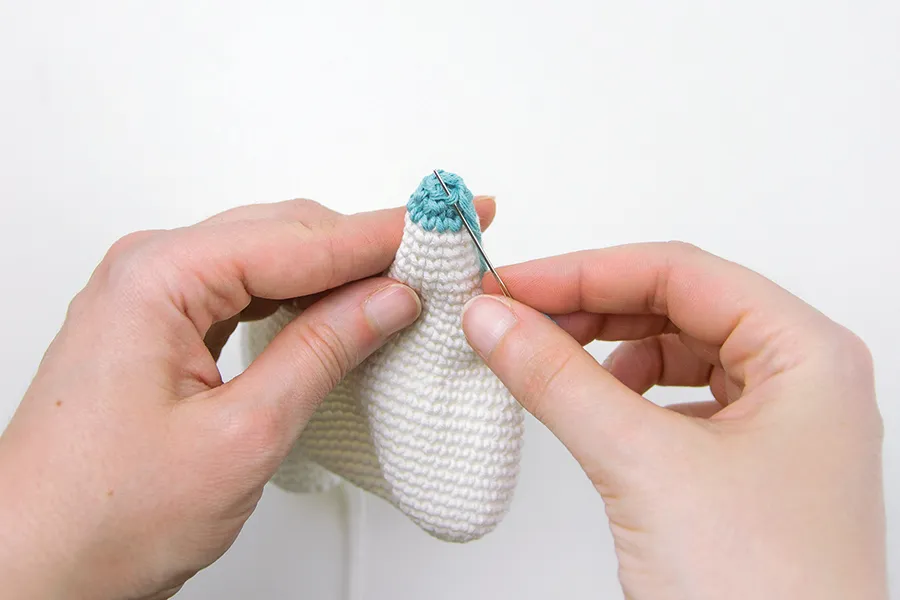
Leg 2
Miss 12 sts on Round 20 of Body after Leg 1, place a stitch marker.
Make the second leg following the instructions of Leg 1.
Leg 3
Miss 5 sts on Round 20 of the Body after Leg 2, place a stitch marker. Make the third leg following the instructions of Leg 1.
Leg 4
Miss 12 sts on Round 20 of Body after Leg 3, place a stitch marker. Make the fourth leg following the instructions of Leg 1.
Looking for more amigurmi inspiraition? Check out our round-up of the Best Amigurumi Crochet Books.
Belly
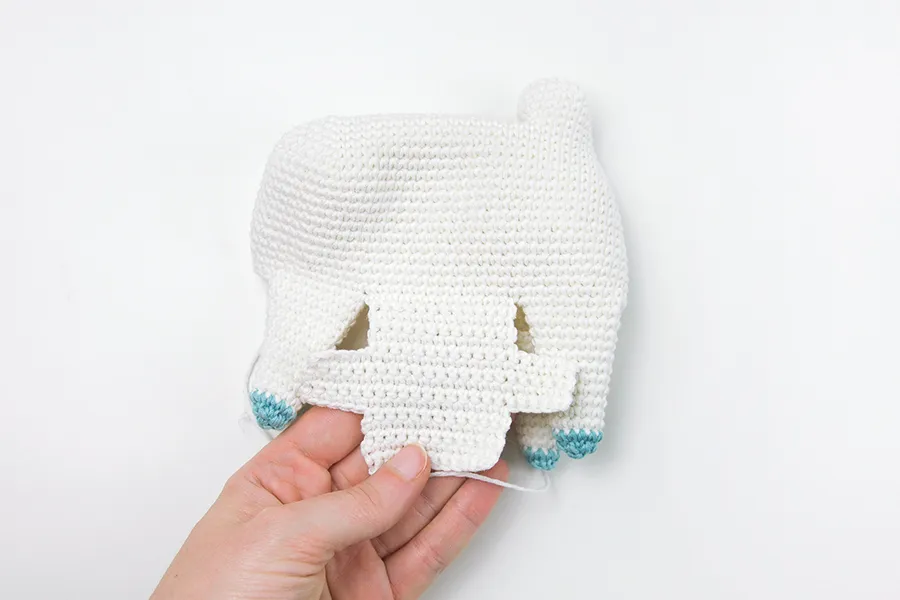
Join Yarn A on Round 20, on the right side of the 12 sts space between Leg 1 and Leg 2
Rows 1-5 ch1 (does not count as st), 1dc in each st to next leg, turn [12 sts]
Row 6 ch6, 1dc in 2nd ch from hook, 1dc in each remaining ch, 12dc, turn [17 sts]
Row 7 ch6, 1dc in 2nd ch from hook, 1dc in each remaining ch, 17dc, turn [22 sts]
Rows 8-10 ch1 (does not count as st), 1dc in each st to end, turn [22 sts]
Row 11 (partial) ch1 (does not count as st), 17dc, turn leaving the remaining sts unworked [17 sts]
Row 12 (partial) ch1 (does not count as st), 12dc, turn leaving the remaining sts unworked [12 sts]
Rows 13-16 ch1 (does not count as st), 1dc in each st to end, turn [12 sts]
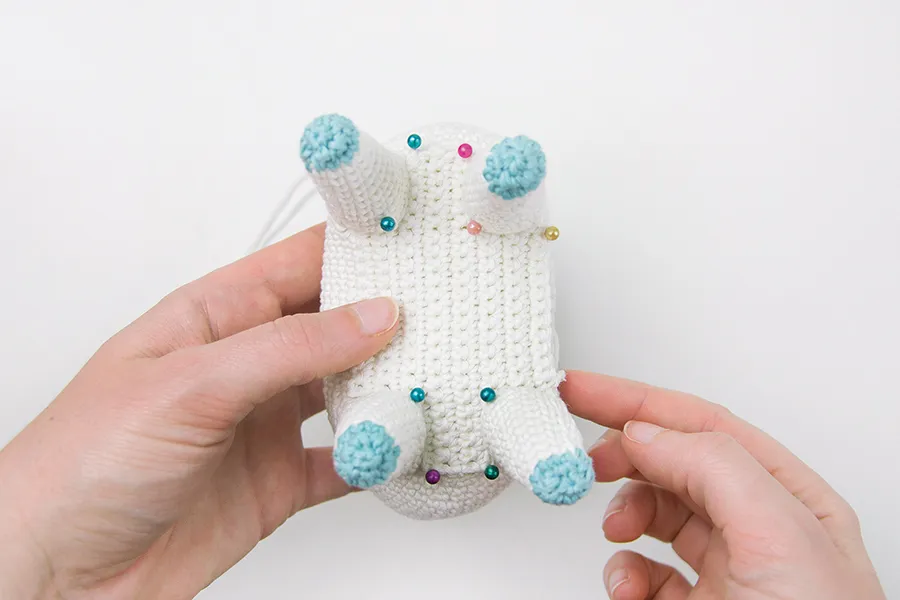
Fasten off, leaving a long tail for sewing. Pin the Belly piece to Round 20 of the Body, then sew around the body and legs. Stuff the body just before finishing the seam. Continue stuffing the body from the neck until it stays firm and stands up.
Head
Using Yarn A, start with a crochet magic loop. Round 1 ch1 (does not count as st), 6dc into the ring, pull ring tight [6 sts] Round 2 2dc in each st around [12 sts] Round 3 (2dc in next st, 1dc) 6 times [18 sts] Round 4 (2dc in next st, 2dc) 6 times [24 sts] Round 5 (2dc in next st, 3dc) 6 times [30 sts] Rounds 6-11 1dc in each st around [30 sts] Round 12 (2dc in next st, 4dc) 6 times [36 sts] Round 13 (2dc in next st, 5dc) 6 times [42 sts] Round 14 1dc in each st around [42 sts] Round 15 (2dc in next st, 6dc) 6 times [48 sts] Rounds 16-26 1dc in each st around [48 sts] Round 27 (dc2tog, 6dc) 6 times [42 sts] Round 28 (dc2tog, 5dc) 6 times [36 sts] Place the eyes between Rounds 15 and 16 of the head, approximately 16 stitches apart. Stuff the head and continue stuffing as you go. Round 29 (dc2tog, 4dc) 6 times [30 sts] Round 30 (dc2tog, 3dc) 6 times [24 sts] Round 31 (dc2tog, 2dc) 6 times [18 sts] Round 32 (dc2tog, 6dc) 6 times [12 sts] Round 33 dc2tog 6 times [6 sts] Fasten off. Using a tapestry needle, thread the yarn through each front loop of the last round, pull to close the hole, and weave in the ends.
Ears (make two)
Using Yarn A, start with a crochet magic loop. Round 1 ch1 (does not count as st), 6dc into the ring, pull ring tight [6 sts] Round 2 2dc in next st, 5dc [7 sts] Round 3 2dc in next st, 6dc [8 sts] Round 4 (2dc in next st, 3dc) 2 times [10 sts] Round 5 (2dc in next st, 4dc) 2 times [12 sts] Round 6 1dc in each st around [12 sts] Do not stuff. Flatten the ear. Fasten off, leaving a long tail for sewing the ears to the head between Rounds 24 and 25.
Horn
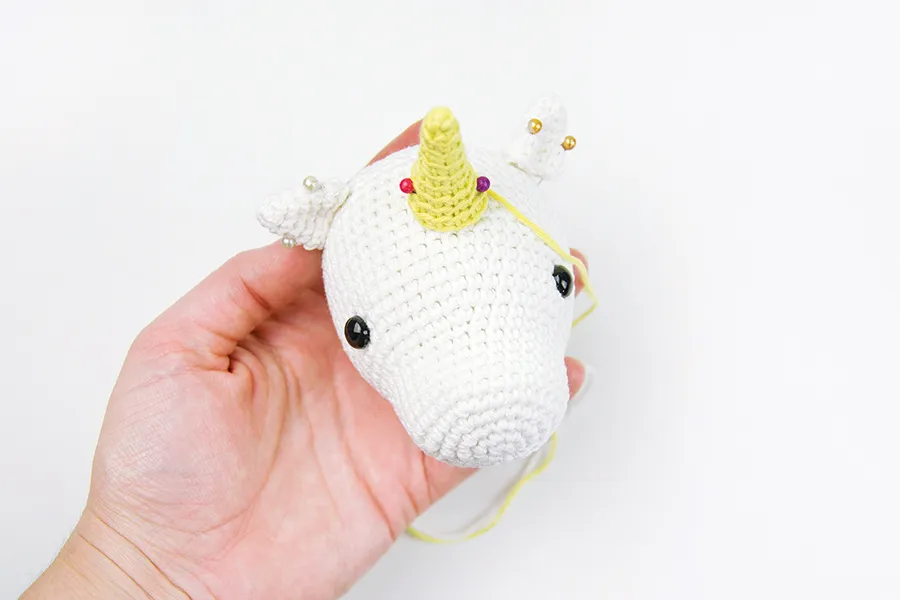
Using Yarn C, start with a crochet magic loop. Every st of the horn is worked in back loop only Round 1 ch1 (does not count as st), 5dc into the ring, pull ring tight [5 sts] Round 2 2dc in next st, 4dc [6 sts] Round 3 1dc in each st around [6 sts] Round 4 2dc in next st, 5dc [7 sts] Round 5 2dc in next st, 6dc [8 sts] Round 6 2dc in next st, 7dc [9 sts] Round 7 2dc in next st, 8dc [10 sts] Round 8 2dc in next st, 9dc [11 sts] Round 9 2dc in next st, 10dc [12 sts] Round 10 1dc in each st around [12 sts] Stuff the horn. Fasten off, leaving a long tail for sewing the horn to the head between Rounds 17 and 21.
Mane
Change colour for each row, alternating Yarns B, D, E, F and G.
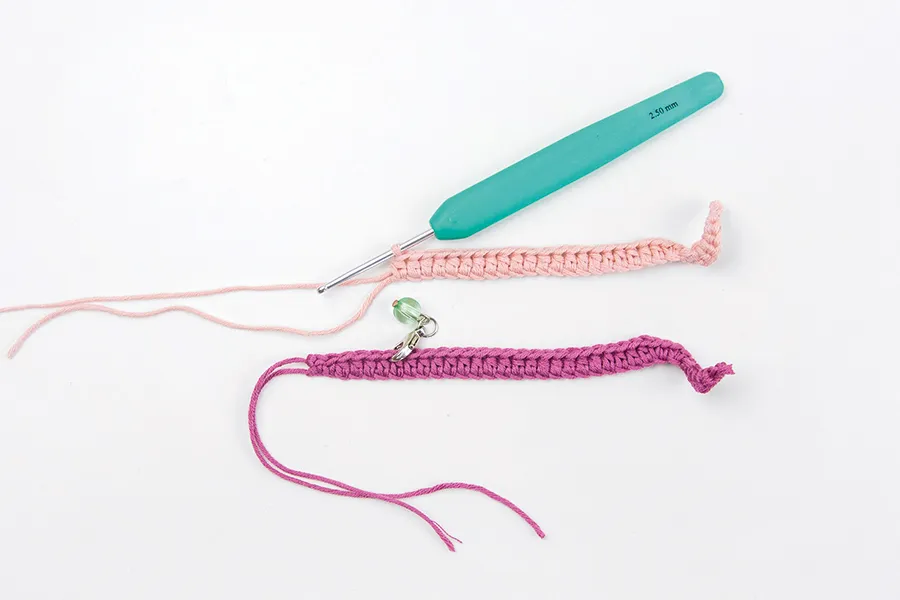
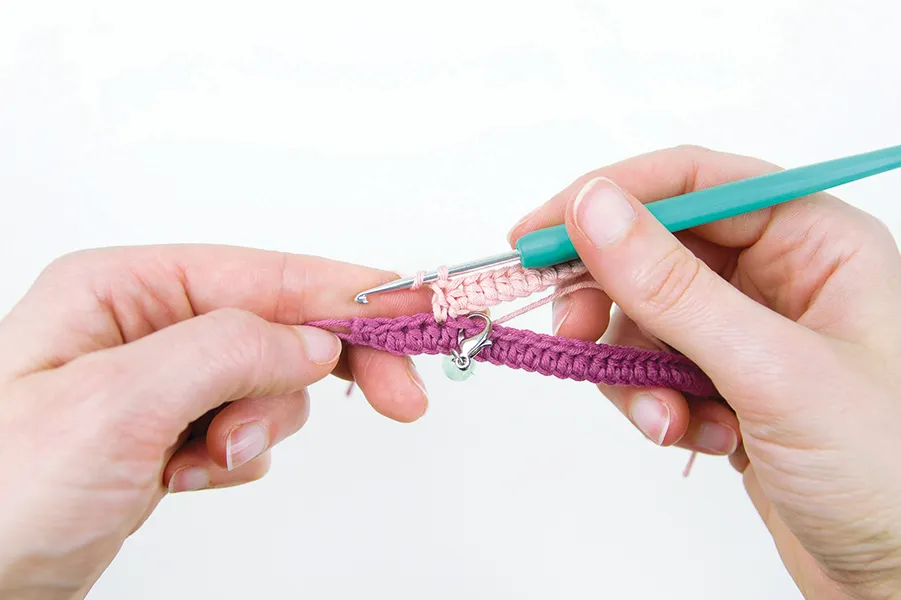
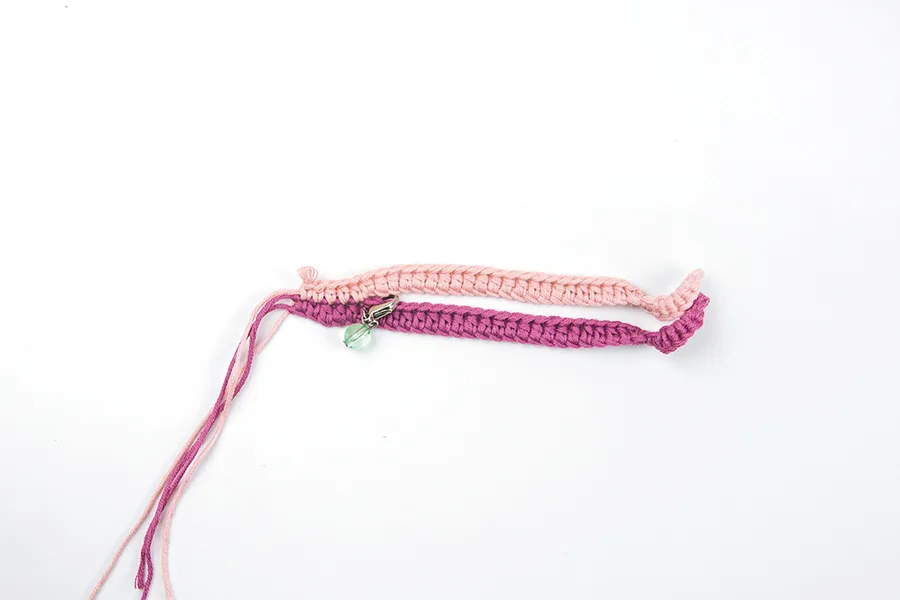
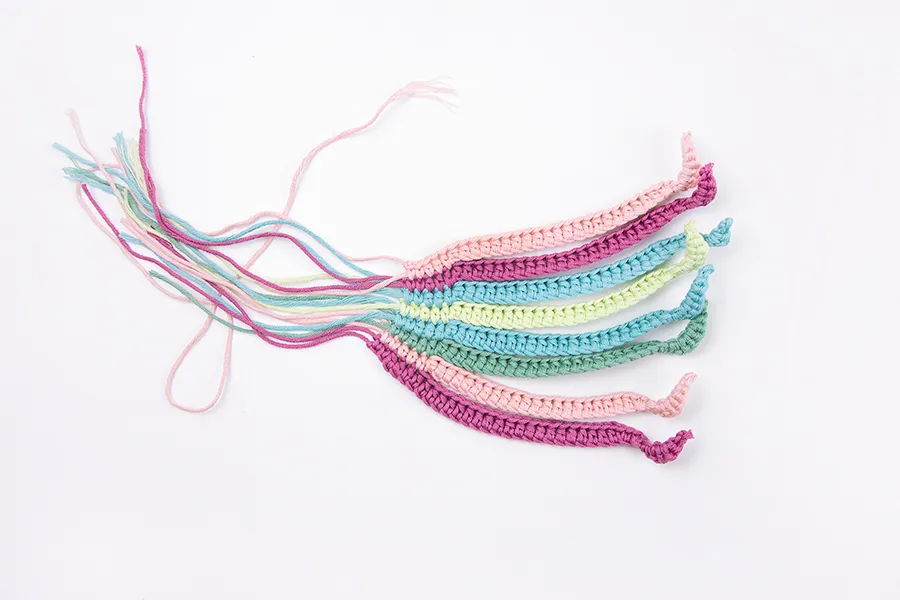
Change colour for each row, alternating Yarns B, D, E, F and G.


Change colour for each row, alternating Yarns B, D, E, F and G.


Change colour for each row, alternating Yarns B, D, E, F and G.


Fringe
Row 1 ch33, ss in 2nd ch from hook, 2dc in each of next 5 ch, 24htr (place a stitch marker on the 21st htr), 2dc [37 sts] Fasten off Lay the first row aside and start the second one – you’ll join them at the end of the next row Row 2 ch28, ss in 2nd ch from hook, 2dc in each of next 5 ch, 21htr (place a stitch marker on last st), continue working on the previous row starting from the first stitch after the stitch marker, 3htr, 2dc [37 sts] Fasten off Lay the mane aside and start the following row Row 3 ch25, ss in 2nd ch from hook, 2dc in each of next 5 ch, 18htr (place a stitch marker on last st), continue working on the previous row starting from the first stitch after the stitch marker, 3htr, 2dc [34 sts] Fasten off Lay the mane aside and start the following row Rows 4-5 repeat Row 3 Row 6 ch22, ss in 2nd ch from hook, 2dc in each of next 5 ch, 15htr (place a stitch marker on last st), continue working on the previous row starting from the first stitch after the stitch marker, 3htr, 2dc [31 sts] Fasten off, leaving a tail for sewing.
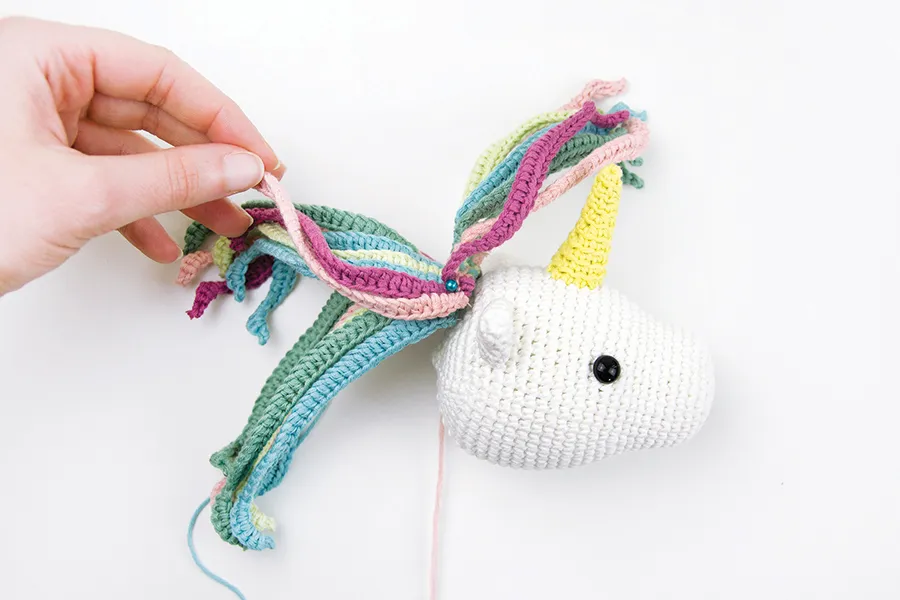
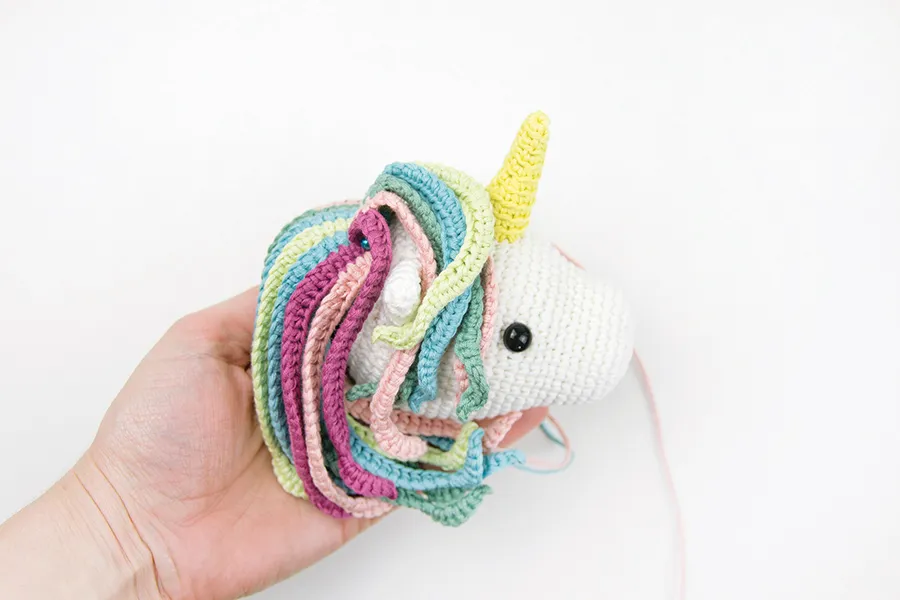
Row 1 ch33, ss in 2nd ch from hook, 2dc in each of next 5 ch, 24htr (place a stitch marker on the 21st htr), 2dc [37 sts] Fasten off Lay the first row aside and start the second one – you’ll join them at the end of the next row Row 2 ch28, ss in 2nd ch from hook, 2dc in each of next 5 ch, 21htr (place a stitch marker on last st), continue working on the previous row starting from the first stitch after the stitch marker, 3htr, 2dc [37 sts] Fasten off Lay the mane aside and start the following row Row 3 ch25, ss in 2nd ch from hook, 2dc in each of next 5 ch, 18htr (place a stitch marker on last st), continue working on the previous row starting from the first stitch after the stitch marker, 3htr, 2dc [34 sts] Fasten off Lay the mane aside and start the following row Rows 4-5 repeat Row 3 Row 6 ch22, ss in 2nd ch from hook, 2dc in each of next 5 ch, 15htr (place a stitch marker on last st), continue working on the previous row starting from the first stitch after the stitch marker, 3htr, 2dc [31 sts] Fasten off, leaving a tail for sewing.


Upper back
Row 1 repeat Row 1 of Fringe Rows 2-8 repeat Row 2 of Fringe Fasten off, leaving a tail for sewing.
Lower back
Row 1 ch37, ss in 2nd ch from hook, 2dc in each of next 5 ch, 28htr (place a stitch marker on the 21st htr), 2dc [41 sts] Fasten off Lay the first row aside and start the second row Rows 2-6 ch32, ss in 2nd ch from hook, 2dc in each of next 5 ch, 25htr (place a stitch marker on last st), continue working on the previous row starting from the first stitch after the stitch marker, 3htr, 2dc [41 sts] Fasten off, leaving a tail for sewing Sew the three parts of the mane between the ears as shown Using black thread, embroider nostrils to the unicorn with two long stitches over Round 7 of the head, roughly 2 sts apart Place the head on the neck so that Rounds 16 to 22 sit on the neck, then sew all around.
Tail
Change colour for each row, alternating Yarns B, D, E, F and G. Rows 1-3 repeat Rows 1-3 of Fringe Row 4 repeat Row 6 of Fringe Row 5 ch19, ss in 2nd ch from hook, 2dc in each of next 5 ch, 12htr (place a stitch marker on last st), continue working on the previous row starting from the first stitch after the stitch marker, 3htr, 2dc [28 sts] Fasten off, leaving a length of yarn Use this to sew the tail between Rounds 7 and 8 of the body. We hope you've enjoyed making our amigurumi unicorn. For more adorable crochet patterns check out our best amigurumi bunny patterns and our free amigurumi crochet snowman pattern.
