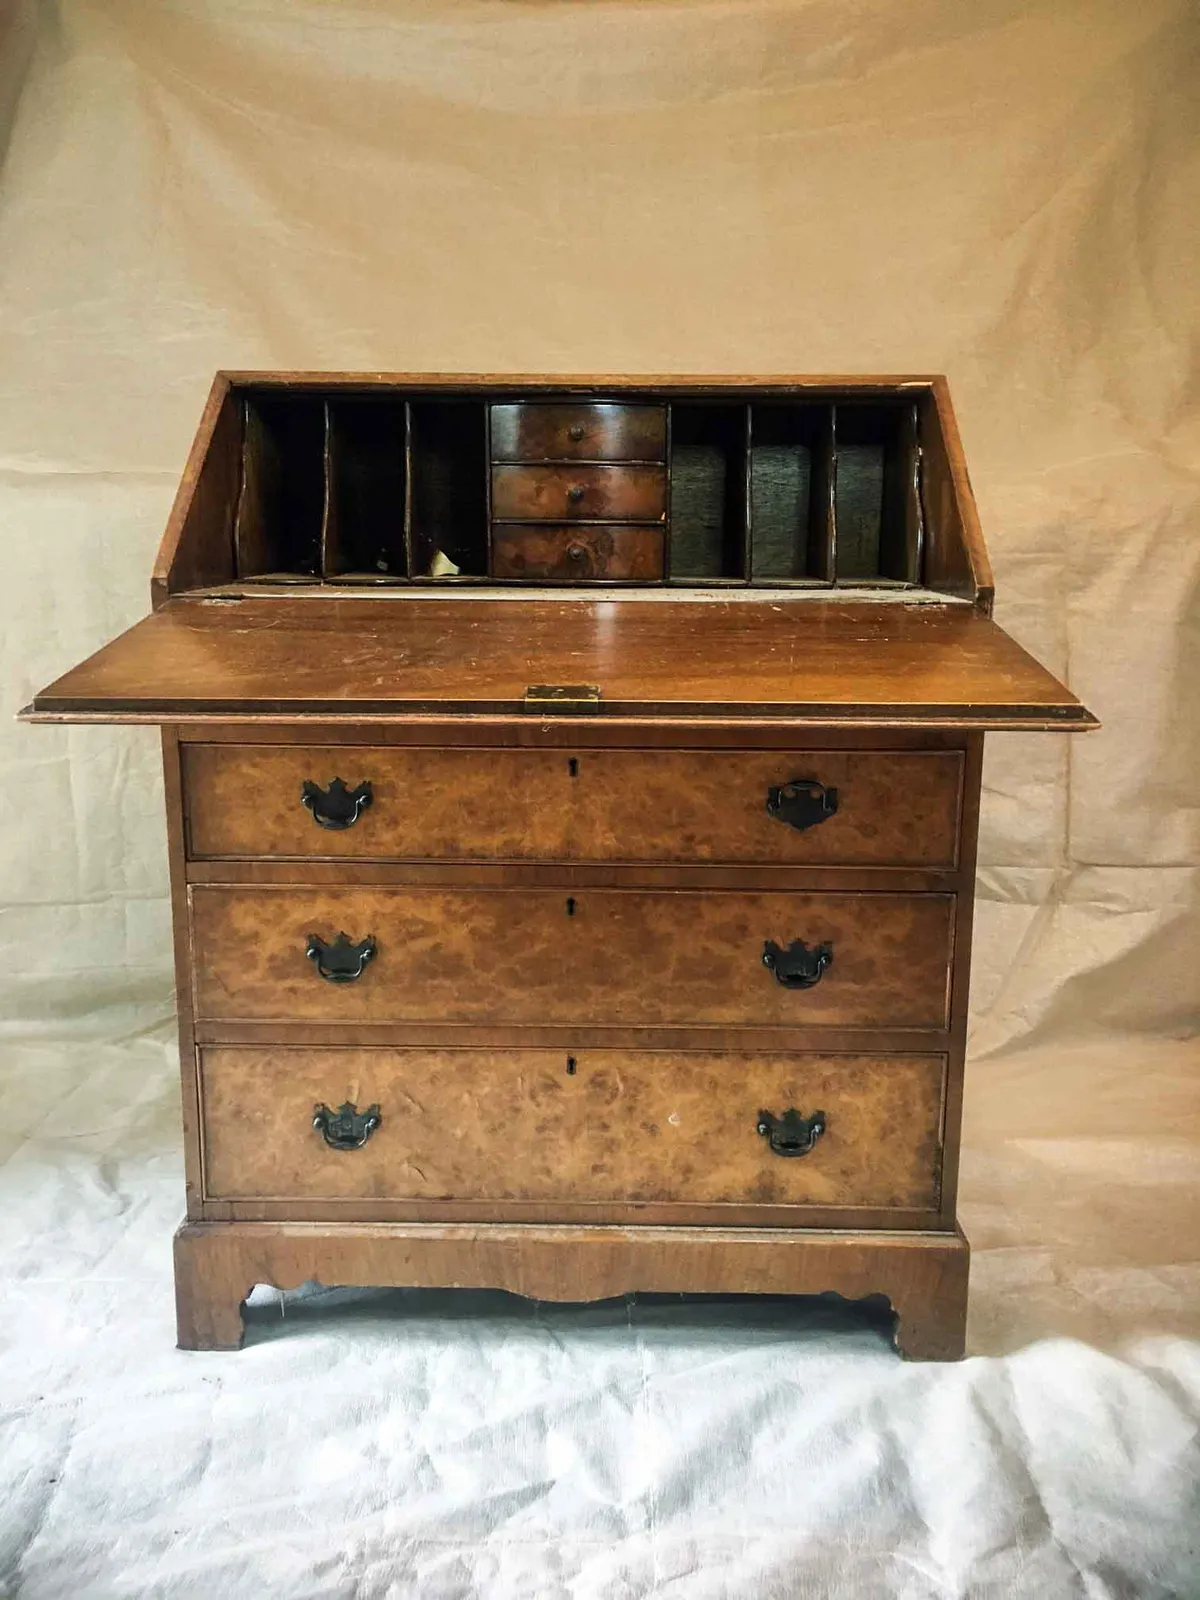
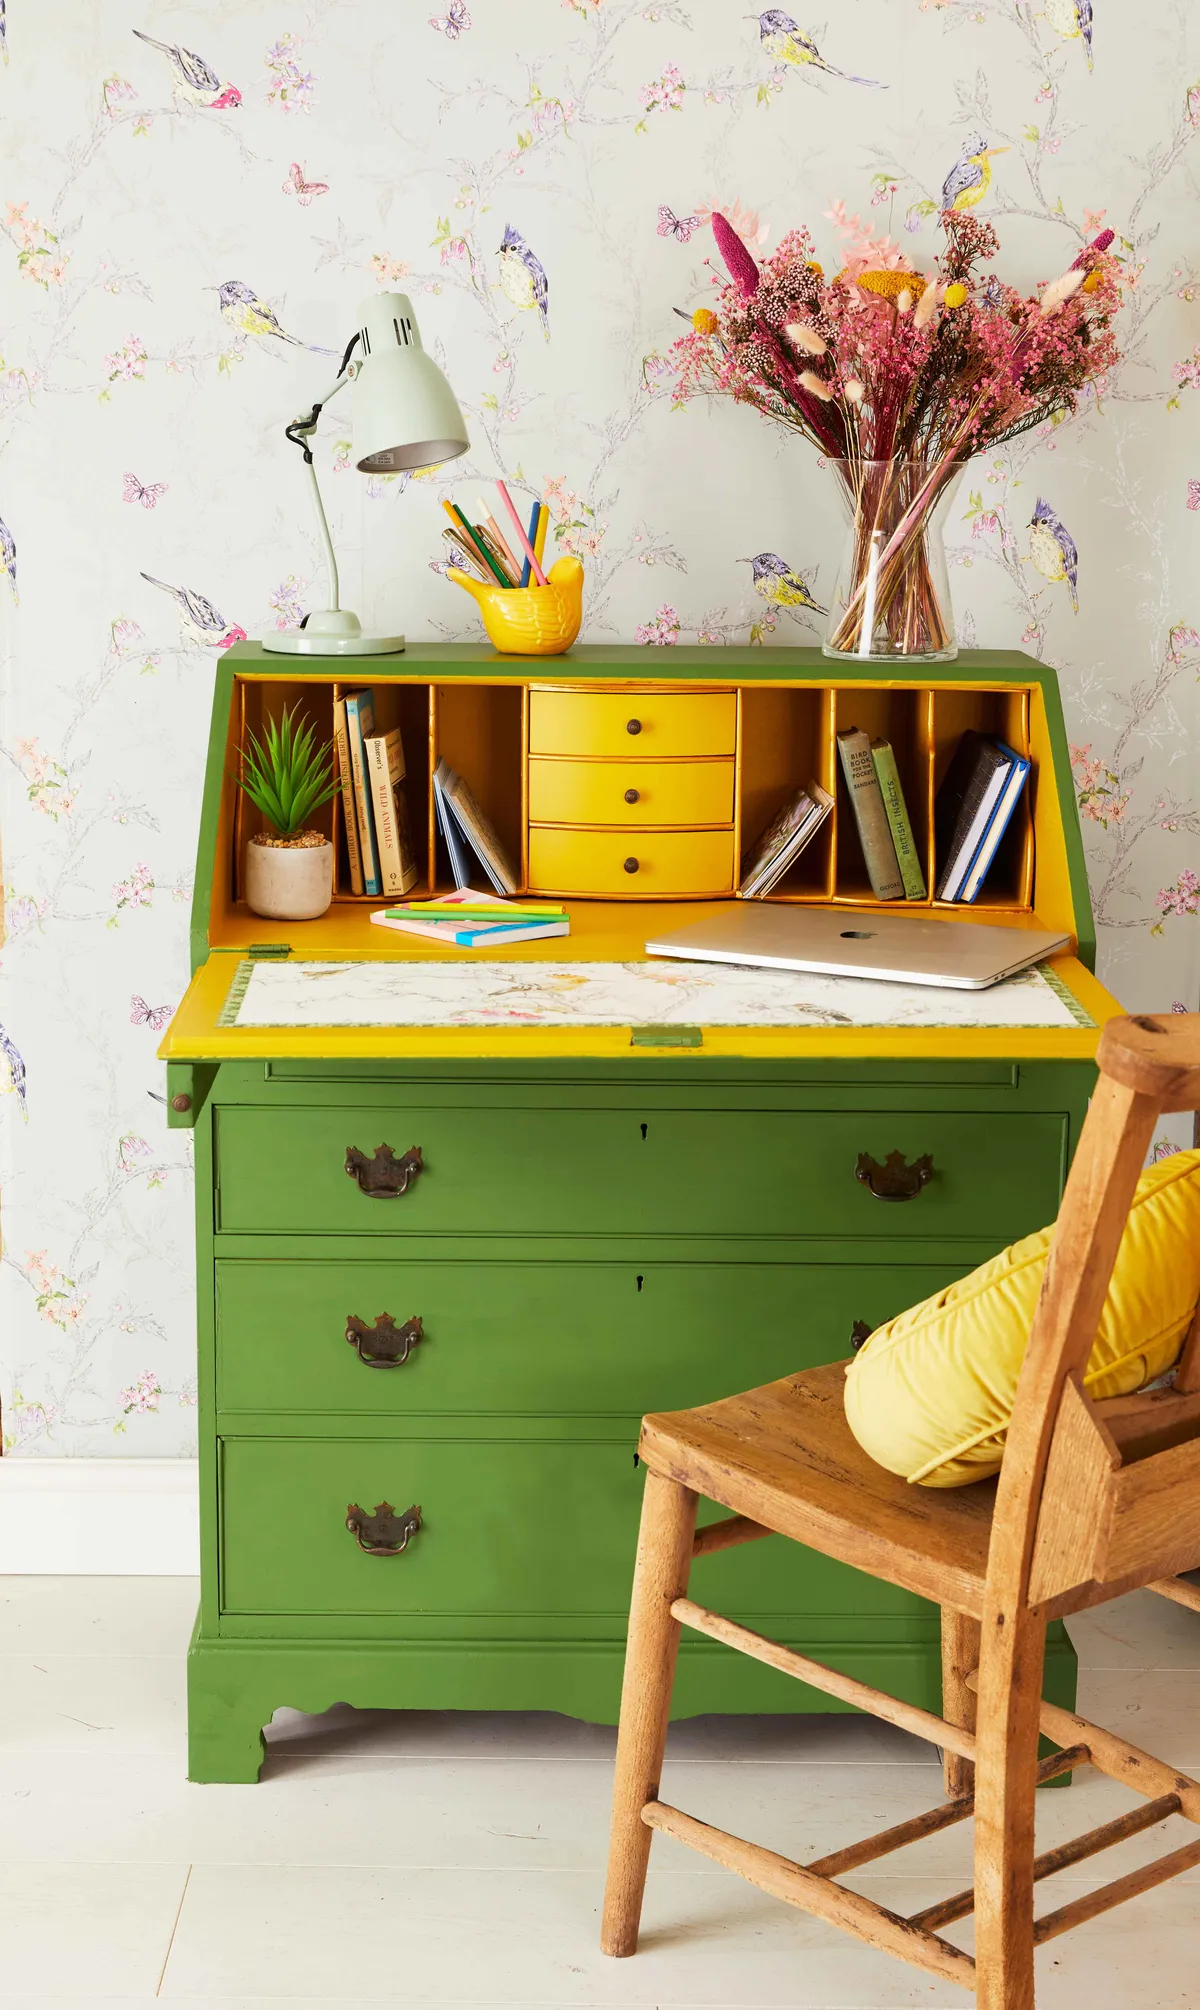
While the high street seems to be loving home office desks that are large enough to accommodate your laptop, a lamp, books, pictures and plants right now, not all of us have the room! Vintage and antique furniture is often on a smaller scale and, with a little attention, you can make a desk by upcycling a writing bureau.
Vintage writing bureaus are often cheap and fairly easy to find in junk shops or on online auction sites. They are great for storage with all their cubby holes and drawers, and the drop-leaf shelf folds neatly away when not in use.
Give an old writing bureau a new purpose
If your writing bureau is in perfect condition and fits your home's aesthetic then – voila – you have a readymade desk. But if it's looking a little shabby and in need of some primping, it's time to give it a mood-boosting pop of colour to make your working day feel more cheerful! It's amazing how adding a splash of colour can instantly lift a room. Read on to see how to make a desk from an upcycled writing bureau!
Before the writing bureau's transformation...

...and after! What a colour revelation!

You can use the paint we used or mix up your own, of course. See our article on how to make your own chalk paint for using on all manner of upcycling projects like this one.
What you'll need
- An old writing bureau
- Screwdriver
- Sanding block
- Paintbrush
- Valspar furniture paint in Aloe Vera, £22 for 750ml, B&Q
- Furniture paint in Grand Estate, Valspar
- Royal Metallics in Gold, £1.98 for 125ml, Protek Woodstain
- Artist’s paintbrush
- Tape measure
- Pencil
- Craft knife
- Straight edge ruler
- Cutting mat
- Wallpaper off-cut
- Spray adhesive
- Decorative washi/masking tape
How to make a desk step-by-steps
1. Begin by carefully removing the handles of the writing bureau using a screwdriver. Be sure to store all the fittings safely so you don’t lose any pieces, as you’ll need them later. Use a sanding block to give the surface a light key to help the paint adhere better. Once you’ve finished sanding, wipe the surface with a damp cloth to remove dust and dirt. Allow to dry.
2. Give the exterior of the desk, including the external drawer fronts, two coats of green furniture paint, allowing the first coat to dry thoroughly before applying the second. Once the paint is dry, replace the handles on the desk.
3. Give the interior of the bureau, including the internal drawer fronts, two coats of ochre furniture paint, allowing the first coat to dry thoroughly before applying the second.
4. Using a small artist’s paintbrush, carefully apply two coats of gold paint along the edges of the pigeon holes and shelves inside the desk to highlight them.
5. On the drop leaf of the bureau, measure a rectangle 4cm smaller on each side than the size of the drop leaf. Lightly draw the outline of the rectangle in pencil centrally on the surface of the drop leaf. Using a craft knife, a metal ruler and a cutting mat, cut a piece of wallpaper (or you could use thick wrapping paper or card) to the same size as the rectangle and use spray adhesive to glue it firmly to the surface of the drop leaf. Gently glide your hands over the surface of the wallpaper to remove any air bubbles and ensure a smooth, flat finish.
6. Cut four lengths of washi tape slightly longer than each side of the wallpaper rectangle. Carefully stick them along each side of the wallpaper, slightly overlapping the edges. Run your finger along the tape to ensure it is firmly adhered to the desk. Use a craft knife to make a 45-degree cut in the overlap of washi tape at each corner. Gently peel away the excess tape to create a neat corner. Press each corner down firmly to ensure it is well adhered to the surface.
