How to turn a wardrobe into a larder in 8 easy steps

How to turn a wardrobe into a larder in 8 easy steps

If you're short on shelving space and need extra storage for your kitchen but are on a tight budget, learn how to turn a wardrobe into a larder with handy advice from Gathered.

Published: February 23, 2024 at 6:21 pm

Look at any dreamy kitchen on Instagram and there's a strong chance there's a larder in it. Once the preserve of large, hardworking kitchens in the basements of big country houses, larder cupboards are now essential parts of any new kitchen project. They are as important as an island, so it's worth considering how to make a larder cupboard work in your space.

Larders are usually for storing dried goods - pasta, rice, cereal and so on. But they can incorporate a marble shelf for keeping things cool - but not too chilled - such as a cake or cheese, or even a bottle of wine.

What's the difference between a larder and a pantry?

A pantry is the name given to a separate room, just off the kitchen. It can also refer to a walk-in cupboard. Lined with shelves, this is where you'd store all your dried goods, with harder-to-reach items on the top shelves and your go-to ingredients at a more accessible height.
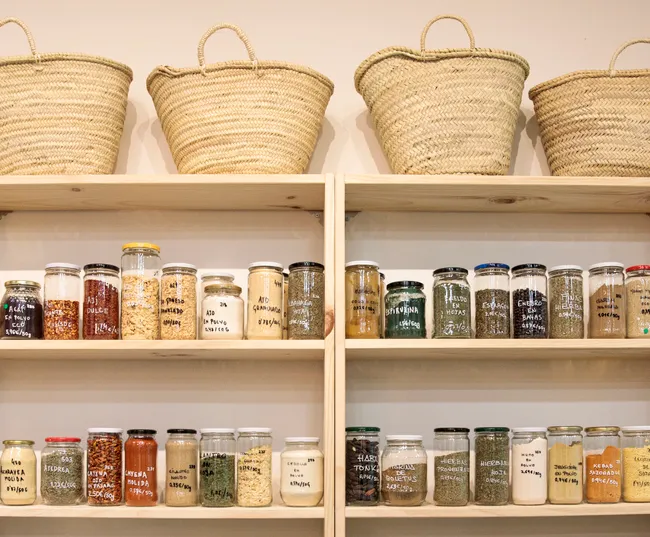
Pantry shelves filled with glass jars of dried goods
Larder shelves are enclosed in a cupboard whereas pantry shelves are open, as here - Getty Images/Lourdes Balduque

A larder is essentially a large cupboard in your kitchen where you store dried foods, oil, spices and other condiments that don't need to go in the fridge. In fact, it's often referred to in full as a larder cupboard.

Learn how to make a larder cupboard with Gathered

Having a bespoke larder made to measure is a pricey undertaking. Even freestanding larder units will set you back the best part of a thousand pounds.

However, if you've got a wardrobe to spare (check sites like Gumtree, Facebook Marketplace and Freecycle), a few basic DIY supplies and a bit of time on your hands, you can make your own without spending much money at all.

How to upcycle a wardrobe into a larder

What you need

  • Wardrobe
  • Primer
  • Paint
  • Sealer
  • Wood for shelves
  • Brackets or battens
  • Screws
  • Drill

Step 1

Source a suitable wardrobe if you don’t have one. You can get wardrobes fairly easily for nothing, or at a bargain price, from sites such as Freecycle, Facebook Marketplace, eBay and Gumtree. Measure up your space first and wait for a wardrobe that will fit well into your kitchen. You can afford to be picky even though you are sourcing things for free! 

Drawers are a useful addition – they add handy extra storage space and help make the finished product look more cupboard-like.

Step 2

Remove the wardrobe handles. If you like them, put to one side. Otherwise, you can source new ones from either local DIY stores, antiques shops, online sellers or a salvage yard.

Step 3

Clean the wardrobe and make sure it is free from dirt and dust.

Step 4

Prime the wardrobe for painting. Primer not only helps the paint adhere to the furniture and prevents it from peeling, it also makes it easier to get a smooth finish.

If your unit is made of natural wood you might want to use a primer that has an inbuilt stain blocker included to stop bleeding or yellow spots forming.

Step 5

Start painting! You can buy specialist kitchen cabinet paint from high street retailers or opt for chalk furniture paint. You can buy it or make your own chalk paint with help from Gathered. 


Step 6

Time to add in some shelves! First, measure the depth and width of the shelves needed, taking into consideration that you need to be able to close the doors easily. You'll also need to consider the height requirements for what you plan to store in the larder. You can usually get wood cut to the right size at your local DIY store.

If you want to paint the shelves, make sure you do this before you fix them in place – it’s much easier!

To mount the shelves, pick up brackets from your local DIY store. You can follow these instructions for how to put up wall shelves on our sister site YourHomeStyle.

Step 7

Seal your wardrobe with furniture wax to ensure it is wipeable and protected from moisture. You can choose either a clear or tinted wax depending on the effect you want to obtain.

Attach the door and drawer handles.

Step 8

Now for the best part! Put the larder into its rightful position as the star of the kitchen and start filling it with goodies!

This article first appeared in YourHomeStyle and HomeStyle magazine.

Create useful extra storage space with a larder cupboard

A larder is an essential in your kitchen and is definitely something to think about when planning a new layout. You can buy larder cupboards from a range of kitchen showrooms. But, if you're on a tight budget, they can be out of many people's price range.

Upcycling an old, spacious wardrobe into a larder is a great way of gaining that star piece in your kitchen for a fraction of the cost of a new item of furniture. Plus it's much better for the environment too.

Learn how to upcycle a writing bureau with Gathered

If this project has given you ideas for other ways you can save money while improving your home, you might like to learn how to upcycle a writing bureau. It's exciting giving your home a refresh and so satisfying reusing things you already own rather than buying new. Get all the home inspiration you need with Gathered.