How to do visible mending
All products were chosen independently by our editorial team. This review contains affiliate links and we may receive a commission for purchases made. Please read our affiliates FAQ page to find out more.

How to do visible mending

Master the art of visible mending with Flora Collingwood-Norris' colourful tutorial.

Published: March 11, 2024 at 9:10 am

Say goodbye to fast fashion by learning the art of visible mending. We're all about sustainability here at Gathered and are big believers in fixing your clothes not chucking them away!

In fact, we've even created a how to mend clothing guide to you can start patching up your pieces. Visible mending is a brilliant way of fixing your clothing and we're here to show you how it's done.

What is visible mending?

Visible mending is when you fix a garment (whether it's a hole in a sock or a rip in your jeans) but keep the repairs visible. There's something beautiful about visible mending.

It's the opposite of hiding away your mistakes and imperfections instead, fixing problems with handmade decoration that makes the garment look even better!

Whether that's through sashiko embroidery or Kintsugi, visible mending adds a whole new dimension to your pieces and will save your pennies and the planet. In fact, we cover more visible mending techniques at the bottom of this article to show you just how many styles there are.

So how do you mend visibly? Flora Collingwood-Norris' colourful tutorial is here to show you the beauty of visible mending.
How to do visible mending

Step 1

Step 1 visible mending

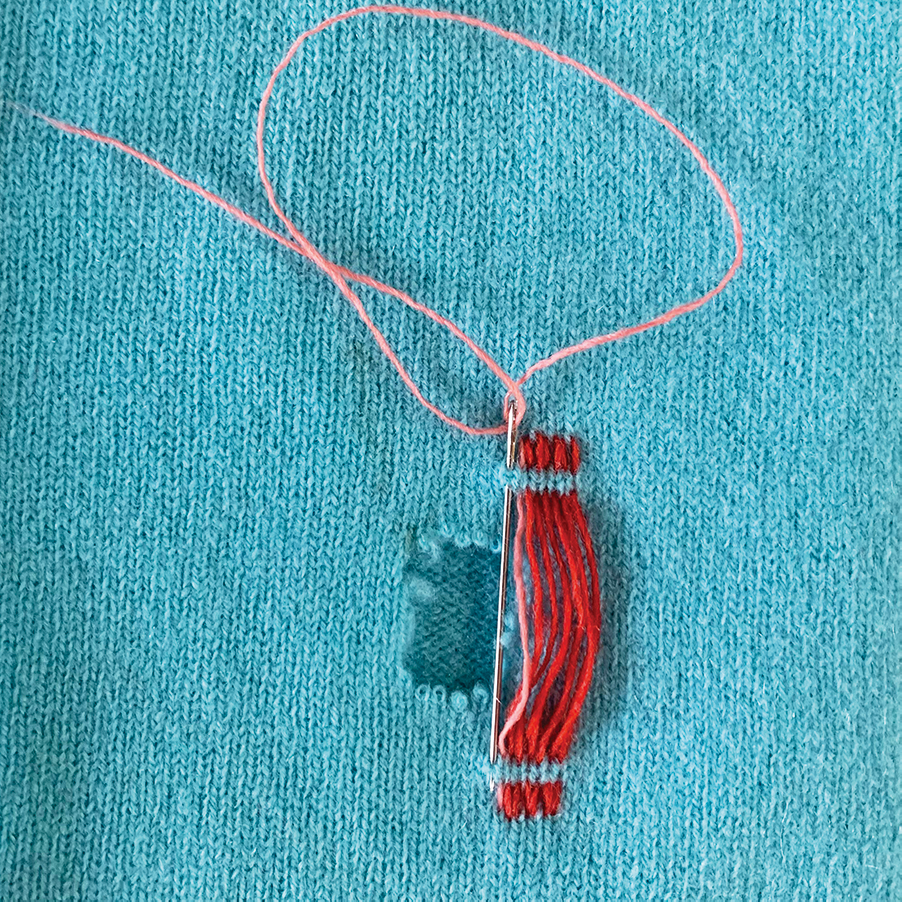
Position your knitwear with the hole facing up. Leave a good amount of room around the hole to prevent any further unravelling.

Thread the sewing needle with the first coloured yarn, then bring it up from the inside of the jumper, above the hole and to the right.

Take the needle back down roughly 0.5cm (¼") along, and bring it back up 0.25cm (⅛") along. Then take it back down over the other side of the hole.

Repeat the same process of going under, over, then under the fabric again, as shown, to create the first row of visible mending.

Step 2

Step 2 visible mending

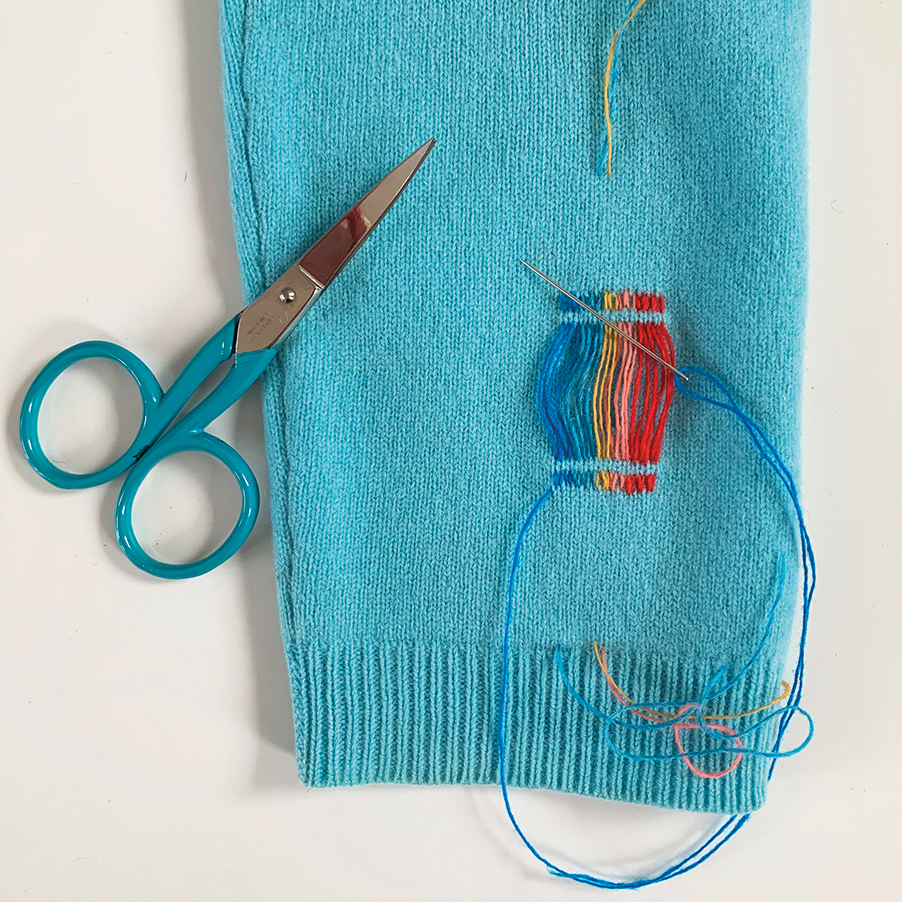
Bring the needle up next to the bottom of the first stitch, half a knitted stitch over.

Then repeat step 2, this time sewing upwards.

Repeat for a few rows, making sure the threads don’t pull on the fabric or become loopy.

Cut the yarn, leaving a tail for weaving in.

Step 3

Step 3 visible mending

Repeat steps 1-2 with another yarn, then continue with the other colours until the hole is completely covered.


Looking for more sustainable fashion?

Head over to our collection of the best beginner sewing patterns and start stitching your me-made wardrobe. 


Step 4

Step 4 visible mending

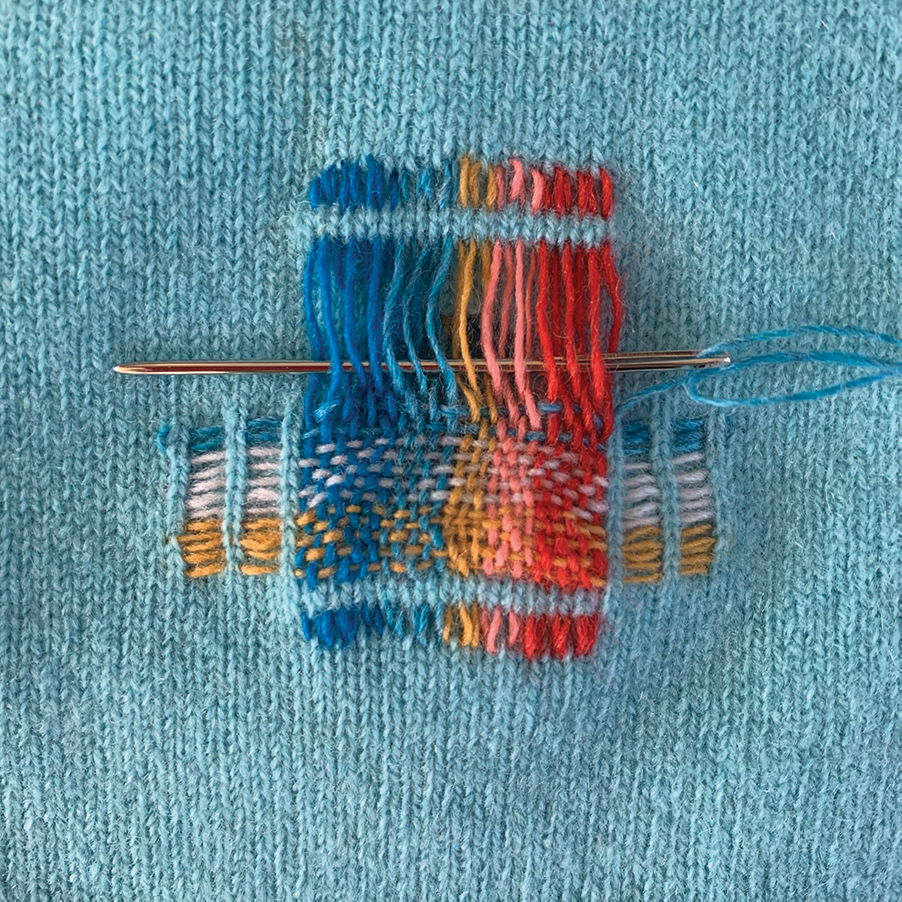
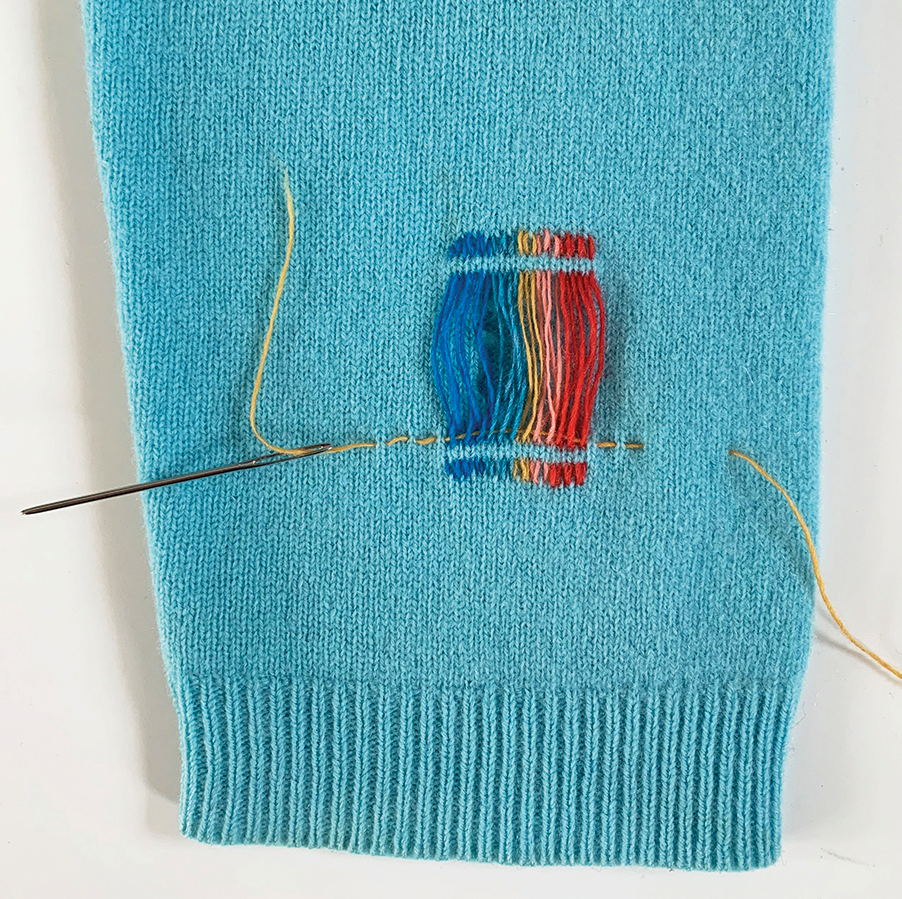
Thread the tapestry needle and repeat step 1 across the bottom of the mending, using the image as a guide to placement. This time take the needle over the first row of mending, under the second, over the third, and so on.

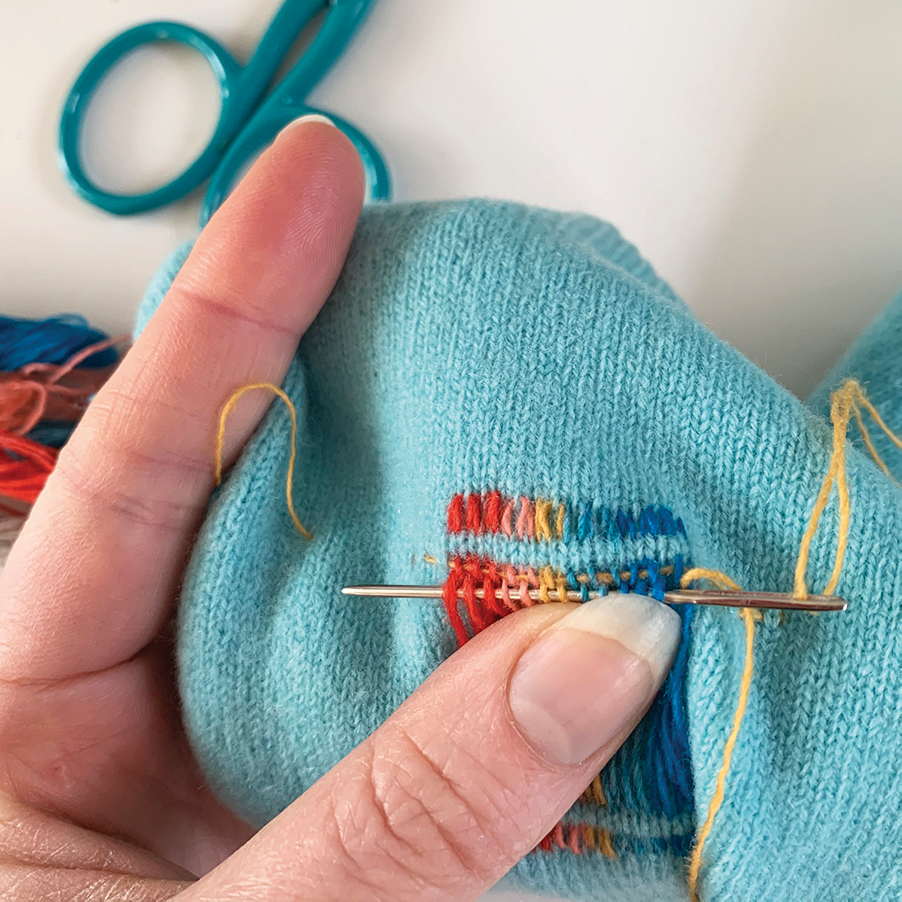
Bring the needle back up half a knitted stitch over. Then on the next row, weave over the threads you went under, and under those, you went over.

Step 5

Step 5_visible mending

Repeat until all the centre rows of visible mending have been woven over, switching yarn colours as you go.

Step 6

Step 6_visible mending

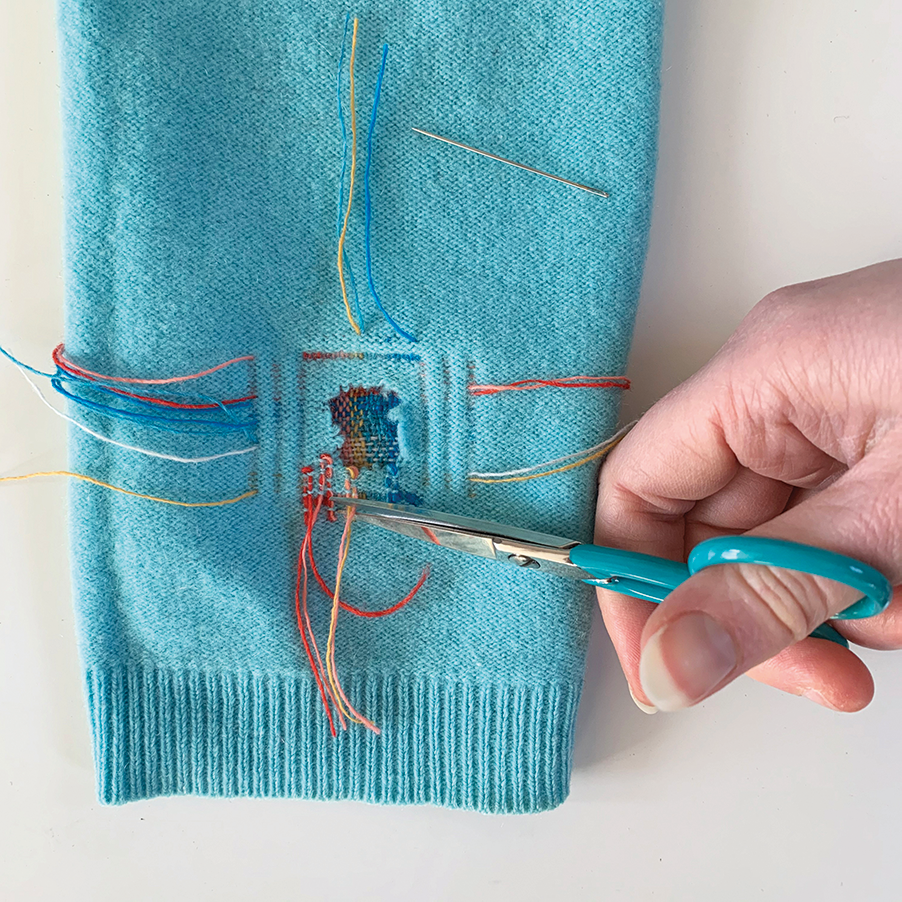
To finish, turn the knitwear wrong side out, weave in the ends to secure them, then trim off any excess yarn.

You can also use visible mending method to cover over stains or marks.

Visible mending

More visible mending techniques

There’s plenty of different visible mending techniques out there. Many of them can be both visible and invisible, for example, you sew holes using matching thread or darn using matching yarn.

However, we love the colourful, abstract look of visible mending so would recommend using a contrasting colour for a striking effect.

We’ve gathered four more types of visible mending for you to explore. Your clothes are about to get an upgrade!

Fix your feet by learning how to darn a hole

How to darn a hole step 7

Visible mending techniques aren’t all about sewing! The Knitters how to darn a hole tutorial is a brilliant form of visible mending that is great for socks.

Sashiko mending guide

How to do sashiko mending

Sashiko mending is an ancient and incredible form of visible mending. Head over to our tutorial which shows you how how to create these tiny criss-cross stitches.

Patch up your clothes!

Model Nicki wearing blue and white stripy top against white T&G wall with leather patches

 
Patches are a fun form of visible mending that can really jazz up an outfit. We show you how to sew a patch and how to add them to the elbows of a denim jacket.

You could add your patches to jeans, jackets or even as applique to a tote bag.

Learn how to fix a hole

How to sew a hole step 4

Finally, the classic form of mending – sewing a hole! Learn how to sew a hole with our step by step instructions but why not make it a form of visible mending? Follow our tutorial but swap the white thread for colourful ones.


Make your wardrobe last for years with visible mending

Visible mending can be applied to any and all your clothing. It’s a beautiful way of appreciating your clothes and saying no to fast fashion.

Use our visible mending technique on your favourite pieces and love them for years to come.


Reduce, re-use and recycle with Gathered

We hope you’ve enjoyed learning about visible mending and that it has inspired you to fix your own clothes.

If you’re interested in making more sustainable crafts check out our upcycling clothing ideas.

Upcycling clothes ideas